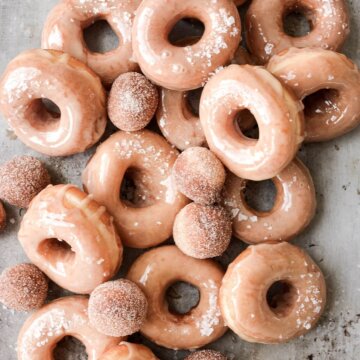
Basic High Altitude Yeast Doughnuts with Maple Icing
An easy recipe for basic yeast doughnuts glazed with maple icing. You can use this recipe for doughnuts plus holes, or make a filled doughnut with jam or custard.
All recipes on Curly Girl Kitchen are developed for high altitude at 5,280 feet. See FAQs for adjusting to higher or lower elevations.
Equipment
- Small Saucepan
- Large Heavy Bottomed Saucepan
- Instant Read Thermometer
- Large Baking Sheets + Parchment Paper
- Cooling Racks
- Rolling Pin and Doughnut Cutter
- Stand Mixer with Dough Hook
- Skimmer
- Mixing Bowls, Measuring Cups, Measuring Spoons
Ingredients
Doughnuts
- 4 tbsp unsalted butter
- ⅔ cup whole milk or buttermilk
- 1 packet (2 1/4 tsp) active dry yeast or instant/rapid rise yeast
- ¼ cup granulated sugar, divided
- ½ tsp coarse Kosher salt (if using table salt, use half the amount)
- ¼ tsp grated nutmeg, optional
- 3 ½ cups bread flour, spooned and leveled
- 1 large egg, room temperature
- 2 qts vegetable oil, for frying
Icing
- 2 ½ cups powdered sugar
- ¼ cup light corn syrup
- 3 tbsp whole milk
- 1 tsp vanilla extract
- 1 tsp maple extract
Instructions
Doughnuts
- In a small saucepan, melt the butter over medium heat. Add the milk, and heat just until the mixture reaches between 110-115 degrees Fahrenheit. Remove from the heat, stir in the yeast and 1 tablespoon of the sugar, and let sit for 5-10 minutes until bubbly and foamy.
- In the bowl of your stand mixer, combine the remainder of the sugar with the salt, nutmeg and all but 1/2 cup of the flour. Add the egg and the warm milk mixture.
- With the dough hook, stir the mixture for several minutes until it comes together, then knead for 5 minutes, gradually adding the remaining 1/2 cup of flour. The dough should form a "torpedo" around the dough hook and mostly pull away from the sides of the bowl, although it may stick a little at the bottom of the bowl.If you don't have a stand mixer, you can knead the dough by hand for about 10 minutes.
- Scrape the dough into a lightly greased bowl and cover tightly with plastic wrap. Set in a warm place to rise until doubled in size - this may take anywhere from 30-90 minutes, depending on the freshness of the yeast and the warmth of the environment. Be sure to check frequently, so that you don't over-proof the dough.If you have a "bread proof" setting in your oven, you can use that. Otherwise, preheat the oven to the lowest temperature, turn it off, then place your dough inside to rise.
- Prep several large baking sheets by lining them with parchment paper. If you like, you can cut the paper into individual 4x4 inch squares, which can be helpful for dropping the doughnuts into the oil.
- On a floured surface, roll out the dough to 1/2 inch thick. Use a 2 1/2-inch doughnut cutter dipped in flour to cut as many doughnuts and holes as you can. You'll probably get around 12-15 doughnuts + holes.If you like, you can gather up and roll out the dough scraps to cut more doughnuts, but these will be a little more dense and will never look as nice as the ones you cut the first time around, so try to cut them as close together the first time to reduce dough waste.
- Place the cut doughnuts and holes on the parchment lined baking sheets. Set the baking sheets inside your oven - again, use the "bread proof" setting, or gently warm the oven before setting the doughnuts inside.
- Fill a small saucepan with several inches of boiling water and place it inside the oven. The steam will keep the doughnuts moist, and prevent them from forming a "skin" on their surface, which will ruin the doughnuts and prevent them from frying correctly.
- Let the doughnuts proof until they are very light and puffy, about 30-40 minutes. If they don't proof for long enough, their texture won't be as light.
- While the doughnuts are proofing, you can start heating the oil over medium heat. Pour the oil into a large, heavy-bottomed saucepan. I used a saucepan that's about 12 inches wide and 5 inches deep. You need to use enough oil, both so that the doughnuts "float" on the oil while frying, as well as to help maintain a steady temperature, which you can't do with too little oil. Heat the oil to between 350-365 degrees Fahrenheit, checking the temperature with an instant read thermometer.If your oil is too cold, the doughnuts will absorb oil and end up tasting greasy. If it's too hot, they'll brown too quickly. It's better to heat the oil fairly slowly to maintain a steady temperature, and to check it frequently throughout the frying process, so you can adjust the temperature as needed. Note that when you first drop the doughnuts in, the temperature of the oil will also drop, so just keep checking to try to maintain a steady temperature.
- Place a cooling rack over a large baking sheet for draining the doughnuts.
- When you're ready to start frying, fry the doughnuts in batches, about 4-5 doughnuts at a time. Carefully lower them into the oil, fry for about 1 minute until golden brown on the bottom, then flip and fry on the other side for 1 minute (I like to use wooden chopsticks to flip the doughnuts). They should be a light golden brown, and if they were proofed correctly, they'll have a white "proof line" running around the middle.
- Use your skimmer to transfer the doughnuts to the cooling rack to drain, and continue frying the remainder of the doughnuts and holes.
Icing
- While the doughnuts are hot, whisk together all the icing ingredients in a bowl until smooth. For a more opaque icing, add a bit more powdered sugar for a thicker icing and better coverage.
- Dip the doughnuts into the icing, then set on the cooling rack to let the icing set. It will set in about 10-15 minutes.
- Enjoy the doughnuts immediately.
Notes
Yeast doughnuts are best eaten the same day they're made.
Tried this recipe?Let us know how it was!
https://curlygirlkitchen.com/