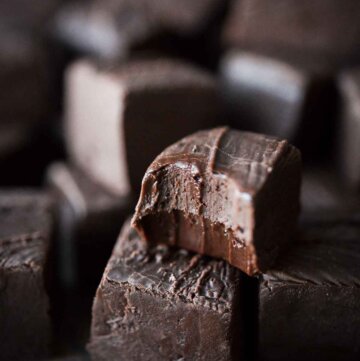
High Altitude Old Fashioned Fudge
A high altitude tested recipe for real, old-fashioned fudge, made without sweetened condensed milk, marshmallow fluff or corn syrup. This chocolate fudge is rich, smooth and creamy, and easy to make if you follow my high altitude tips!
All recipes on Curly Girl Kitchen are developed for high altitude at 5,280 feet. See FAQs for adjusting to higher or lower elevations.

Equipment
- Large Stock Pot (5-6 qt capacity)
- Hand Held Electric Mixer
Ingredients
- 2 ¾ cups granulated sugar
- ¾ cup good quality, unsweetened cocoa powder (see notes)
- ½ tsp coarse Kosher salt (if using table salt, use half the amount)
- 1 ¾ cups whole milk
- 4 tbsp unsalted butter, room temperature
- 4 oz 70% dark chocolate, roughly chopped, optional
- 2 tsp vanilla extract
Instructions
Getting Ready
- Before you begin, read all of the high altitude candy making tips in the post above.
- Be sure to use a large, heavy bottomed stock pot (not a short sauce pan), as the fudge will bubble up quite a bit, and can over-flow a saucepan. In my first test batch, my pan was too small, so don't be like me. Use a stock pot with a 5-6 qt capacity.
Cook the Fudge
- In the stock pot, combine the sugar, cocoa powder and salt, then whisk in the milk.
- Set the pot on the stove over medium heat (or just below medium heat), and clip a digital candy thermometer to the side of the pot. The end of the thermometer should reach all the way down into the liquid, but not touch the bottom of the pot.
- As the fudge cooks and begins to boil, you will not stir it. Not even once. Stirring can agitate the sugar and crystallize the fudge. (You will not stir the fudge at all, until you're instructed to start beating it.)
- As it cooks, it will initially bubble up quite high in the pot and will quickly reach 200 F. Then the bubbling will go down as the temperature more slowly climbs to the soft ball stage for candy. For my altitude, this is 223 F (see high altitude tips above to determine what temperature you're aiming for, based on your altitude). It may take 20-30 minutes to reach 223 F, but don't be tempted to turn up the heat on the burner. Slow and steady is best so the fudge doesn't burn.
- As the fudge boils down, there will be some foamy residue on the sides of the pot. Use a wet pastry brush to wash down the sides of the pot and push the foam down into the bubbling liquid.
- As soon as the temperature reaches 223 F (or the temperature you've determined for your altitude), the candy is at the soft ball stage, and you need to immediately remove the pot from the heat.
Cool the Fudge
- Set the pot somewhere that the fudge can cool down, and leave the thermometer on. You will not stir it at this point.
- Cut the butter into chunks, and drop it into the hot liquid, followed by the chopped chocolate and the vanilla. As these melt into the candy, you'll see a shiny, buttery film on top, but do not stir it in.
- Let the fudge cool, completely undisturbed, until the temperature reaches 110 F.
- While you wait, line an 8x8 inch square pan with wax paper so the bottom and sides of the pan are covered in paper.
Beat the Fudge
- Remove the thermometer from the pot.
- If you plan to beat the fudge by hand, you need a wooden spoon and a strong arm. Seriously, your arm is going to hurt. I recommend using an electric hand mixer, which can do the job quickly. You want to beat fudge quickly, to beat down any sugar crystals into tiny particles. This results in smooth, creamy fudge that's not sugary or grainy. I started with a spoon and then switched to a mixer when I realized just how difficult this part was. And with a hand mixer (instead of a stand mixer), you can just beat it right in the pot.
- With the hand mixer on low or medium low, beat the fudge for about a minute, to incorporate all the melted butter and chocolate. If you need to, use a spatula to scrape around the bottom corners of the pot to get everything mixed in. At this point, the fudge will still look pretty glossy, and will drip off the beaters.
- Beat the fudge for another minute or two on medium low speed. The fudge should lose its high gloss, but should still have a sheen to it. If you lift up the beaters, the fudge should easily flow off the beaters, but you'll see that the surface of the fudge starts to crust over with a matte appearance. This is when you should stop beating (and if adding chopped nuts, stir them in now). If you continue to beat the fudge until it's super thick and matte, it will be very difficult to spread into your pan.
- Working quickly, use a spatula to scrape the fudge into your prepared wax-paper-lined pan. It should spread out on its own to fill the pan, although you may need to use a small offset icing spatula to nudge it into the corners. The less you disturb the fudge as it fills the pan, the smoother the surface will be. Or, use a spatula like I did to create a few swirls and designs on top, which will also make it more matte.
Chill and Cut the Fudge
- Place the pan in the refrigerator to chill and set for several hours, until firm enough to cut.
- When the fudge is firm, remove it from the pan by lifting the paper up. Turn the slab of fudge upside down on a cutting board, and peel off the wax paper. Turn the slab back over, and use a sharp chef's knife to cut it into 1-inch squares.
- The fudge will have have sort of a "crust" on top, but the cut edges will be soft and creamy. By the following day, the fudge will be a bit firmer, and I actually like it best after the cut squares have been chilled for a day. Store the fudge in an airtight container at room temperature or in the refrigerator for up to 1 week, or in the freezer for up to 3-6 months.
Notes
- You can use either natural baking cocoa or Dutch processed cocoa powder. Natural cocoa powder will make a lighter colored chocolate fudge with a sweeter, milk chocolate flavor. Dutch processed cocoa will make a darker colored fudge with a richer, more intense chocolate flavor.
- The addition of the chopped dark chocolate (which melts into the fudge) is optional, but it adds a deeper, richer flavor.
- This recipe is great with chopped walnuts or other chopped nuts or add-ins.
 https://curlygirlkitchen.com/