
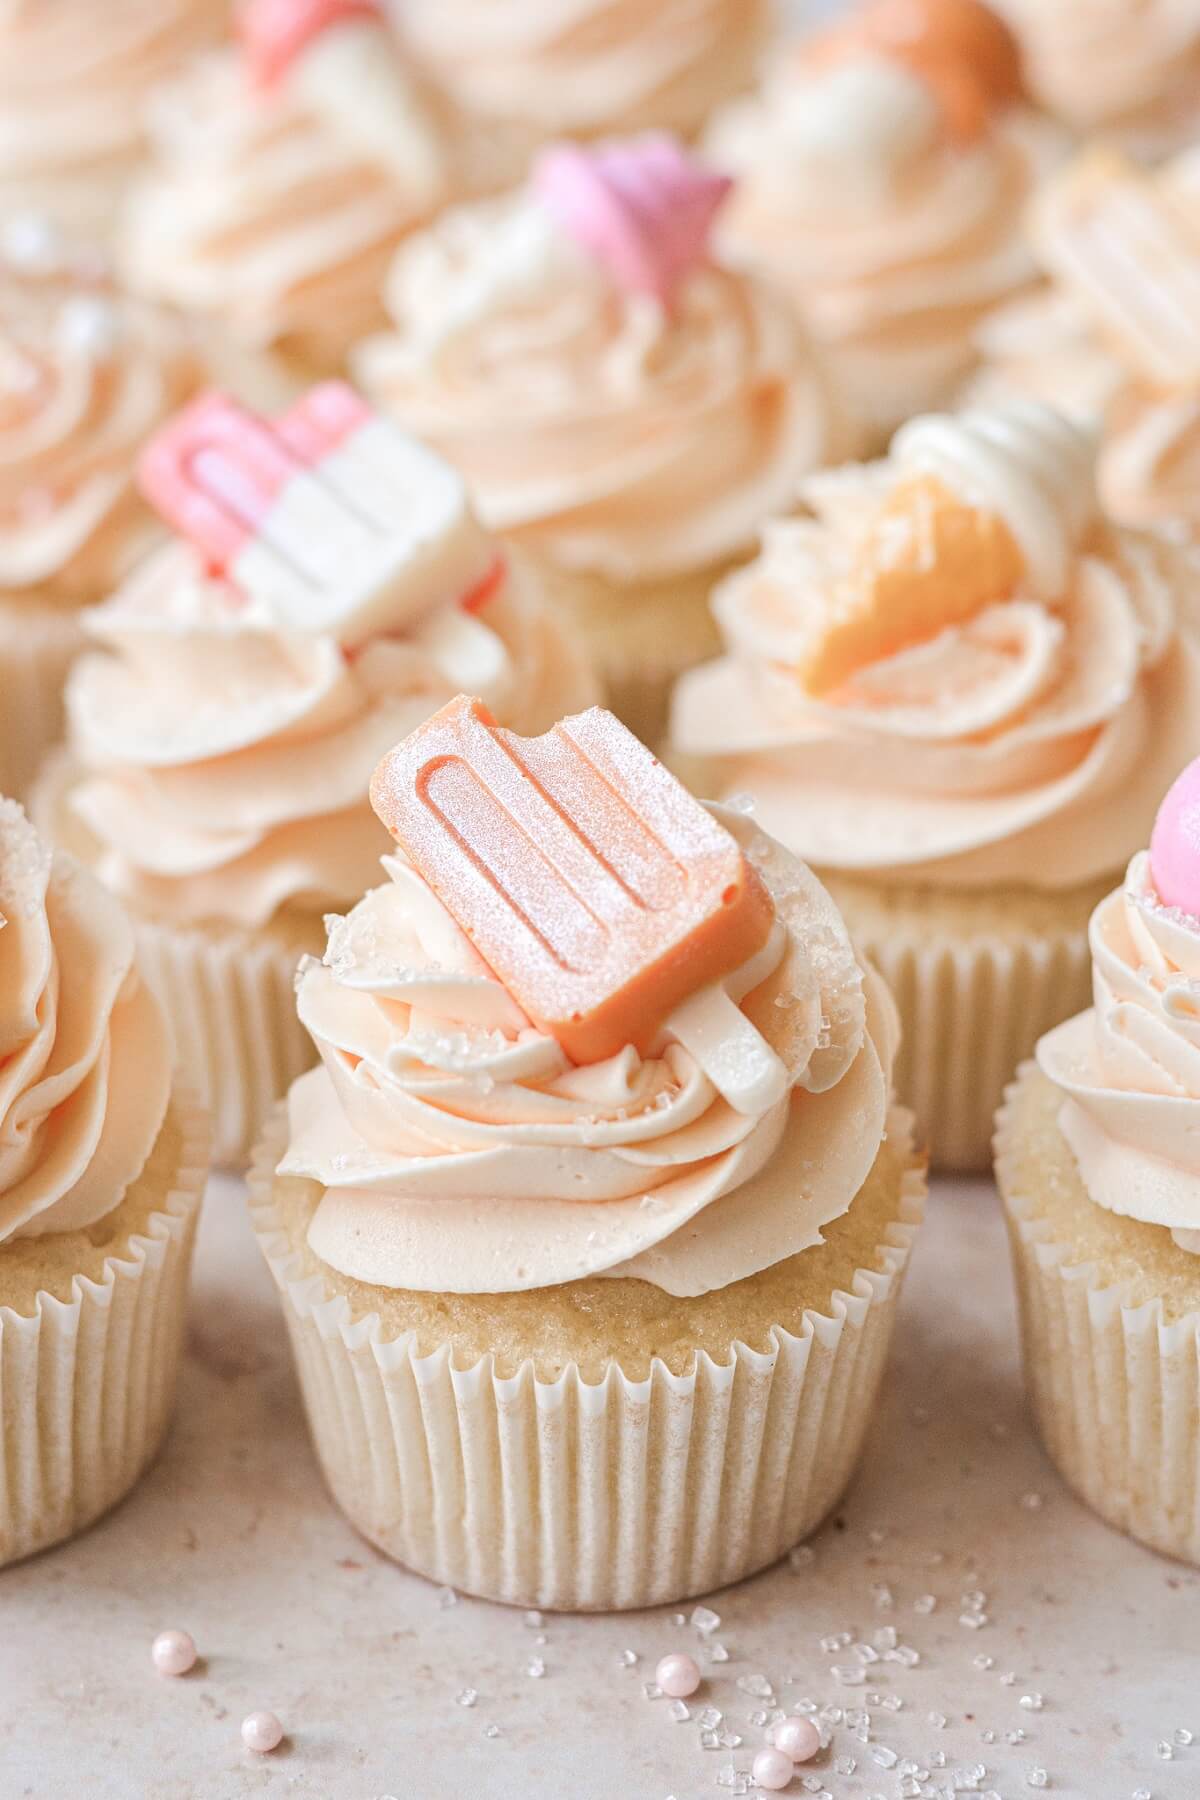
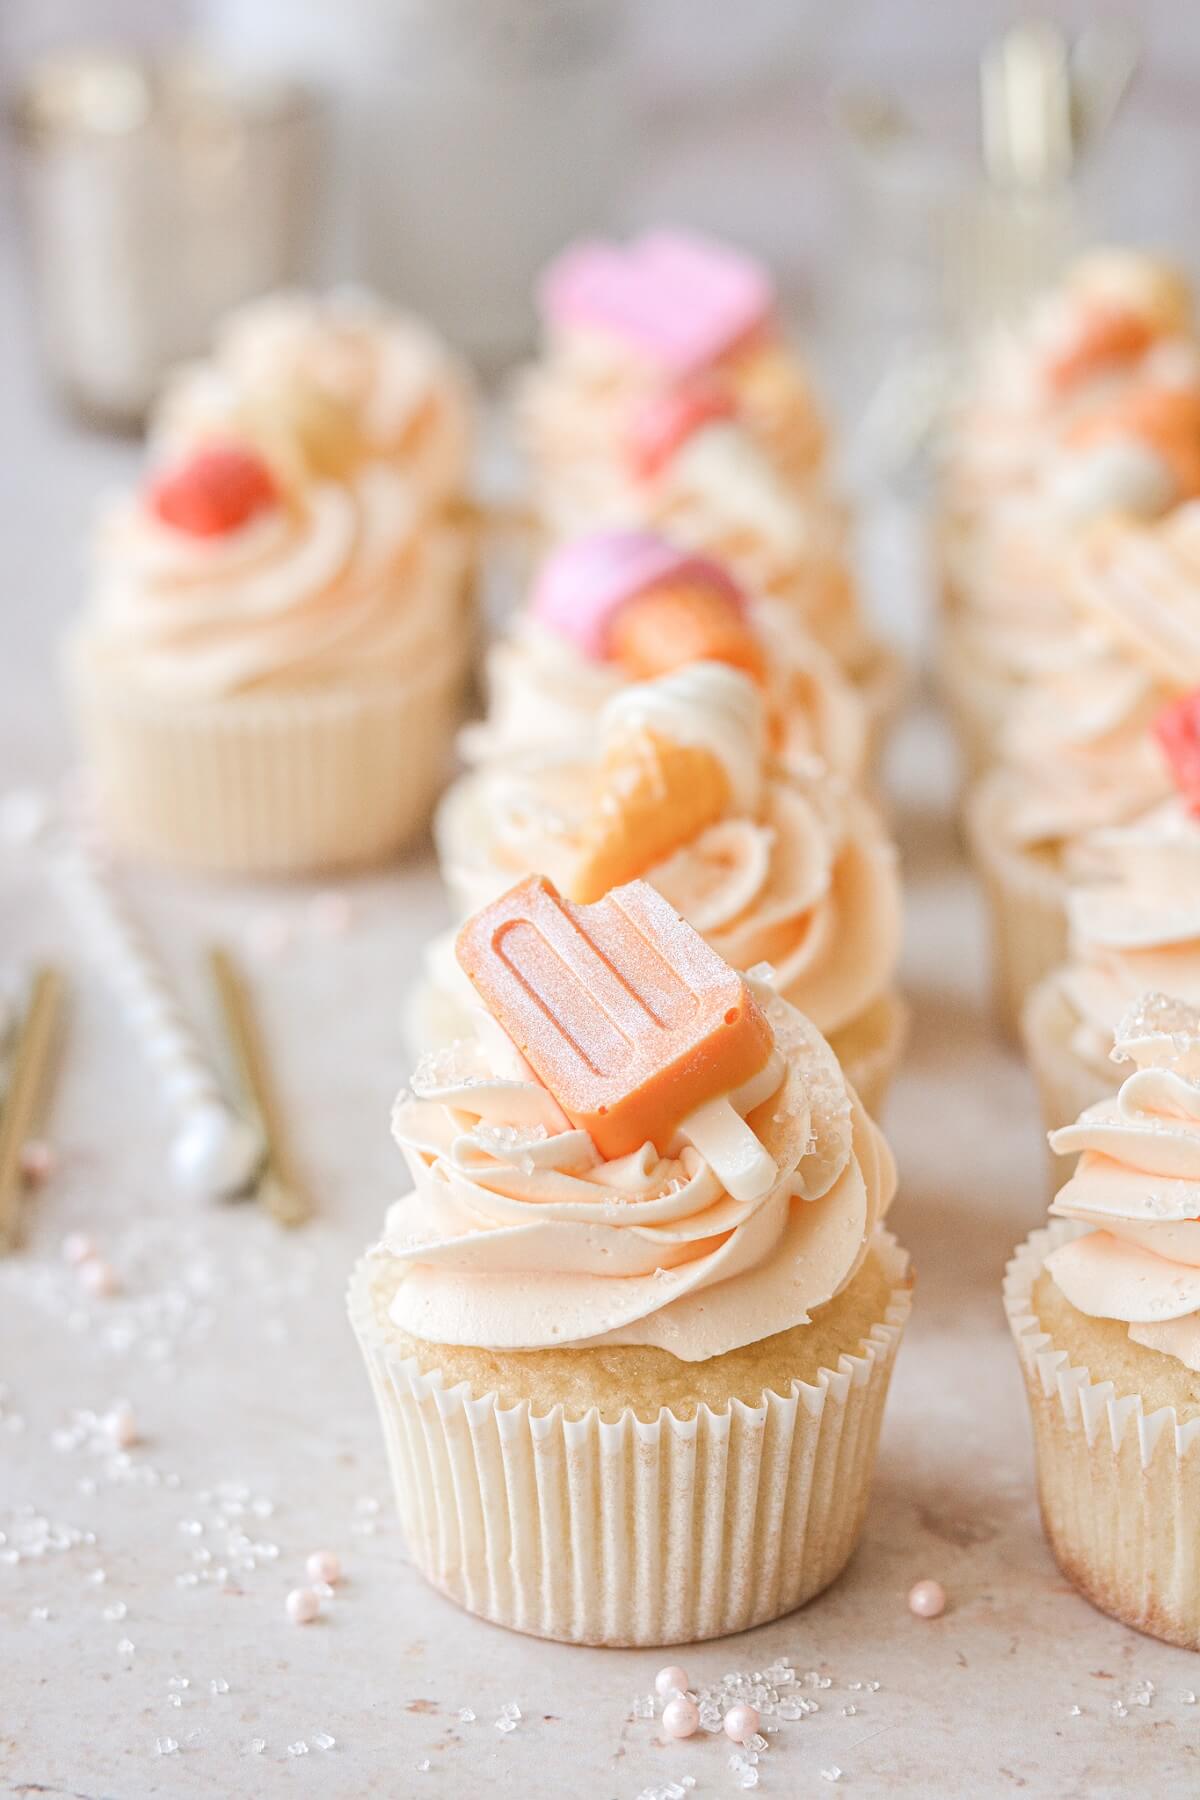
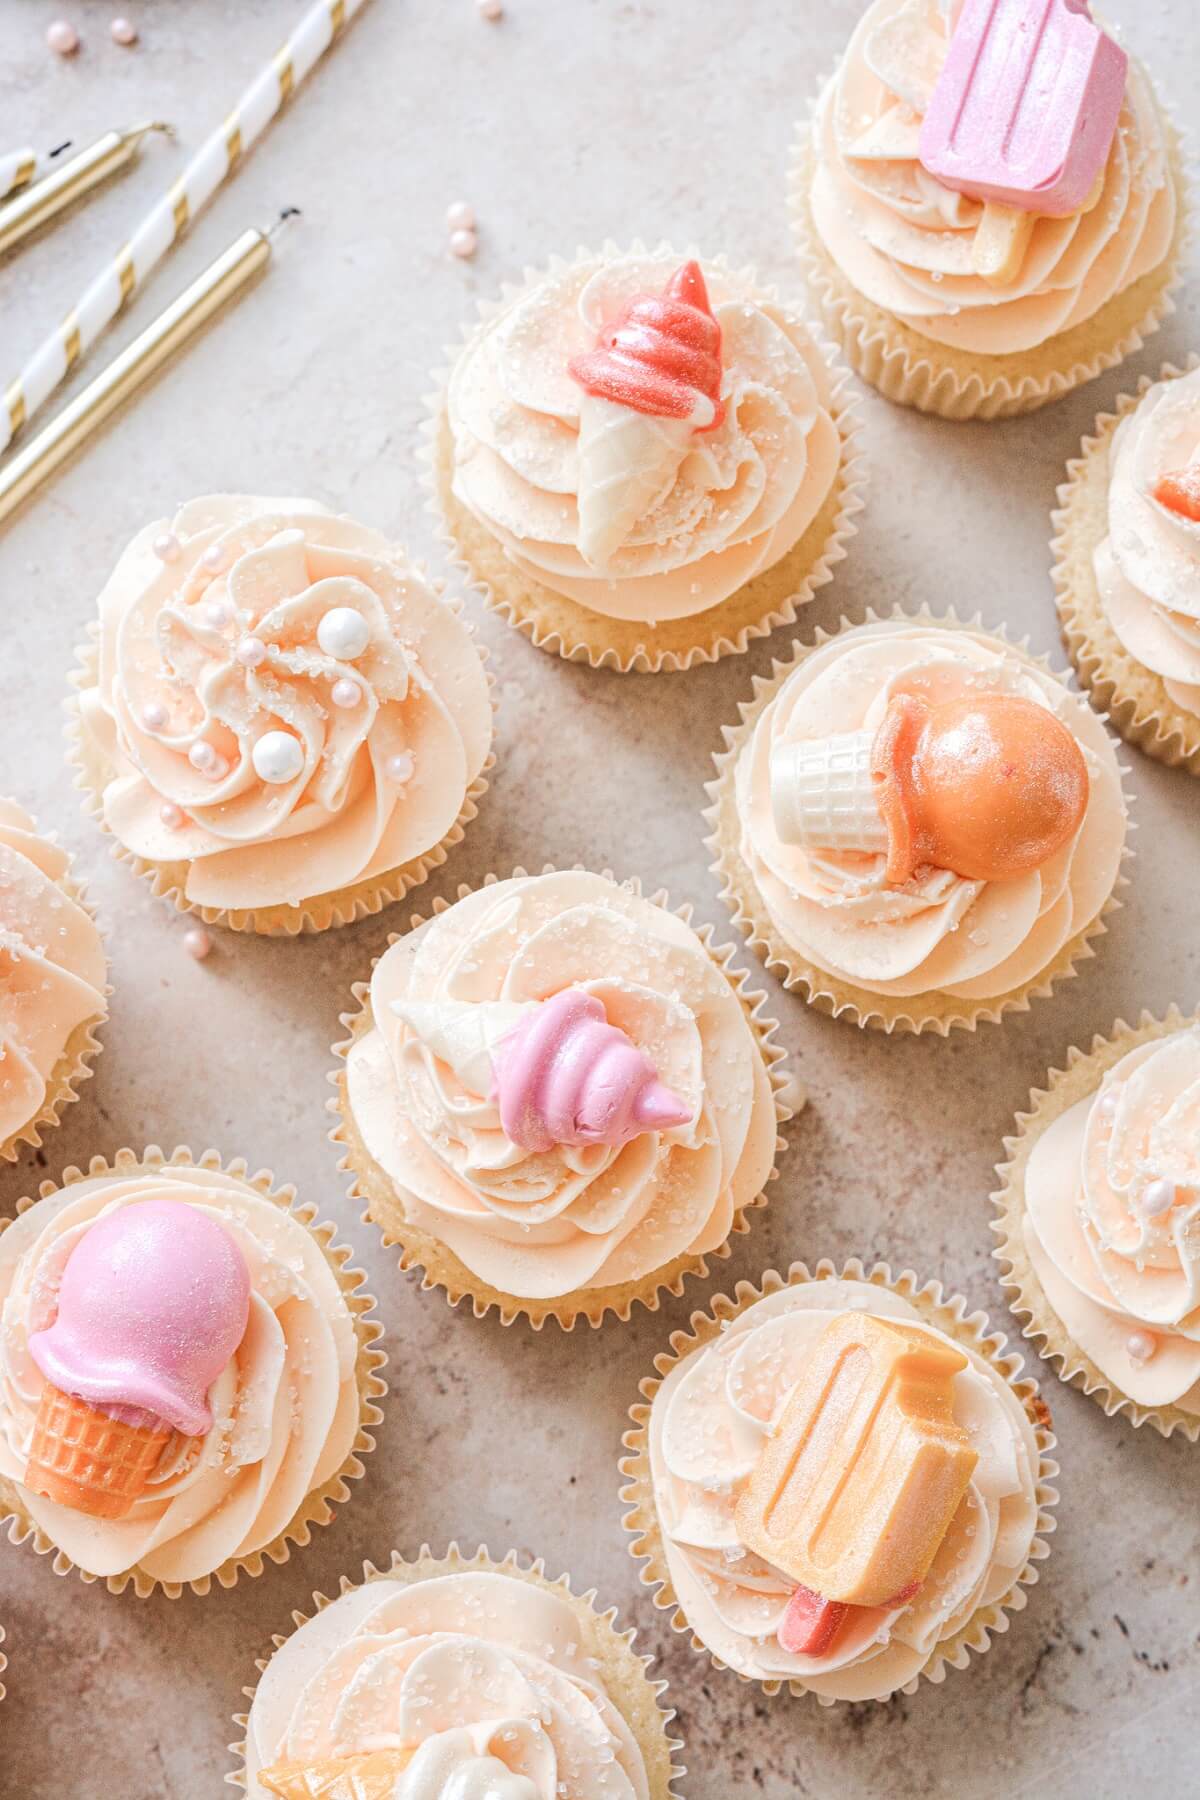
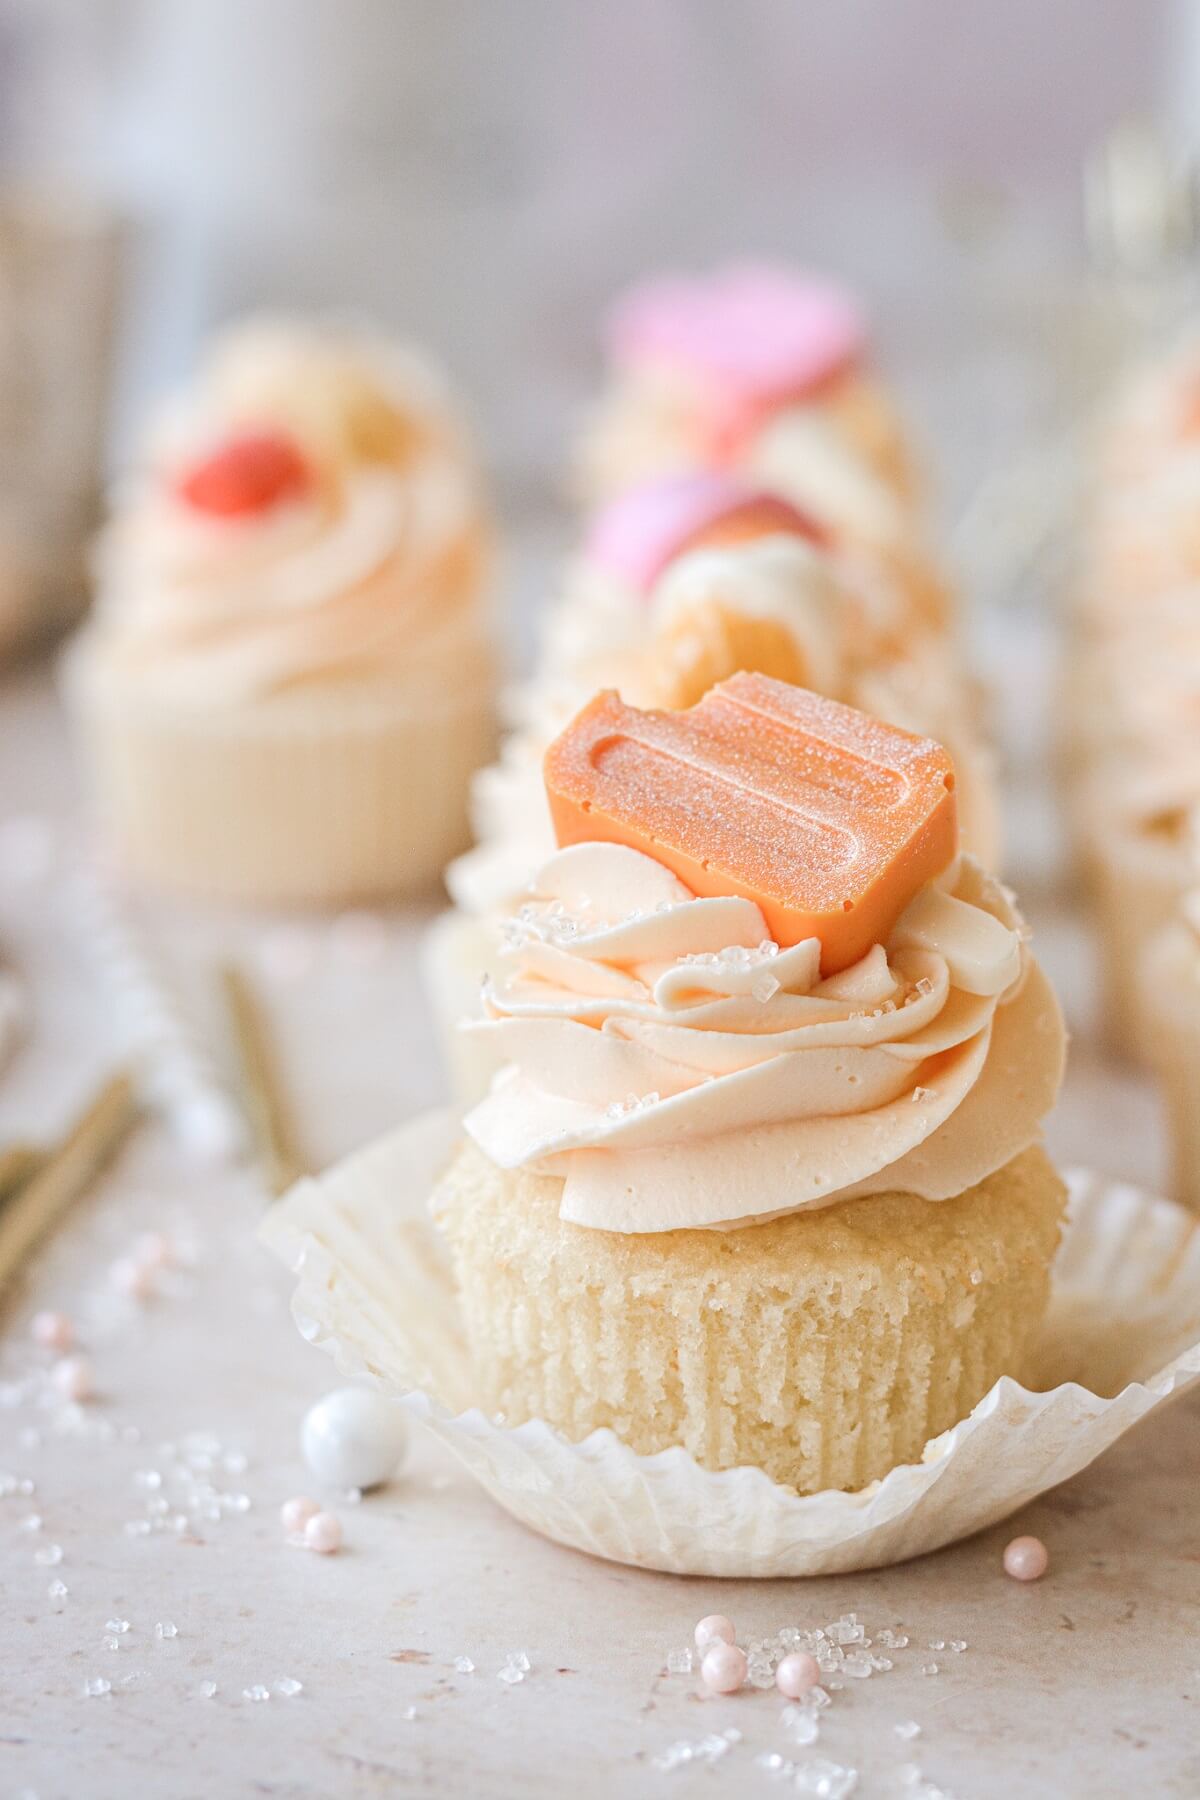
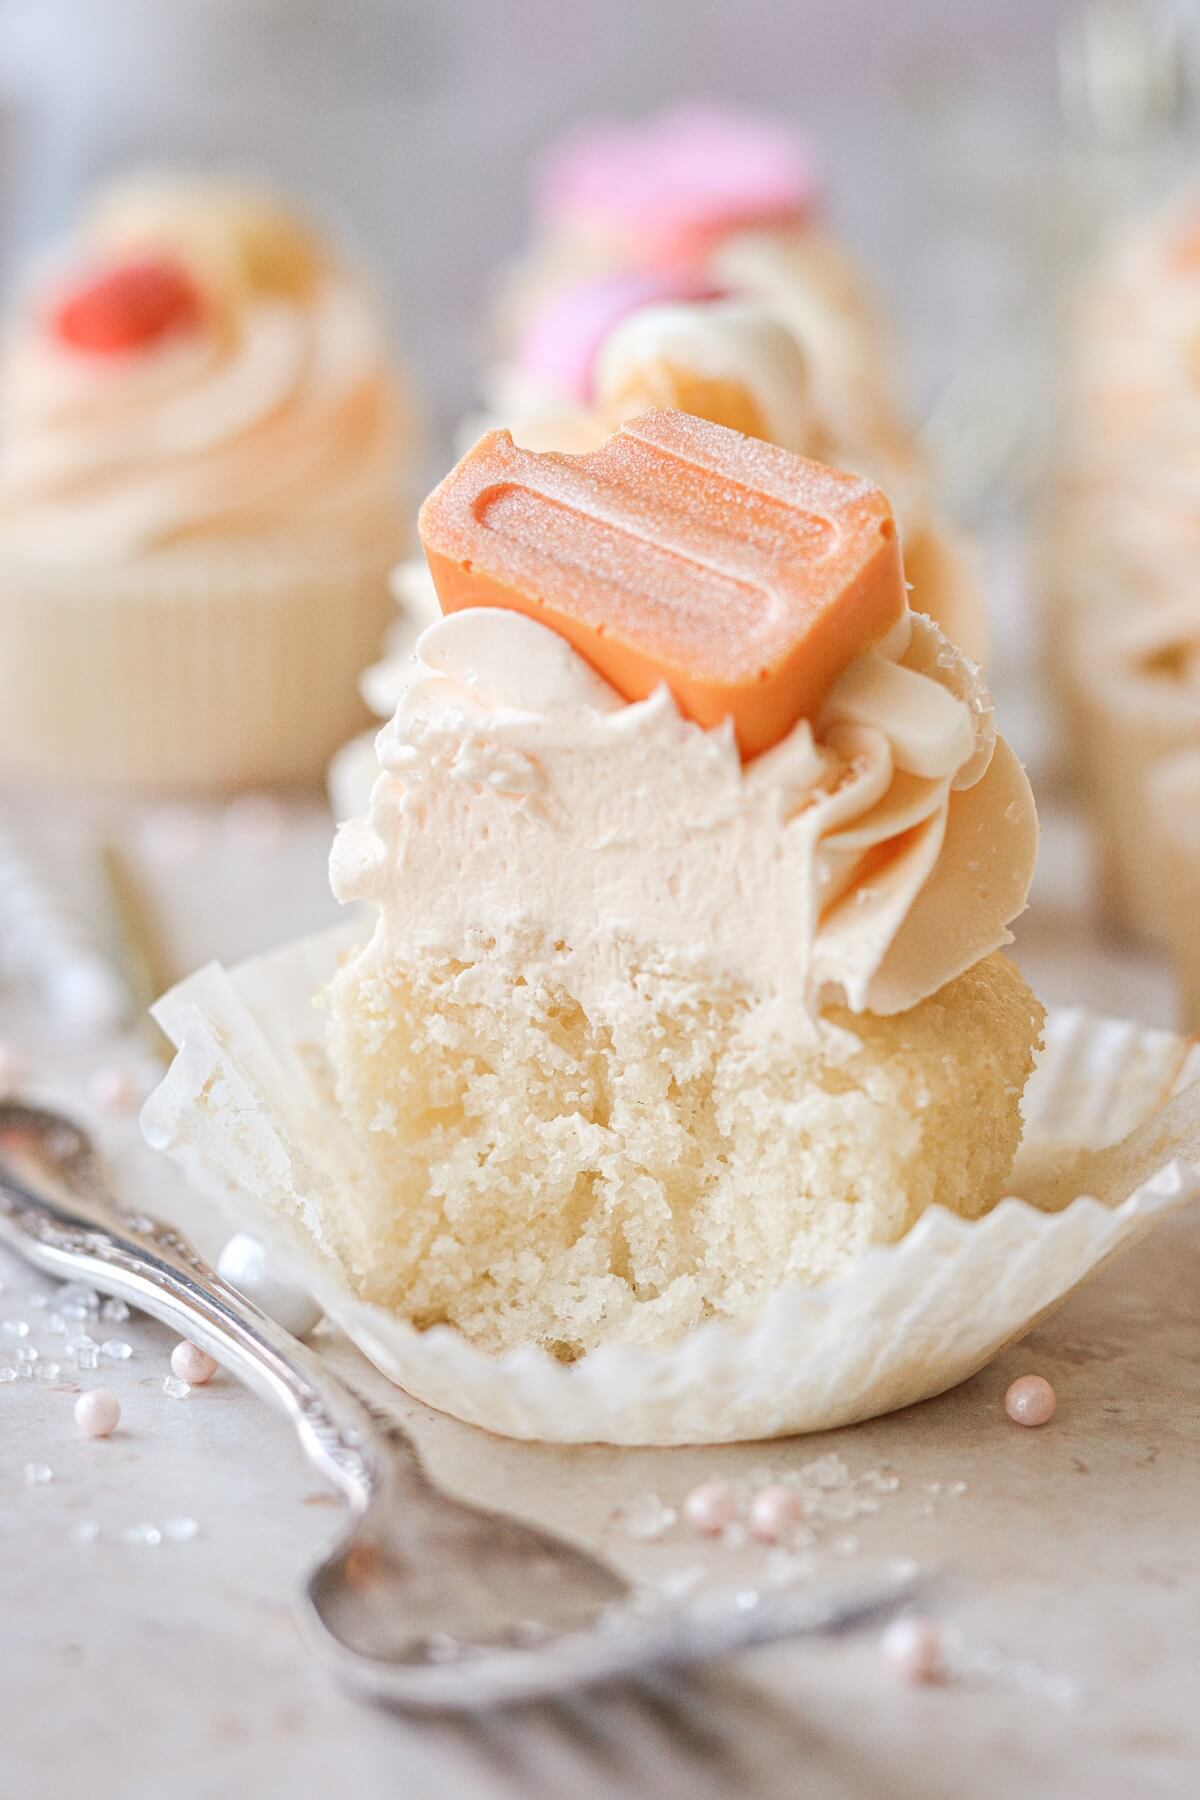
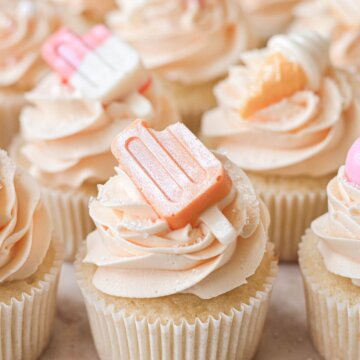
High altitude vanilla orange creamsicle cupcakes made with fluffy vanilla cupcakes and orange buttercream, decorated with the cutest candy melt ice cream cone cupcake toppers. If you love a classic orange creamsicle or dreamsicle in the summer, then you’ll love the flavor of these delicious orange vanilla cupcakes!
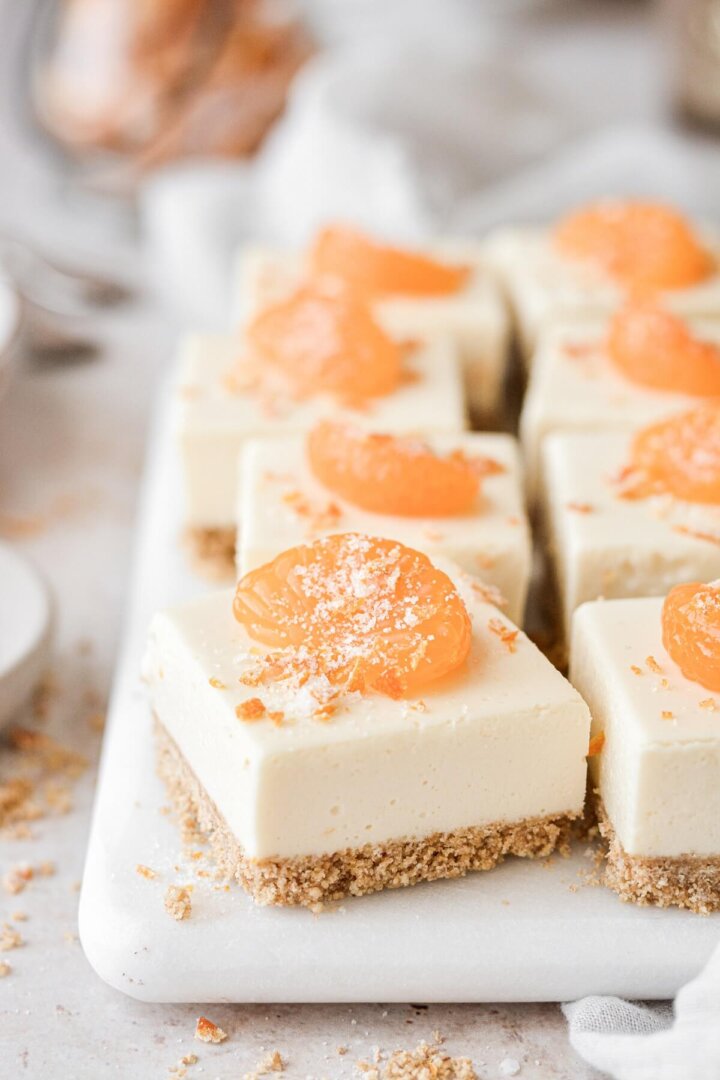
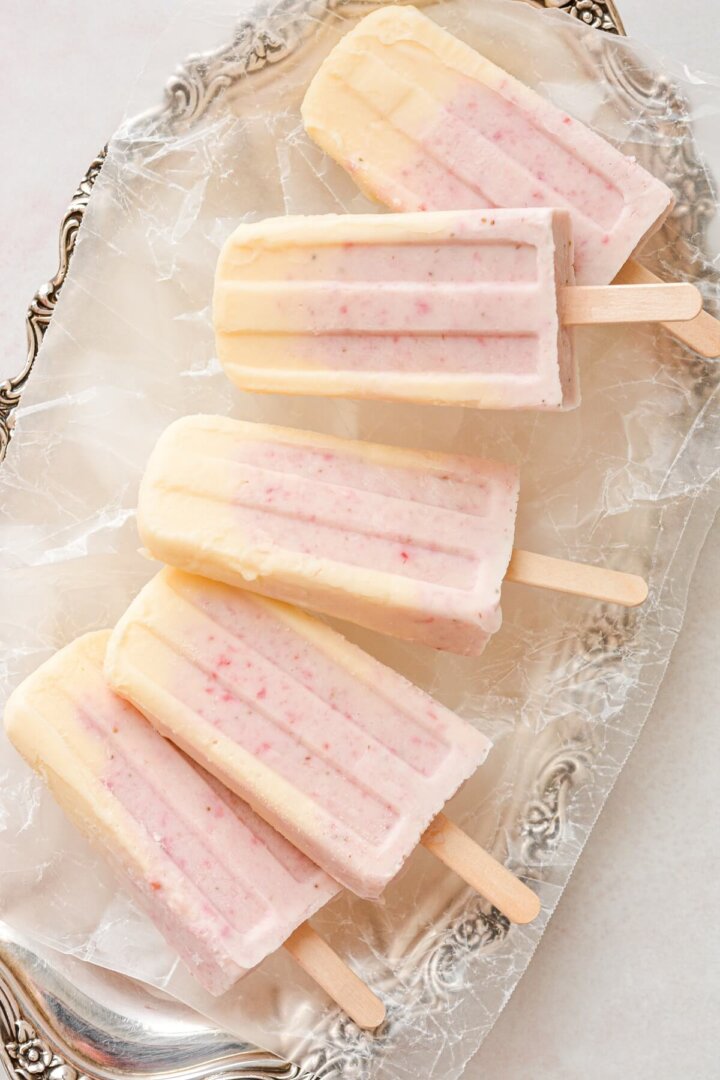
You might also love these no bake orange creamsicle cheesecake bars, strawberry orange creamsicles, and orange pistachio layer cake.
This site contains affiliate links. As an Amazon associate, I earn from qualifying purchases. This means that I may make a small commission if you purchase a product using those links. This in no way affects my opinion of those products and services. All opinions expressed on this site are my own.
Why You’ll Love These Cupcakes
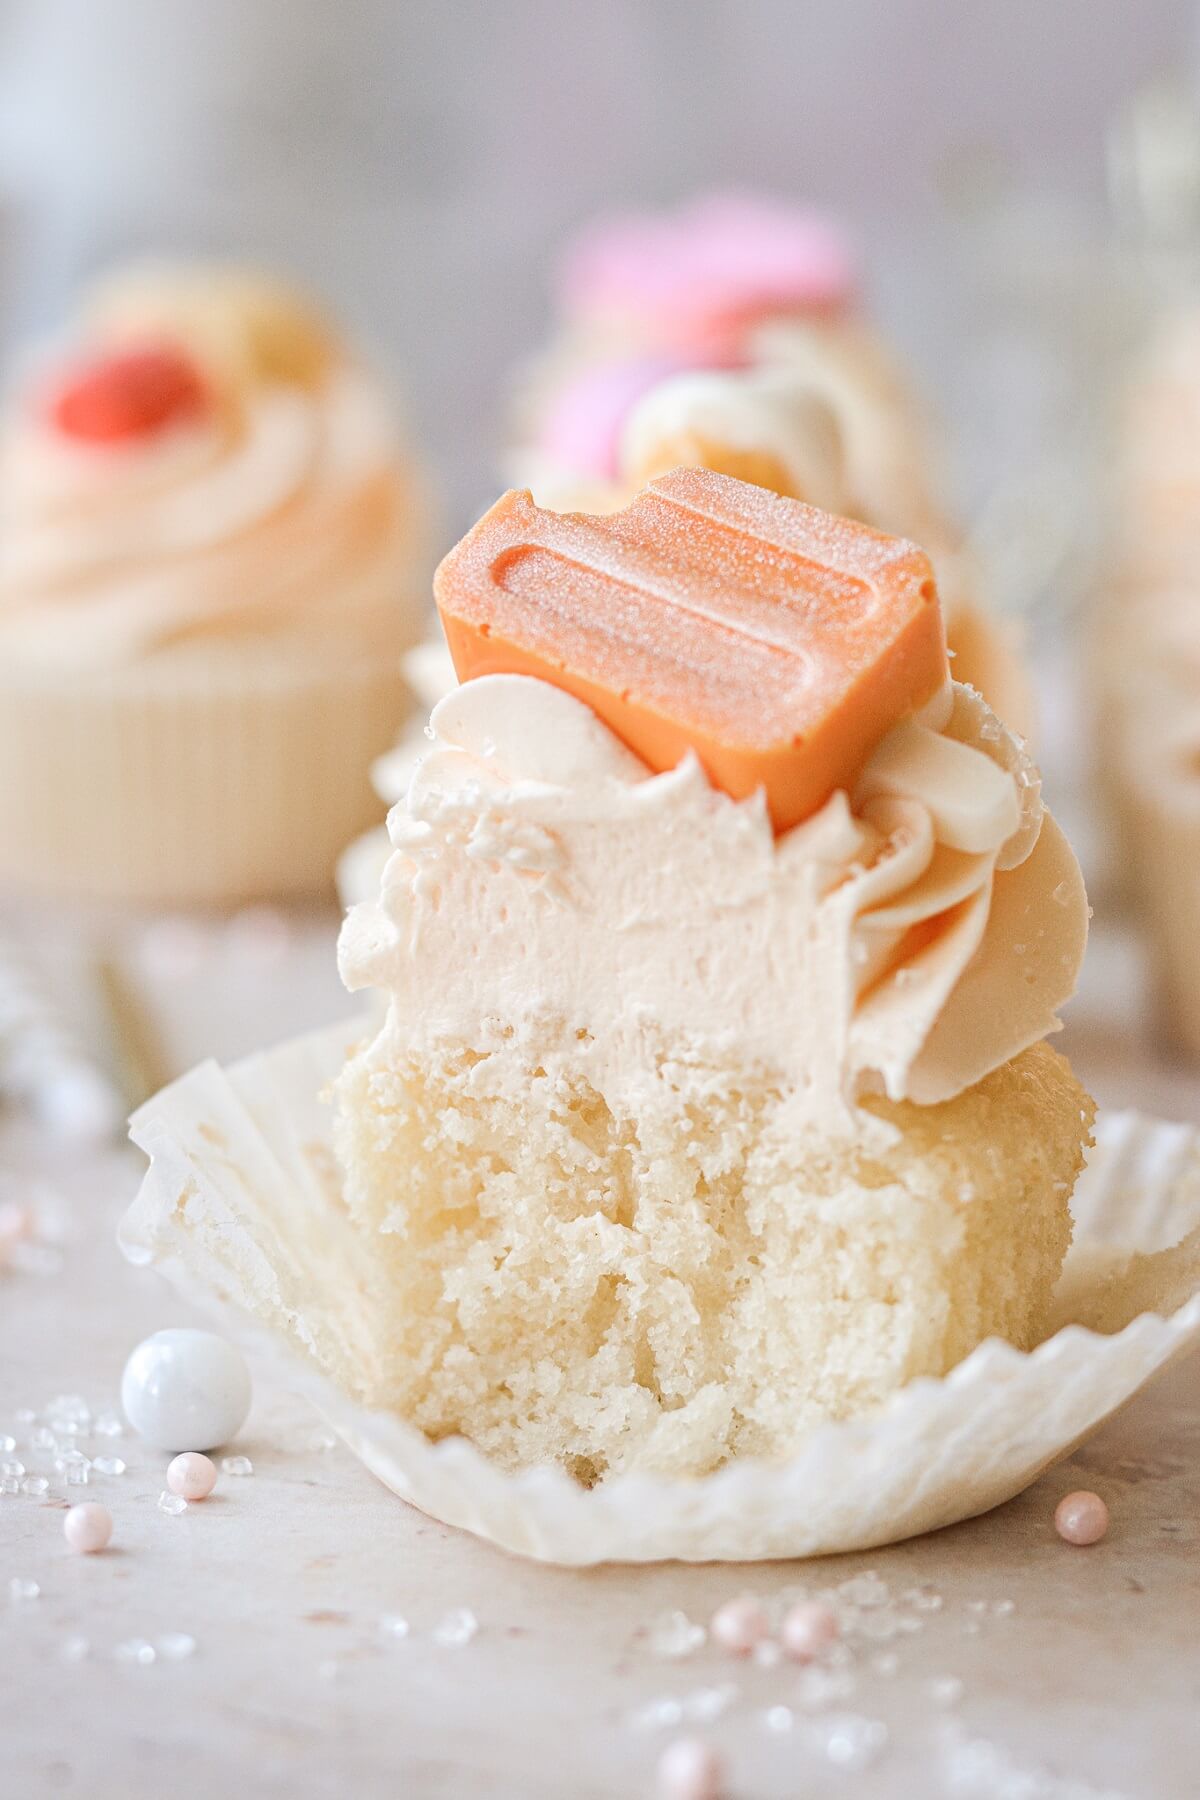
Delicious and Summery. The flavors in these dreamy orange creamsicle cupcakes are perfect for summer! With the soft vanilla cupcakes and fluffy orange buttercream, they’re reminiscent of a classic creamsicle.
Easy to Make. The cupcakes come together quickly, and you only need a bowl and whisk to make the cake batter.
Perfected for High Altitude. I test all of my recipes at Denver’s altitude of 5,280 feet, so high altitude bakers can be assured of perfect results.
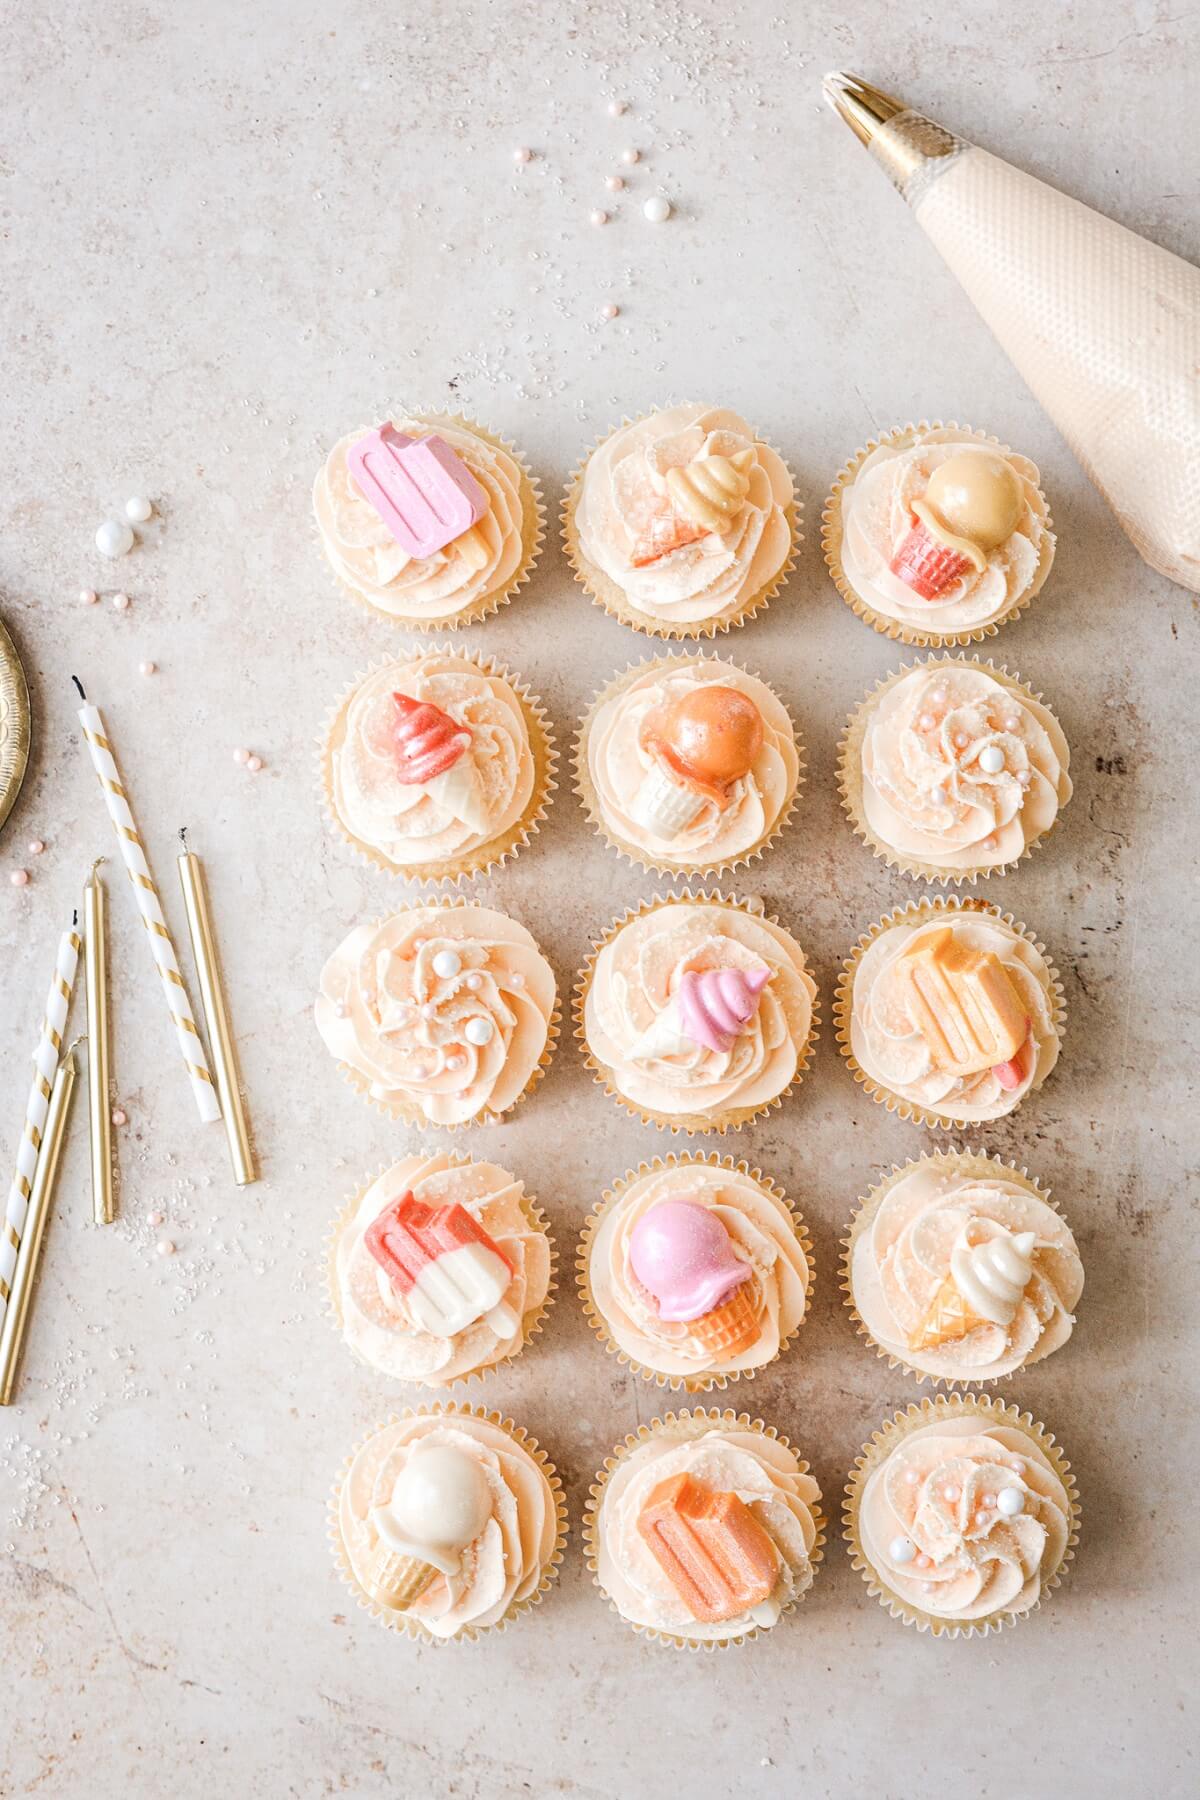
Orange Creamsicle Cupcake Toppers
What You’ll Need
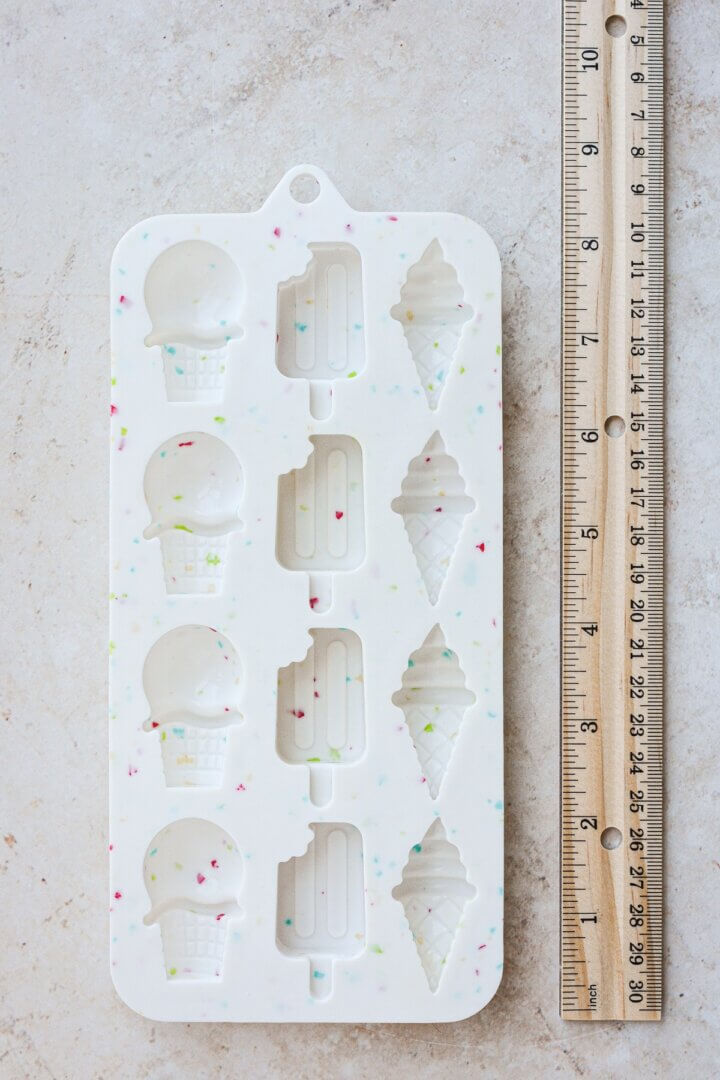
- Silicone Candy Melt Ice Cream Cone Mold
- 12-inch Piping Bags
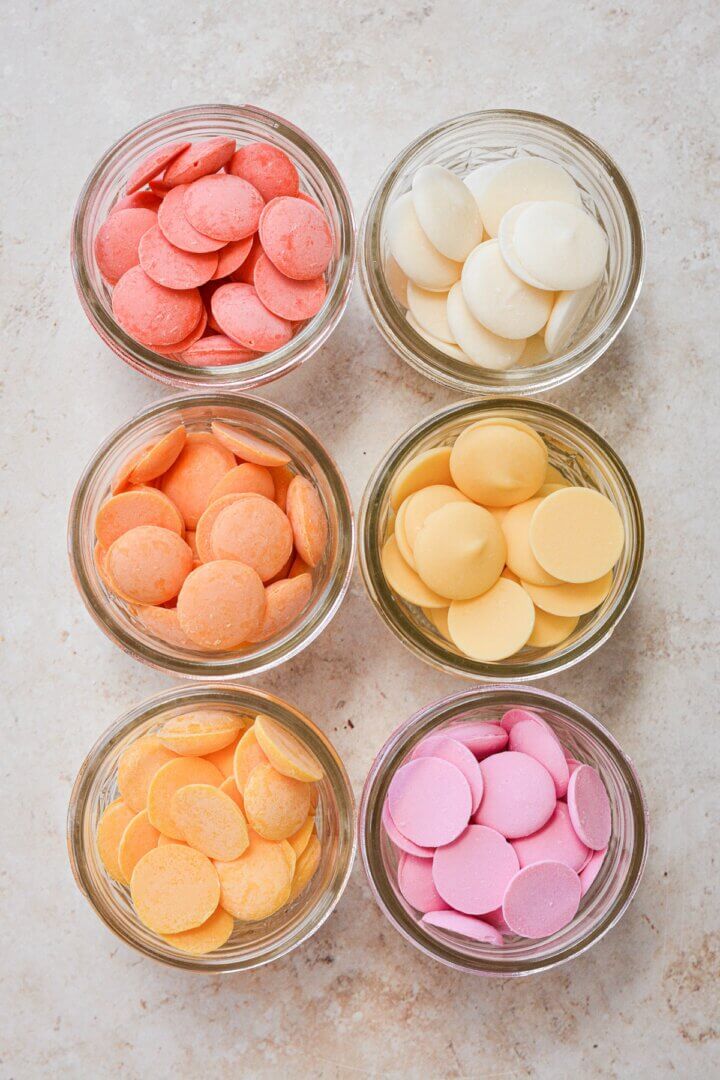
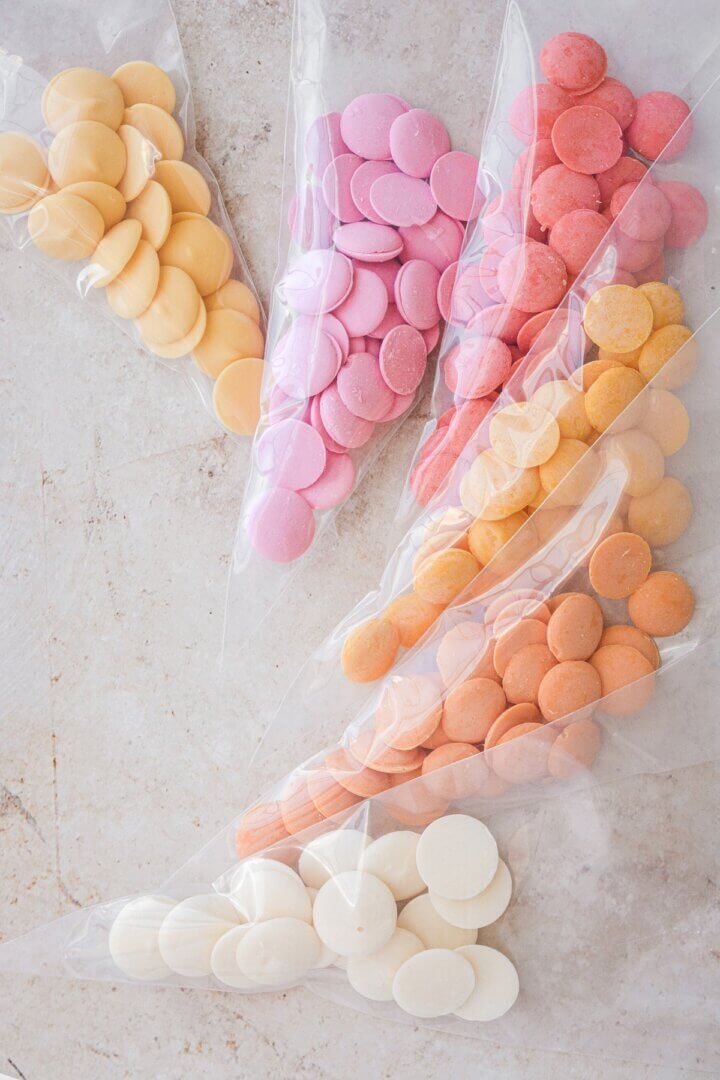
- Candy Melts, in a variety of pinks, yellows, oranges and white
Instructions
- Place the candy melts in piping bags, each color in a separate bag. Place the bags in the microwave, and microwave on 50% power for 2 minutes. Check the candy melts, and continue to microwave on 50% power for additional 30 second increments until the candy melts are soft and melted. Massage the bags to smooth out the candy melts, then snip off a small portion from the tip of the bags.
TIP: Some colors may melt faster than others, so check each individual bag of candy melts and take them out of the microwave when each color is melted.

- Place the silicone mold on something flat, like a cutting board, so it doesn’t flop around when you move it.
- Working quickly before the candy melts harden again, pipe the melted candy into the silicone mold, then gently tap the cutting board against the counter to make sure the candy settles into the mold.
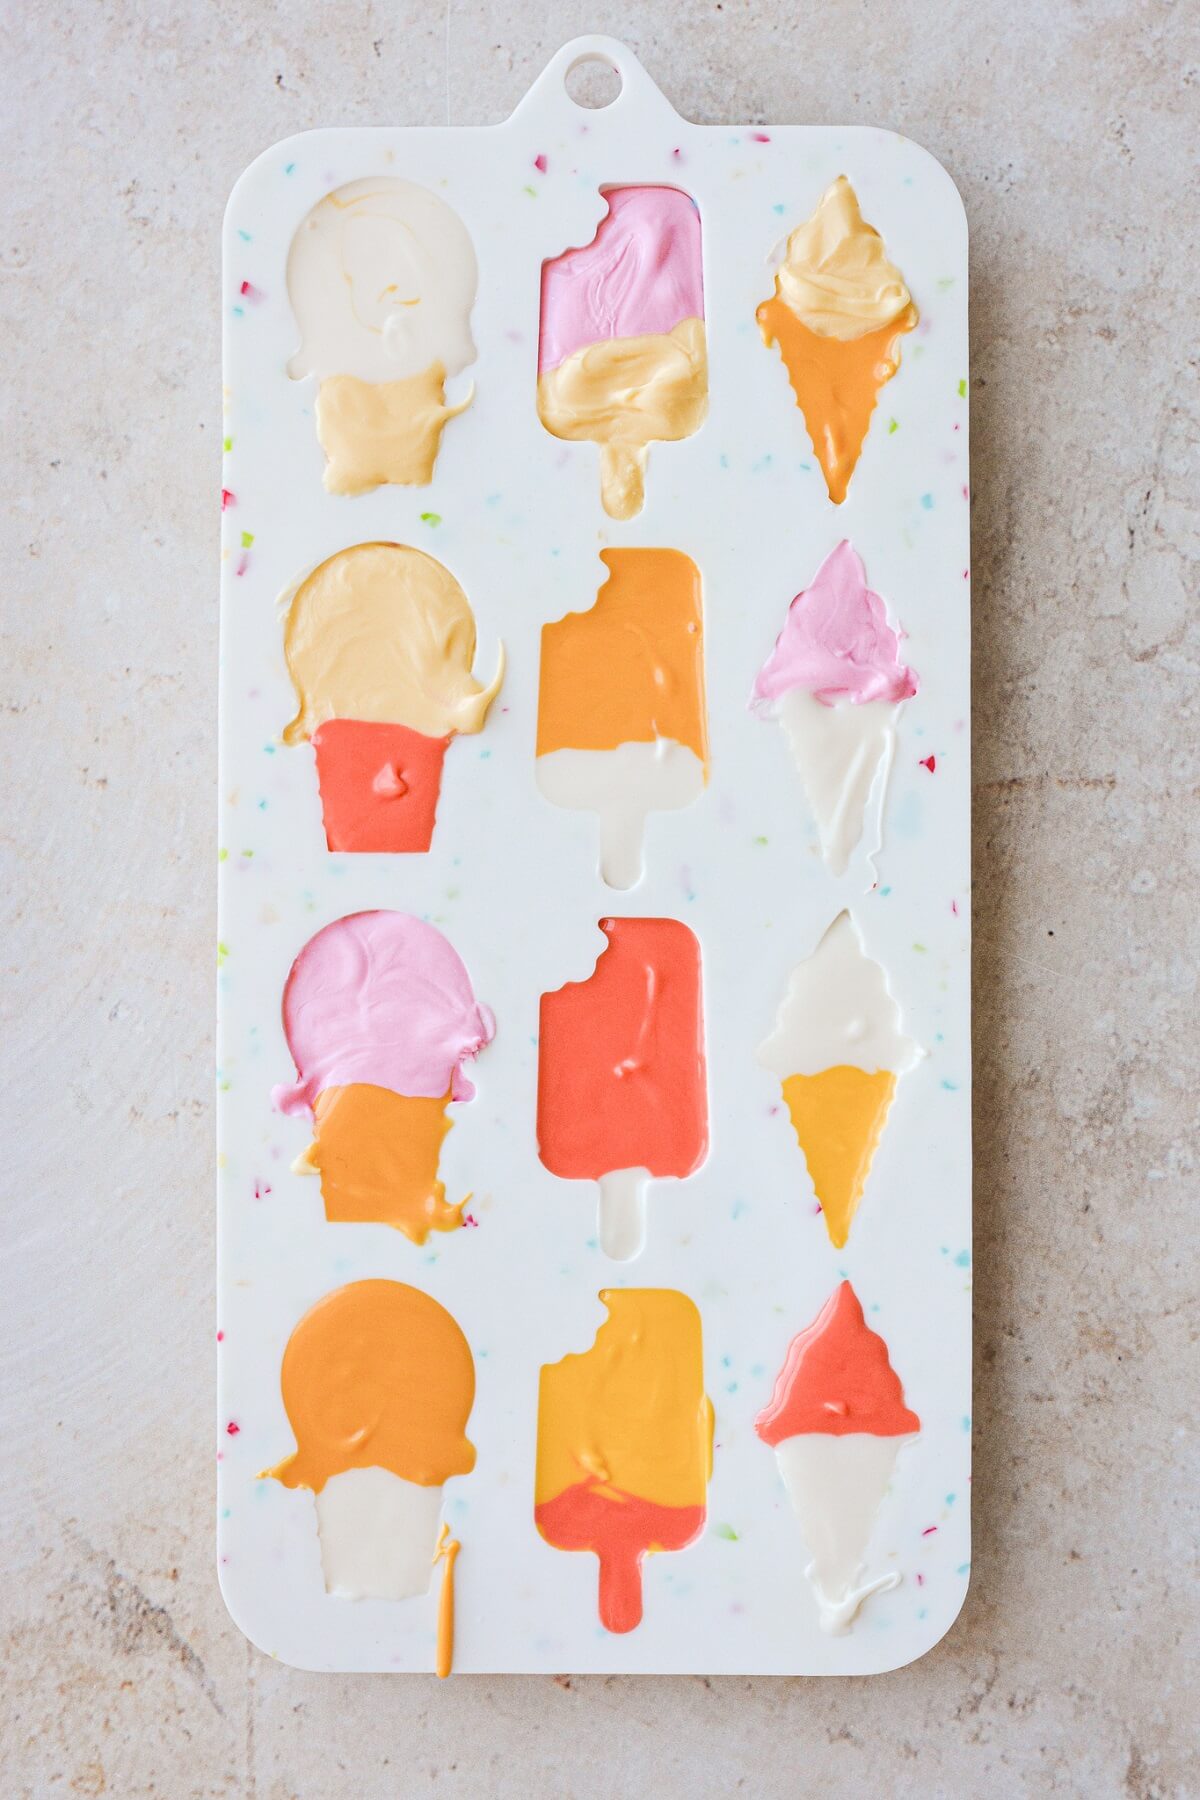
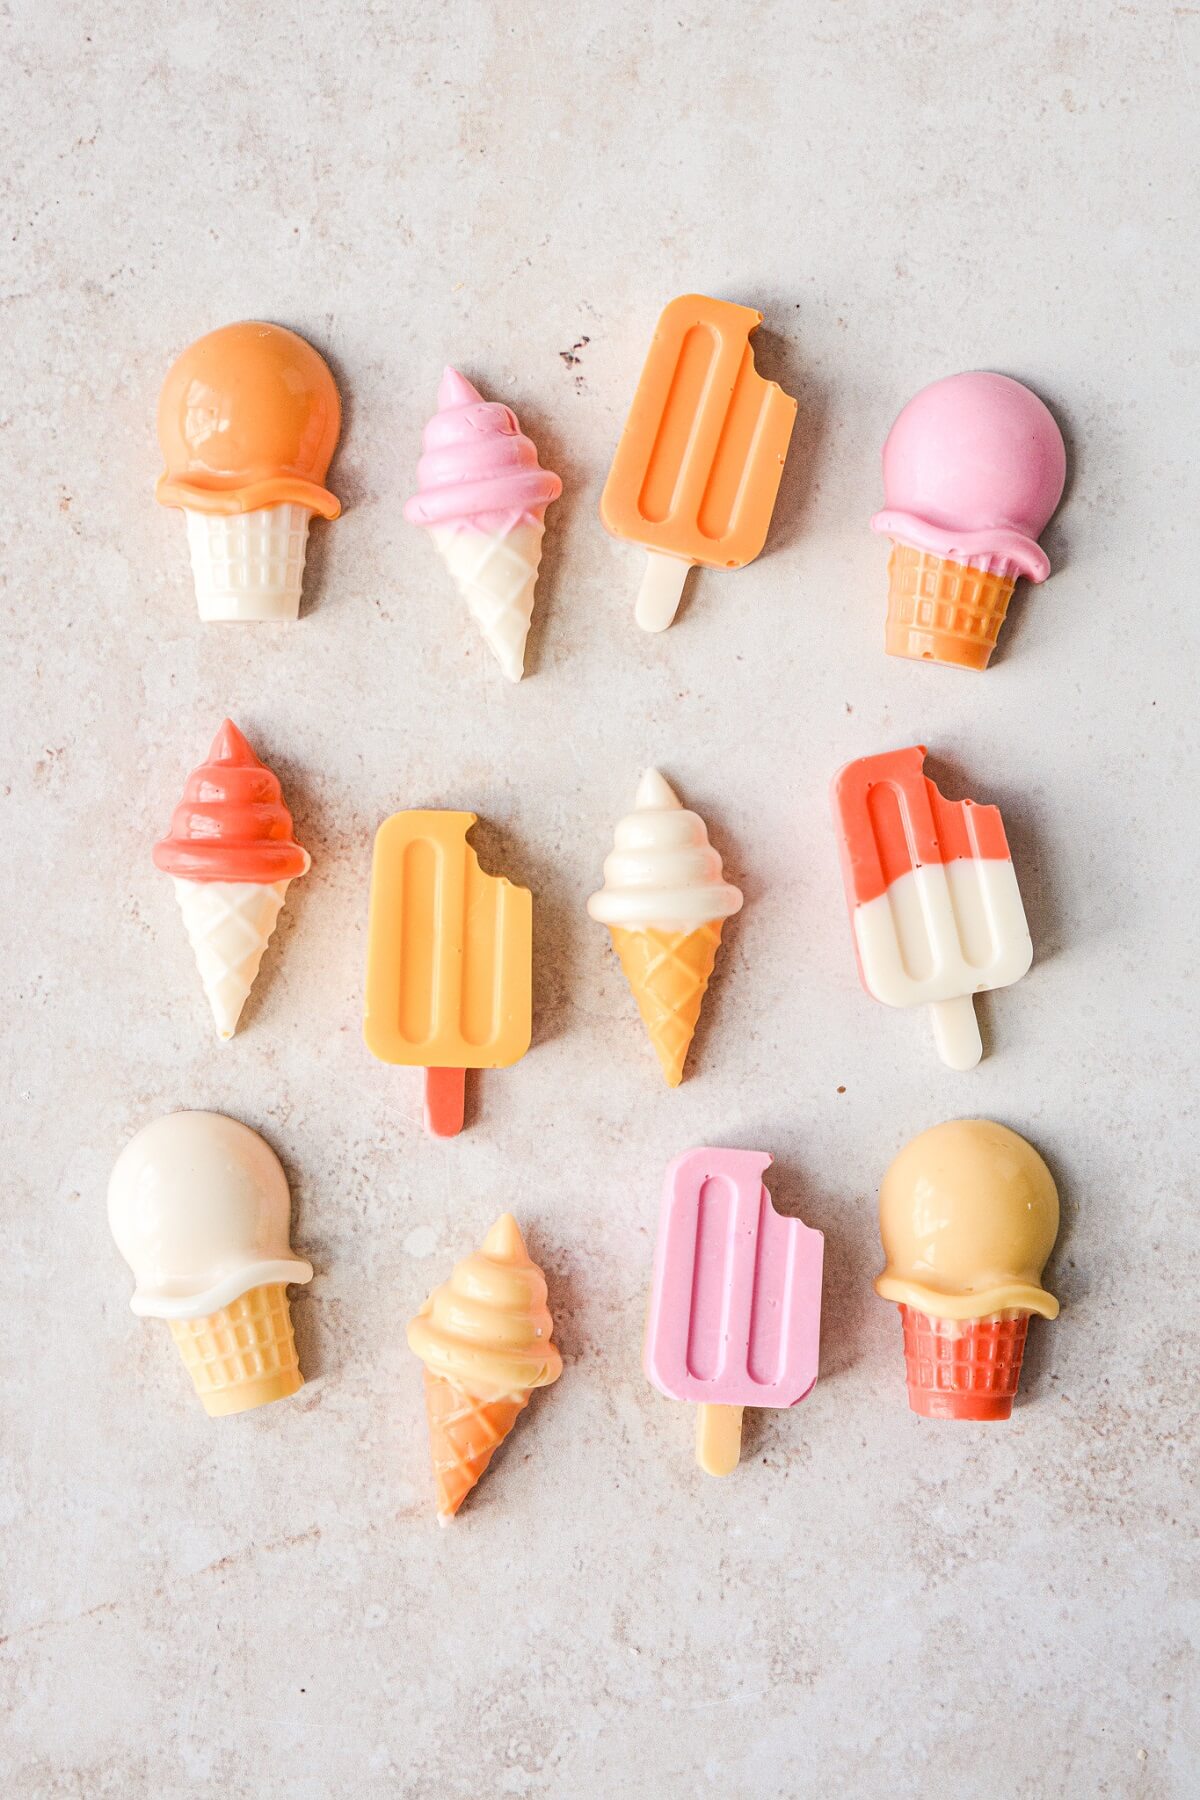
- Refrigerate the silicone mold for about 10 minutes until the candy is hard, then pop the candy out of the mold.
- Make more toppers as needed, and if the candy in the bags has hardened again, you can put them back in the microwave again to soften them.
- Store the candy melt cupcake toppers in a container in the refrigerator until needed.
See the recipe card at the end of the post for the full ingredients list and instructions.
Ingredients
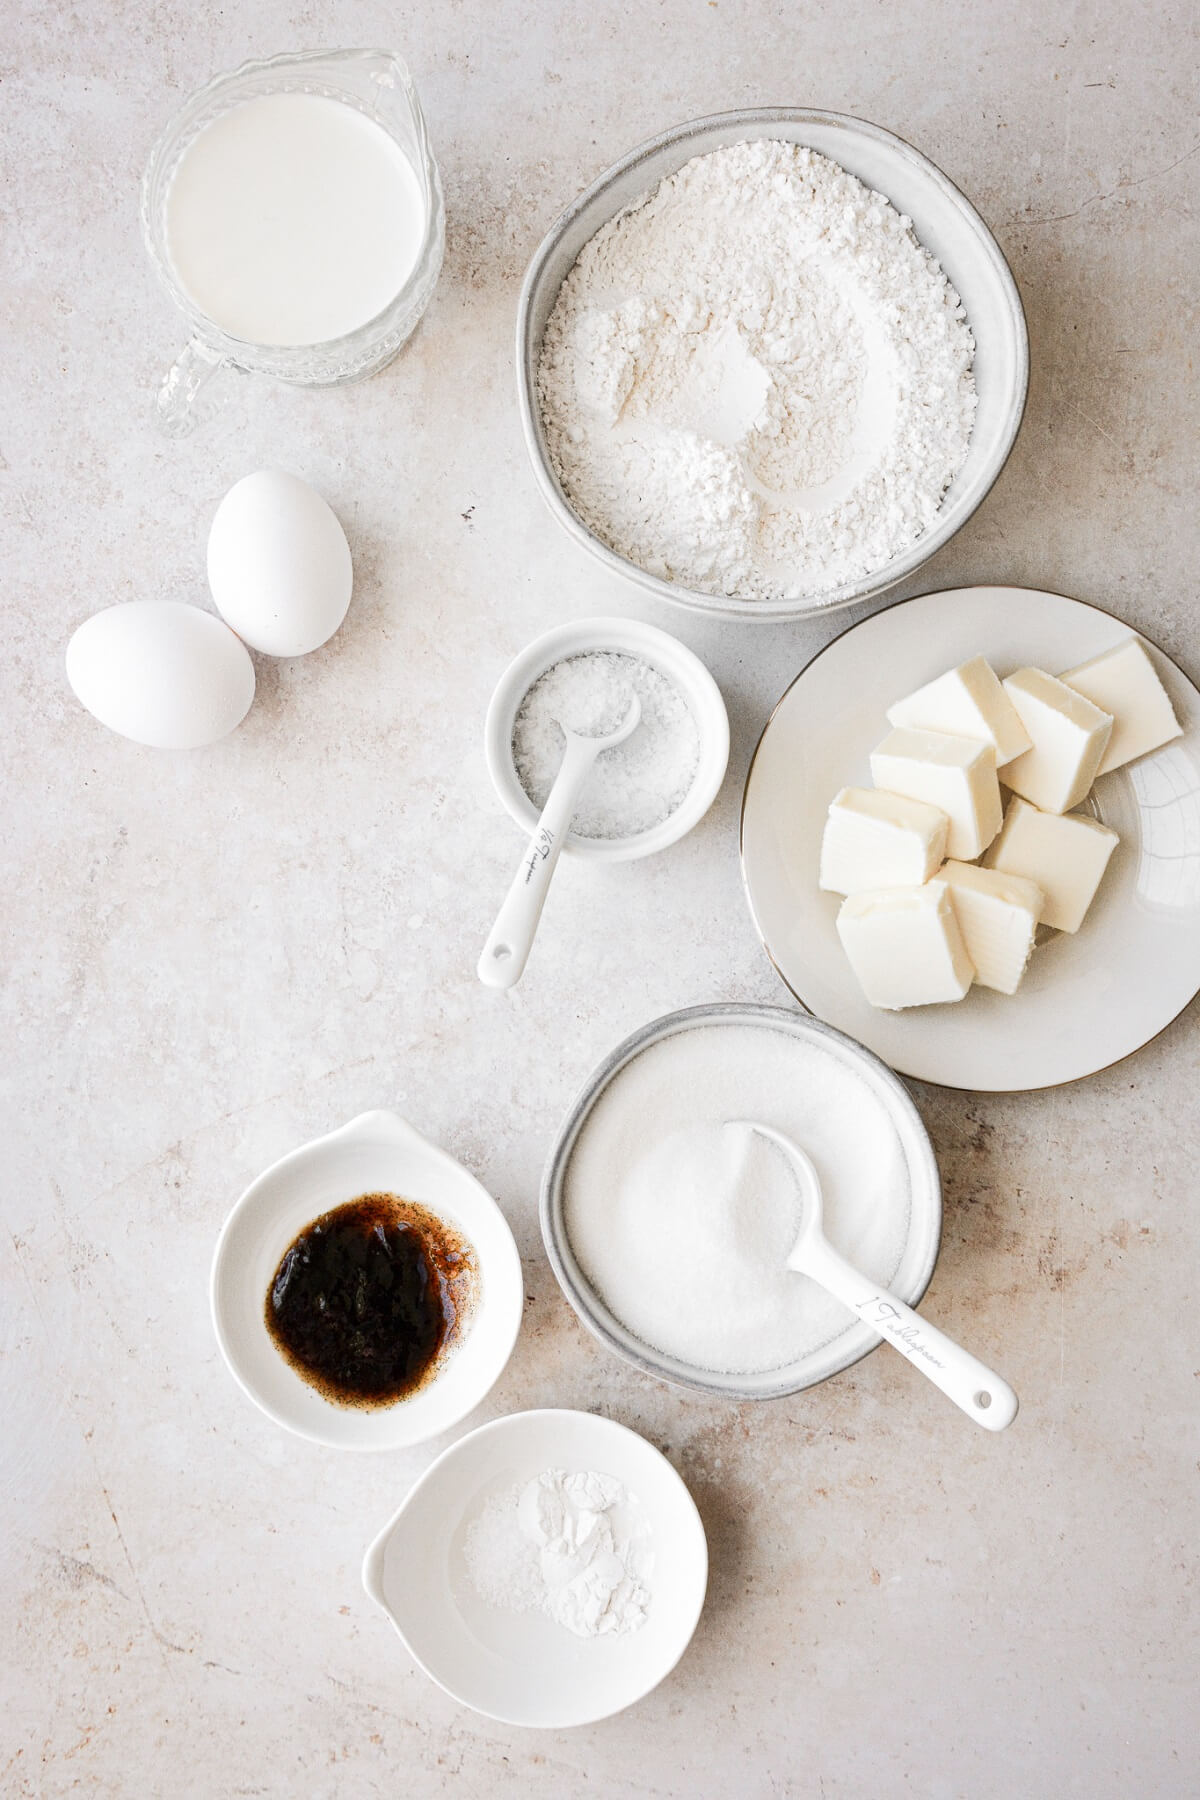
Cupcakes
- Flour. For a super soft, fluffy texture, use cake flour, rather than all-purpose flour. Cake flour has a lower percentage of protein compared to all-purpose flour, which gives it a more tender cake crumb. I use Swans Down cake flour for my white cakes and vanilla cakes.
- Granulated Sugar. Gives the cake sweetness and moisture.
- Baking Powder. Leavening agent, to make the cake rise.
- Salt. Balances the sweetness.
- Eggs. Gives the cake structure and strength.
- Whole Milk. Adds moisture and richness.
- Butter. Gives the cake moisture and a rich, buttery flavor.
- Vanilla Bean Paste. Flavor.
Buttercream
- Unsalted Butter. If you use salted butter, be sure to omit the extra salt in the recipe. For extra stability on a hot summer day, substitute vegetable shortening for half the butter.
- Powdered Sugar. Sweetens and thickens the buttercream.
- Meringue Powder. Stabilizes the buttercream and improves texture.
- Orange + Vanilla Extracts. Flavor.
- Salt. Balances the sweetness.
- Gel Food Coloring. The food coloring is optional, but I used 1 drop orange and 1 drop lemon yellow to get the creamy orange color.
Instructions
Cupcakes
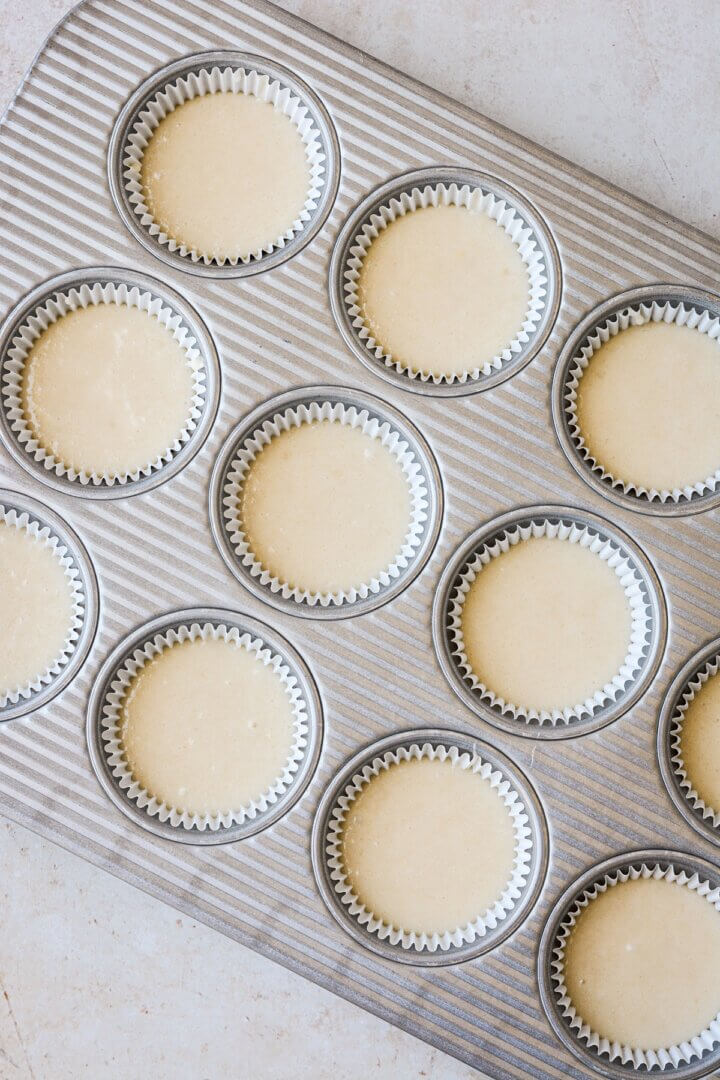
- Preheat the oven to 350 F, and position a rack in the center of the oven. Line your muffin/cupcake pans with 15 paper liners.
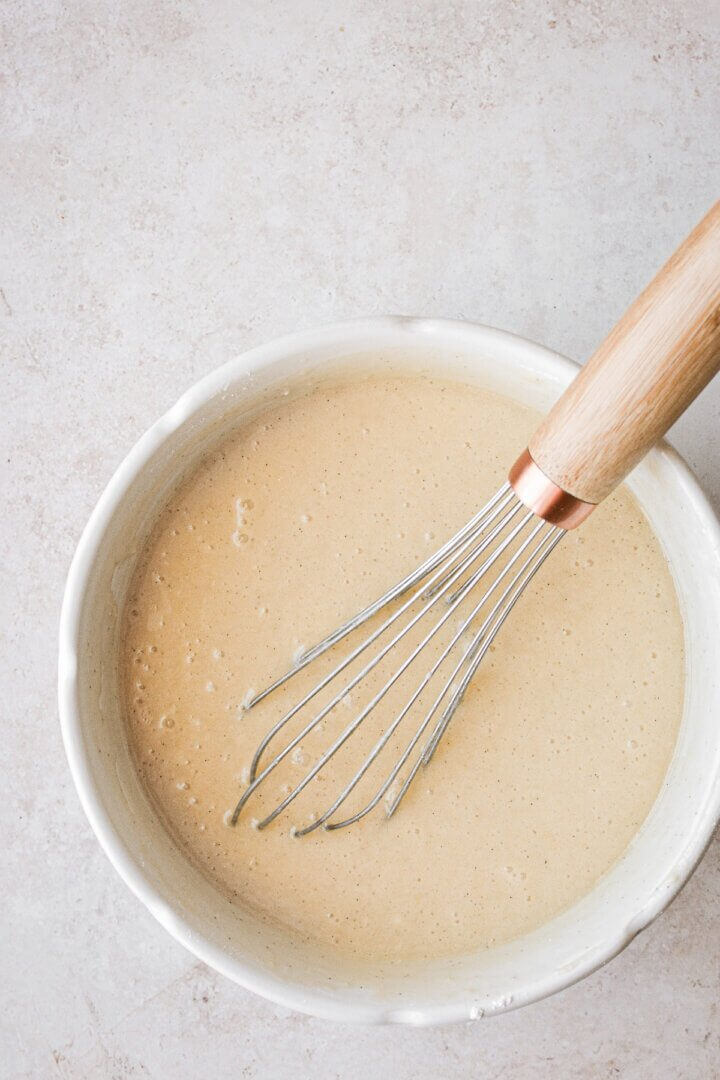
- In a bowl, sift together the flour, sugar, salt and baking powder, then whisk until well combined.
- Separately, whisk together the eggs, milk, melted butter/oil and vanilla. Add the dry ingredients to the wet, and whisk just until combined.
- Divide the batter between the paper liners, filling them no more than 2/3 full.
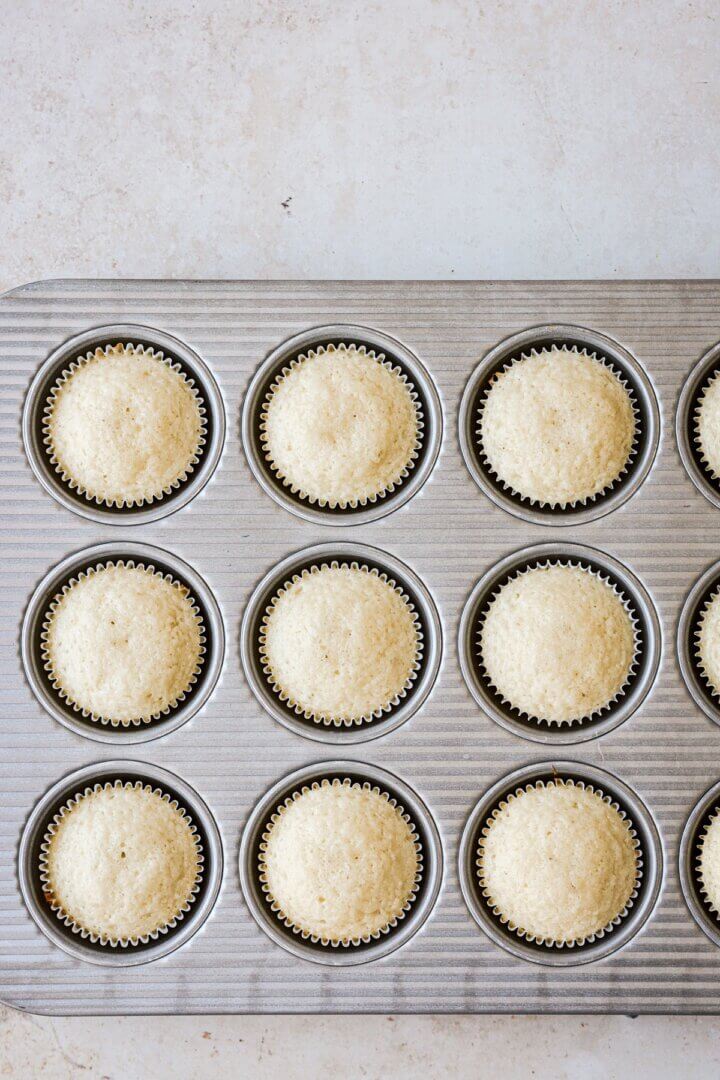
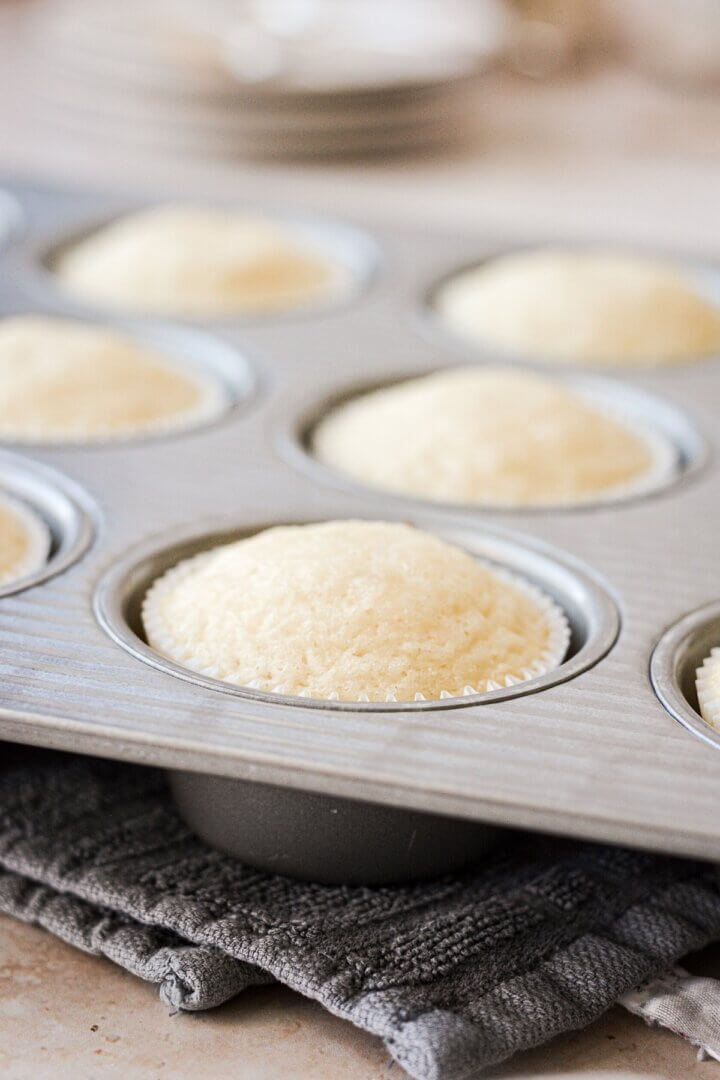
- Bake the cupcakes for about 18 minutes, until the tops are domed and baked through. Cool the cupcakes in the pan for 5 minutes, then gently transfer to a cooling rack. Cool completely before frosting.
Buttercream
- In the bowl of your stand mixer fitted with the paddle attachment, beat the butter for 1 minute until smooth. With the mixer on low, add the powdered sugar and meringue powder, then add the orange extract, vanilla extract, salt and food coloring.
- Increase the speed to medium (#4/6 on a Kitchen Aid mixer), and whip for 4-5 minutes until light and fluffy, scraping the bowl down several times. Turn the speed down to “stir” and mix for 1 more minute to pop any large air bubbles.

- Fit a 16-inch piping bag with tip 1M, and pipe the buttercream onto the cooled cupcakes.
- Decorate with sparkling sugar, sprinkles, sugar pearls, and the candy melt toppers.
Be sure to read all of my BAKING FAQs where I discuss ingredients, substitutions and common questions with cake making, so that you can be successful in your own baking! I also suggest reading these comprehensive posts on making Perfect American Buttercream, How to Stack, Fill, Crumb Coat and Frost Layer Cakes and How to Use Piping Bags.
Frequently Asked Questions
How should I store the cupcakes?
Store leftover cupcakes in an airtight container for up to 2 days. Keep refrigerated in warm weather.
What piping tip did you use?
I used tip 1M to pipe the buttercream.
Where did you get the silicone mold for the candy melts?
I found mine at a local craft store, but you can buy a similar one here.
Can I use all-purpose flour instead of cake flour?
You can use either, but your cupcakes will be softer and fluffier with cake flour instead of all-purpose flour.
You Might Also Like
Please check out my Amazon Shop for a curated collection of some of my favorite cake pans from trusted brands, baking tools, ingredients, pretty things and fashion finds. I recommend products that I buy and use every day!
Did you love today’s recipe? Please rate the recipe and let me know in the comments what you thought! Also, be sure to follow Curly Girl Kitchen on Instagram, and tag me when you try one of my recipes so I can see all your delicious creations!
Vanilla Orange Creamsicle Cupcakes
All recipes on Curly Girl Kitchen are developed for high altitude at 5,280 feet. See FAQs for adjusting to higher or lower elevations.

Equipment
- Stand Mixer with Paddle Attachment
- Silicone Candy Melt Ice Cream Cone Mold
- 12-inch Piping Bags
- 2 Standard Muffin Pans with 12 Cups Each
Ingredients
Candy Melt Toppers & Decorations
- candy melts, in a variety of pinks, yellows, oranges and white
- sparkling sugar, sprinkles or sugar pearls
Cupcakes
- 1 ½ cups + 2 tbsp cake flour, fluffed, spooned and leveled
- ¾ cup granulated sugar
- ½ tsp coarse Kosher salt (if using table salt, use half the amount)
- 1 ½ tsp baking powder
- 2 large eggs
- ¾ cup whole milk
- ½ cup melted unsalted butter or vegetable oil
- 2 tsp vanilla extract
Buttercream
- 1 cup unsalted butter, softened to room temperature
- 2 cups powdered sugar
- ½ tbsp meringue powder, optional
- 1 tsp orange extract
- 1 tsp vanilla extract
- ⅛ tsp coarse Kosher salt (if using table salt, use half the amount)
- gel food coloring, optional (1 drop orange + 1 drop lemon yellow)
Instructions
Candy Melt Toppers
- Place the candy melts in piping bags, each color in a separate bag. Place the bags in the microwave, and microwave on 50% power for 2 minutes. Check the candy melts, and continue to microwave on 50% power for additional 30 second increments until the candy melts are soft and melted. Massage the bags to smooth out the candy melts, then snip off a small portion from the tip of the bags.Note that some colors may melt faster than others, so check each individual bag and take them out of the microwave when each color is melted.
- Place the silicone mold on something flat, like a cutting board. Working quickly before the candy melts harden again, pipe the melted candy into the silicone mold, then gently tap the cutting board against the counter to make sure the candy settles into the mold.
- Refrigerate the silicone mold for about 10 minutes until the candy is hard, then pop the candy out of the mold.
- Make more toppers as needed, and if the candy in the bags has hardened again, you can put them back in the microwave again to soften them.
- Store the candy melt cupcake toppers in a container in the refrigerator until needed.
Cupcakes
- Preheat the oven to 350 F, and position a rack in the center of the oven. Line your muffin/cupcake pans with 15 paper liners.
- In a bowl, sift together the flour, sugar, salt and baking powder, then whisk until well combined.
- Separately, whisk together the eggs, milk, melted butter/oil and vanilla. Add the dry ingredients to the wet, and whisk just until combined.
- Divide the batter between the paper liners, filling them no more than 2/3 full.
- Bake the cupcakes for about 18 minutes, until the tops are domed and baked through. Cool the cupcakes in the pan for 5 minutes, then gently transfer to a cooling rack. Cool completely before frosting.
Buttercream
- In the bowl of your stand mixer fitted with the paddle attachment, beat the butter for 1 minute until smooth. With the mixer on low, add the powdered sugar and meringue powder, then add the orange extract, vanilla extract, salt and food coloring.
- Increase the speed to medium (#4/6 on a Kitchen Aid mixer), and whip for 4-5 minutes until light and fluffy, scraping the bowl down several times. Turn the speed down to "stir" and mix for 1 more minute to pop any large air bubbles.
- Fit a 16-inch piping bag with tip 1M, and pipe the buttercream onto the cooled cupcakes.
- Decorate with sparkling sugar, sprinkles, sugar pearls, and the candy melt toppers.
Notes
 https://curlygirlkitchen.com/
Leave a Reply