
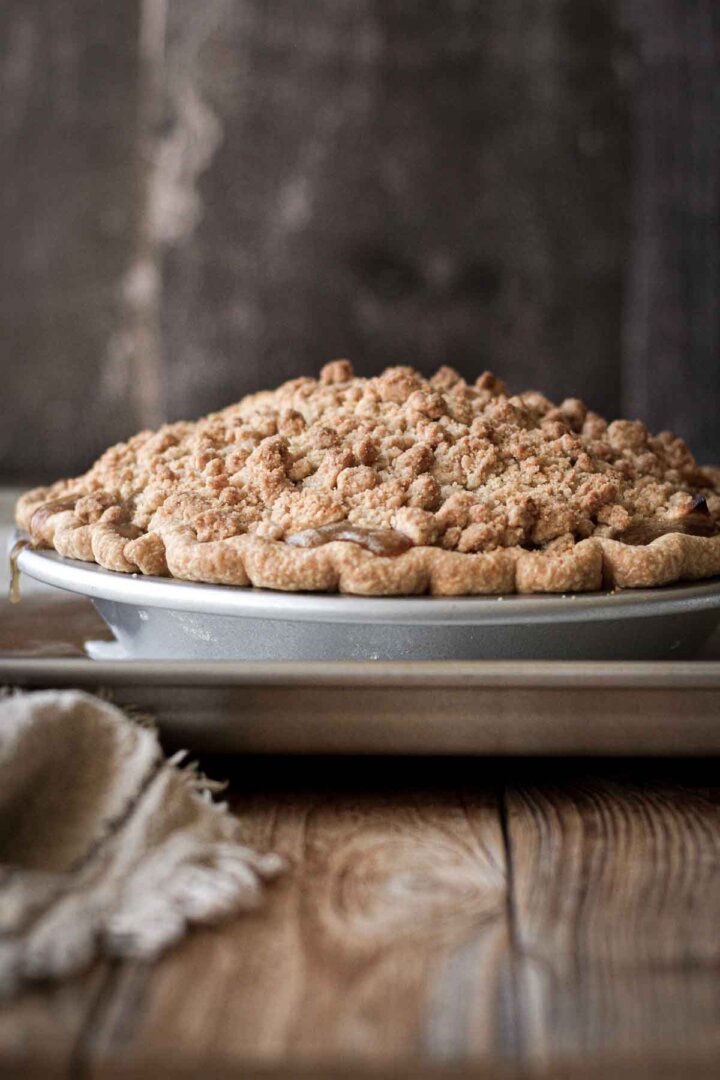
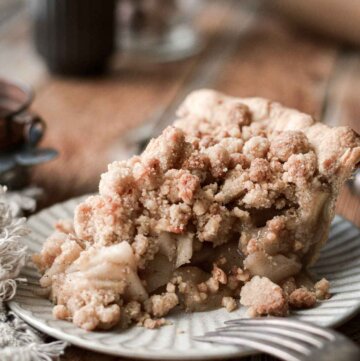
This apple crumb pie has a homemade pie crust that’s crisp and flaky, with spiced apple filling, and a buttery, salty-sweet brown sugar crumb topping. This is a perfect autumn pie to make during the holiday season for Thanksgiving or Christmas.
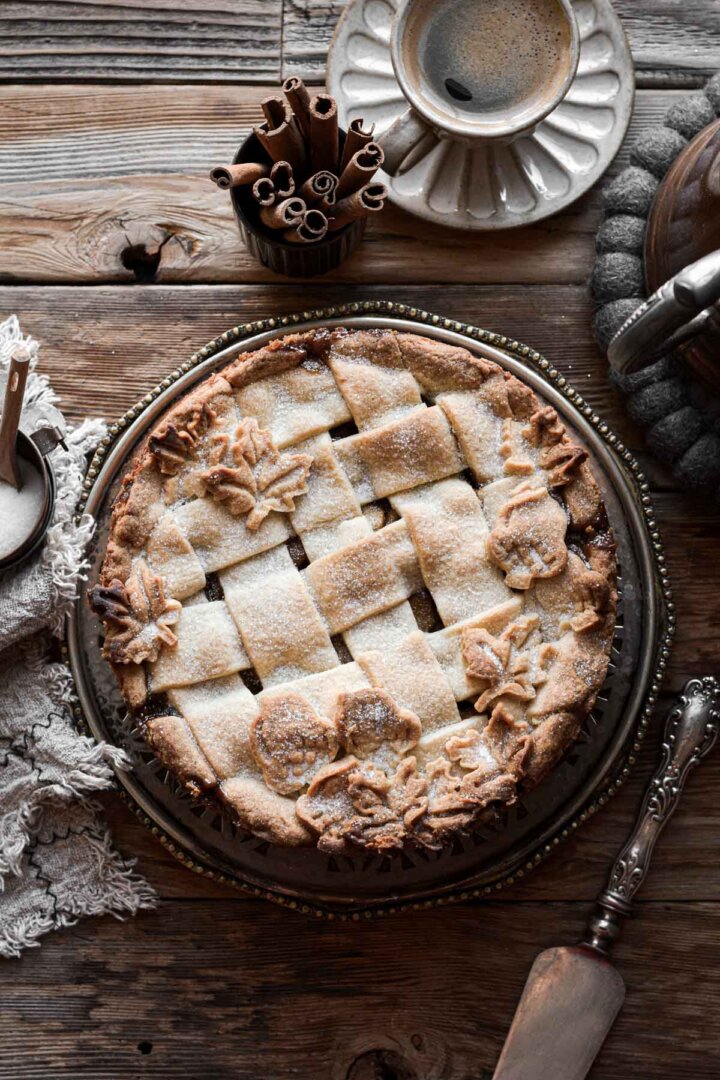
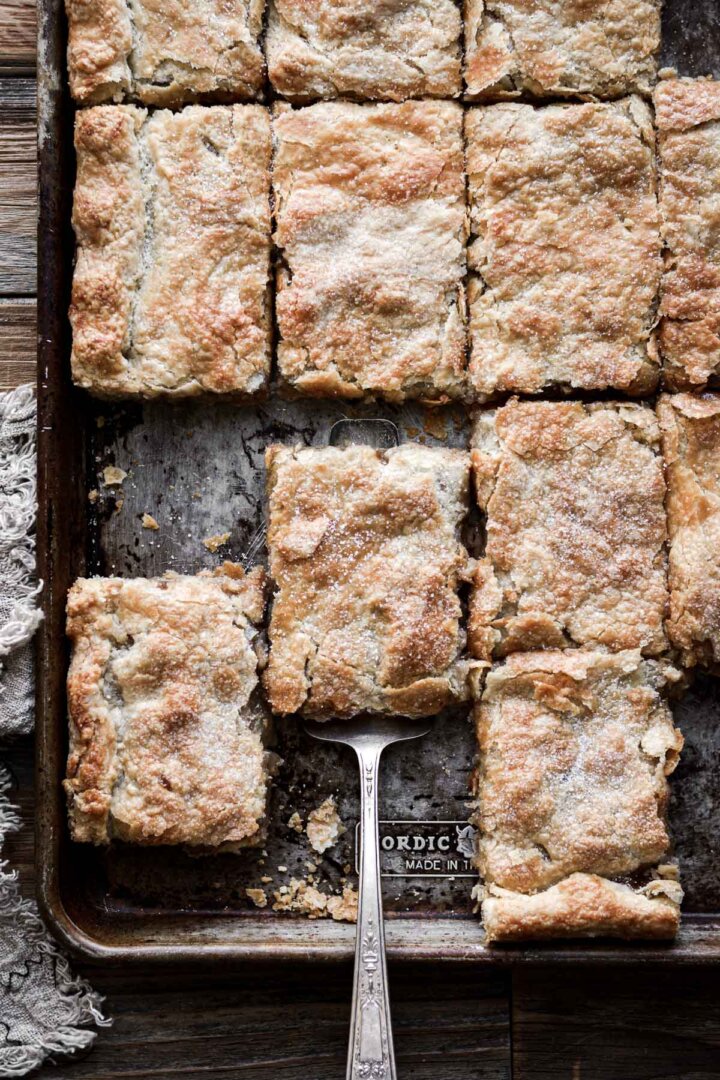
You might also love these recipes for apple slab pie, chocolate pecan pie, and perfect pumpkin pie.
This site contains affiliate links. As an Amazon associate, I earn from qualifying purchases. This means that I may make a small commission if you purchase a product using those links. This in no way affects my opinion of those products and services. All opinions expressed on this site are my own.
Why You’ll Love This Pie
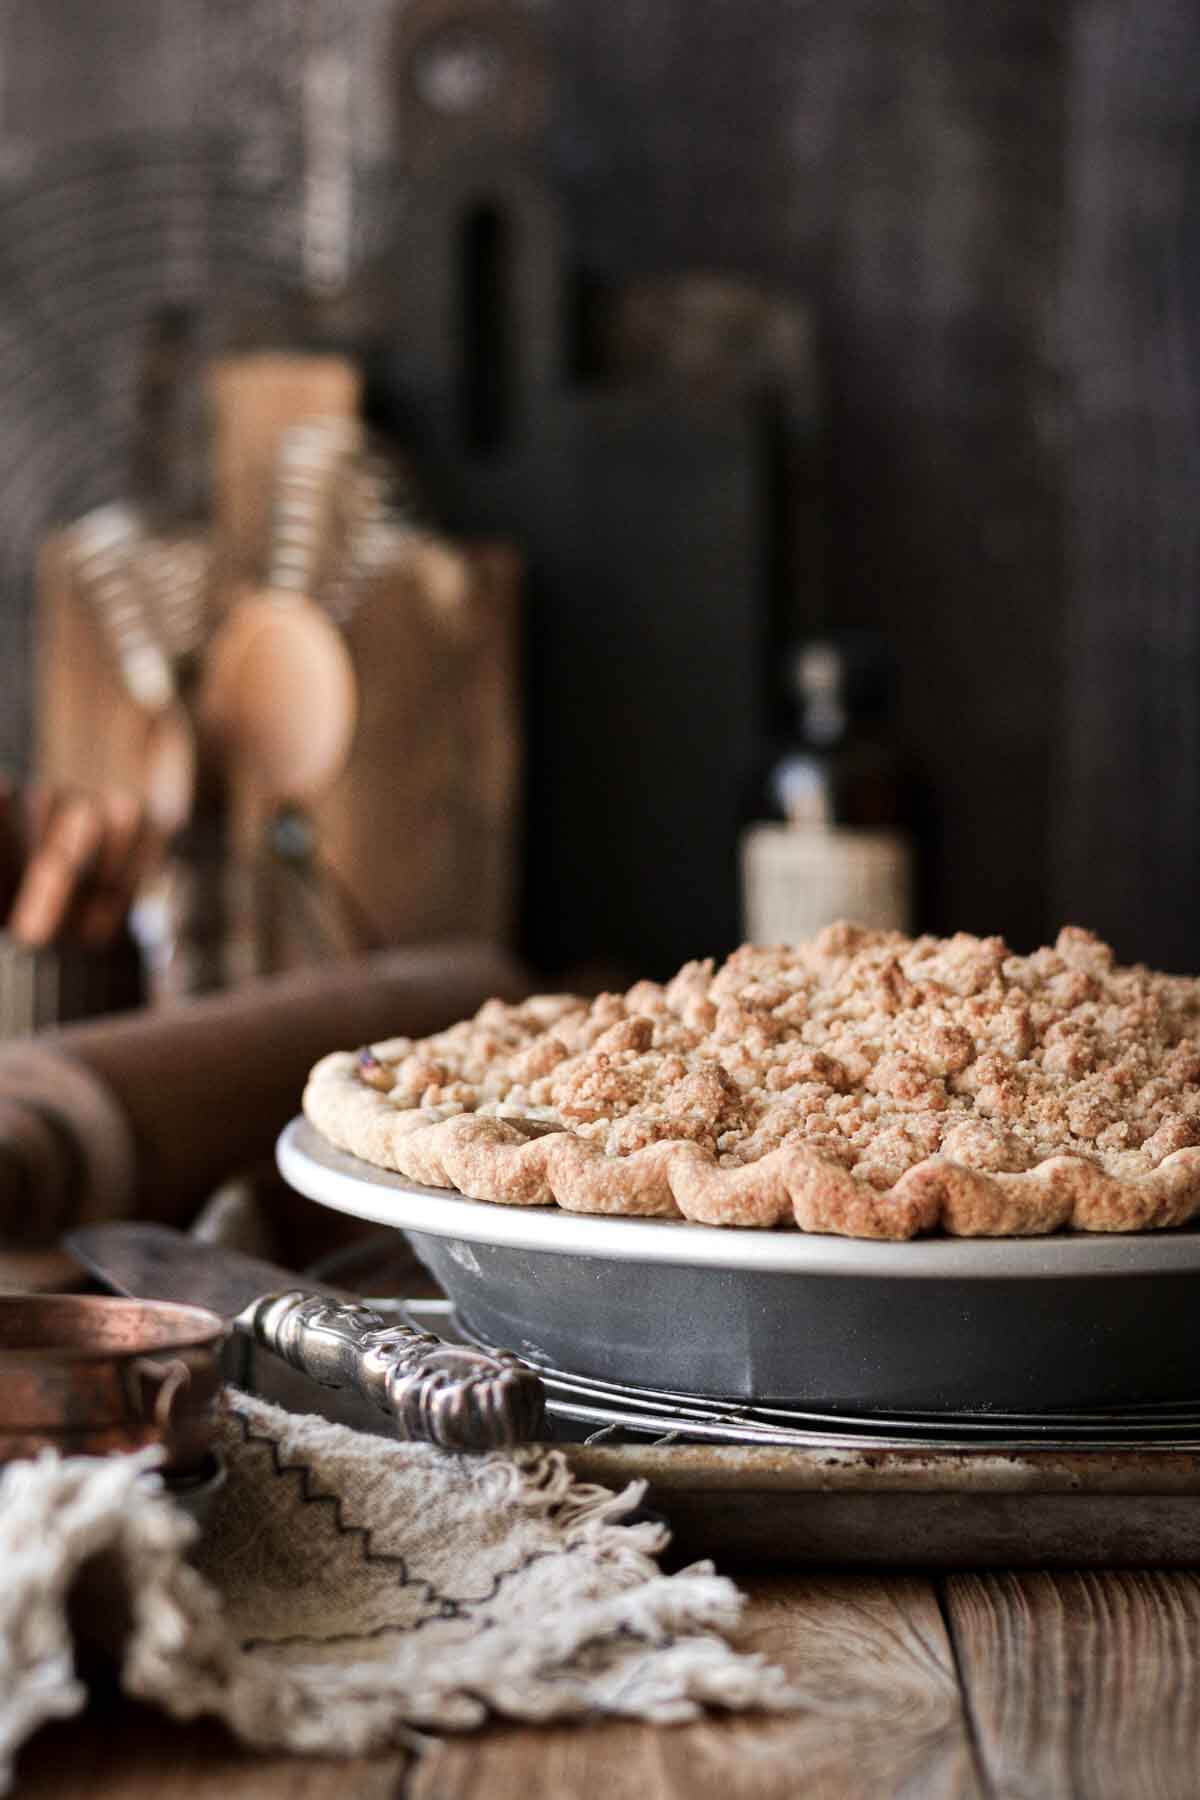
Buttery Flaky Pie Crust. A pie crust made with butter (not shortening) has the best flavor, and makes a perfect, golden brown, flaky crust every time.
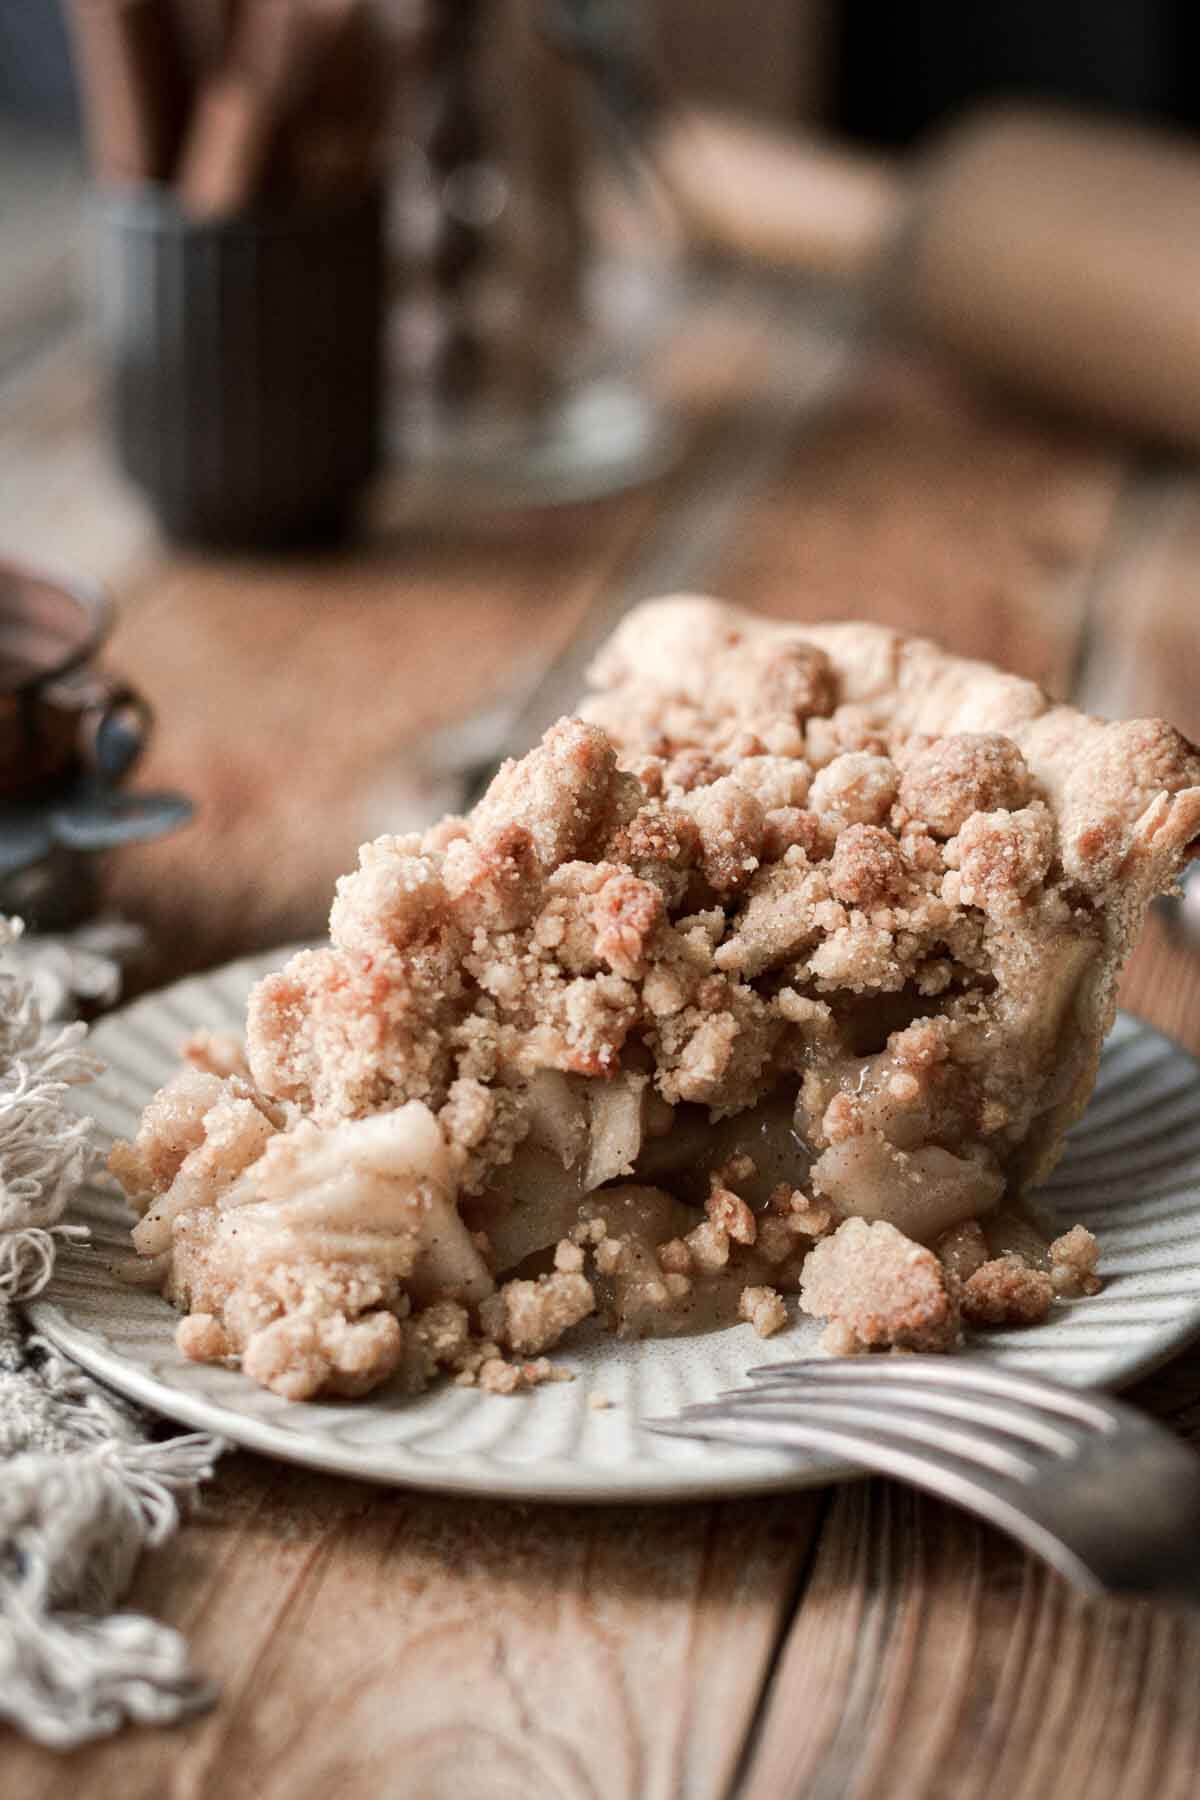
Gooey Apple Filling. The filling is perfectly cooked so the apples still have some texture, with lots of sweet, syrupy, spicy goodness.
Fall Spices. The cinnamon, cardamom and cloves add the best flavor to the apples, and the most wonderful smell while the pie is baking.
High Altitude Tested. I develop all the recipes on my site for Denver’s altitude of 5,280 feet. If you’re at a lower or higher elevation, please see my FAQs for guidance on adjusting recipes for your altitude.
Ingredients
Crust
- ½ recipe for All Butter Pie Dough. This pie dough is buttery, flaky and the perfect crust for all the delicious apple filling.
Filling
- Apples. My preferred apples for pie are Granny Smith and Honey Crisp apples. Their sweet-tart flavor and firm texture is perfect for an apple crumb pie, and using more than one apple gives the pie a more complex flavor.
- Lemon Juice. Adds a bit more tartness and enhances the flavor of the apples.
- Sugar. A combination of granulated sugar and dark brown sugar adds sweetness and moisture to the filling.
- Flour. Thickens the pie filling.
- Spices. Cinnamon, cardamom, cloves, and allspice add wonderful flavor to complement the apples.
Crumb Topping
- Dark Brown Sugar. Sweetens the topping.
- Flour. Adds structure.
- Coarse Kosher Salt. Balances the sweetness.
- Cinnamon & Cardamom. Flavor.
- Unsalted Butter. Adds fat and flavor, to create a crisp crumble topping.
Why Does Apple Pie Filling Need to Be Pre-Cooked?
Ensures the Filling Thickens Properly.
When baking fruit pies, nothing is worse than thin watery juices swimming around the bottom crust, because your pie didn’t thicken. So I almost always pre-cook the fillings for my fruit pies, which offers extra insurance that your pie won’t be runny. Apples don’t release as much juice as say, blueberries or cherries, but if you don’t bake your pie for long enough, then you can still end up with a soupy pie and crunchy apples.
Eliminates the “Gap” Under the Top Crust.
Apples lose a lot of volume as they cook. So if you pile your pie high with apple slices and cover it with a top crust, what’s going to happen is that as the apples cook, they will soften and shrink down. This can leave a big gap between the top crust and the apple filling. It doesn’t affect the taste of the pie, but aesthetically, it’s not as pretty when you cut your pie.
Ensures the Apples will be Perfectly Cooked
And lastly, of course, everyone wants perfectly cooked apple pie filling that’s not too soft and not too crunchy. This is why Granny Smith and Honey Crisp apples are ideal for pie baking. Since they’re tart, they balance the sugar, so that your pie doesn’t end up too sweet. And they’re firm, holding their shape well even when cooked, so they won’t turn to mush. If you don’t use these varieties, you need to makes sure that you choose another good baking apple that will hold its shape, such as Jonagold or Braeburn.
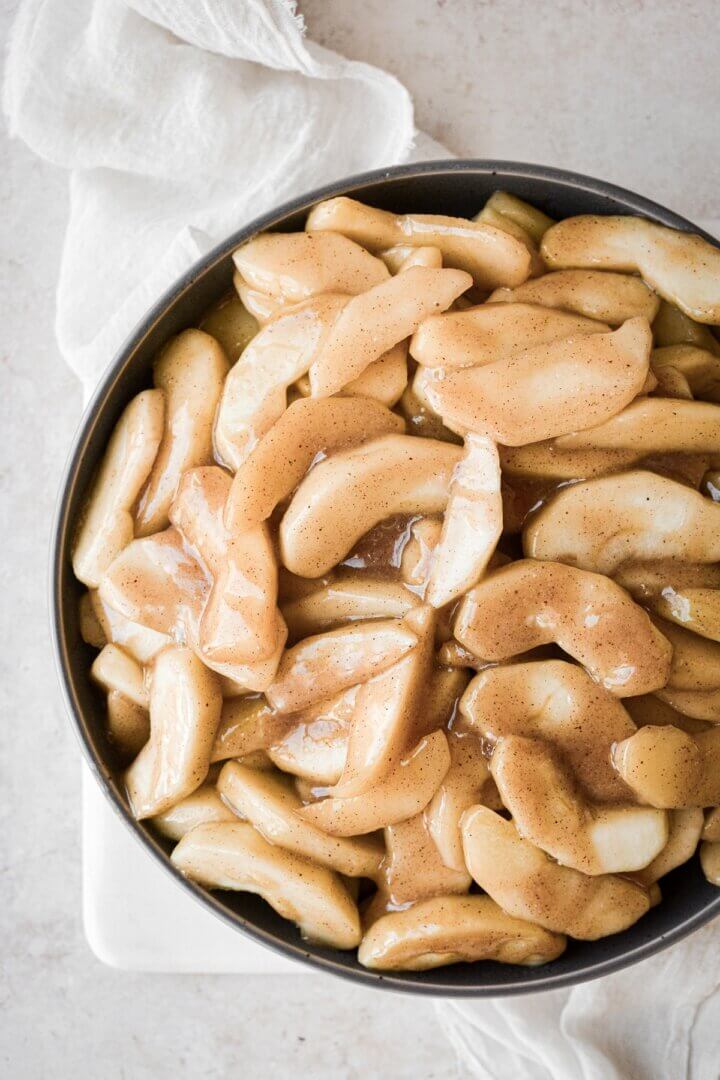
I only cook my filling for about 15 minutes. It’s just enough time to slightly soften the apples so that they lose some of their volume and to let the sugar and apple juices become thick and syrupy, but not so long that they will end up too soft after my pie bakes.
Instructions
Crust
- Prepare the pie dough (1/2 of the recipe), according to my All Butter Pie Dough recipe and post.
- Roll the dough out and fit into a deep-dish metal pie pan or 9-inch metal tart pan. This is the best pie pan I have ever owned. Fold the edges under and crimp the edges, or just trim the edges if using a tart pan.
- Refrigerate the crust while you make the filling and topping.
TIP: A metal pie pan will conduct heat better than a ceramic pan, helping to ensure a perfectly baked, crisp, golden brown bottom crust.
Filling
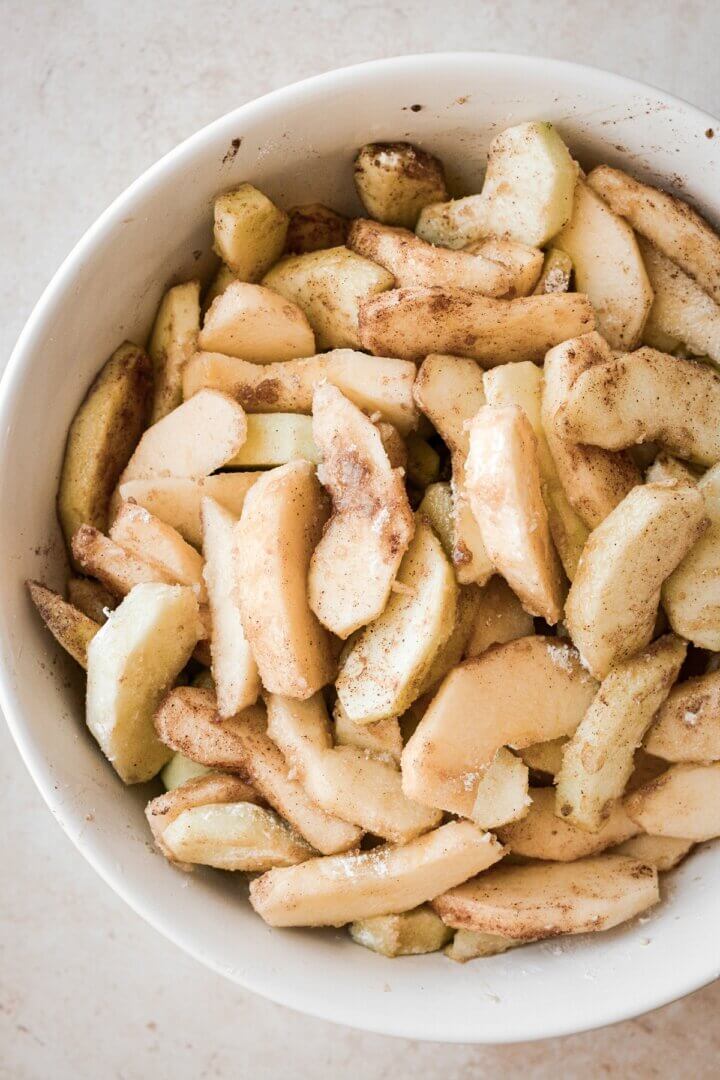
- Peel and core the apples, then slice 1/4 inch thick.
- In a stock pot, toss the apples with the lemon juice, sugar, 4 tbsp flour, and spices. Bring to a simmer over medium heat, then reduce to low. Stirring frequently, simmer the apples for about 15-20 minutes, just until they begin to soften and the juices become syrupy.
- Set aside to cool for 30 minutes.

Topping
- In a bowl, combine the flour, brown sugar, salt, cinnamon and cardamom. Add the melted butter and stir until moistened and crumbly.
- Set aside until needed.
Bake
- Preheat the oven to 400 F, and position a rack in the lower third of the oven.
- Place the pie pan with the chilled crust on a baking sheet lined with parchment paper. Sprinkle the crust with the remaining 1 tbsp flour.
- Spread the apple filling into the crust, letting the apples mound up in the center.
- Bake the pie (without the crumb topping) for 20 minutes at 400 F. Reduce the oven temperature to 375 F, and continue to bake for another 20 minutes.
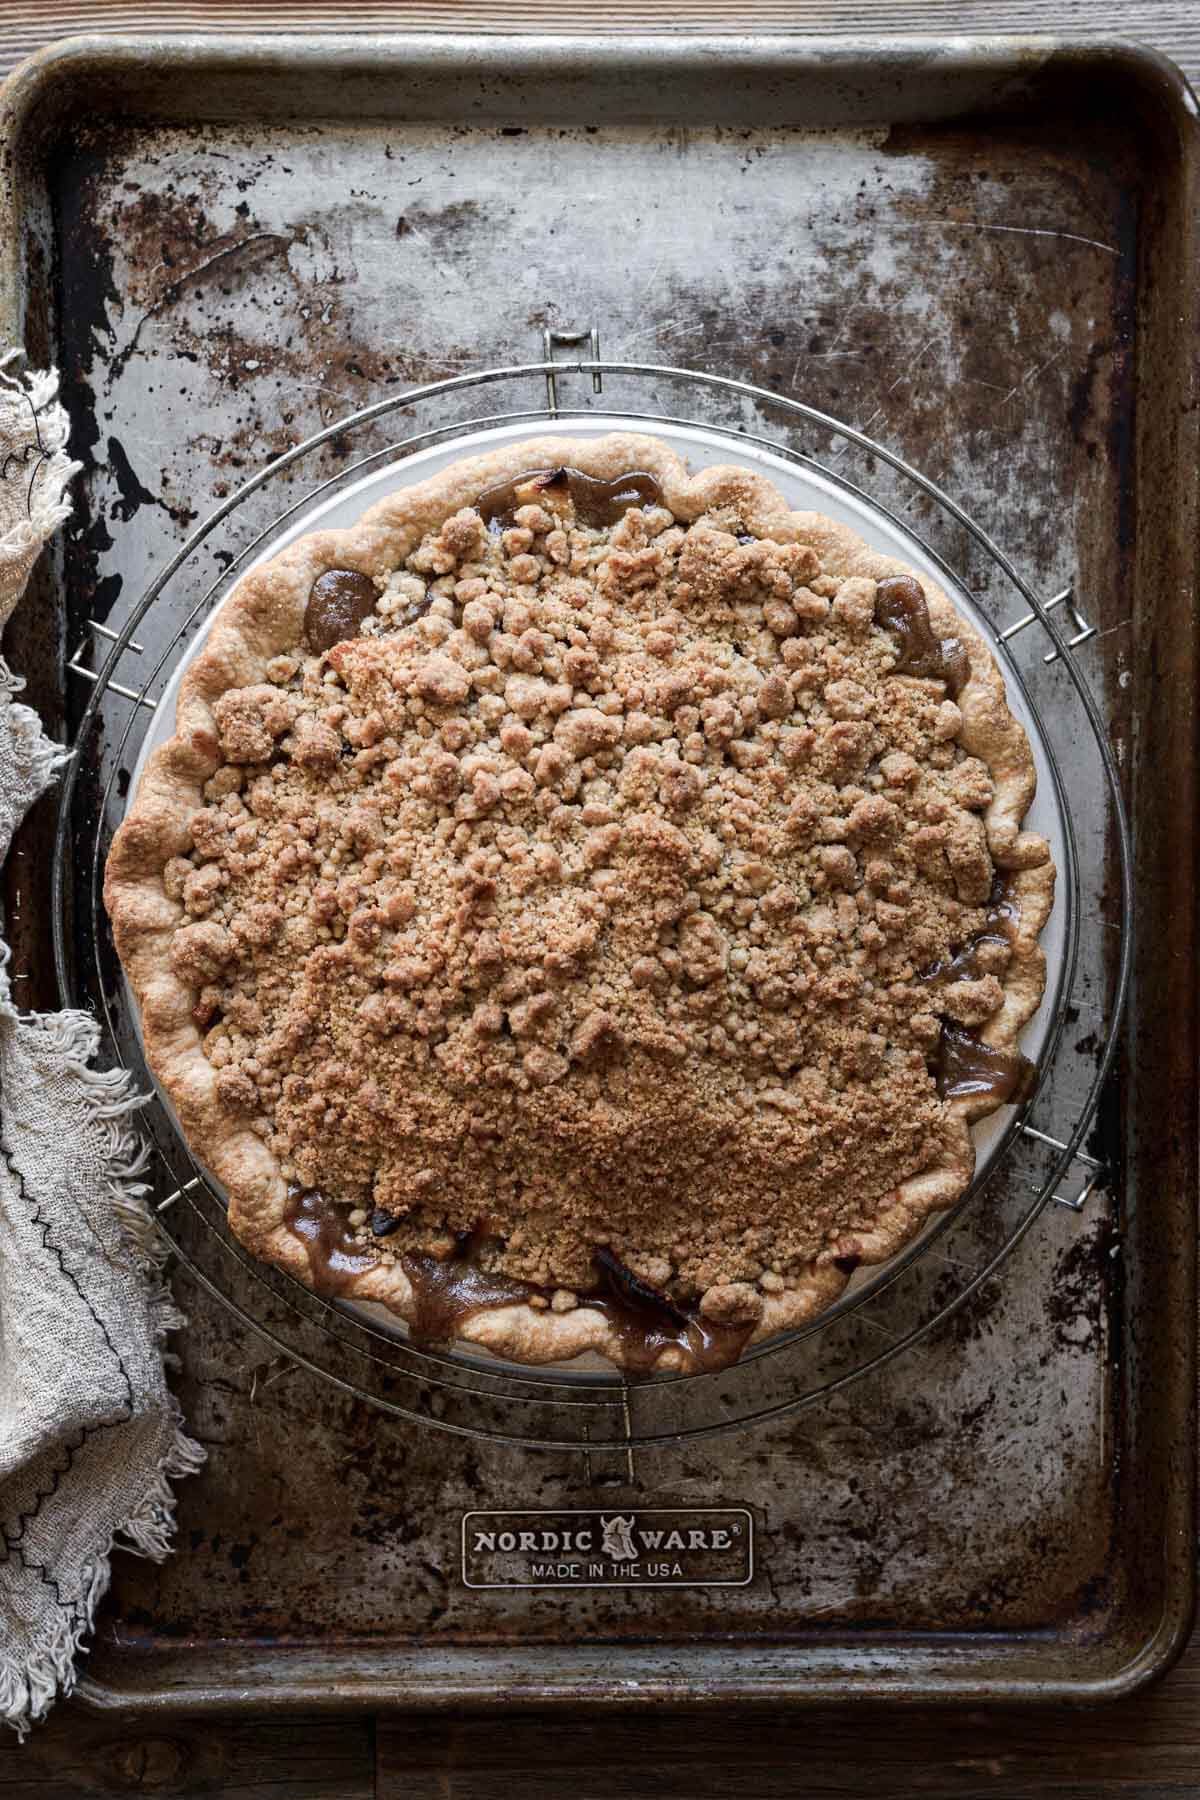
- Remove the pie from the oven, and sprinkle the crumb topping over the apples. If the edges of the pie crust are getting too brown, go ahead and cover them with a pie crust shield, or strips of foil.
- Return the pie to the oven and bake at 375 F for another 30-35 minutes, or until the filling is bubbling over the edges and the topping is golden brown.
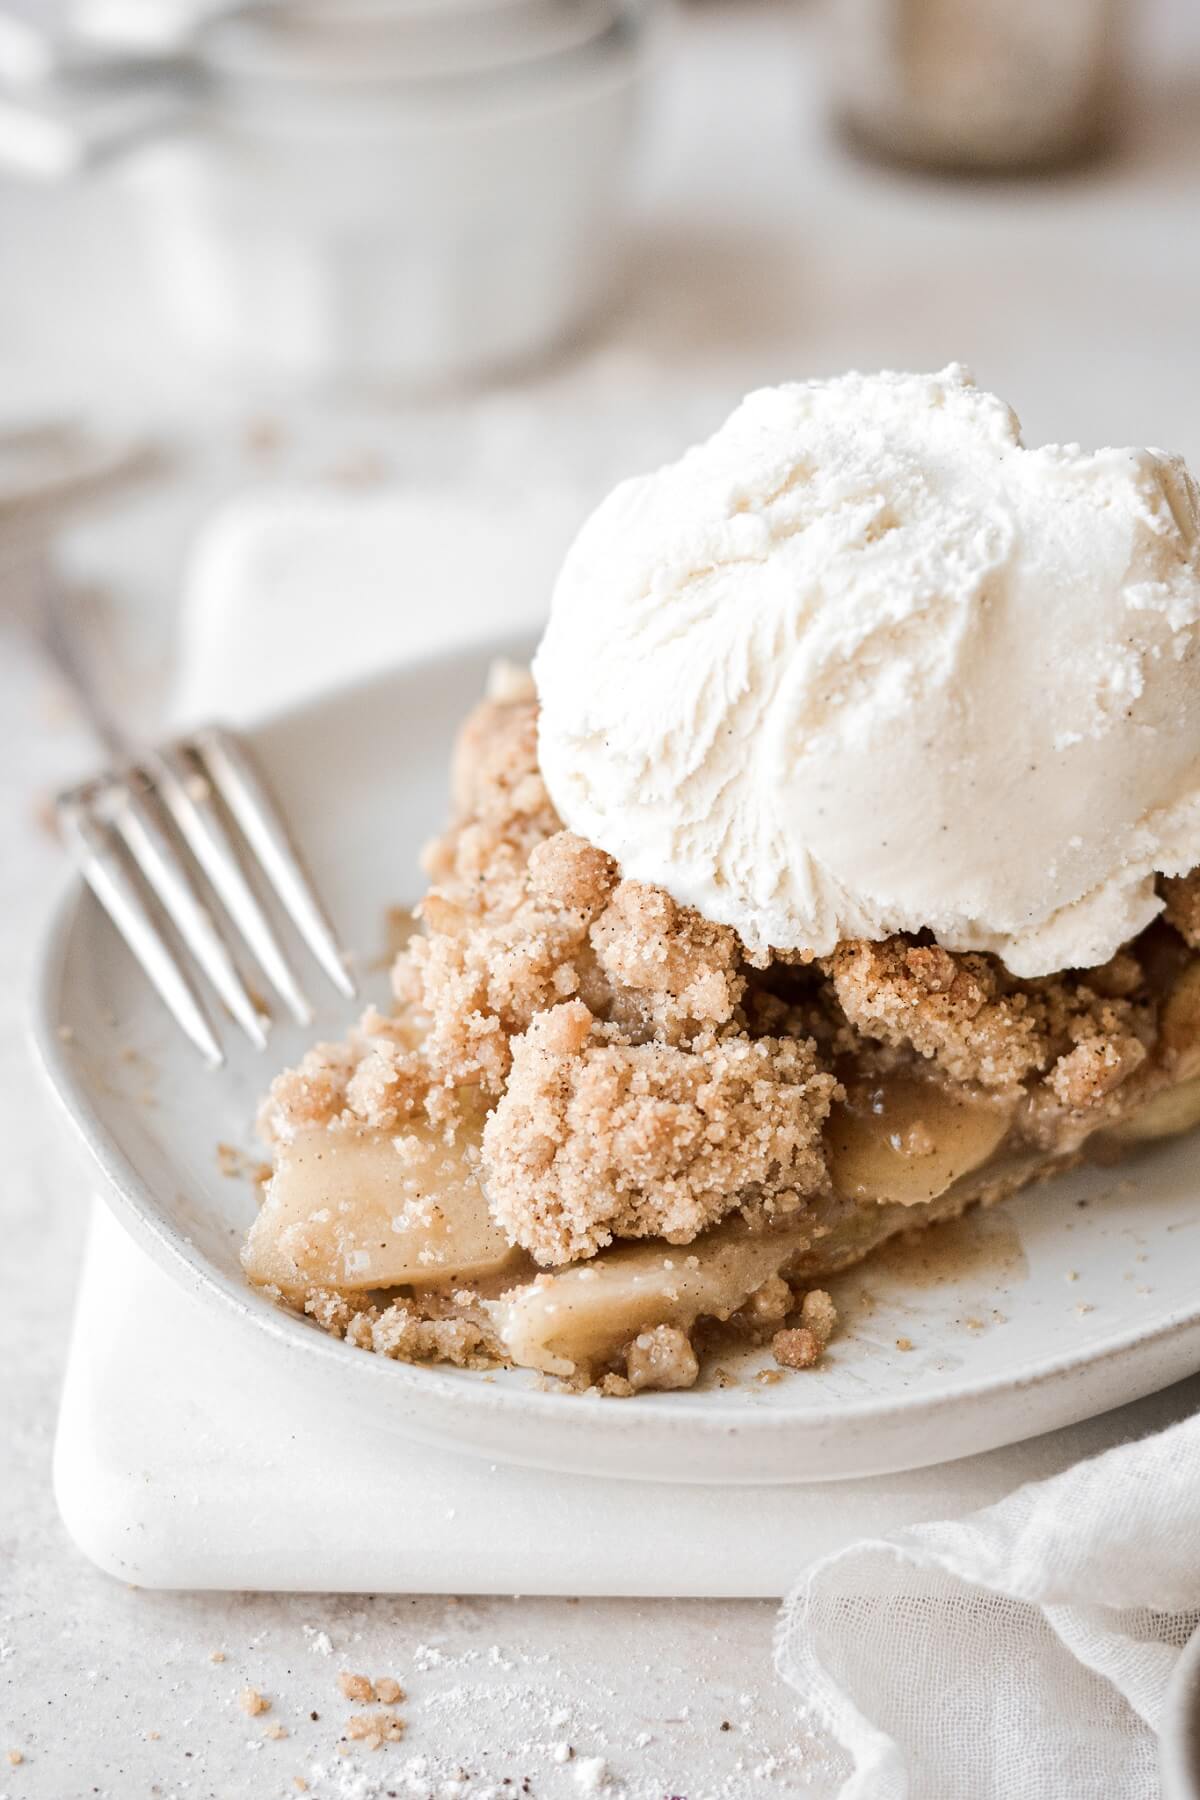
- Set the pie on a cooling rack and cool for several hours. Sprinkle the crumb topping with the ground vanilla. If you want to serve your apple crumb pie warm, it will be delicious, but a little messy.
- For neat slices, let the pie cool for 1 hour at room temperature, then chill in the refrigerator for 3 hours to speed up the cooling and to help the filling set.

Be sure to read all of my BAKING FAQs where I discuss ingredients, substitutions and common baking questions, so that you can be successful in your own baking!
Frequently Asked Questions
What you need to look for are signs that the filling has thickened in the center of the pie and the crust is cooked through. The crust should be golden brown, crisp and flaky. The juices should look thick and syrupy, they should be slowly bubbling up, and just starting to run over the edge of the pan. If you don’t see those slow, thick bubbles, your pie is not done, and you need to keep baking it, otherwise you could end up with watery filling.
In general, fruit pies are best eaten within one day. It’s when the crust and topping will be their best, most flaky and most crisp. I like to bake apple pies at night, and let them cool overnight. By the next day, the filling is perfectly set so that the pieces come out nice and neat. If you want to bake your pie first thing in the morning to serve by that evening, that’s fine, too!
If you can’t resist the scent of a warm, freshly baked apple crumb pie, and you just have to cut into it an hour or two after it’s come out of the oven, just know that while it will be delicious, the pieces will be a little soft and messy. Or you can let it cool at room temperature for 1 hour, then chill in the refrigerator for 3 hours, to speed up the cooling and help set the filling quickly. Leftover pie should be covered loosely, and kept refrigerated for up to 2-3 days.
You should choose a firm apple with a great flavor and firm texture. You don’t want an apple that turns to mush when it’s baked. My favorite for pies are Granny Smith and Honey Crisp apples. They have a perfect texture and nice tart flavor.
While the ruffled edges on ceramic pie plates sure look pretty, ceramic doesn’t conduct heat very well. Metal pie pans are a much better option when baking fruit pies. The metal conducts heat better, helping to ensure a perfectly baked, crisp, golden brown crust. No soggy bottoms allowed! I also sometimes bake fruit pies in my 9-inch tart pan with a removable bottom, and it makes a far superior pie than what my ceramic pans do, but the USA Bakeware pan is my favorite pie pan.
Certainly you can. For instructions on making a lattice top crust, see my blueberry pie recipe post.
You Might Also Like
Please check out my Amazon Shop for a curated collection of some of my favorite cake pans from trusted brands, baking tools, ingredients, pretty things and fashion finds. I recommend products that I buy and use every day!
Did you love today’s recipe? Please rate the recipe and let me know in the comments what you thought! Also, be sure to follow Curly Girl Kitchen on Instagram, and tag me when you try one of my recipes so I can see all your delicious creations!
Apple Crumb Pie
All recipes on Curly Girl Kitchen are developed for high altitude at 5,280 feet. See FAQs for adjusting to higher or lower elevations.

Equipment
Ingredients
Crust
- ½ recipe All Butter Pie Dough (single pie crust)
Filling
- 4 lbs Granny Smith & Honey Crisp apples, about 8-10 apples, depending on size
- 2 tbsp lemon juice
- ½ cup light brown sugar, lightly packed
- ¼ cup granulated sugar
- 5 tbsp all-purpose flour, divided
- ½ tsp ground cinnamon
- ¼ tsp ground cardamom
- ¼ tsp ground cloves
- ¼ tsp ground allspice
Crumb Topping
- 1 ¼ cups all-purpose flour, fluffed, spooned and leveled
- ¾ cup light brown sugar, lightly packed
- ½ tsp coarse Kosher salt (if using table salt, use half the amount)
- ¼ tsp ground cinnamon
- ¼ tsp ground cardamom
- 6 tbsp unsalted butter, melted
Instructions
Crust
- Prepare the pie dough (1/2 of the recipe), according to my All Butter Pie Dough recipe and post.
- Roll the dough out and fit into a 9-inch metal pie pan. Fold the edges under and crimp the edges, or just trim the edges if using a tart pan.
- Refrigerate the crust while you make the filling and topping.
Filling
- Peel and core the apples, then slice 1/4 inch thick.
- In a stock pot, toss the apples with the lemon juice, sugar, 4 tbsp flour, and spices. Bring to a simmer over medium heat, then reduce to low. Stirring frequently, simmer the apples for about 15-20 minutes, just until they begin to soften and the juices become syrupy.
- Set aside to cool for 30 minutes.
Topping
- In a bowl, combine the flour, brown sugar, salt, and spices. Add the melted butter and stir until moistened and crumbly.
- Set aside until needed.
Bake
- Preheat the oven to 400 F, and position a rack in the lower third of the oven.
- Place the pie pan with the chilled crust on a baking sheet lined with parchment paper. Sprinkle the crust with the remaining 1 tbsp flour.
- Spread the apple filling into the crust, letting the apples mound up in the center. Bake the pie (without the crumb topping) for 20 minutes at 400 F. Reduce the oven temperature to 375 F, and continue to bake for another 20 minutes.
- Remove the pie from the oven, and sprinkle the crumb topping over the apples. If the edges of the pie crust are getting too brown, go ahead and cover them with a pie crust shield, or strips of foil.
- Return the pie to the oven and bake at 375 F for another 30-35 minutes, or until the filling is bubbling over the edges and the topping is golden brown.
- Set the pie on a cooling rack and cool for several hours. Sprinkle the crumb topping with the ground vanilla.If you want to serve the pie warm, it will be delicious, but a little messy. For neat slices, let the pie cool for 1 hour at room temperature, then chill in the refrigerator for 3 hours to speed up the cooling and to help the filling set.
Notes
 https://curlygirlkitchen.com/
I'm addicted to Apple pie. This one is perfect!
Thank you! I hope you love it. 🙂
Can leftover pie crust be frozen in pie pans to use a month later?
Yes, just wrap the whole pan in a few layers of plastic wrap before freezing it.
My husband comes from a family of pie bakers, while I did not. So, pies always intimidated me. Thanks to a great recipe with excellent visuals and directions, I’ve made my first perfect pie. Thanks again Heather!