
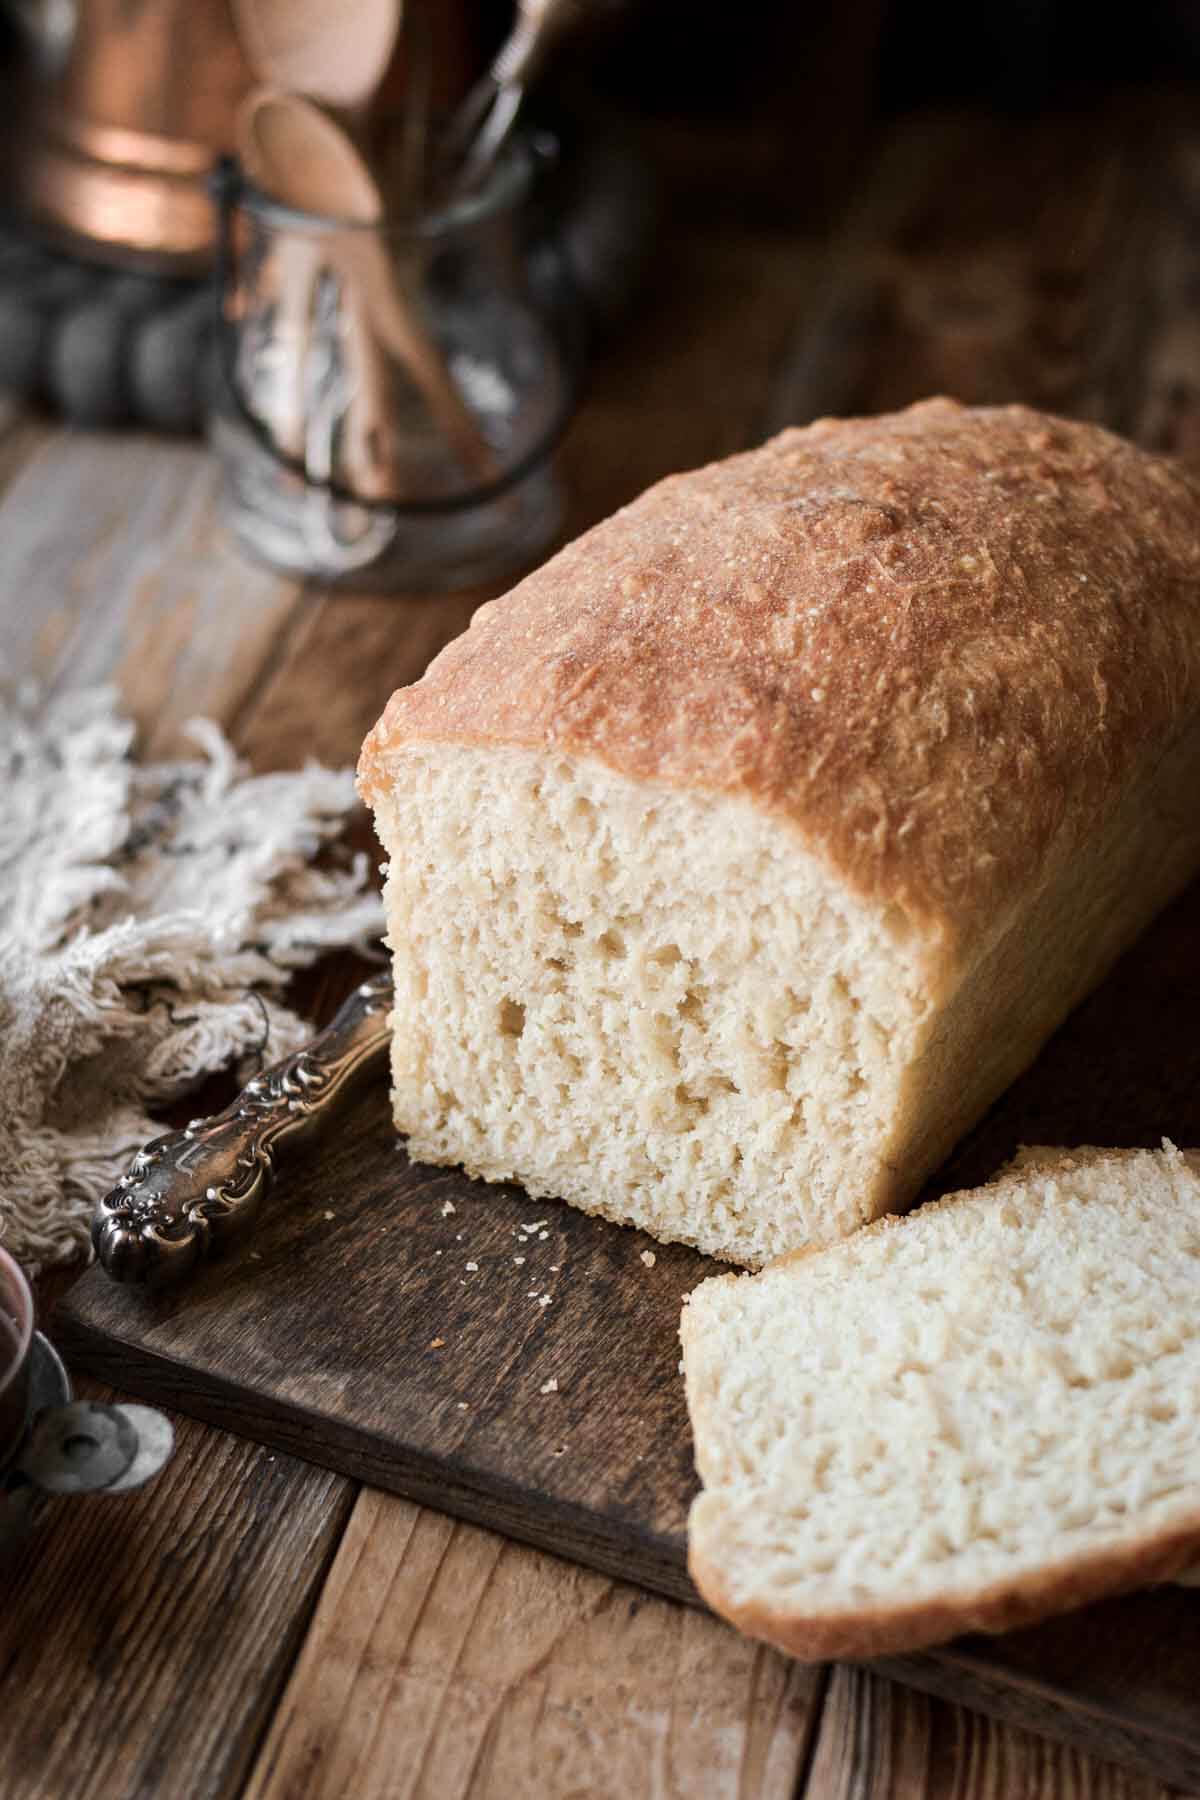
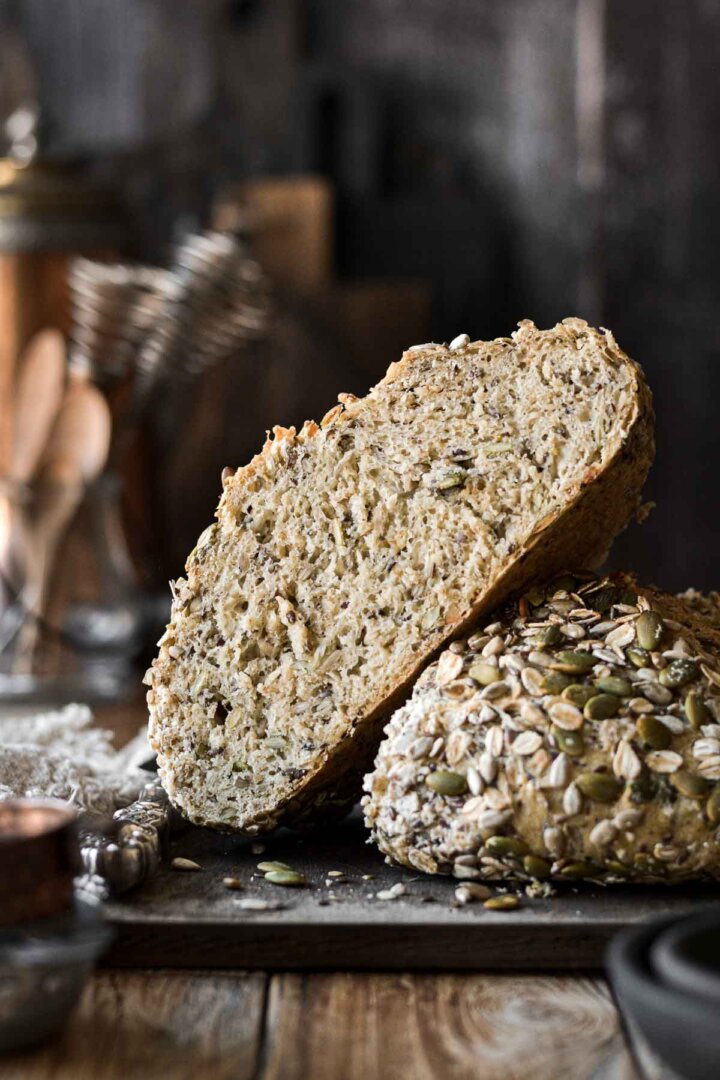
A high altitude recipe for peasant bread that’s soft and fluffy with a golden brown crust. This easy, no knead bread is ideal for sandwiches or toast.
You might also love these recipes for ciabatta bread, no knead seeded bread, and no knead rye sandwich bread.
This site contains affiliate links. As an Amazon associate, I earn from qualifying purchases. This means that I may make a small commission if you purchase a product using those links. This in no way affects my opinion of those products and services. All opinions expressed on this site are my own.
Why You’ll Love This Recipe
Fluffy Texture. The soft, fluffy interior of this white bread is contrasted by a lovely crust that’s so good when the bread is warm from the oven.
Quick and Easy Recipe. There’s absolutely no planning ahead required when making peasant bread. In about two hours, you’ll have a delicious loaf of freshly baked bread.
High Altitude Tested. I develop all the recipes on my site for Denver’s altitude of 5,280 feet. If you’re at a lower or higher elevation, please see my FAQs for guidance on adjusting recipes for your altitude.
High Altitude Adjustments
Most of the popular recipes for peasant bread that you’ll find from a quick internet search are based off of Alexandra Stafford’s recipe on her website Alexandra Cooks. I adapted my recipe from hers as well, but notably, there are two important adjustments for high altitude.
Firstly, the higher your altitude, the less yeast you’ll need. At a little over 5,000 feet, I only reduced the yeast by 1/4 teaspoon, but if you live at a significantly higher elevation, you may need to use even less.
Secondly, at sea level, your dough may need to rest and rise for nearly two hours before it’s doubled in size, as well as another hour or more for the loaf to proof before baking. But the higher the elevation, the faster dough rises due to the lower air pressure. My dough needed only 45 minutes for the first rise, and a mere 15-20 minutes for the second rise/proof before it was ready to bake. You must keep this in mind when you live at high altitude, or your dough can end up over-proofed, and your finished loaf of bread won’t have the best texture.

See the recipe card at the end of the post for the full ingredients list and instructions.
Ingredients
- Flour. You can use either bread flour or all purpose flour for today’s recipe.
- Yeast. I use and love this instant or rapid rise yeast. Note that you won’t be using a whole packet of yeast.
- Salt. Flavor. Without enough salt, your bread will be very bland.
- Warm Water. Be sure your water is at the specified temperature of 110-115F. Too cold, and it won’t activate the yeast, and your bread won’t rise. Too hot, and it will kill the yeast.

Instructions
- In a bowl, combine the flour, yeast, sugar and salt. Add the warm water and stir into a sticky dough.
- Cover the bowl with plastic wrap, set in a warm place, and let rise until doubled in volume. This should take about 45 minutes.


- Brush some of the melted butter inside your bread loaf pan.
- Use a spatula to scrape down the sides of the bowl to gently deflate the dough, then turn it out onto a well-floured counter. Shape the dough into a rustic loaf (it will be soft and sticky, and may stick to your hands), then place the dough into the prepared pan. Brush the rest of the melted butter over the top of the dough.
- Set the pan in a warm place to let the dough rest for 15-20 minutes, until it has filled the pan and has just started to rise above the top edge of the pan.


- Preheat the oven to 375 F, and position a rack in the center of the oven. Bake the bread for about 40 minutes, until a digital instant read thermometer inserted in the center reads 195 F.
- Turn the bread out onto a cooling rack, and let cool for at least 30 minutes before slicing. Use a sharp serrated bread knife to cut the bread, using a back-and-forth sawing motion.


Be sure to read all of my BAKING FAQs where I discuss ingredients, substitutions and common baking questions, so that you can be successful in your own baking!
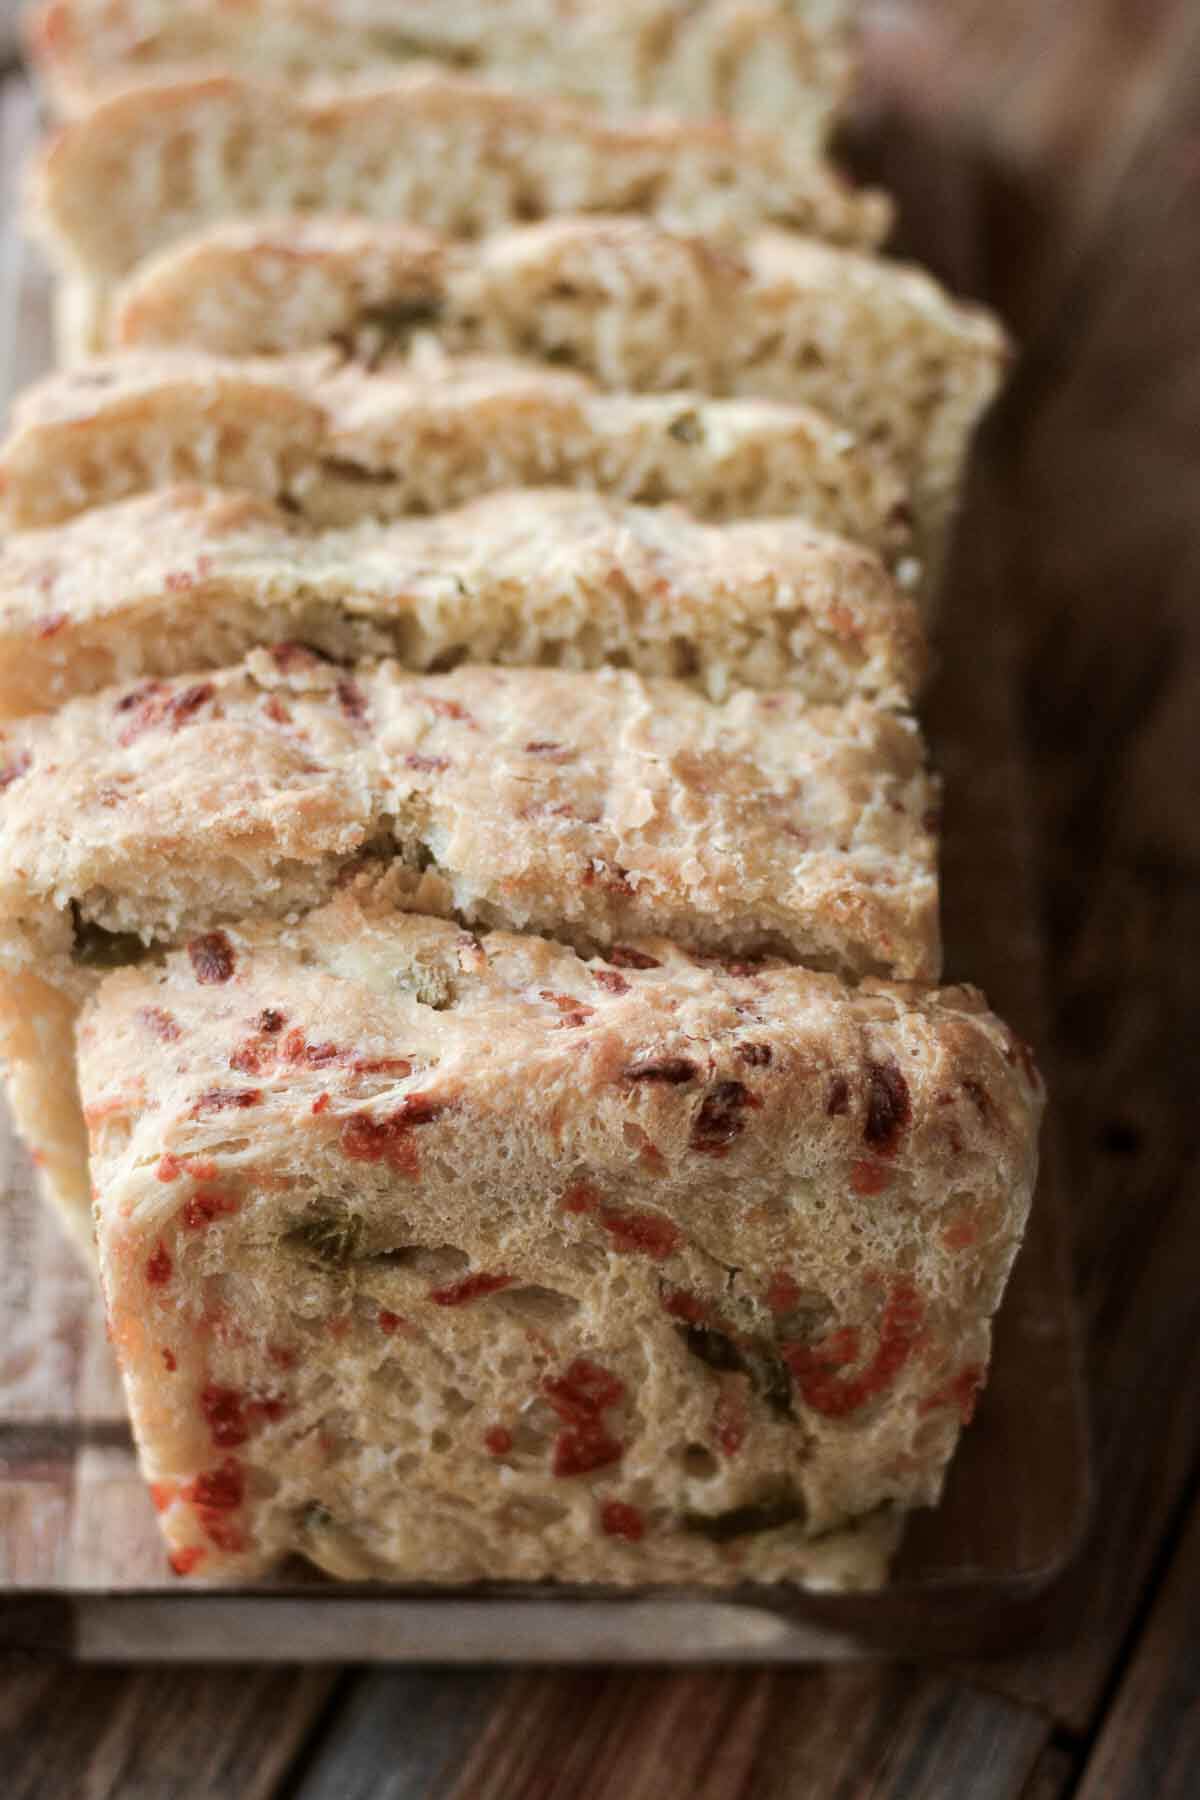
Recipe Variations
Jalapeno Cheese Bread
- For a tasty variation, add 3/4 cup grated mozzarella or cheddar cheese, as well as 1/2 cup chopped “mild” jarred jalapeno slices. Just stir them into the dry ingredients, before you stir in the water.
- With the additional ingredients, you may need to bake your bread for an additional 10 minutes to reach an internal temperature of 195F.
Best Uses for Peasant Bread
- Freshly Baked, with butter, honey or jam
- Sandwich Bread
- Toast
- Grilled Cheese Sandwiches
- Homemade Croutons
- French Toast or Bread Pudding
- Egg in Bread (buttered bread, with a hole cut in the center, toasted in a skillet, with an egg dropped into the middle)

Frequently Asked Questions
After the bread cools completely, store it in an airtight container for up to 3-5 days, or in the freezer for up to 3-6 months.
I used this USA bread loaf pan, the “small” size, which is 8 1/2 x 4 1/2 inches. A standard 9×5 inch loaf pan will also work.
You Might Also Like

Please check out my Amazon Shop for a curated collection of some of my favorite cake pans from trusted brands, baking tools, ingredients, pretty things and fashion finds. I recommend products that I buy and use every day!
Did you love today’s recipe? Please rate the recipe and let me know in the comments what you thought! Also, be sure to follow Curly Girl Kitchen on Instagram, and tag me when you try one of my recipes so I can see all your delicious creations!

High Altitude Peasant Bread
All recipes on Curly Girl Kitchen are developed for high altitude at 5,280 feet. See FAQs for adjusting to higher or lower elevations.

Equipment
- 1-lb Bread Loaf Pan (8 1/2 x 4 1/2 inches)
Ingredients
- 3 cups (416 g) bread flour or all purpose flour, fluffed, spooned and leveled
- 1 ¼ tsp instant or rapid rise yeast
- 1 ½ tsp granulated sugar or honey
- 1 ½ tsp coarse Kosher salt (if using table salt, use half the amount)
- 1 ½ cups warm water, between 110-115 F
- 1 ½ tbsp unsalted butter, melted
Instructions
- In a bowl, combine the flour, yeast, sugar and salt. Add the warm water and stir into a sticky dough.
- Cover the bowl with plastic wrap, set in a warm place, and let rise until doubled in volume. This should take about 45 minutes.
- Brush some of the melted butter inside your bread loaf pan.
- Use a spatula to scrape down the sides of the bowl to gently deflate the dough, then turn it out onto a well-floured counter. Shape the dough into a rustic loaf (it will be soft and sticky, and may stick to your hands), then place the dough into the prepared pan (if you don't want to dirty your counter, you can also just scrape the dough from the bowl into the prepared pan). Brush the rest of the melted butter over the top of the dough.
- Set the pan in a warm place to let the dough rest for 15-20 minutes, until it has filled the pan and has just started to rise above the top edge of the pan. (Note: this bread does not have "oven spring", so the height of the dough when you place the pan in the oven will be the same as the height of the baked bread.)
- Preheat the oven to 375 F, and position a rack in the center of the oven. Bake the bread for about 40 minutes, until a digital instant read thermometer inserted in the center reads 195 F.
- Turn the bread out onto a cooling rack, and let cool for at least 30 minutes before slicing. Use a sharp serrated bread knife to cut the bread, using a back-and-forth sawing motion.
Video
Notes
 https://curlygirlkitchen.com/
I have made this recipe twice in the past 24 hours – it is quick, easy, and perfect for making small sandwiches! Your bread recipes are always winners for me 🙂
What do you consider a warm place? Will it rise if it’s sitting on my counter at 70°?
The “bread proof” setting inside your oven is ideal. If you don’t have that setting, you can preheat your oven to the lowest temperature, turn the oven off, then set your dough inside to proof.
I’ve now made this a couple times at about 4300 feet. Not only does it turn out fantastic each time, but the house smells amazing too! Thank you for the recipe
I’m so glad you love it! And thanks for the tip about the wet hands – very helpful!
I made this wonderful loaf of bread yesterday and my husband raved about it! So easy to make and delicious too. This morning I had it as toast and it was so good. Thank you for this recipe. It will be used often. I am at 6100 and made no adjustments.
I’m so glad you both loved it!
Great, easy recipe. This is exactly what I’ve been looking for. I followed the recipe exactly and it was perfect at 6700 ft.
Can I use almond flour?
No, that will not work as a replacement for all purpose flour or bread flour.
This is such a great recipe! I have made it to the letter several times. Have you tried wheat flour? I am thinking of trying , but feel it may be too heavy. What are your thoughts?
I haven’t used wheat flour in this recipe, but that will typically weigh down breads and make them more dense. If you try it, I’d start with replacing only 25-50% of the flour with wheat flour. You might also like this brown bread recipe, for something more hearty.
https://curlygirlkitchen.com/high-altitude-simple-irish-brown-bread/
I made this today and it was so good! Great recipe! I didn’t use nuts or seeds, and still great that way.
The only thing that was different from your notes is that when I added yeast to milk/water mixture, it took a lot longer than 5 minutes for the yeast to get foamy. I checked the liquid temperature and it was perfect, just took about 20+ minutes. I used Red Star active dry yeast. I’m new to bread baking so I’m not sure how different types or brands of yeast affect recipes.
Great bread recipe! Even my husband who is very picky about his bread loves it!!!
I forgot to mention that I moved on from using floured hands to watered hands. With this sticky dough, it made a huge difference on how much cleaner my hands stayed and the ease in forming a loaf
Oh Heck Yeah! From one Aurora resident to another, THANK YOU!! I just added some bread flour and rapid rise yeast to my King Soopers order today, and can’t wait to try it out again tomorrow. Also have some of that really good yeast coming from Amazon in a few days and really looking forward to using that too. Still, I consider this first loaf today a full-blown success. Pulling out the toaster for tomorrow morning’s breakfast. I’m so thrilled and very happy I decided to give it a go. I appreciate the work you put into your recipes.
My husband sucks at presents. This Christmas I thought I’d help him by saying “I could use a new bread loaf pan”. Apparently I didn’t provide sufficient information as he bought a 13” pan. I didn’t know what to do with it. I have been obsessed with this peasant bread recipe though, my only issue has been my existing pans are too wide so it ends up making small square slices. So I wondered…what if I double the recipe and use this new giant pan? Answer: bigger slices, perfect bread. Everything I’d wanted and now I only have to bake bread every 2 weeks instead of every week. Thank you for the recipe and fyi, it can be doubled in a 13” Pullman.
I’m so happy you love the bread recipe, and that the pan worked out for you in the end!