
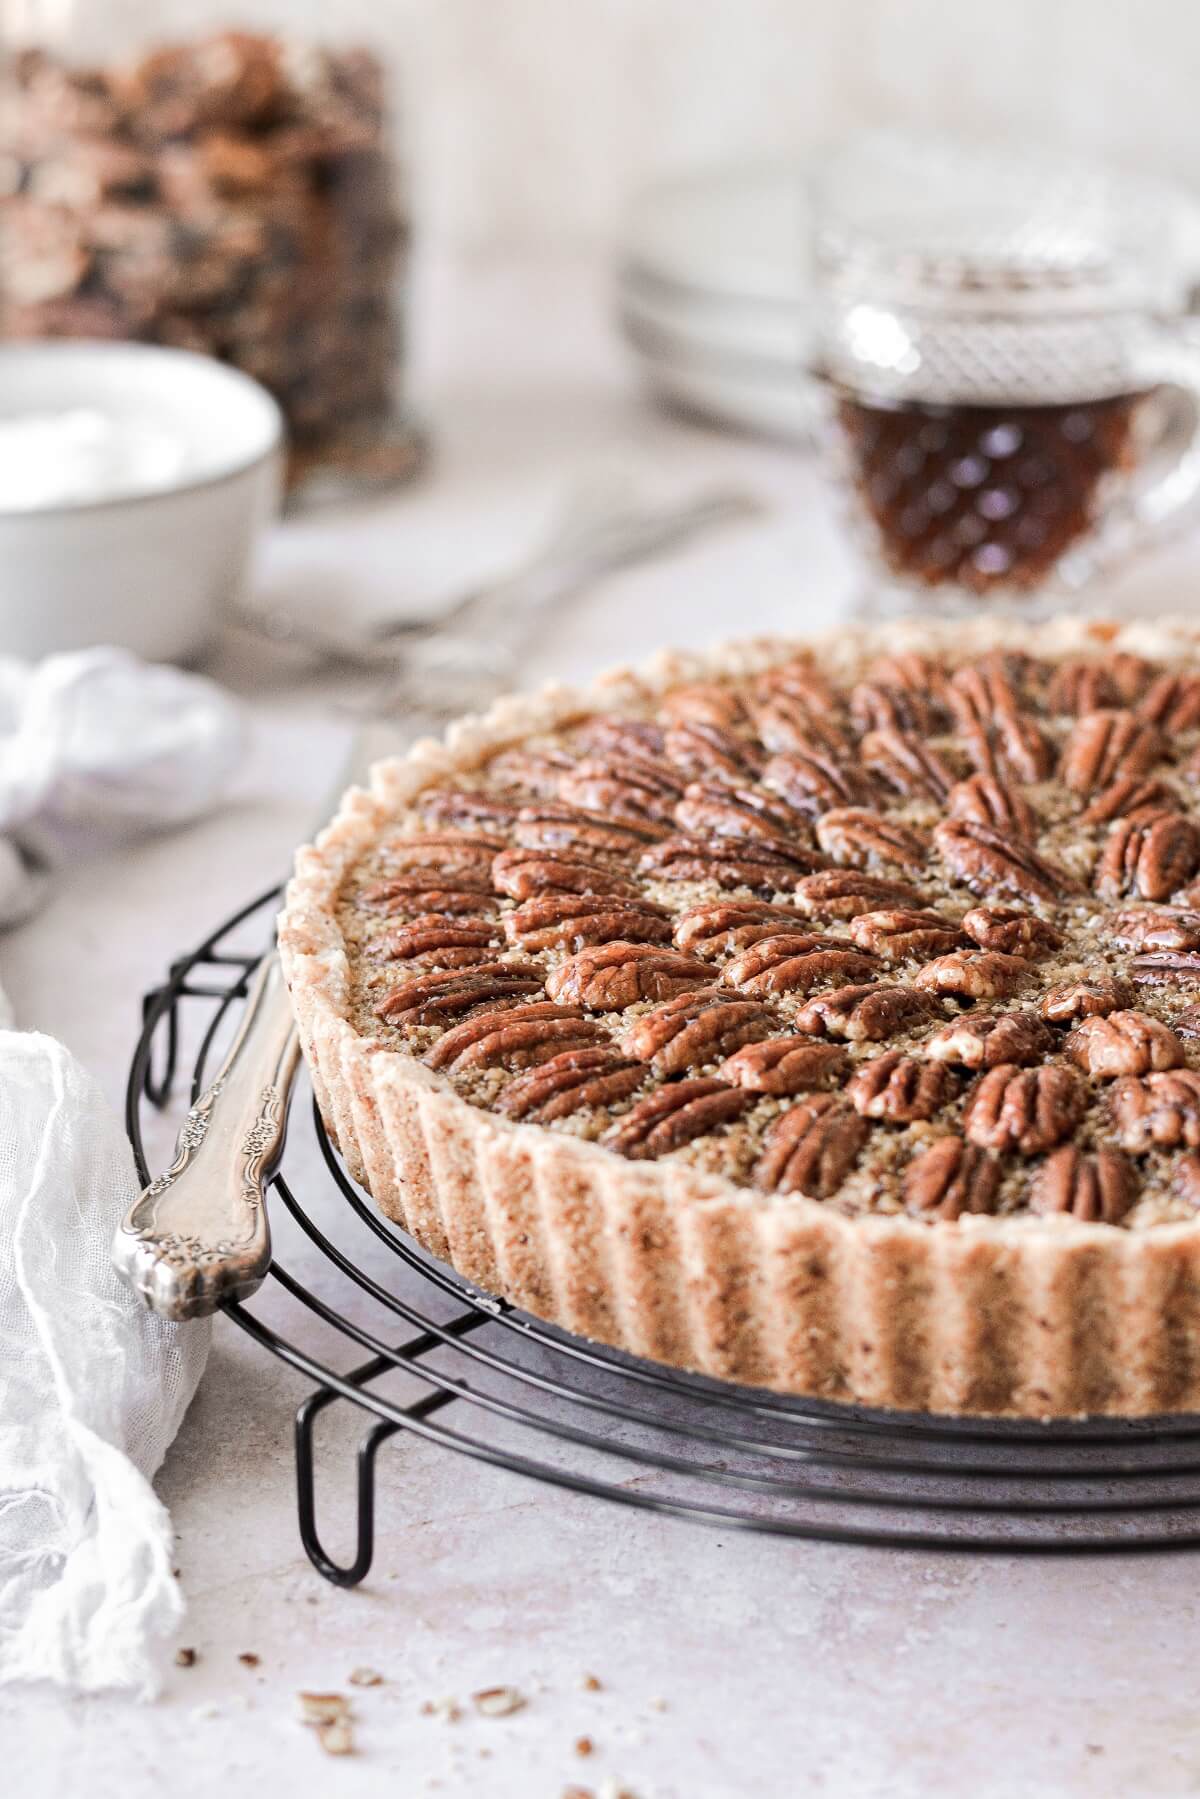
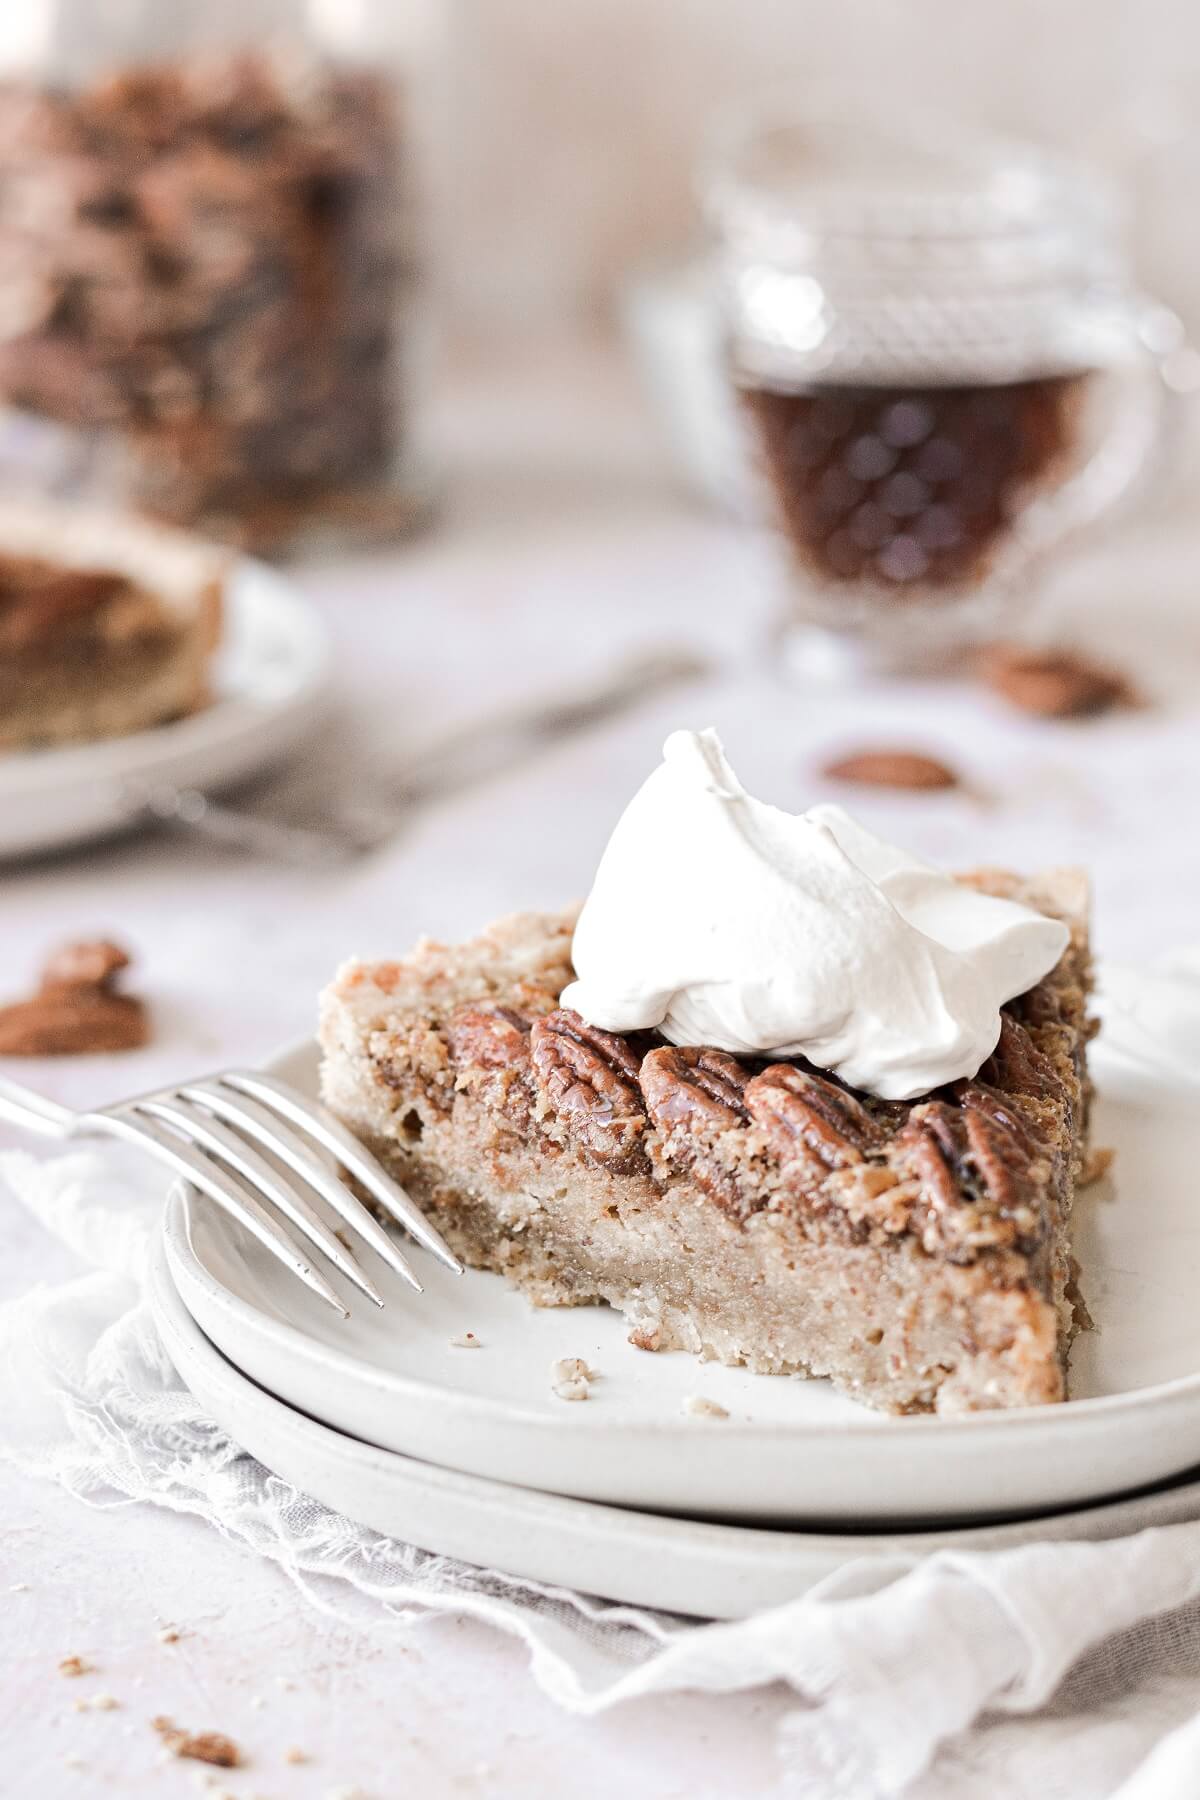
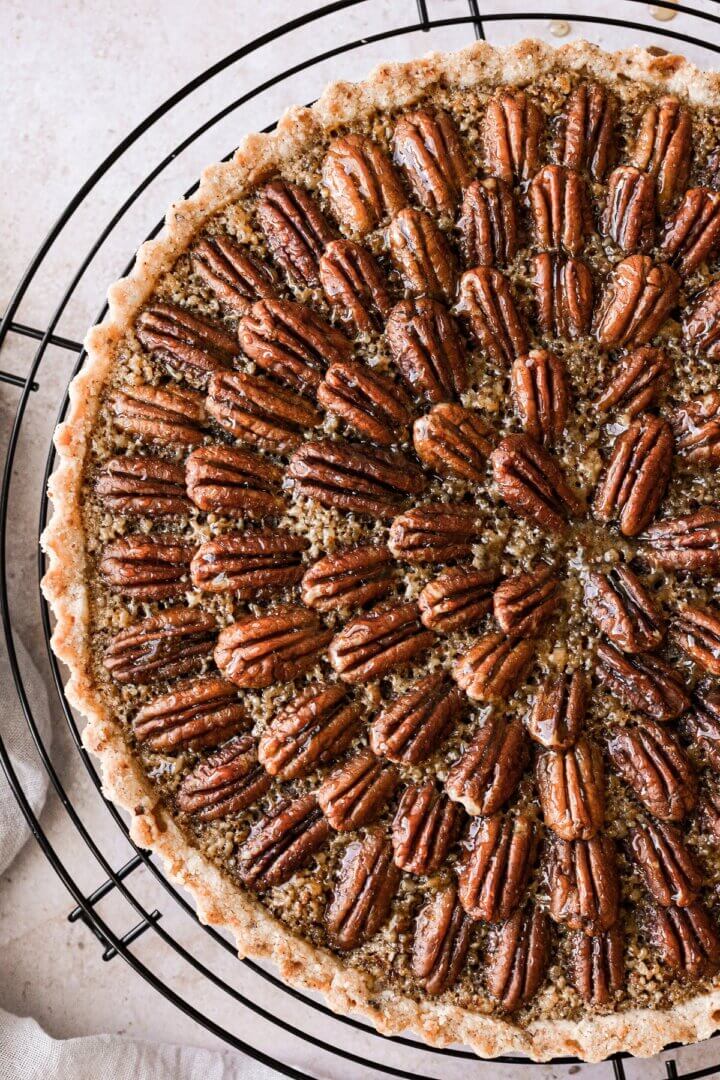
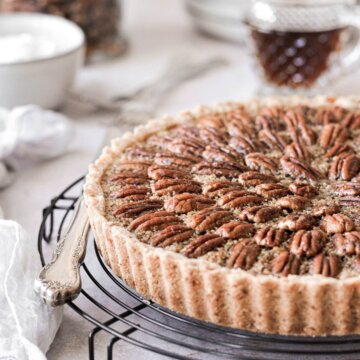
Today’s maple pecan tart has a buttery pecan shortbread crust and a rich maple pecan filling. Topped with pecans, it makes a stunning dessert for the holidays. This maple tart is pretty similar to a pecan pie, but with a less traditional and less gooey filling sweetened with pure maple syrup, and rich with cream, eggs and butter. You can even make it without corn syrup! Pecan flour in the filling adds a bit of crunch, and the pecans halves on top make the most beautiful design. This tart would be so perfect to serve for Thanksgiving or Christmas dessert.
Looking for more holiday recipes? You’ll love this apple pie cake, baked gingerbread doughnuts, and soft maple cookies.
This site contains affiliate links. As an Amazon associate, I earn from qualifying purchases. This means that I may make a small commission if you purchase a product using those links. This in no way affects my opinion of those products and services. All opinions expressed on this site are my own.
Why You’ll Love This Tart
Simple but Stunning. Everyone loves something that looks gorgeous but requires minimal effort to make. This tart couldn’t be easier to put together with a press-in-the-pan crust and a filling that’s quickly whisked together and then baked.
Perfect for the Holidays. If pecan pie is one of your favorite pies for Thanksgiving and Christmas, then you’ll love this maple version of a pecan pie. And for a pretty Christmas decoration, try arranging the pecans on top like a Christmas tree.
Easy to Make Ahead. Make this tart the day before a holiday or family get-together, so you have less to stress about on the big day.
High Altitude Tested. I develop all the recipes on my site for Denver’s altitude of 5,280 feet. If you’re at a lower or higher elevation, please see my FAQs for guidance on adjusting recipes for your altitude.

See the recipe card at the end of the post for the full ingredients list and instructions.
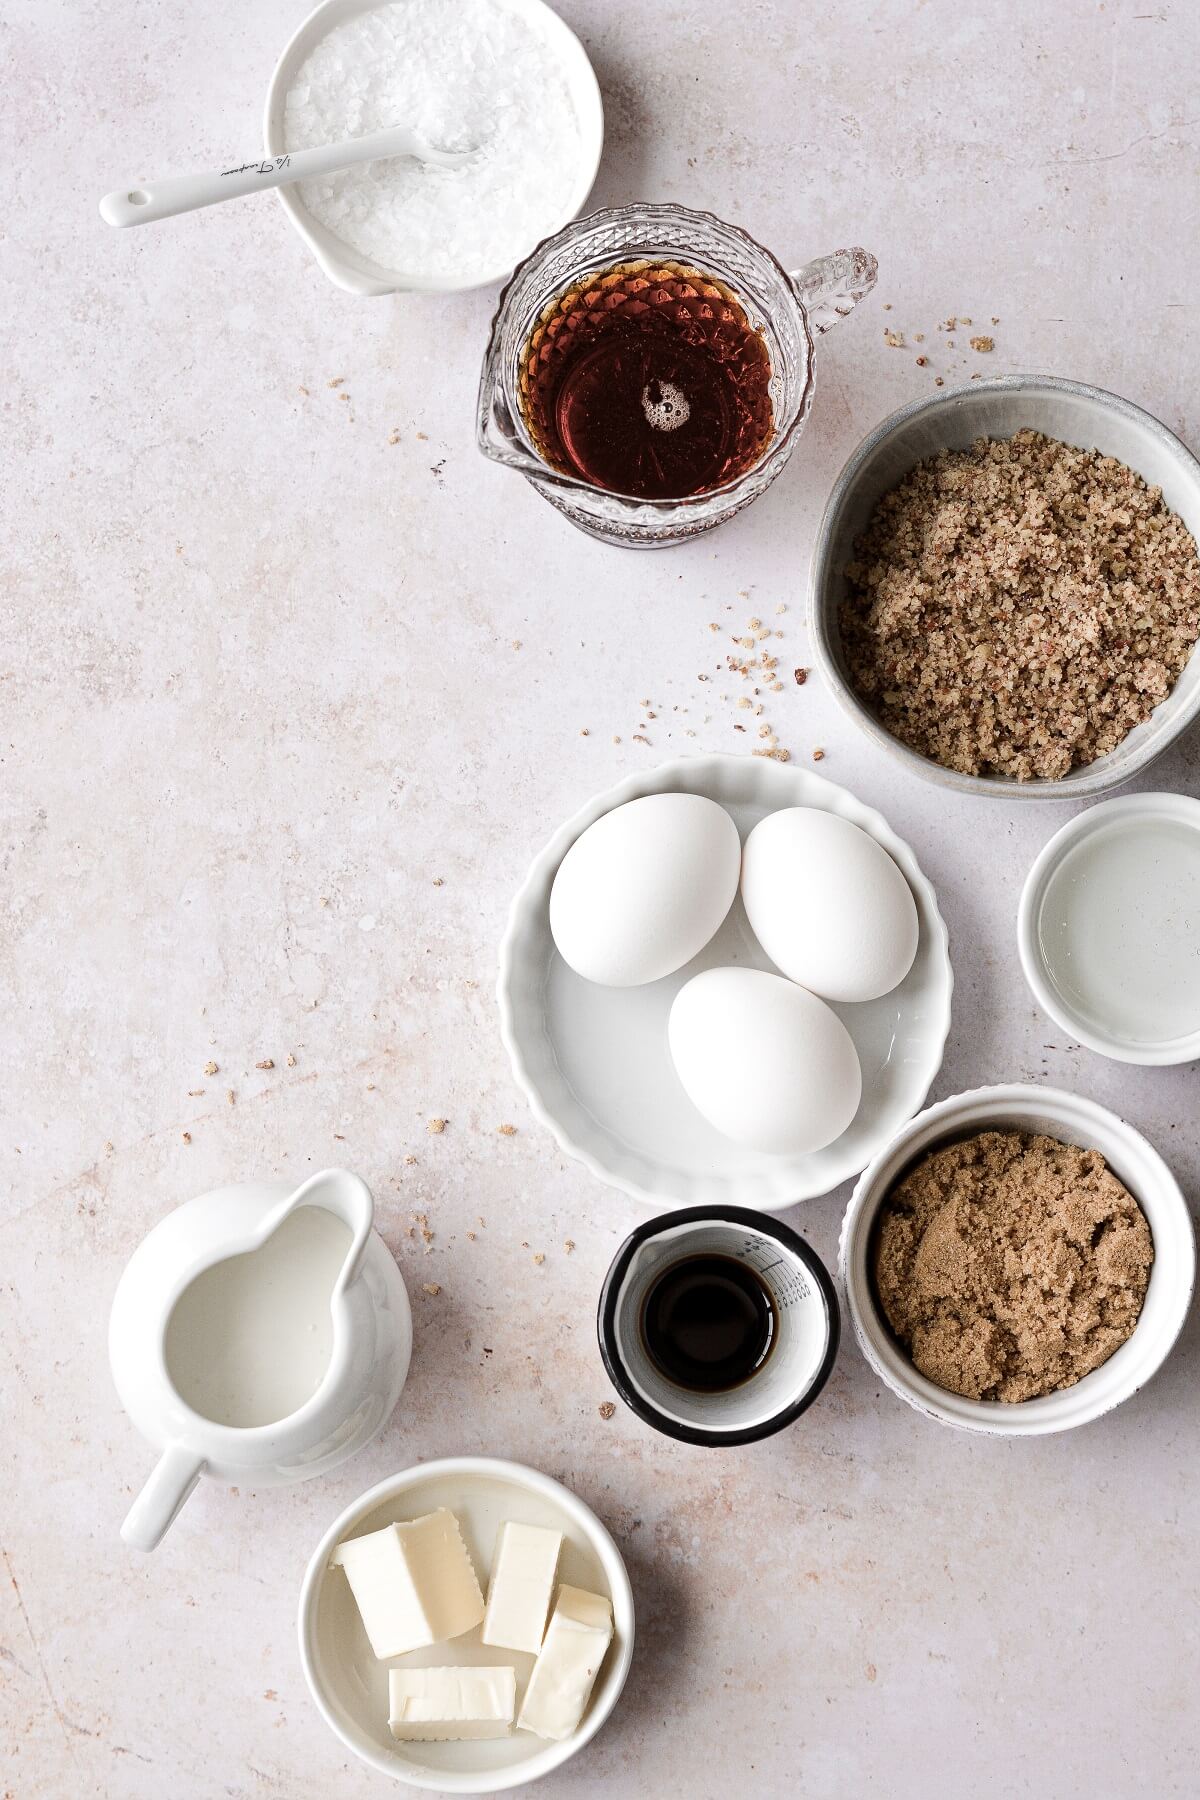
Ingredients
Crust
- Flour. All-purpose flour gives the crust strength and structure.
- Pecan Flour. This isn’t a fancy, hard-to-find ingredient, it’s simply finely ground pecans, which you can make with your food processor.
- Sugar. Sweetens the crust.
- Salt. Balances the sweetness.
- Butter. Adds moisture to the crust, and a rich buttery flavor.
- Egg. You’ll be separating the egg yolk from the white, and using the yolk in the dough, to help bind it together. The white, brushed onto the dough before baking, helps to seal it from moisture to keep it crisp.
TIP: The crust is a cookie-like pecan shortbread, based on my classic shortcrust pastry. It’s easy to make without rolling out dough; just press the crumbs into the tart pan and bake.
Filling
- Pure Maple Syrup. The maple syrup will add a lot of maple flavor to the pie, as well as sweetness.
- Dark Brown Sugar. Adds sweetness and a hint of molasses to complement the flavor of the maple syrup.
- Light Corn Syrup. Gives the filling a soft, smooth texture, as it prevents crystallization of the sugars.
- Cream + Butter. Adds richness and flavor.
- Vanilla + Maple Extract. Flavor.
- Eggs. Gives the filling structure, and helps to thicken and set the filling as it bakes.
- Salt. Balances the sweetness.
- Pecans. Both pecan flour and pecan halves add texture, crunch and wonderful pecan flavor to this tart.
TIP: Be sure to use pure maple syrup in the filling for the best flavor. Artificially flavored high fructose corn syrup won’t give you good results in this maple pecan tart.
Whipped Cream
- Heavy Whipping Cream. You need the fat in heavy whipping cream to make thick, fluffy whipped cream. Don’t substitute with a lighter cream.
- Maple Syrup. Sweetness and maple flavor.
- Vanilla Extract. Flavor.
Instructions
Make the dough for the crust.
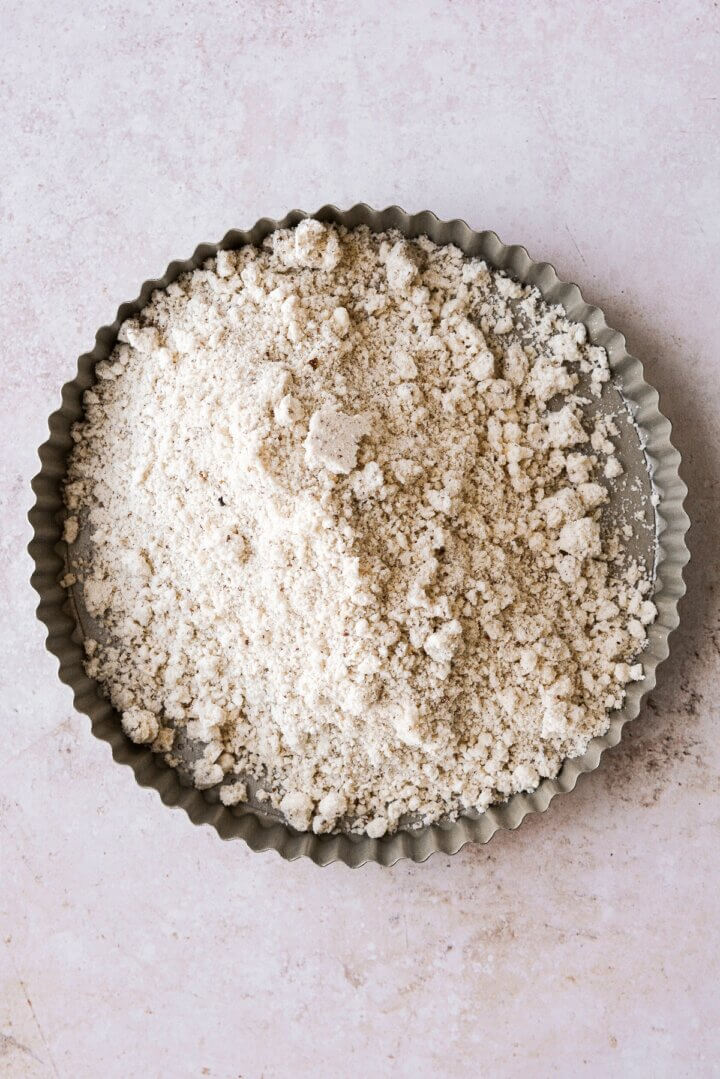
- In a bowl, combine the flour, pecan flour, sugar and salt.
- Scatter the cold butter over the flour mixture and use a pastry cutter to cut the butter in until moist and crumbly, and the pieces of butter are no bigger than peas.
- Stir in the egg yolk, then use your hands to work the moisture into the crumbs until you can squeeze the crumbs together in your hand and they hold together.
- Dump the dough crumbs into the tart pan, and firmly press the crumbs against the bottom and up the sides of the pan. Make sure to press the crumbs all the way up the sides to the top of the pan, so the filling doesn’t spill over.
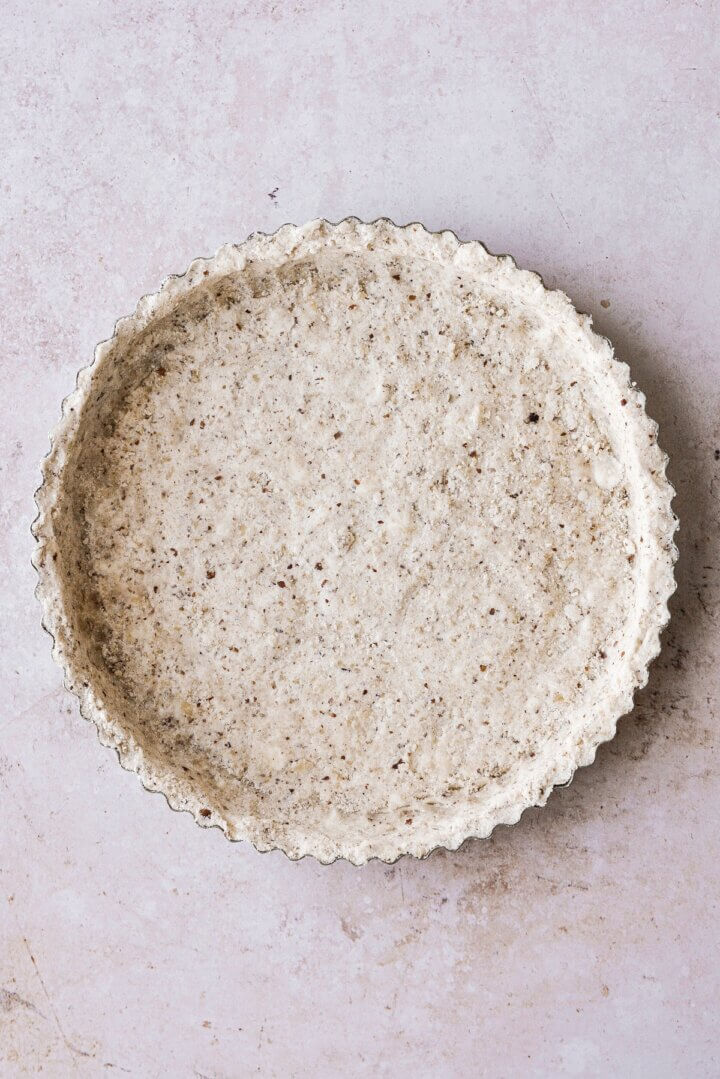
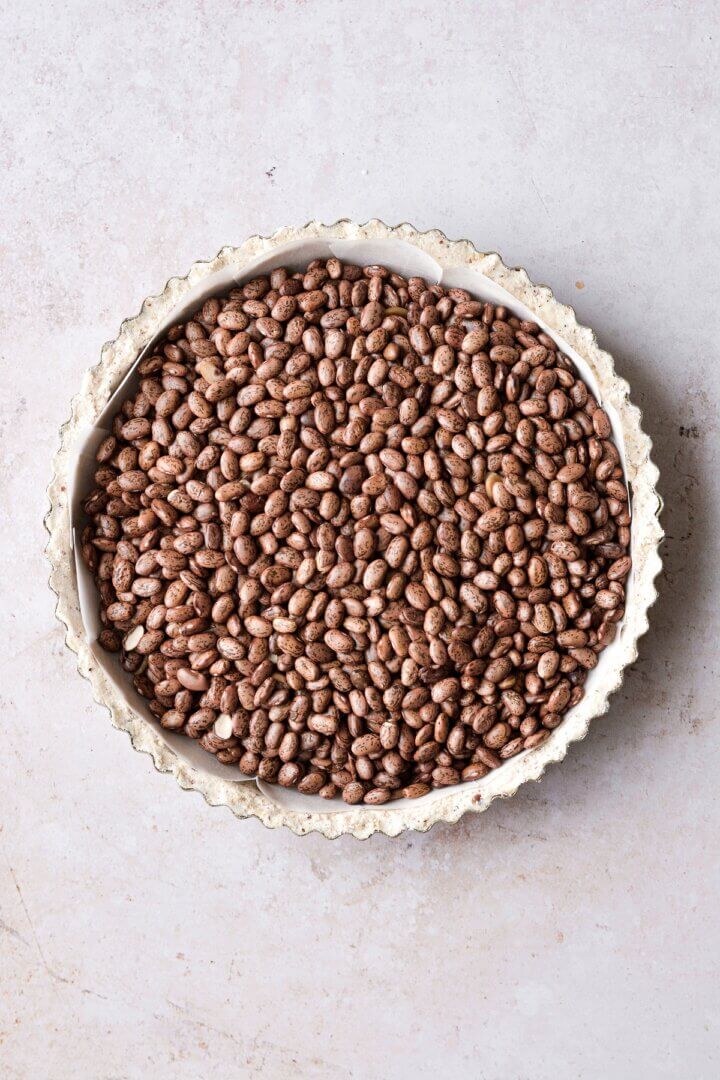
TIP: Freezing the crust and using pie weights (dried beans) ensures that the crust doesn’t slide down the sides of the pan or puff up as it bakes. I also kept a pie crust shield (not pictured) on the edge of the tart for the entire bake, so that the top edge of the crust didn’t become too brown.
Freeze the crust and fill with weights.
- Freeze the crust for 30 minutes.
- Preheat the oven to 375 F, and position a rack in the center of the oven.
- Set tart pan with the frozen crust on a baking sheet. Cut a circle of parchment paper, place it over the frozen crust, and fill with dried beans (or pie weights). Cover the edge of the crust with a pie crust shield.
TIP: Pre-baking (also called “blind baking”) the crust is an important step, as it ensures the crust will be cooked through. If you were to pour the filling into an unbaked crust, the crust would not fully bake and would have an unpleasant doughy texture.
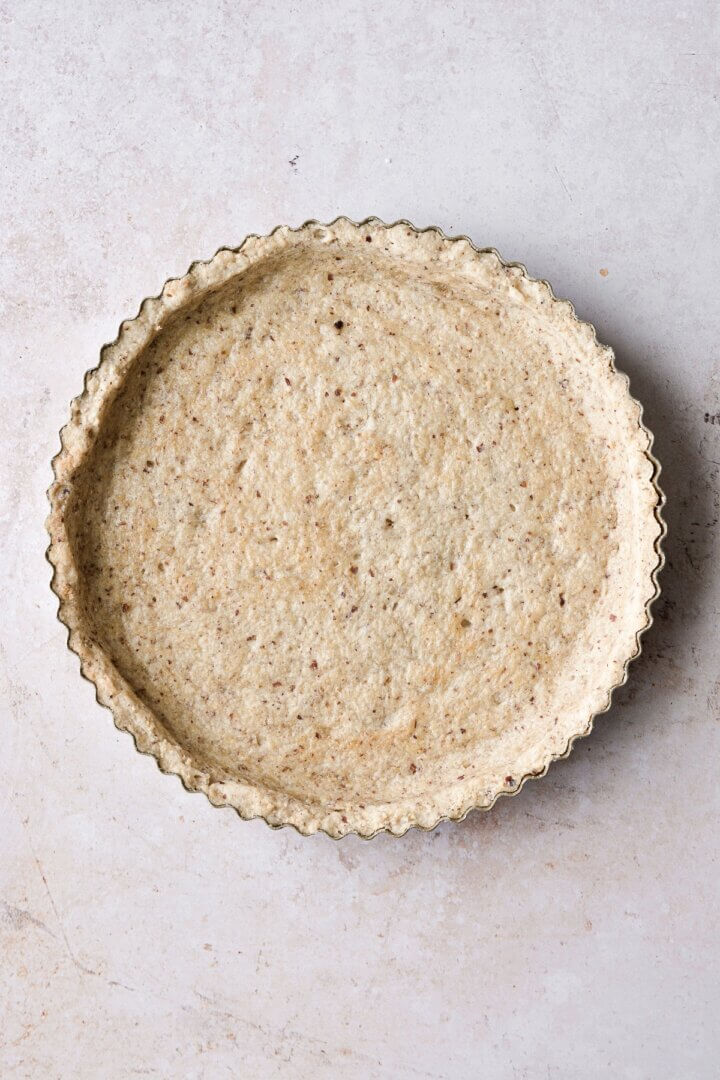
Bake the crust.
- Bake the crust for 20 minutes. Remove from the oven, scoop the dried beans out of the center, and carefully peel off the parchment paper.
- Use a pastry brush to brush the egg white gently over the bottom and sides of the crust.
- Return the crust to the oven and bake for 10 more minutes, just until it’s a light golden brown color. Set aside to cool slightly while you make the filling.
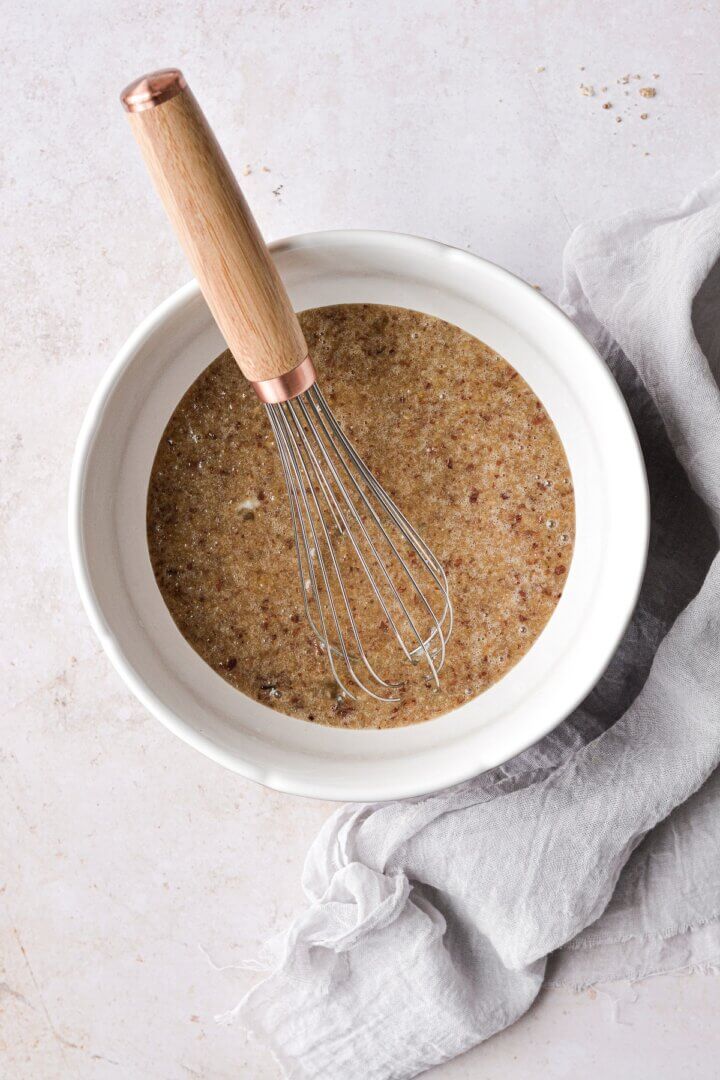
Make the filling.
- Turn the oven temperature down to 350 F.
- In a bowl, whisk together all of the filling ingredients until well combined. Gently pour the filling into the pre-baked crust. (The pan should still be sitting on the baking sheet.)
- If you like, arrange whole pecans on top of the filling. Place them on carefully, and the pecans will float right on top.
TIP: To make the design on my maple pecan tart, you’ll need about 100 pecan halves. Place them on starting on the outer edge next to the crust. Place the next row of pecans slightly overlapping on top of the first row. Continue adding more rows until you get to the middle.
Bake the filled tart.
- Cover the edge of the crust with a pie crust shield.
- Being careful not to slosh the filling, return the tart to the oven. Bake the tart for 30 minutes, until the filling is puffed and set.
- Cool completely at room temperature before serving.
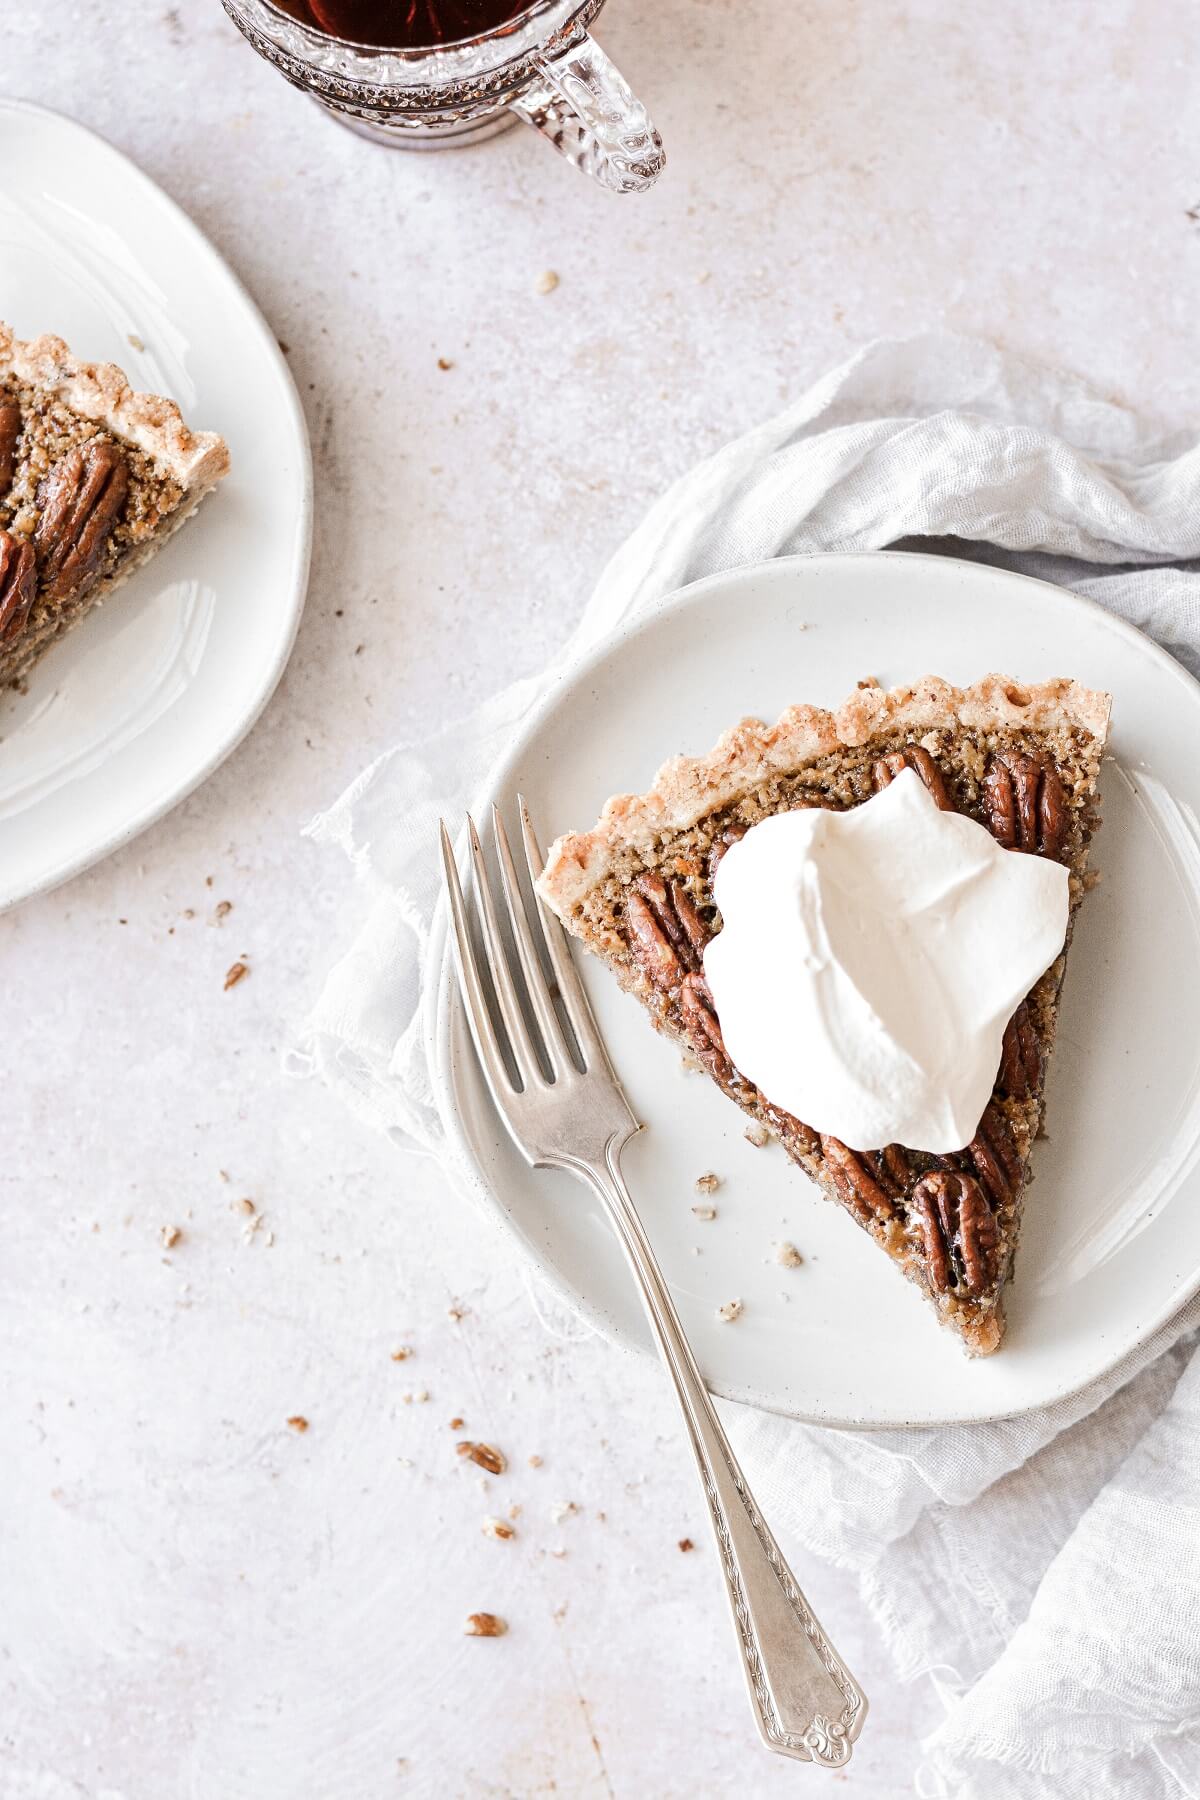
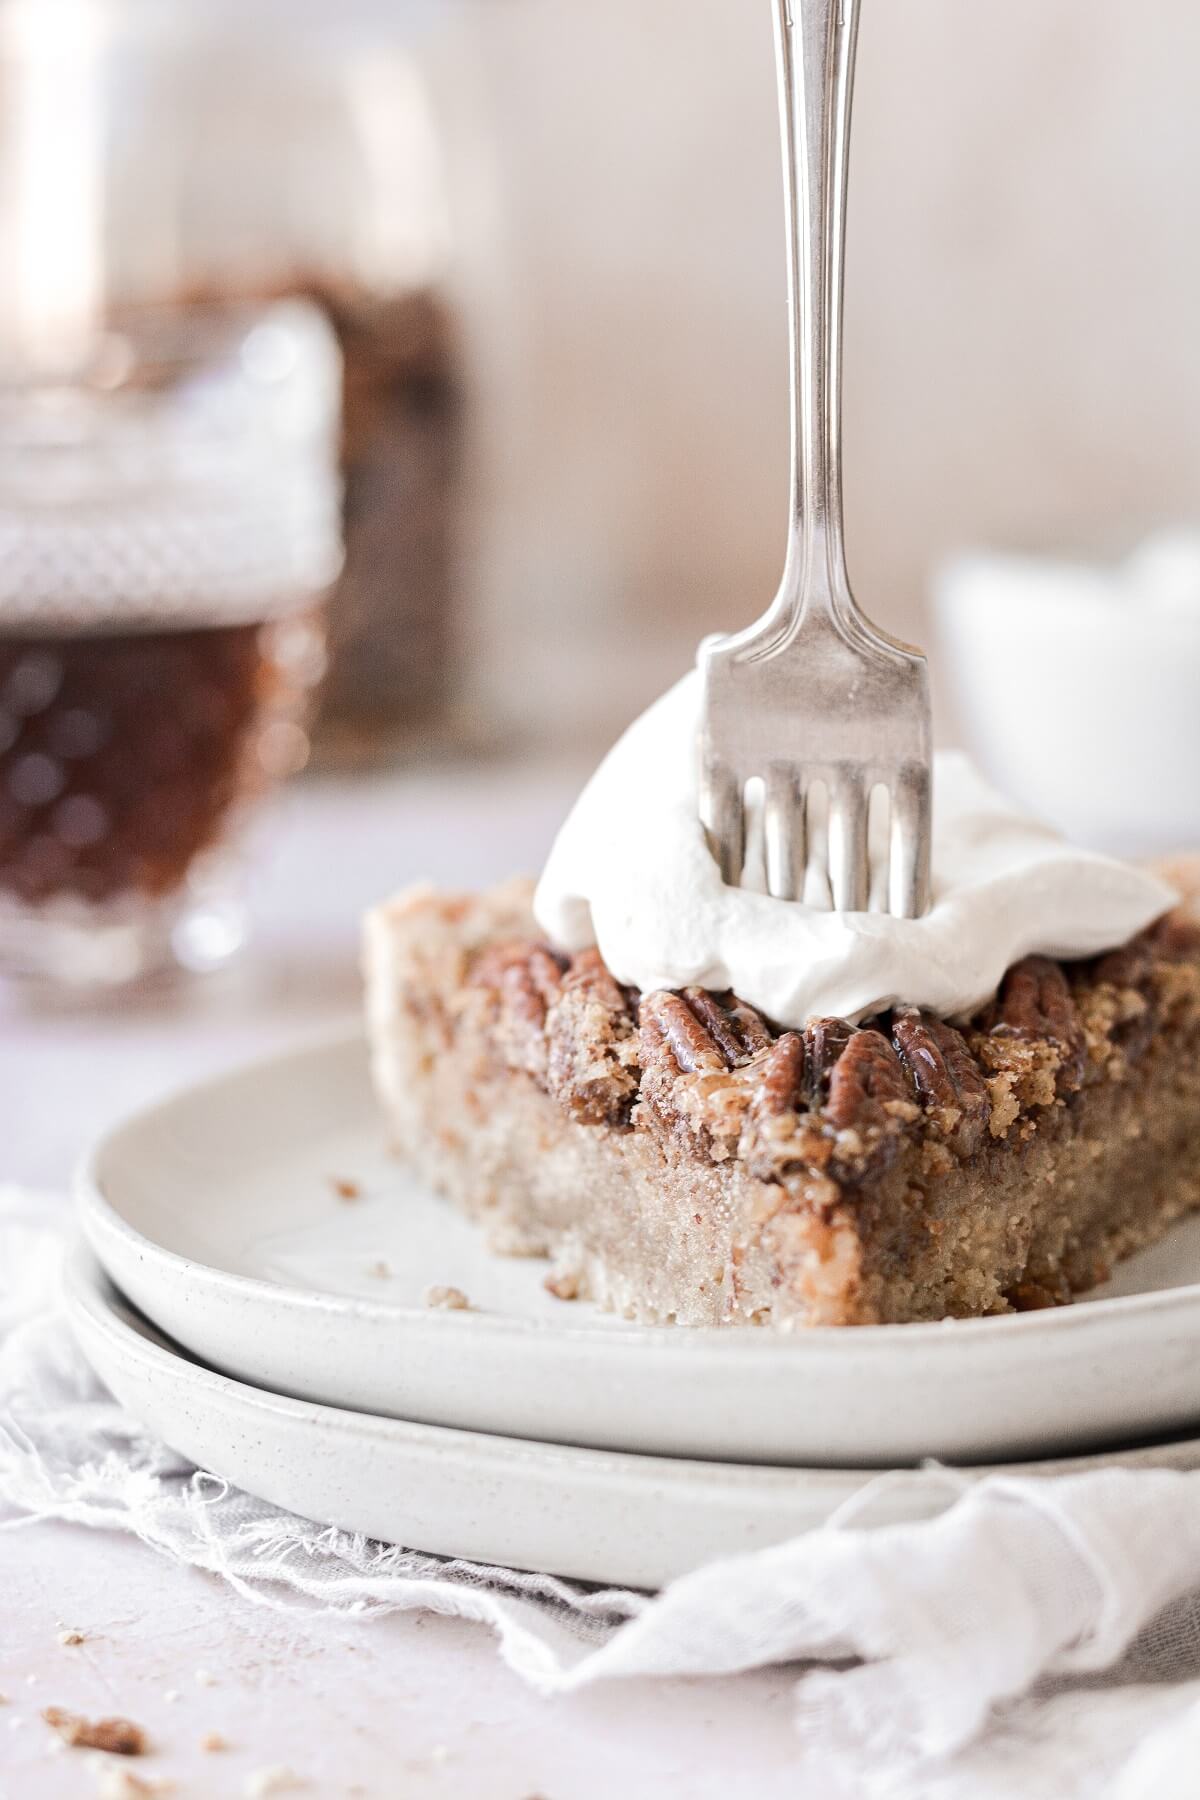
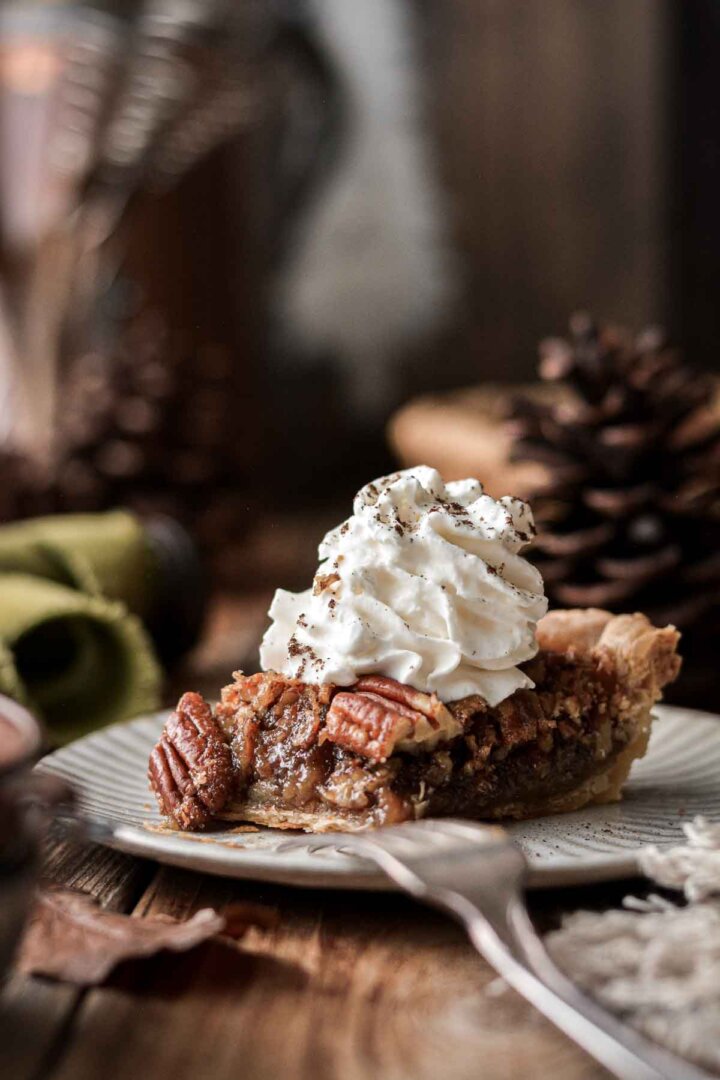
Serve with whipped cream.
- With an electric mixer, whip the cream, syrup and vanilla extract until soft, fluffy peaks form that hold their shape.
- Serve slices of the tart with whipped cream.
Be sure to read all of my BAKING FAQs where I discuss ingredients, substitutions and common baking questions, so that you can be successful in your own baking!
Frequently Asked Questions
Where do I find pecan flour?
You can usually find it with the specialty flours at major grocery stores, but not to worry if you can’t. Just toss some pecans in your food processor and grind them for 30-60 seconds until finely ground. That’s all pecan flour is!
Will this recipe work without the corn syrup?
Yes, you can leave out the corn syrup and simply replace it with more maple syrup.
Can I use a pie pan instead of a tart pan?
Yes, you can use a deep-dish 9-inch pie pan if you don’t have a tart pan.
How many pecans did you use for decorating the top?
A LOT! I counted about 100 pecan halves as I was placing them on top. For another pretty design that uses fewer pecans, see my classic pecan pie.
How long does this tart stay fresh?
Cover the pie loosely and keep it at room temperature for up to 3 days, or refrigerated for up to 5 days. It’s best served at room temperature.
Can I bake this pie in advance and freeze it for later?
Hmm, I’m not sure. I think it would probably thaw out perfectly fine, but I haven’t tried freezing it.

You Might Also Like

Please check out my Amazon Shop for a curated collection of some of my favorite cake pans from trusted brands, baking tools, ingredients, pretty things and fashion finds. I recommend products that I buy and use every day!
Did you love today’s recipe? Please rate the recipe and let me know in the comments what you thought! Also, be sure to follow Curly Girl Kitchen on Instagram, and tag me when you try one of my recipes so I can see all your delicious creations!
Maple Pecan Tart
All recipes on Curly Girl Kitchen are developed for high altitude at 5,280 feet. See FAQs for adjusting to higher or lower elevations.

Ingredients
Crust
- 1 ¾ cups all-purpose flour, spooned and leveled
- ½ cup pecan flour (or finely ground pecans)
- ½ cup granulated sugar
- 1 tsp coarse Kosher salt (if using table salt, use half the amount)
- 10 tbsp cold unsalted butter, diced
- 1 large egg, yolk and white separated
Filling
- ½ cup pure maple syrup
- ¼ cup light or dark brown sugar, lightly packed
- ¼ cup light corn syrup
- ¼ cup heavy whipping cream
- ¼ cup unsalted butter, melted
- 1 tsp vanilla extract
- ½ tsp maple extract
- 3 large eggs, room temperature
- ¼ tsp coarse Kosher salt (if using table salt, use half the amount)
- ½ cup pecan flour (or finely ground pecans)
- whole pecans for decorating the top, optional
Whipped Cream
- 1 cup cold heavy whipping cream
- 2 tbsp pure maple syrup
- ½ tsp vanilla extract
Instructions
Crust
- In a bowl, combine the flour, pecan flour, sugar and salt.
- Scatter the cold butter over the flour mixture and use a pastry cutter to cut the butter in until moist and crumbly, and the pieces of butter are no bigger than peas.
- Stir in the egg yolk, then use your hands to work the moisture into the crumbs until you can squeeze the crumbs together in your hand and they hold together.
- Dump the dough crumbs into the tart pan, and firmly press the crumbs against the bottom and up the sides of the pan. Make sure to press the crumbs all the way up the sides to the top of the pan, so the filling doesn't spill over.
- Freeze the crust for 30 minutes.
- Preheat the oven to 375 F, and position a rack in the center of the oven.
- Set tart pan with the frozen crust on a baking sheet. Cut a circle of parchment paper, place it over the frozen crust, and fill with dried beans (or pie weights). Cover the edge of the crust with a pie crust shield.
- Bake the crust for 20 minutes. Remove from the oven, scoop the dried beans out of the center, and carefully peel off the parchment paper.
- Use a pastry brush to brush the egg white gently over the bottom and sides of the crust.
- Return the crust to the oven and bake for 10 more minutes, just until it's a light golden brown color. Set aside to cool slightly while you make the filling.
Filling
- Turn the oven temperature down to 350 F.
- In a bowl, whisk together all of the filling ingredients until well combined. Gently pour the filling into the pre-baked crust. (The pan should still be sitting on the baking sheet.)
- If you like, arrange whole pecans on top of the filling. Place them on carefully, and the pecans will float right on top.
- Cover the edge of the crust with a pie crust shield.
- Being careful not to slosh the filling, return the tart to the oven. Bake the tart for 30 minutes, until the filling is puffed and set.
- Cool completely at room temperature before serving.
Whipped Cream
- With an electric mixer, whip the cream, syrup and vanilla extract until soft, fluffy peaks form that hold their shape.
- Serve slices of the tart with whipped cream.
Notes
 https://curlygirlkitchen.com/
I made this for thanksgiving and it was a big hit, I will definitely be making it again. I didn’t add the corn syrup so it was a little dry but ice cream and whipped cream took care of that. Definitely worth it.
Good flavor but way too much crust for a 9” tart pan. I baked mine in a 12” pan and it was just right, about 3/4” thick – about half crust and half filling. I prefer this over a more traditional pecan pie – less sweet and cloying =.