
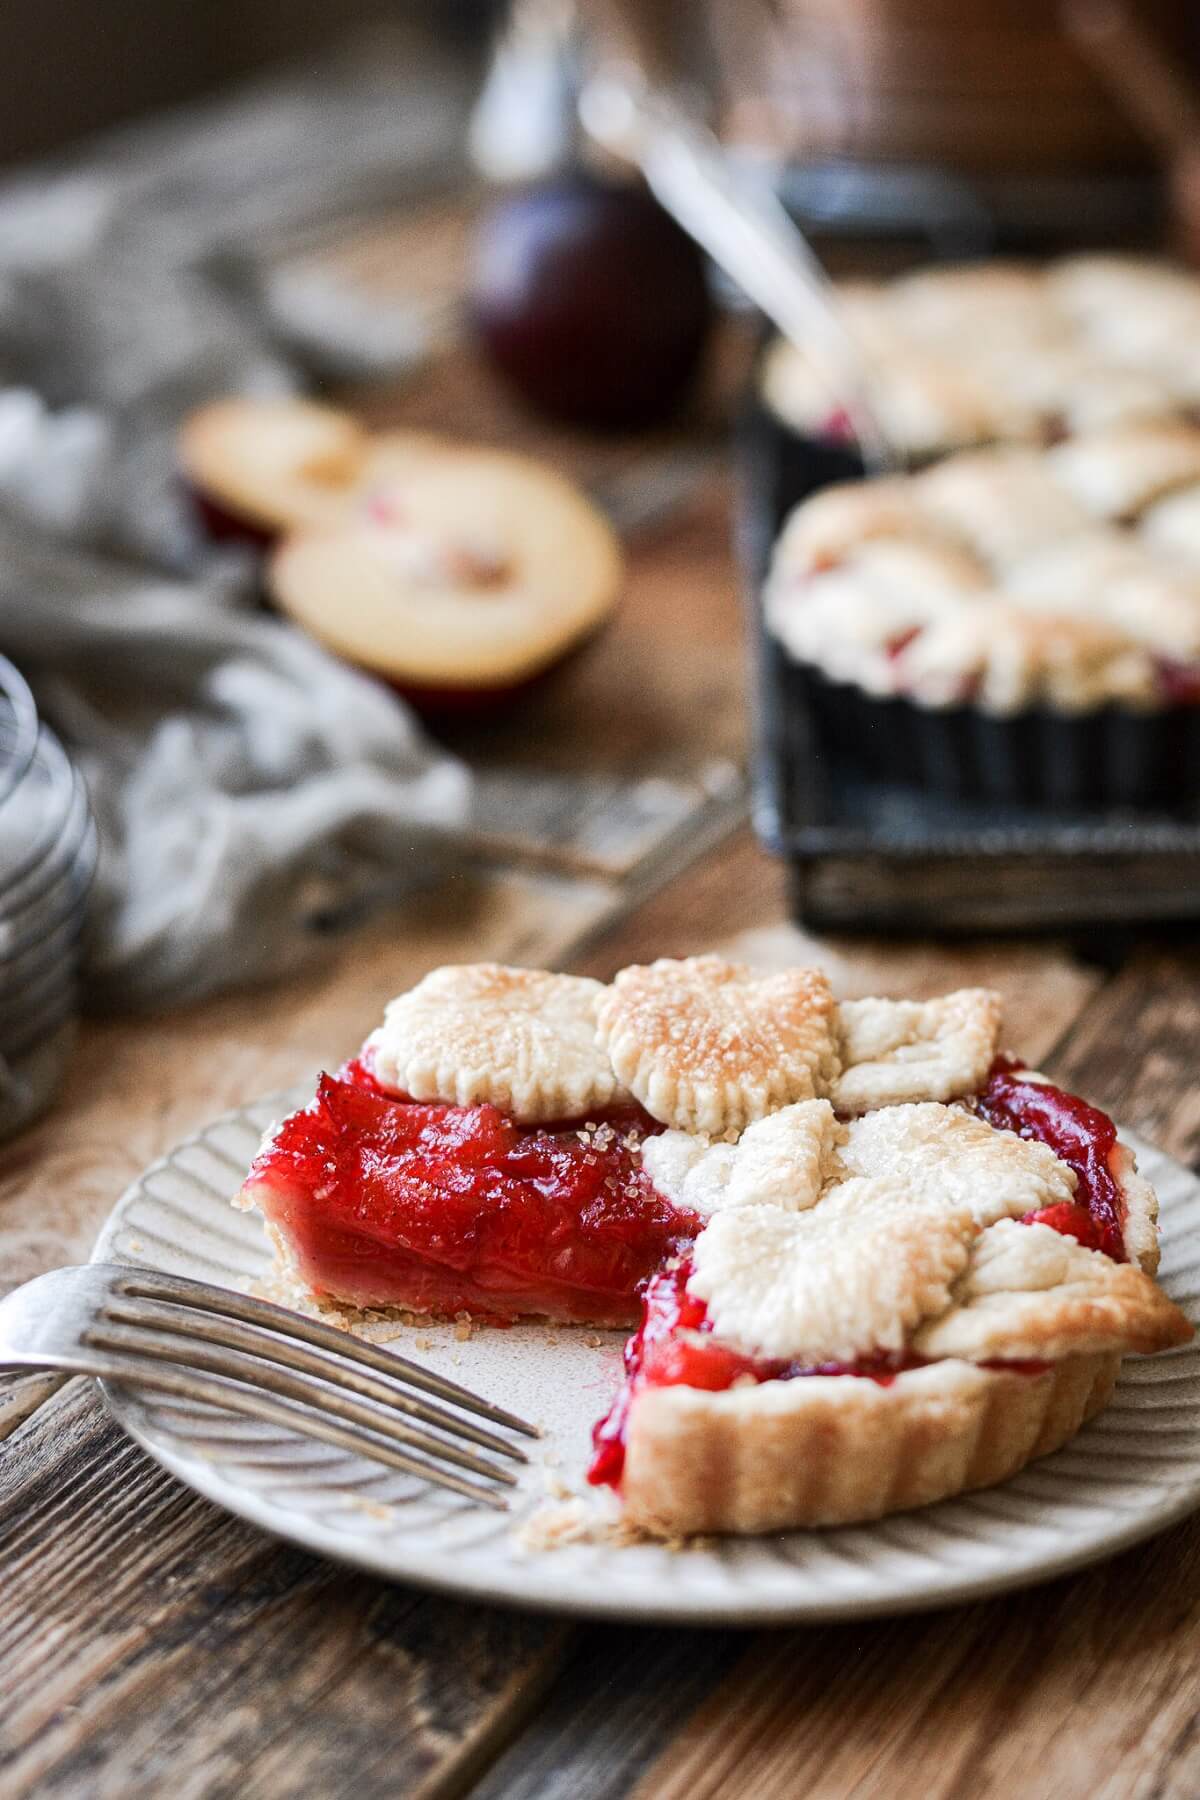
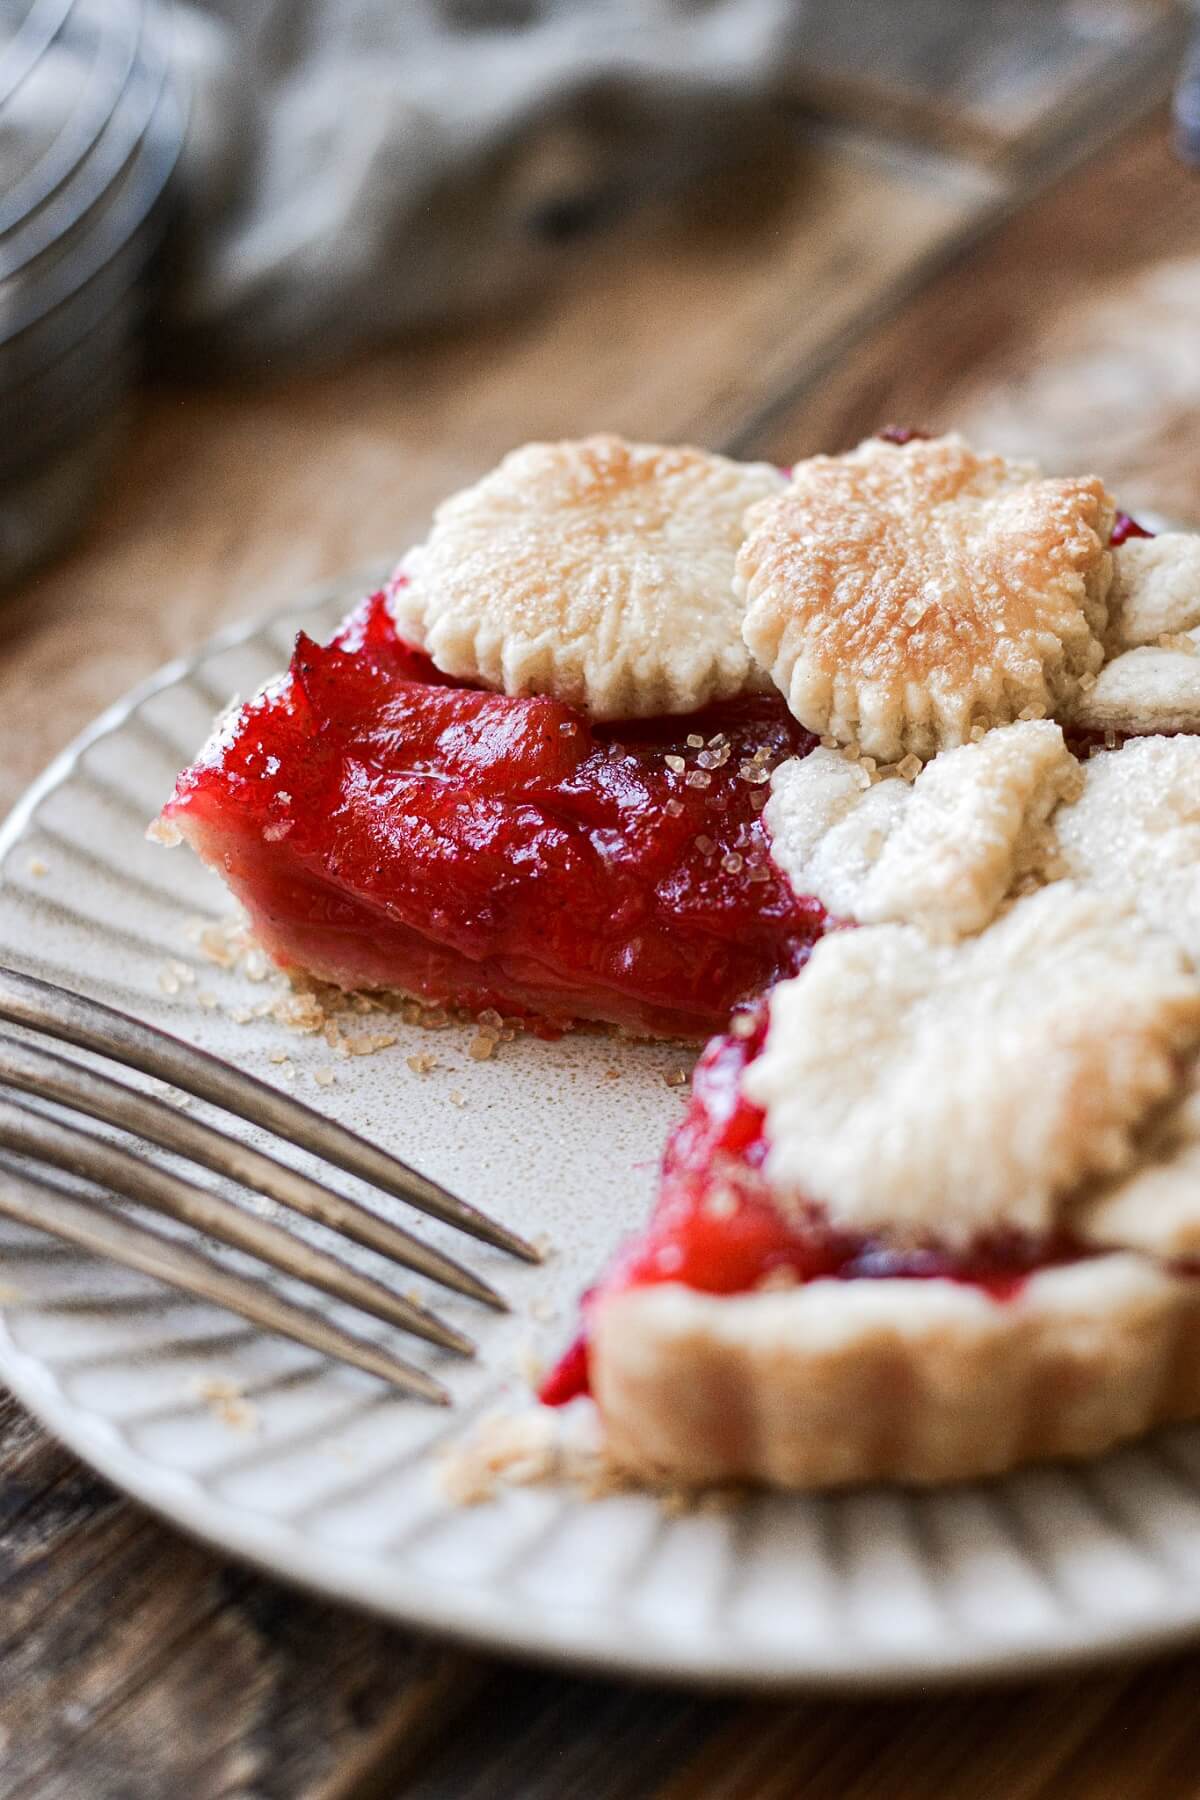
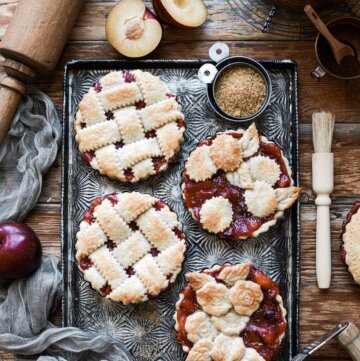
The most delicious plum pie, baked in individual tart pans. These mini plum pies have a buttery, flaky homemade pie crust arranged in a pretty lattice design, filled with juicy, tart red plums and a hint of allspice.
You might also love these summer stone fruit recipes for cherry cobbler with sugar cookie crust, apricot almond oat bars, and peach lattice pie.

This site contains affiliate links. As an Amazon associate, I earn from qualifying purchases. This means that I may make a small commission if you purchase a product using those links. This in no way affects my opinion of those products and services. All opinions expressed on this site are my own.
Why You’ll Love This Recipe
Use Any Stone Fruit. You can make these mini plum pies with red or black plums, peaches, nectarines, apricots, or even cherries.
Tastes Like Summer. Stone fruit season is short lived in Colorado, so it always feels so special when I bring home some sweet, tart, juicy fruit for my family to enjoy. Plums have a wonderful sweet-tartness and beautiful color, so they’re perfect with a bit of sugar, and the allspice for warmth. I can’t think of anything more summery than a lovely plum pie with lattice crust.
High Altitude Tested. I develop all the recipes on my site for Denver’s altitude of 5,280 feet. If you’re at a lower or higher elevation, please see my FAQs for guidance on adjusting recipes for your altitude. That said, since this pie doesn’t contain any leavening, this recipe will work at any altitude without adjustments.

Tools and Equipment
- Tart Pans. You’ll need 6 individual 4 1/2 – 5 inch tart pans with removable bottoms.
- Baking Sheet + Parchment Paper. Pies bubble over when they bake, so be sure to line the baking sheet with parchment paper for easy cleanup.
- Pastry Cutter or Food Processor. For making the pie dough.
- Saucepan. For pre-cooking the plum filling.
- Rolling Pin + Bench Scraper. Rolling out the pie dough. Depending on how you want to decorate your pies, you’ll also need a rolling pastry wheel cutter to cut strips of dough for a lattice crust, or plunger style pie crust cutters to cut out flowers and leaves.
See the recipe card at the end of the post for the full ingredients list and instructions.
Ingredients
Filling
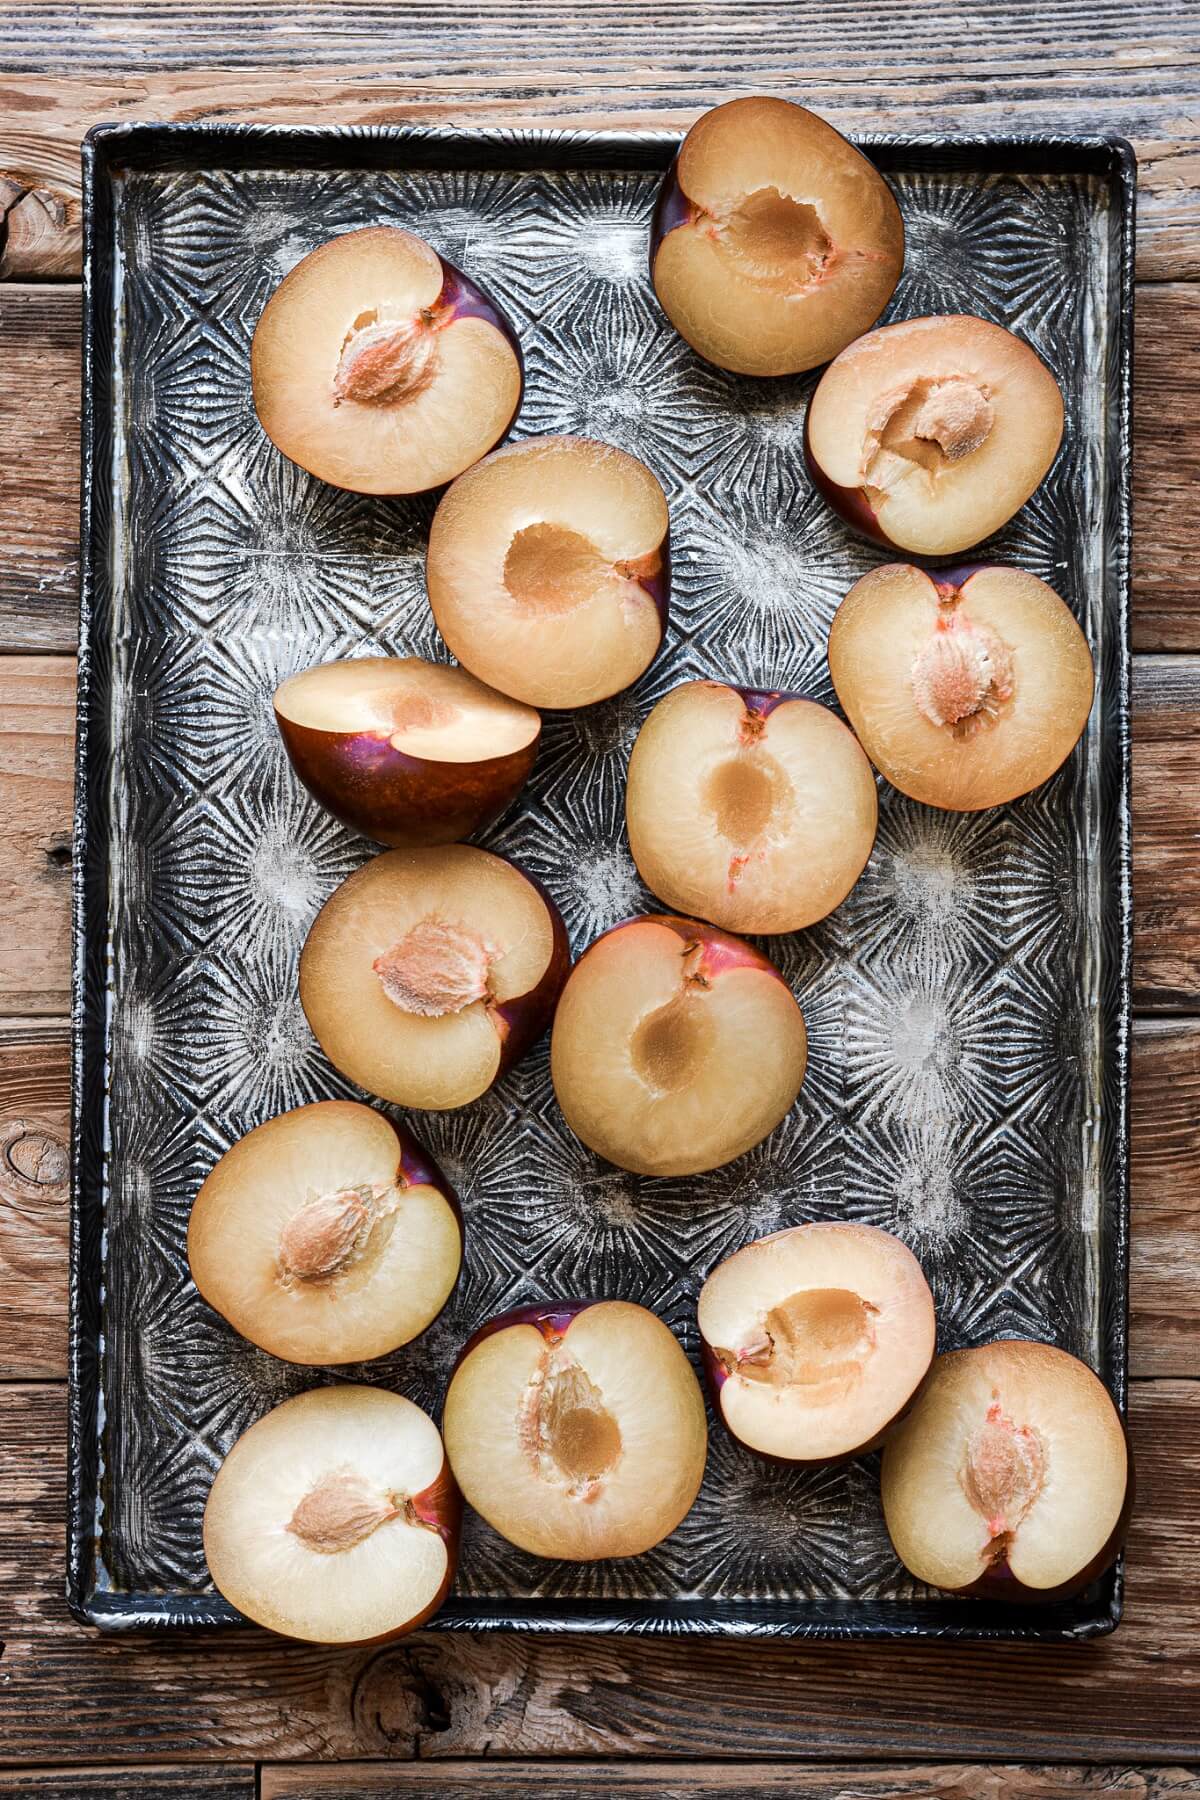
- Plums. You can use red or black plums, whichever you prefer. Just make sure they’re perfectly ripe, and not crunchy or overly ripe and mushy.
- Granulated Sugar. Adds sweetness, and draws out the moisture from the plums.
- Corn Starch. Thickens the pie filling.
- Allspice. Adds a little warmth to complement the flavor of the plums.
- Butter. Richness and flavor.
Crust
- 1 1/2x recipe All Butter Pie Dough. This will give you enough dough for 3 pie crusts, which is more than you’ll need, but you can save the leftover scraps.
- All Purpose Flour. For rolling out the dough.
- Milk. To brush over the pies before baking.
- Granulated Sugar. For sprinkling over the pies before baking.
Baker’s Note: The peel is soft, so there’s no need to peel the plums, unless you want to. I used red plums, which have red peel and yellow flesh. If I had peeled them, the pie filling would have been yellow, but the red peel is a natural dye, and it colored the filling a vibrant red color. The peel also contains a lot of the plum’s flavor and tartness, which is another good reason to keep it on the fruit.
Instructions
Make the Plum Filling
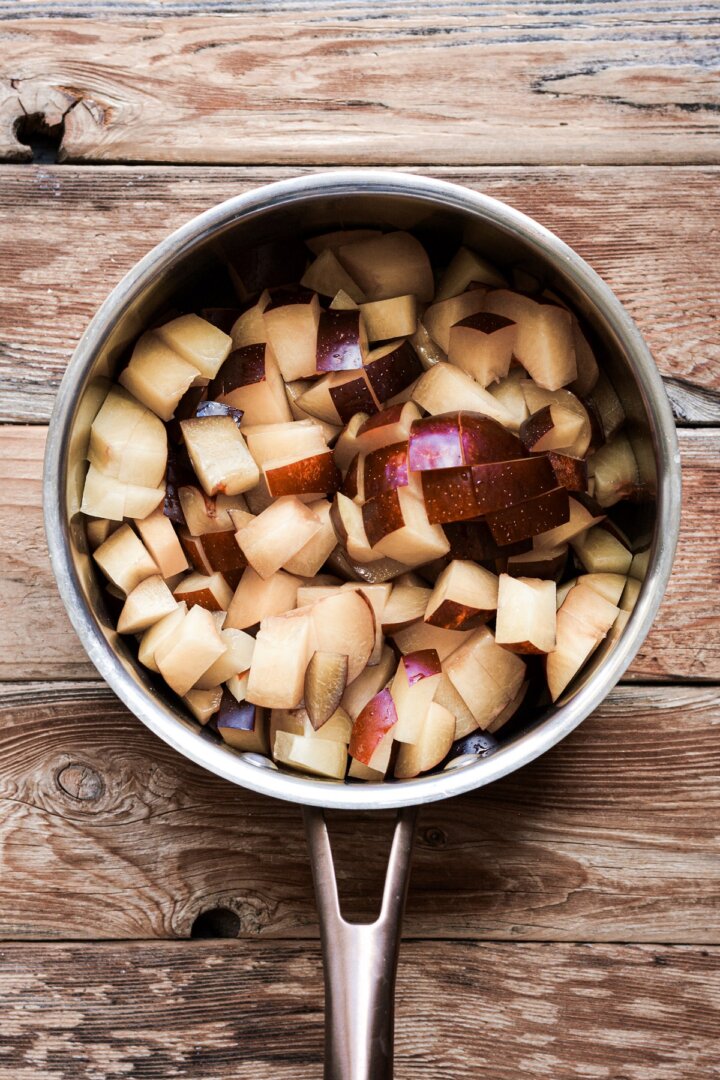
- Remove the pits from the plums, then chop the fruit into 1/2 inch pieces.
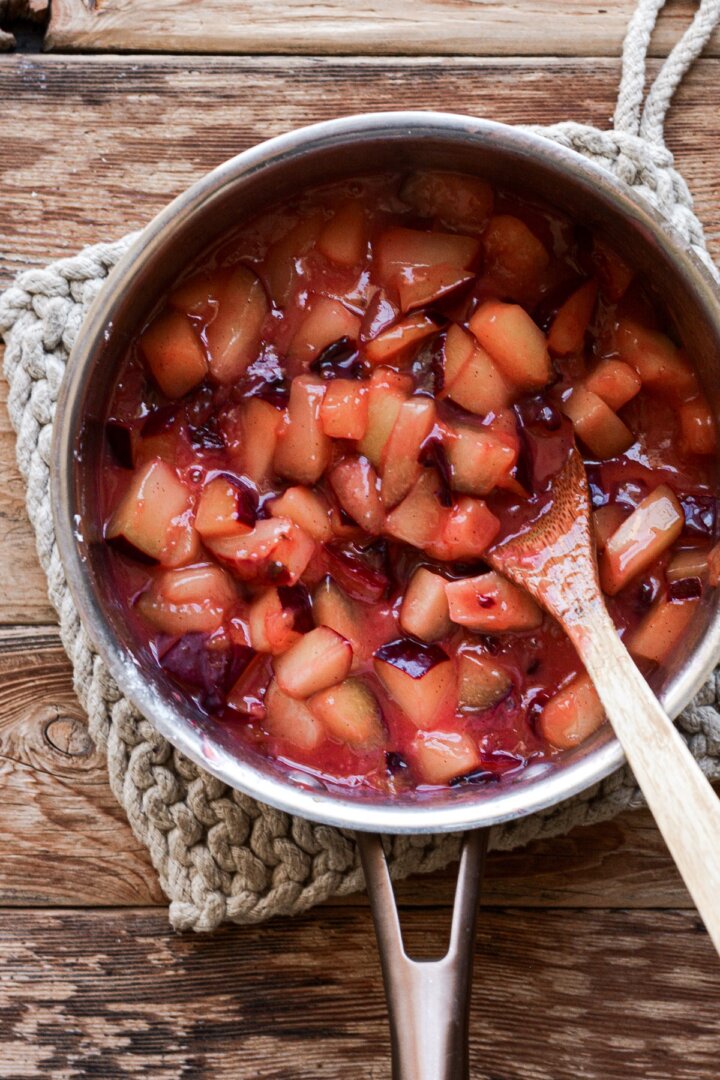
- In a saucepan, combine the chopped plums, sugar, corn starch and allspice. Over medium heat, bring the fruit to a simmer. Stirring frequently, continue to simmer the fruit until the juices start to thicken. Remove from the heat and stir in the butter.
- Let the plum filling cool to room temperature, or make it a day or two in advance, and refrigerate until needed.
Make the Pie Dough
- Prepare 1 1/2x the recipe for All Butter Pie Dough, as instructed.
- The recipe yields enough dough for a double pie crust, so 1 1/2x will give you enough dough for 3 pie crusts. This is plenty of dough for today’s project, with some leftover, to ensure you have enough.
Assemble the Pies
- Line a baking sheet with parchment paper, and set your tart pans on the baking sheet.
- Work with half the dough at a time, wrapping the other half in plastic wrap and refrigerating until needed. Roll the dough out thinly, to about 1/8 inch thick, using as much flour as needed to keep the dough from sticking to the counter and the rolling pin.
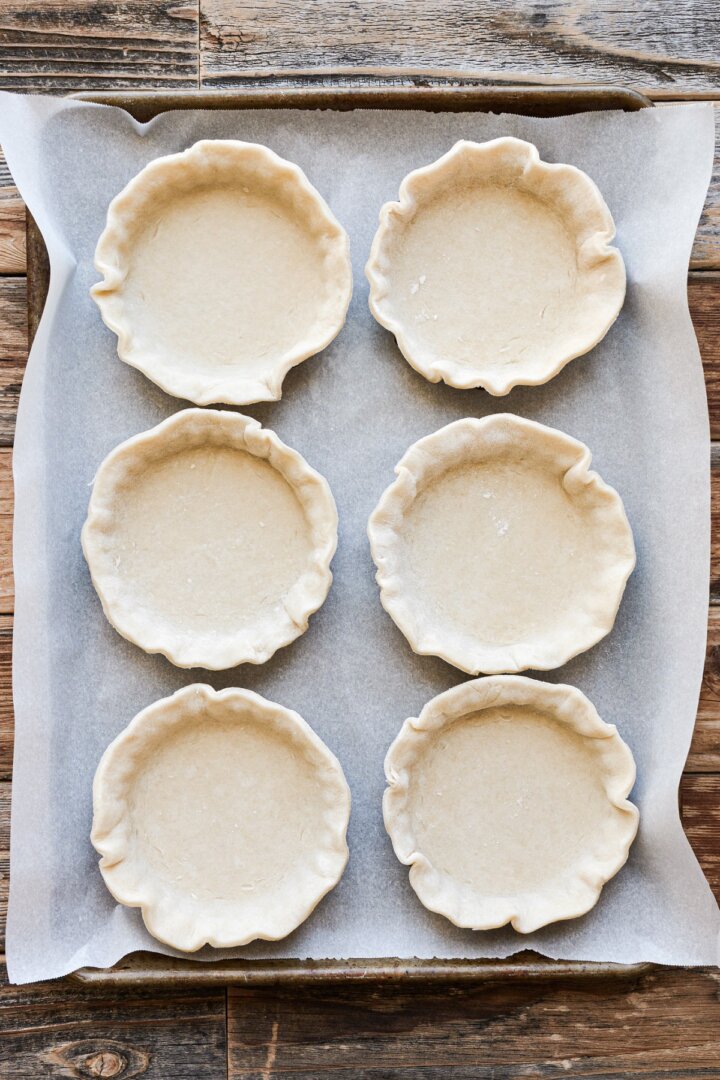
- Cut rounds of dough two inches larger than your tart pans. I used a 6 1/2 inch round acrylic cake disk as a template for cutting my dough, since my tart pans were 4 1/2 inches in diameter. Without stretching the dough, fit the dough rounds into the tart pans, letting the excess dough hang over the edges. Sprinkle about 1/4 teaspoon flour into each crust, to absorb moisture and prevent a soggy crust.
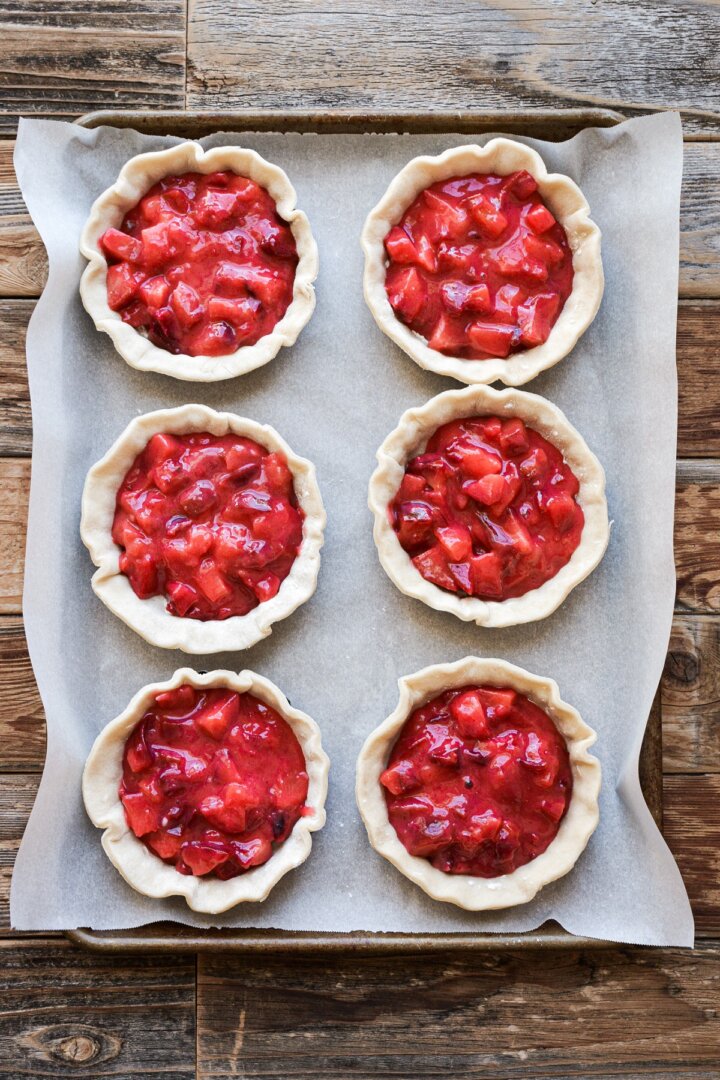
- Divide the plum filling between the tarts.
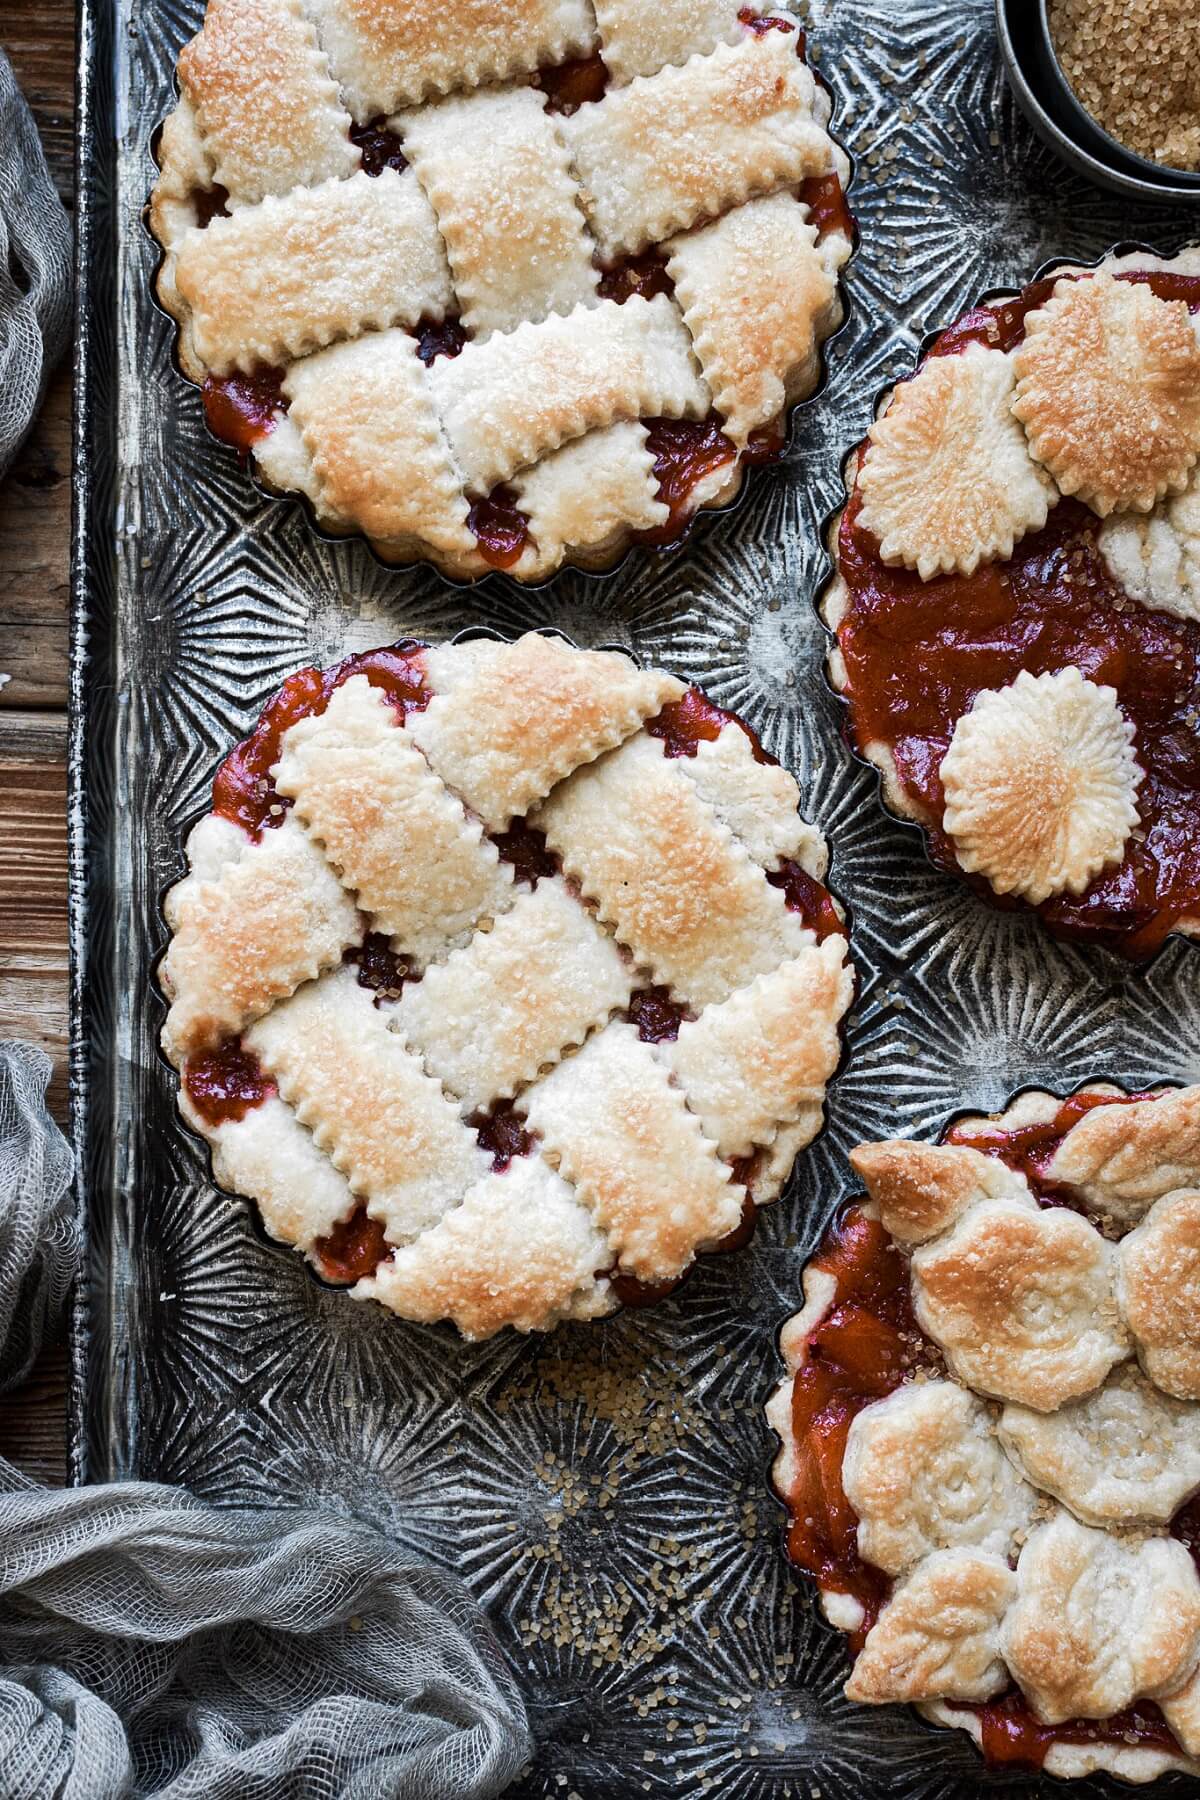
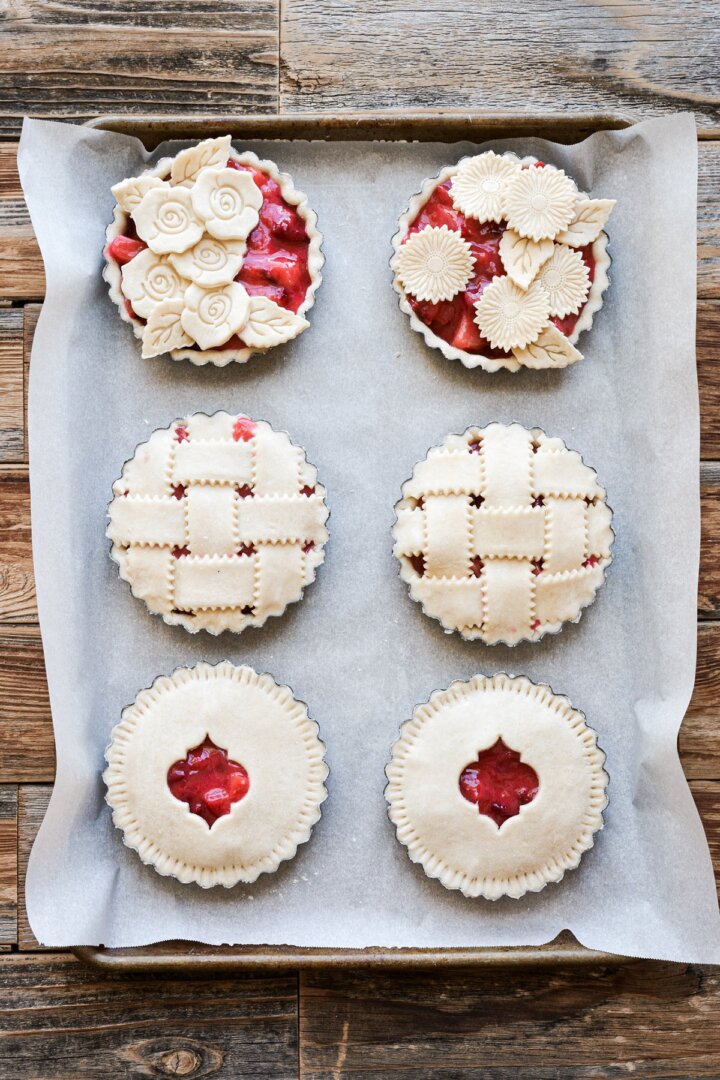
- Roll out the rest of the dough, about 1/8 inch thick, for the top crust. Cut the dough any way you like, with strips for a lattice crust, a top crust with a cutout in the center, or using pie crust cutters to cut flowers and leaves. I thought that the lattice crust looked the prettiest after baking, though, and when I make these again, I’d top all of them with the lattice crust.
- Arrange the top crusts over the filling. Then use your fingers to press the dough down around the edges, to seal the bottom and top crusts together, and to cut the dough off at the edge of the tart pan. Remove the dough scraps.
- Place the pan in the refrigerator to chill the pies for 30 minutes, before baking.

Bake the Pies
- Preheat the oven to 375 F, and position a rack in the center of the oven.
- Lightly brush the milk over the top of the pies, and sprinkle with the granulated sugar.
- Bake the pies for about 45 minutes, until the crust is puffed and golden brown, and the filling is bubbling over the edges onto the baking sheets.


- Let the pies cool for about an hour, then remove the sides and bottoms of the pans. Enjoy the pies warm, or at room temperature.
Be sure to read all of my BAKING FAQs where I discuss ingredients, substitutions and common baking questions, so that you can be successful in your own baking!
Frequently Asked Questions
Why don’t you peel the plums?
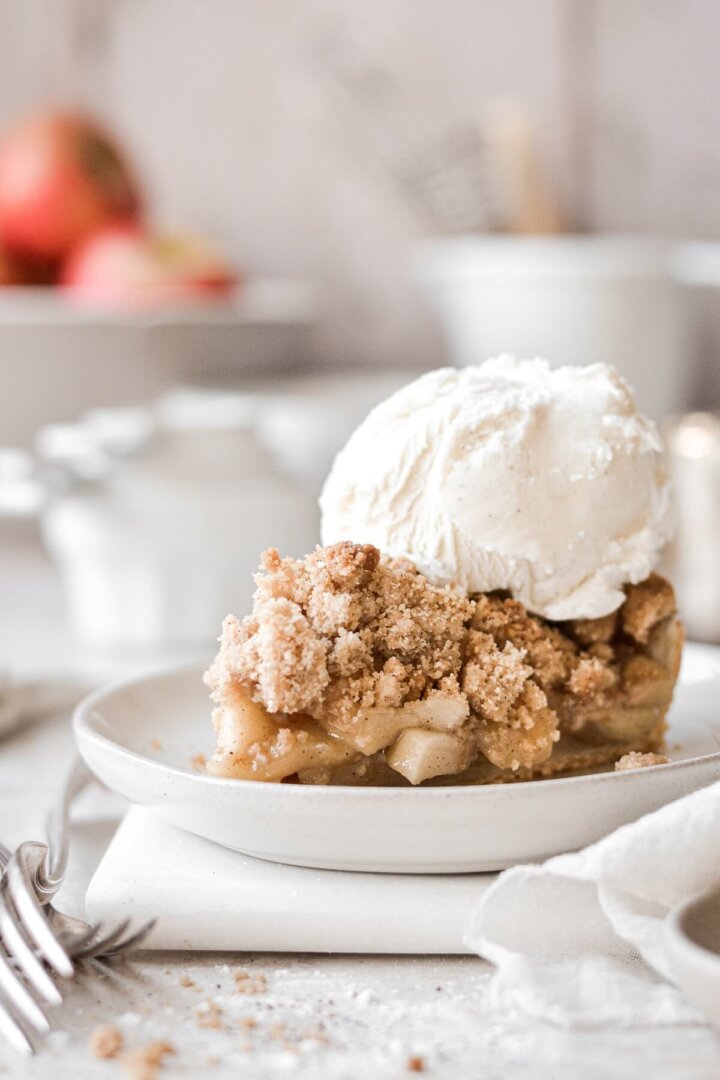
I don’t peel the plums for a few reasons. One, the plum peel is very tender, and pretty much just melts into the filling, so I don’t even notice it. Unlike an apple pie, where I always peel the apples first, since the peel can be a bit tough. Two, the peel contains so much flavor as well as tartness. Three, the red peel is a natural dye, coloring the filling a deep red. Without the peel, the filling would be yellow, just like the flesh, looking more like a peach pie.
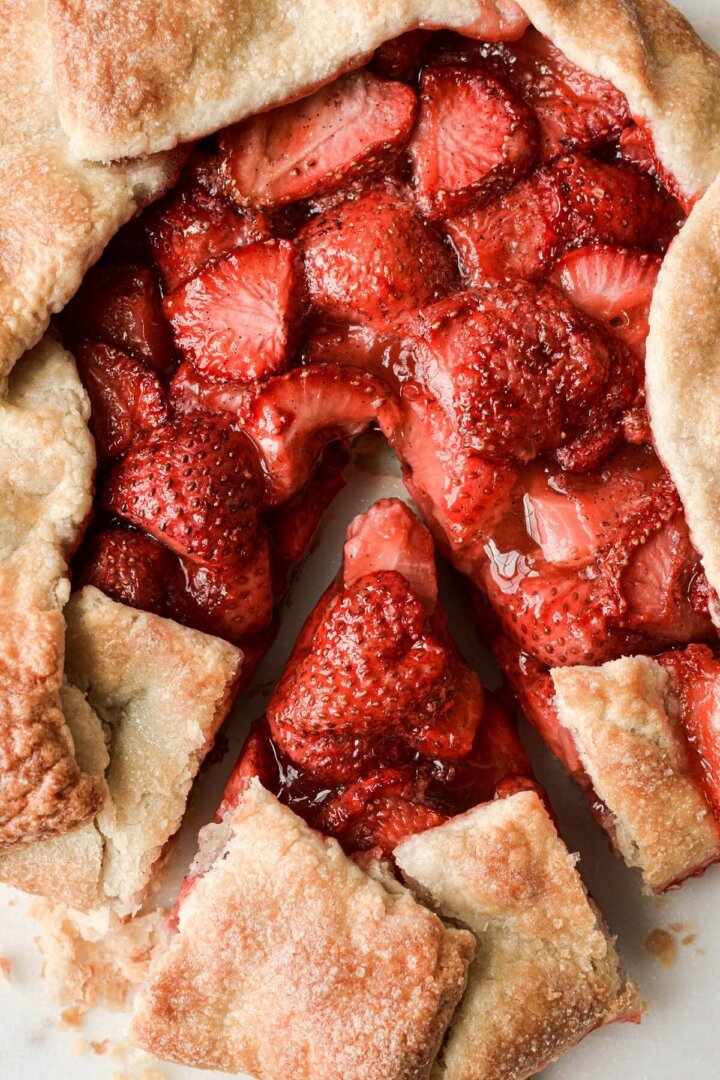
Will this recipe work as one deep dish plum pie instead of individual mini plum pies?
It certainly will. I’d recommend following the assembly and bake time for this peach pie, if you’re planning on making one large plum pie. Also, while I baked my peach pie in a ceramic pie dish, I’ve since come to love the results of baking pies in metal pie pans and tart pans, like how I baked this blueberry lattice pie in a tart pan.
How long do these pies stay fresh?
Fruit pie is best eaten the day it’s made, while the crust is more crisp. But you can keep the leftover pies loosely covered at room temperature, for up to 2 days, although the crust will be a bit softer.

You Might Also Like

Please check out my Amazon Shop for a curated collection of some of my favorite cake pans from trusted brands, baking tools, ingredients, pretty things and fashion finds. I recommend products that I buy and use every day!
Did you love today’s recipe? Please rate the recipe and let me know in the comments what you thought! Also, be sure to follow Curly Girl Kitchen on Instagram, and tag me when you try one of my recipes so I can see all your delicious creations!
Mini Plum Pies
All recipes on Curly Girl Kitchen are developed for high altitude at 5,280 feet. See FAQs for adjusting to higher or lower elevations.

Equipment
- (6x) 4 1/2 inch Tart Pans with Removable Bottoms
- Baking Sheet + Parchment Paper
- Pastry Cutter or Food Processor
- Saucepan
- Rolling Pin + Bench Scraper
Ingredients
Filling
- 2 lbs red or black plums, ripe (about 7-8 plums)
- ½ cup granulated sugar
- 3 ½ tbsp corn starch
- ¼ tsp allspice
- 1 tbsp unsalted butter
Crust
- 1 1/2x recipe All Butter Pie Dough (enough for 3 pie crusts)
- all-purpose flour, for rolling out the dough
- 2 tbsp milk, to brush over the pies before baking
- 1 tbsp granulated sugar, for sprinkling over the pies before baking
Instructions
Filling
- Remove the pits from the plums, then chop the fruit into 1/2 inch pieces.Baker's Note: The peel is soft, so there's no need to peel the plums, unless you want to. I used red plums, which have red peel and yellow flesh. If I had peeled them, the pie filling would have been yellow, but the red peel is a natural dye, and it colored the filling a vibrant red color. The peel also contains a lot of the plum's flavor and tartness, which is another good reason to keep it on the fruit.
- In a saucepan, combine the chopped plums, sugar, corn starch and allspice. Over medium heat, bring the fruit to a simmer. Stirring frequently, continue to simmer the fruit until the juices start to thicken. Remove from the heat and stir in the butter.
- Let the plum filling cool to room temperature, or make it a day or two in advance, and refrigerate until needed.
Pie Dough
- Prepare 1 1/2x the recipe for All Butter Pie Dough, as instructed.
- The recipe yields enough dough for a double pie crust, so 1 1/2x will give you enough dough for 3 pie crusts. This is plenty of dough for today's project, with some leftover, to ensure you have enough.
Assembly
- Line a baking sheet with parchment paper, and set your tart pans on the baking sheet.
- Work with half the dough at a time, wrapping the other half in plastic wrap and refrigerating until needed. Roll the dough out thinly, to about 1/8 inch thick, using as much flour as needed to keep the dough from sticking to the counter and the rolling pin.
- Cut rounds of dough two inches larger than your tart pans. I used a 6 1/2 inch round acrylic cake disk as a template for cutting my dough, since my tart pans were 4 1/2 inches in diameter. Without stretching the dough, fit the dough rounds into the tart pans, letting the excess dough hang over the edges. Sprinkle about 1/4 teaspoon flour into each crust, to absorb moisture and prevent a soggy crust.
- Divide the plum filling between the tarts.
- Roll out the rest of the dough, about 1/8 inch thick, for the top crust. Cut the dough any way you like, with strips for a lattice crust, a top crust with a cutout in the center, or using pie crust cutters to cut flowers and leaves. I thought that the lattice crust looked the prettiest after baking, though, and when I make these again, I'd top all of them with the lattice crust.
- Arrange the top crusts over the filling. Then use your fingers to press the dough down around the edges, to seal the bottom and top crusts together, and to cut the dough off at the edge of the tart pan. Remove the dough scraps.
- Place the pan in the refrigerator to chill the pies for 30 minutes, before baking.
Bake
- Preheat the oven to 375 F, and position a rack in the center of the oven.
- Lightly brush the milk over the top of the pies, and sprinkle with the granulated sugar.
- Bake the pies for about 45 minutes, until the crust is puffed and golden brown, and the filling is bubbling over the edges onto the baking sheets.
- Let the pies cool for about an hour, then remove the sides and bottoms of the pans. Enjoy the pies warm, or at room temperature.
- Fruit pie is best eaten the day it's made, while the crust is more crisp. But you can keep the leftover pies loosely covered at room temperature, for up to 2 days.
Notes
 https://curlygirlkitchen.com/
I made this as a regular-sized pie since I didn’t have mini pie dishes, and it came out amazing. I will be making this plum pie again for sure!