
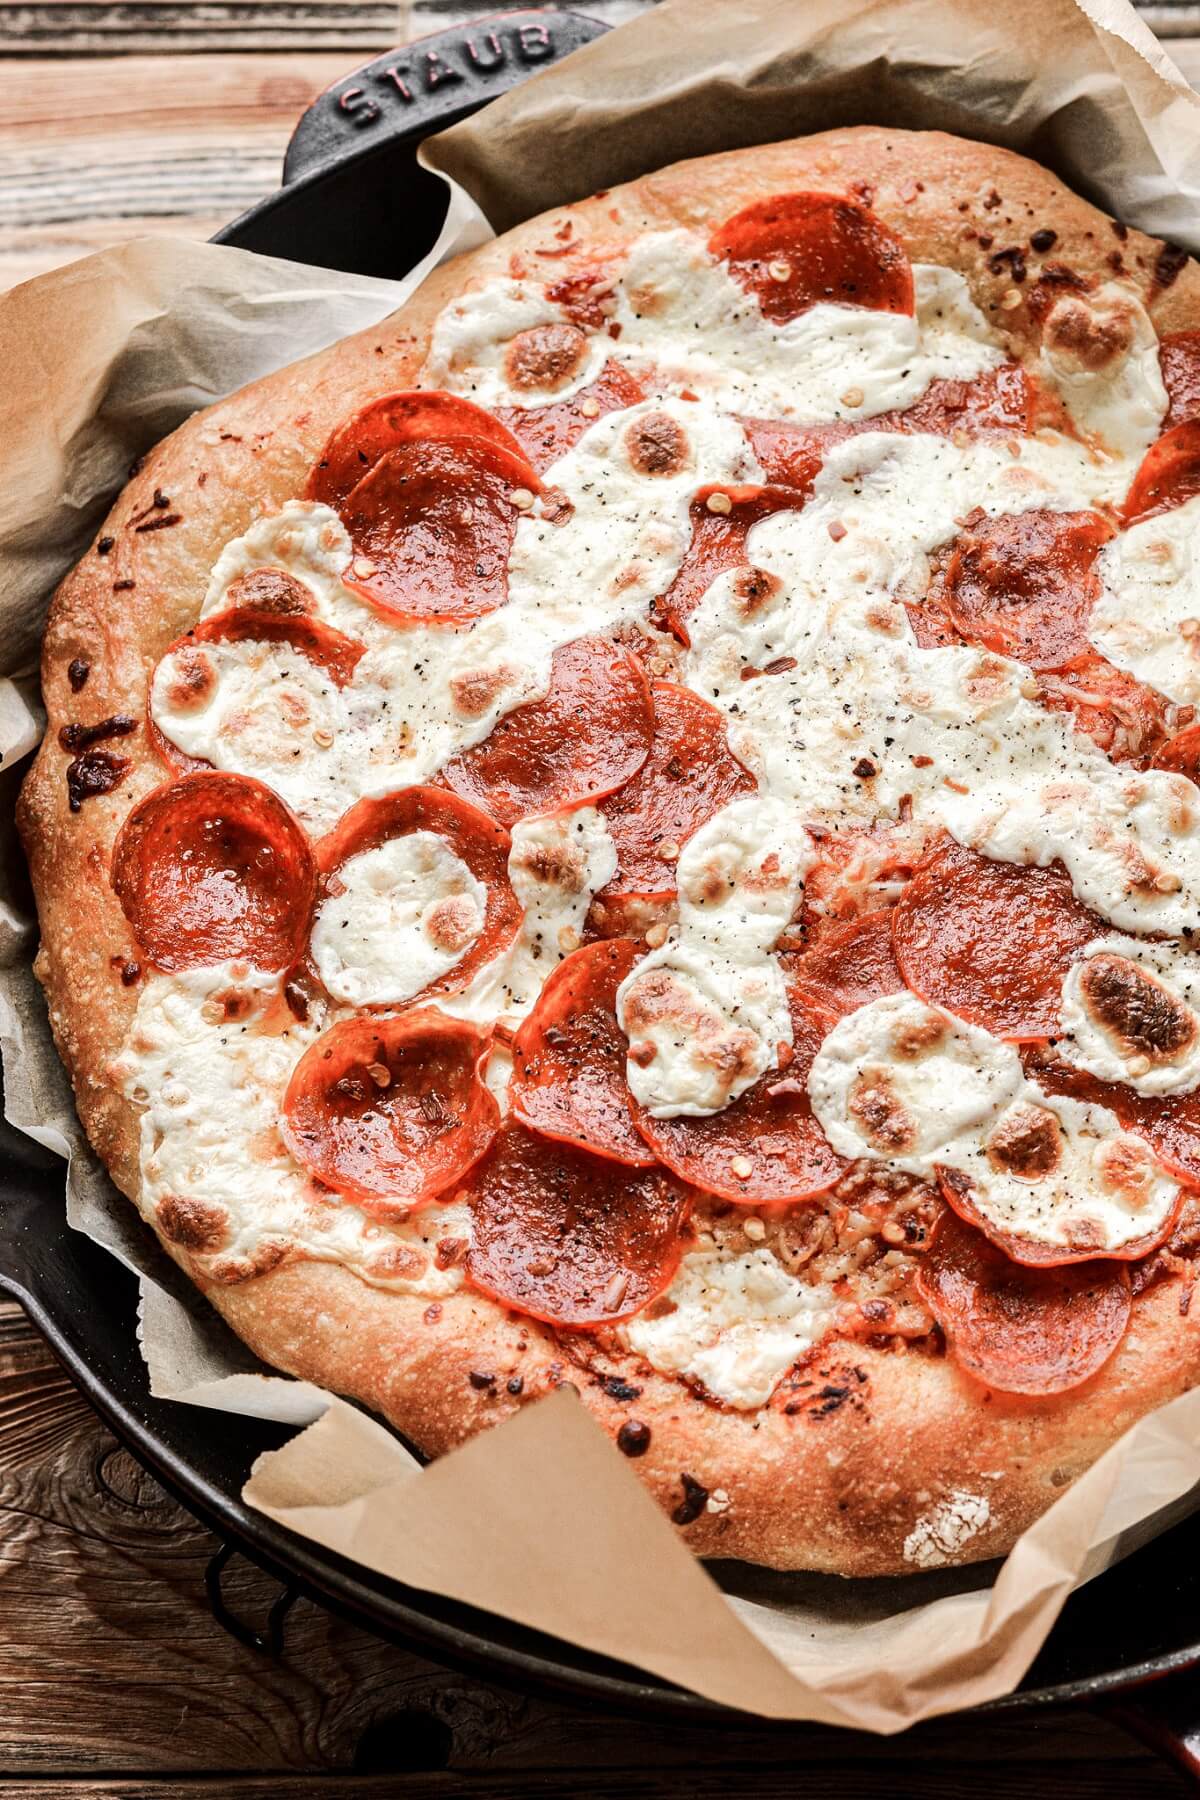
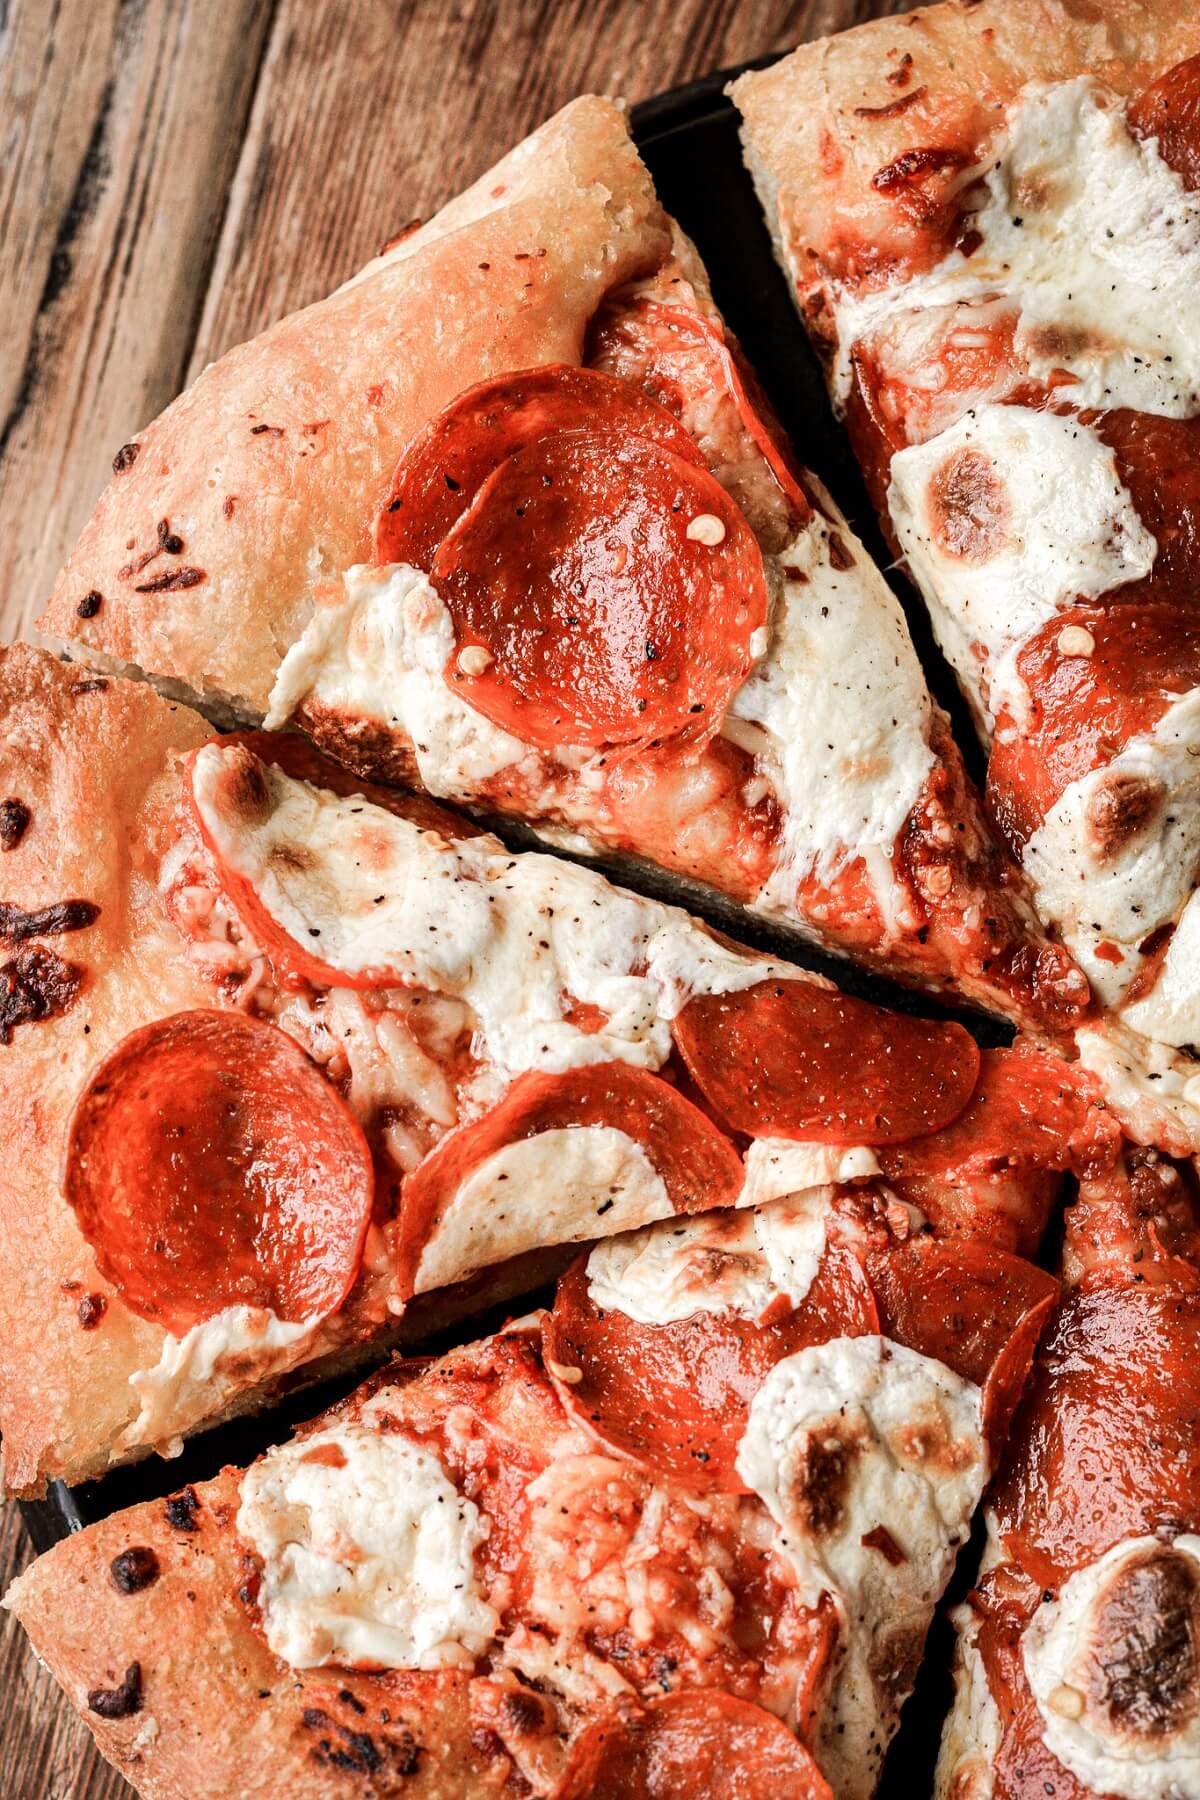
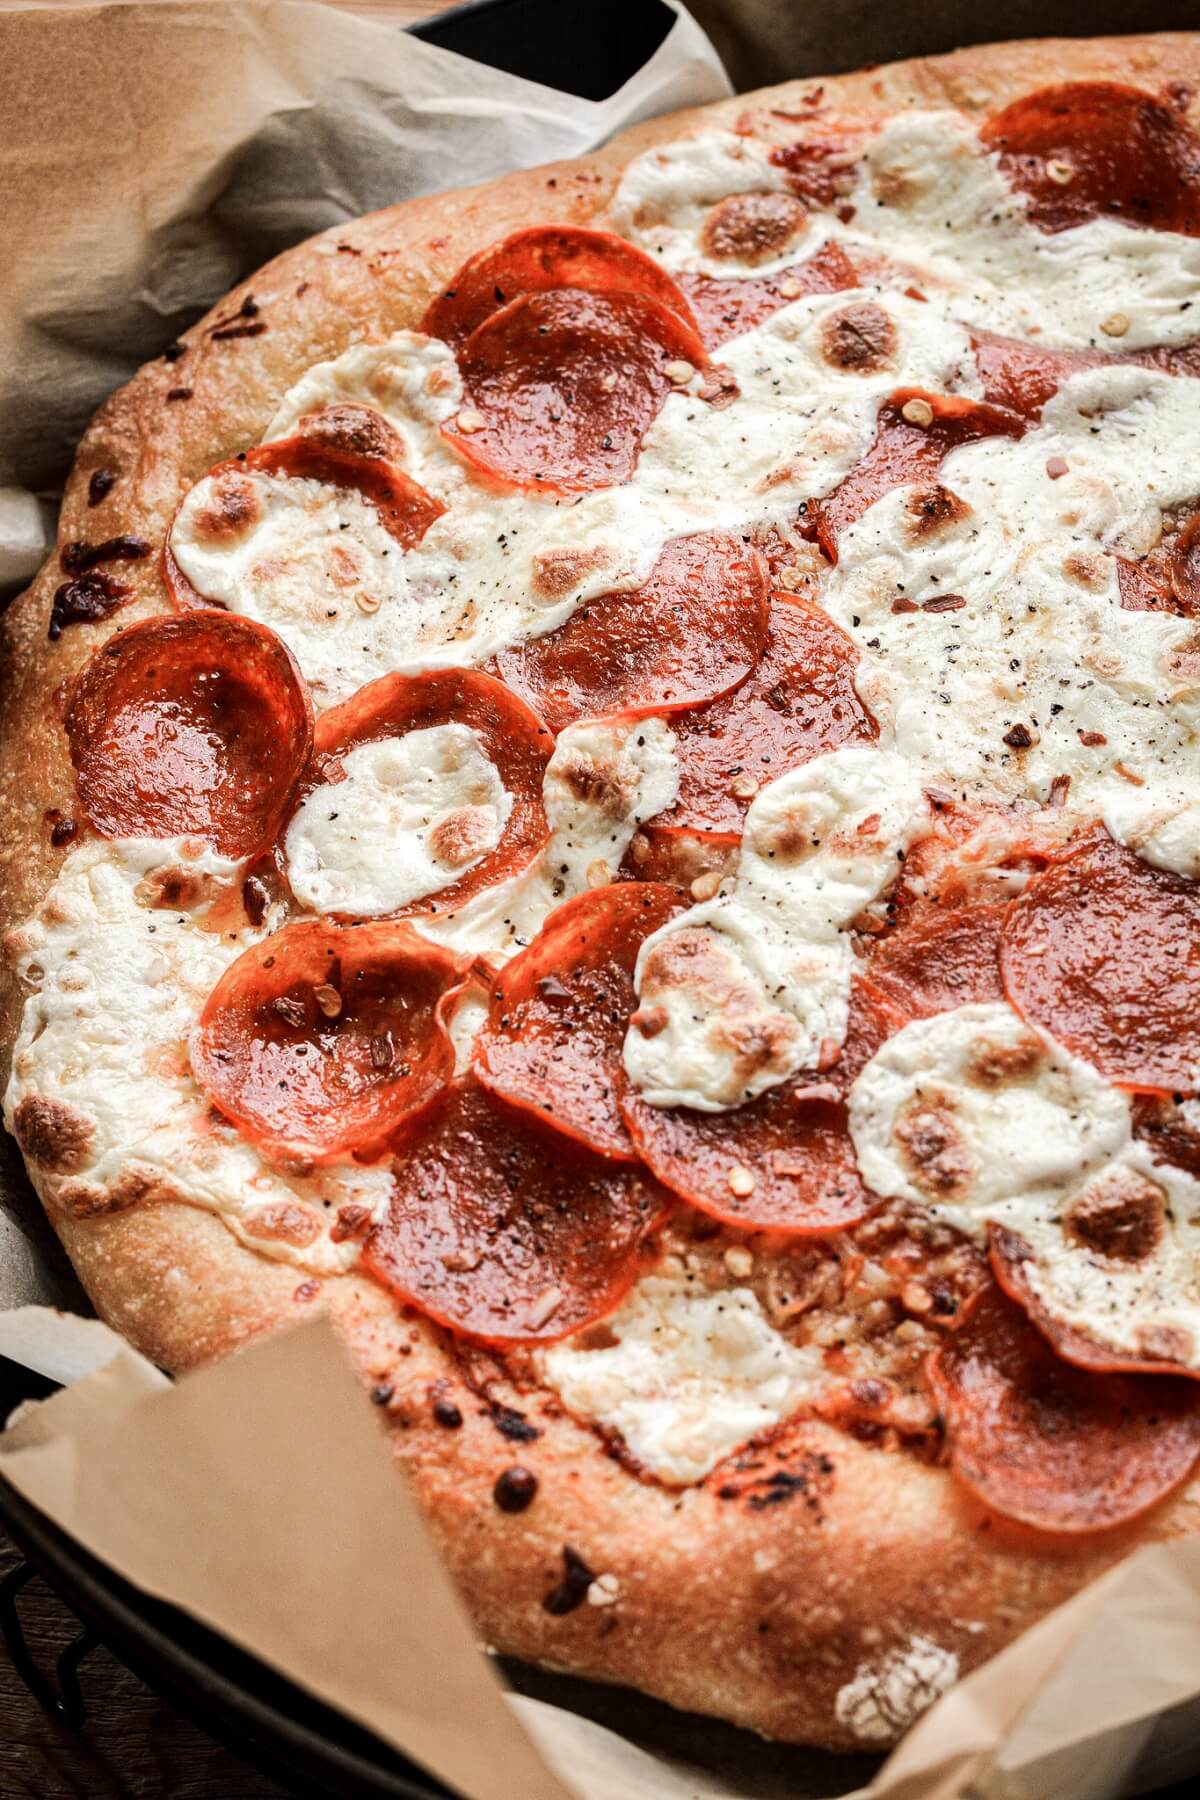
An easy, high altitude tested recipe for no knead cast iron pan pizza that bakes up thick, crispy, chewy and bubbly. Pizza nights will be so much tastier with this homemade pizza dough. And be sure to see the video in the recipe card for a helpful tutorial!
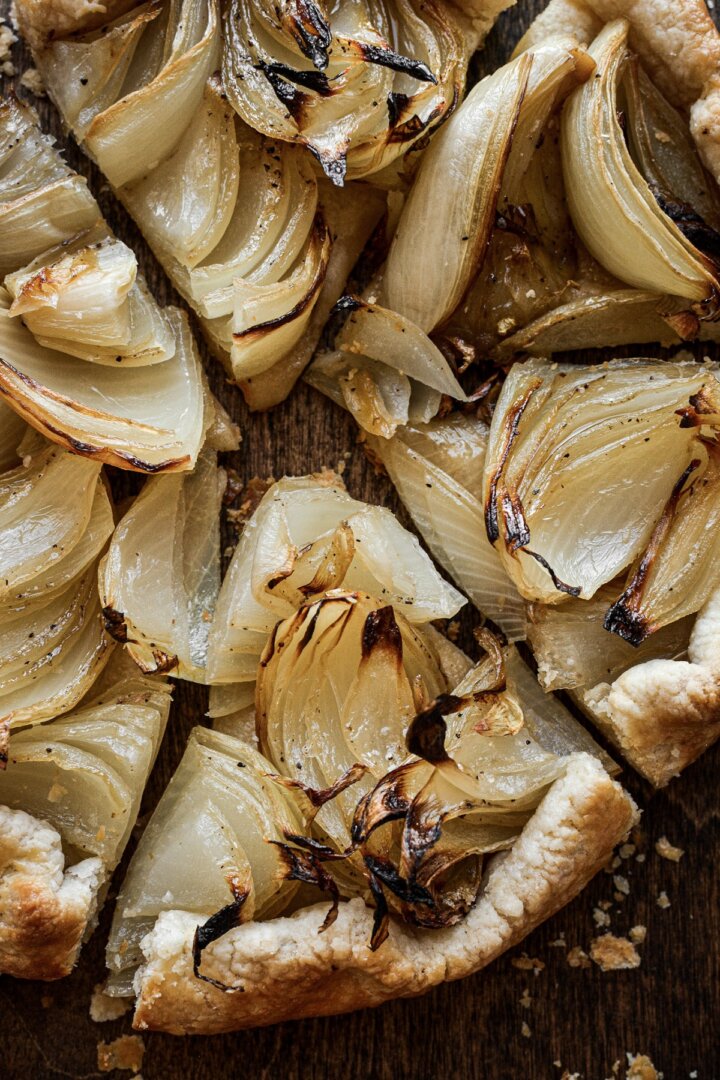
You might also love these recipes for heirloom tomato galette, caramelized onion galette, and cheesy garlic herb bread rolls.
This site contains affiliate links. As an Amazon associate, I earn from qualifying purchases. This means that I may make a small commission if you purchase a product using those links. This in no way affects my opinion of those products and services. All opinions expressed on this site are my own.
So What is Pan Pizza?
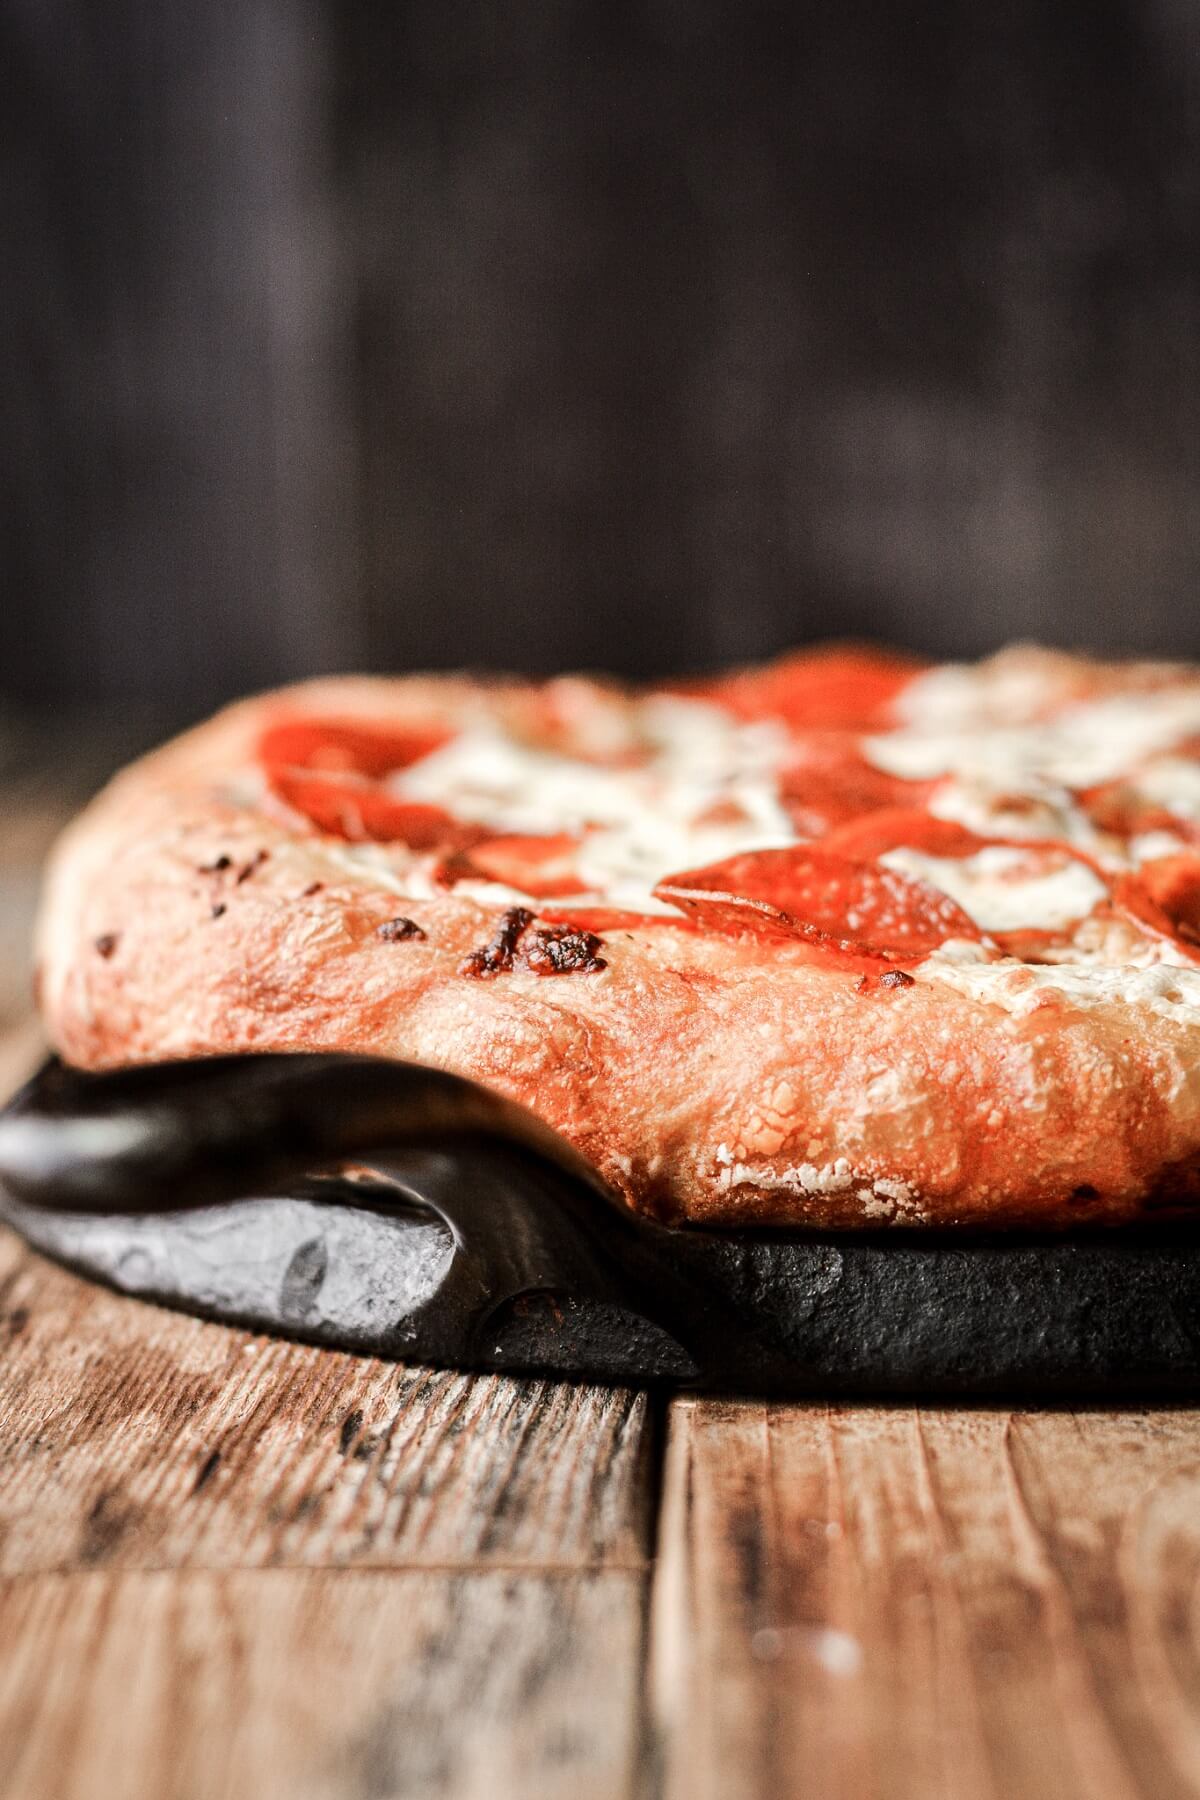
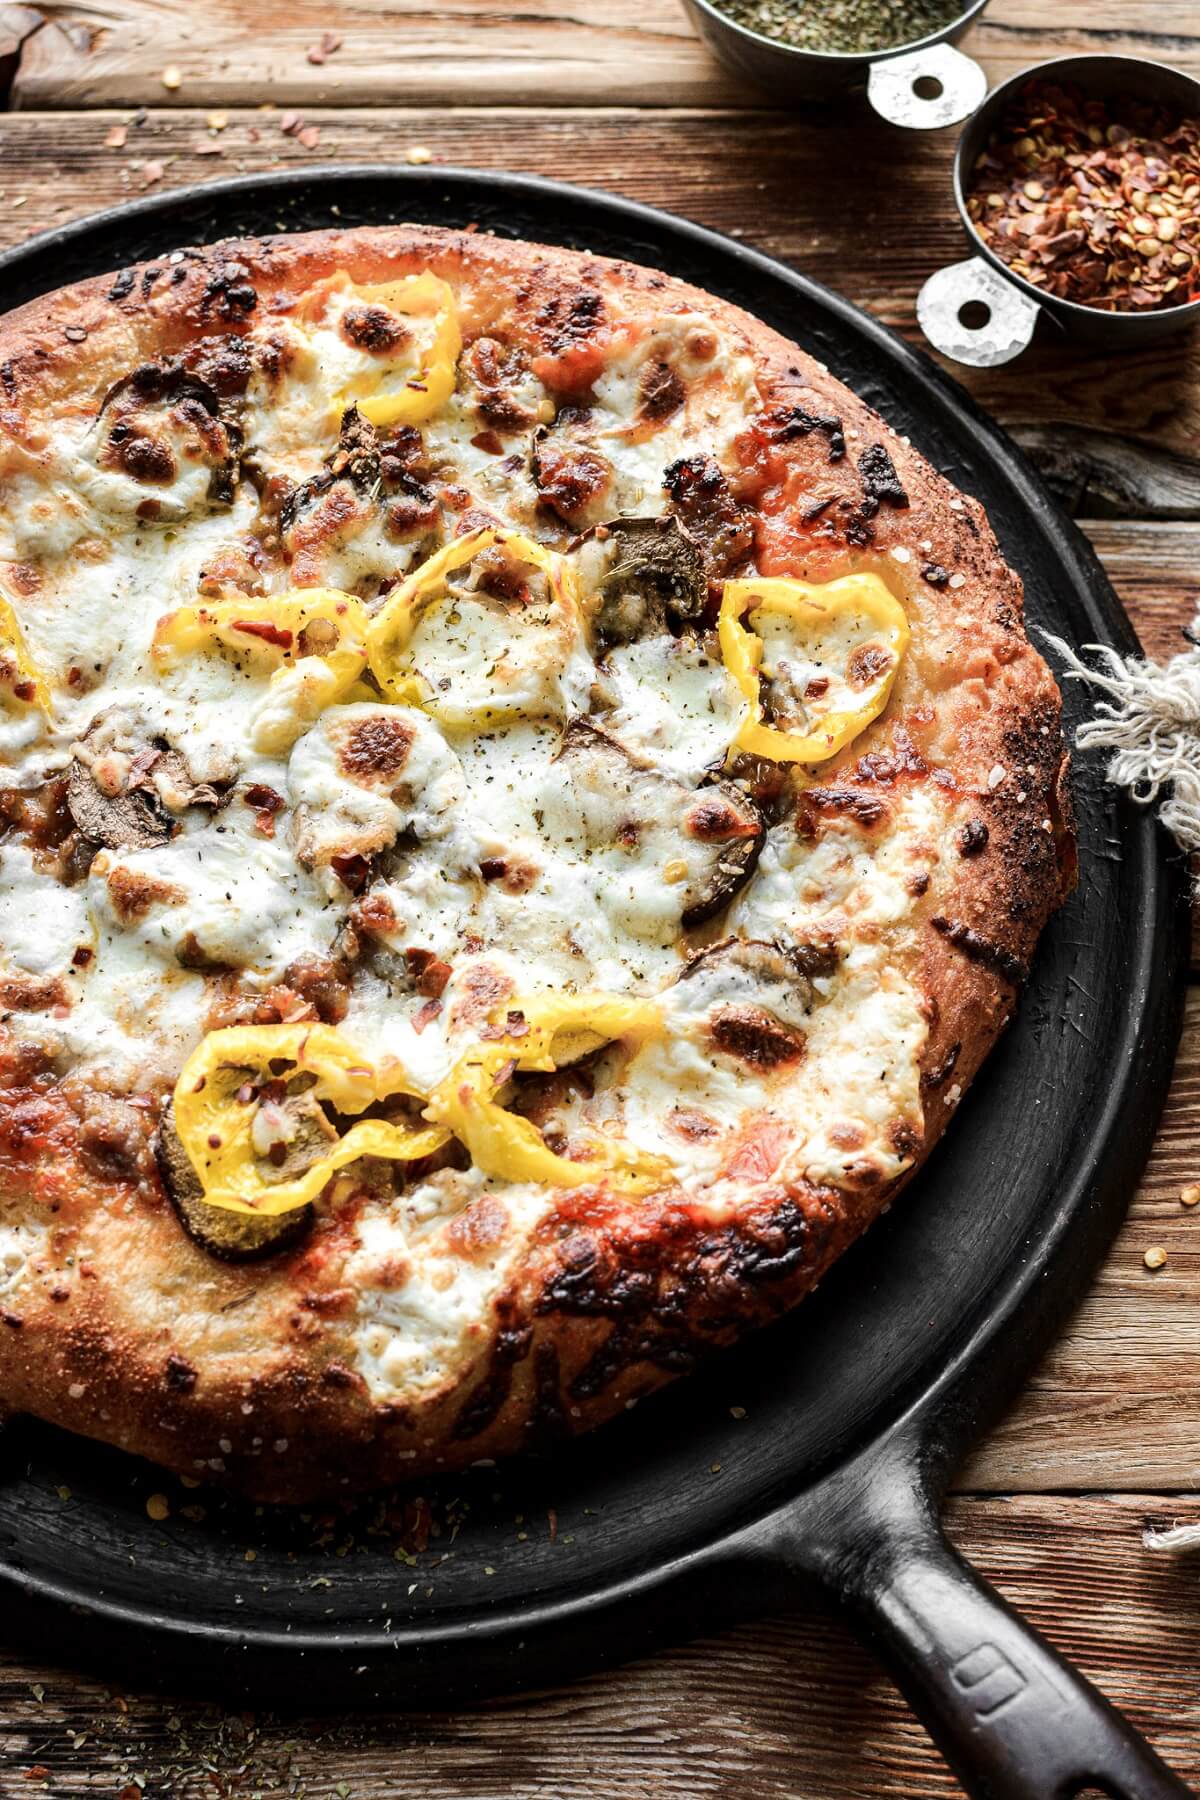
Pan pizza has a thicker, crispy, chewy crust, compared to a hand tossed pizza which tends to be thinner and less bubbly. Detroit style pizza and Chicago style pizza are both types of pan pizza. After the dough rests, it’s shaped, covered with sauce and toppings and baked on a hot cast iron pan, baking sheet or a pizza steel/stone. Today’s recipe for pan pizza dough results in a thicker, bubblier crust than my other pizza dough recipe, which I often roll out much thinner for a thin crust pizza.

Why You’ll Love This Recipe
No Knead Dough. The dough is ridiculously easy. Simply stir together the ingredients, then fold the dough a few times before letting it rest in the refrigerator. It requires some patience and planning ahead, since the dough is best left to rest for at least 24 hours and up to 3 days. But if you make your dough on a Wednesday or Thursday, you can forget about it, and it will be good to go for homemade pizza on Saturday night.
High Hydration Dough. You’ll also find that this dough is wetter (high hydration), for a slack, sticky texture, resulting in a crispy, airy pizza. Since it is so wet and sticky, you cannot gather it into a firm ball or handle it without it sticking to everything. This is why I assemble it on parchment paper, then transfer it with the paper to bake it on a pre-heated cast iron skillet.
Simple Ingredients. Five simple pantry ingredients (plus water) is all you need for no knead pizza dough!
Less Expensive than Delivery. It’s gotten so expensive for our family to go to restaurants or order pizza at home. But if you make the dough yourself and buy the toppings, you’ll spend a fraction of the amount that you would to have a pizza delivered.
High Altitude Tested. High altitude bakers can bake with confidence since I test all my recipes at Denver’s altitude of 5,280 feet. That said, this recipe will work at any altitude.
See the recipe card at the end of the post for the full ingredients list and instructions.
Tools and Equipment
- Cast Iron Skillet. For one large pizza, you’ll need a 10-12 inch cast iron skillet. But if you have a pizza stone or a pizza steel and you prefer using those, then those will work great, too. You can also just use a baking sheet. Whatever pan you use, you’ll need to preheat it in the oven for 30 minutes, before placing the pizza on the pan to bake.
- Parchment Paper. Today’s dough recipe is sticky and soft, so it’s difficult to transfer once it’s pressed out and covered with toppings. It’s for this reason that I build my pizza on parchment paper, then simply transfer the pizza with the paper to a hot cast iron pan to bake. I bake my pizza at 500 degrees Fahrenheit, and the paper does not catch on fire.
Ingredients
- Flour. Use bread flour, which is a high protein flour, and yields a chewier pizza crust. I like High Altitude Hungarian flour, which is essentially a bread flour. It’s available at many major grocery stores in Colorado and a few other mid-western states.
- Salt. The salt adds flavor, and without it, your pizza dough will be bland.
- Yeast. The yeast leavens the dough, making it bubbly and airy, but it adds flavor, too. As the dough rests for several days, it ferments, developing a stronger flavor.
- Sugar. Helps to feed the yeast.
- Water. Moistens the dough. Make sure your water is warm, between 110-115 F, to activate the yeast.
- Olive Oil. You’ll use this to coat the bowl and the dough, through the folding process, as well as for pressing the dough out onto parchment paper.
Instructions
Make the Dough
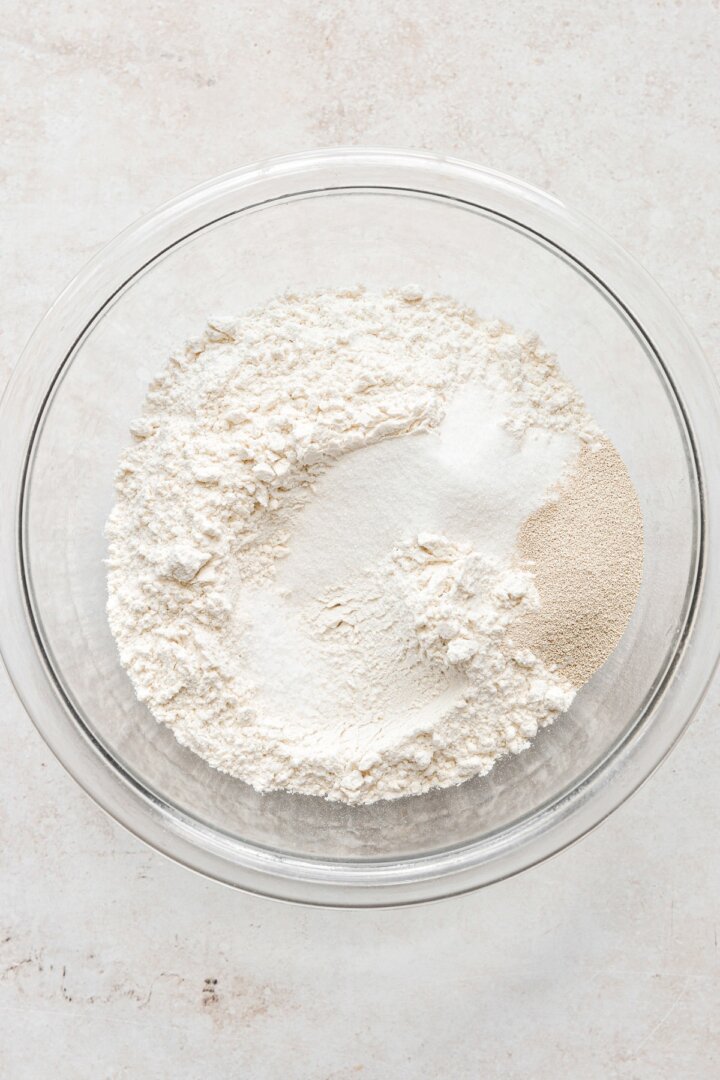
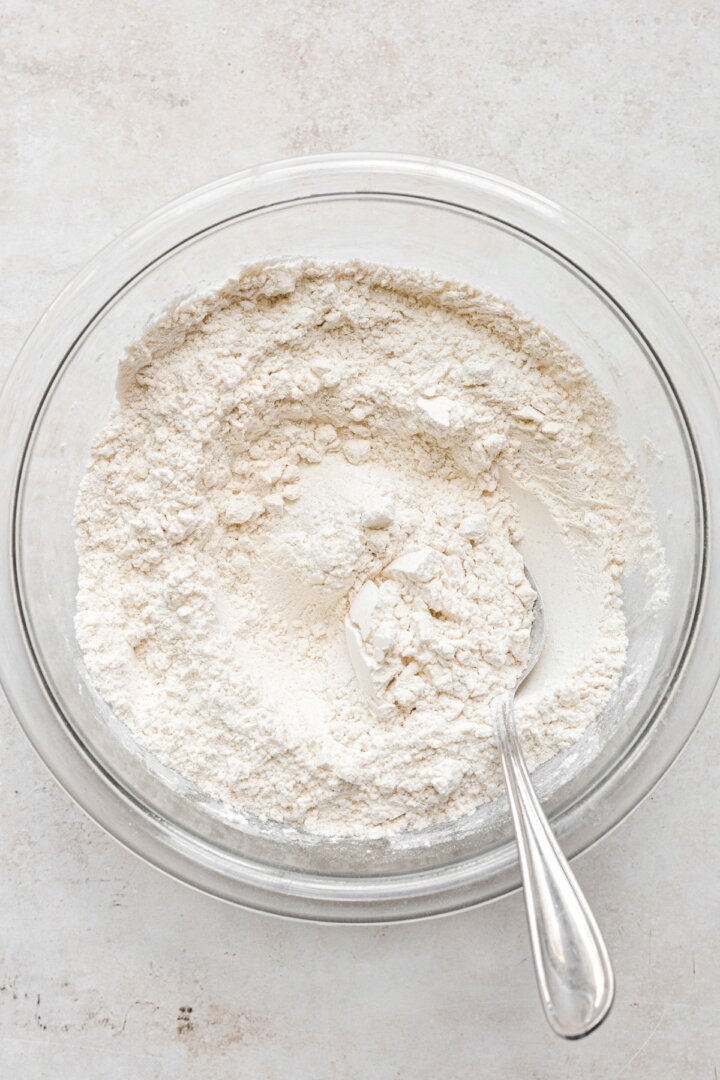
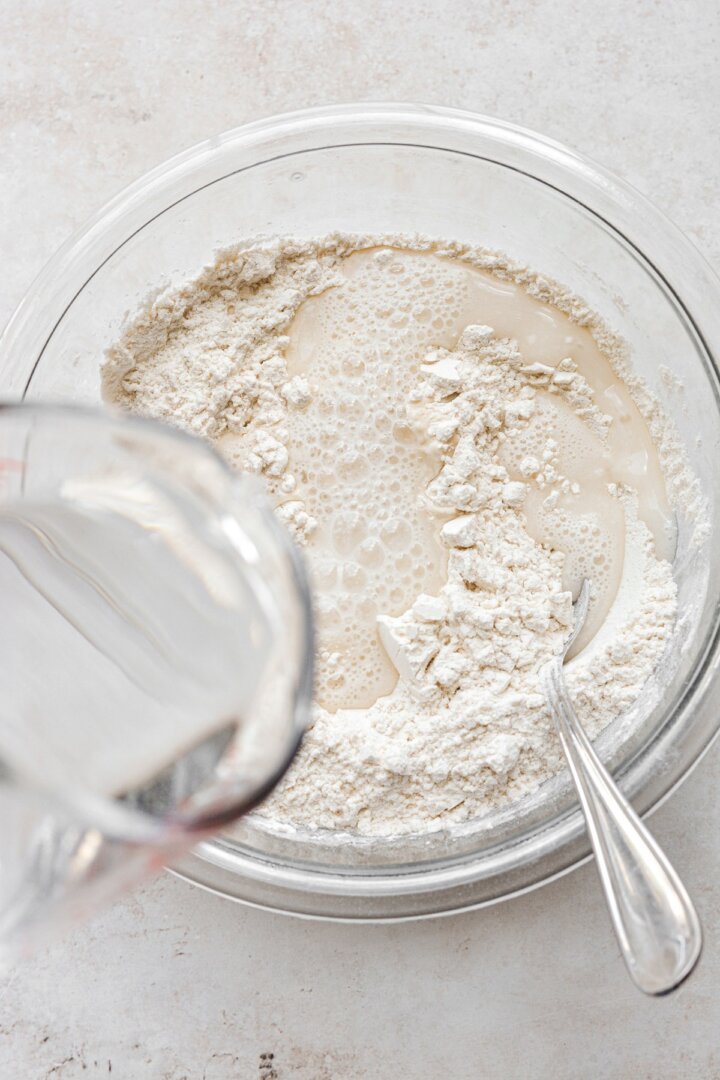
- In a bowl, combine the flour, salt, yeast and sugar. Stir in 1 cup of the water, adding the additional 2 tablespoons if the dough seems too stiff and dry. The dough should be loose, slack and sticky.

- Grease a large bowl with the olive oil, and scrape the dough into the bowl, turning it to coat it in the oil.
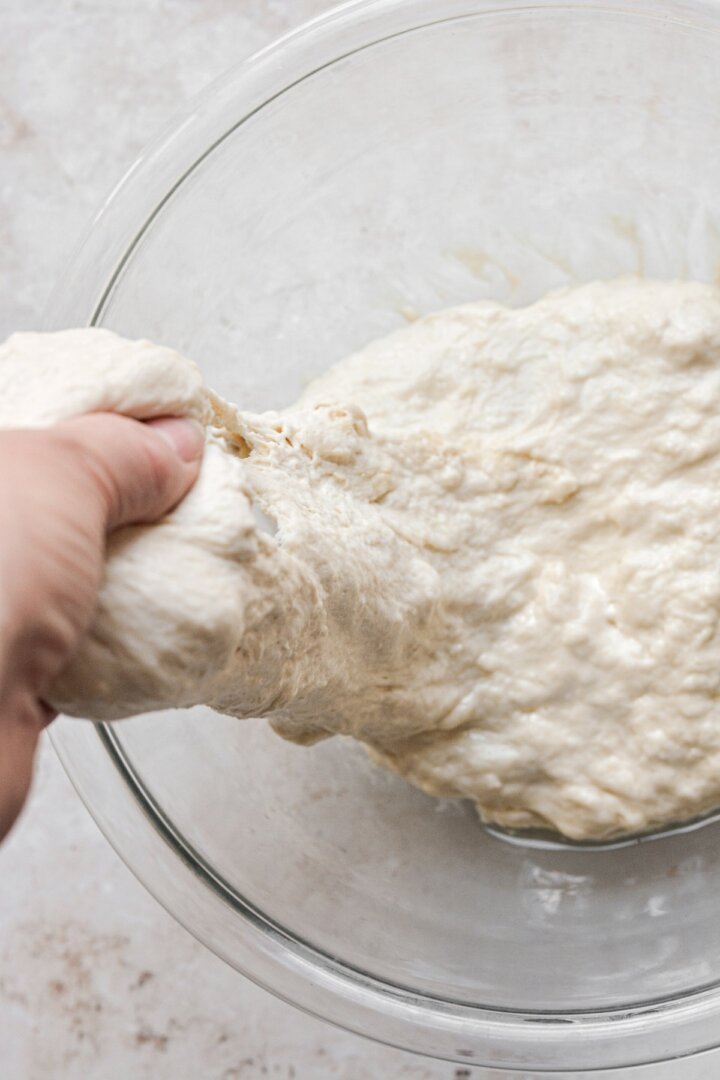
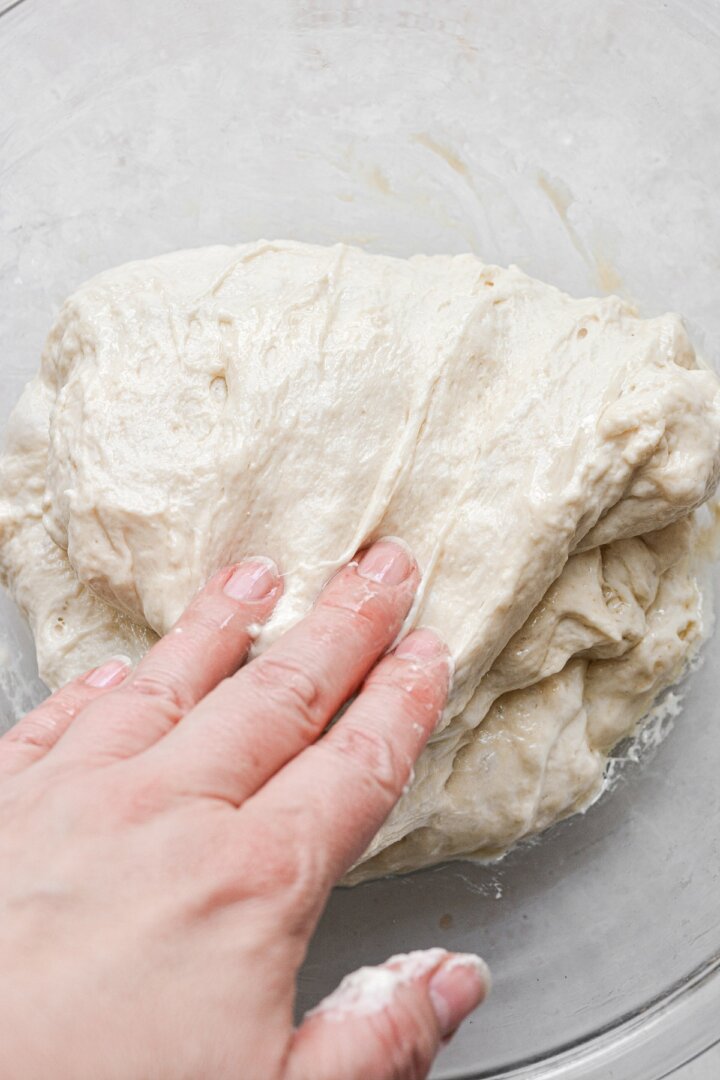
- Let the dough rest for 5 minutes. Now “fold” the dough, by grabbing onto one edge of it and folding it over itself. Do this 3-4 times, rotating the bowl clockwise so you fold each edge of the dough over itself.
- Let the dough rest for another 5 minutes, then repeat the above step of folding the dough. Repeat these steps 2 more times, so that you fold the dough a total of 4 times, resting it for 5 minutes in between each fold.
Rest the Dough
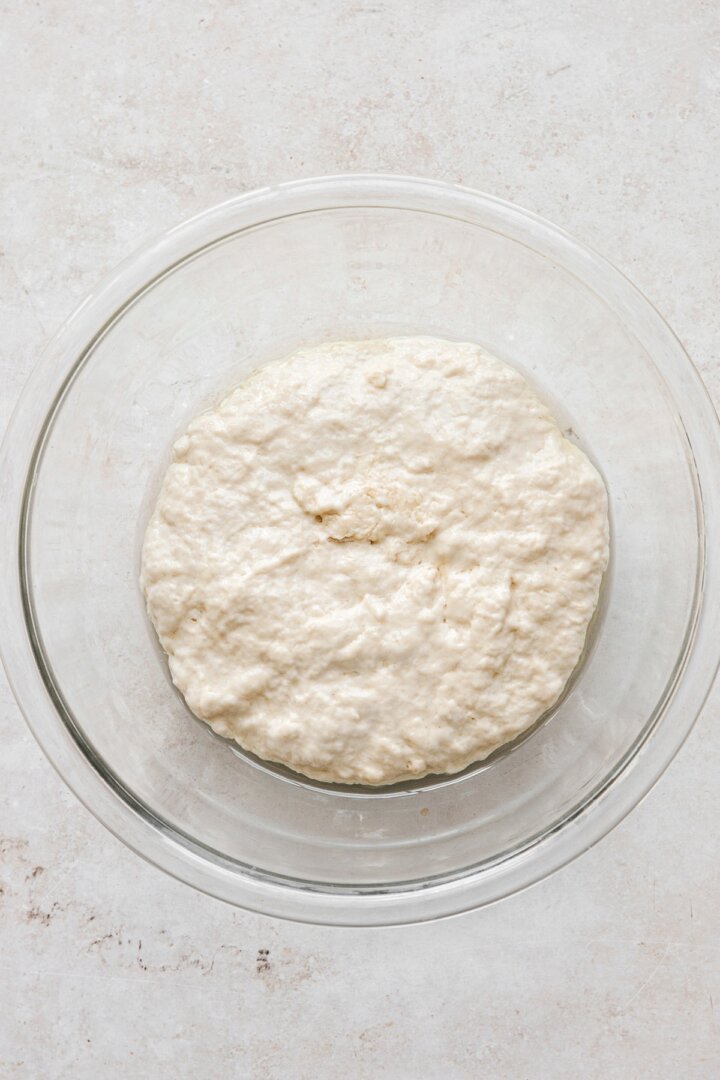
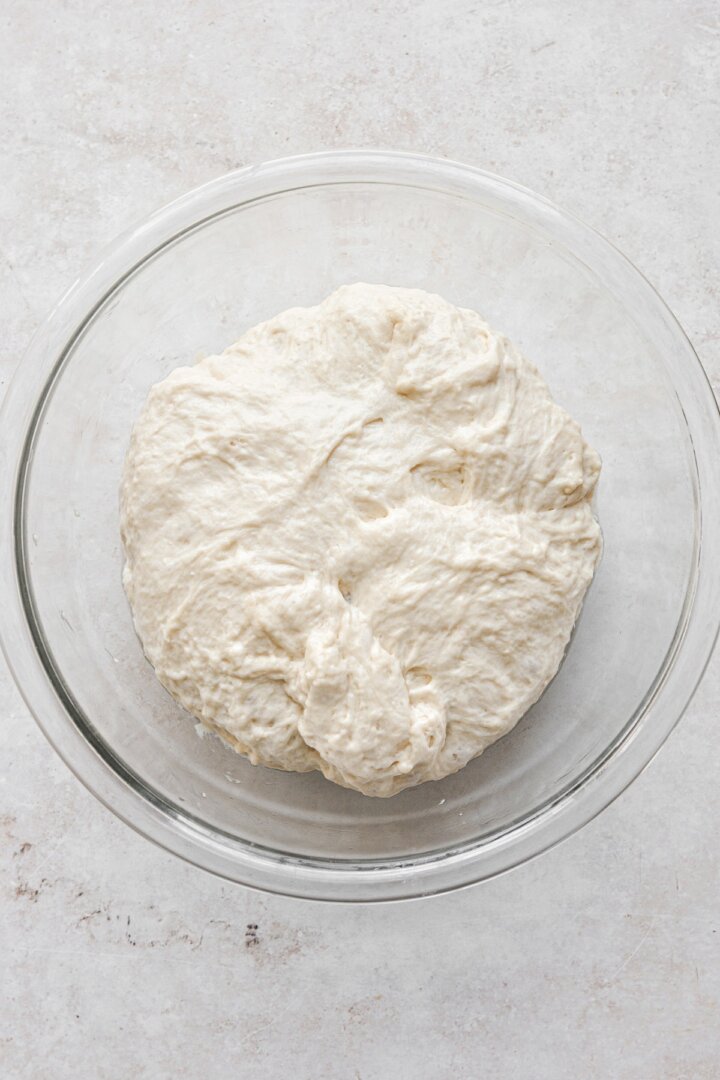
- Cover the bowl tightly with plastic wrap, and place it in the refrigerator to rest. Let it rest for at least 18-24 hours. For more flavor, let it rest and chill for up to 3 days.
- As the dough rests, it will rise and bubble up a bit more, and will develop a stronger, more fermented aroma.

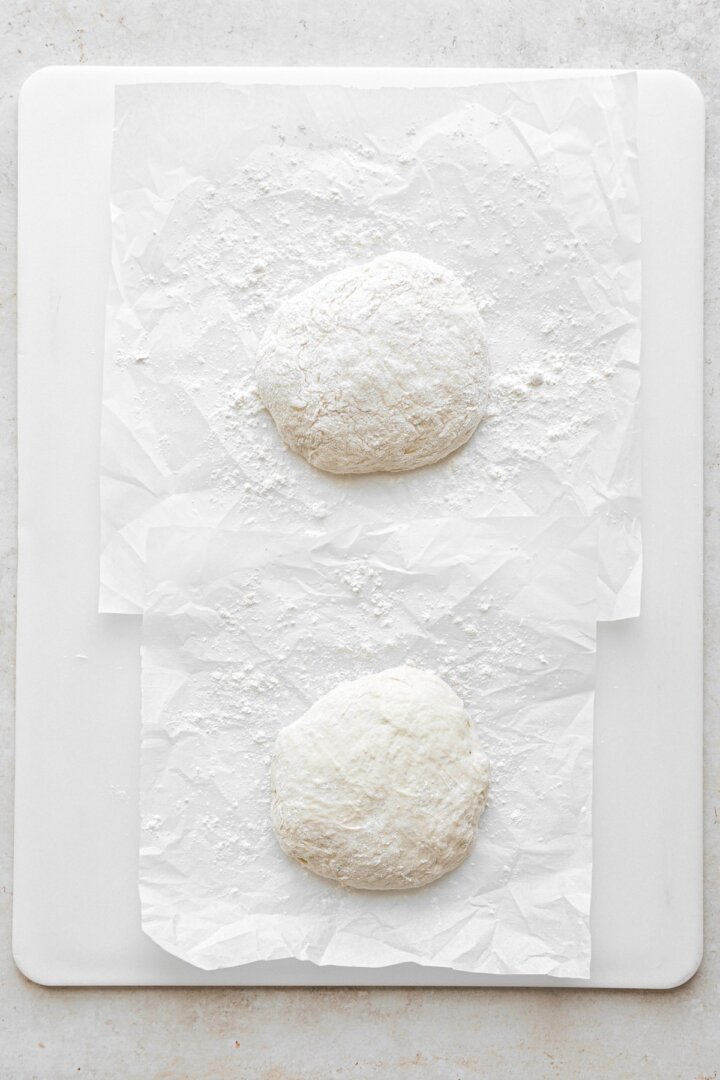
Baker’s Note: The dough makes enough for a large pizza, but you can also divide the dough for two medium pizzas or three small personal pan pizzas. Each portion of dough needs to sit on its own piece of parchment paper if you’re baking them on separate pans.
Shape the Pizza
- About 3-4 hours before you want to bake your pizza, take the dough out of the refrigerator.
- Place a piece of parchment paper on a cutting board, and drizzle the paper with 1 tablespoon olive oil.
- Use a spatula to scrape the dough out of the bowl and onto the paper. As you scrape down the bowl, the dough will deflate. The dough will be very soft and sticky.
- Turn the dough to coat it in the oil. Let rest at room temperature for 1 hour.
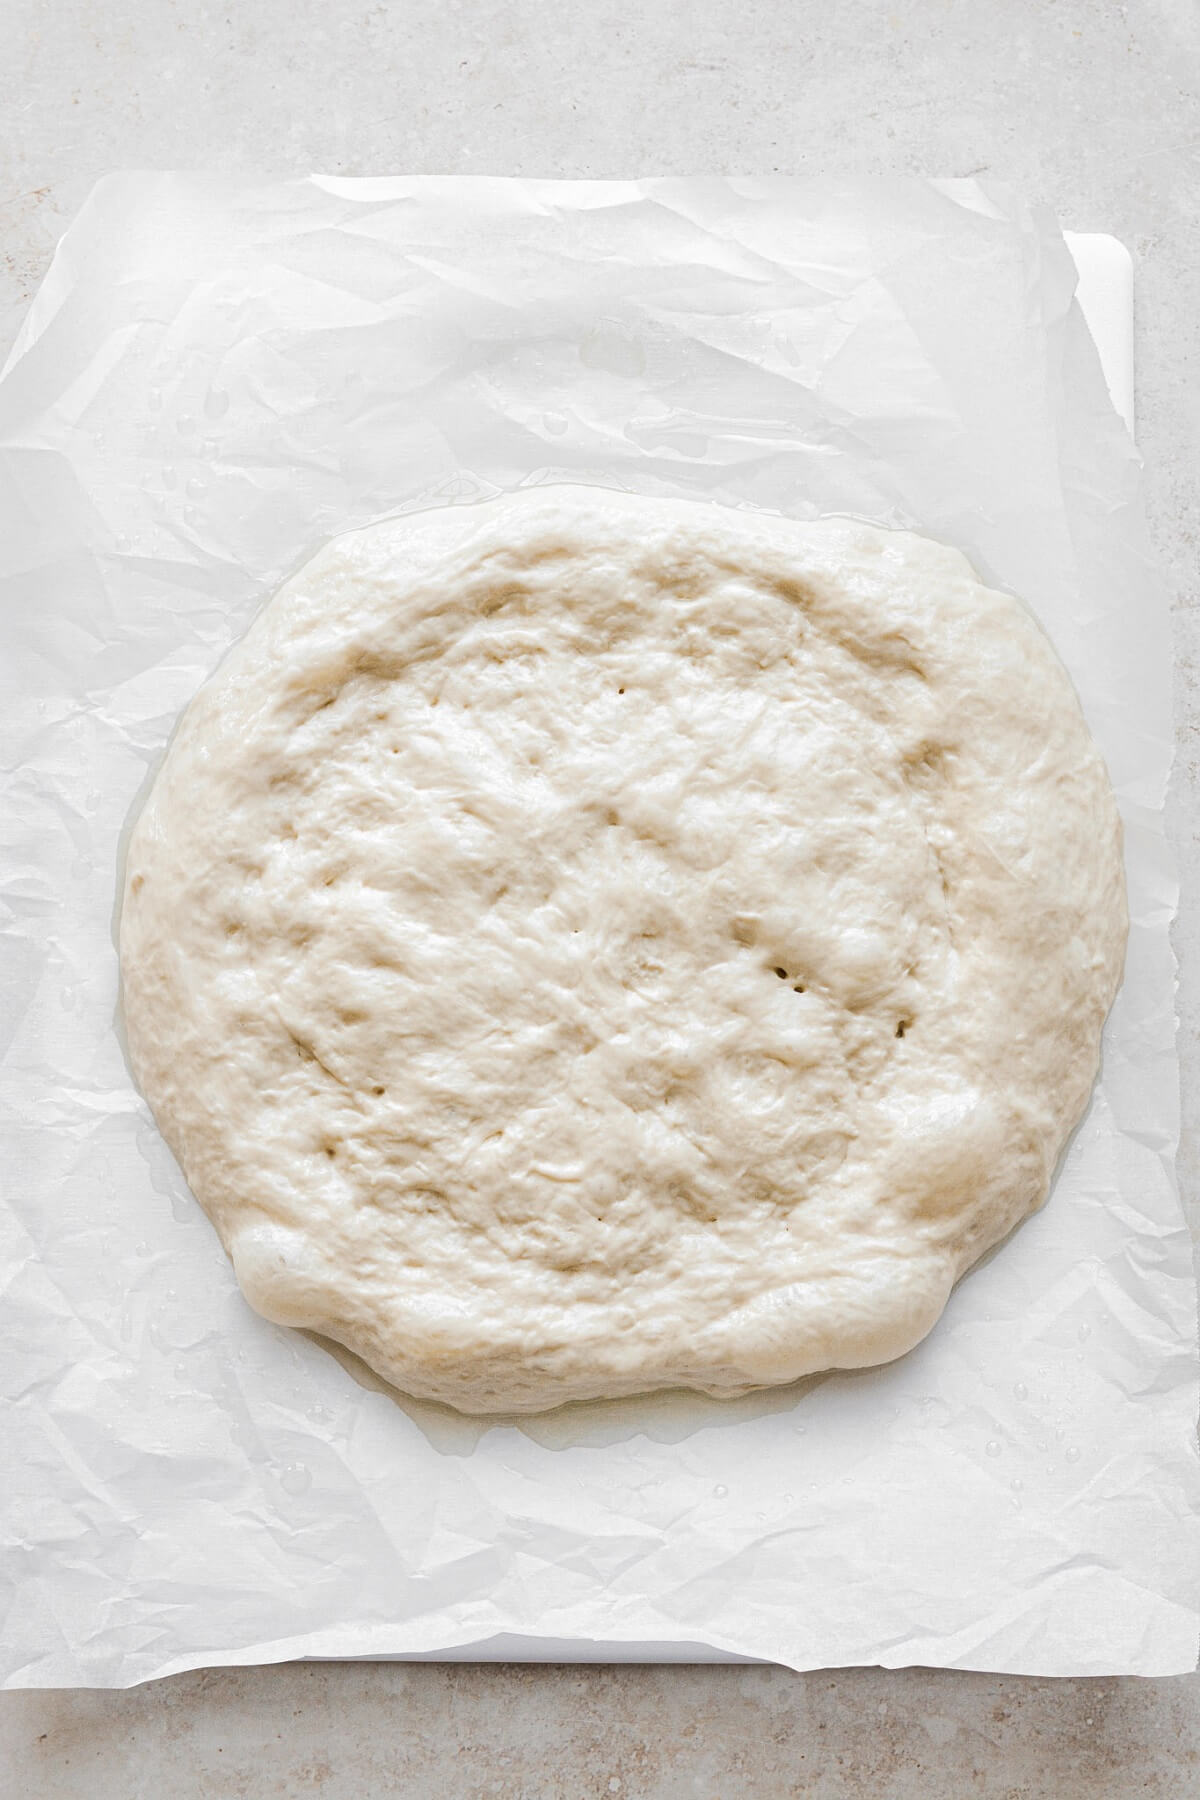
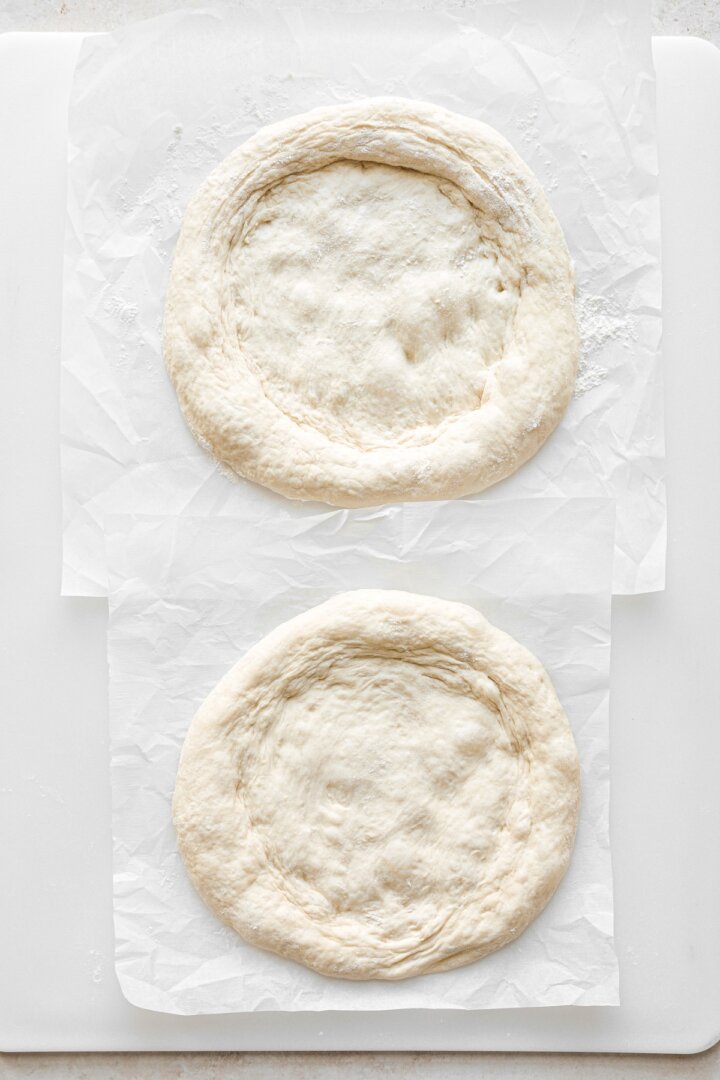
- After letting the dough rest, use your fingers to press it out into a circle, taking care not to press down on the edge of the dough. Press from the center of the dough to push it towards the edges. You may need to let the dough rest again for several minutes to let the gluten relax, then press it again, until it’s the size that you want. The dough will stick to the paper as you press it out. (For a large pizza, press the dough out into a 12-inch circle. For two medium pizzas, press the dough to about 8-10 inches. For three small pizzas, press the dough to about 6-8 inches.)
- Let rest until 30 minutes before you’re ready to bake your pizza.
Heat the Pan
- 30 minutes before you plan to bake your pizza, position a rack in the lower third of your oven. Place your baking pan (cast iron pan, pizza stone/steel or baking sheet) on the rack to preheat. Preheat the oven to 500 F, and let the pan heat for 30 minutes.
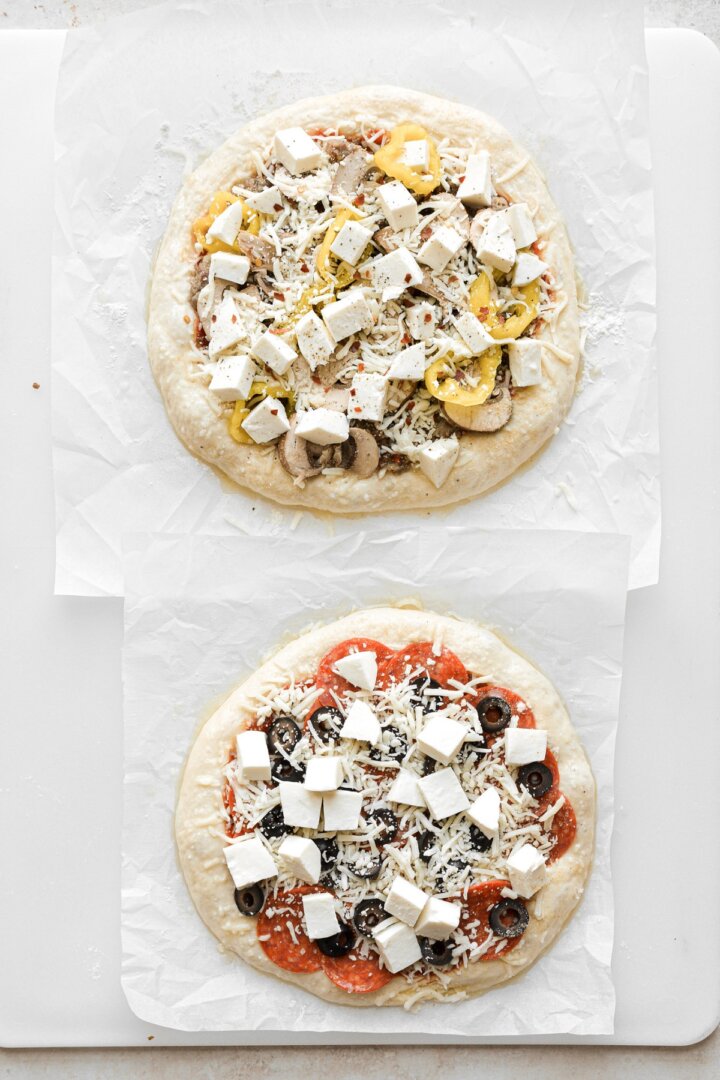
- Meanwhile, you can assemble your pizza with sauce, cheese and toppings. Be sure to use a thick pizza sauce, not a watery marinara sauce, which can make the crust soft and soggy.
Bake the Pizza
- Using oven mitts, carefully remove the pan from the oven. Transfer your pizza to the hot pan by sliding the paper off the cutting board and onto the pan. The pizza will bake with the paper underneath it, making it easy to move it to the pan.
- Return the pan to the oven (to the rack in the lower third), and bake your pizza for about 15-18 minutes, until the crust is crisp and golden brown, and the toppings are bubbling. Don’t take your pizza out earlier than 15 minutes, or it may not be cooked in the middle.
- Let the pizza cool on the pan for several minutes. If you like, brush the edges of the crust with a little melted butter and sprinkle with garlic salt.
- Lift the paper, and slide the pizza off onto a cutting board or serving board. The baked pizza will slide right off the paper. Cool for several minutes, then cut into servings.
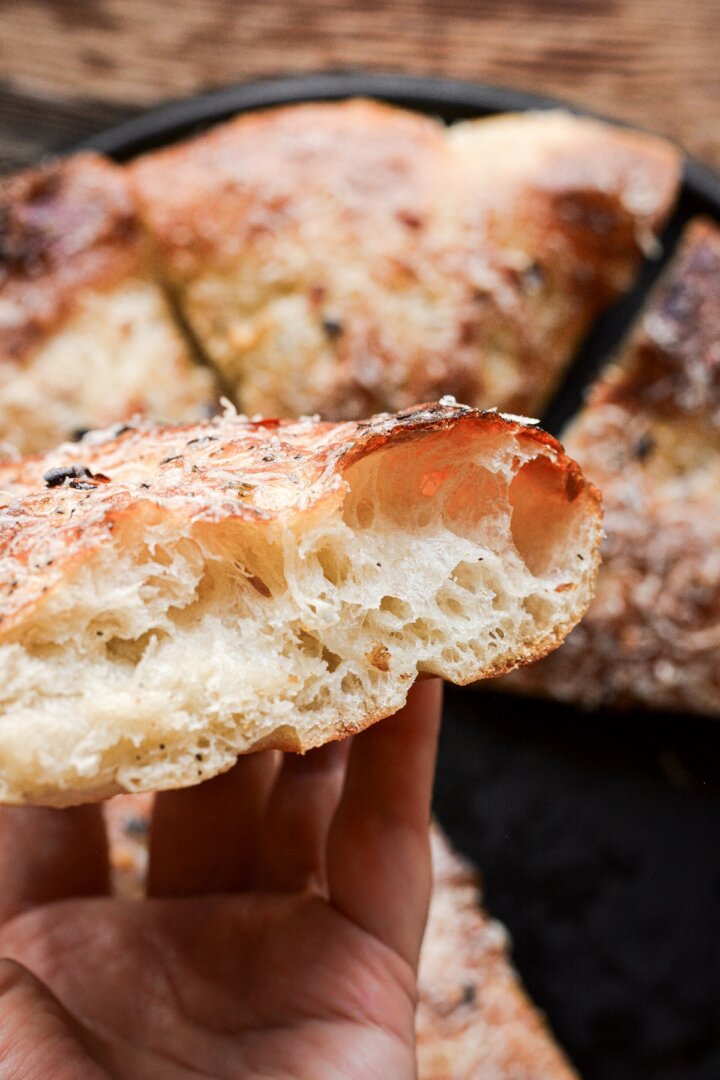
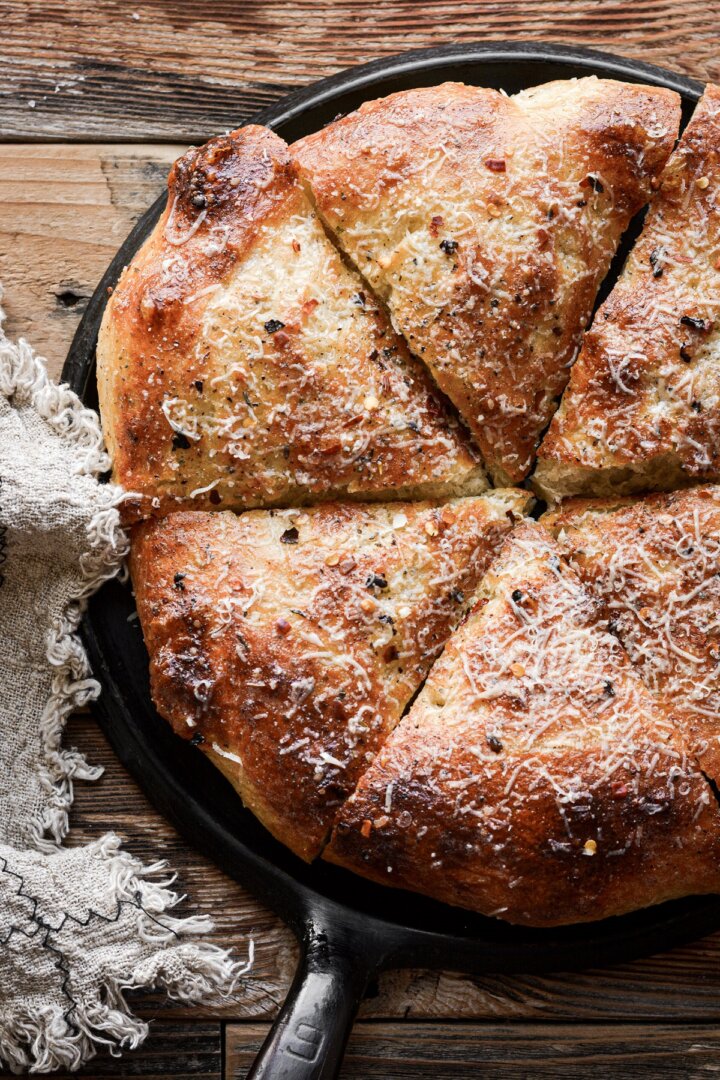
Recipe Variation: Naked Pizza or Garlic Bread
This pizza dough recipe is also fantastic baked as a naked pizza. Without toppings, it’s very light, puffy and airy, and it tastes like the most delicious crispy, chewy garlic bread.
- Press the dough out on oiled parchment paper, as instructed. Before baking, sprinkle the dough with a little coarse salt, black pepper, dried Italian seasoning and garlic powder.
- Bake as instructed.
- While the pizza is hot from the oven, brush it all over with 1 tablespoon melted butter. Sprinkle with a little more salt, crushed red pepper, and freshly grated Parmesan cheese.
- Enjoy the bread plain, or serve it with warm pizza sauce for dipping.

Be sure to read all of my BAKING FAQs where I discuss ingredients, substitutions and common baking questions, so that you can be successful in your own baking!
Frequently Asked Questions
Can this pizza dough be frozen?
Yes, you can freeze your pizza dough. Prepare the dough, and let it rest in the refrigerator as instructed. Then dust with flour and wrap in several layers of plastic wrap. Immediately place it in the freezer, and freeze for up to 3-6 months.
What’s the best way to reheat leftover pizza?
To reheat your pizza and crisp up the crust again, set slices on a baking sheet and reheat in the oven at 300 F for about 7-10 minutes.
Do you have a pizza sauce recipe?
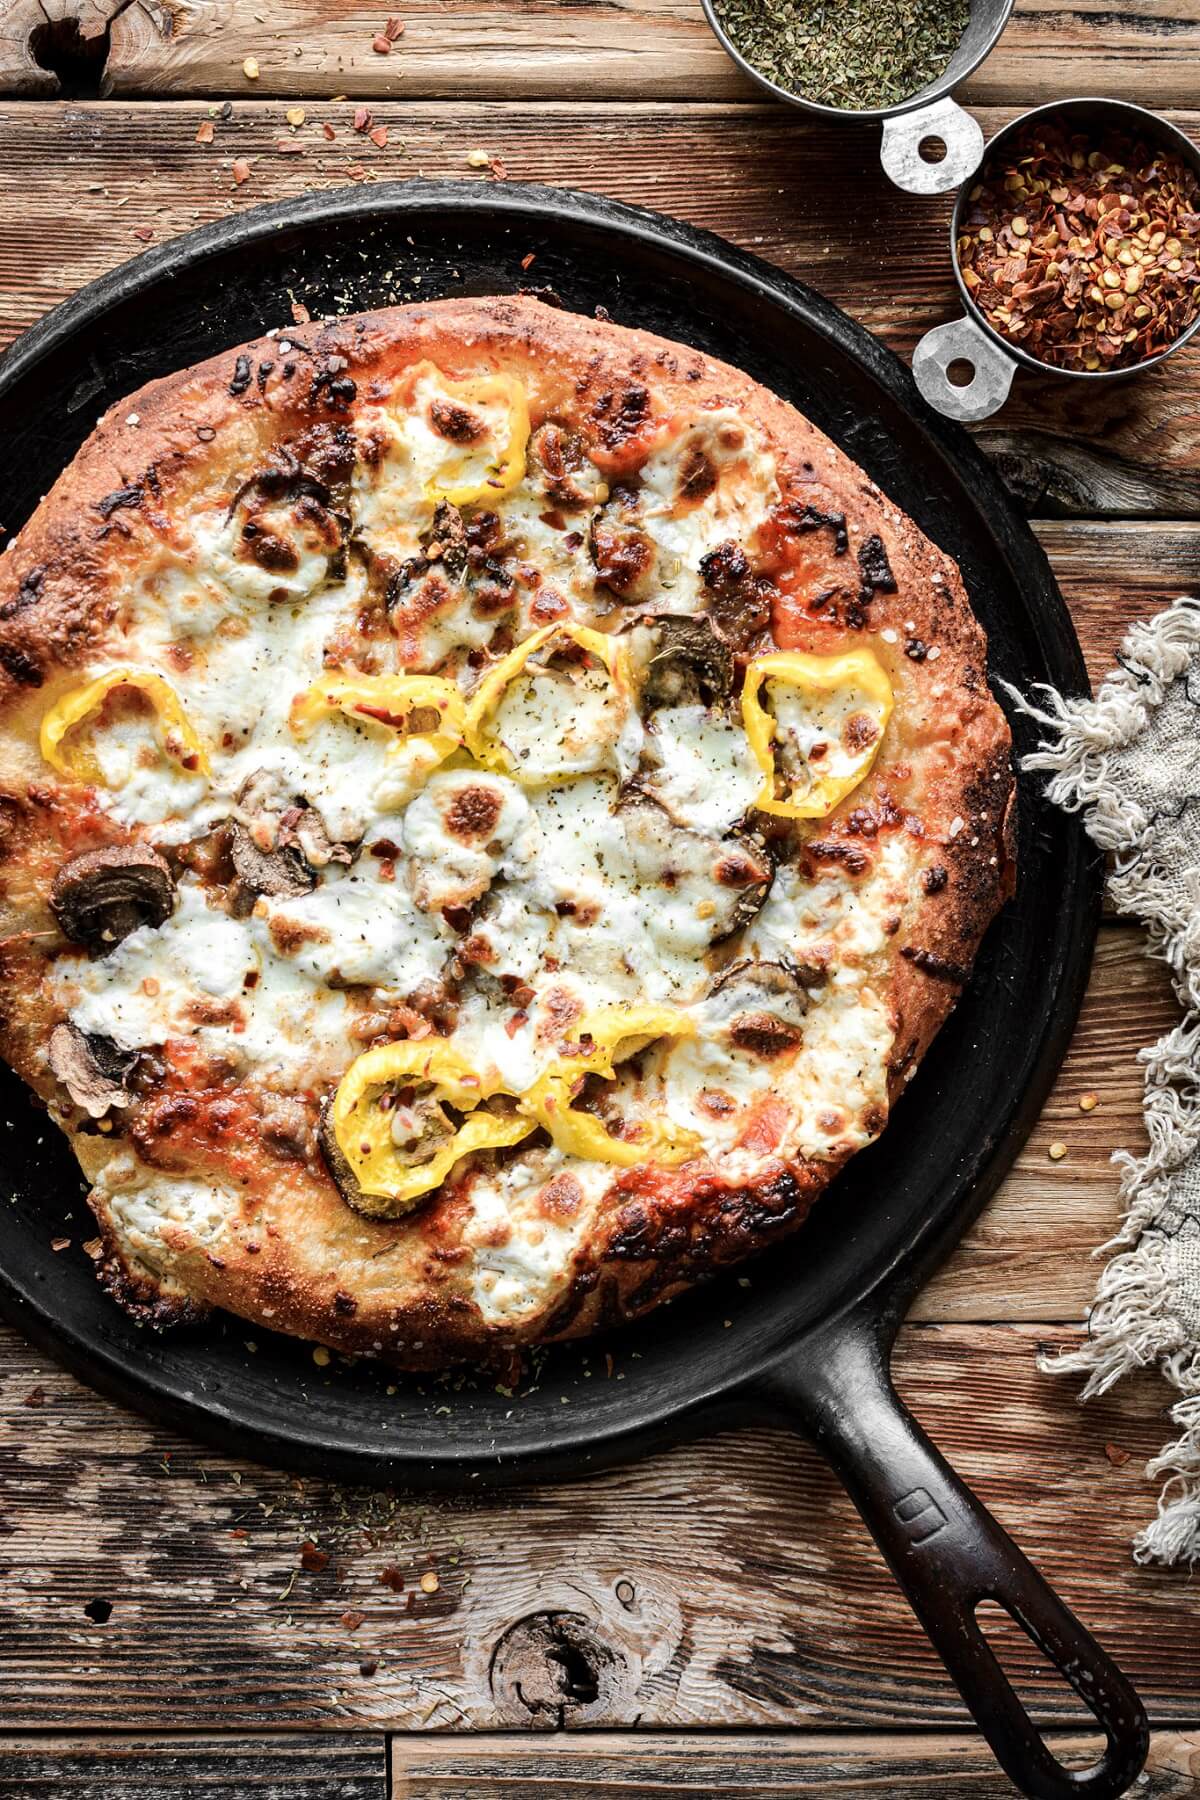
My favorite pizza sauce is thick, flavorful, and very quick and easy to make. I used it on the pizzas shown in today’s post, and you can find the recipe in the notes section of the recipe card below. You don’t want to use jarred marinara sauce, which is more watery than pizza sauce, and can make your crust soggy and under-cooked. Along with this, some toppings (such as mushrooms) can release moisture on your pizza, also making the crust soggy. If you’re using toppings that have a high water content, I’d suggest pre-cooking them a little to release some of the moisture first, before placing them on your pizza.
Why does the pan need to be preheated first?
If you’re using a pizza stone, the stone must be placed into a cold oven, then slowly brought up to temperature as the oven preheats. If you place a cold stone into a hot oven, it can crack and will be ruined.
Since I used a cast iron pan, having the pan crack isn’t a concern. However, preheating the pan is necessary to get a super crispy crust on the pizza. By placing the pizza onto a really hot pan, then placing it in the oven, the bottom of the crust begins to cook instantly against the pan, developing a crispy exterior while the inside will be airy and chewy.
Why does the oven rack need to be in the lower third of the oven?
You want the bottom of the crust to be closer to the heating element, so that it can cook through before your toppings get too dark. If you bake your pizza in the middle or near the top of the oven, your toppings can burn while your crust will still be raw and doughy inside.
You Might Also Like

Please check out my Amazon Shop for a curated collection of some of my favorite cake pans from trusted brands, baking tools, ingredients, pretty things and fashion finds. I recommend products that I buy and use every day!
Did you love today’s recipe? Please rate the recipe and let me know in the comments what you thought! Also, be sure to follow Curly Girl Kitchen on Instagram, and tag me when you try one of my recipes so I can see all your delicious creations!

High Altitude Homemade Crispy Pan Pizza
All recipes on Curly Girl Kitchen are developed for high altitude at 5,280 feet. See FAQs for adjusting to higher or lower elevations.

Equipment
- 10-12 Inch Cast Iron Skillet or Pizza Stone (or baking sheet)
Ingredients
- 2 cups (280 g) bread flour (fluffed, spooned and leveled)
- ¾ tsp coarse Kosher salt (if using table salt, use half the amount)
- 1 packet (2 1/4 tsp) yeast (either instant/rapid-rise or active dry)
- 1 tbsp granulated sugar
- 1 cup + 2 tbsp (270 ml) warm water (between 110-115 degrees Fahrenheit)
- 1 tbsp olive oil
Instructions
Make the Dough
- In a bowl, combine the flour, salt, yeast and sugar. Stir in 1 cup (250 ml) of the water, adding the additional 2 tablespoons if the dough seems too stiff and dry. The dough should be loose, slack and sticky.
- Grease a large bowl with the olive oil, and scrape the dough into the bowl, turning it to coat it in the oil.
- Let the dough rest for 5 minutes. Now "fold" the dough, by grabbing onto one edge of it and folding it over itself. Do this 3-4 times, rotating the bowl clockwise so you fold each edge of the dough over itself.
- Let the dough rest for another 5 minutes, then repeat the above step of folding the dough. Repeat these steps 2 more times, so that you fold the dough a total of 4 times, resting it for 5 minutes in between each fold.
Rest the Dough
- Cover the bowl tightly with plastic wrap, and place it in the refrigerator to rest. Let it rest for at least 18-24 hours. For more flavor, let it rest and chill for up to 3 days.
- As the dough rests, it will rise and bubble up a bit more, and will develop a stronger, more fermented aroma.
Shape the Pizza
- About 3-4 hours before you want to bake your pizza, take the dough out of the refrigerator.
- Place a piece of parchment paper on a cutting board, and drizzle the paper with 1 tablespoon olive oil.
- Use a spatula to scrape the dough out of the bowl and onto the paper. As you scrape down the bowl, the dough will deflate. The dough will be very soft and sticky.
- Rub some oil over the top of the dough as well. Let rest at room temperature for 1 hour.Note: The dough makes enough for a large pizza, but you can also divide the dough for two medium pizzas or three small personal pan pizzas. Each portion of dough needs to sit on its own piece of parchment paper.
- After letting the dough rest, use your fingers to press it out into a circle, taking care not to press down on the edge of the dough. If the dough is sticking to your fingers, use a little more oil on your fingers. Press from the center of the dough to push it towards the edges. You may need to let the dough rest again for several minutes to let the gluten relax, then press it again, until it's the size that you want. The dough will stick to the paper as you press it out.Note: For a large pizza, press the dough out into a 12-inch circle. For two medium pizzas, press the dough to about 8-10 inches. For three small pizzas, press the dough to about 6-8 inches.
- Let rest again until 30 minutes before you're ready to bake your pizza.
Heat the Pan
- 30 minutes before you plan to bake your pizza, position a rack in the lower third of your oven. Place your baking pan (cast iron pan, pizza stone/steel or baking sheet) on the rack to preheat. Preheat the oven to 500 F, and let the pan heat for 30 minutes.
- Meanwhile, you can assemble your pizza with sauce, cheese and toppings. Be sure to use a thick pizza sauce, not a watery marinara sauce, which can make the crust soft and soggy.
Bake the Pizza
- Using oven mitts, carefully remove the pan from the oven. Transfer your pizza to the hot pan by sliding the paper off the cutting board and onto the pan. The pizza will bake with the paper underneath it, making it easy to move it to the pan.
- Return the pan to the oven (to the rack in the lower third), and bake your pizza for about 15-18 minutes, until the crust is crisp and golden brown, and the toppings are bubbling. Don't take your pizza out earlier than 15 minutes, or it may not be cooked in the middle.
- Let the pizza cool on the pan for several minutes. If you like, brush the edges of the crust with a little melted butter and sprinkle with garlic salt.
- Lift the paper, and slide the pizza off onto a cutting board or serving board. The baked pizza will slide right off the paper. Cool for several minutes, then cut into servings.
Video
Notes
- 15 oz can tomato sauce
- 6 oz can tomato paste
- 1 tbsp dried Italian seasoning
- ¼ tsp garlic powder
- ¼ tsp onion powder
- ¼ tsp ground black pepper
- ¾ tsp coarse Kosher salt (if using table salt, use half the amount)
- 1 tsp granulated sugar
 https://curlygirlkitchen.com/
I am always on the lookout for high altitude pizza dough recipes, and am excited to try this one. My preferred method for assembling and baking match this recipe, except for one point. You add flour to the parchment under the crust, and over the crust , where I generally prefer olive oil. I like the crispness that oil lends to the finished product. Is there a specific reason that you prefer to use the flour? Just curious, maybe I need to change. Thanks for the recipe!
I used flour just because the dough was so soft and sticky, however, I’ll probably try oil next time, just to compare. I’m always looking to test variables in recipes, so I’ll see what difference it makes! I’m making it again next weekend, so I’ll update the post with any additional info from using oil.
Would King Arthur 00 pizza dough flour work for this recipe?
I’m not sure. I’ve never used it, but from what I’ve read, 00 flour is lower in protein than bread flour and all purpose flour, and ideal for Neapolitan style pizza. The texture of the pizza may be a bit different than if you use bread flour, but it’s possible it would work out just fine.
Absolutely amazing My husband loved this pizza dough We did it both in a cast iron pan and on a pizza stone for us the pizza stone got more crispy which was amazing
This recipe is perfect for me at 5700 ft elevation. Love the taste the fermentation gives! Excellent texture too.