
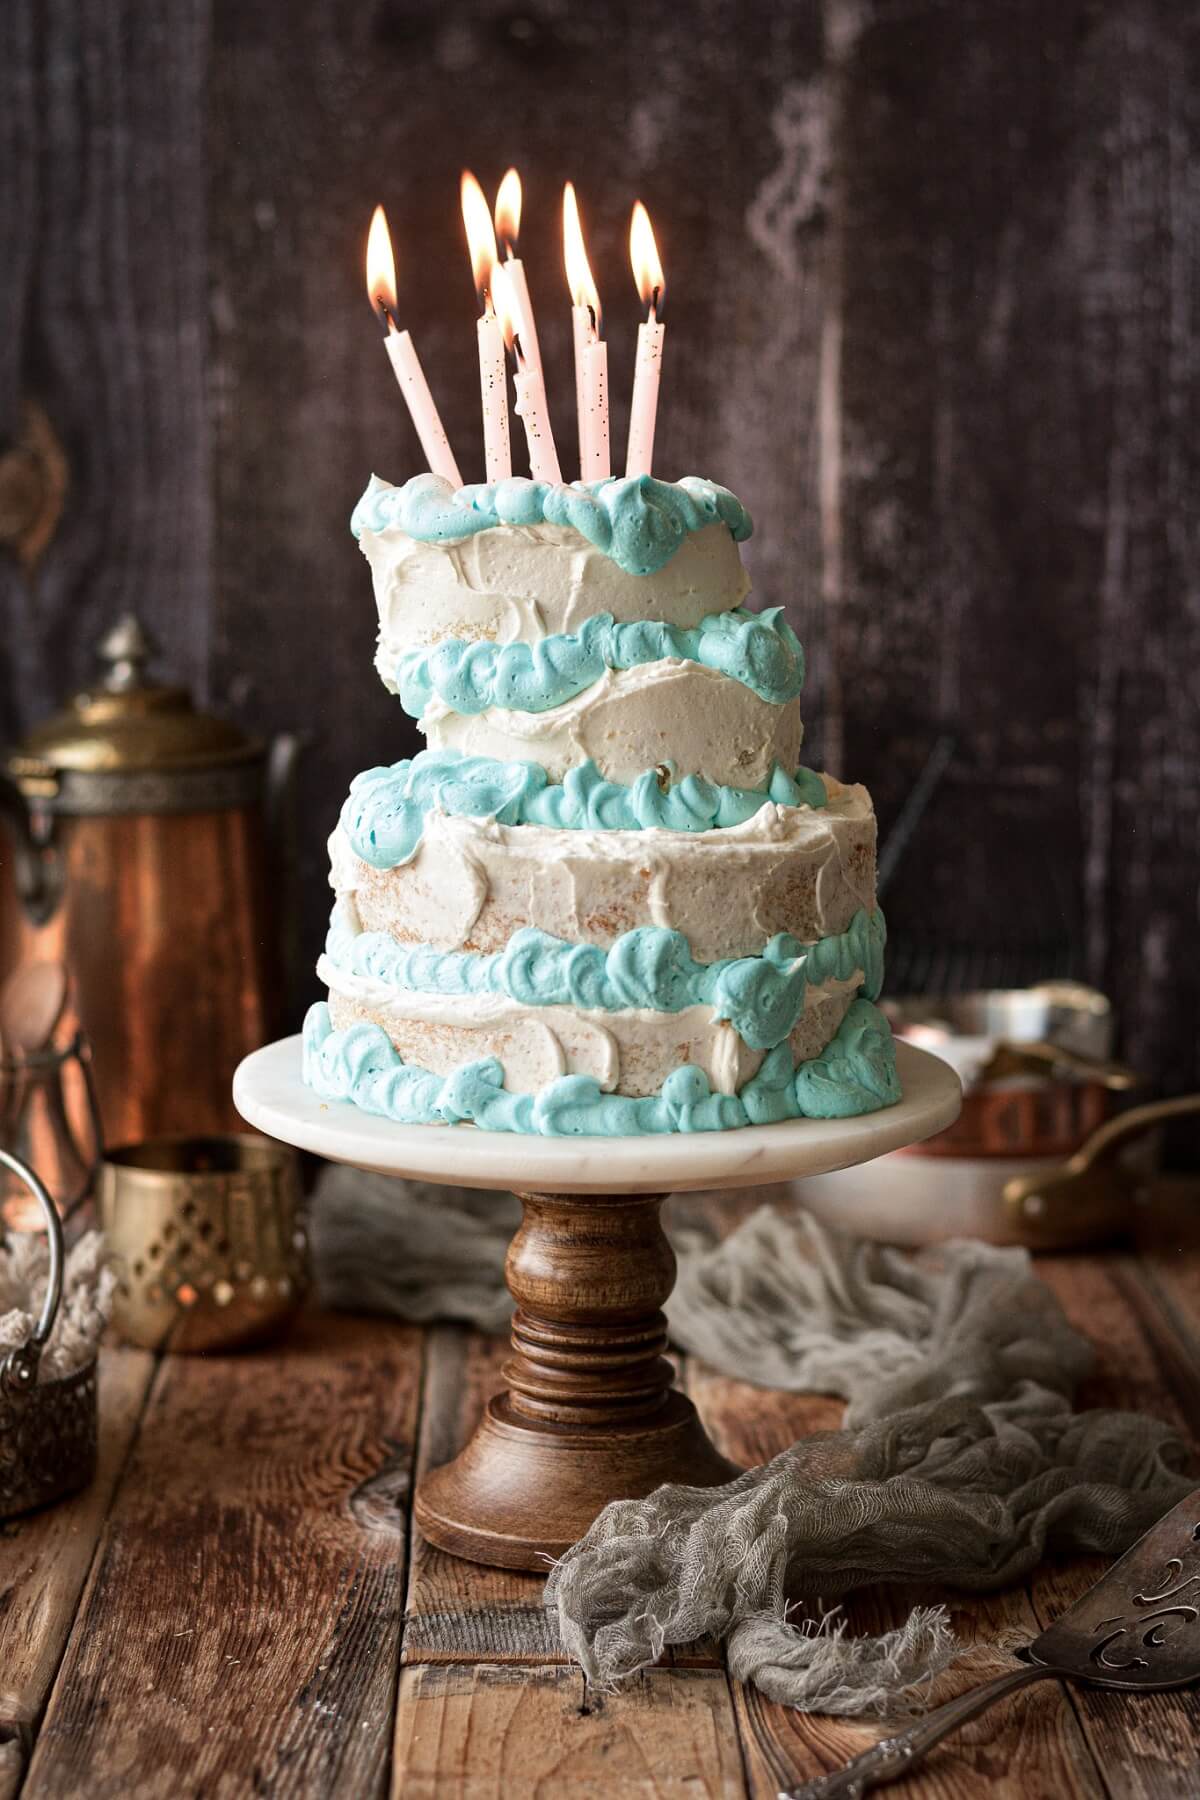
A mini tiered cake made of four tender layers of high altitude tested vanilla cake, decorated like Sleeping Beauty’s birthday cake. This whimsical Sleeping Beauty cake is perfect for birthdays, baby showers, smash cake photos, or even a themed wedding. And the petite size is just right for a smaller celebration when you don’t want too much leftover cake.
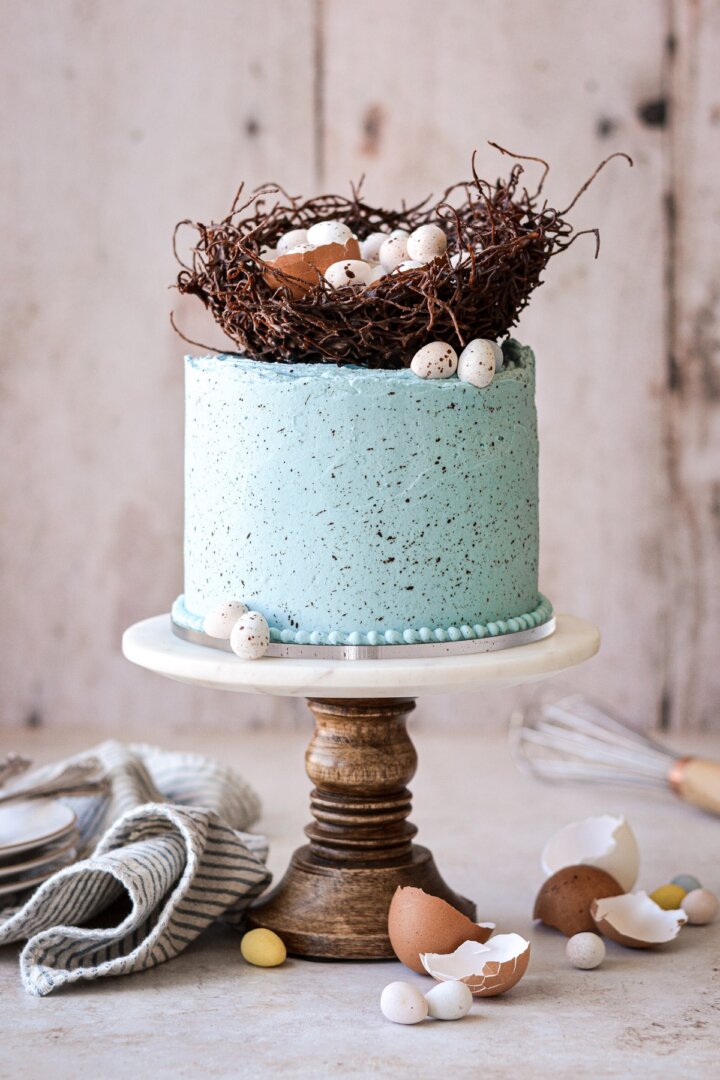
You might also love these cake decorating tutorials for a Lambeth cake, turquoise floral cake, Christmas tree cake, and a floral buttercream sheet cake.
This site contains affiliate links. As an Amazon associate, I earn from qualifying purchases. This means that I may make a small commission if you purchase a product using those links. This in no way affects my opinion of those products and services. All opinions expressed on this site are my own.
Why You’ll Love This Recipe
Smaller Size. I’ve added a few mini layer cakes to my site this year, and I love the idea of a mini tiered cake, too. It looks so fancy and so special, but it’s petite, serving about 12 people, so it’s about 3/4 the size of a standard layer cake that serves 16 people. This makes it perfect for a small wedding cake or other celebration, where you don’t want to be left with a ton of uneaten cake after the party. Assembling this mini vanilla tiered cake is really no different from stacking and frosting four layers of cake.
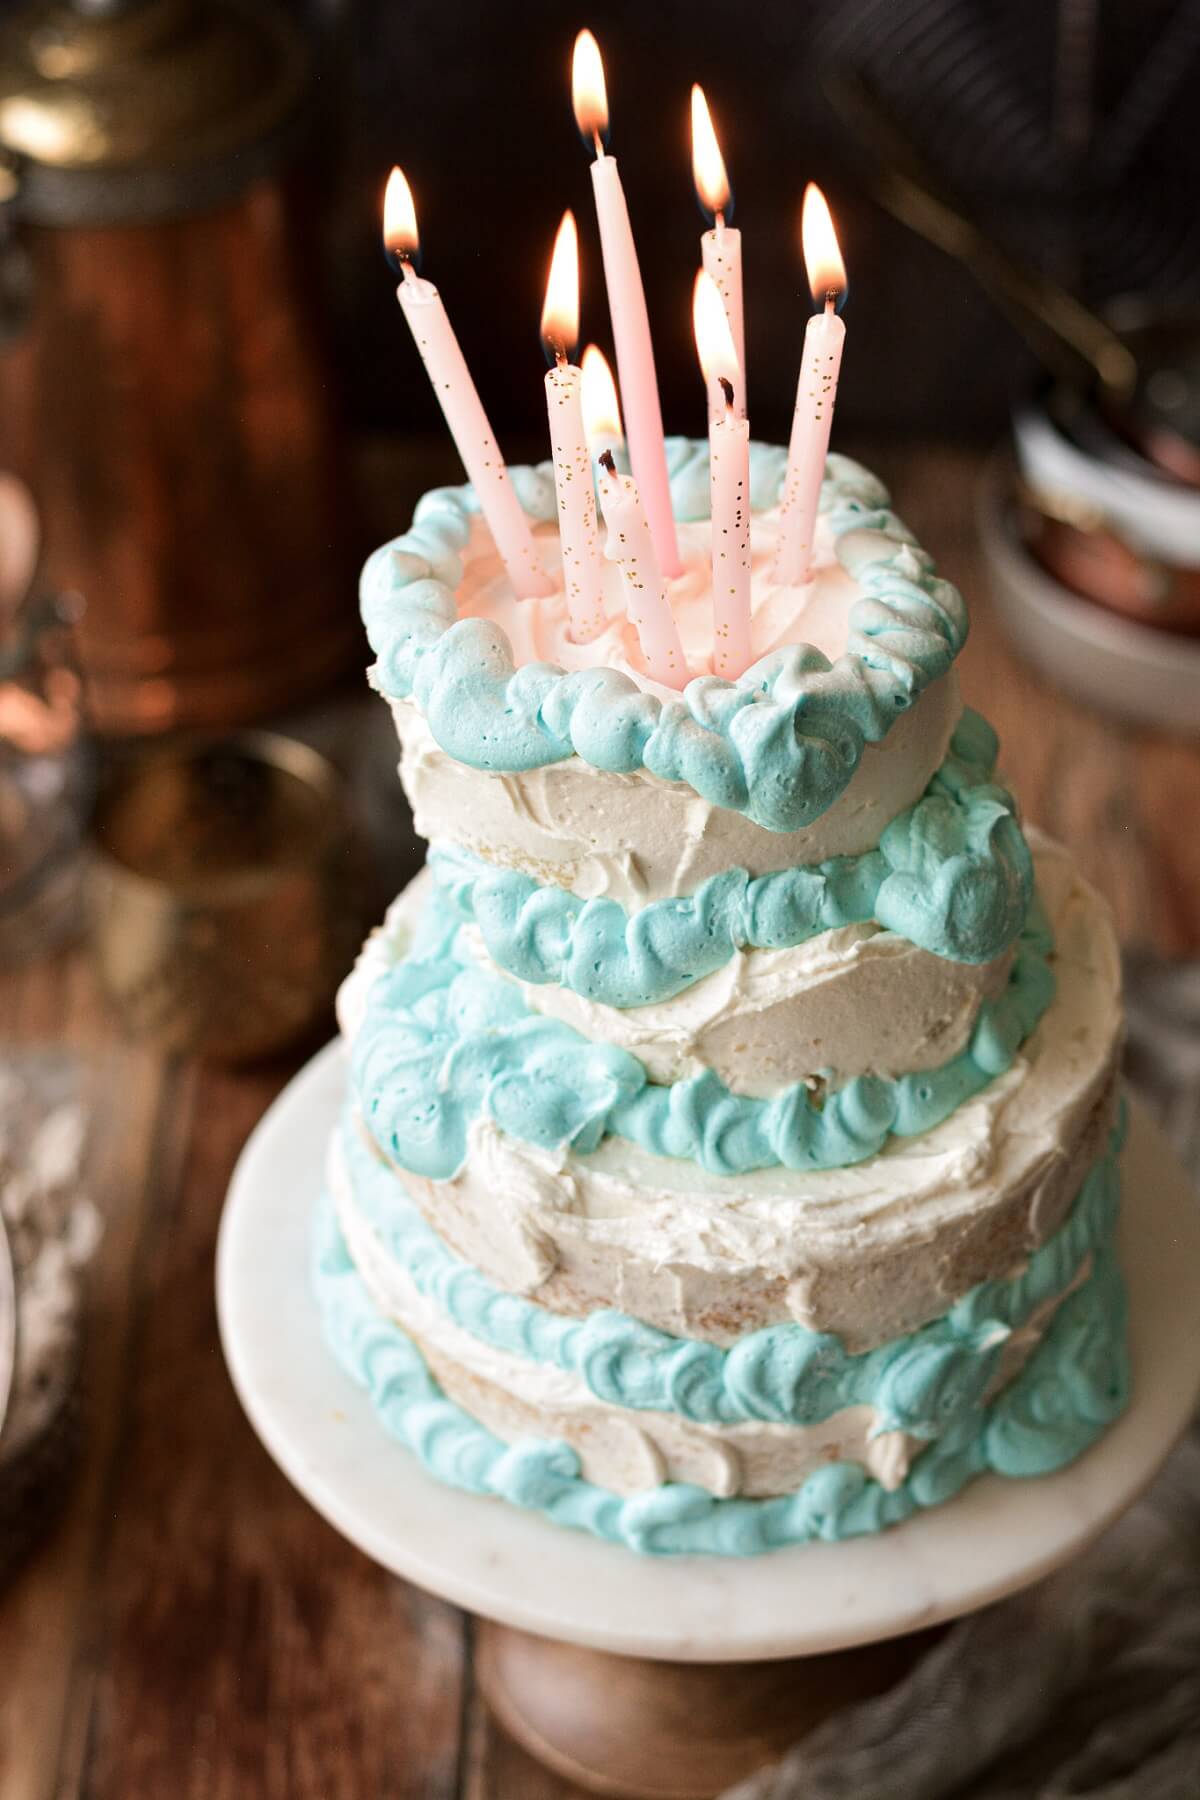
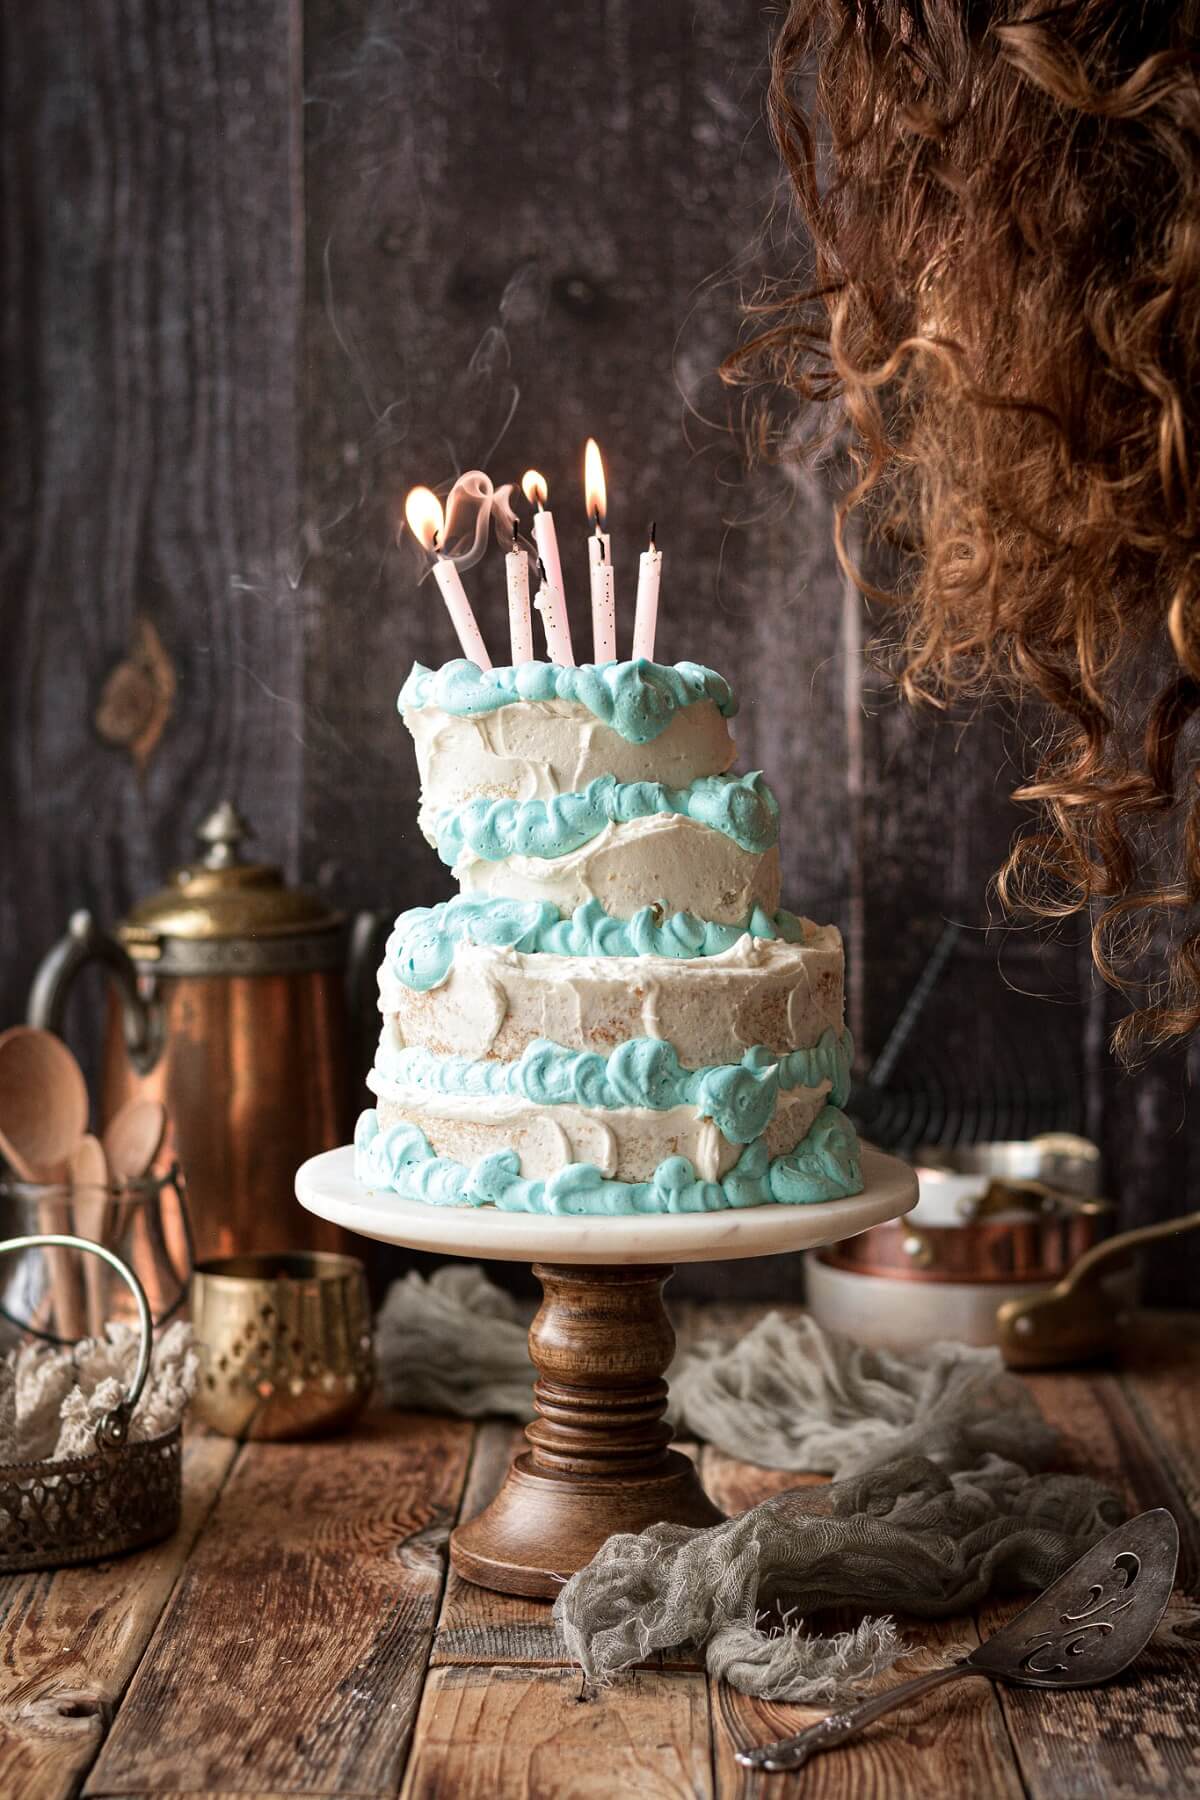
No Decorating Skills Needed. In the original Sleeping Beauty movie, the fairies make a real mess of Sleeping Beauty’s birthday cake. They forget to even bake the cake, the cake layers are uneven, the frosting is sliding off, the candles won’t stay on top, and eventually, they use a broom to prop up the cake, lest it topple over onto the floor. So this is a cake that’s meant to look wonky, messy and amateurish, as though it might fall over at any moment. Have fun with the decorating, and definitely don’t try to make it look perfect! Perfectionism is the opposite of what we’re going for in this Sleeping Beauty cake. Be sure to scroll through the whole post today for an easy photo tutorial for stacking and frosting your own cake.
High Altitude Tested. I develop all the recipes on my site for Denver’s altitude of 5,280 feet. If you’re at a lower or higher elevation, please see my FAQs for guidance on adjusting recipes for your altitude. Today’s recipe is scaled down from my popular vanilla cake recipe.
See the recipe card at the end of the post for the full ingredients list and instructions.
Ingredients
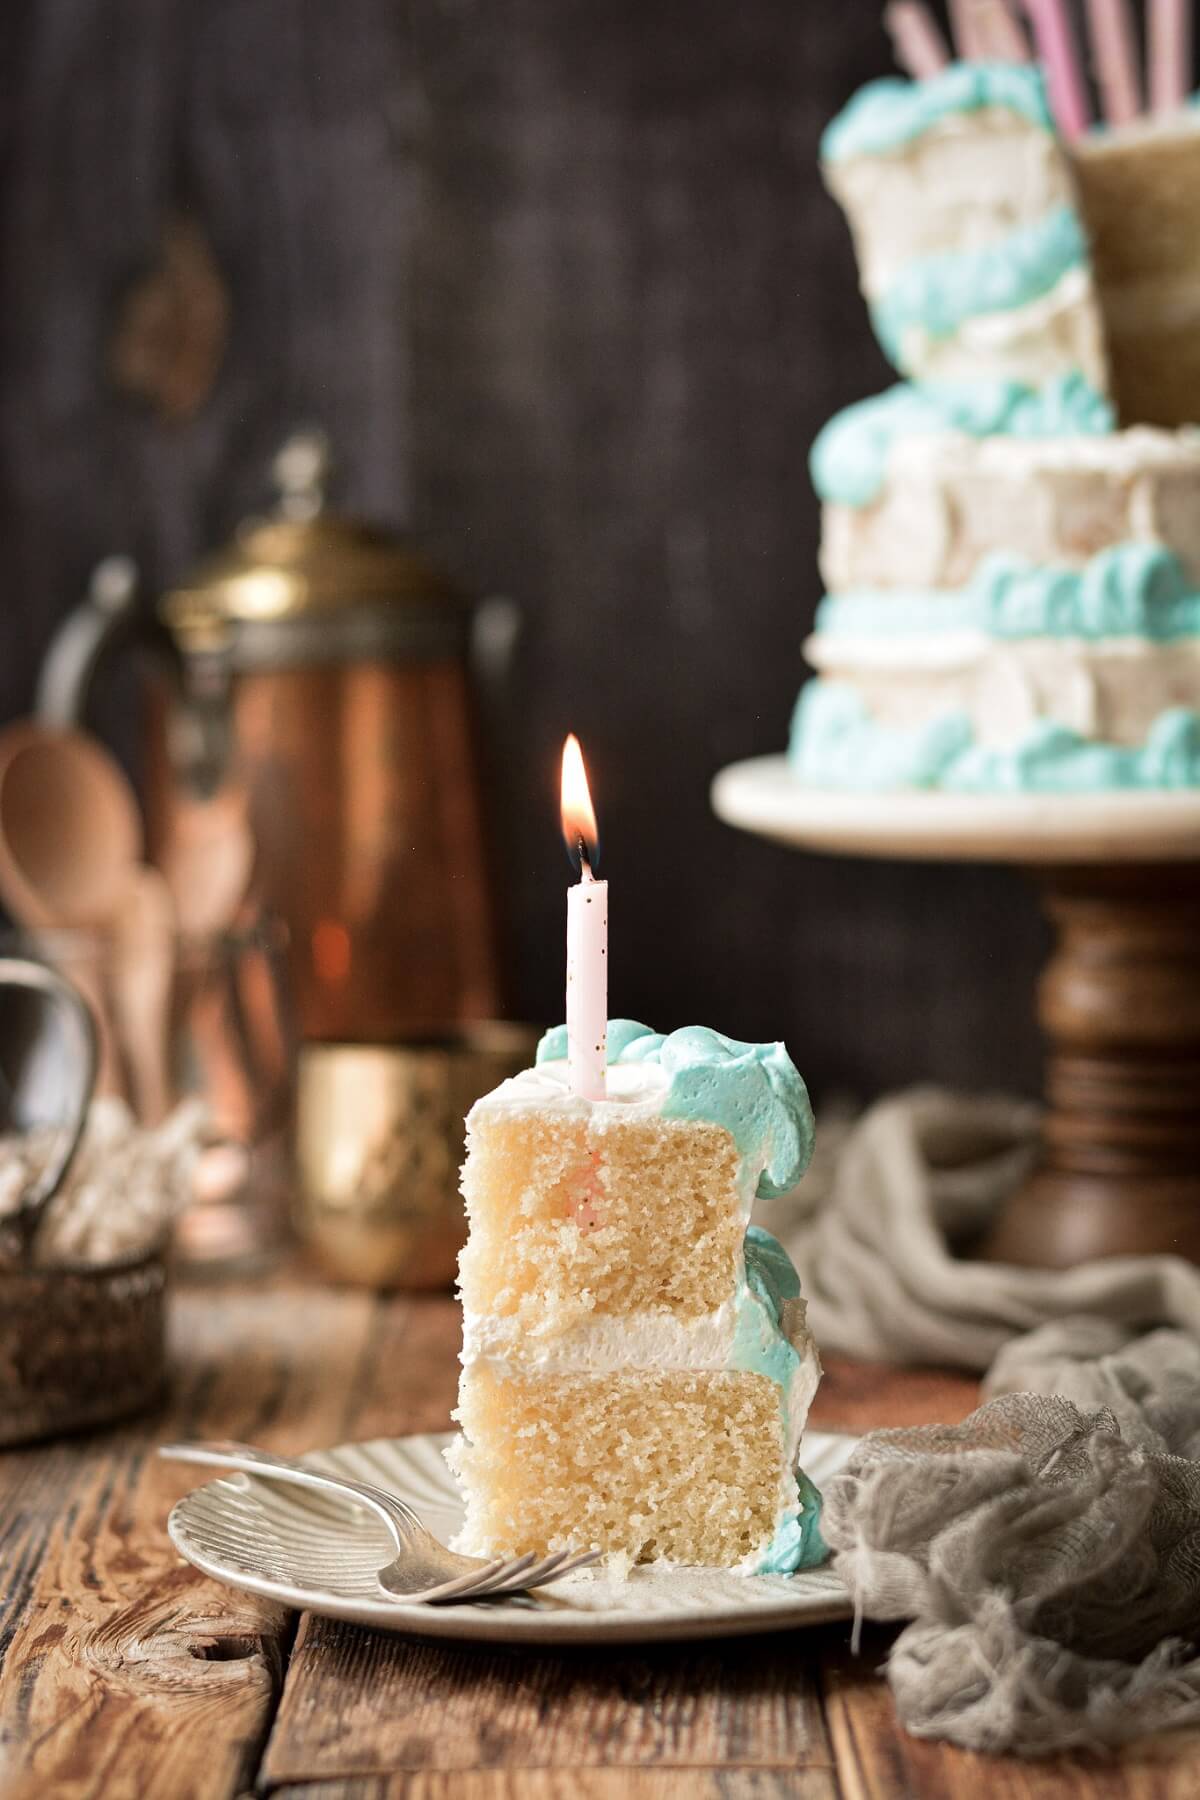
- Vanilla Cake + Vanilla Buttercream. This is a tested, high altitude recipe that you’ll just love. The cake is soft, moist and fluffy, and bakes perfectly at mountain altitudes. To read more about my vanilla cake in detail, see the original cake post here.
Instructions
Cake
- Preheat the oven to 350 F, and position a rack in the center of the oven.
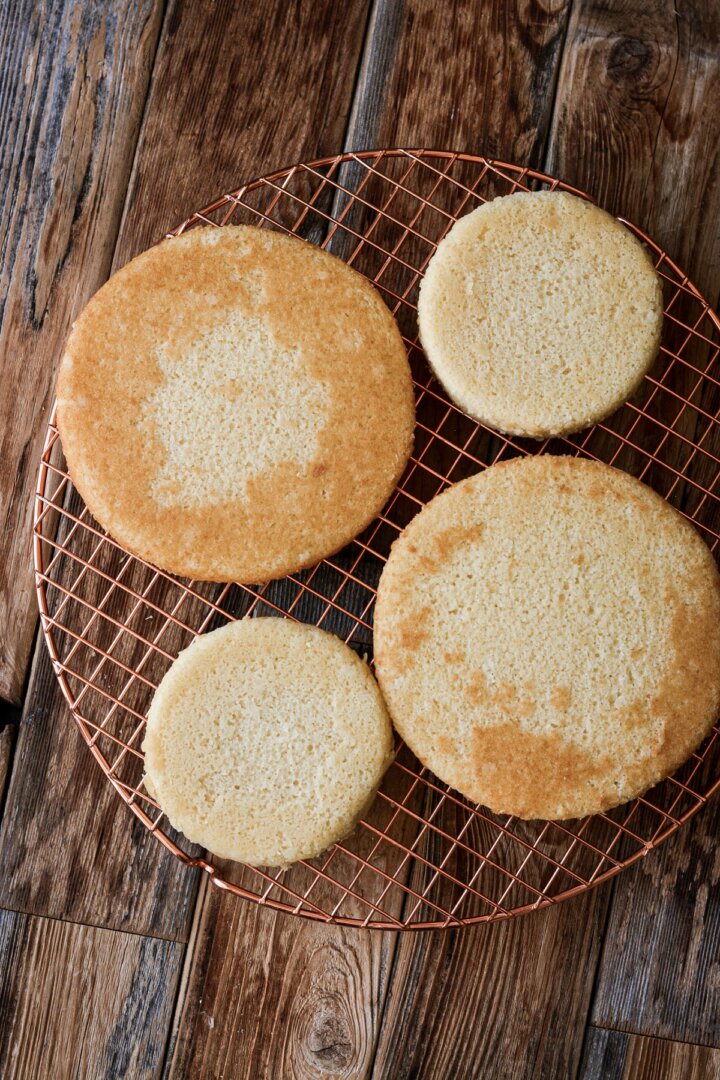
- Lightly spray the bottoms of two 6-inch round cake pans and two 4-inch round cake pans with non-stick baking spray.
- In a bowl, sift together the flour, sugar, baking powder and salt, then whisk until evenly distributed.
- In a separate bowl, whisk together the eggs, egg white, buttermilk, melted butter, oil, vanilla and almond extracts. Add the wet ingredients to the dry, and whisk for 10-15 seconds, until combined.
- To divide the batter evenly between the pans so that your cake layers are all the same height, measure a scant 3/4 cup of batter into each of the 4-inch pans. Then divide the remaining batter evenly between the 6-inch pans.
- Bake the cakes for about 20-25 minutes, until the tops spring back when gently touched, and a cake tester or toothpick inserted in the cake comes out clean. Set the pans on a cooling rack and cool completely before frosting.

Buttercream
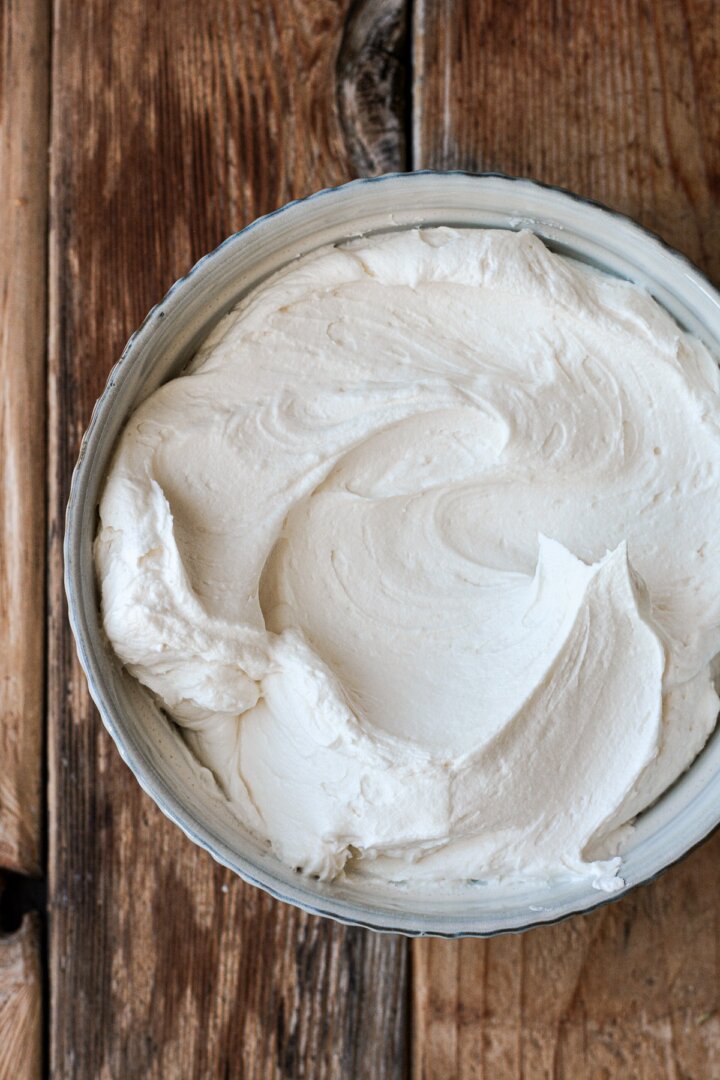
- In the bowl of your stand mixer fitted with the paddle attachment, beat the butter for 1 minute until smooth.
- With the mixer on low, add the powdered sugar, meringue powder, salt and vanilla, mixing until combined. Increase the speed to medium and whip for 4-5 minutes until light and fluffy, stopping to scrape the bowl down several times. Turn the speed down to “stir” and mix for 1 minute.
Assembly and Decorating
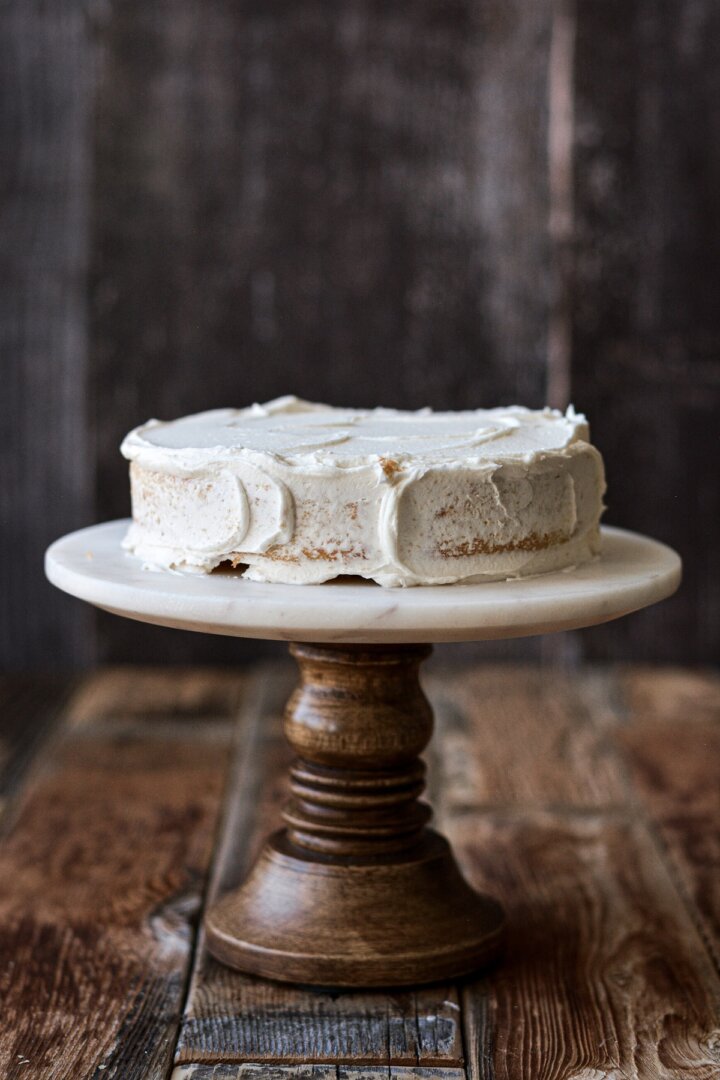
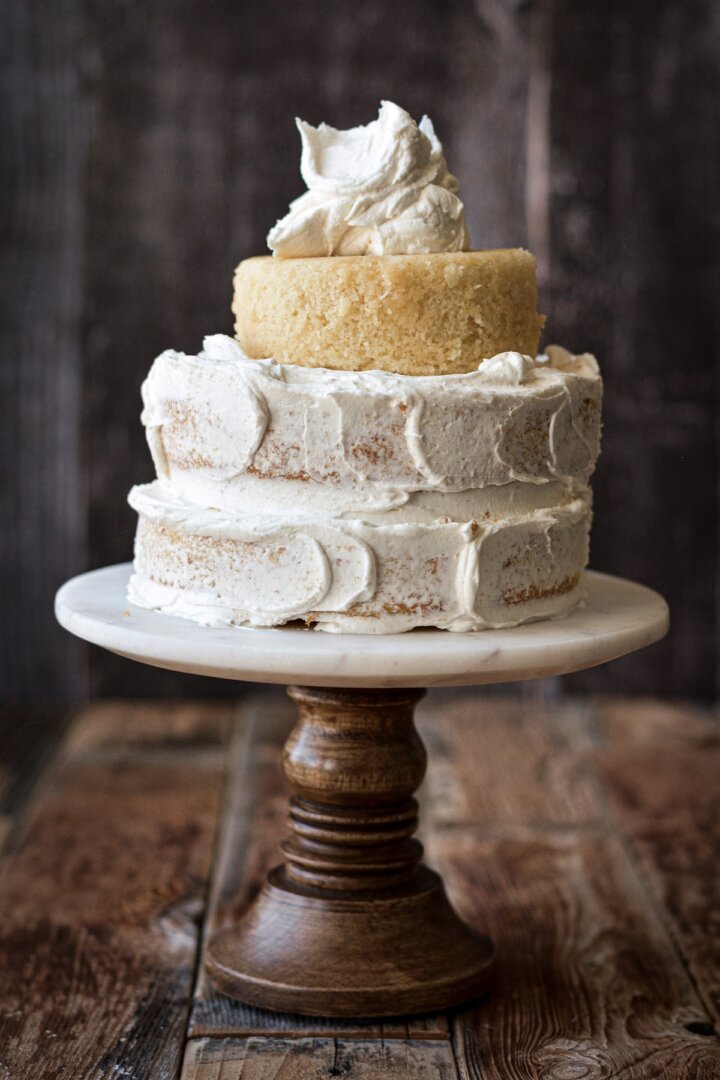
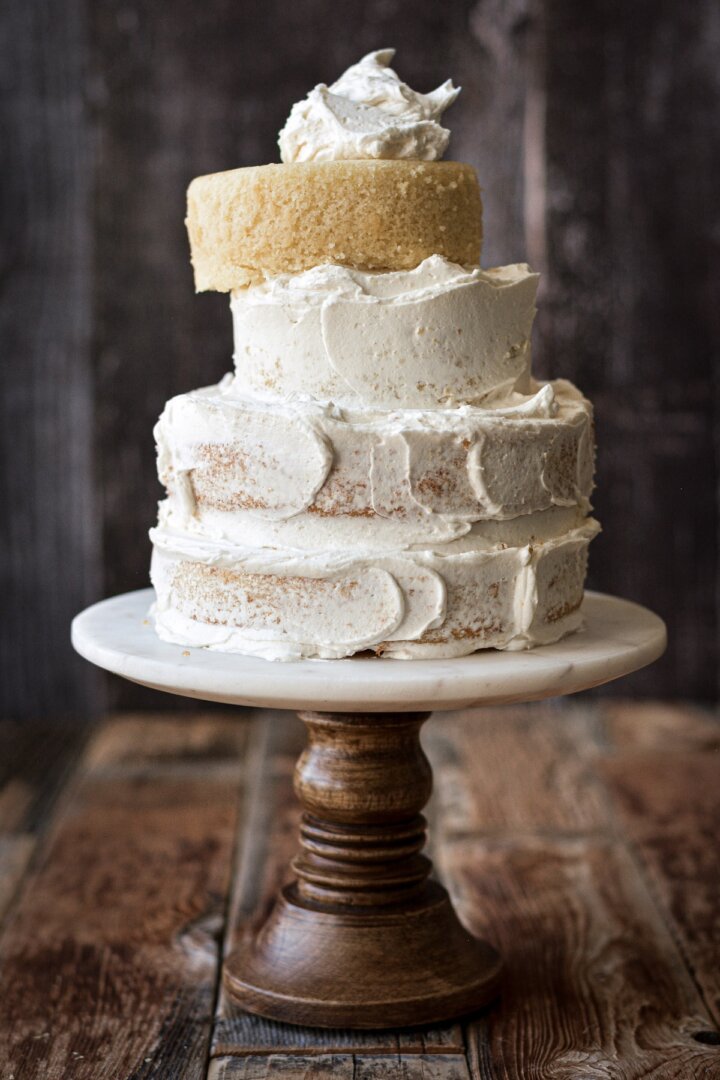
- Place one of the 6-inch cakes on a cake board or serving plate. Frost the top and sides of the cake with a messy, fairly thin layer of buttercream.
- Place the second 6-inch cake on top of the first, making it slightly off-center, towards the right. Frost the top and sides of the cake.
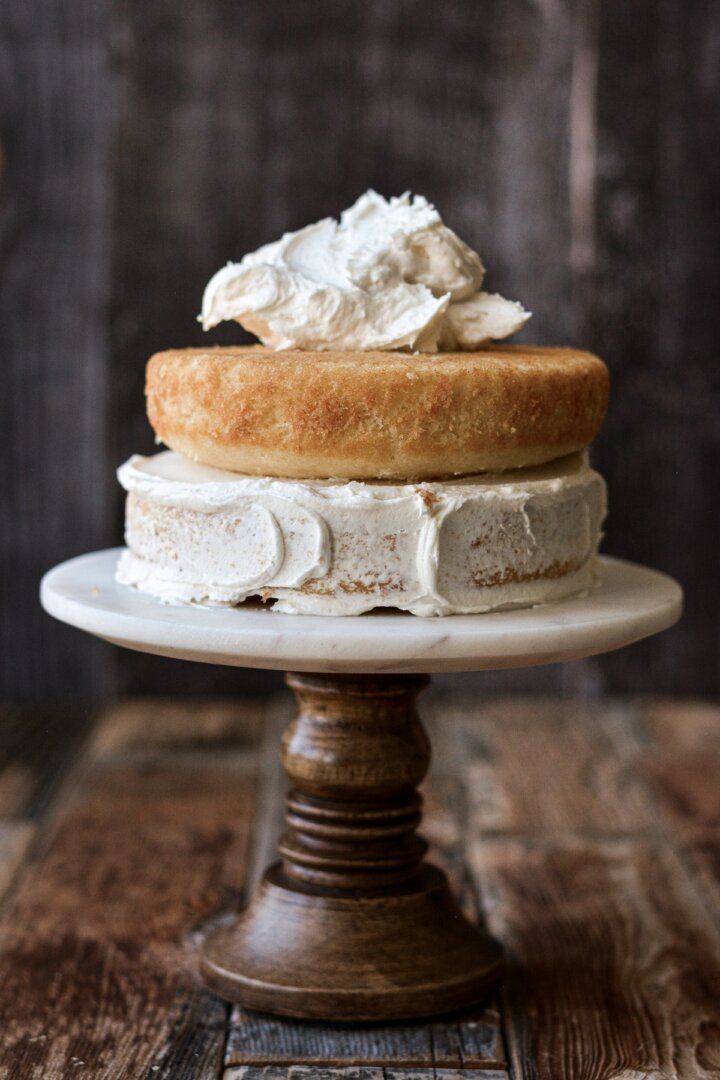
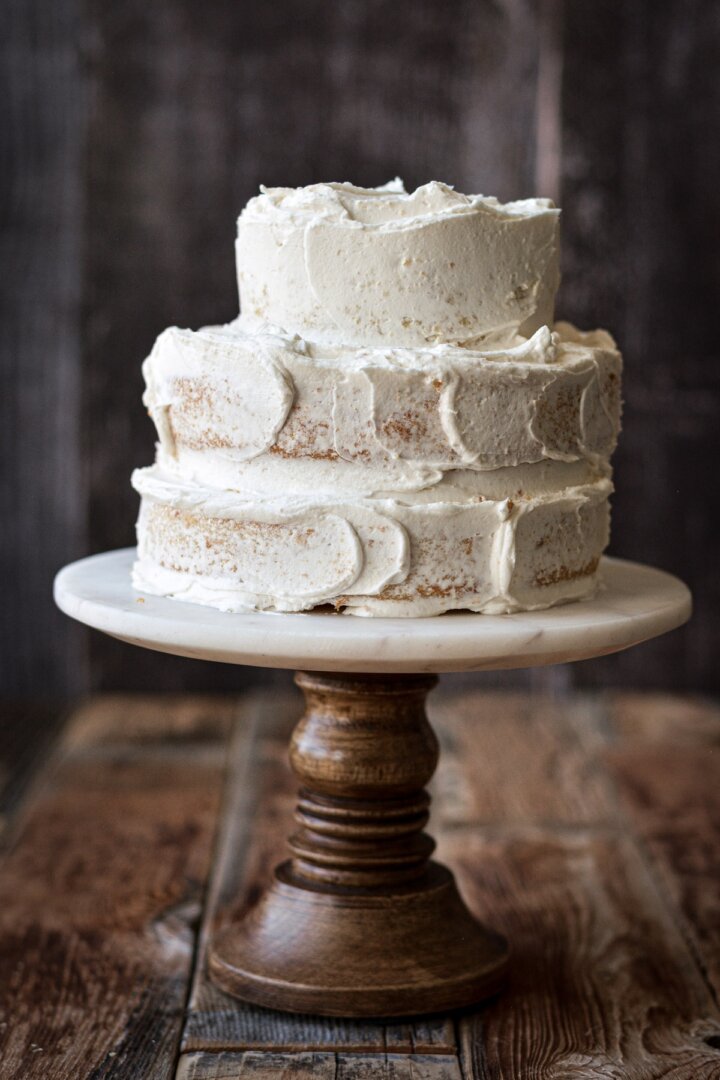
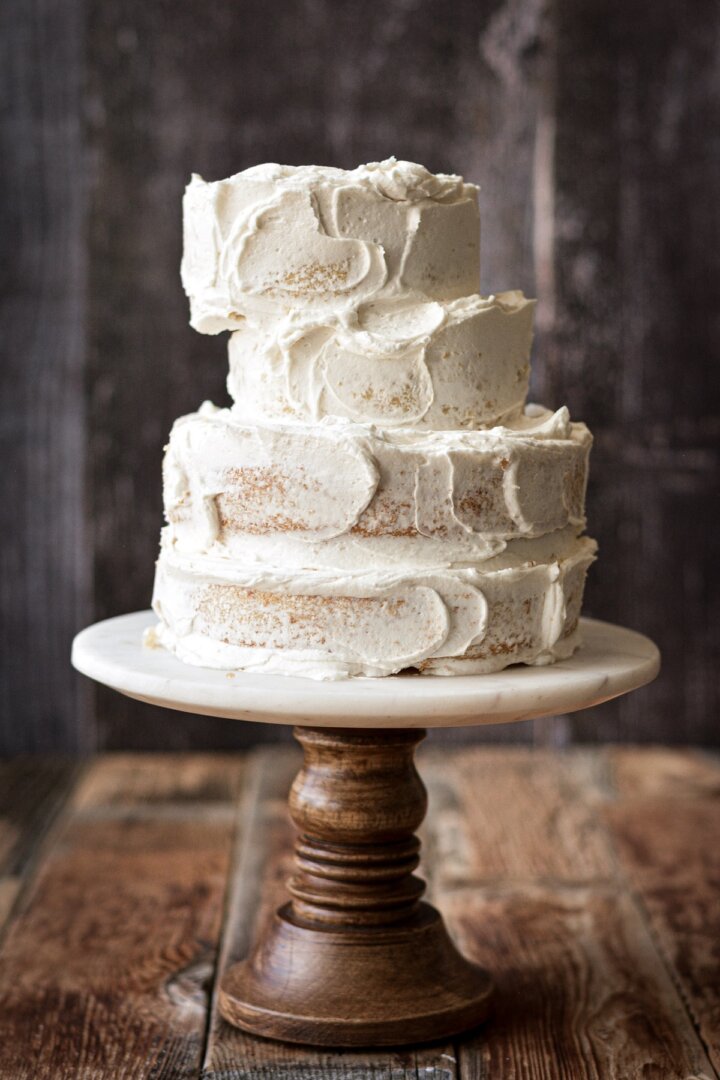
- Place one of the 4-inch cakes on top, and frost the top and sides of the cake.
- Place the second 4-inch cake on top, making it off-center towards the left, so that it’s slightly hanging over the edge of the cake layer underneath it. Frost the top and sides of this cake layer.
- Remember, the cake is meant to look wonky, and like it’s about to topple over. Don’t try to be a perfectionist with the buttercream, but just let it look messy and amateurish. If you’re nervous that it might actually fall over, you can insert a straw or dowel down through the center of the cake to keep the layers in place.


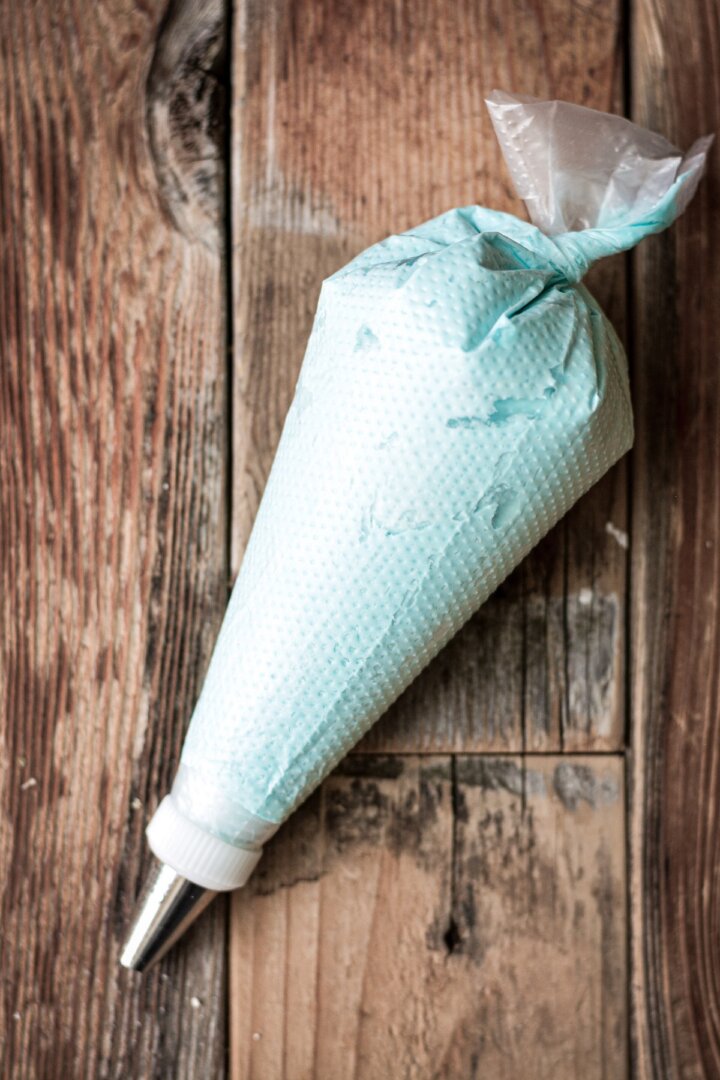
- Add a few drops of blue food coloring to the remaining buttercream, making the color as deep as you’d like. Fit a piping bag with a coupler and tip #12 (a medium round tip), and fill with the blue buttercream.
- Now pipe the blue buttercream around the cake in messy dollops and swirls. Pile it up in some places and let it look like it’s dripping off the sides of the cake here and there.
- Don’t forget to finish the cake with pink birthday candles!


Be sure to read all of my BAKING FAQs where I discuss ingredients, substitutions and common questions with cake making, so that you can be successful in your own baking! I also suggest reading these comprehensive posts on making Perfect American Buttercream, How to Stack, Fill, Crumb Coat and Frost Layer Cakes and How to Use Piping Bags.
Frequently Asked Questions
How far in advance can I make this Sleeping Beauty cake?
You can keep the frosted cake refrigerated in an airtight container for up to 1 day in advance, then let it come to room temperature for several hours before serving. Store leftover cake in an airtight container at room temperature for up to 2-3 days.
What’s the best way to cut and serve a tiered cake?
This mini tiered cake will yield about 12 servings. To serve the cake, it’s easiest to cut the top tier into 4 pieces first, then cut the bottom tier into 8 pieces. Don’t try to cut tall pieces all the way from the top to the bottom.

You Might Also Like

Please check out my Amazon Shop for a curated collection of some of my favorite cake pans from trusted brands, baking tools, ingredients, pretty things and fashion finds. I recommend products that I buy and use every day!
Did you love today’s recipe? Please rate the recipe and let me know in the comments what you thought! Also, be sure to follow Curly Girl Kitchen on Instagram, and tag me when you try one of my recipes so I can see all your delicious creations!

High Altitude Sleeping Beauty Mini Tiered Vanilla Cake
All recipes on Curly Girl Kitchen are developed for high altitude at 5,280 feet. See FAQs for adjusting to higher or lower elevations.

Equipment
- Stand Mixer with Paddle Attachment
- (2) 6-inch Round Cake Pans
- (2) 4-inch Round Cake Pans
- Disposable Piping Bag
- Coupler + Tip #12
Ingredients
Cake
- 2 ⅓ cups cake flour, fluffed, spooned and leveled
- 1 cup granulated sugar
- 2 tsp baking powder
- ½ tsp coarse Kosher salt (if using table salt, use half the amount)
- 2 large eggs
- 1 large egg white (save the extra yolk for another use)
- 1 cup buttermilk
- ⅓ cup unsalted butter, melted
- ⅓ cup vegetable oil
- 1 ½ tsp vanilla extract
- 1 tsp almond extract, optional
Buttercream
- 1 ½ cups unsalted butter, softened to room temperature
- 3 cups powdered sugar
- 2 tsp meringue powder, optional
- 1 ½ tsp vanilla extract
- ⅛ tsp coarse Kosher salt (if using table salt, use half the amount)
- 1-2 tbsp milk, only if needed for consistency
- "royal blue" gel food coloring
Instructions
Cake
- Preheat the oven to 350 F, and position a rack in the center of the oven.Lightly spray the bottoms of two 6-inch round cake pans and two 4-inch round cake pans with non-stick baking spray.
- In a bowl, sift together the flour, sugar, baking powder and salt, then whisk until evenly distributed.
- In a separate bowl, whisk together the eggs, egg white, buttermilk, melted butter, oil, vanilla and almond extracts. Add the wet ingredients to the dry, and whisk for 10-15 seconds, until combined.
- To divide the batter evenly between the pans so that your cake layers are all the same height, measure a scant 3/4 cup of batter into each of the 4-inch pans. Then divide the remaining batter evenly between the 6-inch pans.
- Bake the cakes for about 20-25 minutes, until the tops spring back when gently touched, and a cake tester or toothpick inserted in the cake comes out clean. Set the pans on a cooling rack and cool completely before frosting.If the cakes are domed on top, use a sharp knife to slice off a small portion of the domed top before frosting, so the cakes sit flat and level.
Buttercream
- In the bowl of your stand mixer fitted with the paddle attachment, beat the butter for 1 minute until smooth.
- With the mixer on low, add the powdered sugar, meringue powder, salt and vanilla, mixing until combined. Increase the speed to medium and whip for 4-5 minutes until light and fluffy, stopping to scrape the bowl down several times. Turn the speed down to "stir" and mix for 1 minute.
Assembly and Decorating
- Place one of the 6-inch cakes on a cake board or serving plate. Frost the top and sides of the cake with a messy, fairly thin layer of buttercream.Place the second 6-inch cake on top of the first, making it slightly off-center, towards the right. Frost the top and sides of the cake.
- Place one of the 4-inch cakes on top, and frost the top and sides of the cake.Place the second 4-inch cake on top, making it off-center towards the left, so that it's slightly hanging over the edge of the cake layer underneath it. Frost the top and sides of this cake layer.Remember, the cake is meant to look wonky, and like it's about to topple over. Don't try to be a perfectionist with the buttercream, but just let it look messy and amateurish. If you're nervous that it might actually fall over, you can insert a straw or dowel down through the center of the cake to keep the layers in place.
- Add a few drops of blue food coloring to the remaining buttercream, making the color as deep as you'd like. Fit a piping bag with a coupler and tip #12 (a medium round tip), and fill with the blue buttercream.
- Now pipe the blue buttercream around the cake in messy dollops and swirls. Pile it up in some places and let it look like it's dripping off the sides of the cake here and there.
- Don't forget to finish the cake with pink birthday candles!
Notes
 https://curlygirlkitchen.com/
So adorably cute! I’m not baking at a high altitude. How can I adapt?
I have some guidance on adjusting recipes in my FAQs: https://curlygirlkitchen.com/baking-faqs/
Lovely and so delicious! We are at about 6,500 ft and I made this for my daughter’s birthday. Came out beautifully! Just discovered your blog and I am very much looking forward to trying more of your recipes. Thank you!!
Hi!
I want to attempt this cake for my daughter’s birthday. One of the 4” cakes looks slanted, but I did not see in your instructions to cut the cake to that shape. How did you get it to look that way?
It looks that way, simply because of how it’s offset, and the way I applied the frosting. I didn’t cut it to that shape.