
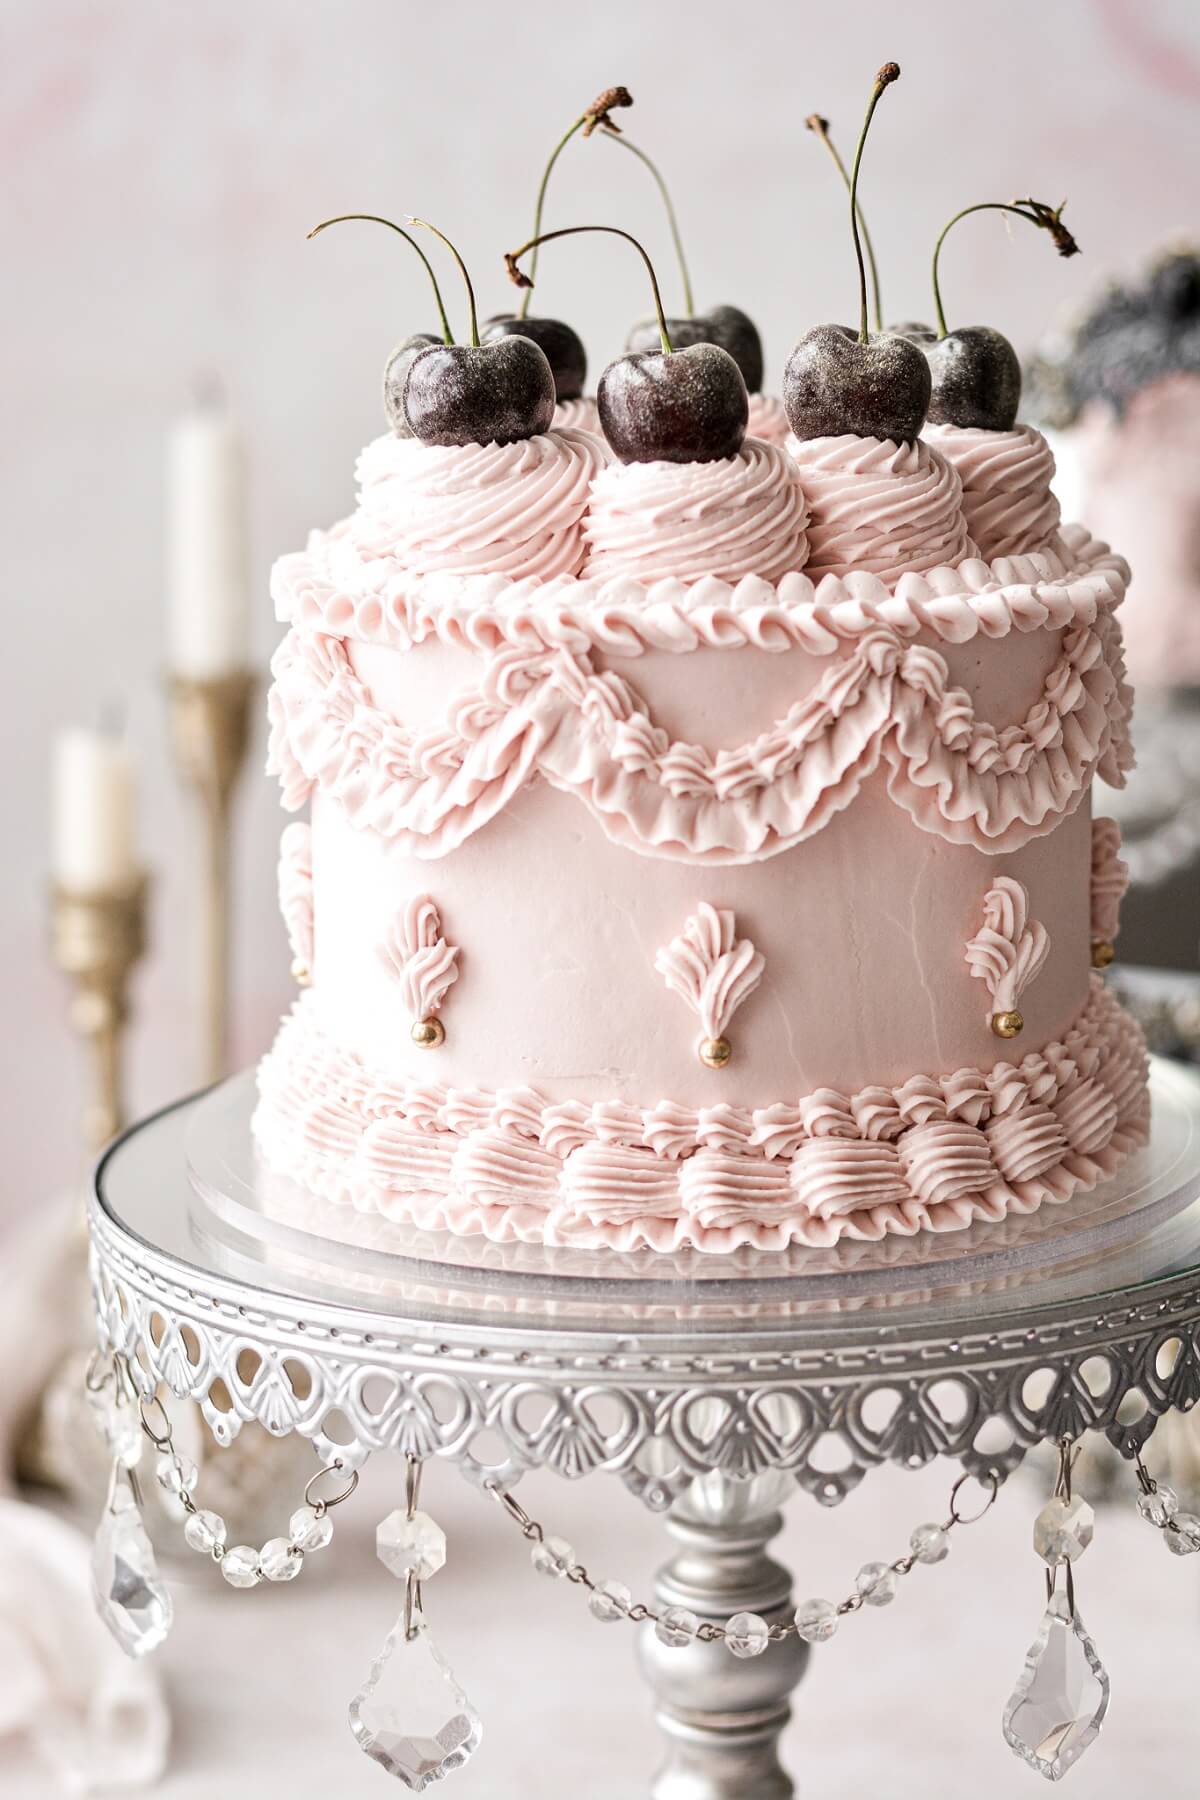
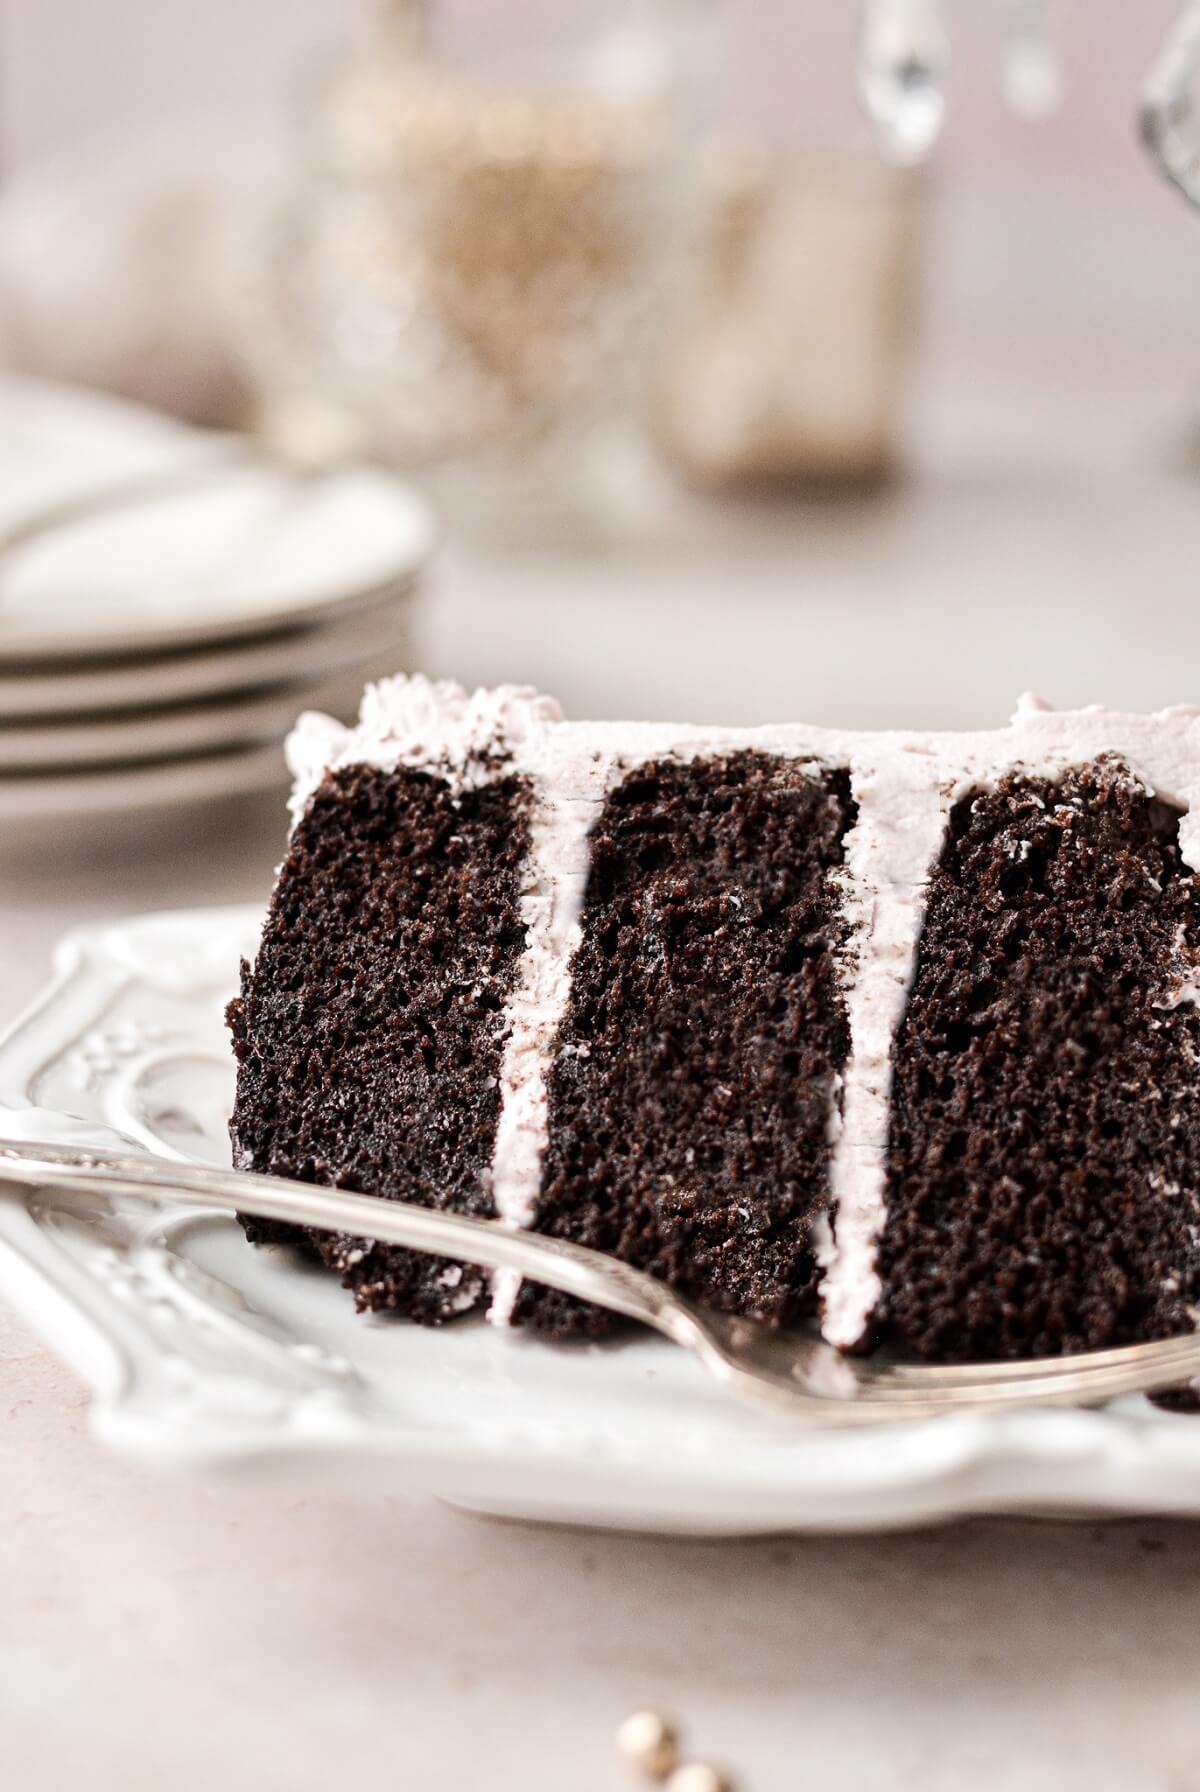
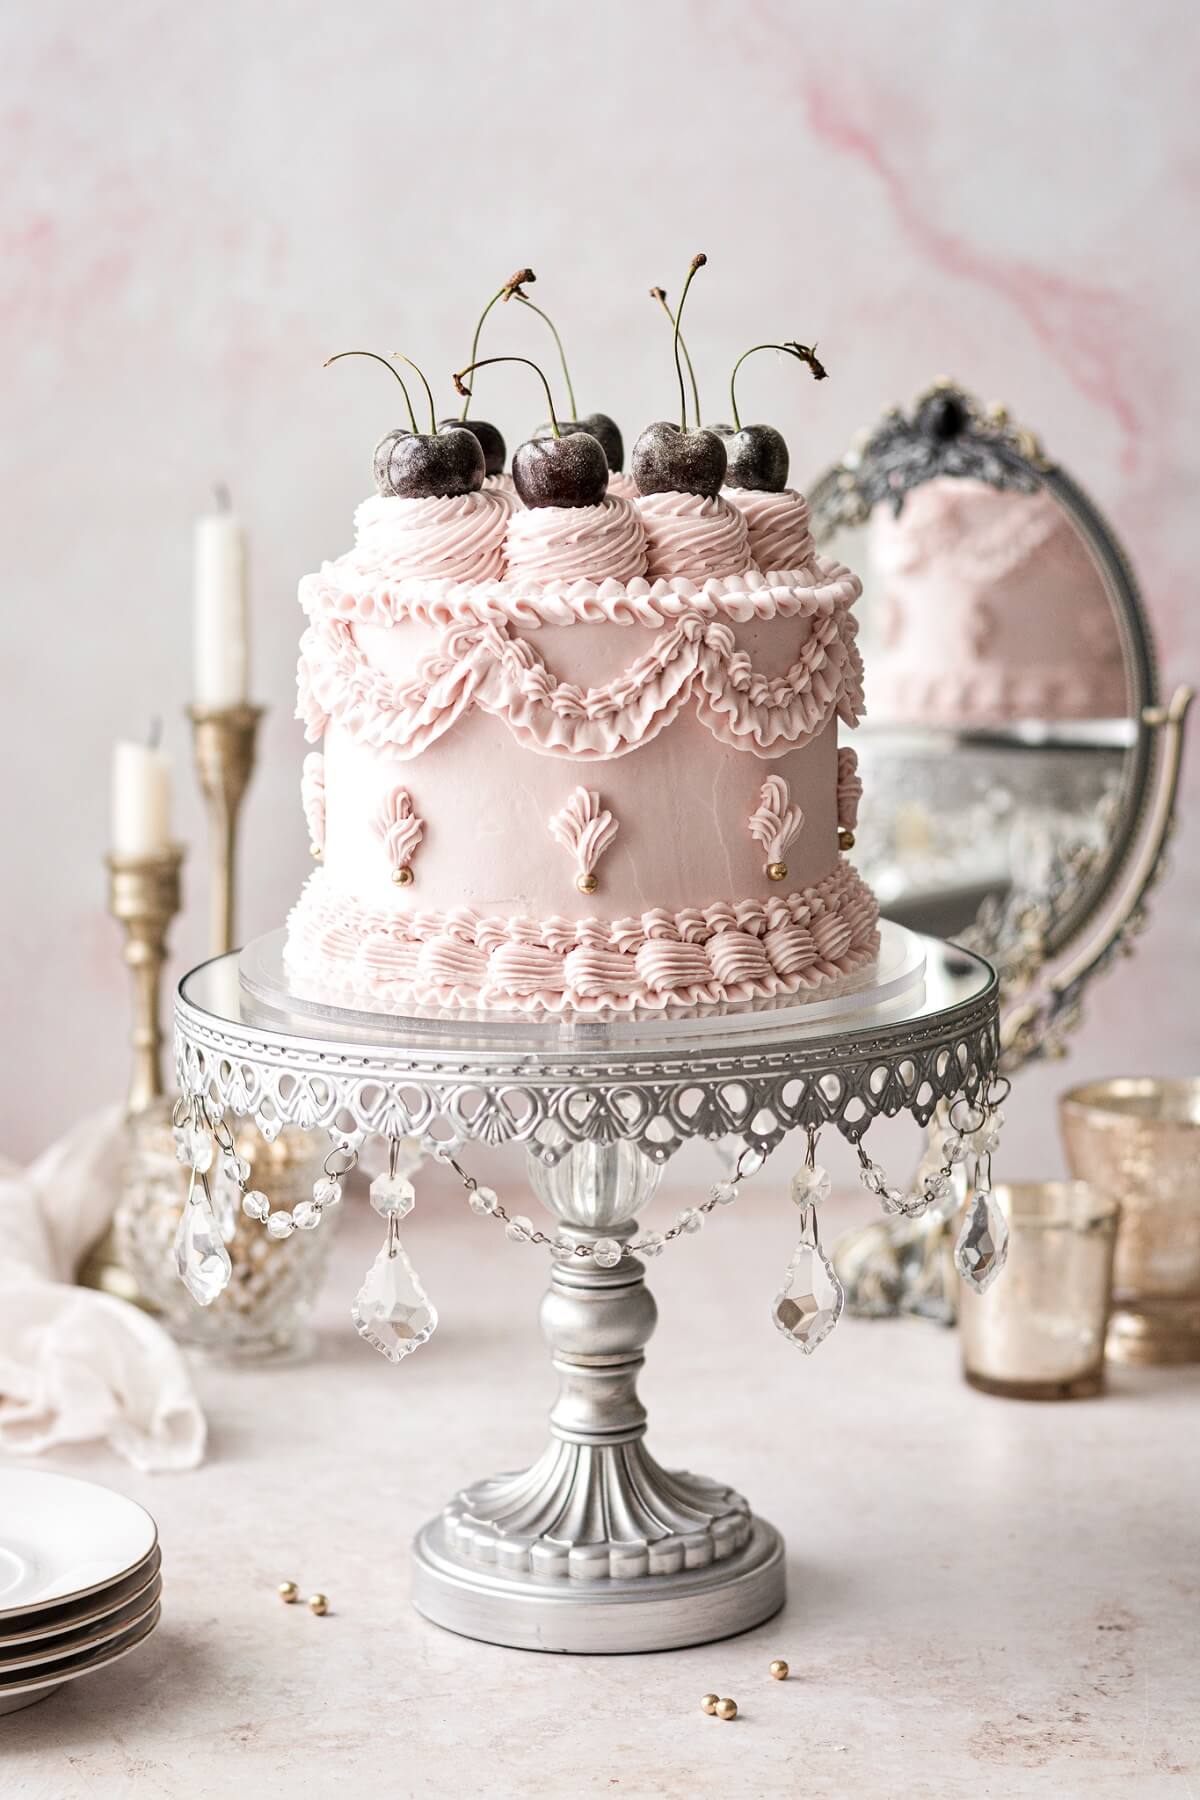
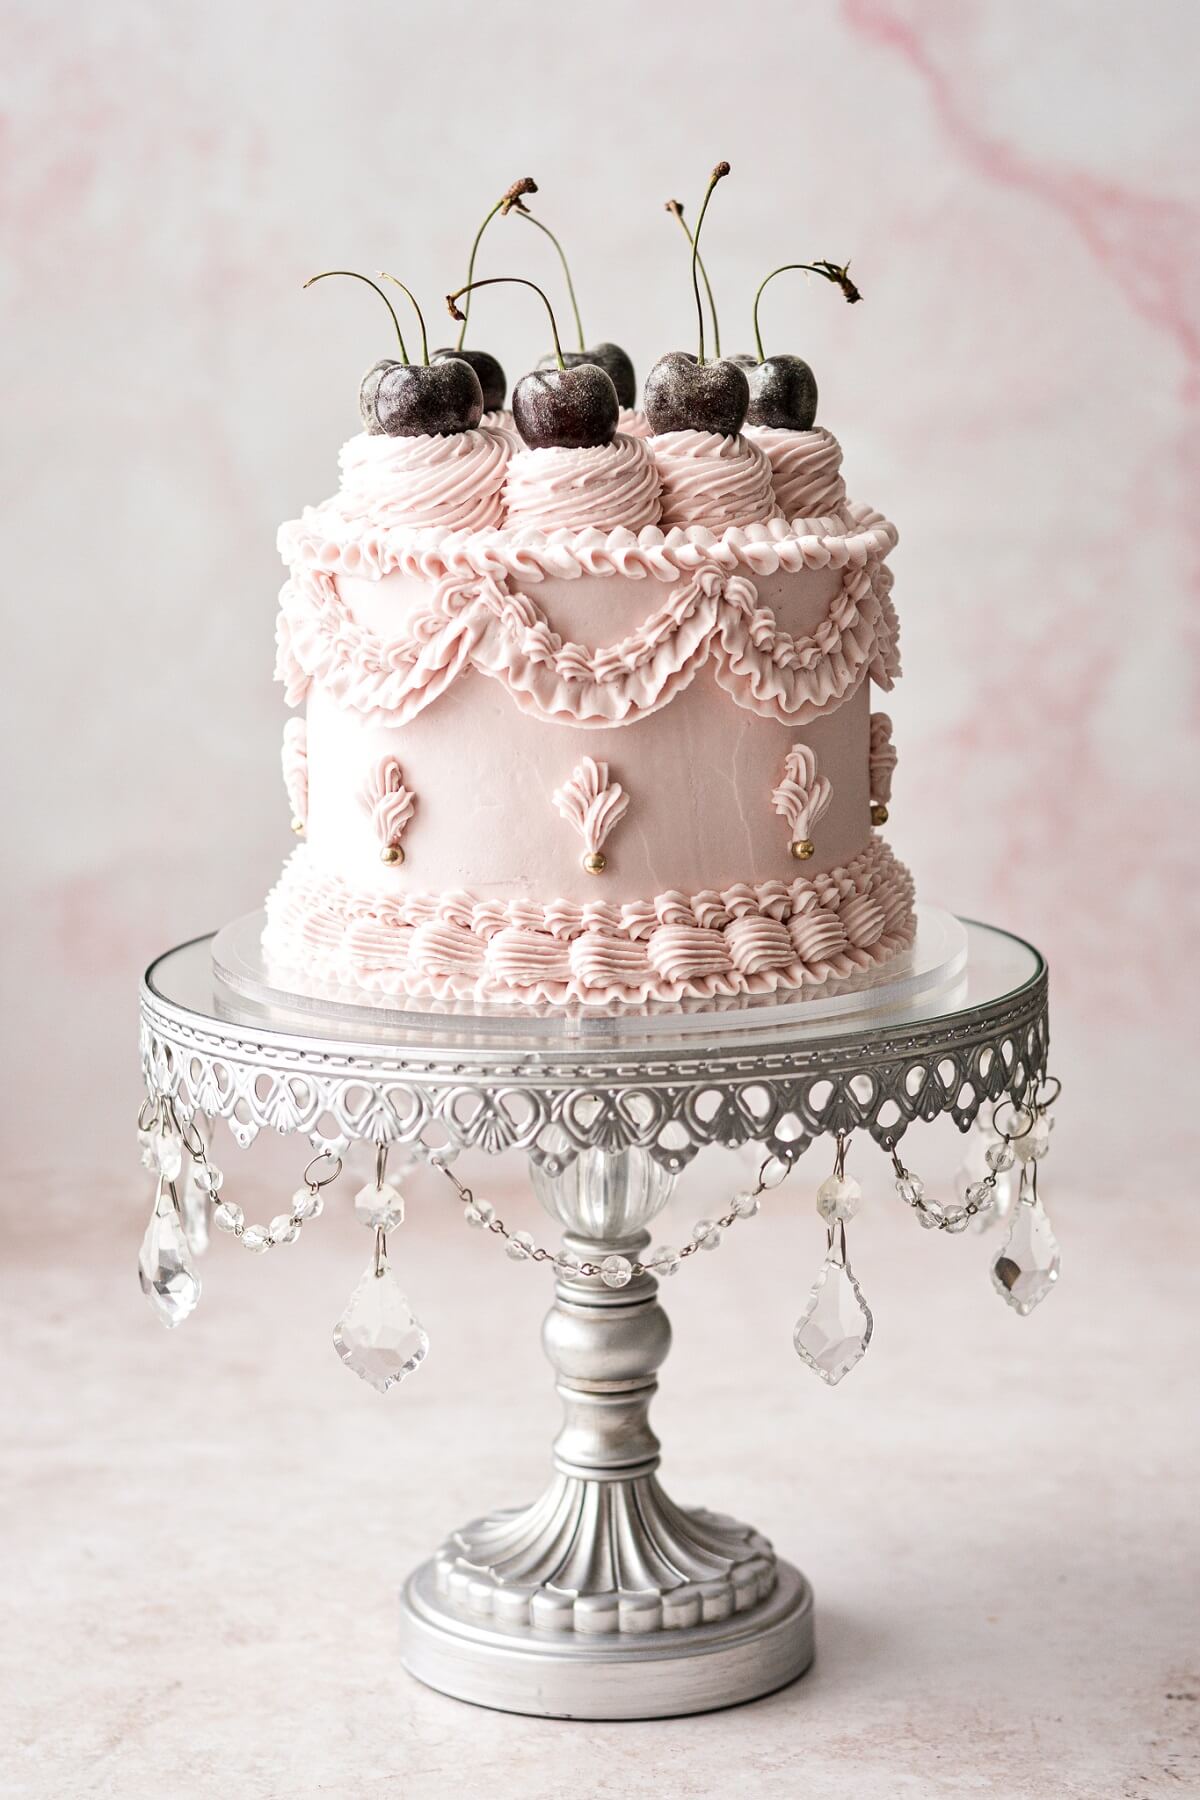
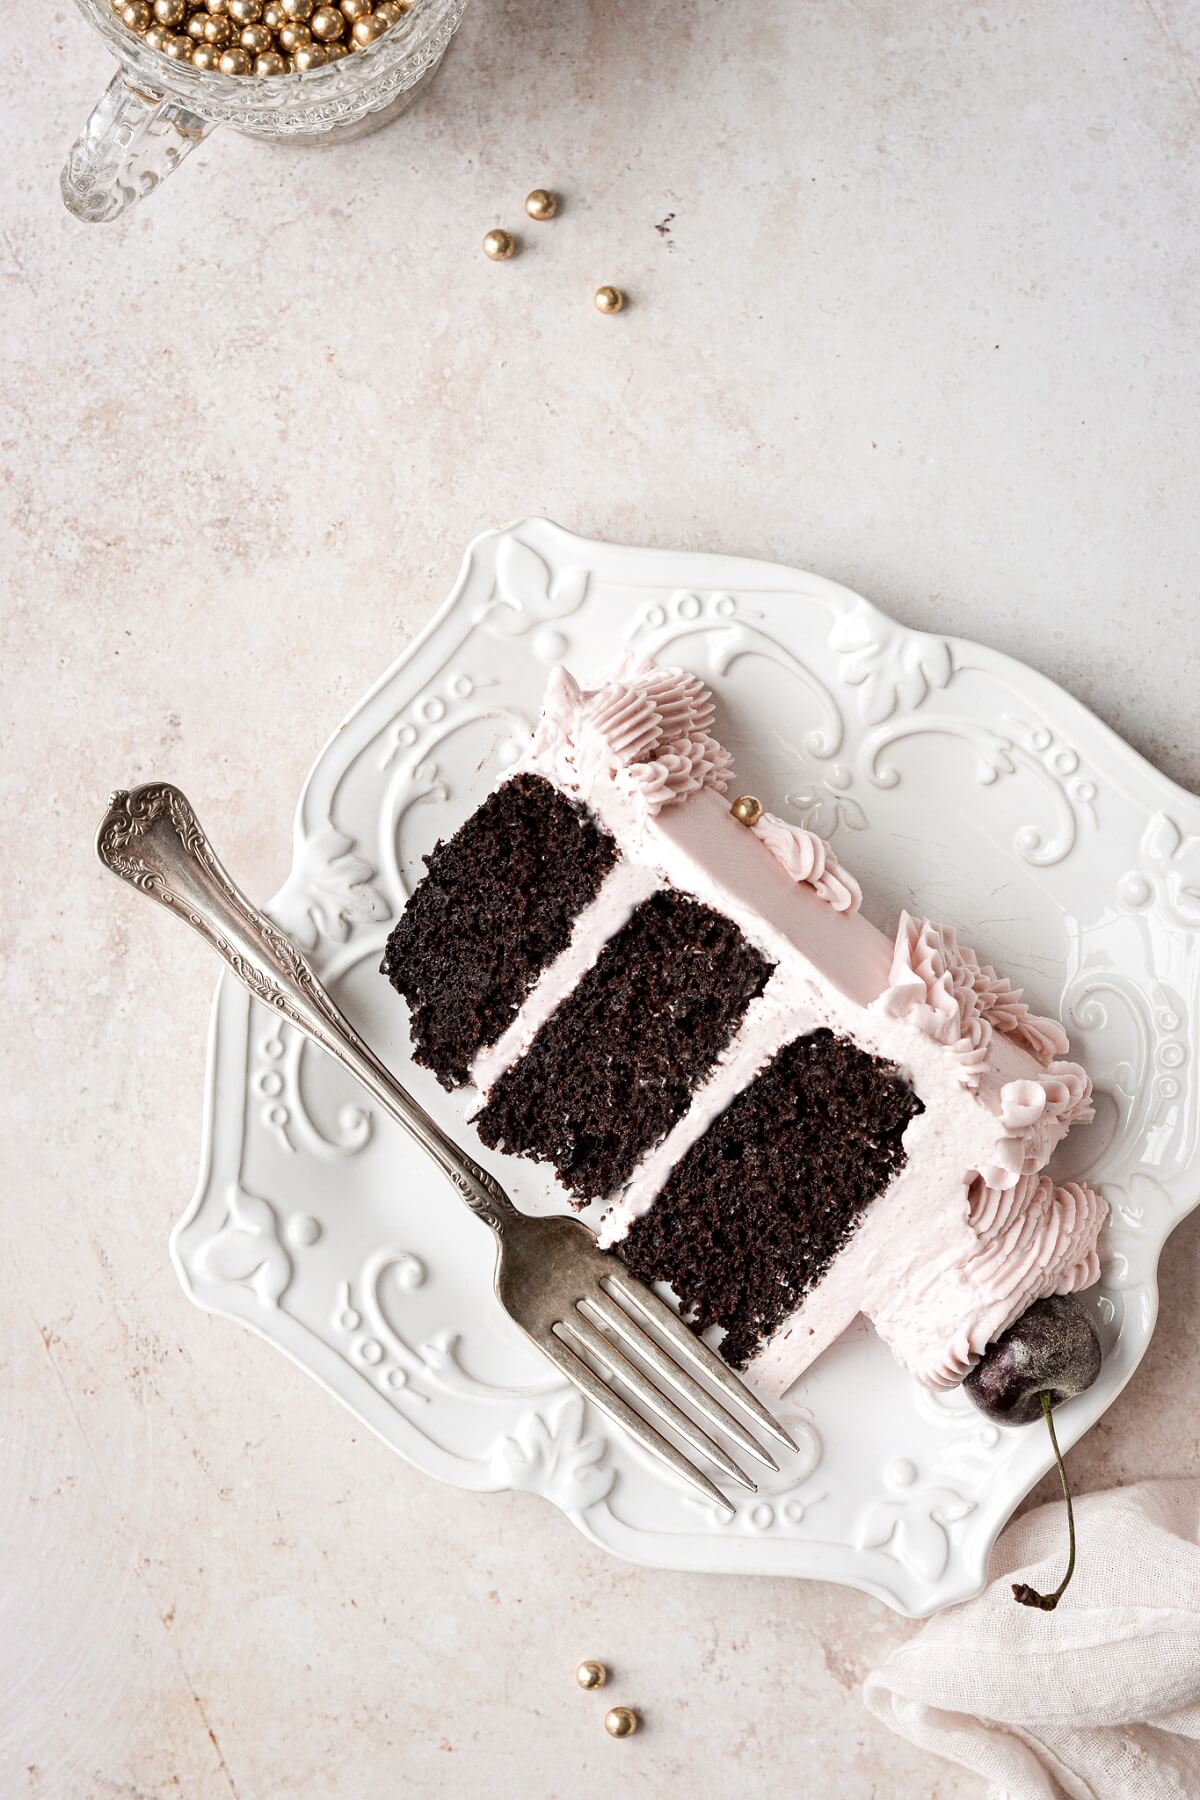
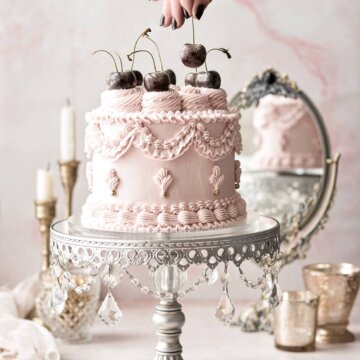
A stunning Lambeth cake with three layers of moist chocolate cake studded with sweet cherries, frosted with fluffy, pale pink cherry buttercream in a beautiful piped vintage design. This gorgeous Victorian style cake would be perfect for a baby’s smash cake photos, Mother’s Day, a christening celebration, or a wedding cake.
Today’s post contains lots of information and step-by-step photos on how to decorate a Lambeth cake, so if you’re more interested in just the high altitude chocolate cherry cake recipe, feel free to scroll through the post to the recipe card at the bottom.
Looking for more high altitude cake recipes? You might also love this lavender lemon cake, chocolate truffle cake, and chai tea spice cake.

This site contains affiliate links. As an Amazon associate, I earn from qualifying purchases. This means that I may make a small commission if you purchase a product using those links. This in no way affects my opinion of those products and services. All opinions expressed on this site are my own.
What is a Lambeth Cake?
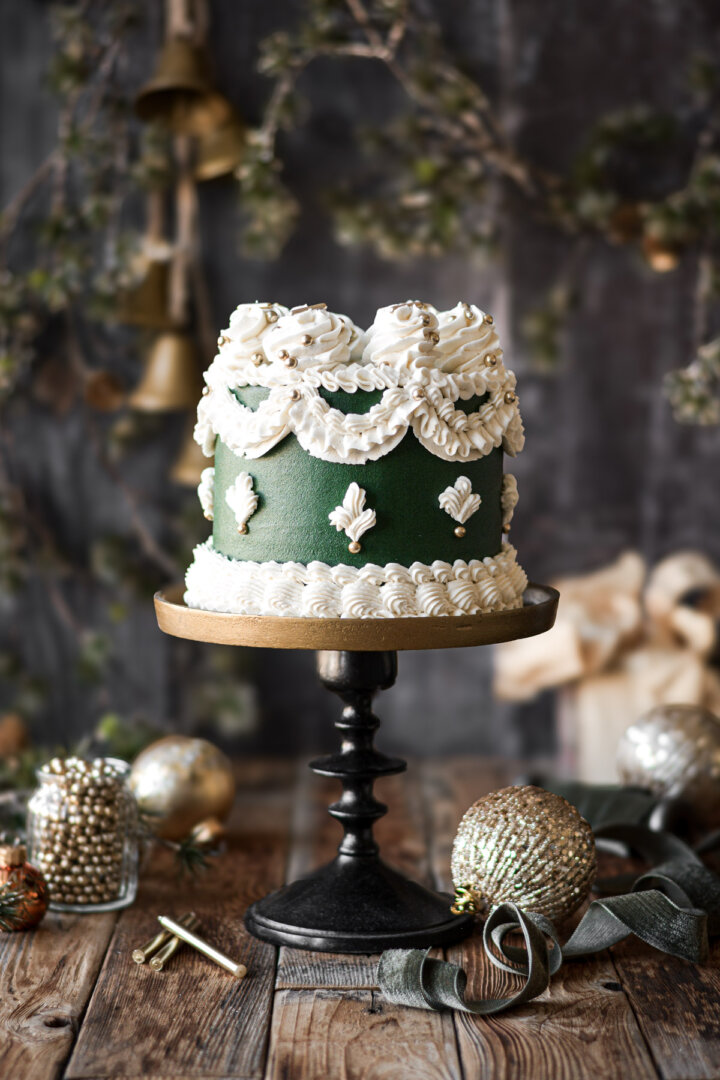
Lambeth piping is a centuries old English tradition of “over-piping”, an ornate style of cake decorating named after Joseph Lambeth, who popularized the style in his book The Lambeth Method of Cake Decoration & Practical Pastries in 1934. You might also hear this style referred to as Victorian or vintage, and it’s reminiscent of the very ornate rococo (roccoco) or baroque architectural style.
Traditionally, cake decorators used royal icing to create rows and rows of intricate piped details on their cakes. Think scrolls, garlands, swags, drapes, ruffles, shells, scallops and pearls. The many layers of icing and tiny details turn a cake into a work of art that looks impressive enough for any special occasion.
In the last few years, social media has once again popularized these old-school cake decorating techniques, and these Lambeth cakes are showing up everywhere! Instead of royal icing, I’ve decorated my chocolate cherry cake with the prettiest pink buttercream and topped it with fresh cherries. My design is also simple enough that even someone without much cake decorating experience can master the techniques with a little patience and practice.
“As I always say, if it’s not Baroque, don’t fix it!” – Beauty and the Beast
See the recipe card at the end of the post for the full ingredients list and instructions.
Ingredients
Chocolate Cherry Cake
- All-Purpose Flour. Adds structure to the cake.
- Cocoa Powder. Gives chocolate cake its chocolate flavor and rich color.
- Granulated Sugar. Adds sweetness and moisture.
- Espresso Powder. A small amount of espresso powder enhances the flavor of the cocoa powder, without making the cake taste like coffee.
- Baking Powder + Baking Soda. Leavens the cake so it rises.
- Coarse Kosher Salt. Balances the sweetness.
- Eggs. Add structure.
- Whole Milk + Sour Cream. Moisture, fat, flavor and acidity.
- Vegetable Oil. Moisture.
- Vanilla Extract. Complements the flavor of the chocolate.
- Cherries. You’ll need pitted cherries, and you can use either fresh or frozen, whichever is in season, although you’ll want fresh cherries for the top of the cake.
Cherry Buttercream
- Unsalted Butter. Make sure your butter is at room temperature. If it’s too cold, you’ll get little lumps of butter in your buttercream, which will clog your piping tips. Also, consider substituting vegetable shortening for half the butter. It makes a much more stable buttercream, especially in warm weather, that won’t soften quite as fast while you’re piping. Soft, melty buttercream is your enemy when piping lots of details on a cake.
- Vanilla Extract. Flavor.
- Powdered Sugar. Sweetens and thickens the buttercream.
- Meringue Powder. Adds stability.
- Salt. Balance the sweetness. If you use unsalted butter, just omit the added salt in the recipe.
- Tart Cherry Juice. Adds cherry flavor and a pretty pink color to your buttercream, without adding chunks of fruit which would clog your piping tips.
Instructions
Make the chocolate cherry cake.
- Preheat the oven to 350 F, and position a rack in the center of the oven.
- Grease the bottoms of three 6-inch cake pans with non-stick baking spray.
- In a bowl, sift together the flour, sugar, cocoa powder, espresso powder, baking soda, baking powder and salt.
- Separately, whisk together the eggs, milk, sour cream, oil and vanilla. Add the wet ingredients to the dry, and whisk until well combined, about 15 seconds. Fold in the chopped cherries.
- Bake the cakes on the center oven rack until a cake tester or sharp knife inserted in the cake comes out clean. If your ingredients are at room temperature, it may take 15-20 minutes for the cakes to bake. My batter was quite cold, due to my using frozen cherries that I didn’t allow to fully thaw first, so my cakes took 25 minutes to bake.
- Set the pans on a cooling rack, cover loosely with a clean kitchen towel, and cool completely before frosting.
Frost with cherry buttercream.
- In the bowl of your stand mixer, beat the softened butter and vanilla extract for 1 minute until smooth. If you’re doing the piped buttercream design, I highly recommend substituting vegetable shortening for half the butter, for a more stable buttercream.
- In a separate bowl, combine the powdered sugar, meringue powder and salt. With the mixer on low, gradually add the powdered sugar mixture, alternating with the cherry juice.
- Increase speed to medium, and beat for about 5 minutes until very light and fluffy, scraping the bowl down occasionally. If your buttercream is a little thin for piping, just add more powdered sugar. If it seems too stiff, add a bit more cherry juice.
- Turn the speed down to “stir” and mix for 2 minutes to get rid of large air bubbles.
- Frost your cooled cake with the buttercream, making the final coat of buttercream as smooth as possible. See my post How to Stack, Fill, Crumb Coat and Frost a Layer Cake for step-by-step photos and a detailed explanation of this process.
Decorating a Lambeth Cake (Step-by-Step Photos)
Cake Decorating Tools and Equipment.
- Cake Decorating Turntable. You really need a good-quality cake decorating turntable, or you’ll get extremely frustrated trying to smoothly spin your cake around as you pipe the buttercream details. I have a marble turntable that I love. The cheaper plastic ones you’ll see at your local craft store might seem tempting, but they have a tendency to wobble and jerk, which can ruin your cake design.
- Cake Board/Disk. I always decorate cakes on an acrylic cake disk, rather than directly on the cake stand. An acrylic disk looks much nicer than a cardboard cake board, and makes it easy to transfer the cake to the refrigerator to chill, to your turntable, and finally to a cake stand. Make sure to place a non-slip pad underneath the disk, so it doesn’t slip off your turntable or cake stand. For today’s chocolate cherry Lambeth cake, I used an 8 1/2 inch acrylic disk.
- Piping Bags. You’ll need 2 piping bags, either 12 or 16 inches will do.
- Coupler. A standard-sized coupler will make it easy for you to switch between different piping tips while decorating your cake.
- Piping Tips: The tips I used are #104, #4B, #17, #69. You can use similar sizes, of course, but if your tips are too much bigger or smaller, then your design will look a bit different in the end. #104 is a petal tip, used to create the ruffled garlands. #4B is a large open star tip, used for the swirls on top of the cake, and the larger shell border around the bottom of the cake. #17 is a small star tip, used for the smaller shell borders and garlands. #69 is a leaf tip, but makes a pretty ruffle around the top edge of the cake.
- Gold Sugar Pearls. I also finished the look of my cake with gold sugar pearls. Note that these are often labeled as “only for decoration” and eating them is not advised.
The Wilton Master Decorating Tips Set will include all of the tips and couplers that you’ll need for today’s cake design.
Prep the cake by making a decorating template.
- Piping all those details to decorate your Lambeth cake may look complicated, but when you break it down to each individual step, you’ll see that it’s really quite simple.
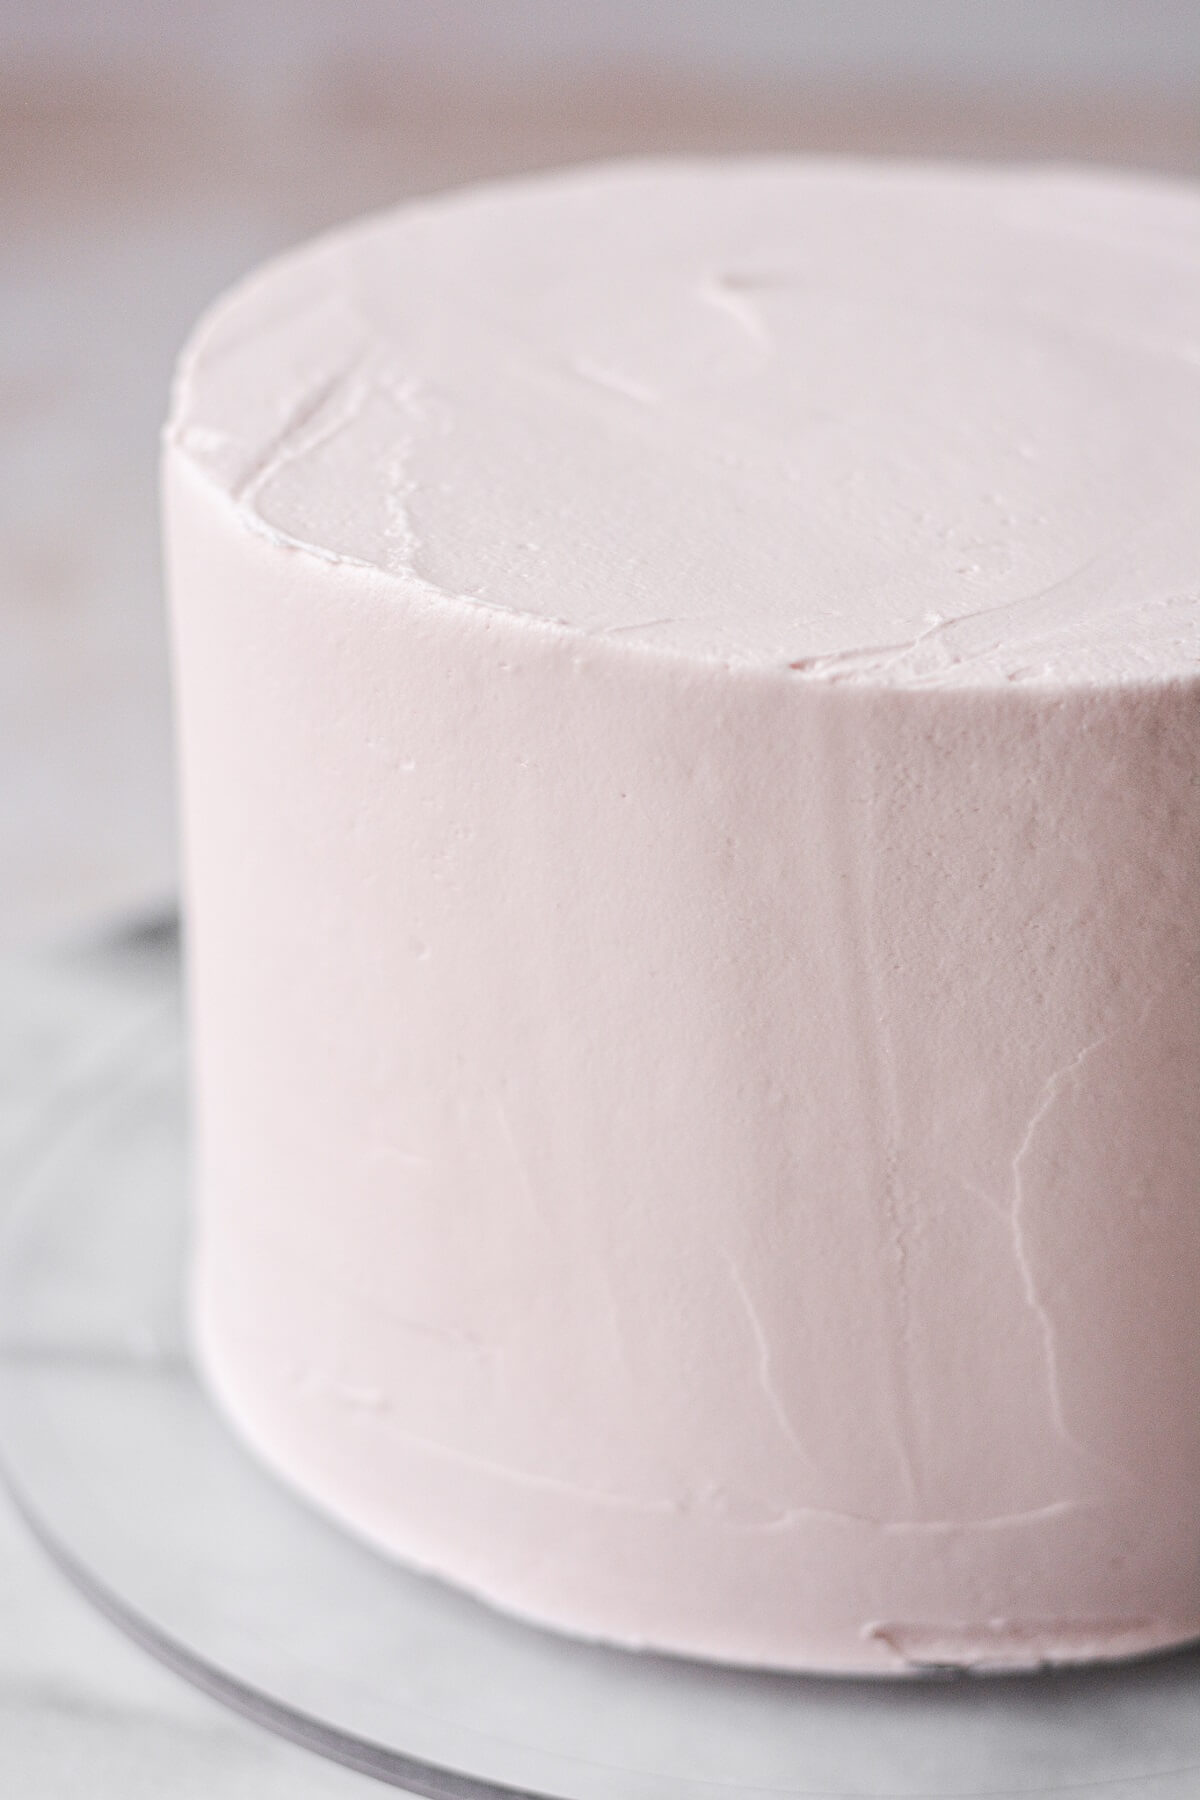
- First, start with your frosted cake. Make the buttercream as smooth as you can, and chill your cake well, at least several hours in the refrigerator, before starting the piping. See my post How to Stack, Fill, Crumb Coat and Frost a Layer Cake.
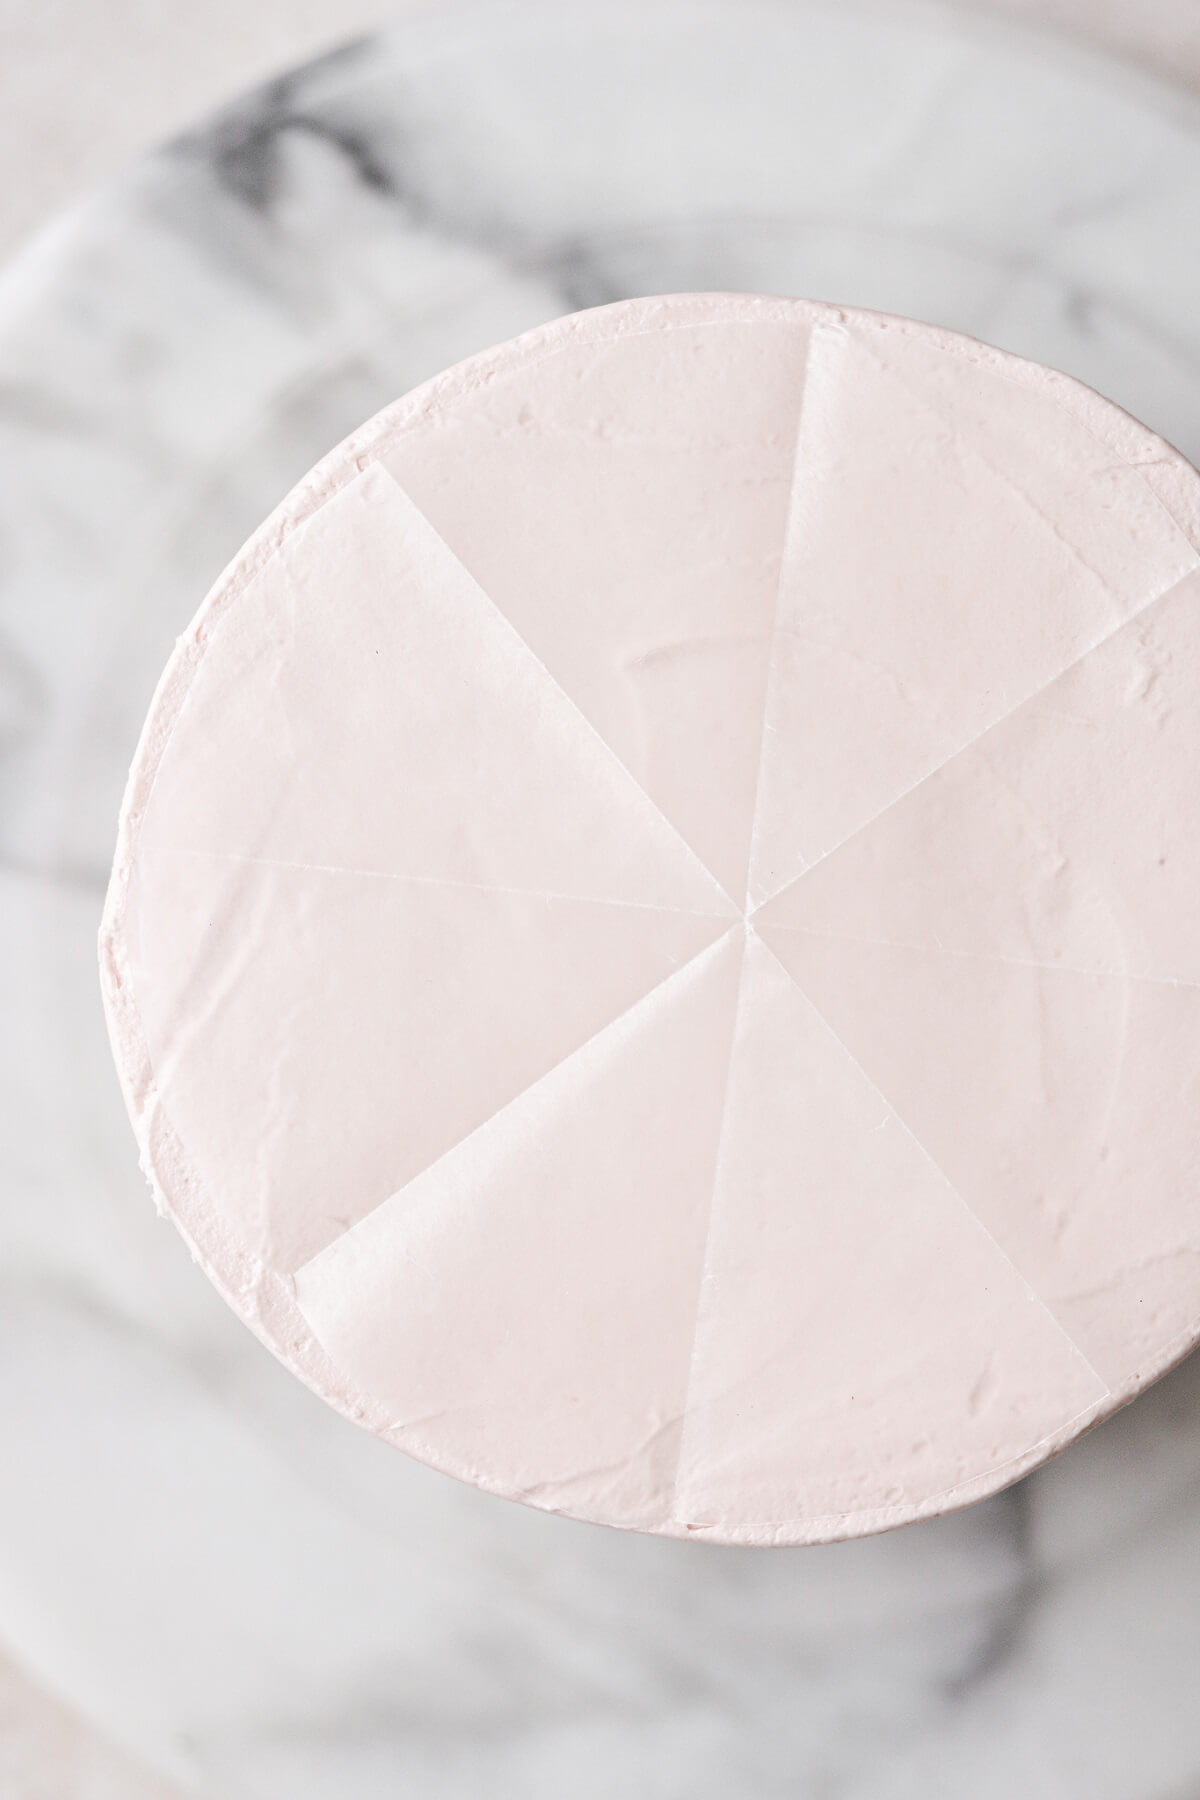
- Next, cut a circle of wax paper that’s the same diameter as the top of your cake.
- Fold the circle of paper in half three times, to form 8 creases in the paper. Set the paper on top of your cake, and use a toothpick to make 8 equal markings around the side of the cake. This will help you get your piped design perfectly even, all the way around the cake. Remove the paper.
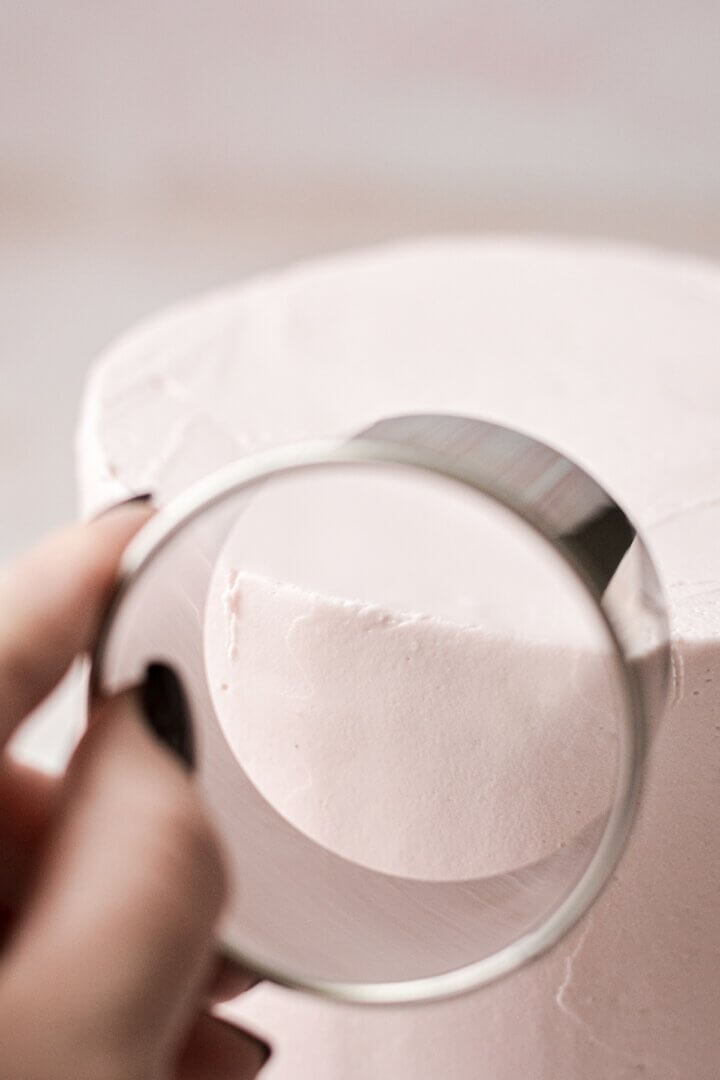
- Now take a round cookie cutter or biscuit cutter with the same diameter as the markings around your cake. The circumference of my cake was about 20 inches, so my 8 markings were about 2 1/2 inches apart. So I used a 2 1/2 inch biscuit cutter to mark my cake.
- Place a piece of tape across the biscuit cutter. This is simply to help you line up the tape with the top edge of the cake, so when you mark the cake with the cutter, your half circles will all be positioned the same.
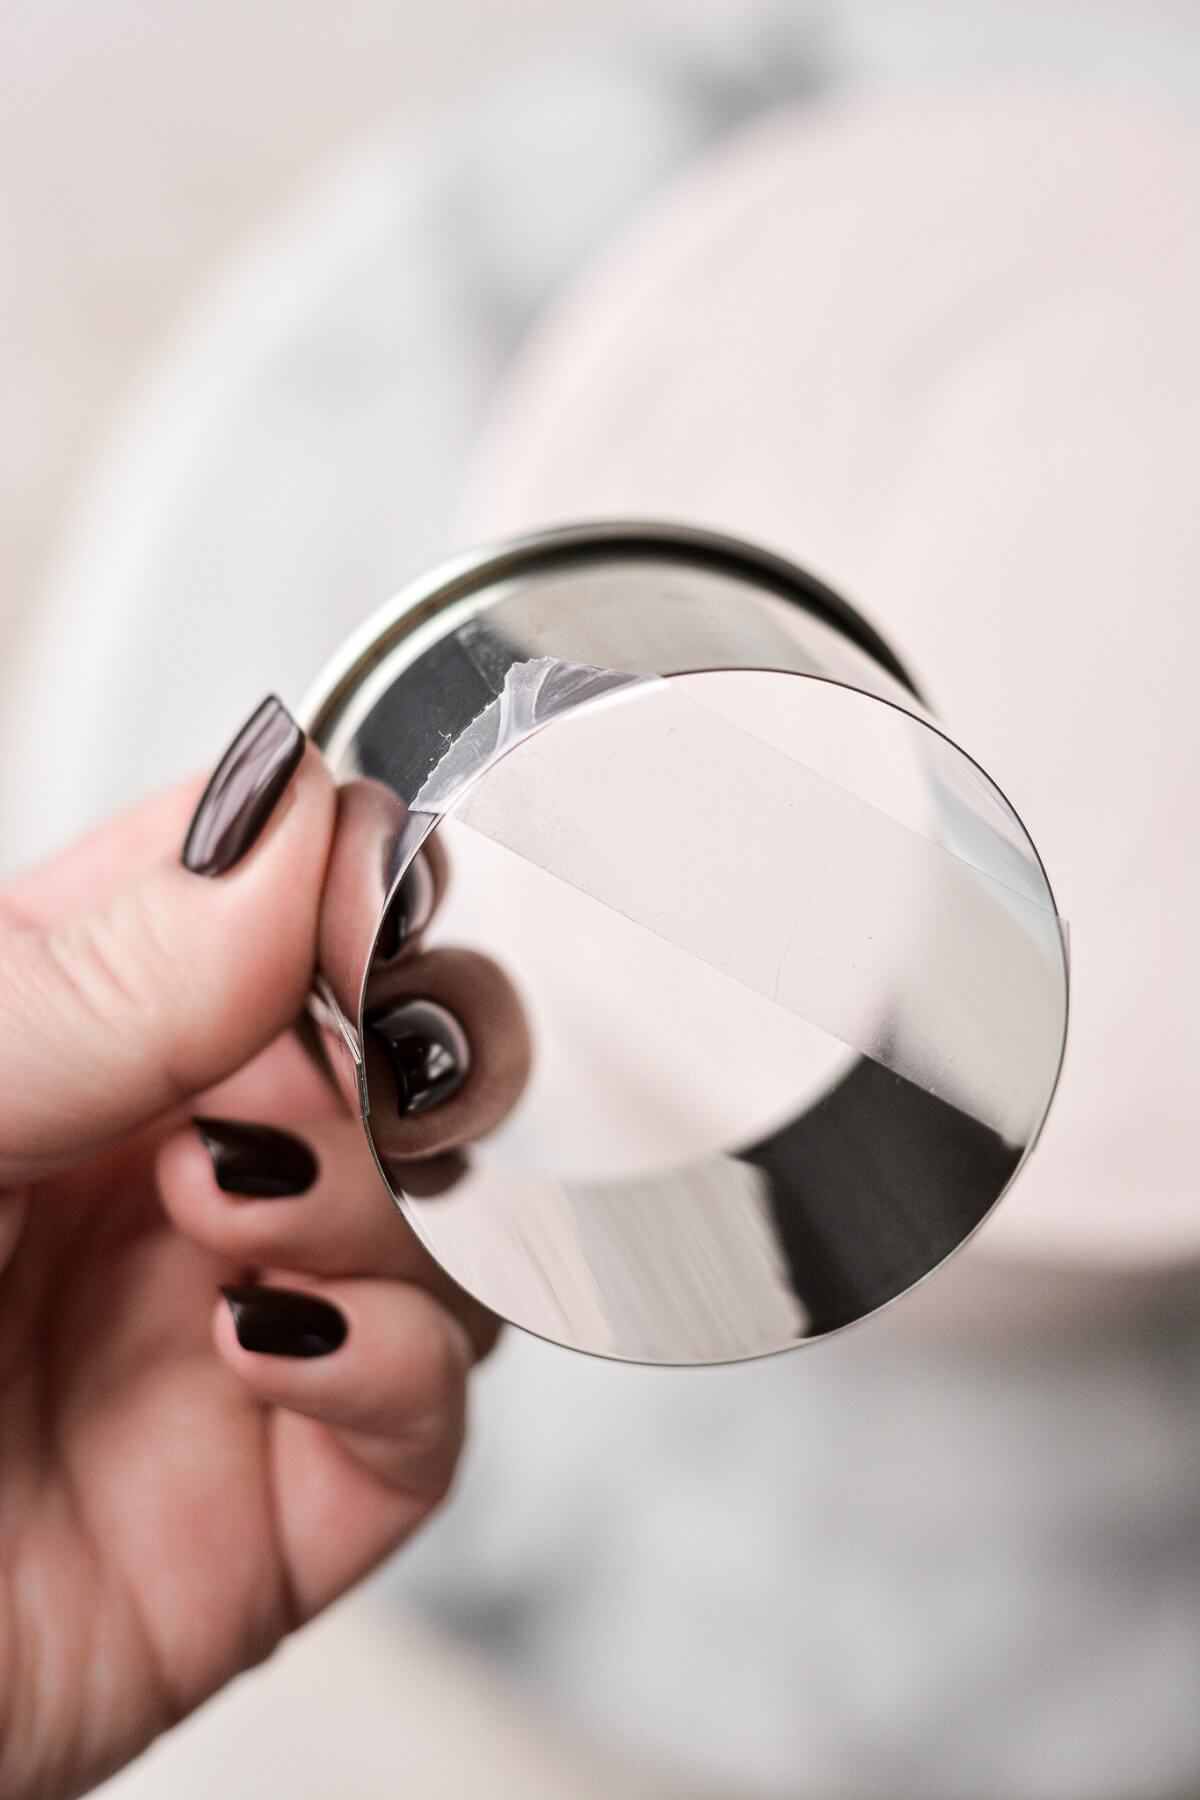
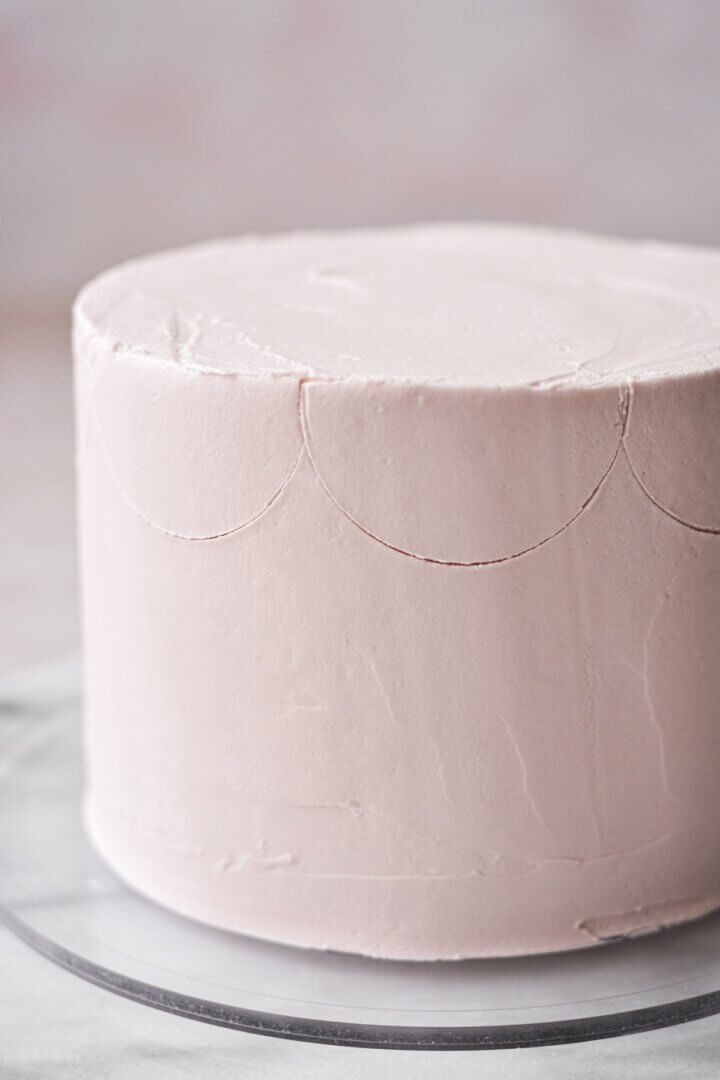
- Lightly press the cutter against the cake, to mark 8 half-circles all the way around.
- Your template is done, and you’re ready to start piping!
Decorate your cake.
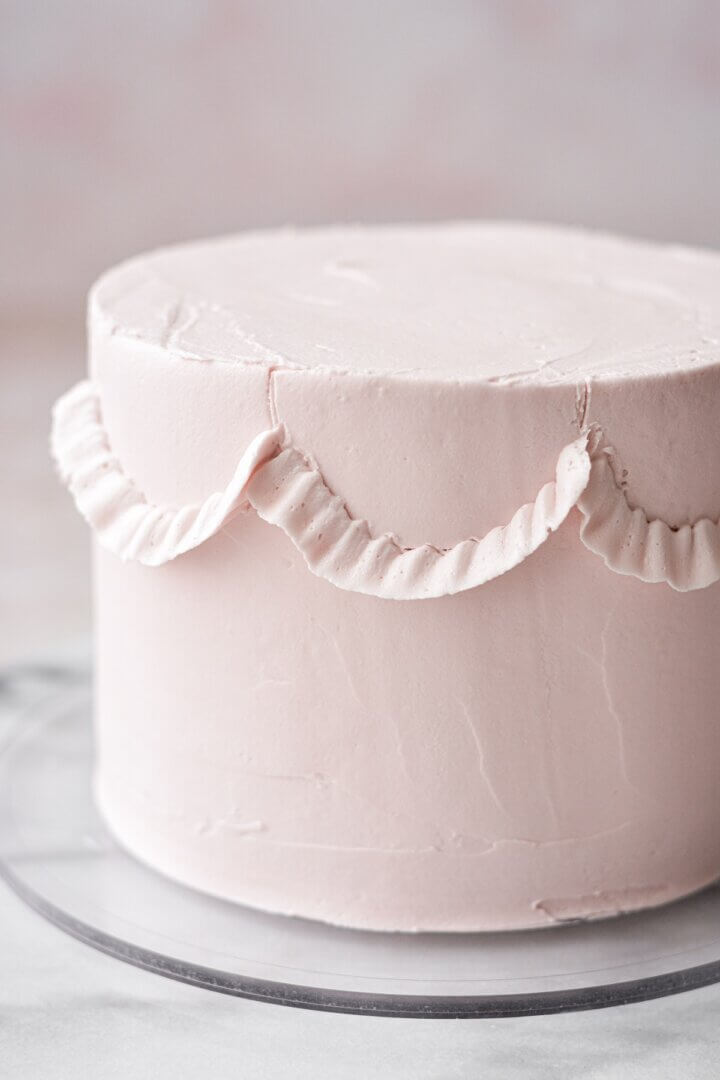
- Begin by fitting a piping bag with the coupler and tip #104. Fill the bag half full with buttercream, and refill as needed throughout the decorating process.
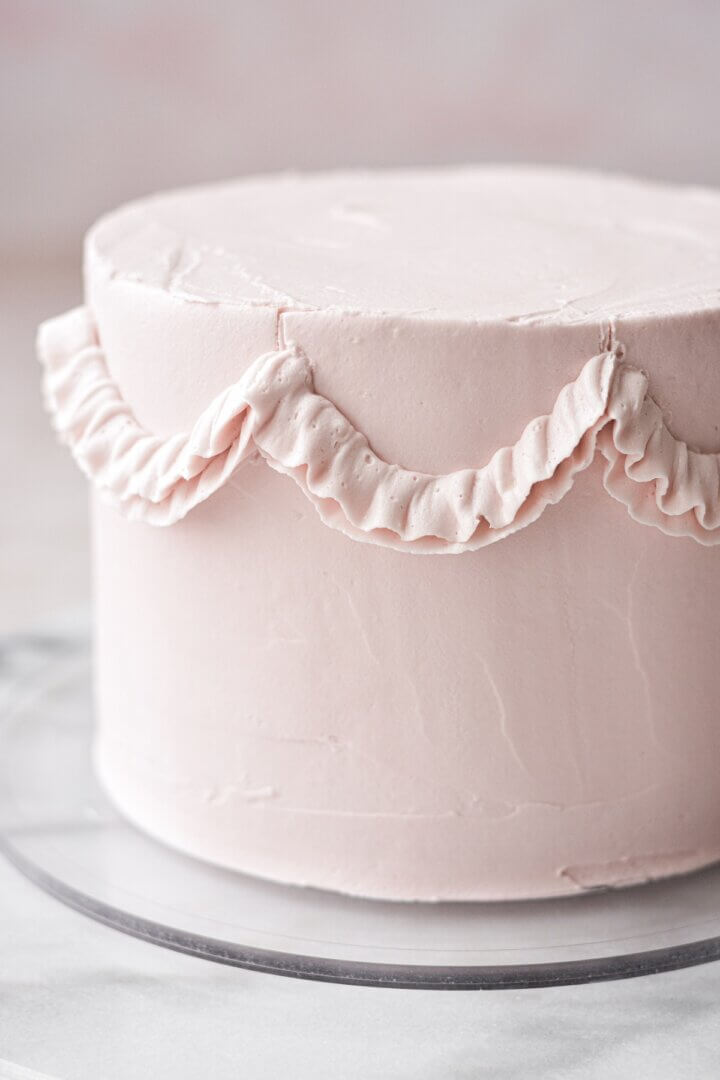
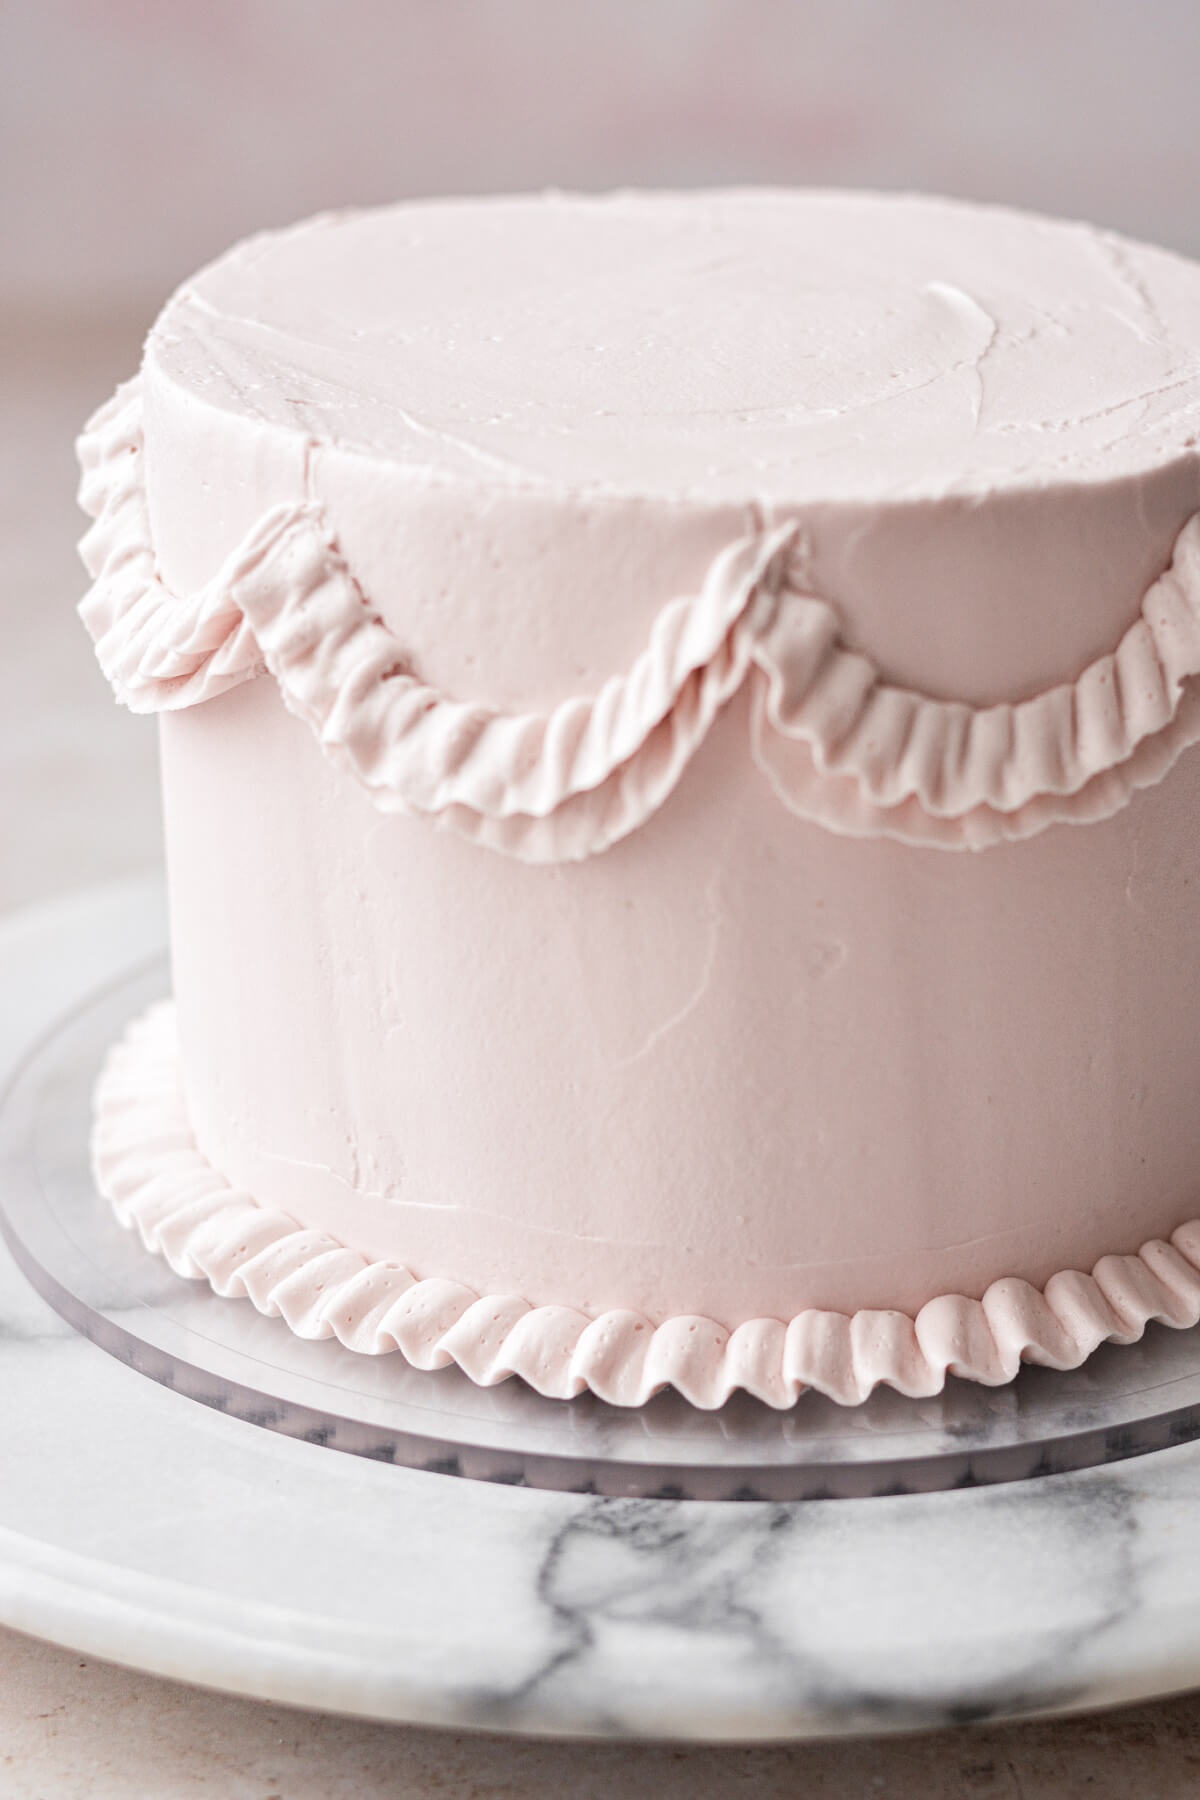
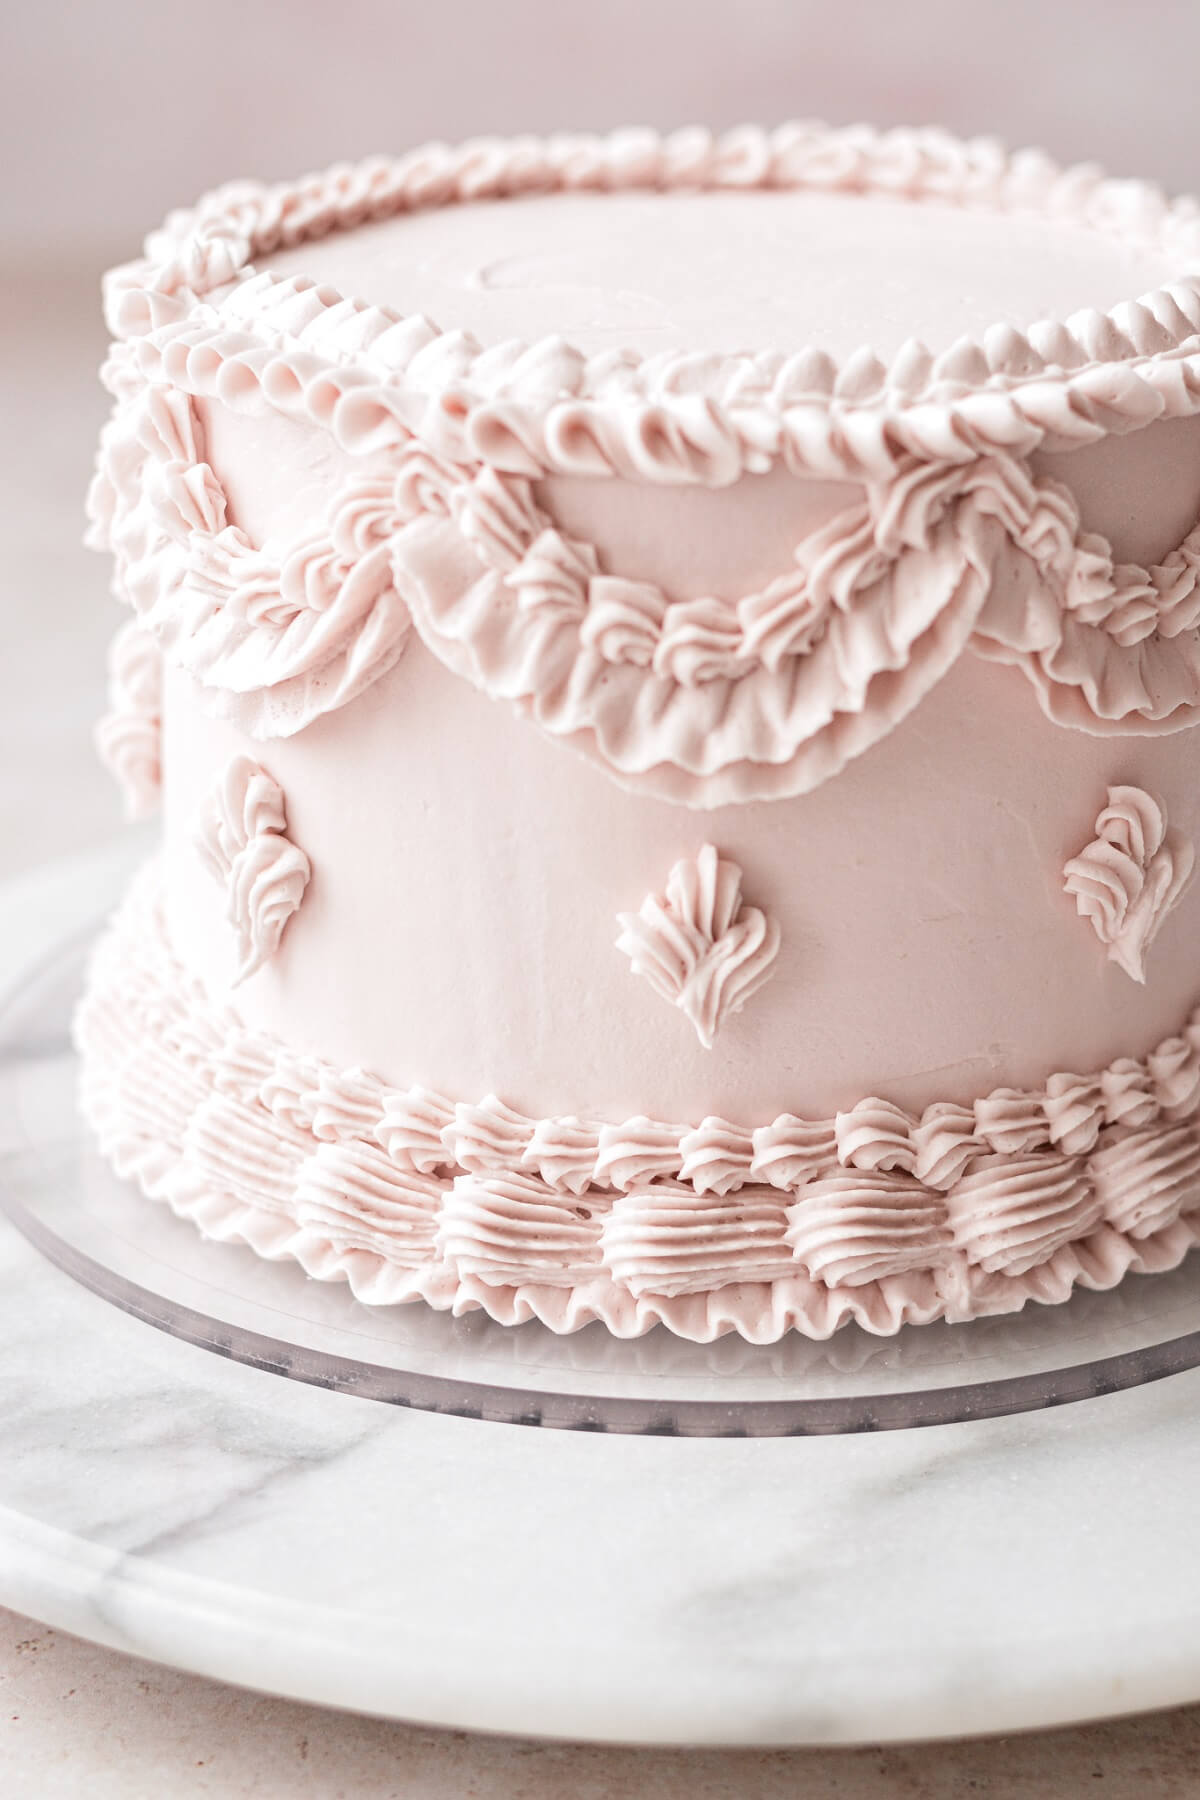
- With tip #104, pipe a ruffle along the half circles, all around the cake, to make a ruffly garland or draped design. Note that on the first row of ruffles, I didn’t go all the way up to the top edge of the cake, since I wanted to leave room for more rows of piping.
- Now pipe a second ruffle, right above the first.
TIP: When piping your ruffles, make sure that the larger, rounded end of the petal tip is against the cake, with the smaller pointed end facing out/downward at about a 45 degree angle to the cake. This is definitely a technique you should practice a few times on a piece of wax paper, to get it right before you start piping on your cake.
- Still using tip #104, pipe a ruffle around the bottom edge of the cake.
- Now switch to tip #17.
- Pipe a “shell” border above the two rows of ruffles to complete the garlands or drapes around the cake.
- Still using tip #17, pipe three shells beneath each swag, as shown in the photos.

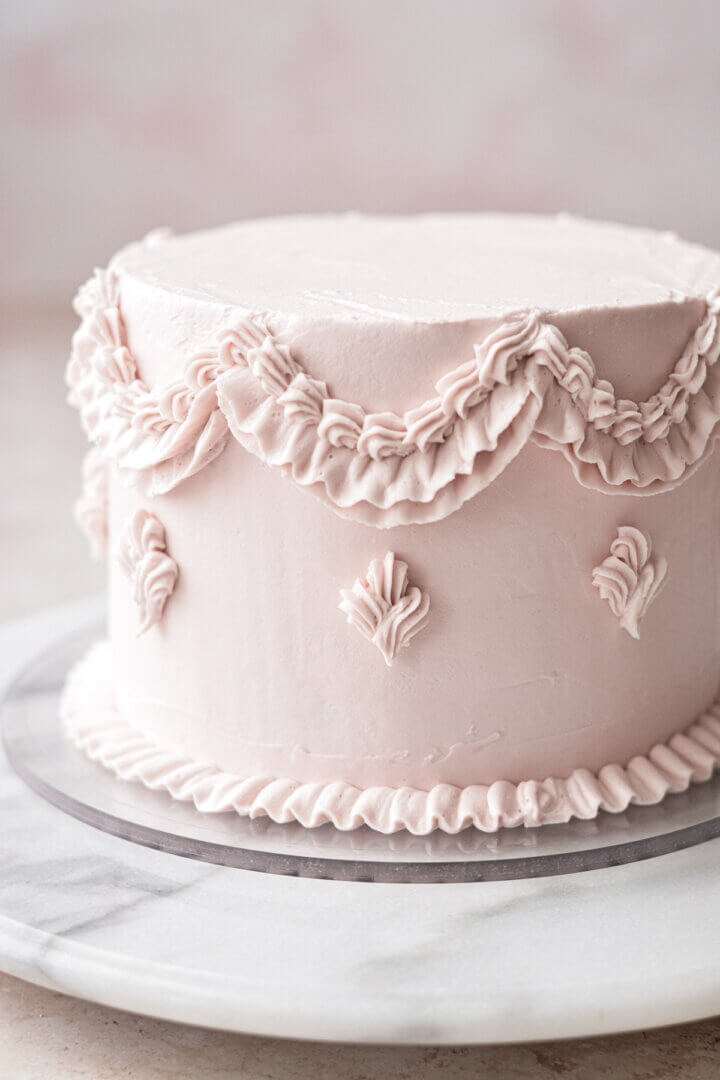
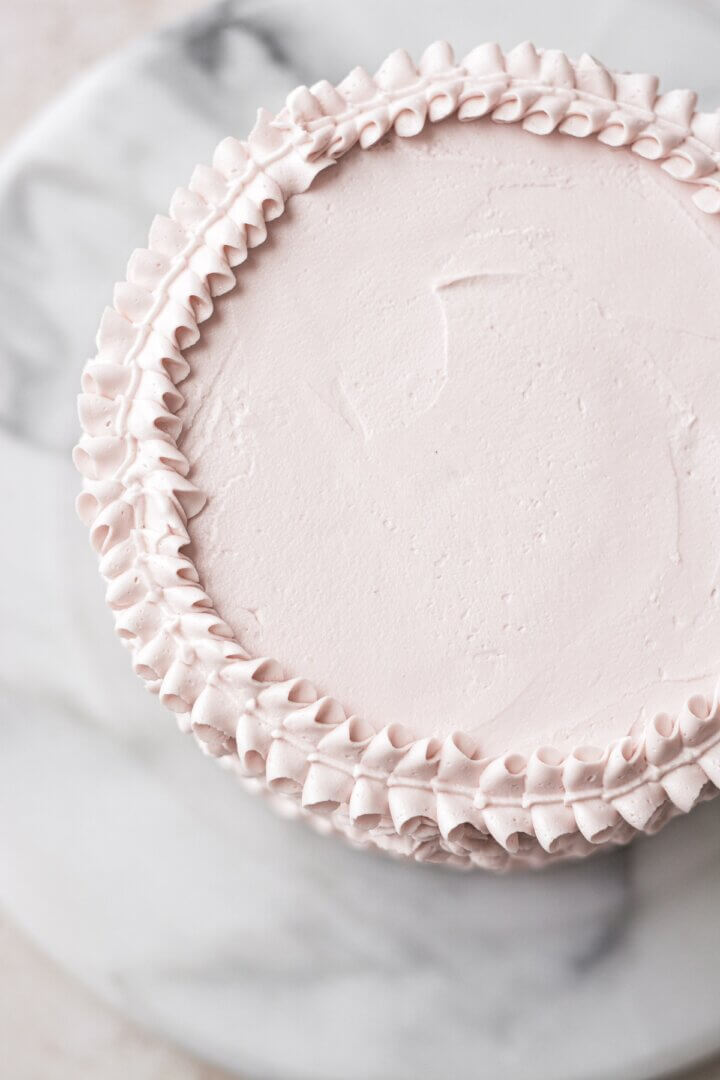
- Switch to tip #69. This is a leaf tip, but it’s perfect to pipe a ruffle along the top edge of the cake.
- Use the same “push and pull” movement that you do when piping a shell border to pipe the ruffle around the top edge. If you’re unsure how to do this, be sure to practice first on a piece of wax paper, until you like how it looks, before you start piping on your cake.

- Switch to your second piping bag and fit it with tip #4B. This tip is too big for a standard coupler, which is why it needs its own piping bag. Just drop the tip into the bag, and snip off the end, making sure the end of the bag isn’t covering the teeth on the piping tip.
- With tip #4B, pipe a large shell border above the ruffle around the bottom edge of the cake.
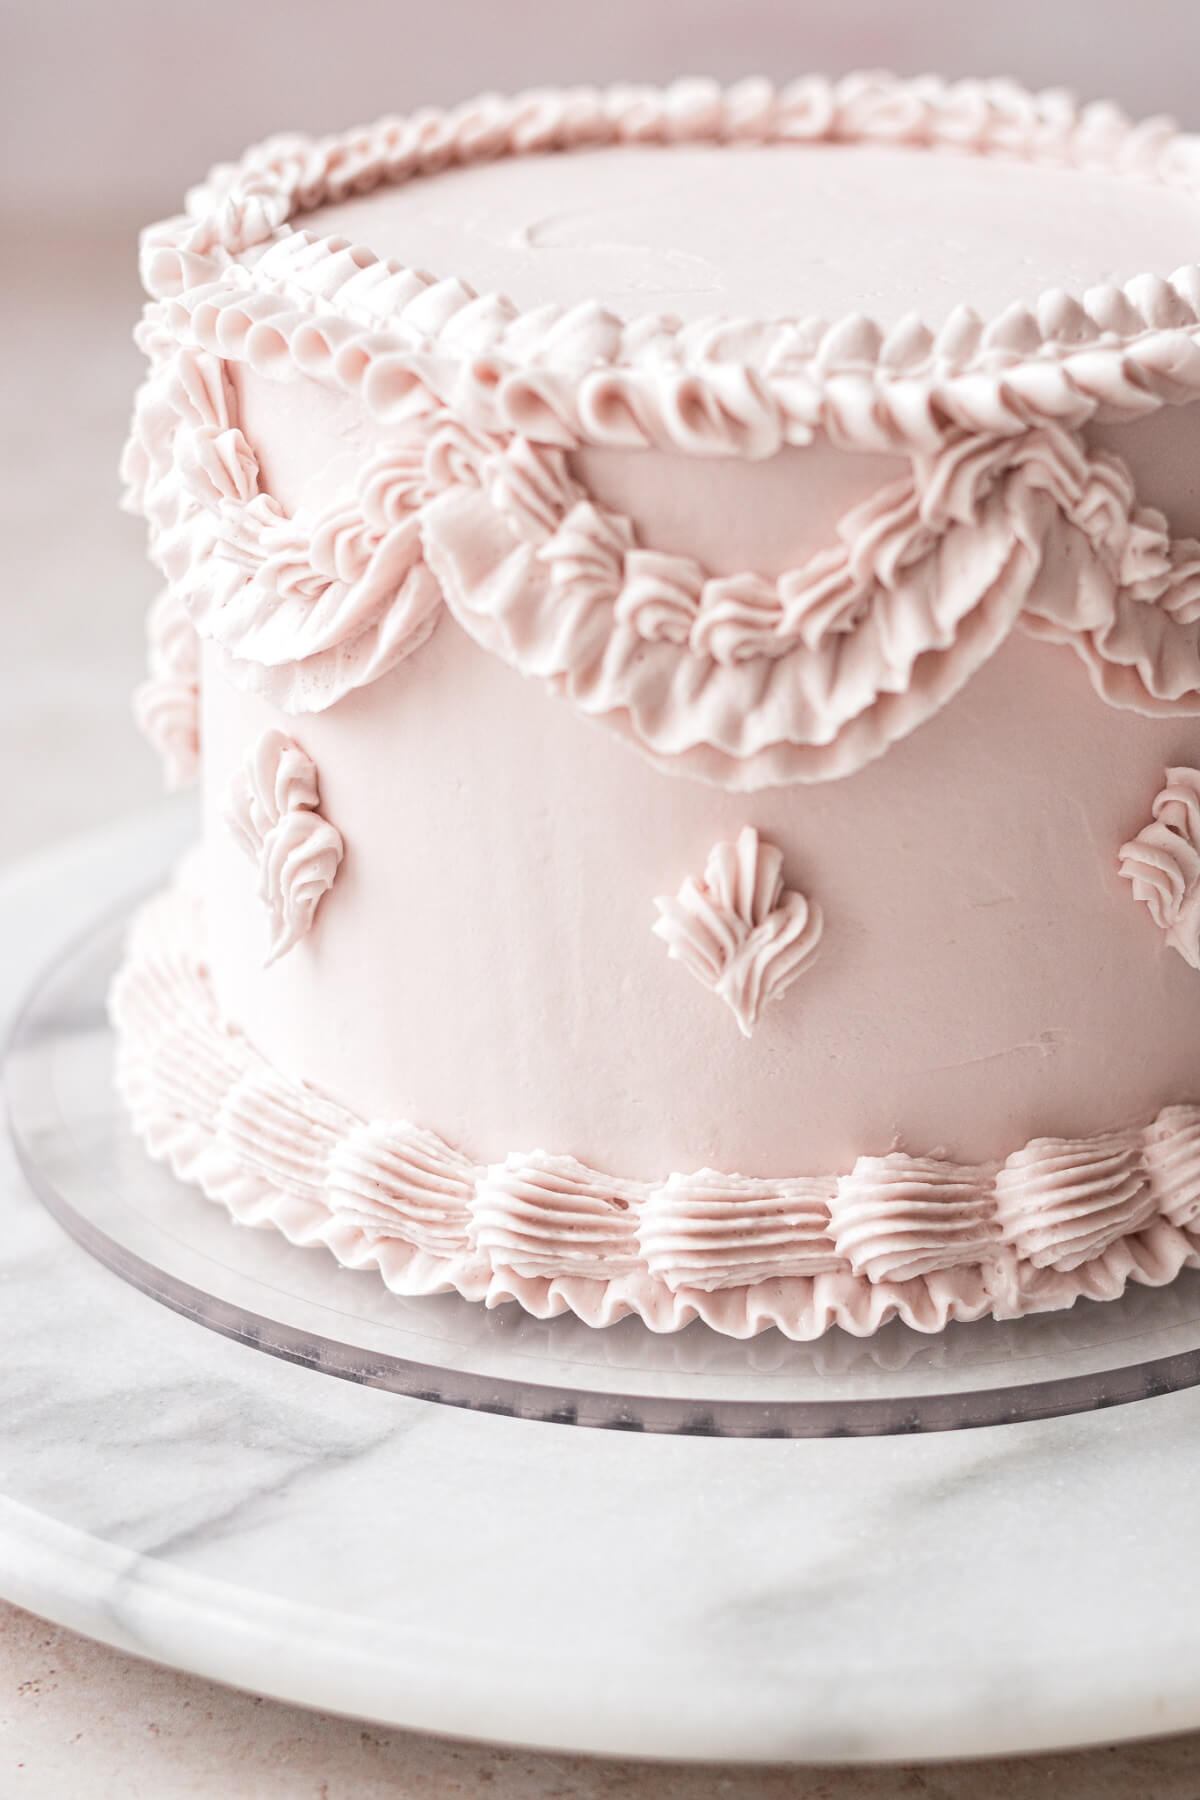
- With your other piping bag, switch the coupler to tip #17 again, and pipe a small shell border above the larger shells, around the bottom edge of the cake. You’re almost done!
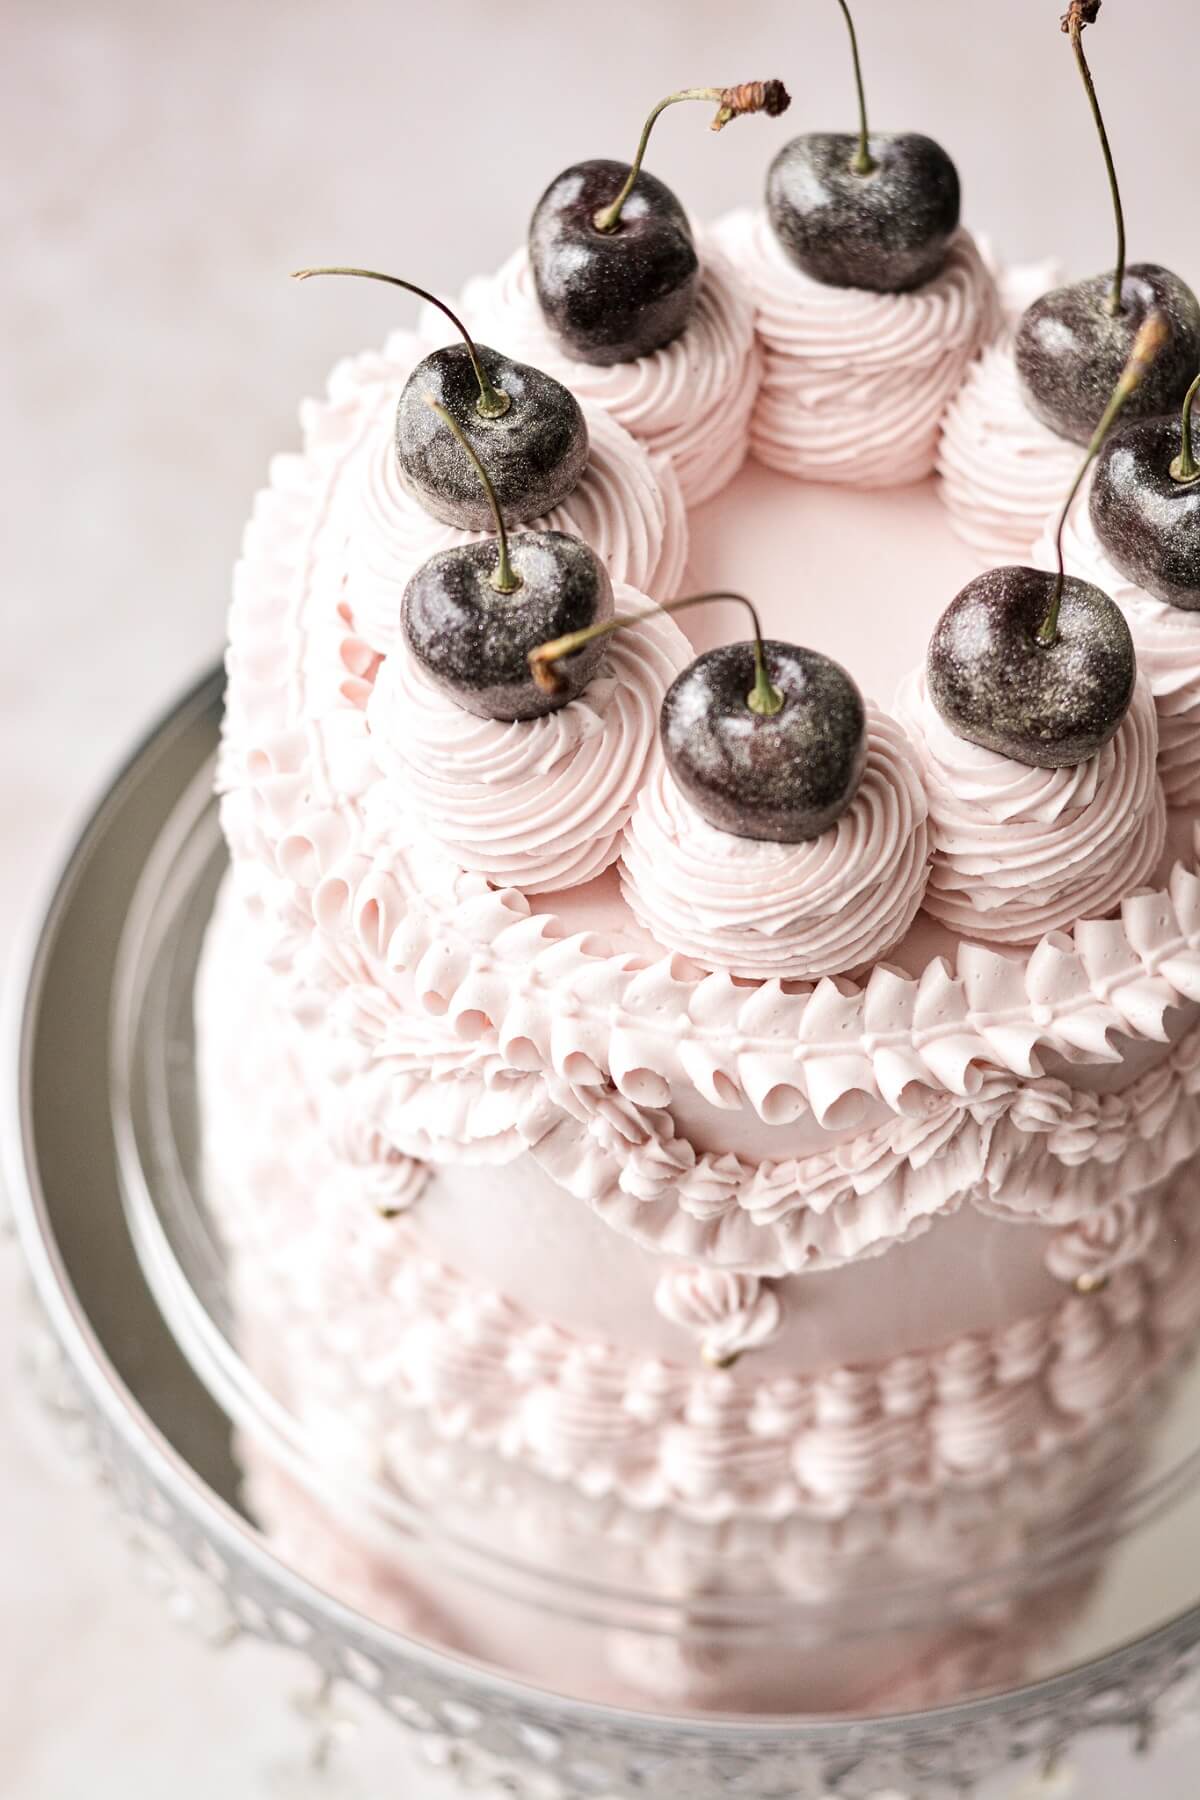
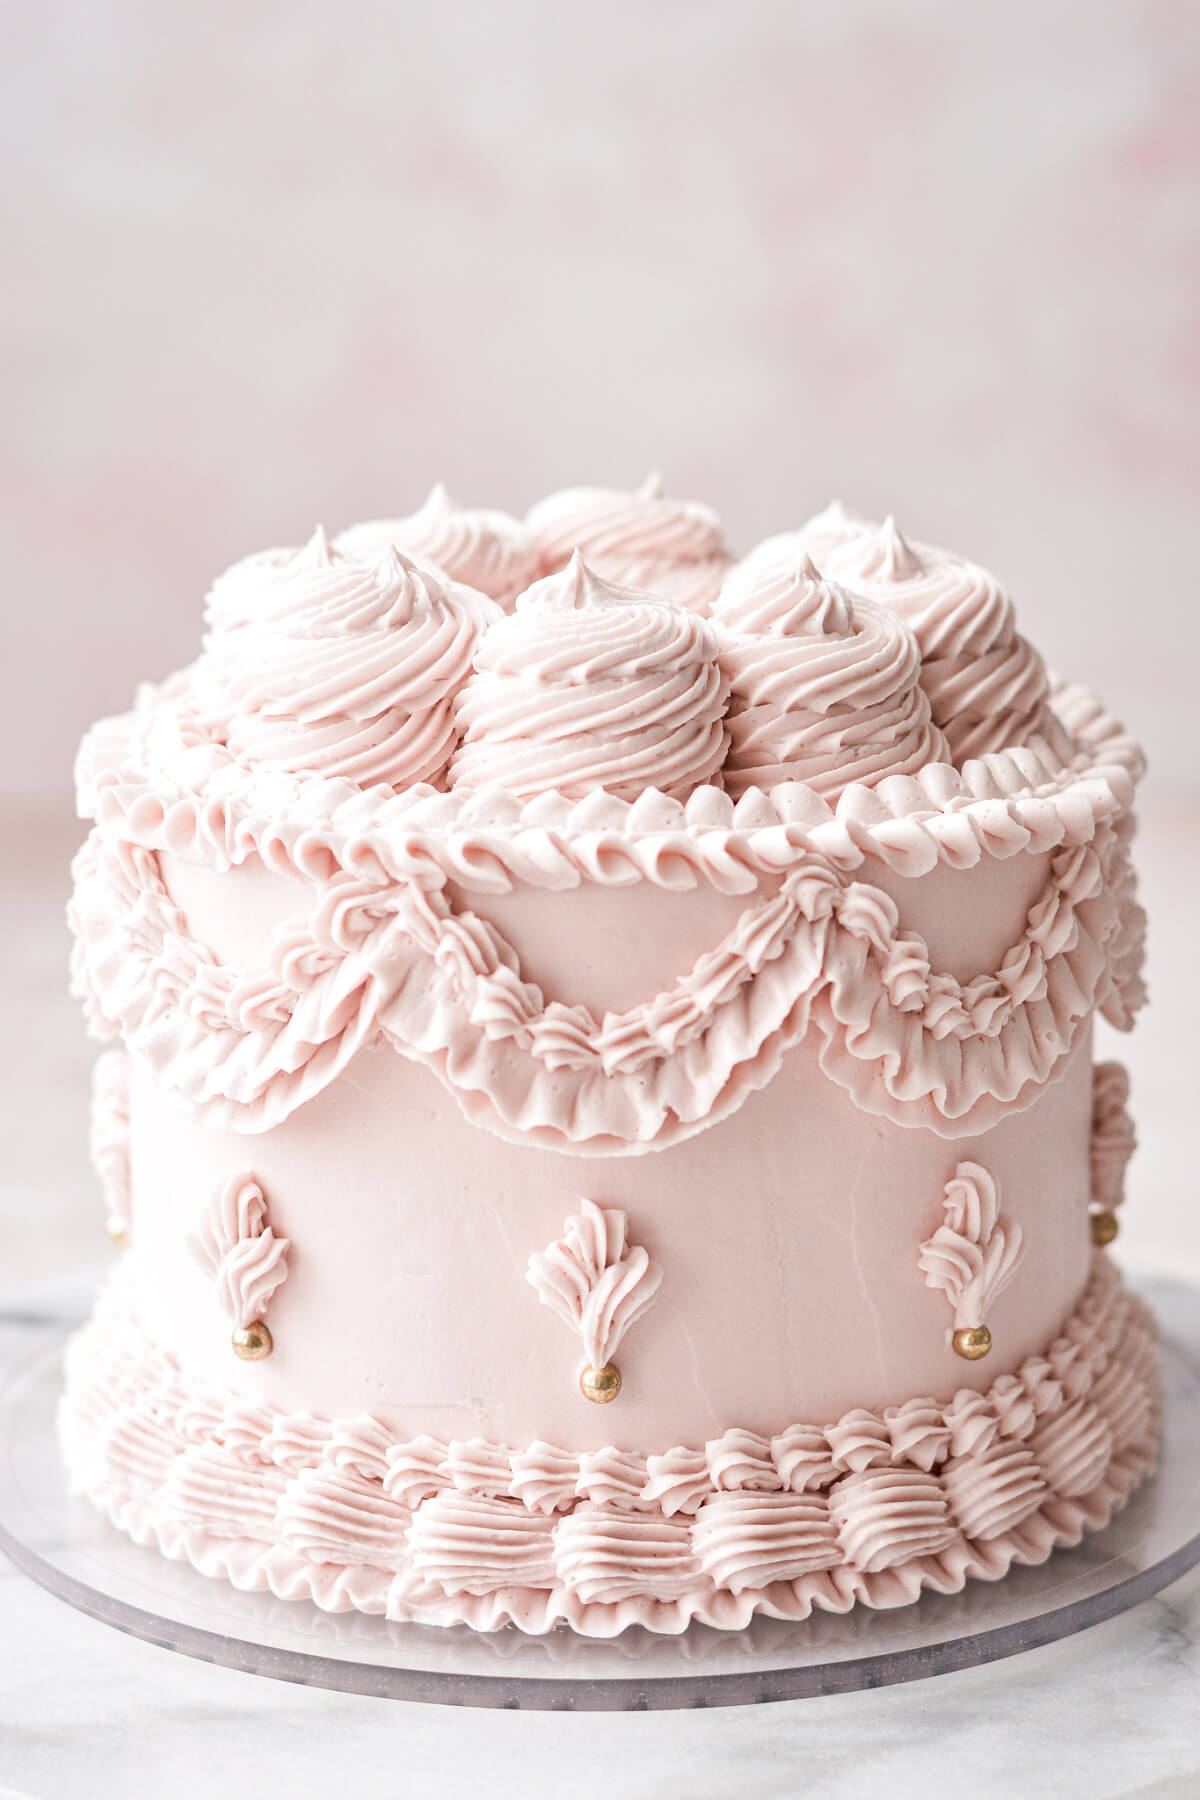
- With tip #4B again, pipe 8 swirls on top of the cake.
- If you like, add 8 gold sugar pearls as shown in the below photo.
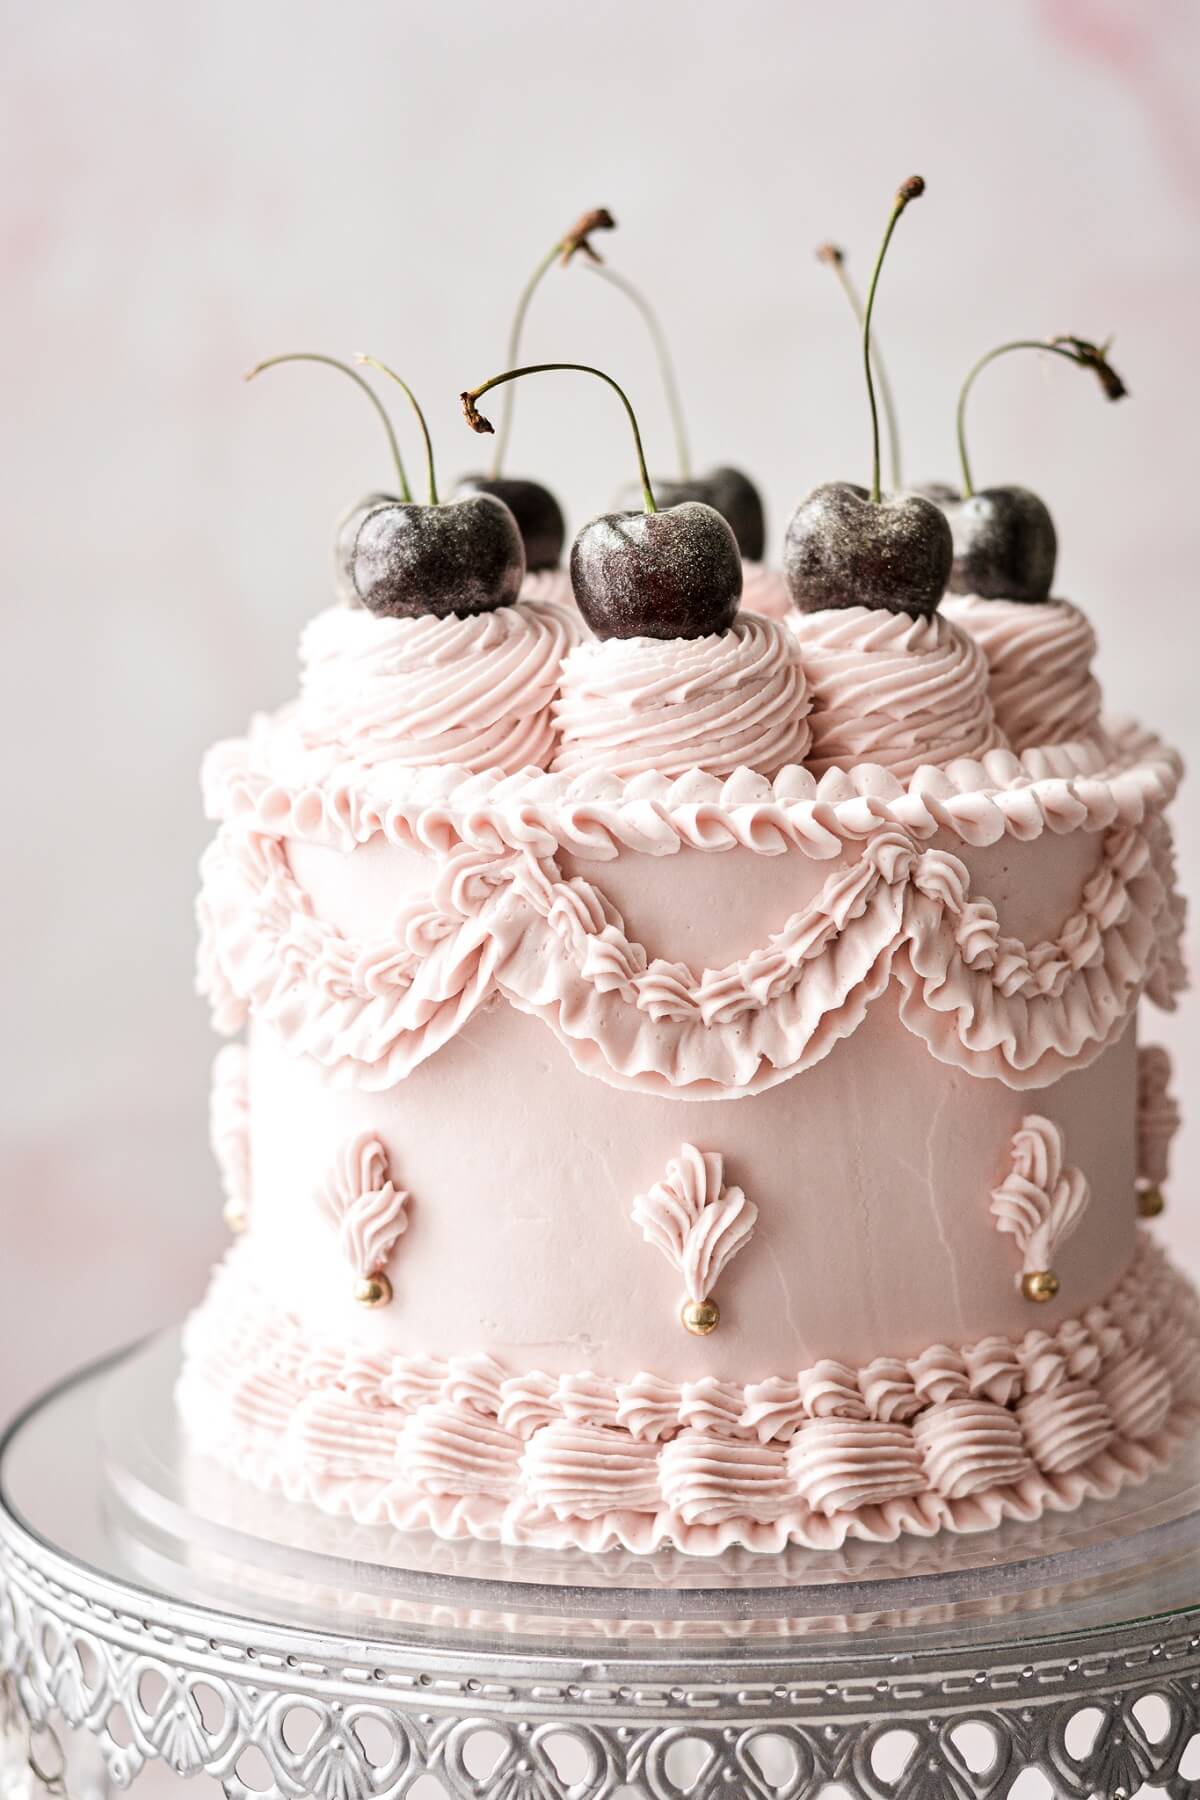
- Top the 8 swirls on top of the cake with fresh cherries.
- You’re done!
Decorating Tips and Tricks
Mise en Place.
Mise en place is a French culinary phrase which simply means to put everything in place or gather everything together. Get all of your ingredients, tools and equipment laid out and organized, so when you need something quickly, you know exactly where it is.
Chilled Cake.
Piping won’t stick well to warm, soft buttercream, so don’t even think about starting the piping on your cake before chilling it first. The frosted cake will need at least 2-3 hours in the refrigerator to firm up. If you have the freezer space, you could also just pop it into the freezer for 1 hour.
Stable Buttercream.
Make sure you use a stable buttercream that will hold up well to the piped design and the heat of your hands. This isn’t a design that I would recommend using with cream cheese frosting, which tends to be much softer.
Keep Things Cool.
As you pipe, the heat of your hands will inevitably warm up and soften the buttercream in the piping bag, especially if you’re working slowly. If your buttercream becomes too soft to hold the design, just put the piping bag in the refrigerator for a few minutes to firm back up, then continue on. If it’s summertime, crank up the AC to keep your kitchen cool while you work.
Start and Stop on the Same Side.
When you pipe the shell borders and ruffled garlands, try to start on the same side. The start and stop position where these borders meet will end up being the back of the cake when you’re done.
Practice First.
I can’t stress enough that you should always practice first, especially when you’re a beginner. If you mess up on your cake, it can be really difficult to scrape the frosting off without ruining the cake, when there’s already lots of other piped details in the way. To practice, place a piece of wax paper on a cutting board and practice piping as much as you need to master the various techniques. When you’re done, you can just scrape the frosting back into the bowl and reuse it.
Have Fun.
Cake decorating should be fun! Don’t stress over imperfections. It takes a lot of practice and experience to learn different piping techniques, and to figure out what works and what doesn’t. There were a few techniques I really wanted to do on my cake that I just couldn’t get right. So eventually, I let those go and focused on what I was able to do well.
Be sure to read all of my BAKING FAQs where I discuss ingredients, substitutions and common questions with cake making, so that you can be successful in your own baking! I also suggest reading these comprehensive posts on making Perfect American Buttercream, How to Stack, Fill, Crumb Coat and Frost Layer Cakes and How to Use Piping Bags.
Frequently Asked Questions
Can this recipe be doubled?
Yes, for a larger cake, you can double the cake recipe and bake it in three 8-inch cake pans. You probably won’t need to double the buttercream, though, and you can just increase it by 1 1/2 times to have enough for the piping.
Should I use fresh or frozen cherries in the cake?
You can use either, just make sure they’re pitted.
If I don’t want to do the Lambeth design, how much buttercream should I make?
The cherry buttercream recipe makes a LOT of buttercream for the piped design. If you don’t want to do the piping, you can adjust the buttercream to these amounts for a 6-inch cake:
- 1 1/2 cups unsalted butter
- 3 cups powdered sugar
- pinch salt
- 1 teaspoon meringue powder
- 1 1/2 teaspoons vanilla extract
- 2-3 tablespoons tart cherry juice
Can I use cherry jam or preserves in the buttercream instead of tart cherry juice?
If you’re doing the Lambeth piping, you need to use the tart cherry juice for a perfectly smooth buttercream. If you’re not doing the piped design, cherry jam is perfectly fine. I’d suggest blitzing it a few times in a food processor to break up any larger pieces of cherries.
What piping tips do I need for this design?
You’ll need tips 104, 4B, 17, and 69.
Is this a high altitude cake recipe?
Yes, all the cake recipes on my site are for Denver’s high altitude of 5,280 feet.
Can this cake be frozen?
Yes, you can decorate your cake in advance and freeze it in an airtight container for up to 2 weeks.
You Might Also Like
Please check out my Amazon Shop for a curated collection of some of my favorite cake pans from trusted brands, baking tools, ingredients, pretty things and fashion finds. I recommend products that I buy and use every day!
Did you love today’s recipe? Please rate the recipe and let me know in the comments what you thought! Also, be sure to follow Curly Girl Kitchen on Instagram, and tag me when you try one of my recipes so I can see all your delicious creations!
Lambeth Style High Altitude Chocolate Cherry Cake
All recipes on Curly Girl Kitchen are developed for high altitude at 5,280 feet. See FAQs for adjusting to higher or lower elevations.

Equipment
- Stand Mixer with Paddle Attachment
- 6-inch Round Cake Pans (x3)
- Piping Bags and Piping Tips
Ingredients
Cake
- 1 cup all-purpose flour, spooned and leveled
- ¾ cup + 2 tbsp granulated sugar
- 6 tbsp unsweetened Dutch-processed cocoa powder
- 1 tbsp instant espresso powder or instant coffee
- ½ tsp baking soda
- ¼ tsp baking powder
- ½ tsp coarse Kosher salt (if using table salt, use half the amount)
- 2 large eggs
- ½ cup whole milk
- ½ cup full-fat sour cream
- ½ cup vegetable oil
- 1 ½ tsp vanilla extract
- 5 oz (1 cup) pitted sweet cherries, fresh or frozen, chopped into 1/4 inch pieces
Buttercream
- 2 ½ cups unsalted butter, softened to room temperature (substitute half the butter with vegetable shortening, for a more stable buttercream in warm weather)
- 2 tsp vanilla extract
- 5 cups powdered sugar
- 2 tbsp meringue powder
- ¼ tsp coarse Kosher salt (if using table salt, use half the amount)
- ¼ cup tart cherry juice (or cherry jam, if you're not piping the buttercream)
Instructions
Cake
- Preheat the oven to 350 F, and position a rack in the center of the oven.
- Grease the bottoms of three 6-inch cake pans with non-stick baking spray.
- In a bowl, sift together the flour, sugar, cocoa powder, espresso powder, baking soda, baking powder and salt.
- Separately, whisk together the eggs, milk, sour cream, oil and vanilla. Add the wet ingredients to the dry, and whisk until well combined, about 15 seconds. Fold in the chopped cherries.
- Bake the cakes on the center oven rack until a cake tester or sharp knife inserted in the cake comes out clean. If your ingredients are at room temperature, it may take 15-20 minutes for the cakes to bake. My batter was quite cold, due to my using frozen cherries that I didn't allow to fully thaw first, so my cakes took 25 minutes to bake.
- Set the pans on a cooling rack, cover loosely with a clean kitchen towel, and cool completely before frosting.
Buttercream
- In the bowl of your stand mixer, beat the softened butter and vanilla extract for 1 minute until smooth.TIP: If you're doing the piped buttercream design, I highly recommend substituting vegetable shortening for half the butter, for a more stable buttercream.
- In a separate bowl, combine the powdered sugar, meringue powder and salt. With the mixer on low, gradually add the powdered sugar mixture, alternating with the cherry juice.
- Increase speed to medium, and beat for about 5 minutes until very light and fluffy, scraping the bowl down occasionally. If your buttercream is a little thin for piping, just add more powdered sugar. If it seems too stiff, add a bit more cherry juice.
- Turn the speed down to "stir" and mix for 2 minutes to get rid of large air bubbles.
- Frost your cooled cake with the buttercream – see my post How to Stack, Fill, Crumb Coat and Frost a Layer Cake.
- For the piped Lambeth cake decoration, see the post above for detailed, step-by-step photos.
Video
 https://curlygirlkitchen.com/
Can two 8″ pans be used for this cake? Thank you.
If you’re just making the cake without the piping detail, then sure. But the layers will be thinner, and you won’t have enough height in the assembled cake for the Lambeth piping, unless you’re planning on doubling the recipe.
Can this cake be made in a regular altitude condition.
I’d suggest reading this article for guidance on adjusting recipes for various altitudes: https://www.kingarthurbaking.com/learn/resources/high-altitude-baking
I know you did this with buttercream and suggest half the amount of butter be substituted with shortening but can this be done with another cream? For example swiss meringue buttercream/ermine frosting? Or will those not hold as well
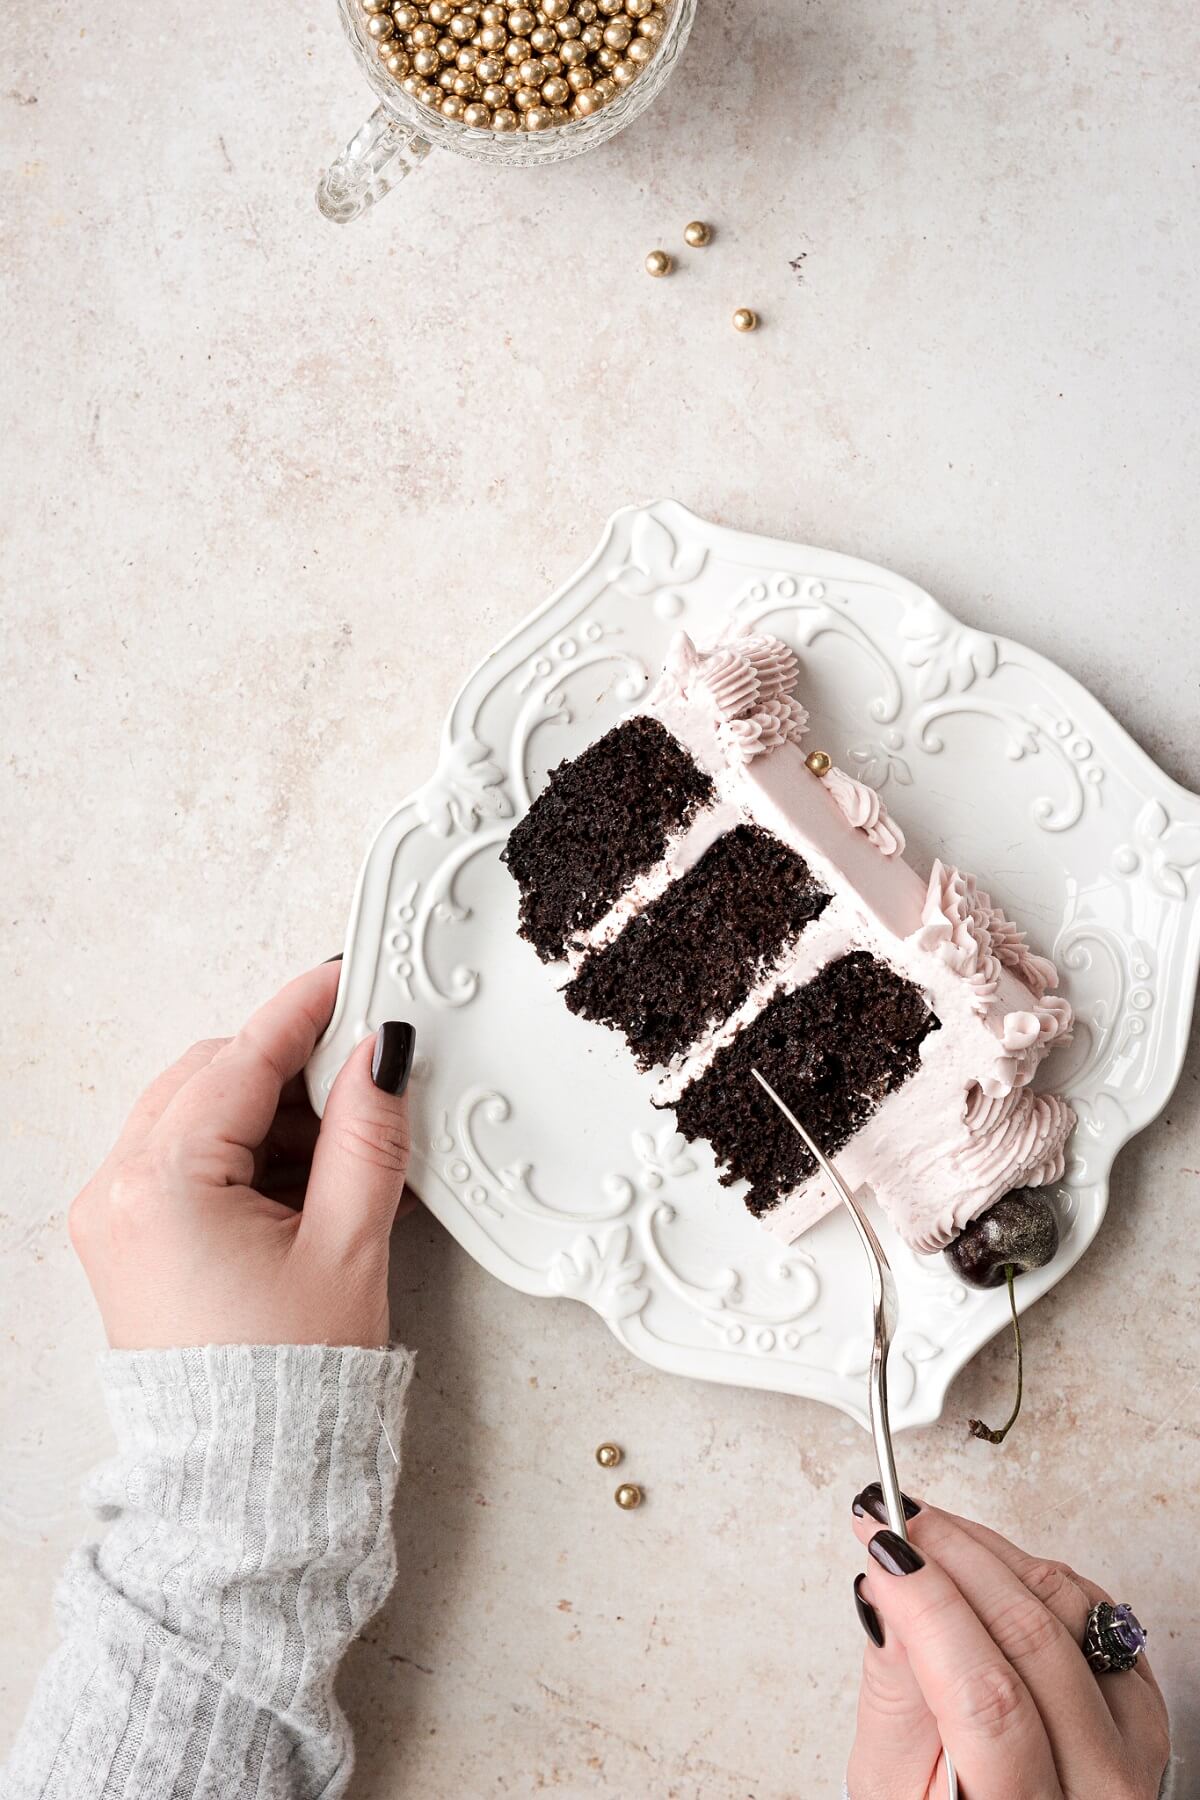
How many slices do you get with this 3 layer 6 inch?
8-12, all depends on how it’s cut.