
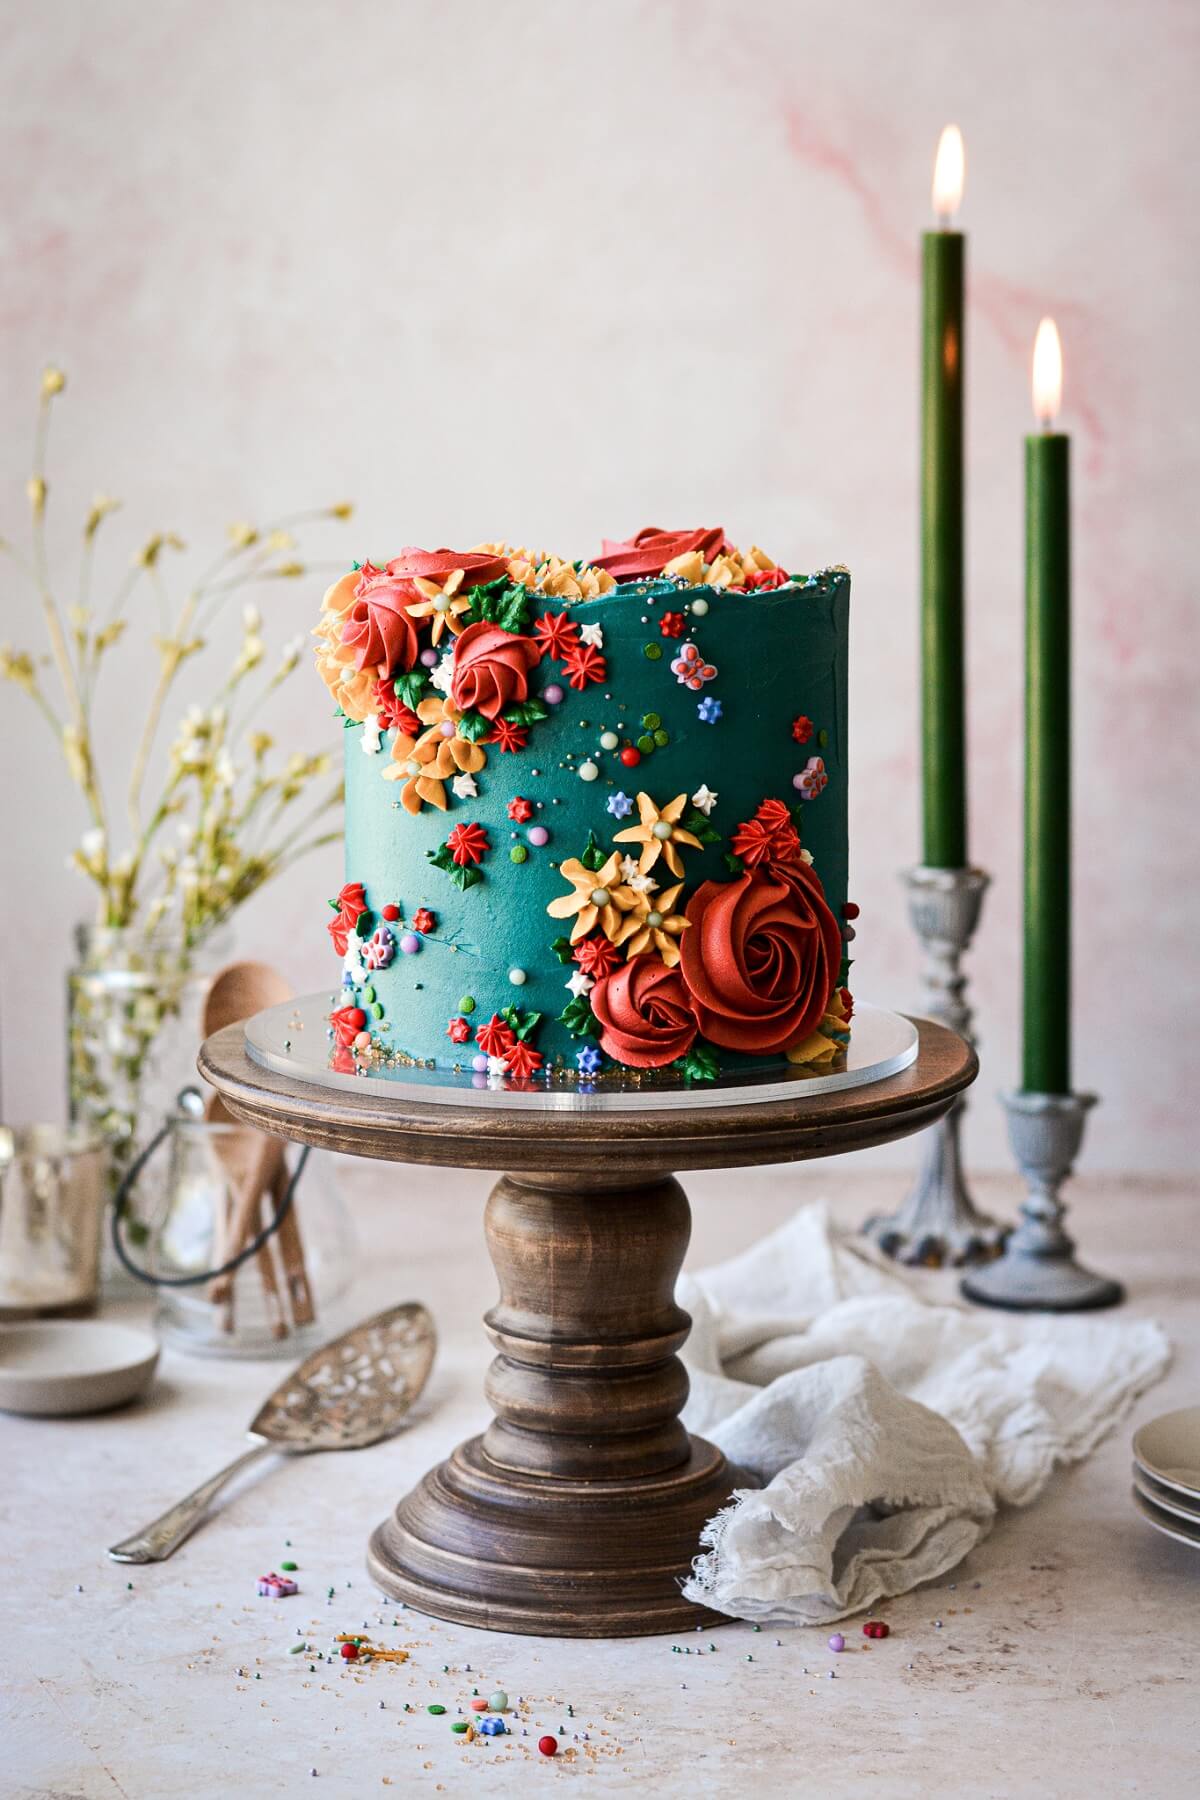
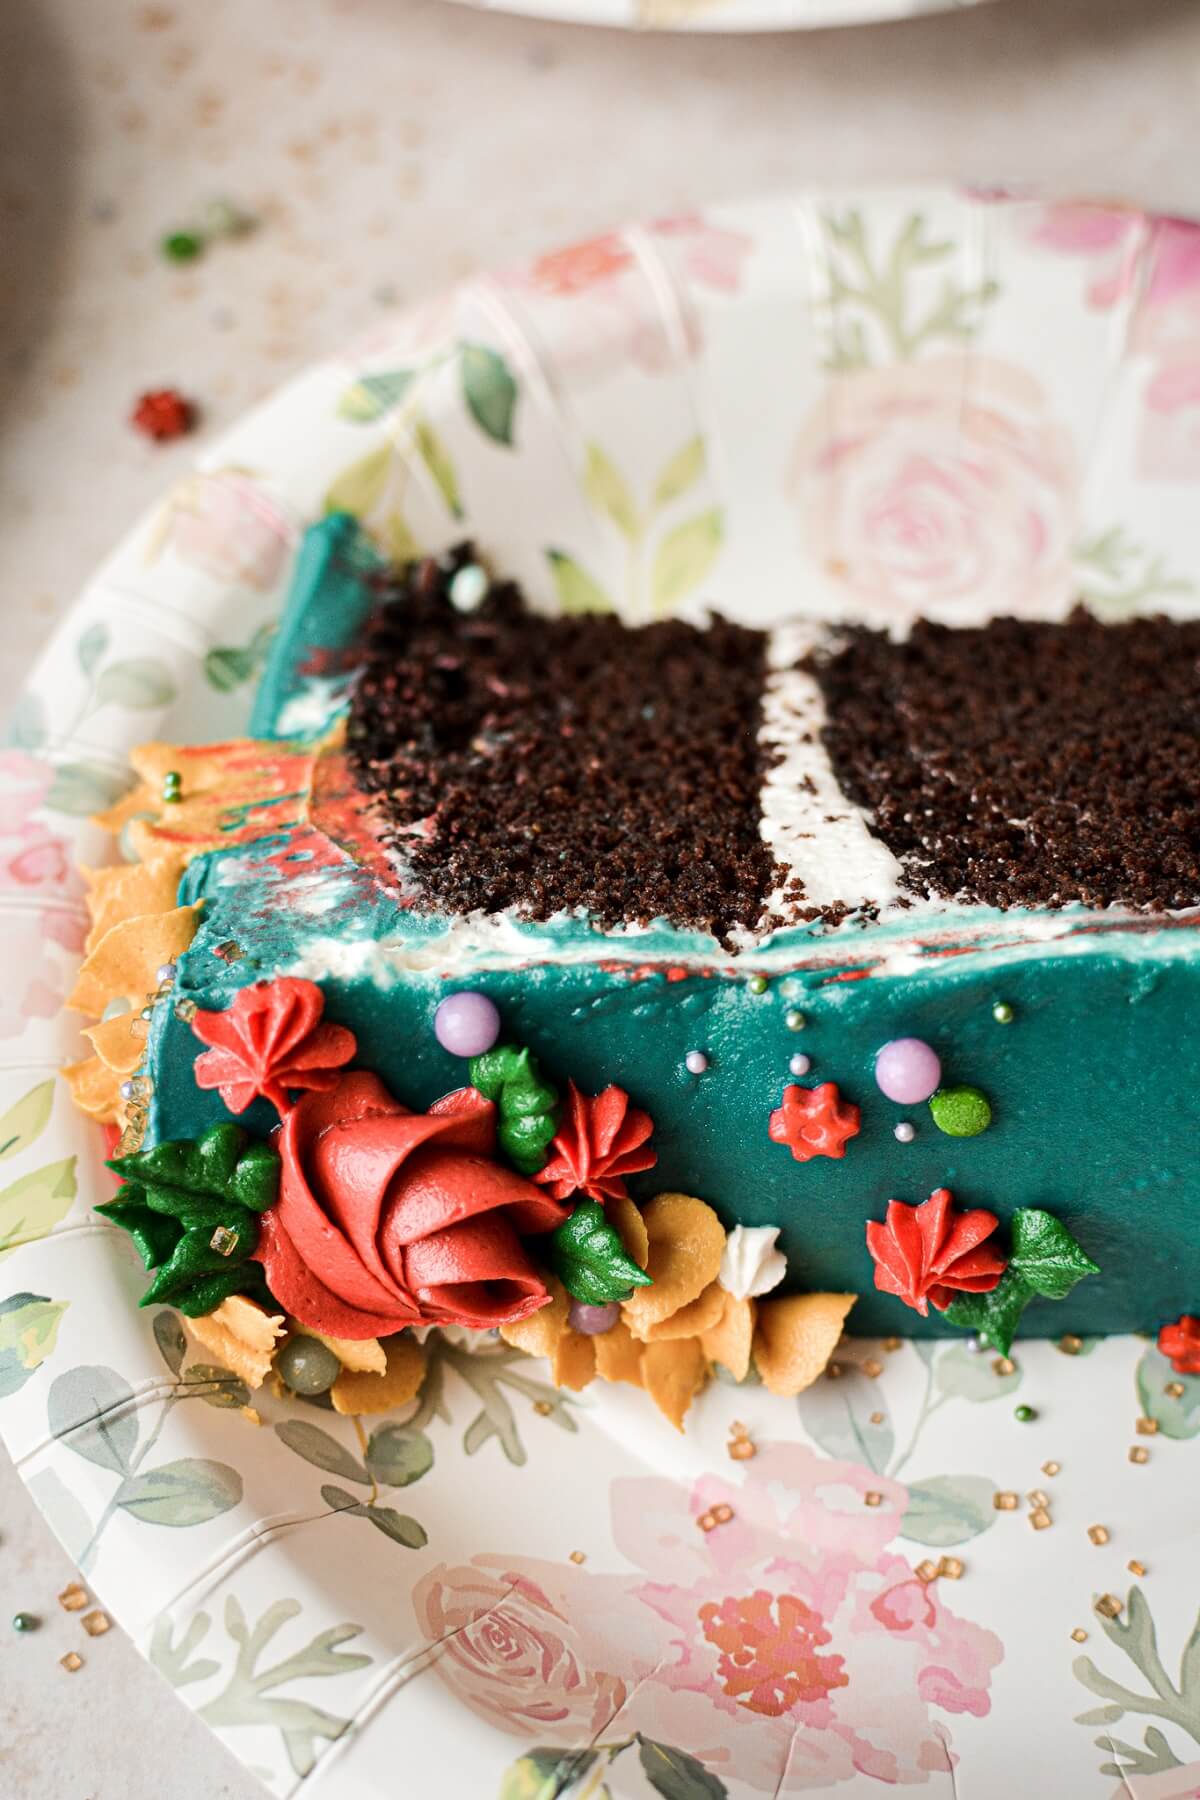
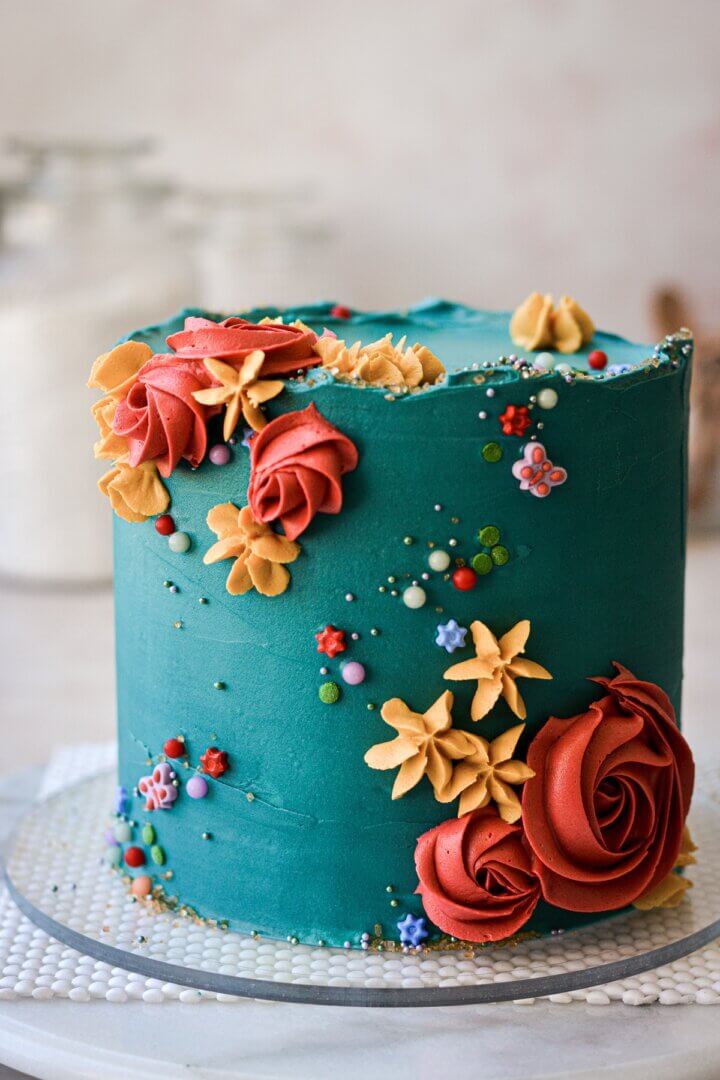
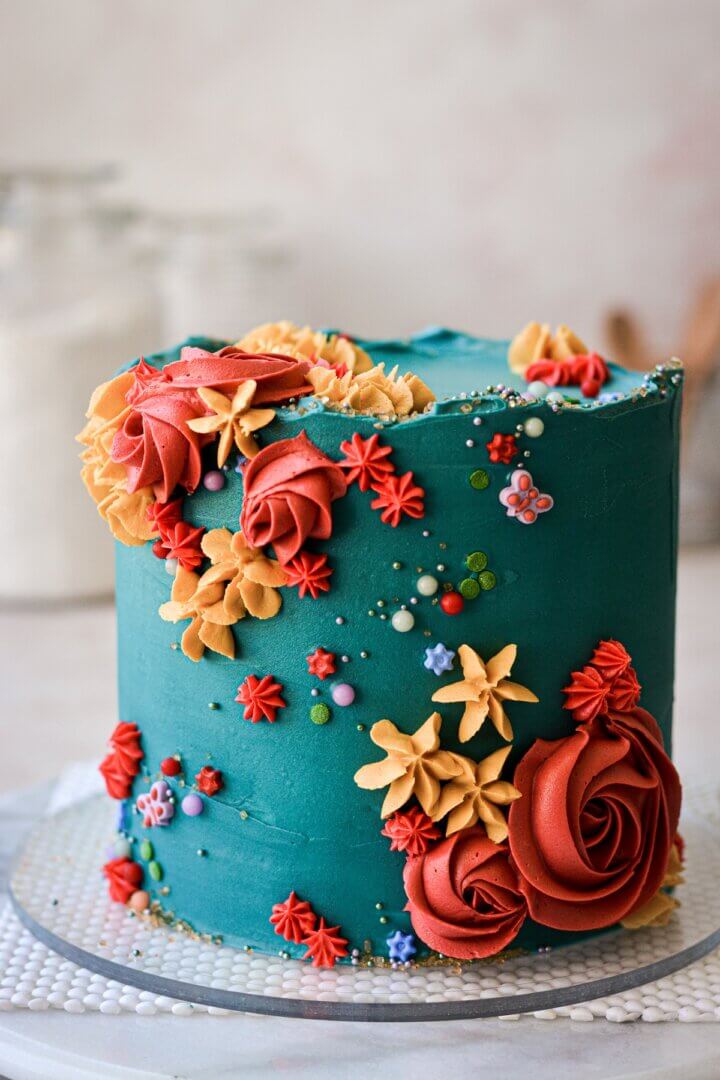
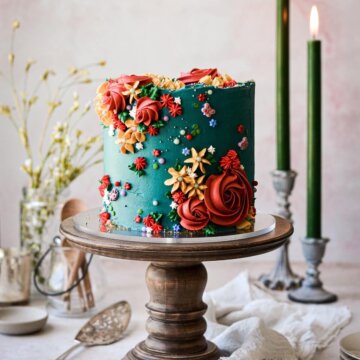
This turquoise floral cake with piped buttercream flowers features vivid colors of deep turquoise blue, rich reds, forest green, and marigold yellow, with little pops of blue and lavender. A scattering of sugar pearls, butterfly sprinkles and nonpareils add a touch of whimsy. In today’s post, you’ll find detailed instructions and an easy photo tutorial to create this cake in your own home kitchen!
You might also love this textured watercolor buttercream cake, Lambeth style chocolate cherry cake, and pink buttercream flowers cake.
This site contains affiliate links. As an Amazon associate, I earn from qualifying purchases. This means that I may make a small commission if you purchase a product using those links. This in no way affects my opinion of those products and services. All opinions expressed on this site are my own.
The Cake Details
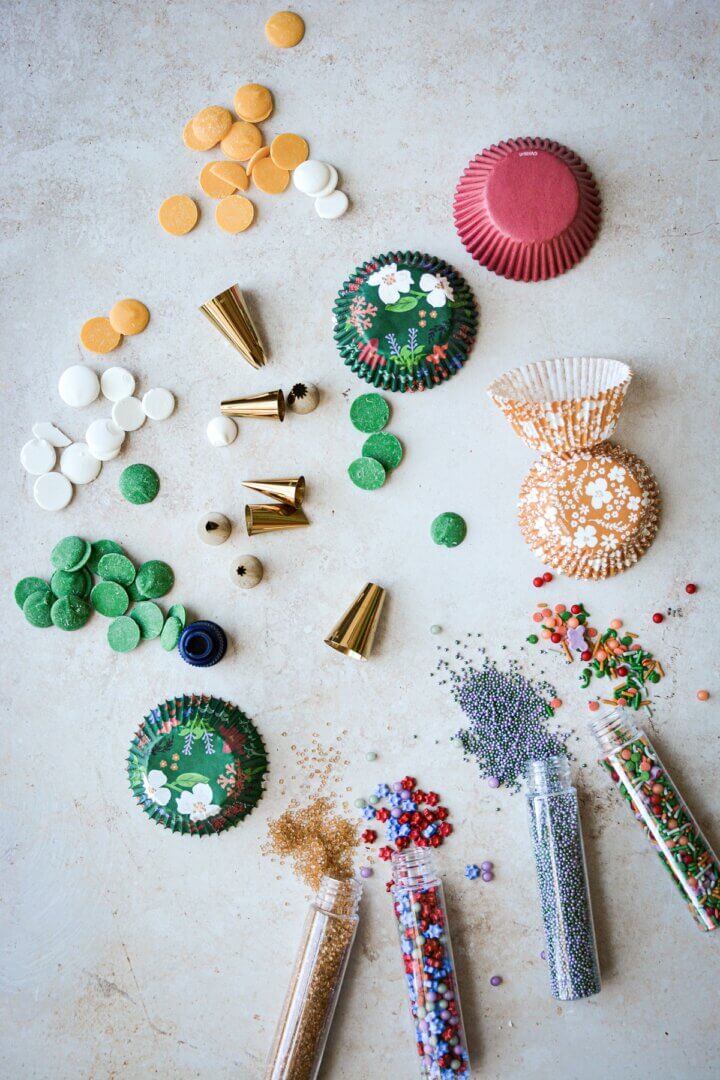
I recently had the pleasure of previewing Wilton’s new “Folklore and Floral” collection of sprinkles, cupcake liners and candy melts, along with some gorgeous gold piping tips. The colorful reds, yellows, greens, blues and purples are so pretty, and the name of the collection is so perfectly fitting. The colors of the sprinkles especially caught my eye, and inspired today’s turquoise floral cake design. In the sprinkle mix are butterflies, tiny flowers, sugar pearls in a variety of colors, confetti quins, jimmies, shimmery silver nonpareils, and coarse gold sugar. Be sure to check your local craft and cake decorating stores for this fun and whimsical collection.
The deep turquoise buttercream on the cake makes a beautiful background for the vividly colored buttercream flowers and sprinkles. A magical secret garden at twilight comes to mind, lush with flowers, stars beginning to glimmer in the darkening sky, and butterflies flitting from one flower to the next.
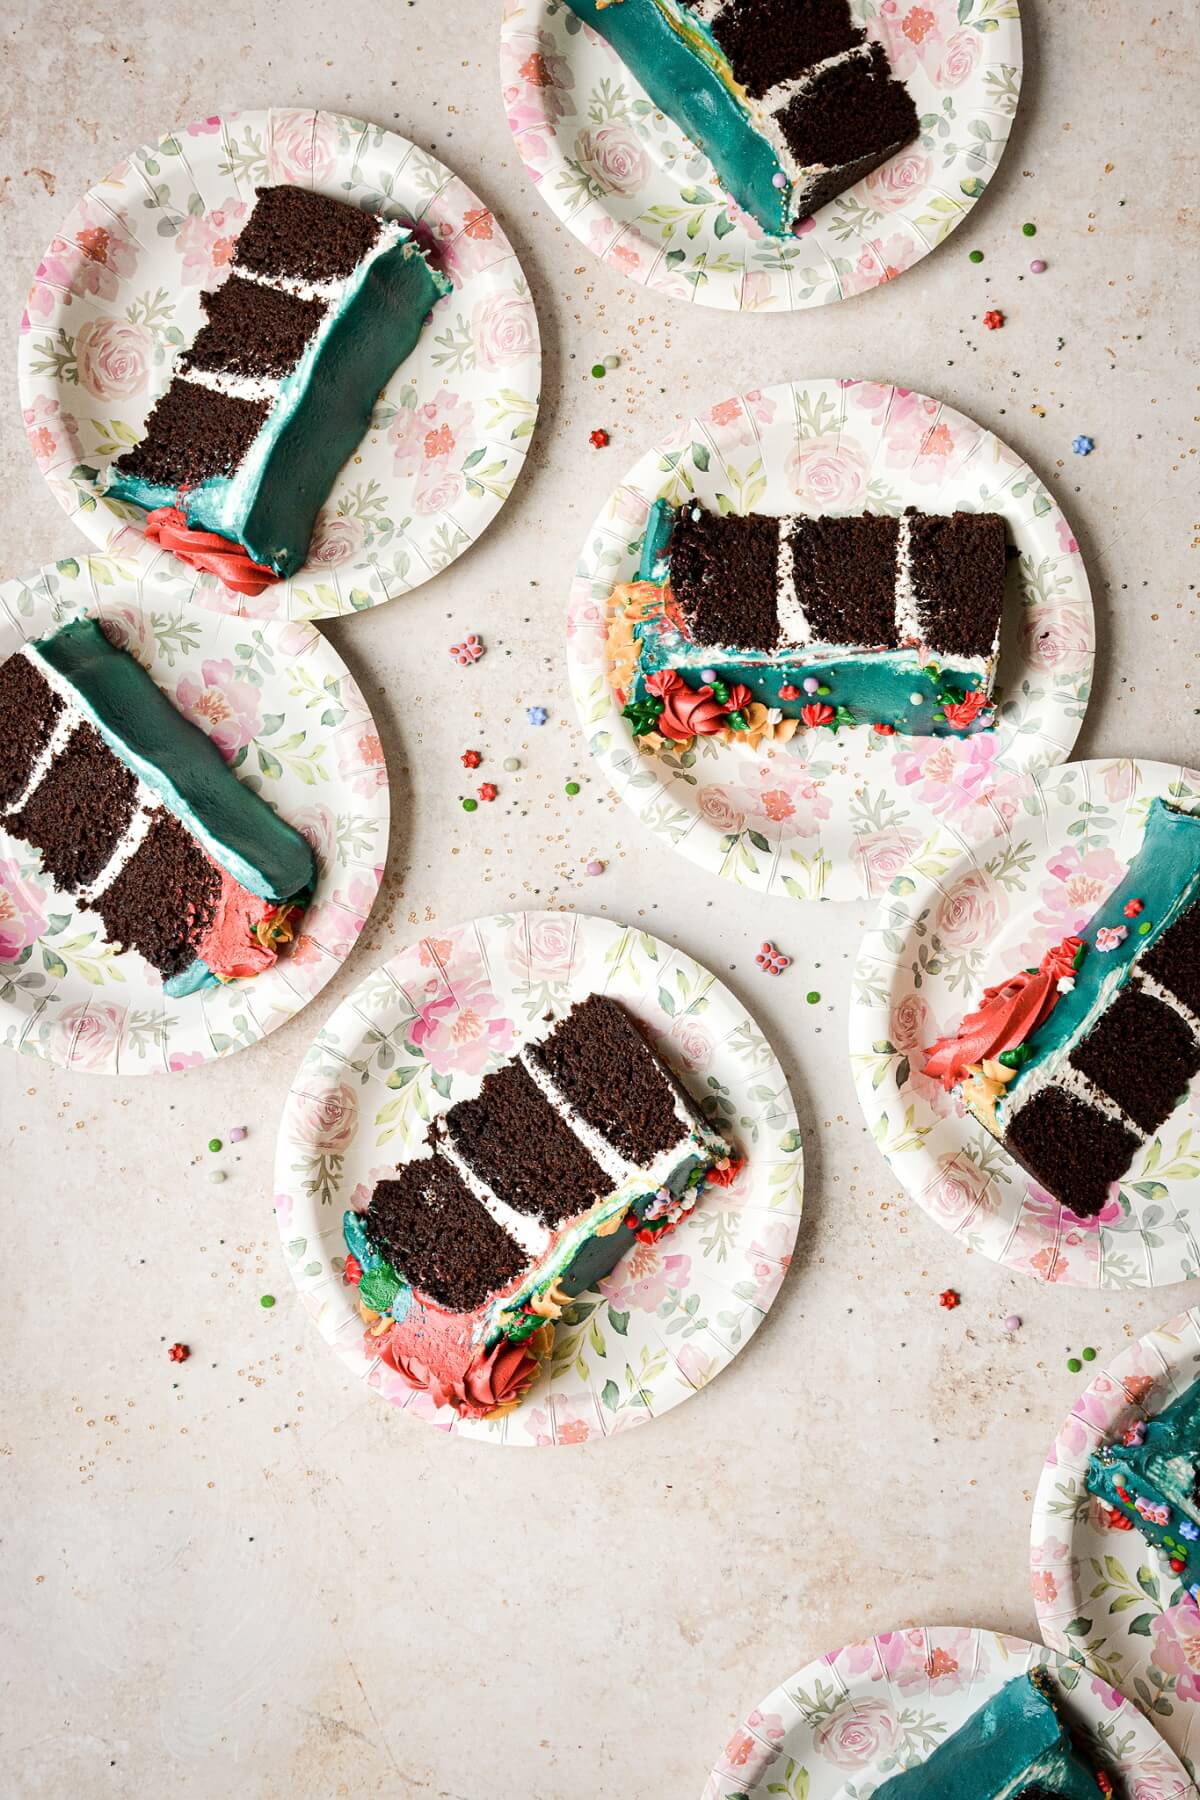
Hidden inside the floral buttercream is three layers of my signature high altitude chocolate cake with vanilla buttercream, one of my favorite flavor combinations. It’s as delicious to eat as it is lovely to look at.

The Cake Design
Let’s talk for a minute about the cake design – the composition, grouping and flow of the sprinkles and piped flowers. When designing a cake, you’ll want to consider how the elements are grouped together, and how this will lead a person’s gaze around the cake in a pleasing way.
Flow
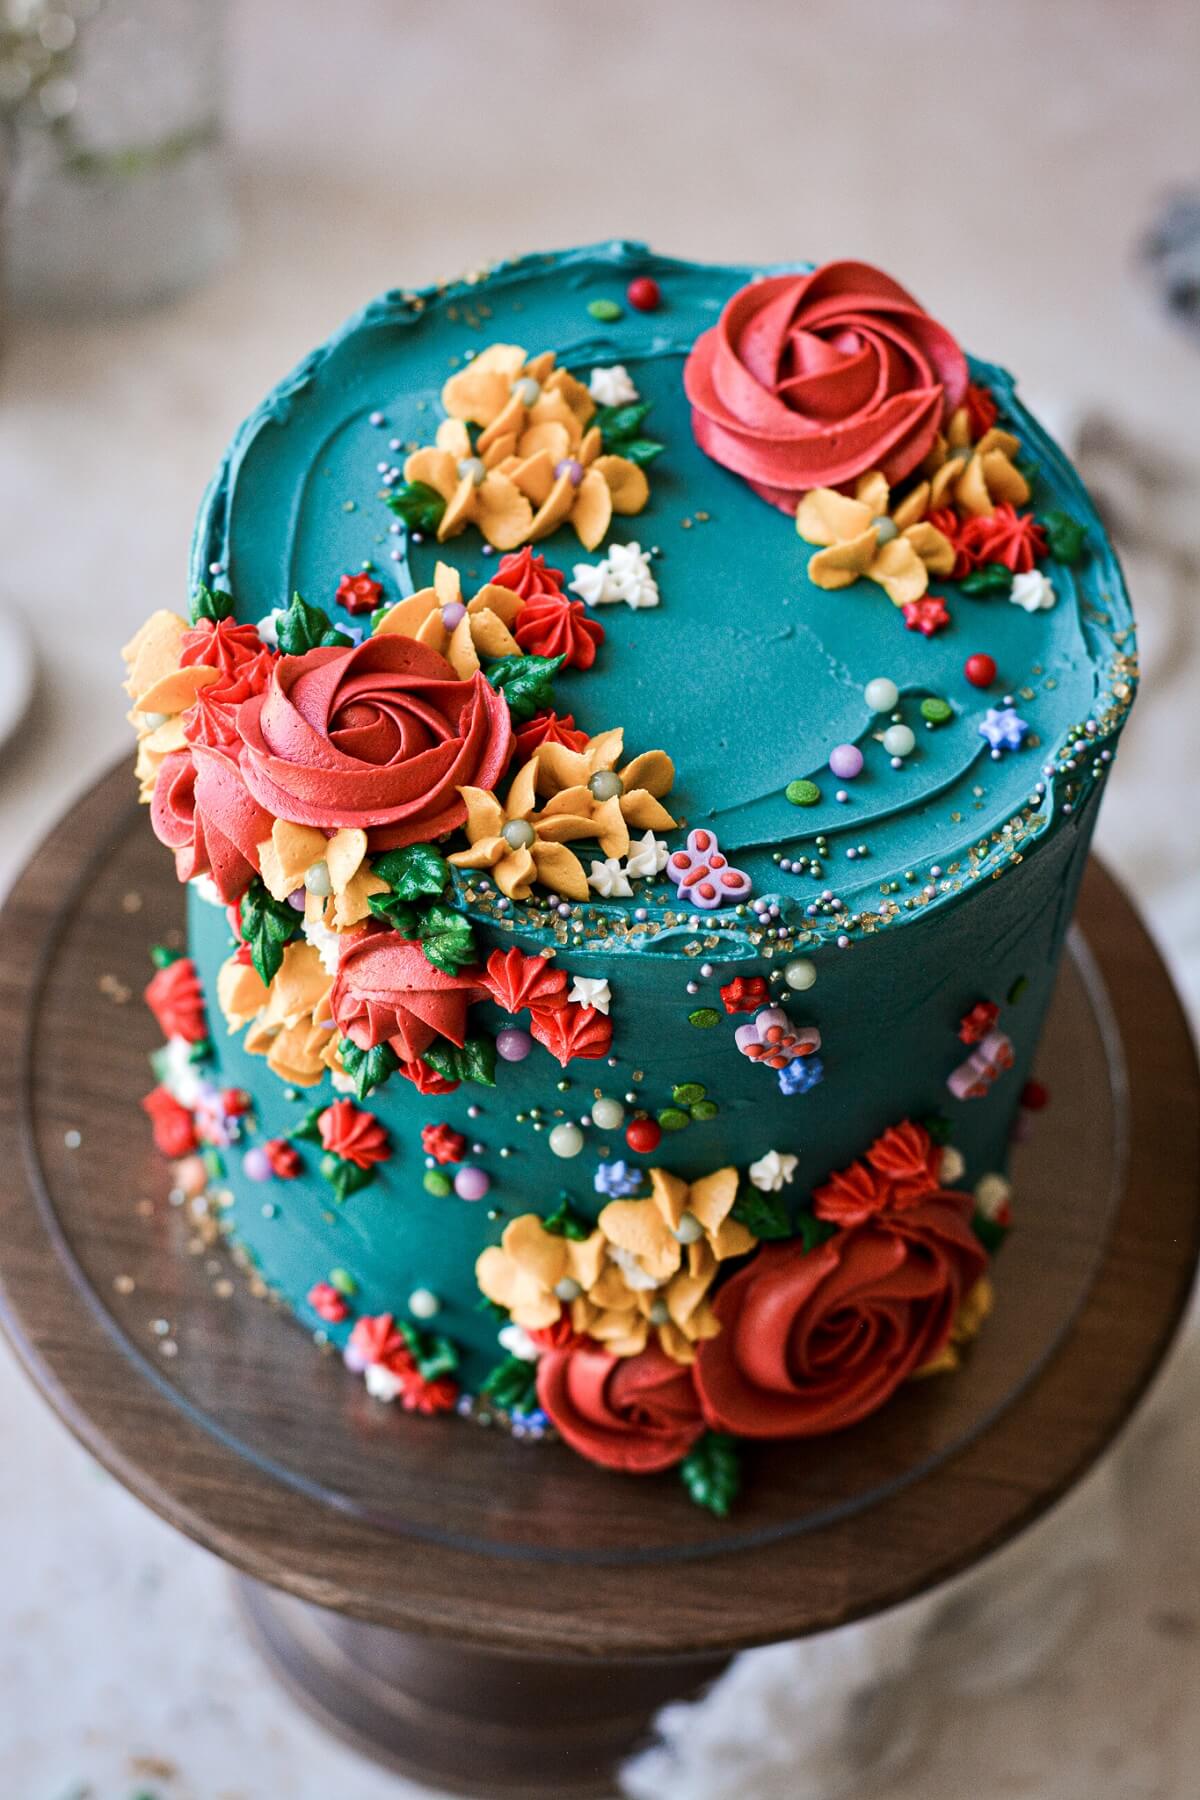
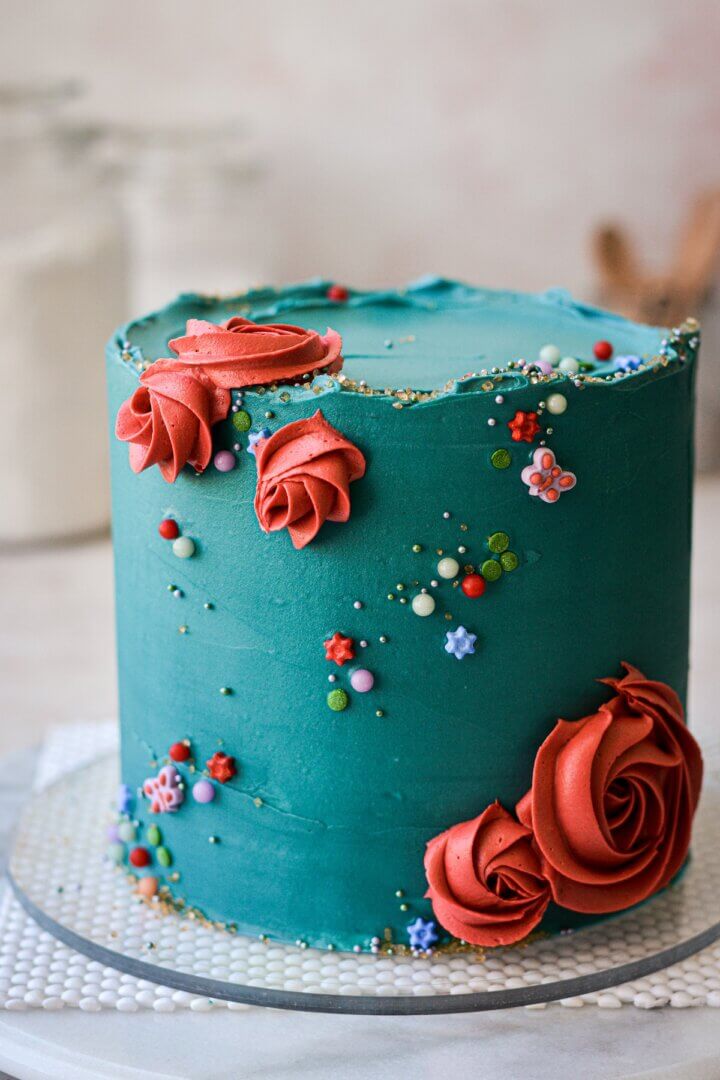
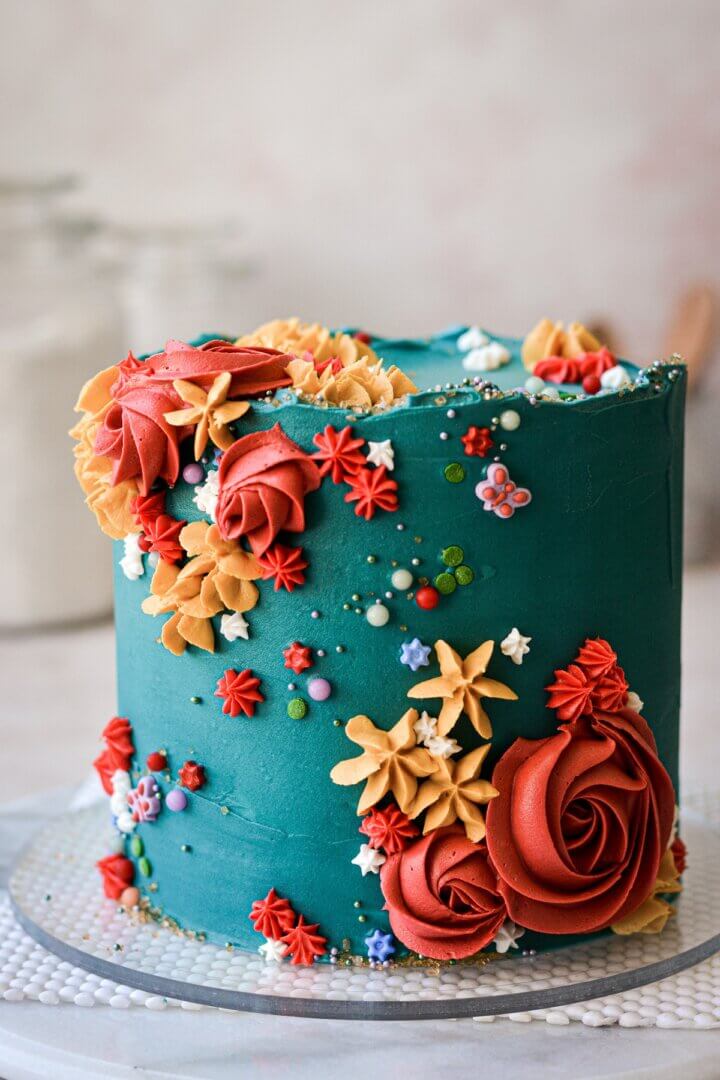
When you look at the cake from various angles, do you see the way the your eyes travel along the scattering of sprinkles that slant in a diagonal along the front of the cake? What about the “s” curve that you get if you drew a line connecting the three large groupings of piped flowers, from the top to the left to the bottom? The arrangement of elements is intentional, to lead your gaze around the cake in a natural, organic way.
Grouping
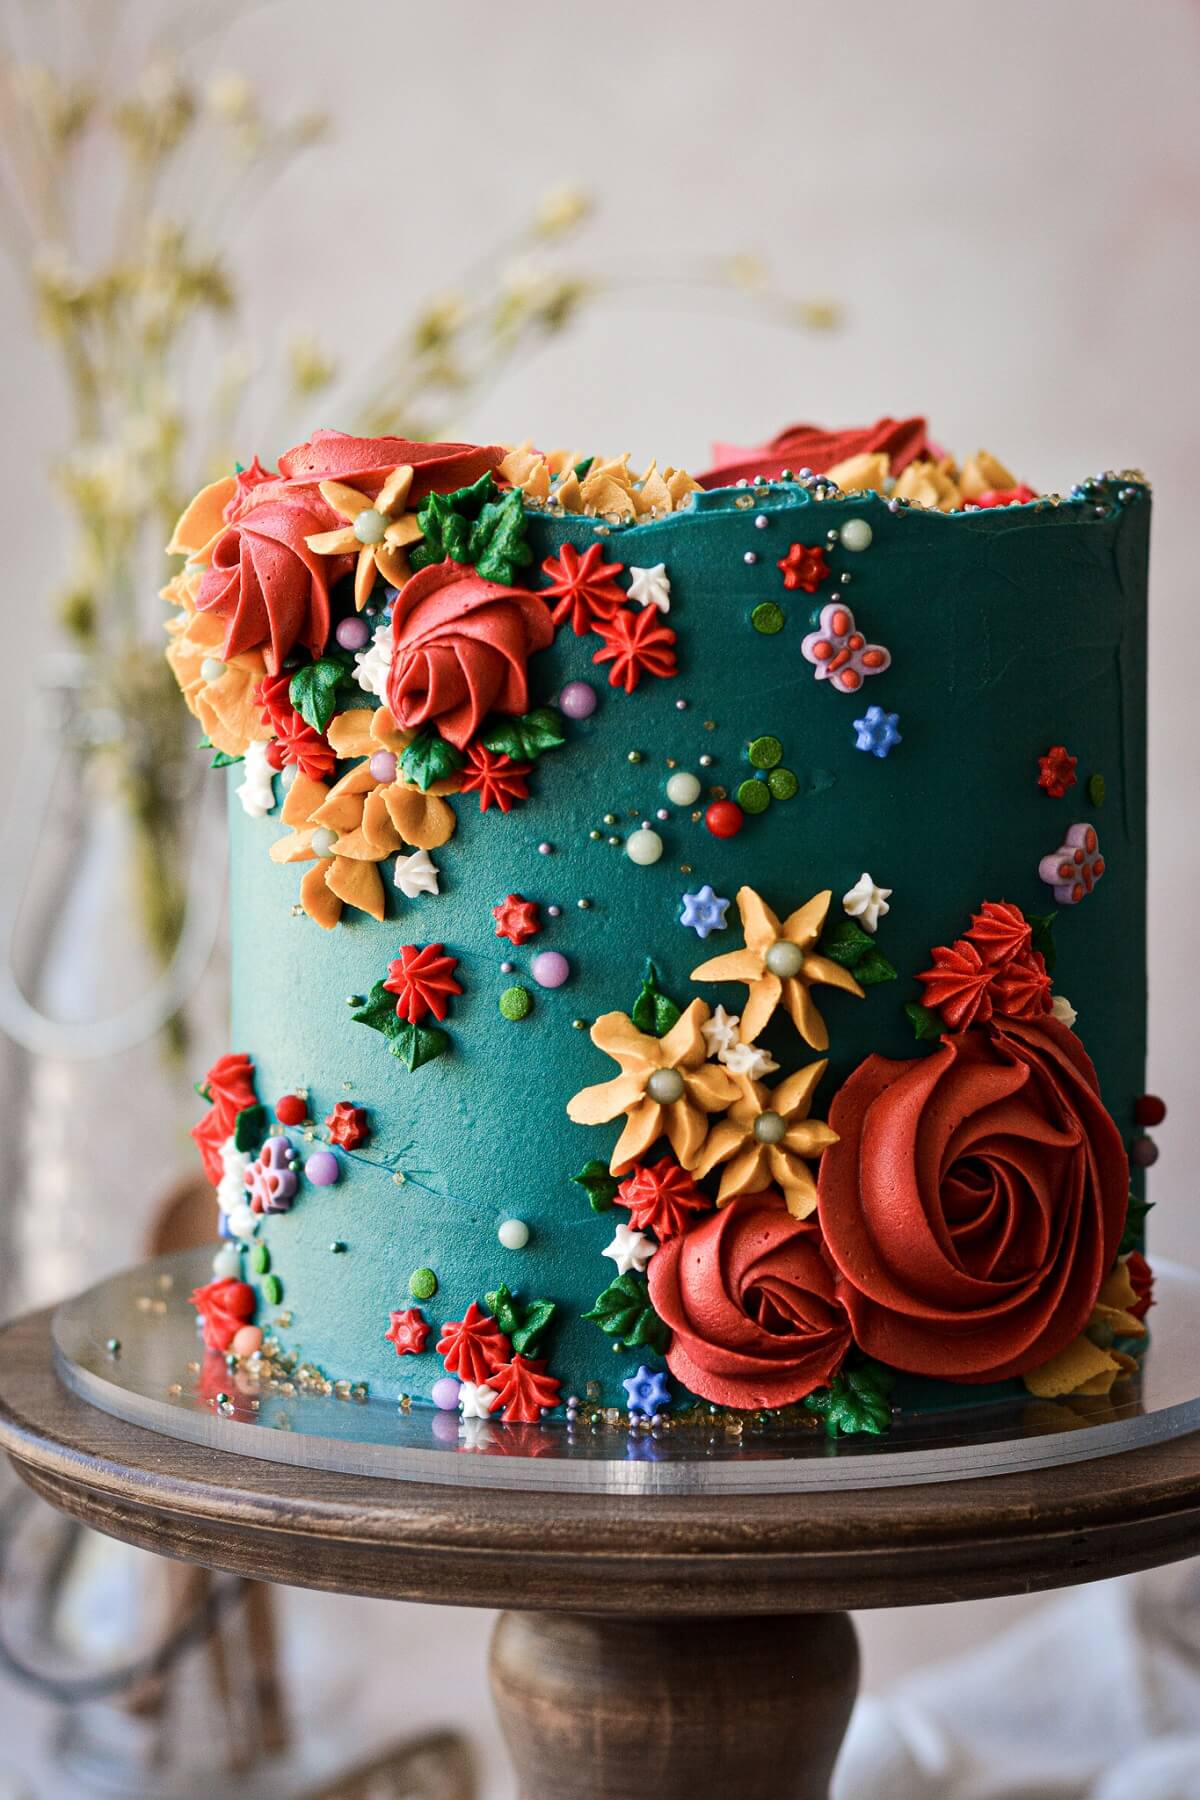
Next, study how everything is grouped together. You’ll see 3 main groups of piped flowers, at the top, the left and the bottom. And within those groups, study how the grouping of each type of flower varies. For the “rosy red rosettes”, you’ll see 1 rosette at the top, a group of 3 at the left, and a group of 2 at the bottom. The “marigold drop flowers” vary in groups of 1, 2 and 3. The same goes for the small red and white flowers, as well as the sprinkles. By grouping the elements in this way, your final composition will be more interesting, surprising and pleasing to the eye.
Think about how many strawberry cakes or cheesecakes you’ve seen, or maybe even made yourself, with the same predictable row of strawberry slices arranged symmetrically around the top edge of the cake. Or a layer cake with evenly piped swirls of frosting encircling the cake. It’s perfectly fine but pretty boring, and symmetry isn’t what we’re going for here. So while the composition on today’s cake isn’t symmetrical, it’s well balanced.
Before you begin, be sure to read my posts on Perfect American Buttercream and How to Stack, Fill, Crumb Coat and Frost Layer Cakes.
Tools and Ingredients
- Frosted Cake. I started with a three-layer, 6 inch chocolate cake with vanilla buttercream. Your cake and frosting can be any flavor you like, but the frosting needs to be smooth and well chilled before you begin decorating.
- Vanilla Buttercream. To decorate your cake, you’ll need about 3 cups Vanilla Buttercream. You’ll likely have some leftover, which you can freeze and use for another cake.
- Gel Food Coloring. To make the buttercream colors featured on my turquoise floral cake, you’ll need “super red”, “regal purple”, “soft pink”, “lemon yellow”, “warm brown”, “navy blue”, “turquoise”, “electric green”, and “leaf green”.
- Piping Tips. You’ll need tips 1M, 2D, 22, 73, 352.
- Couplers & 12-Inch Piping Bags.
- Icing Spatula and Bench Scraper.
- Sprinkles. A variety of sprinkles, sugar pearls and non pareils.
Instructions
Getting Started
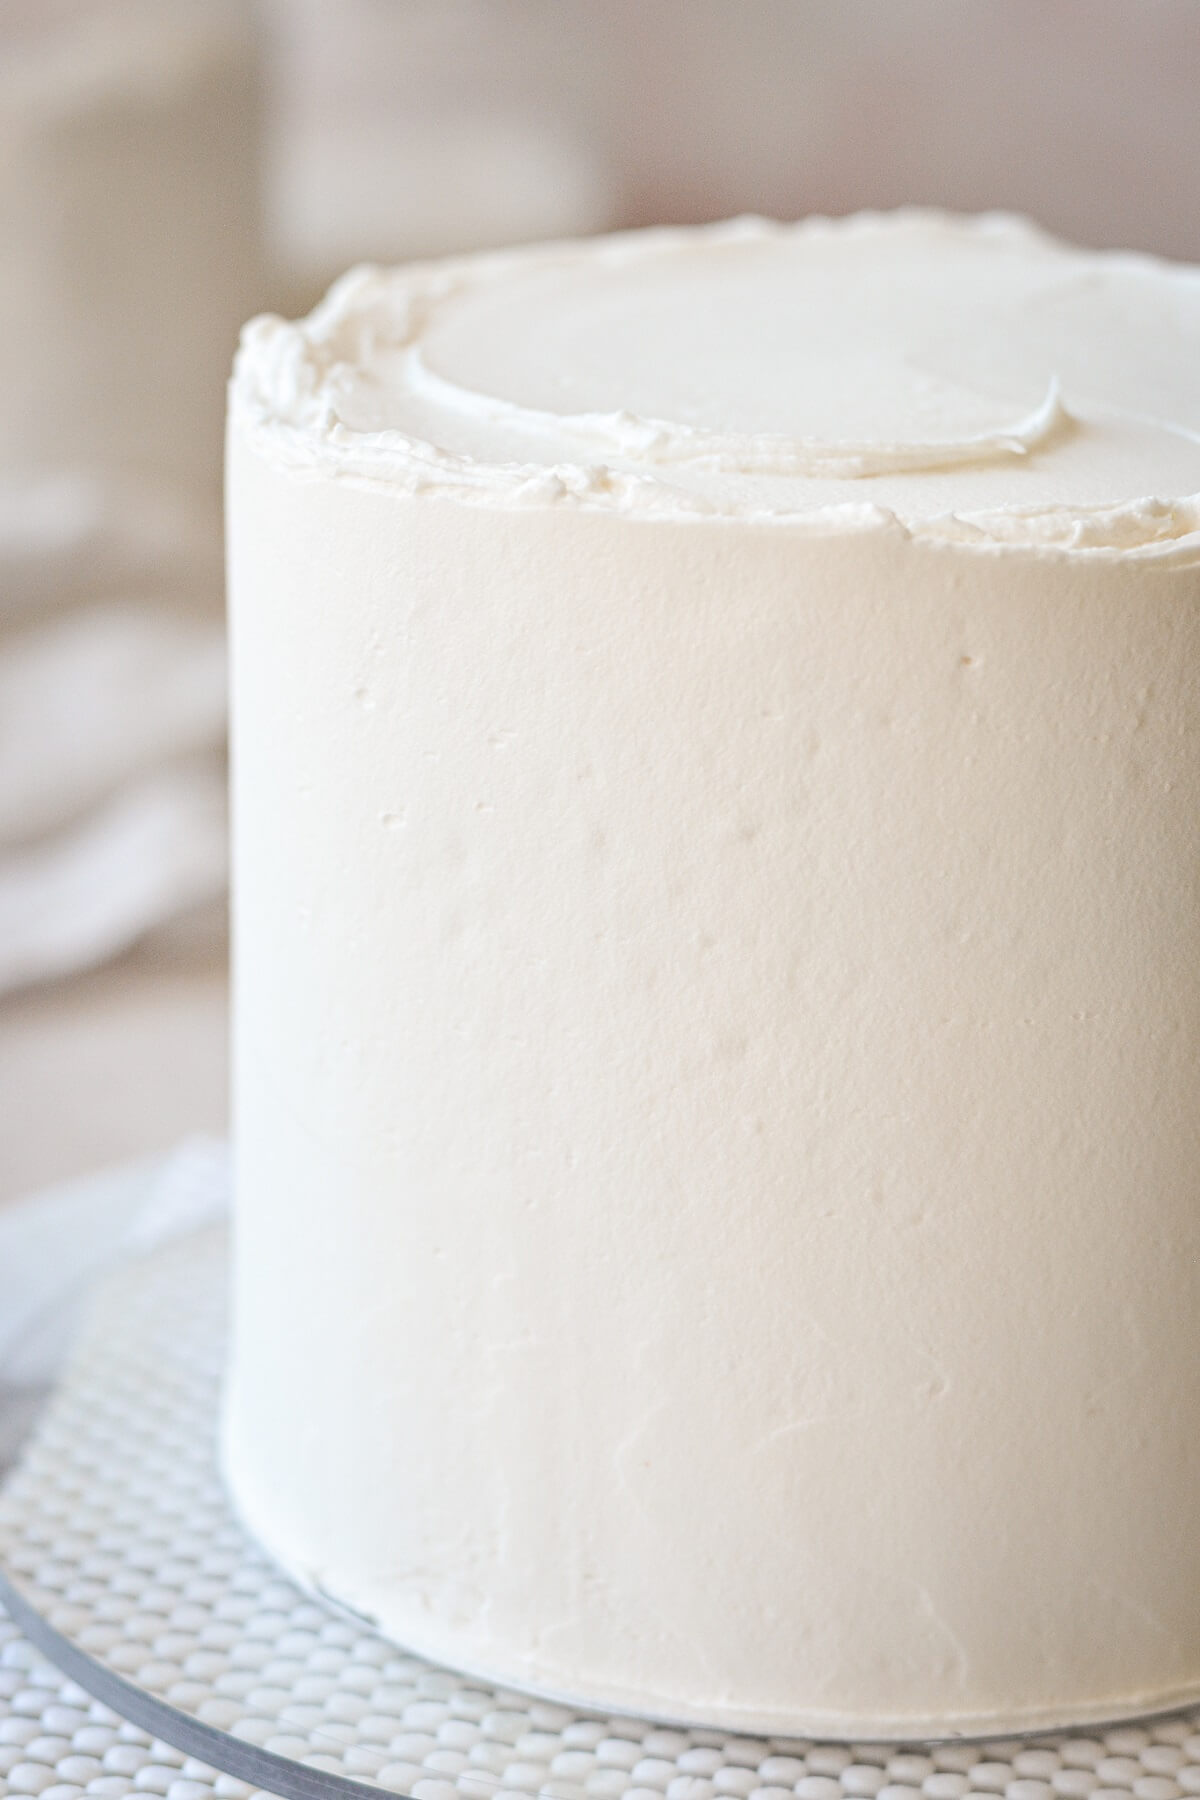
- Begin by getting your cake layers assembled, filled, and frosted as smoothly as you can, then well chilled. I frosted my cake with plain white vanilla buttercream. You can use any cake recipe you like, but I recommend using my Perfect American Buttercream recipe. Be sure to also read my comprehensive post on How to Stack, Fill, Crumb Coat and Frost a Layer Cake. I assembled my cake with three 6-inch cake layers.
- You’ll need to chill the cake for at least several hours before you begin decorating, to ensure the frosting is firm and cold. I frosted my cake at night, so I could chill it overnight and decorate it the next morning.
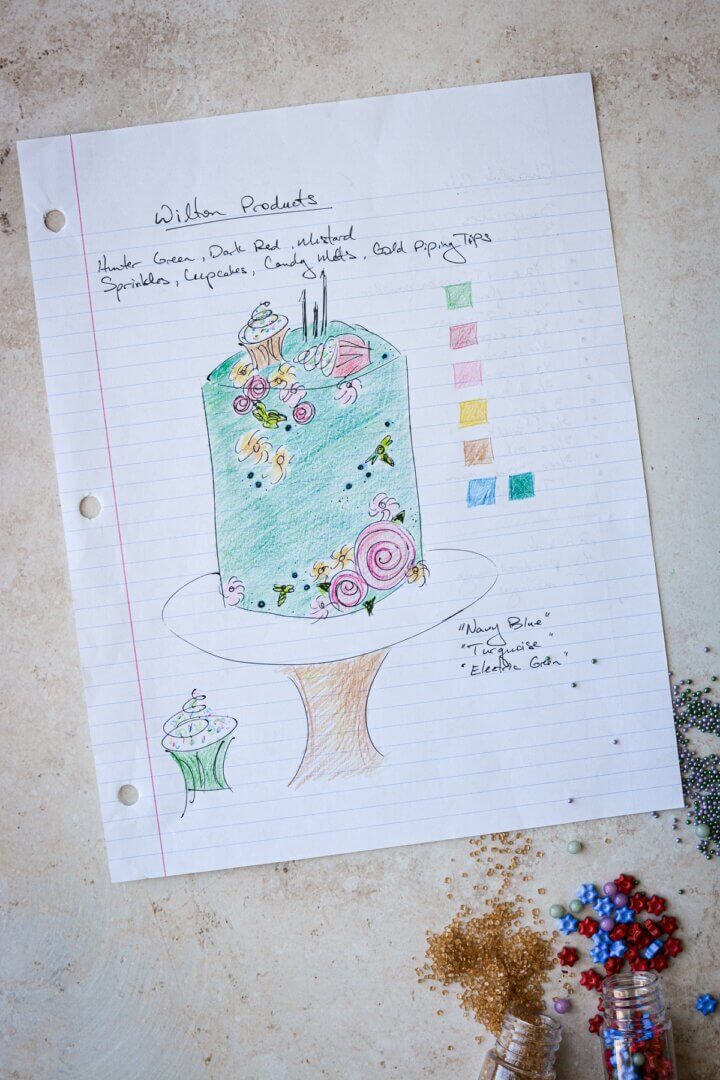
- You should also plan and sketch your cake design. I find that my decorated cakes turn out much better when I draw a sketch of most of the details I want to incorporate. In my sketch, you’ll see that I had planned on adding some cupcakes on top, but decided against using them in the end.
TIP: I’d suggest mixing your colors several hours before (or the night before) you’re going to decorate your cake, since the colors will deepen and darken over time.
Mix the Buttercream Colors
- You’ll need about 1 1/4 cups of buttercream for the turquoise base coat, with the remaining 1 3/4 cups divided between various shades of red, yellow, green and white. You might have to adjust the gel colors a little from my suggestions, until you’re happy with the final colors.
- For the deep turquoise, begin by adding a few drops of “navy blue” to get a medium deep blue color. Next add a few drops of “turquoise” and a very small amount of “electric green“. This will be the base coat of buttercream.

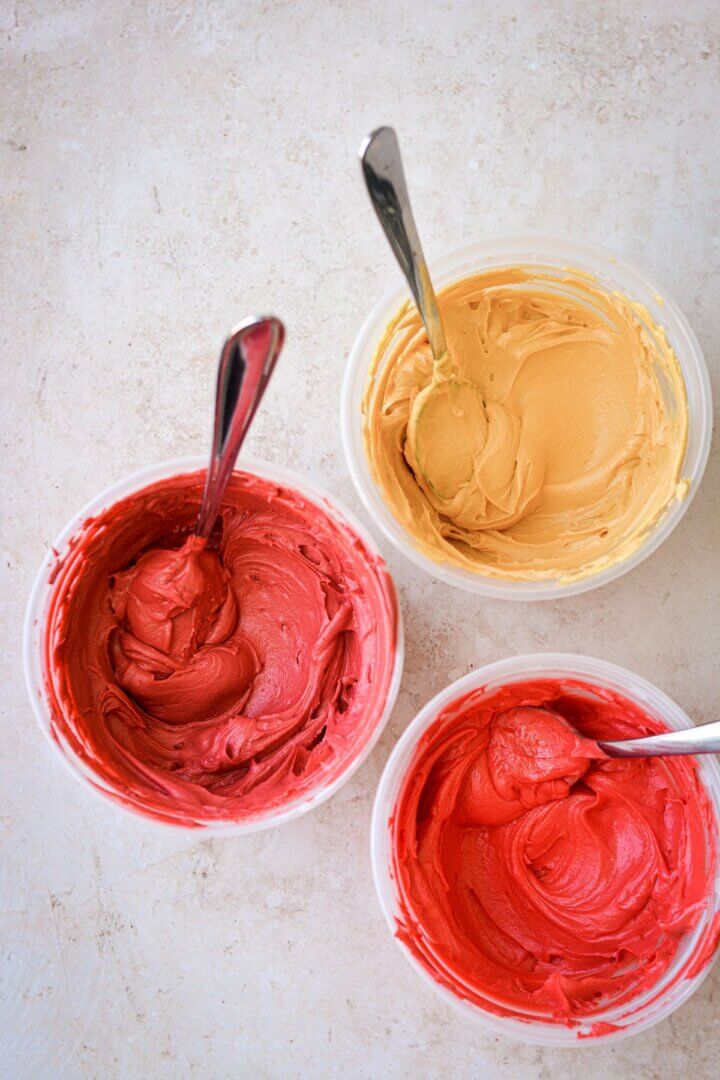
- For the bright red, add “super red” until you have a vivid red color. This will be for the small red star flowers.
- For the rosy red, add “super red” until you have a vivid red color. Add a drop of “regal purple” and a few drops of “soft pink” to soften the red into a duskier hue. This will be for the larger rosettes, and you’ll need more buttercream for this color, since the rosettes are bigger than the other flowers.
- For the yellow, add “lemon yellow” for a sunny yellow color. Now add “warm brown“, a small amount at a time, to deepen the color into a mustard yellow or marigold. This will be for the yellow drop flowers.
- For the white, simply reserve a small amount of buttercream to keep white. This will be for the small white star flowers.
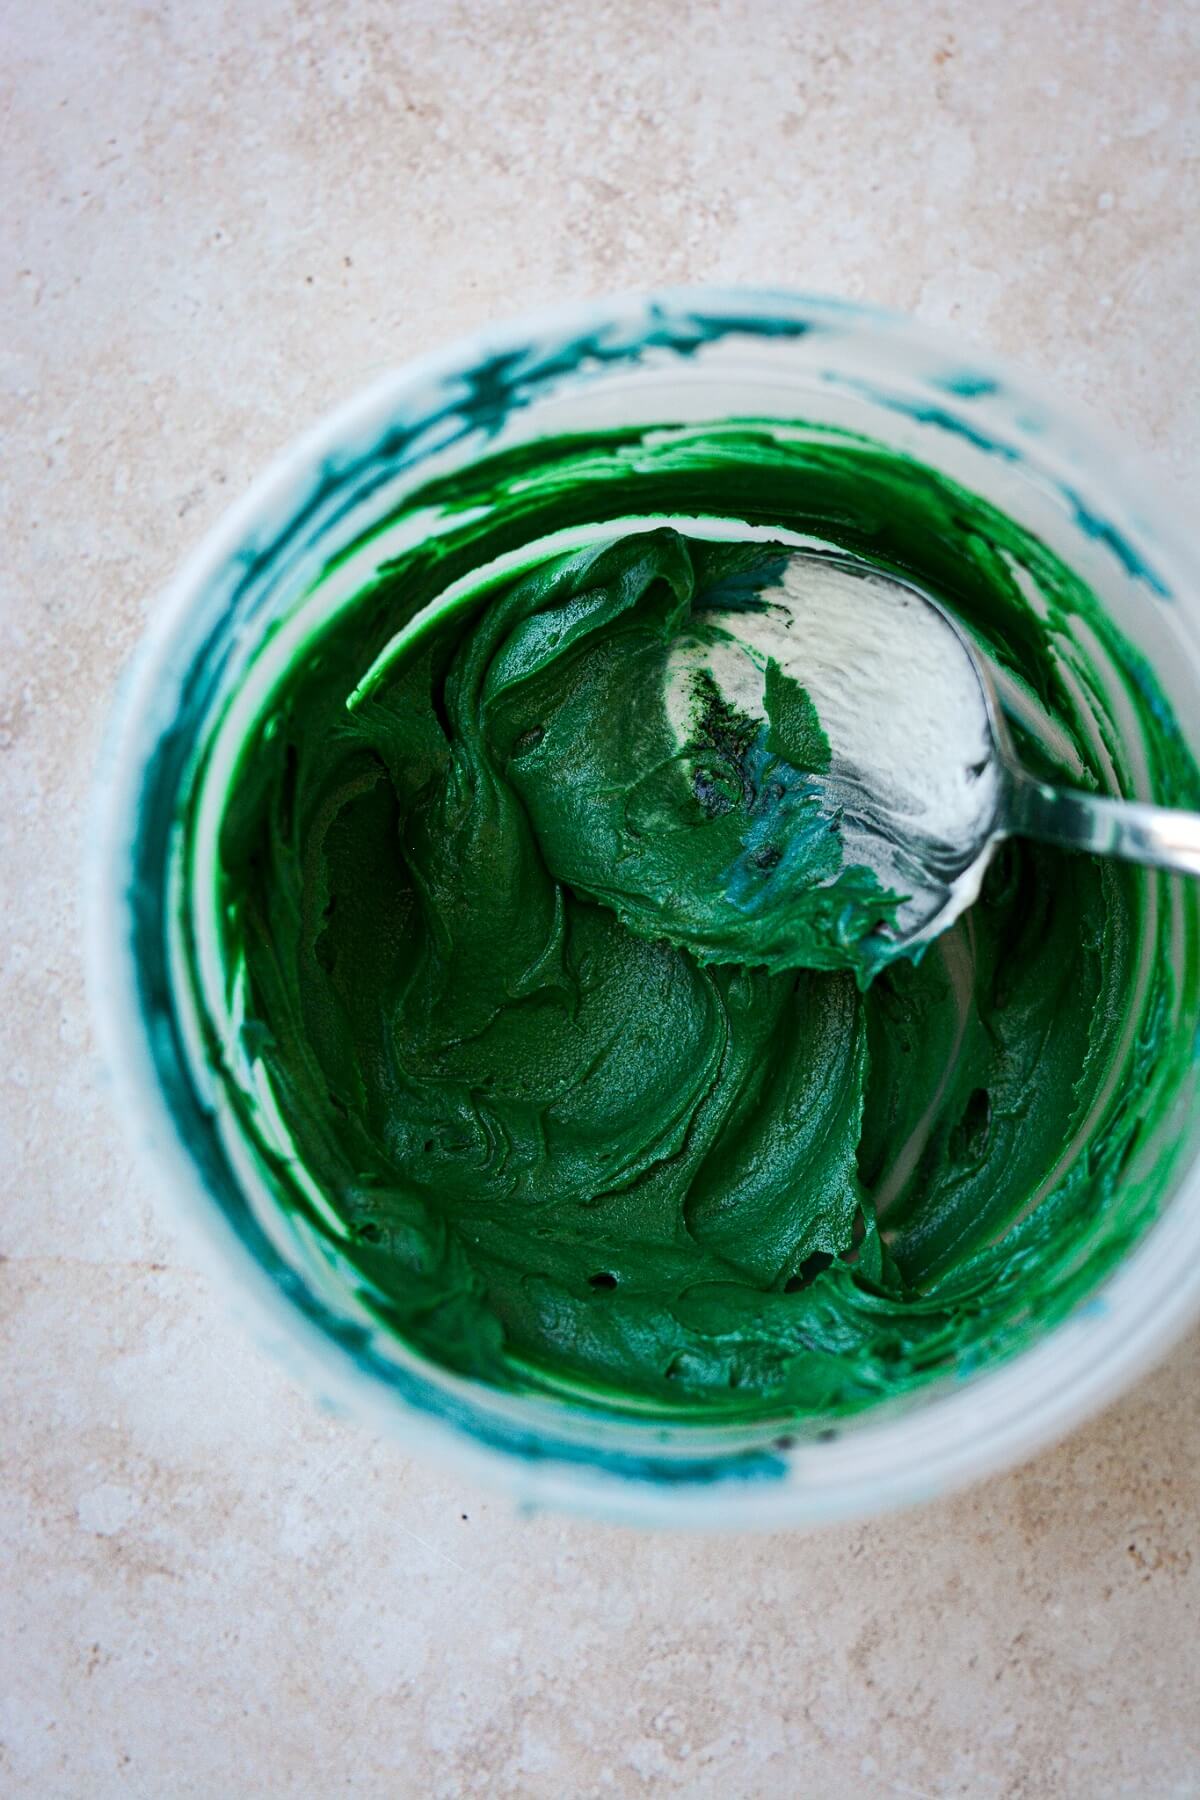
- For the green, take 2 tablespoons of the turquoise buttercream. Add a drop or two of “leaf green” for a deep green color. This will be for the leaves.
Frost the Cake with Turquoise Buttercream
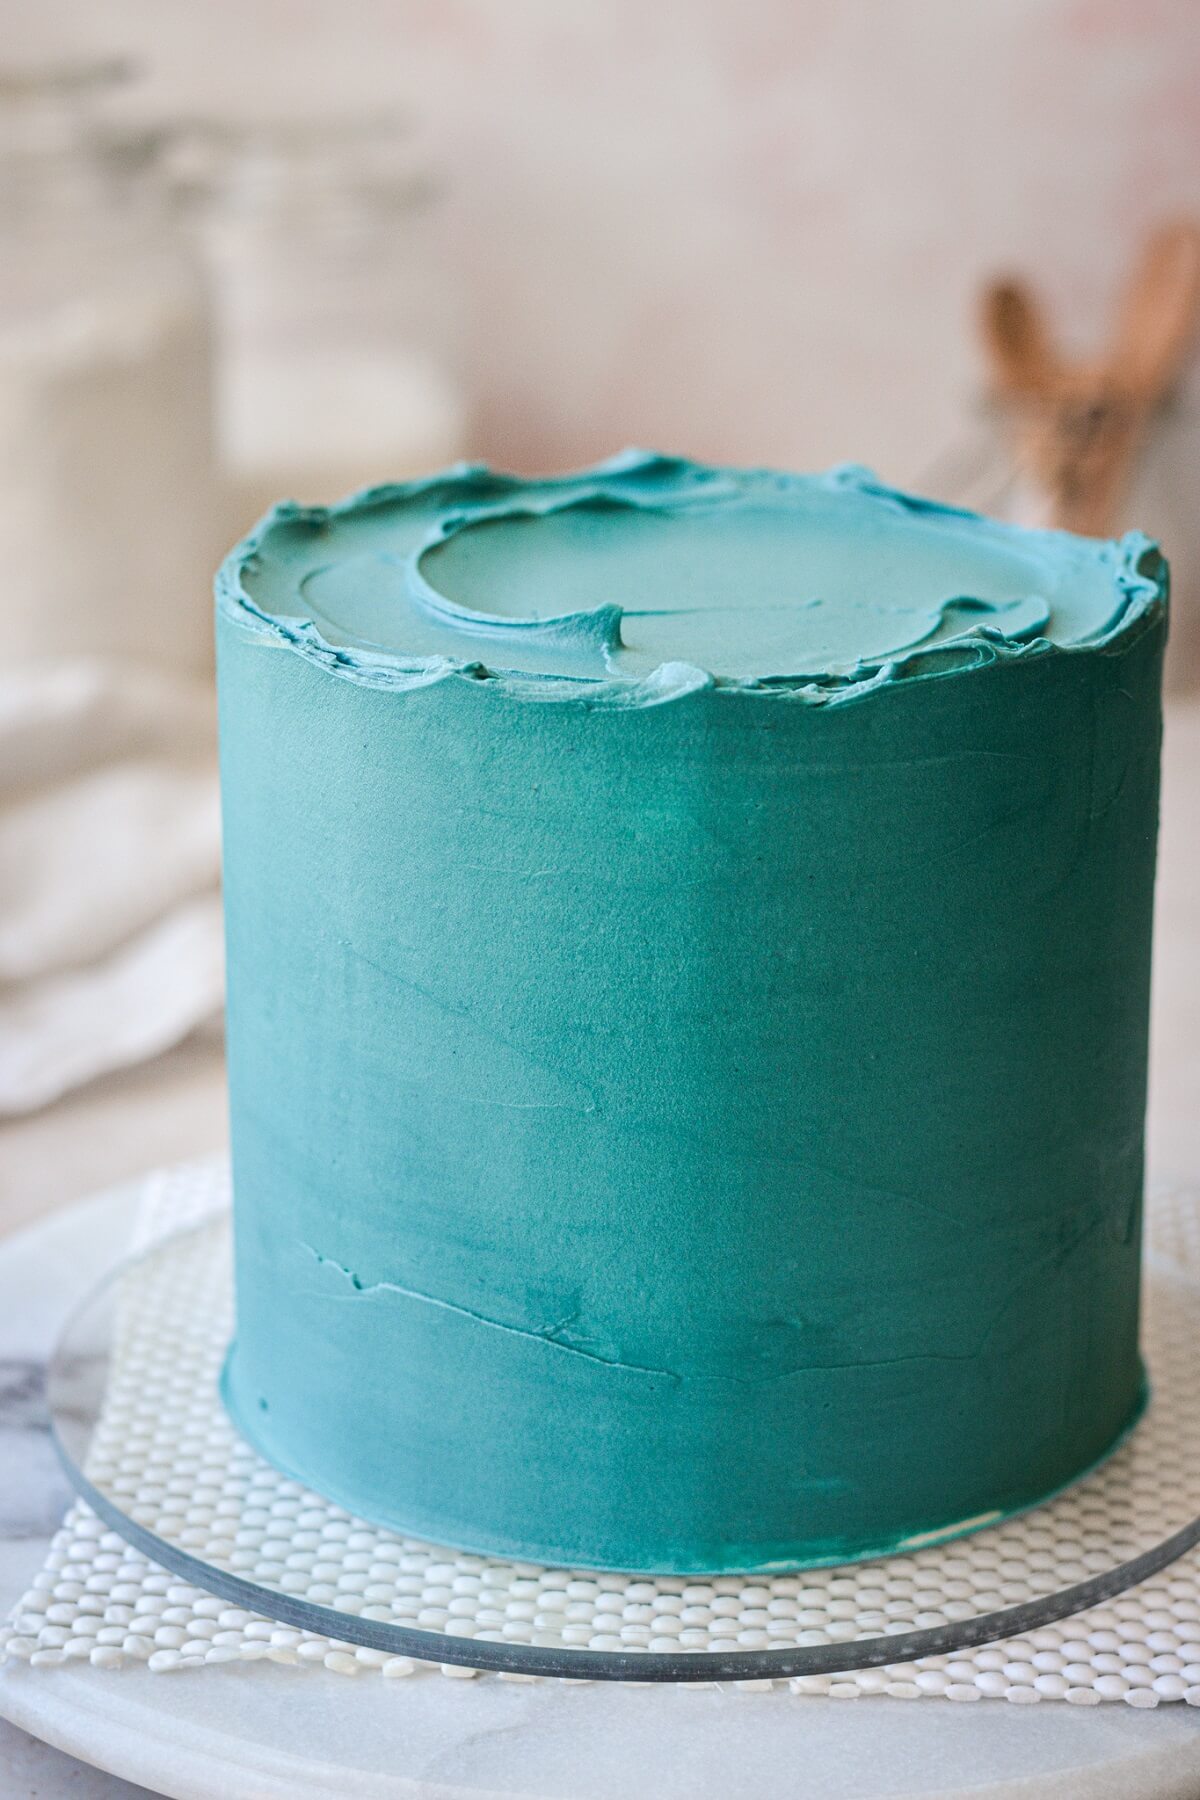
- Take your chilled cake, which should be completely covered in a cold base coat of buttercream.
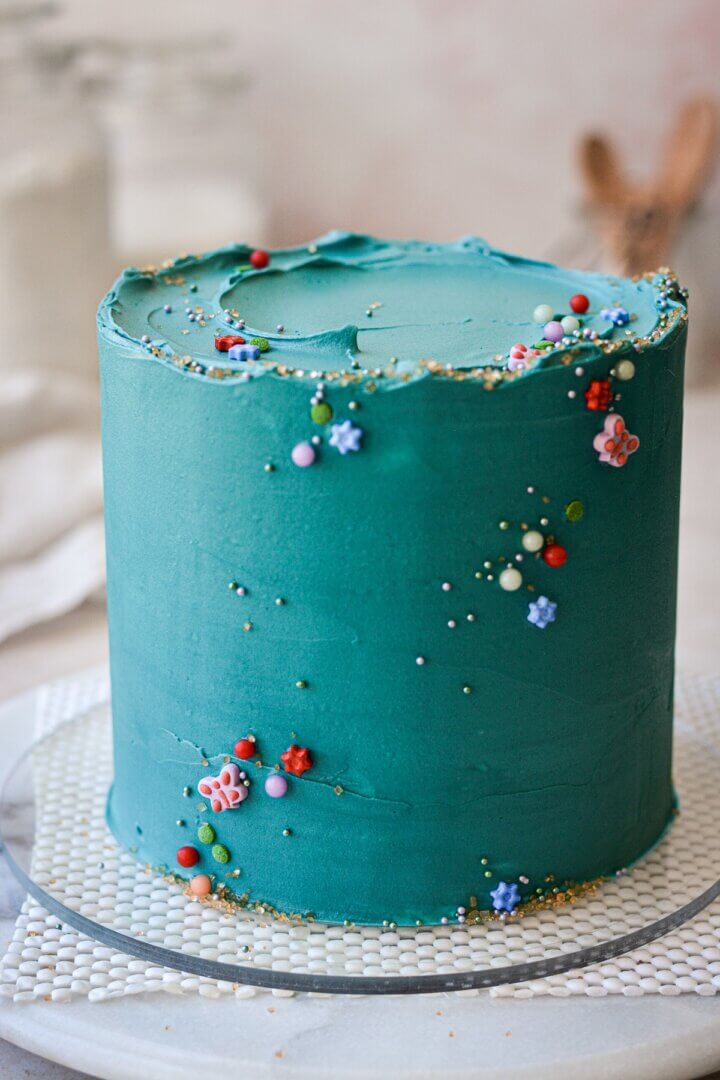
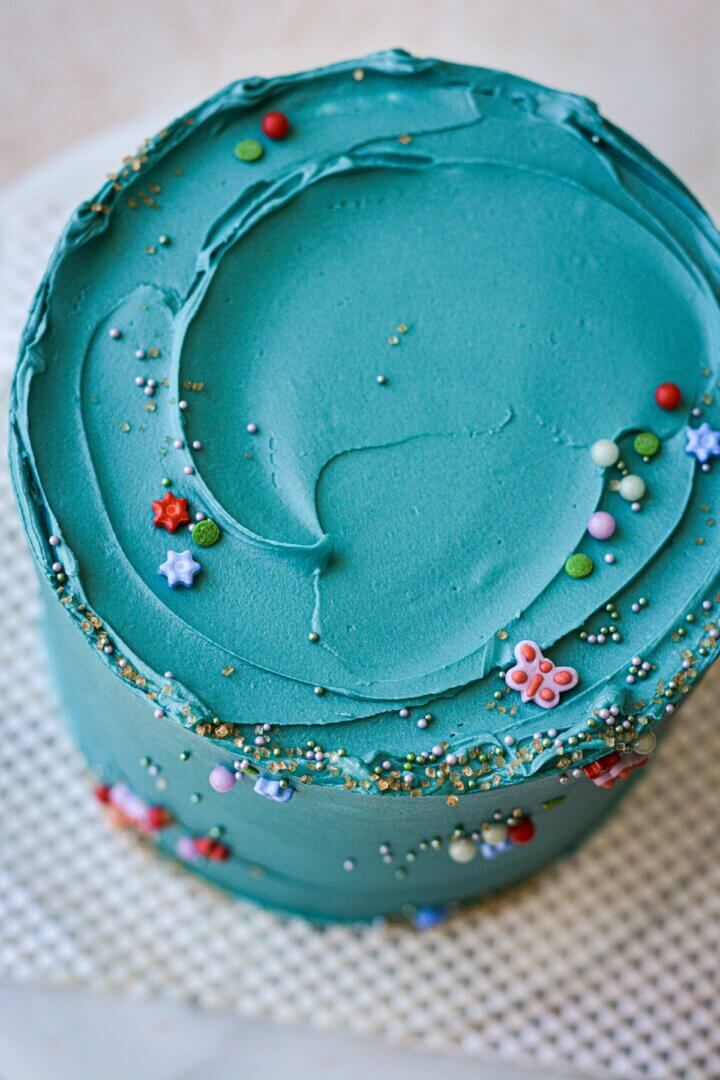
- Frost the cake all over with the turquoise buttercream, and lightly sweep it smooth with your bench scraper. You’ll only need a thin layer of turquoise to cover the cake, and you’ll find that it smooths over the chilled base coat beautifully. You can even leave it a bit textured, if you like. For tips on that technique, see my textured watercolor buttercream cake.
Add the Sprinkles
- While it might seem to make more sense to add the sprinkles after you’ve decorated the cake with all your buttercream flowers, there’s a good reason for adding the sprinkles first. Tiny sprinkles like sparkling sugar and nonpareils will only stick to a freshly frosted cake. Once the buttercream begins to crust over, which will happen in a few minutes, those tiny sprinkles simply will not stick, and they’ll just bounce right off the surface of the buttercream. This is why it will be so helpful for you to have a sketch of your cake to reference, so you’ll know exactly where you want to add sprinkles, and where you want to leave space for piping the flowers.
- So first, add the nonpareils and gold sparkling sugar. There’s no magic method to doing this; I simply pinch them between my fingers and toss them against the side of the cake, hoping that they stick in the general area that I want them. They’re too tiny to try to apply with cake decorating tweezers.
- Now add your sugar pearls and other sprinkles. These you can apply with tweezers, or carefully press them on with your fingers. At this point, the cake will already look so pretty, even without all the piped buttercream flowers.
Chill the Cake
- Return the cake to the refrigerator so you can chill and firm up the turquoise coat of buttercream.
- You need a chilled, crusted surface of buttercream before you begin piping on the flowers, so let the cake chill for about 1 hour.
Pipe the Flowers
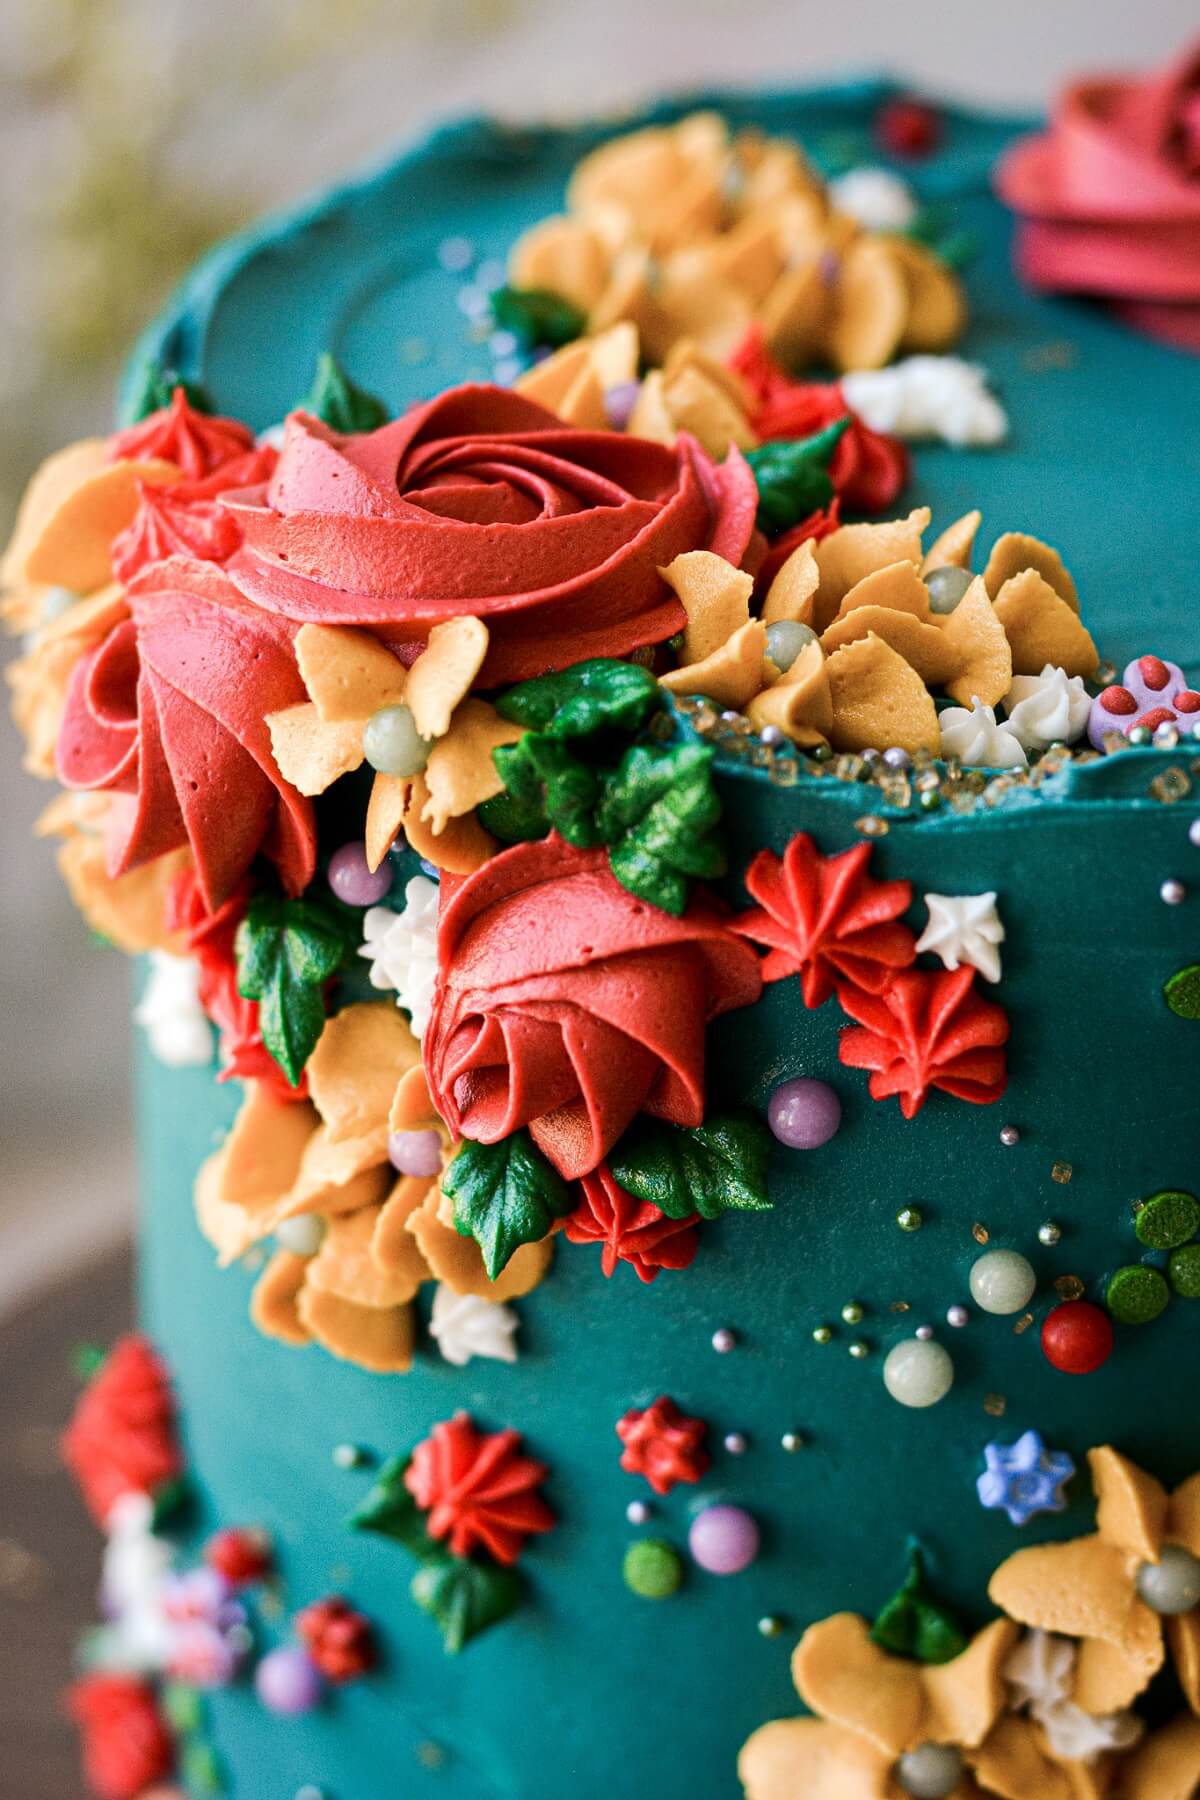
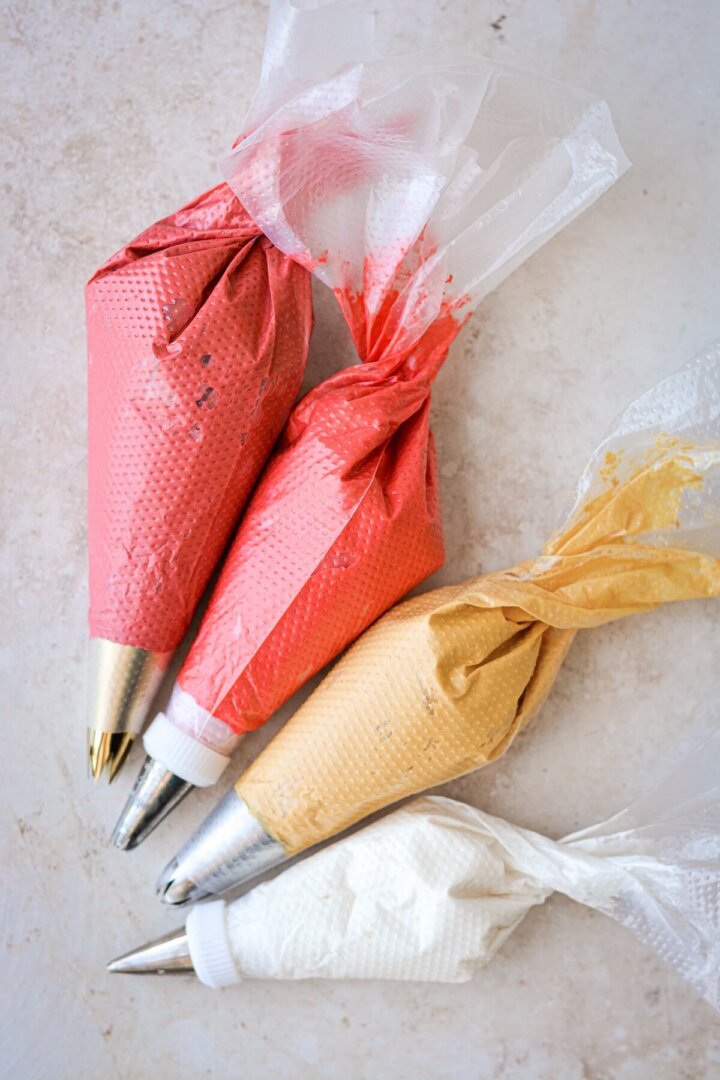
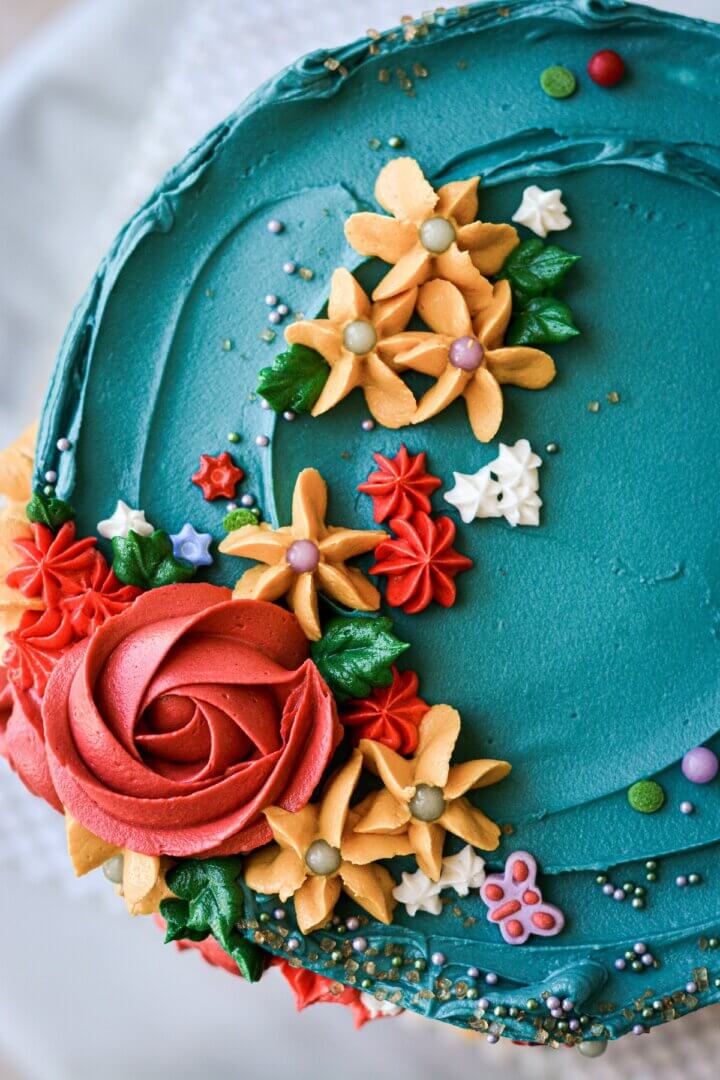
- Fit a piping bag with Tip #1M, and fill with the rosy red buttercream. Pipe the large and medium sized rosettes.
- Fit a piping bag with Tip #2D, and fill with the marigold yellow buttercream. Pipe the drop flowers.
- Fit a piping bag with a coupler and Tip #22, and fill with the bright red buttercream. Pipe the small red star flowers.
- Fit a piping bag with a coupler and Tip #73, and fill with the white buttercream. Pipe the small white star flowers.
- Fit a piping bag with a coupler and Tip #352, and fill with the green buttercream. Pipe the leaves. I don’t like to go overboard with the leaves – just enough to add depth and interest, but not so many that they take over your cake design.
- As a finishing touch, use tweezers to place sugar pearls in the center of each of the yellow drop flowers, and press a few more sprinkles onto the cake as desired, to complete the design. These details will bring your turquoise floral cake to life!

Be sure to read all of my BAKING FAQs where I discuss ingredients, substitutions and common questions with cake making, so that you can be successful in your own baking! I also suggest reading these comprehensive posts on making Perfect American Buttercream, How to Stack, Fill, Crumb Coat and Frost Layer Cakes and How to Use Piping Bags.
Frequently Asked Questions
What brand of gel food coloring do you use?
I love the Americolor brand, but I generally use whatever is available at my local Hobby Lobby or Michael’s craft store.
Why didn’t you just fill and frost the cake with turquoise buttercream to begin with?
Okay, so I have two reasons for why I filled and frosted my cake with white vanilla buttercream, before adding the turquoise buttercream on top. One, doing it this way uses a lot less food coloring. Two, by chilling the cake with its white base coat of buttercream first, and then spreading the turquoise buttercream over the cold base coat, your final coat of buttercream will look prettier and smoother, with some interesting texture and variation in color. You could even let the white show through a little, if you want a streaky watercolor effect. See this Textured Watercolor Buttercream Cake for details on that technique.
Why do you add the sprinkles before piping the flowers?
While it might seem to make more sense to add the sprinkles after you’ve decorated the cake with all your buttercream flowers, there’s a good reason for adding the sprinkles first. Tiny sprinkles like sparkling sugar and nonpareils will only stick to a freshly frosted cake. Once the buttercream begins to crust over, which will happen in a few minutes, those tiny sprinkles simply will not stick, and they’ll just bounce right off the surface of the buttercream. This is why it will be so helpful for you to have a sketch of your cake to reference, so you’ll know exactly where you want to add sprinkles, and where you want to leave space for piping the flowers. You can add more sugar pearls and larger sprinkles at any point while you’re decorating, but those tiny nonpareils and sparkling sugar are only going to stick within the first few minutes after you’ve frosted your cake. So get them on there quickly.
How far in advance can I decorate my cake?
If your cake recipe is really moist, like the chocolate cake recipe I used, you can assemble, frost and decorate your cake up to two days in advance, keeping it in the refrigerator in an airtight container. Let it come to room temperature for 3-4 hours before serving.
You can also freeze your fully decorated cake in an airtight container for up to 2 weeks. Thaw overnight in the refrigerator, then let it come to room temperature for 3-4 hours before serving.
If you’re planning on transporting a cake like this to an event or venue, the cake should be very cold and firm from the refrigerator before transportation in your car.
You Might Also Like
Please check out my Amazon Shop for a curated collection of some of my favorite cake pans from trusted brands, baking tools, ingredients, pretty things and fashion finds. I recommend products that I buy and use every day!
Did you love today’s recipe? Please rate the recipe and let me know in the comments what you thought! Also, be sure to follow Curly Girl Kitchen on Instagram, and tag me when you try one of my recipes so I can see all your delicious creations!
Turquoise Floral Cake
All recipes on Curly Girl Kitchen are developed for high altitude at 5,280 feet. See FAQs for adjusting to higher or lower elevations.

Ingredients
- 1 6-inch 3-Layer Cake, any flavor, frosted and well chilled
- 3 cups Vanilla Buttercream
- Gel Food Coloring (super red, regal purple, soft pink, lemon yellow, warm brown, navy blue, turquoise, electric green, leaf green)
- Piping Tips (1M, 2D, 22, 73, 352)
- Couplers and 12-Inch Piping Bags
- Icing Spatula and Bench Scraper
Instructions
Getting Started
- Begin by getting your cake layers assembled, filled, and frosted as smoothly as you can, then well chilled. I frosted my cake with plain white vanilla buttercream. You can use any cake recipe you like, but I recommend using my Perfect American Buttercream recipe. Be sure to also read my comprehensive post on How to Stack, Fill, Crumb Coat and Frost a Layer Cake. I assembled my cake with three 6-inch cake layers.
- You'll need to chill the cake for at least several hours before you begin decorating, to ensure the frosting is firm and cold. I frosted my cake at night, so I could chill it overnight and decorate it the next morning.
- You should also plan and sketch your cake design. I find that my decorated cakes turn out much better when I draw a sketch of most of the details I want to incorporate. In my sketch, you'll see that I had planned on adding some cupcakes on top, but decided against using them in the end.
Mix the Buttercream Colors
- You'll need about 1 1/4 cups of buttercream for the turquoise base coat, with the remaining 1 3/4 cups divided between various shades of red, yellow, green and white. You might have to adjust the gel colors a little from my suggestions, until you're happy with the final colors.TIP: I'd suggest mixing your colors several hours before (or the night before) you're going to decorate your cake, since the colors will deepen and darken over time.
- For the deep turquoise, begin by adding a few drops of "navy blue" to get a medium deep blue color. Next add a few drops of "turquoise" and a very small amount of "electric green".This will be the base coat of buttercream.
- For the bright red, add "super red" until you have a vivid red color.This will be for the small red star flowers.
- For the rosy red, add "super red" until you have a vivid red color. Add a drop of "regal purple" and a few drops of "soft pink" to soften the red into a duskier hue.This will be for the larger rosettes, and you'll need more buttercream for this color, since the rosettes are bigger than the other flowers.
- For the yellow, add "lemon yellow" for a sunny yellow color. Now add "warm brown", a small amount at a time, to deepen the color into a mustard yellow or marigold.This will be for the yellow drop flowers.
- For the white, simply reserve a small amount of buttercream to keep white.This will be for the small white star flowers.
- For the green, take 2 tablespoons of the turquoise buttercream. Add a drop or two of "leaf green" for a deep green color.This will be for the leaves.
Frost the Cake with Turquoise Buttercream
- Take your chilled cake, which should be completely covered in a cold base coat of buttercream.
- Frost the cake all over with the turquoise buttercream, and lightly sweep it smooth with your bench scraper. You'll only need a thin layer of turquoise to cover the cake, and you'll find that it smooths over the chilled base coat beautifully. You can even leave it a bit textured, if you like. For tips on that technique, see my textured watercolor buttercream cake.
Add the Sprinkles
- While it might seem to make more sense to add the sprinkles after you've decorated the cake with all your buttercream flowers, there's a good reason for adding the sprinkles first. Tiny sprinkles like sparkling sugar and nonpareils will only stick to a freshly frosted cake. Once the buttercream begins to crust over, which will happen in a few minutes, those tiny sprinkles simply will not stick, and they'll just bounce right off the surface of the buttercream. This is why it will be so helpful for you to have a sketch of your cake to reference, so you'll know exactly where you want to add sprinkles, and where you want to leave space for piping the flowers.
- So first, add the nonpareils and gold sparkling sugar. There's no magic method to doing this; I simply pinch them between my fingers and toss them against the side of the cake, hoping that they stick in the general area that I want them. They're too tiny to try to apply with cake decorating tweezers.
- Now add your sugar pearls and other sprinkles. These you can apply with tweezers, or carefully press them on with your fingers.
Chill the Cake
- Return the cake to the refrigerator so you can chill and firm up the turquoise coat of buttercream.
- You need a chilled, crusted surface of buttercream before you begin piping on the flowers, so let the cake chill for about 1 hour.
Pipe the Flowers
- Fit a piping bag with Tip #1M, and fill with the rosy red buttercream. Pipe the large and medium sized rosettes.
- Fit a piping bag with Tip #2D, and fill with the marigold yellow buttercream. Pipe the drop flowers.
- Fit a piping bag with a coupler and Tip #22, and fill with the bright red buttercream. Pipe the small red star flowers.
- Fit a piping bag with a coupler and Tip #73, and fill with the white buttercream. Pipe the small white star flowers.
- Fit a piping bag with a coupler and Tip #352, and fill with the green buttercream. Pipe the leaves.I don't like to go overboard with the leaves – just enough to add depth and interest, but not so many that they take over your cake design.
- As a finishing touch, use tweezers to place sugar pearls in the center of each of the yellow drop flowers, and press a few more sprinkles onto the cake as desired, to complete the design.
 https://curlygirlkitchen.com/
this cake is gorgeous!!!!! do you decorate the sides all the way around or just the front? it sort of looked like only the front was decorated in one of the pictures.
I might have added a few sprinkles around the back, but the main decoration is on the front.
Love how detailed you explain the design. Thank you so much for all the details and all the pictures of each decorating step. I will be doing it in a couple weeks for a friend.
BEAUTIFUL. I want to recreate this. Lol Which gel food coloring brand do you use for such perfect colors??
Americolor
Beautiful cake. I’m wondering, can you taste the coloring in the icing? I am always afraid to do dark colors because of bad taste from coloring. Thanks
I’ve never noticed an unpleasant flavor from the food coloring.
My daughter has asked me to make this cake for her 18th party, would you have any tips or a link to instructions on how to pipe the rosettes? I am a fondant girl usually so I’m not confident piping buttercream! Thanks so much.
I don’t have a video, but this post might be helpful for you:
https://curlygirlkitchen.com/how-to-frost-cupcakes-6-ways-tip-1m/
There are lots of videos online, though, if you need to see it in action. I usually search YouTube when I need to learn a new piping technique.
I made this cake as a double barrel for my daughter’s 18th at her request. Was hard to recreate the colours in Australia as our butter is yellow but your instructions were so clear, I got there in the end! Thanks so much.
Thank you thank you thank you! I just had a go at decorating a cake and because of your awesome instructions was I make to get some decent results . Thanks again for sharing your talents
wow this looks insane! if i took ages making it, would i have to keep putting it in the fridge so that it wouldnt go really moist and hard to work with?
Yes, with this type of design, you do need to keep the cake cold and firm as you decorate it.