
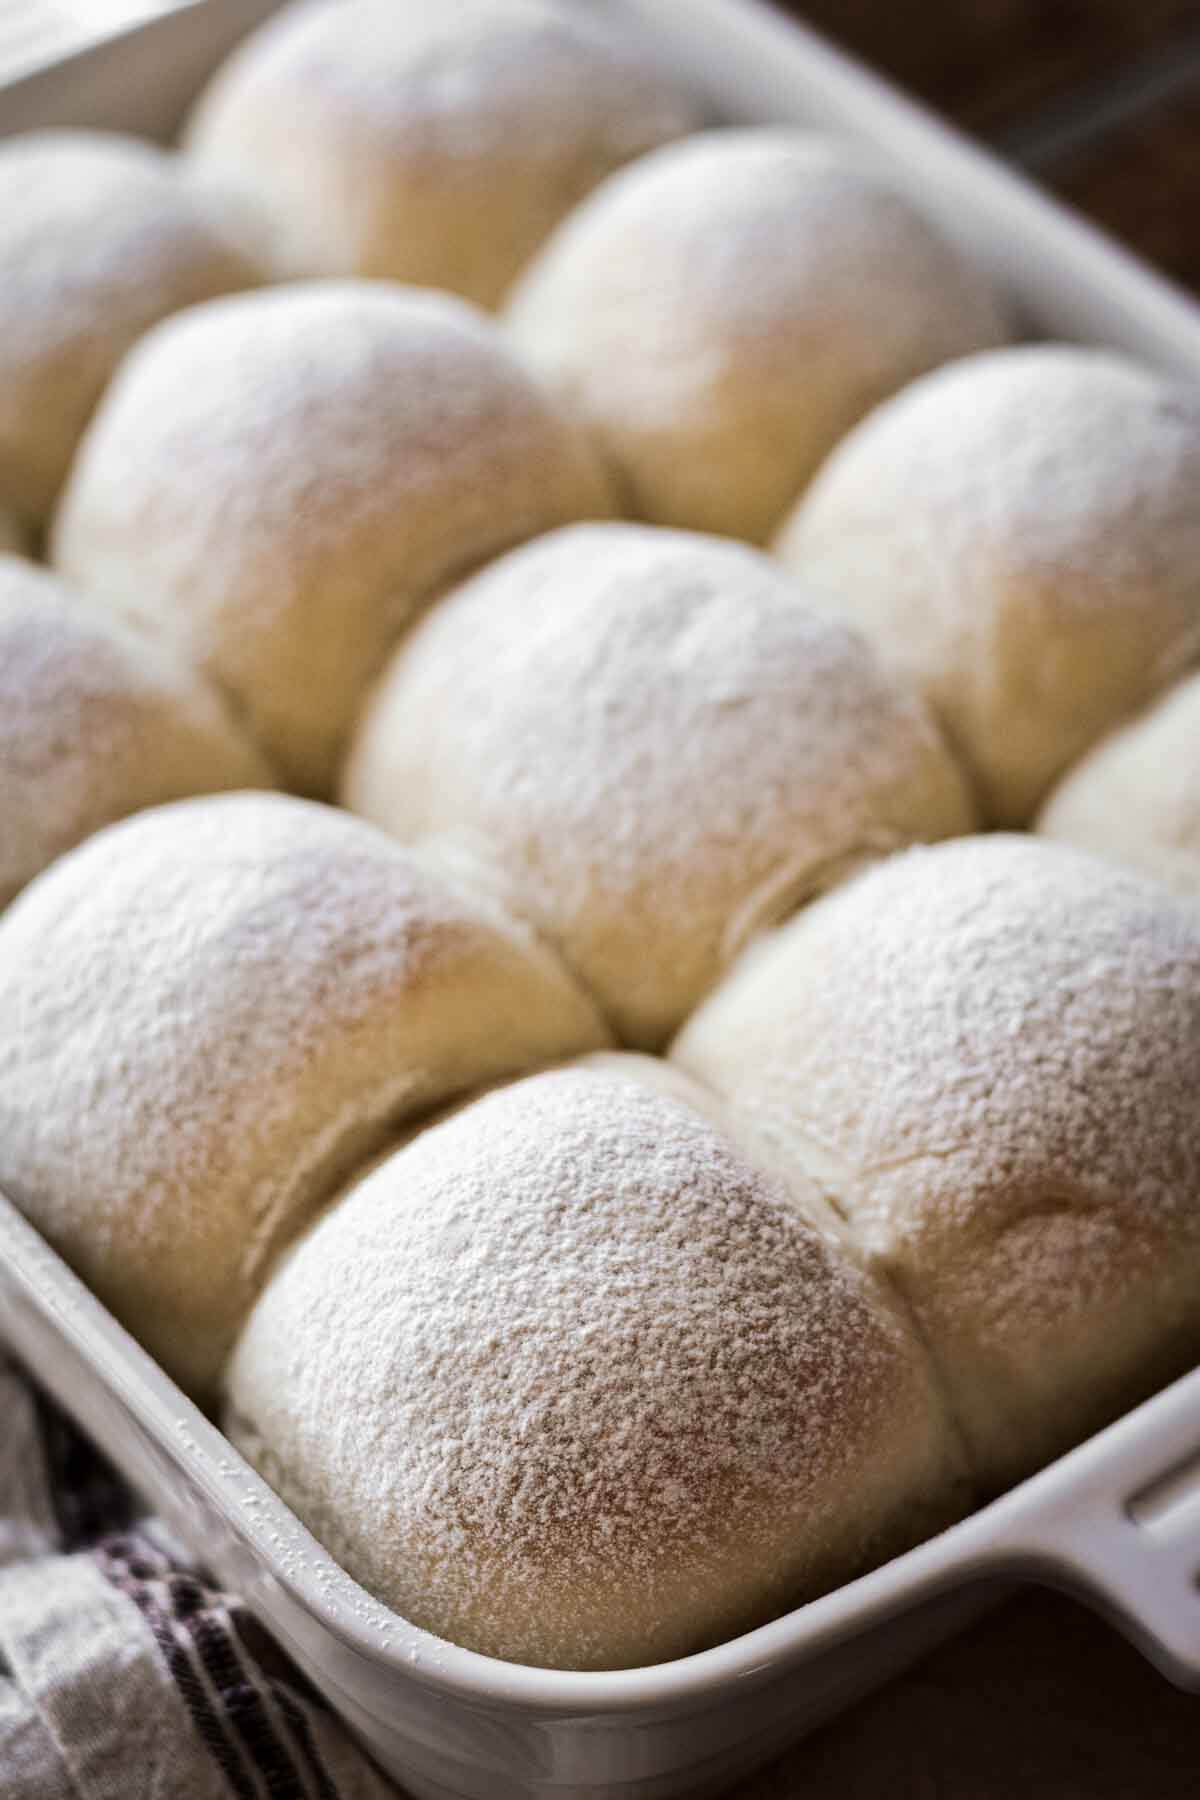
These classic, high altitude tested Waterford blaas are soft floury white buns or Irish rolls. They’re wonderful spread with salted Irish butter and honey, or used for sandwiches.
If you’re looking for more Irish recipes for St. Patrick’s Day, you’ll love these high altitude recipes for Irish soda bread, poppy seed Irish tea cake, simple Irish brown bread, shamrock shake cupcakes, and chocolate guinness cake.
This site contains affiliate links. As an Amazon associate, I earn from qualifying purchases. This means that I may make a small commission if you purchase a product using those links. This in no way affects my opinion of those products and services. All opinions expressed on this site are my own.
What are Waterford Blaas?
A blaa is a soft bread roll, with Waterford blaas being especially popular in Waterford, Ireland. These rolls are typically soft, fluffy and floury, with a slightly crusty exterior. The dough is a “lean” dough, meaning it’s made with little to no fat or dairy, although I did add a bit of butter to mine to tenderize it and add more flavor. When baked, the rolls remain quite light on top with little browning, due to the dusting of flour over the top of them. A unique characteristic of this recipe is that the dough is proofed twice before shaping the rolls, giving them a deeper flavor.
You can enjoy these rolls on their own for breakfast or a snack, and I especially love them with butter and honey. They also make wonderful sandwich rolls, used as hamburger buns, or served along side soup or stew.

Why You’ll Love This Recipe
Perfect for St. Patrick’s Day. Whether you’re Irish or not, you can still wear something green and celebrate St. Patrick’s Day with a batch of these delicious, homemade Irish rolls.
Fast Rising Dough. Even with the double proofing, these rolls were ready in no time. With so little fat in the dough to slow down the proofing, the dough rises quickly. So you can move on to baking and eating homemade bread in just a few hours.
High Altitude Tested. I develop all the recipes on my site for Denver’s altitude of 5,280 feet. If you’re at a lower or higher elevation, please see my FAQs for guidance on adjusting recipes for your altitude.

See the recipe card at the end of the post for the full ingredients list and instructions.
Ingredients
- Yeast. For best results, I recommend using Red Star Platinum Premium Instant Yeast. I use this yeast for all my yeast breads, and it works wonderfully.
- Salt. The salt is what gives these rolls their flavor. I prefer coarse Kosher salt for all my cooking and baking.
- Butter. Although this is a lean dough, a little butter will add flavor, as well as tenderness.
- Flour. I prefer to make this recipe with bread flour, which has a higher percentage of protein than all purpose flour, and gives the rolls a chewier texture.

Instructions
Kneading the Dough
- In the bowl of your stand mixer fitted with the dough hook, combine the water, yeast, sugar, salt, butter, and all but 1/2 cup of the flour.
- On medium low speed, knead the dough for 5 minutes until smooth, gradually adding the remaining 1/2 cup of flour if needed. The dough should form a torpedo around the dough hook, but may still stick to the bottom of the bowl.
- If you don’t have a stand mixer, you can also knead the dough by hand on a lightly floured counter top.

First Rise
- Transfer the dough to a lightly greased bowl or container. I like these lidded 4-qt storage containers, which are ideal for rising dough, since the marked sides let you easily see how much the dough has increased in volume.
- Cover the container with a lid or plastic wrap, and set in a warm place to rise until doubled in volume. If your oven has a “bread proof” setting, use that.
- My dough rose very quickly, and doubled in volume within about 45 minutes. The higher your elevation, the faster your dough will rise.


Second Rise
- Gently punch down the dough to deflate it, then replace the lid.
- Set in a warm place to rise again for 30 minutes.
Shaping the Rolls
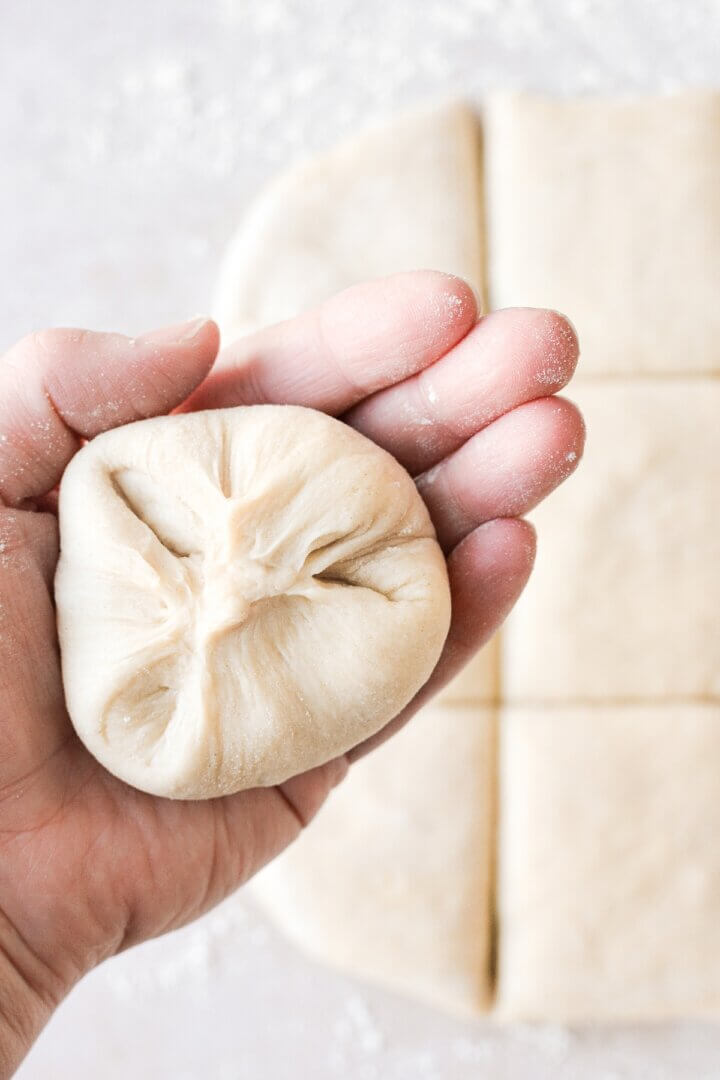
- Scrape the dough out onto a lightly floured counter. Gently press the dough into a circle, then use a sharp knife or bench scraper to cut the dough into 12 equal portions.
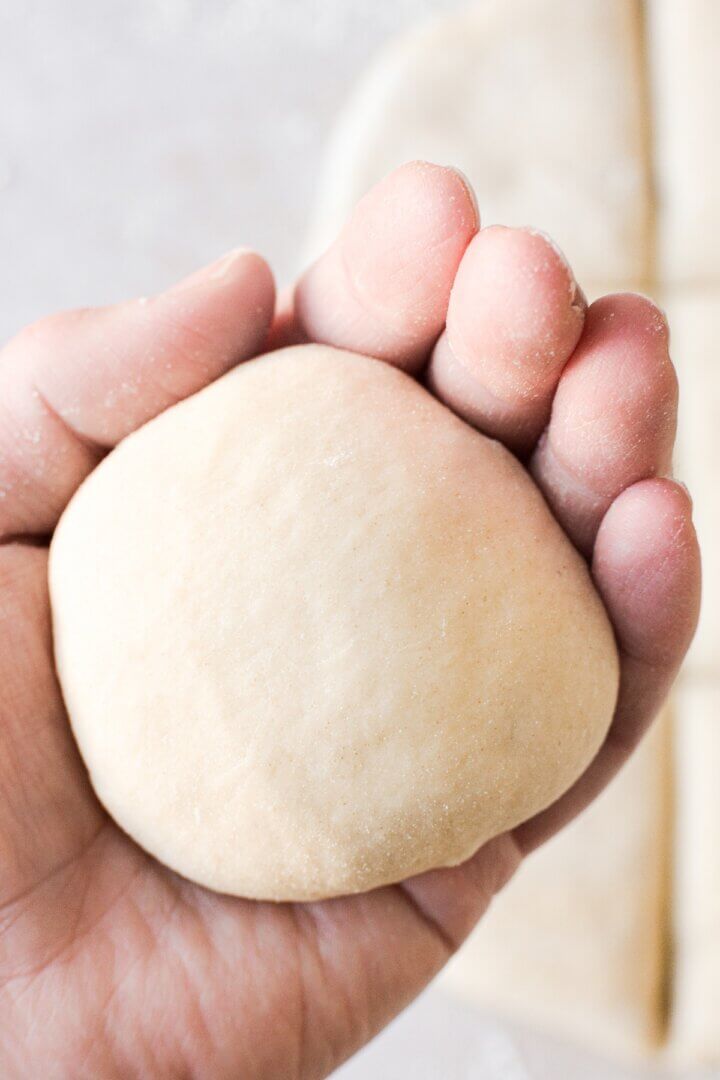
- Shape each portion of dough into a roll by cupping it in your hand and pinching the dough together on the bottom.
- Place the rolls, smooth side up, in a lightly greased or buttered 9×13 inch baking dish.
- Cover with a clean towel, and set aside to rest for about 30 minutes, until the rolls are puffing against each other.


Baking
- Preheat the oven to 425 F, and position a rack in the center of the oven.
- Just before baking, lightly dust the top of the rolls with flour.
- Bake for about 20-25 minutes, until puffed and a digital instant read thermometer inserted into the center of the rolls reads 195F.
- Let cool for several minutes, then serve warm or at room temperature with butter and honey or jam.


Be sure to read all of my BAKING FAQs where I discuss ingredients, substitutions and common baking questions, so that you can be successful in your own baking!
Frequently Asked Questions
Let the rolls cool completely, then store them in an airtight container or freezer bag at room temperature for up to 3 days, or in the freezer for up to 3-6 months. Leftover rolls can be split and lightly toasted, or warmed in the microwave for 20-30 seconds on 50% power.
Yes, you can use all purpose flour, but the higher percentage of protein in bread flour will make a chewier bread roll.

You Might Also Like


Please check out my Amazon Shop for a curated collection of some of my favorite cake pans from trusted brands, baking tools, ingredients, pretty things and fashion finds. I recommend products that I buy and use every day!
Did you love today’s recipe? Please rate the recipe and let me know in the comments what you thought! Also, be sure to follow Curly Girl Kitchen on Instagram, and tag me when you try one of my recipes so I can see all your delicious creations!

High Altitude Waterford Blaas (Soft Irish Bread Rolls)
All recipes on Curly Girl Kitchen are developed for high altitude at 5,280 feet. See FAQs for adjusting to higher or lower elevations.

Equipment
- Stand Mixer with Dough Hook
- 9×13 Baking Dish
Ingredients
- 2 cups hot water (between 110-115 degrees F)
- 1 tbsp instant or rapid rise yeast
- 2 tsp granulated sugar
- 1 ½ tsp coarse Kosher salt (if using table salt, use half the amount)
- 3 tbsp unsalted butter, very soft
- 5 – 5 ½ cups (26 oz) bread flour, fluffed, spooned and leveled
Instructions
Kneading the Dough
- In the bowl of your stand mixer fitted with the dough hook, combine the water, yeast, sugar, salt, butter, and all but 1/2 cup of the flour.
- On medium low speed, knead the dough for 5 minutes until smooth, gradually adding the remaining 1/2 cup of flour if needed. The dough should form a torpedo around the dough hook, but may still stick to the bottom of the bowl.
- If you don't have a stand mixer, you can also knead the dough by hand on a lightly floured counter top.
First Rise
- Transfer the dough to a lightly greased bowl or container. I like these lidded 4-qt storage containers, which are ideal for rising dough, since the marked sides let you easily see how much the dough has increased in volume.
- Cover the container with a lid or plastic wrap, and set in a warm place to rise until doubled in volume. If your oven has a "bread proof" setting, use that.
- My dough rose very quickly, and doubled in volume within about 45 minutes. The higher your elevation, the faster your dough will rise.
Second Rise
- Gently punch down the dough to deflate it, then replace the lid.
- Set in a warm place to rise again for 30 minutes.
Shaping the Rolls
- Scrape the dough out onto a lightly floured counter. Gently press the dough into a circle, then use a sharp knife or bench scraper to cut the dough into 12 equal portions.
- Shape each portion of dough into a roll by cupping it in your hand and pinching the dough together on the bottom.
- Place the rolls, smooth side up, in a lightly greased or buttered 9×13 inch baking dish.
- Cover with a clean towel, and set aside to rest for about 30 minutes, until the rolls are puffing against each other.
Baking
- Preheat the oven to 425 F, and position a rack in the center of the oven.
- Just before baking, lightly dust the top of the rolls with flour.
- Bake for about 20-25 minutes, until puffed and a digital instant read thermometer inserted into the center of the rolls reads 195F.
- Let cool for several minutes, then serve warm or at room temperature with butter and honey or jam.
Notes
 https://curlygirlkitchen.com/
Leave a Reply