
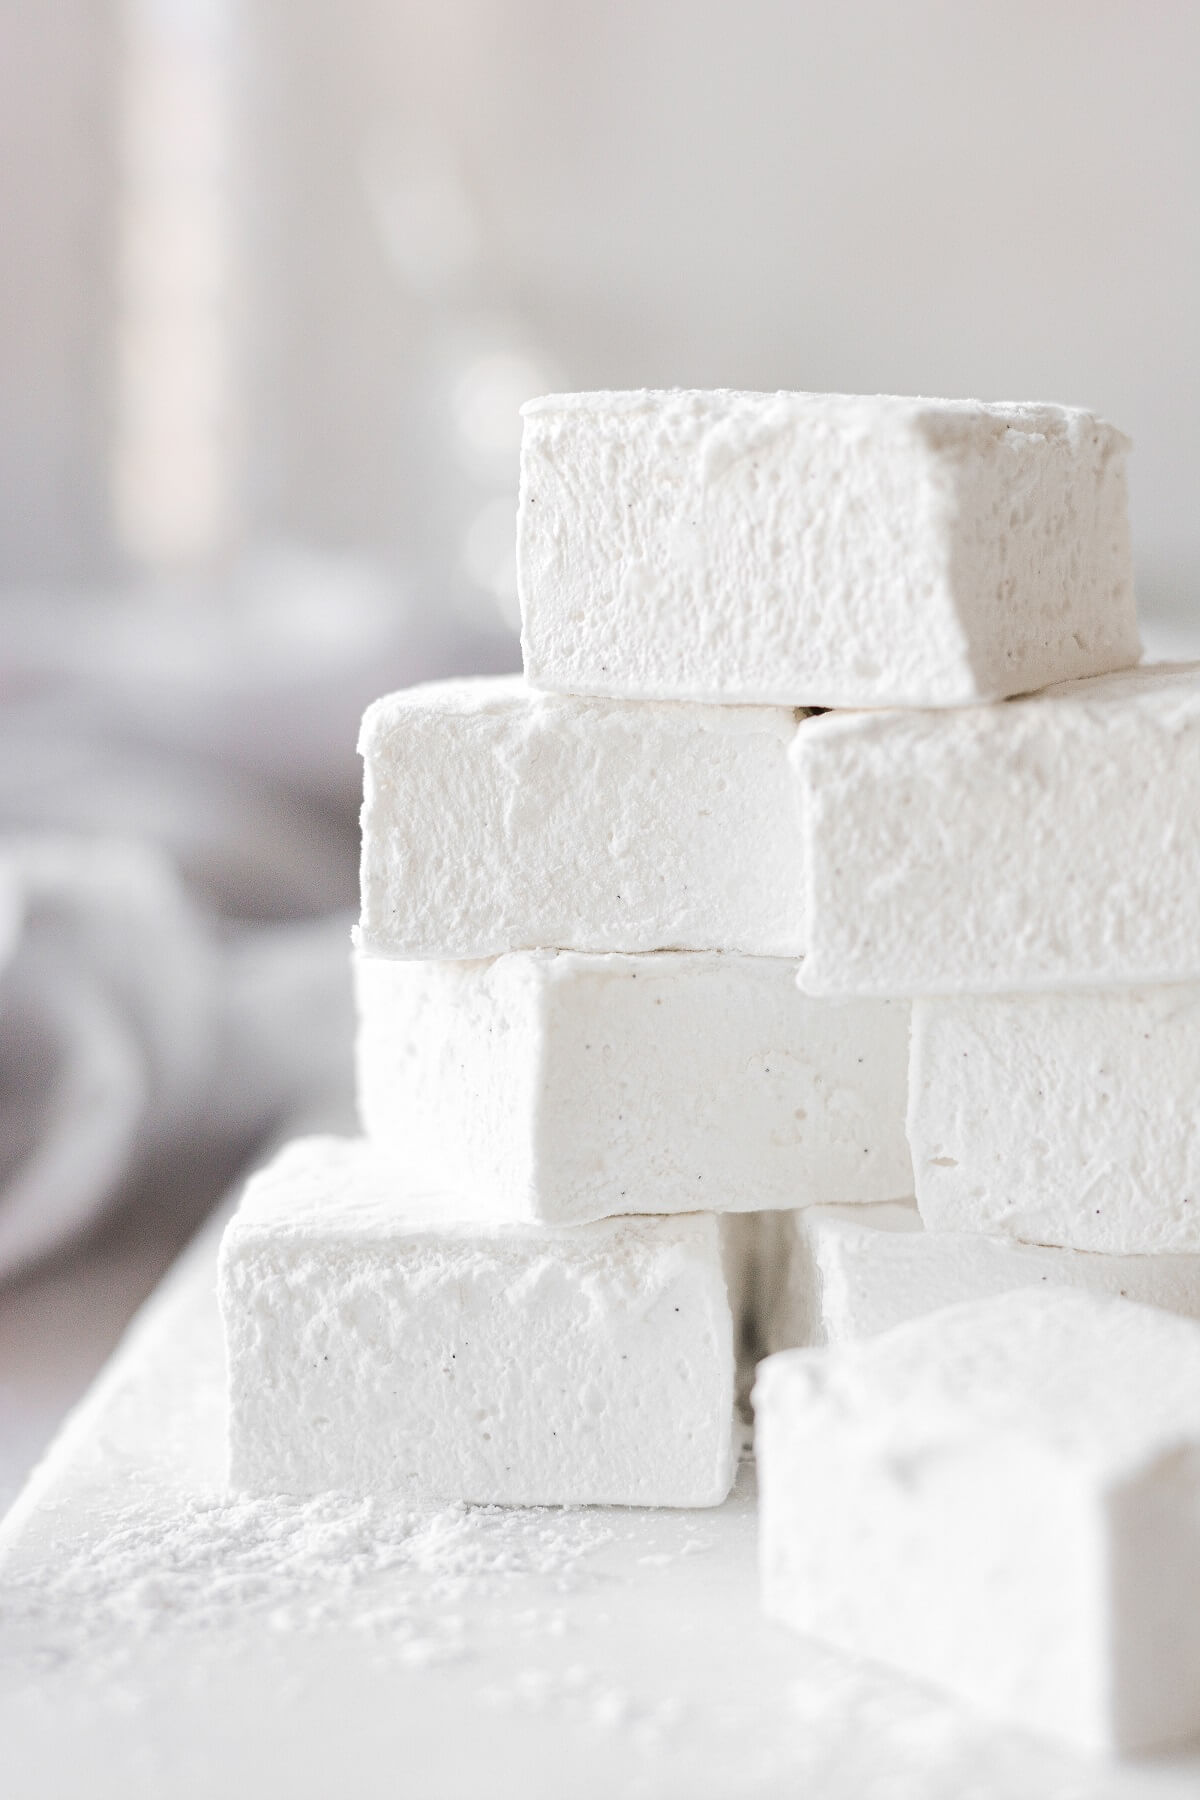
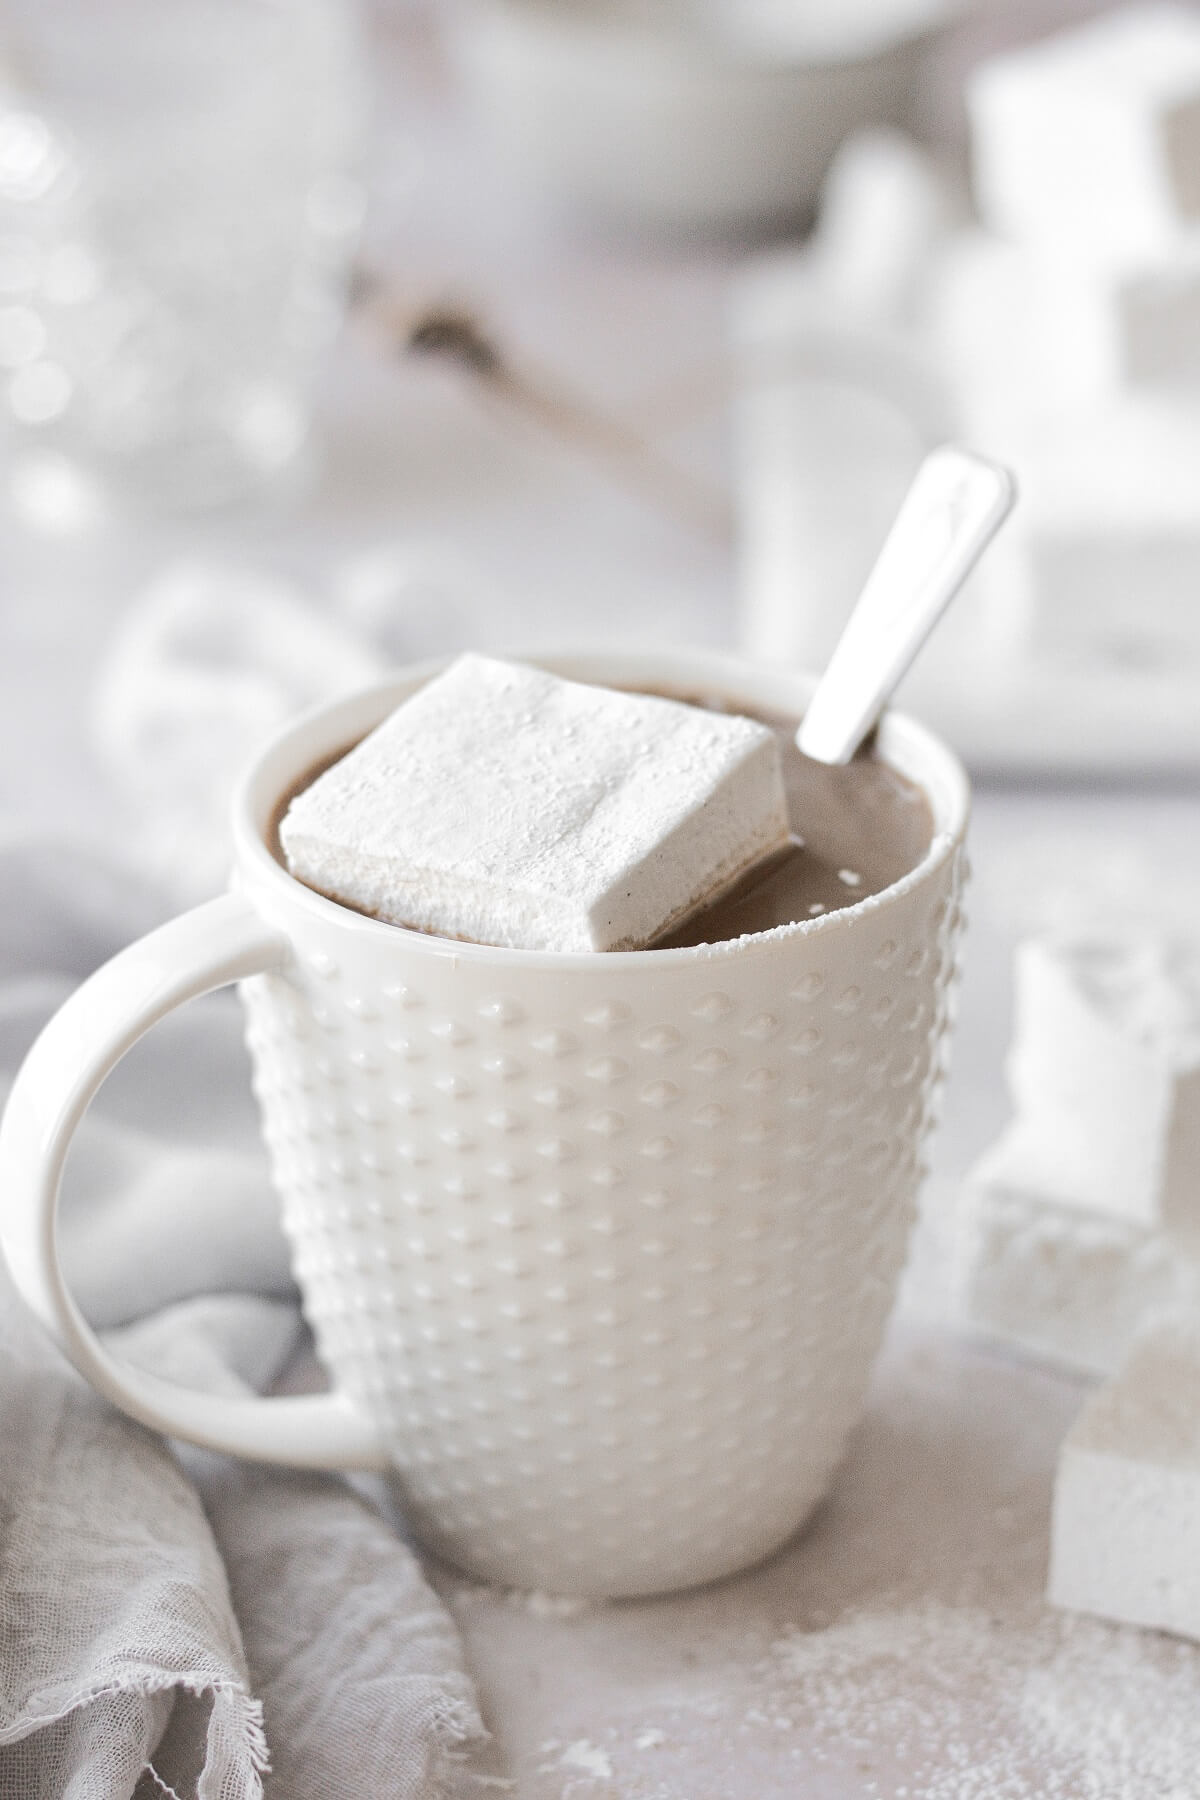
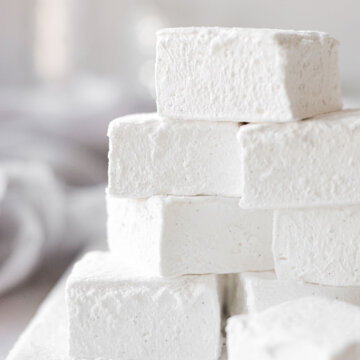
These soft and fluffy homemade marshmallows are flecked with real vanilla bean seeds. They’re sweet and pillowy, and so much better than store bought marshmallows. Serve these vanilla bean marshmallows with hot chocolate, or toast them for s’mores!
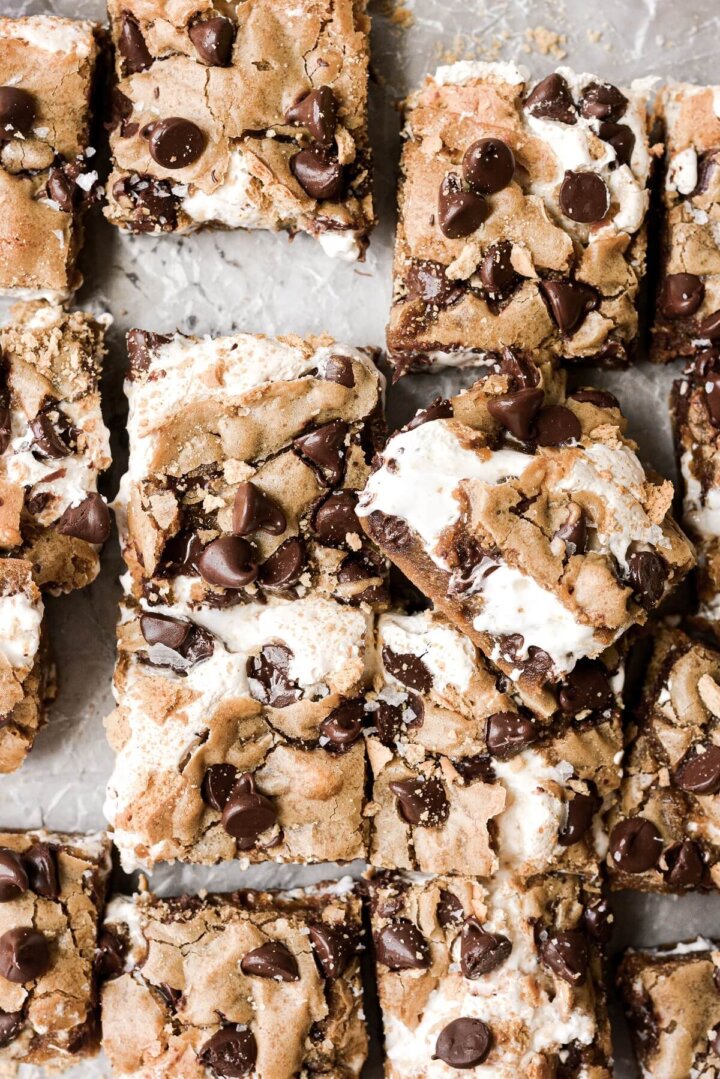
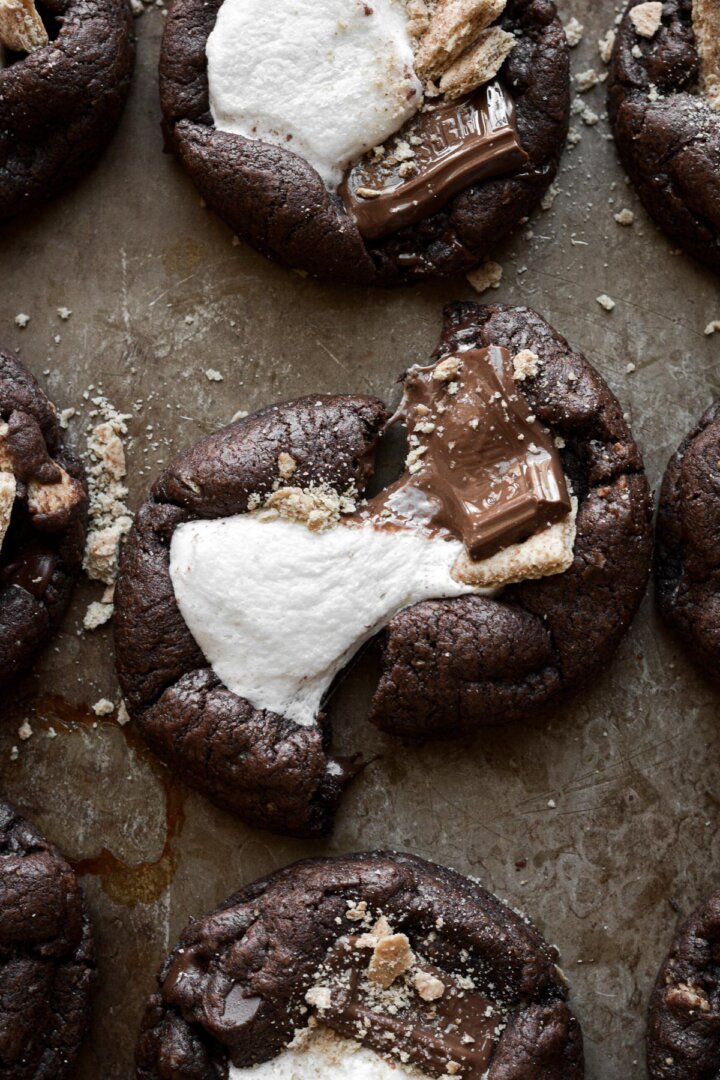
You might also like this s’mores cake with homemade marshmallow fluff, s’mores chocolate chip cookie bars, and homemade hot chocolate mix.
This site contains affiliate links. As an Amazon associate, I earn from qualifying purchases. This means that I may make a small commission if you purchase a product using those links. This in no way affects my opinion of those products and services. All opinions expressed on this site are my own.
Why You’ll Love This Recipe
Better than Store Bought. With homemade marshmallows, you can add so much more flavor, like vanilla bean, peppermint, or other flavored extracts.
Easy to Make. Boiling syrup and whipping it into fluffy marshmallow might sound complicated, but it’s really so easy. Most of the time spent on this recipe is waiting for the marshmallow to set up so you can cut it into squares.
Stays Fresh for Weeks. Stored in an airtight container, these marshmallows will stay fresh for weeks to last you through hot chocolate season.
See the recipe card at the end of the post for the full ingredients list and instructions.
Ingredients and Tools
- Stand Mixer with Whisk Attachment. This is a necessity. The marshmallow has to whip for a good 10-12 minutes, and you need a stand mixer to accomplish this.
- 9-inch Baking Pan.
- Vegetable Shortening or Softened Butter. For greasing the pan and utensils. Homemade marshmallows are extremely sticky, and everything has to be greased to keep it from sticking.
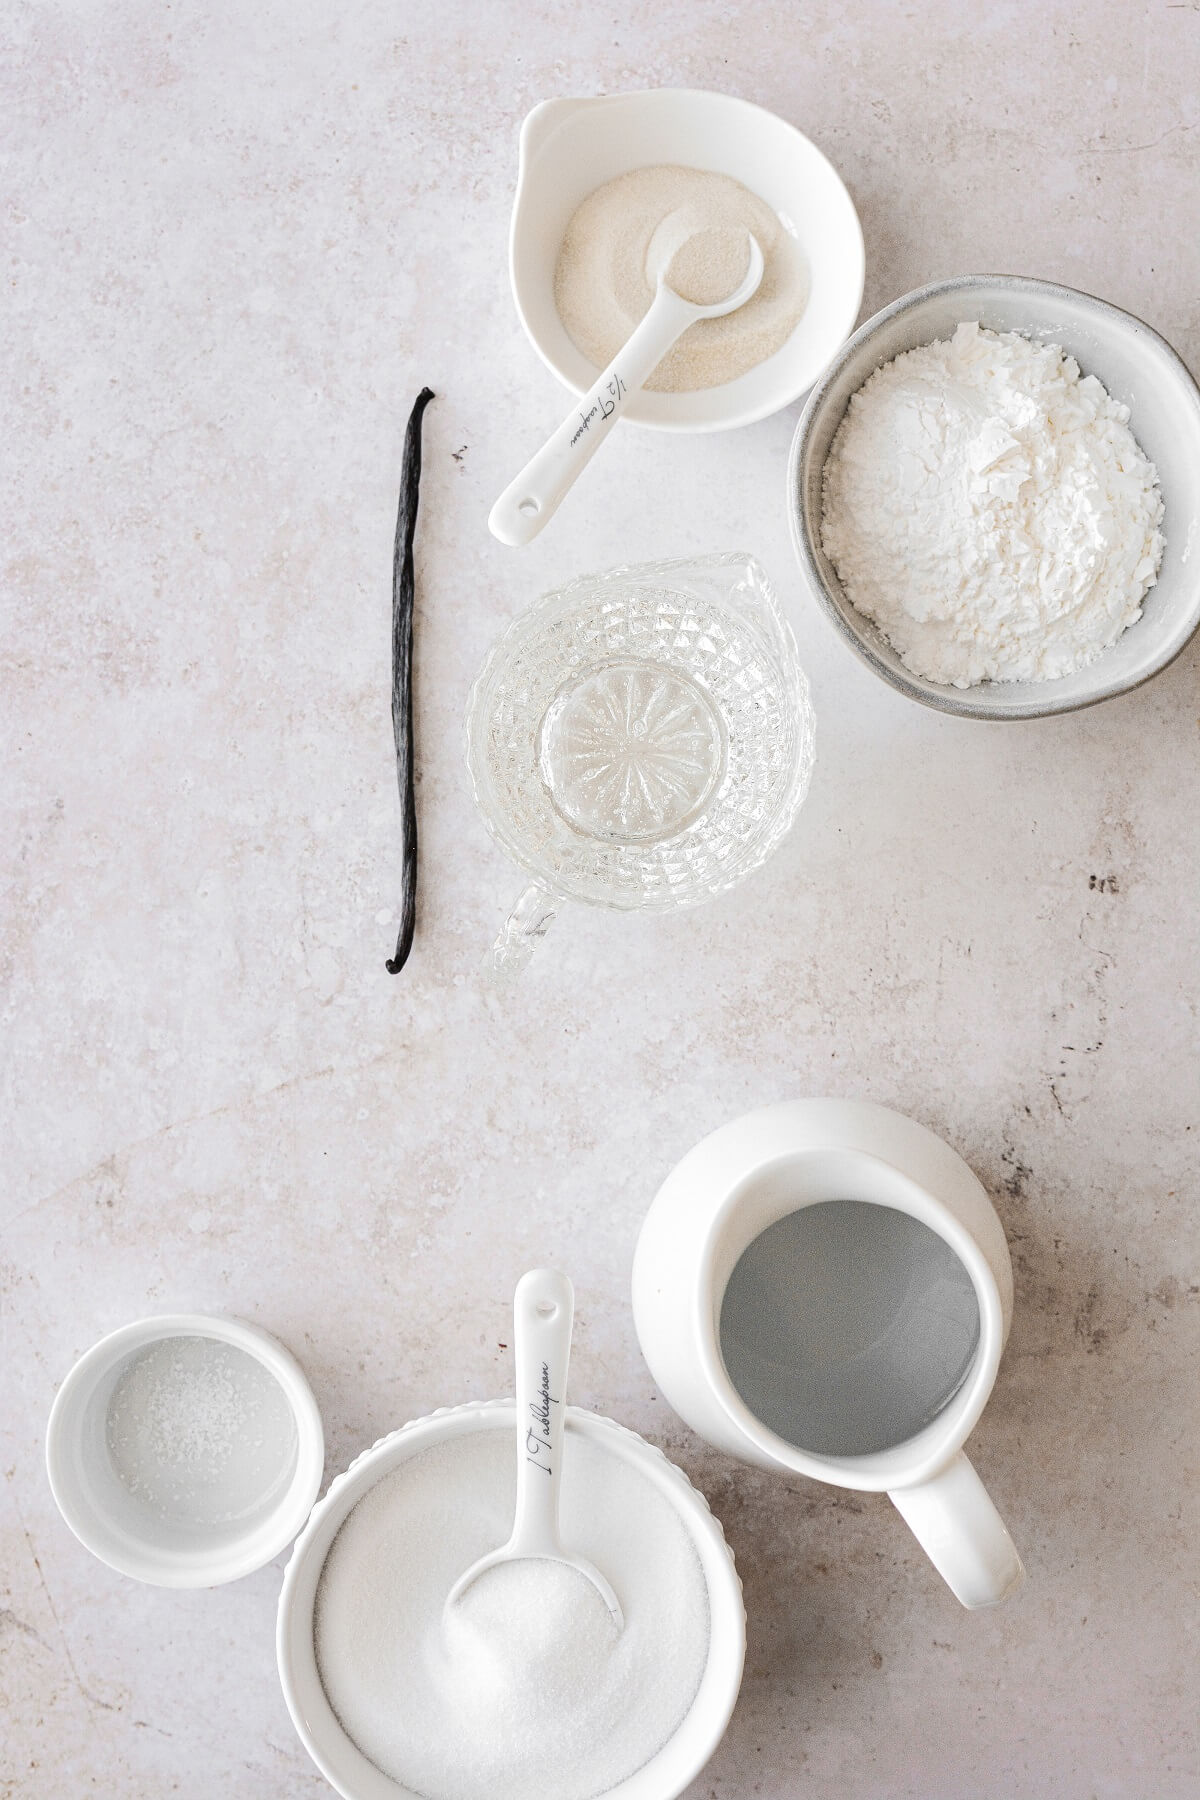
- Cold Water.
- Gelatin. I use unflavored powdered gelatin, which comes in 1/4 ounce packets. The gelatin sets the marshmallows with a soft, fluffy, squishy texture.
- Granulated Sugar + Light Corn Syrup. Adds sweetness. Since corn syrup is an invert sugar, it prevents the syrup from crystallizing and becoming grainy.
- Salt. Balances the sweetness.
- Vanilla. I added both vanilla extract and vanilla bean for the best flavor.
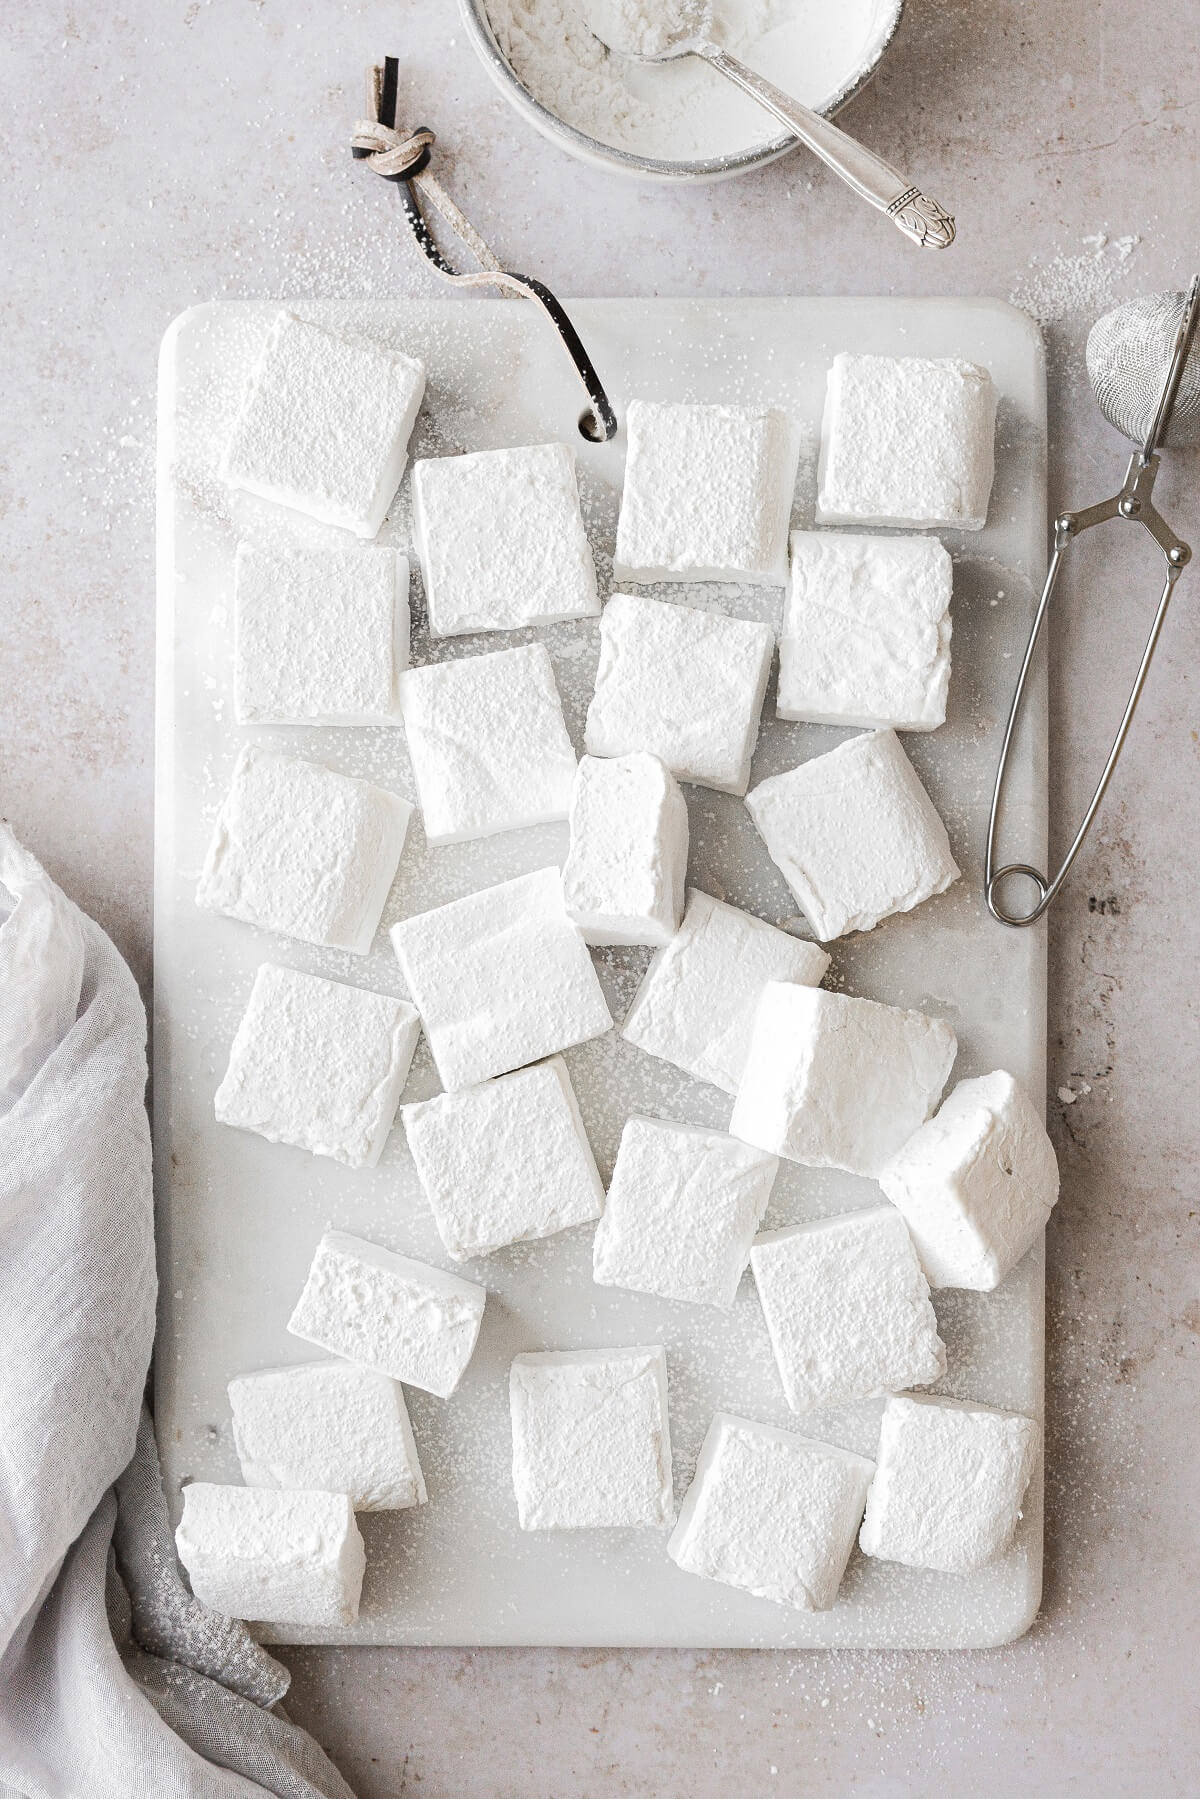
- Powdered Sugar. Keeps the cut marshmallows from sticking together.
Instructions
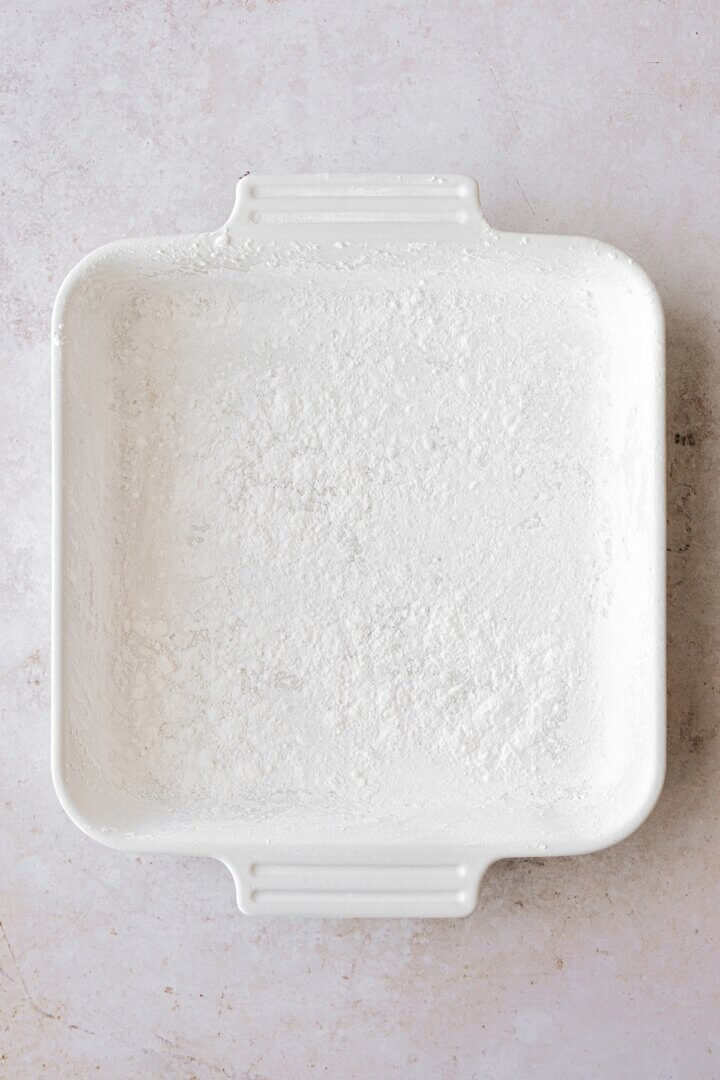
Prepare the pan.
- Grease the bottom and sides of the pan thoroughly with the shortening or butter, then dust with enough powdered sugar to coat the pan in a thin layer. This will keep the marshmallow from sticking to the pan.
Bloom the gelatin.
- Pour 1/3 cup of the water into the bowl of your stand mixer.
- Sprinkle the gelatin over the water, but don’t stir it in. Leave it to sit while you complete the next step.
Cook the syrup.
- In a saucepan, stir together 1/3 cup of water with the granulated sugar, corn syrup and salt. If there are any grains of sugar on the sides of the pan, brush them off with a wet pastry brush.
- Over medium heat, cook the syrup (without stirring) until it reaches 240 degrees Fahrenheit. You can check the temperature with a candy thermometer or a digital instant read thermometer. This step might take around 10 minutes.
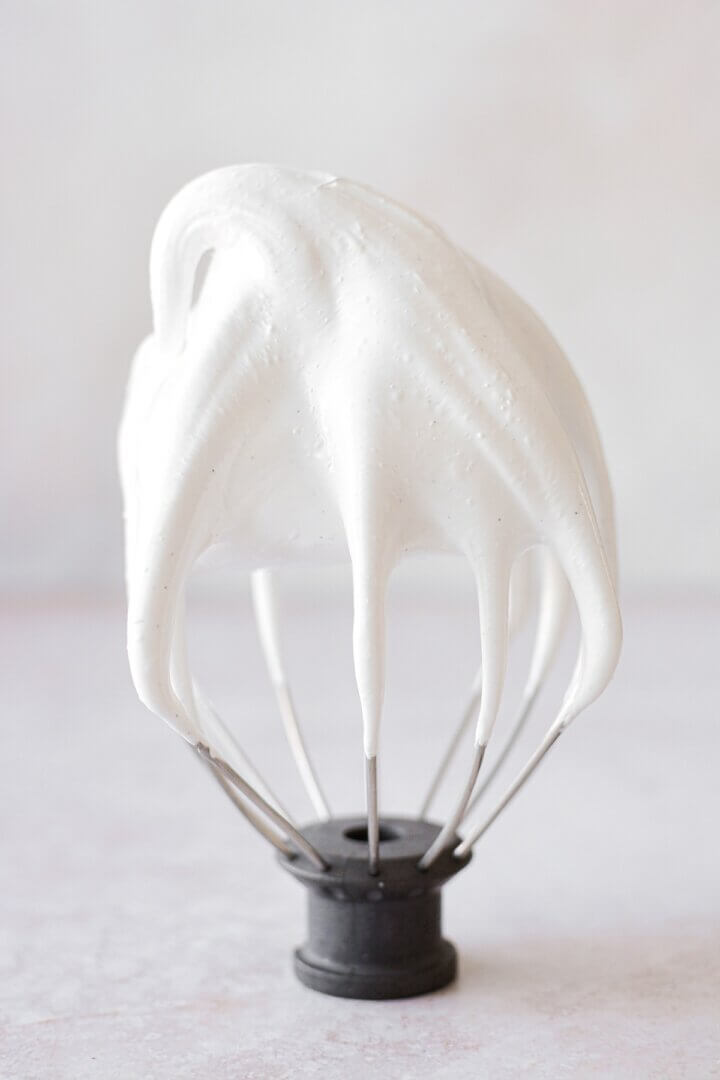
Whip the marshmallow.
- Turn the mixer on to low speed, and slowly drizzle the boiling syrup into the gelatin mixture.
- Increase speed to medium (#6 on a Kitchen Aid stand mixer), and whip for about 10-11 minutes.
- The marshmallow should now be pure white, lukewarm, very sticky and thick, but not so thick that you won’t be able to spread it into a pan.
- Beat in the vanilla extract and vanilla bean paste.
- Using a greased spatula, immediately scrape the marshmallow into the prepared pan. Lightly grease your hands with butter or shortening and press the marshmallow out evenly in the pan. Lightly sprinkle the top of the marshmallow with more powdered sugar.
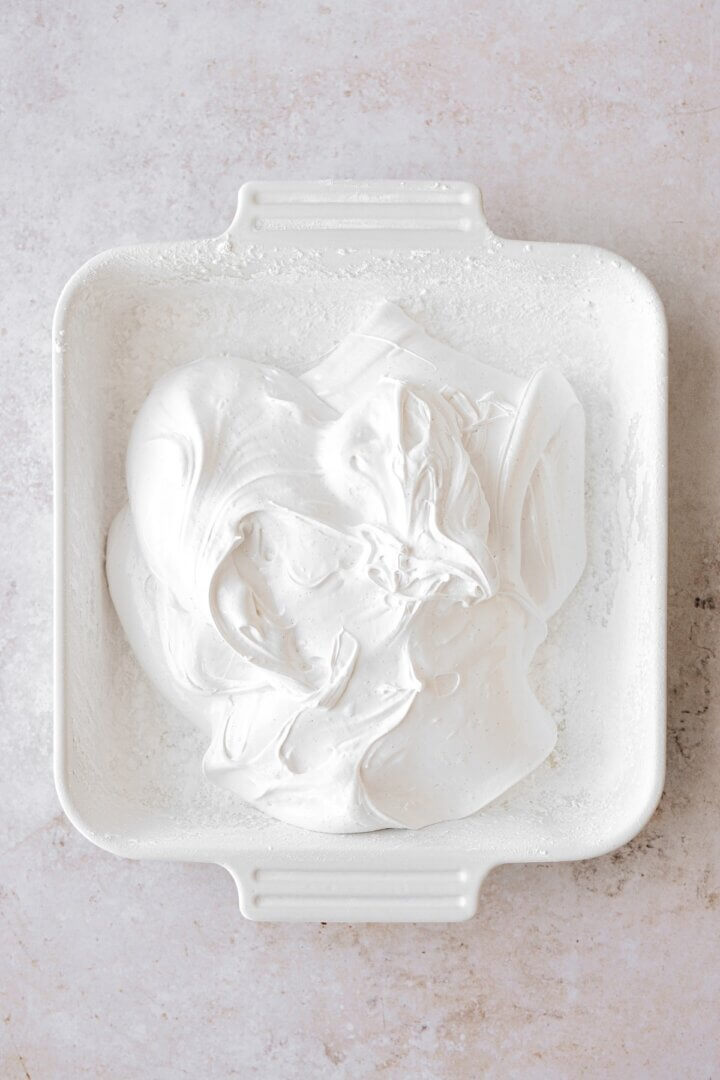

Let the marshmallow rest before cutting.
- Cover the pan with a clean kitchen towel, and let sit at room temperature for 6 hours (or overnight) before cutting.
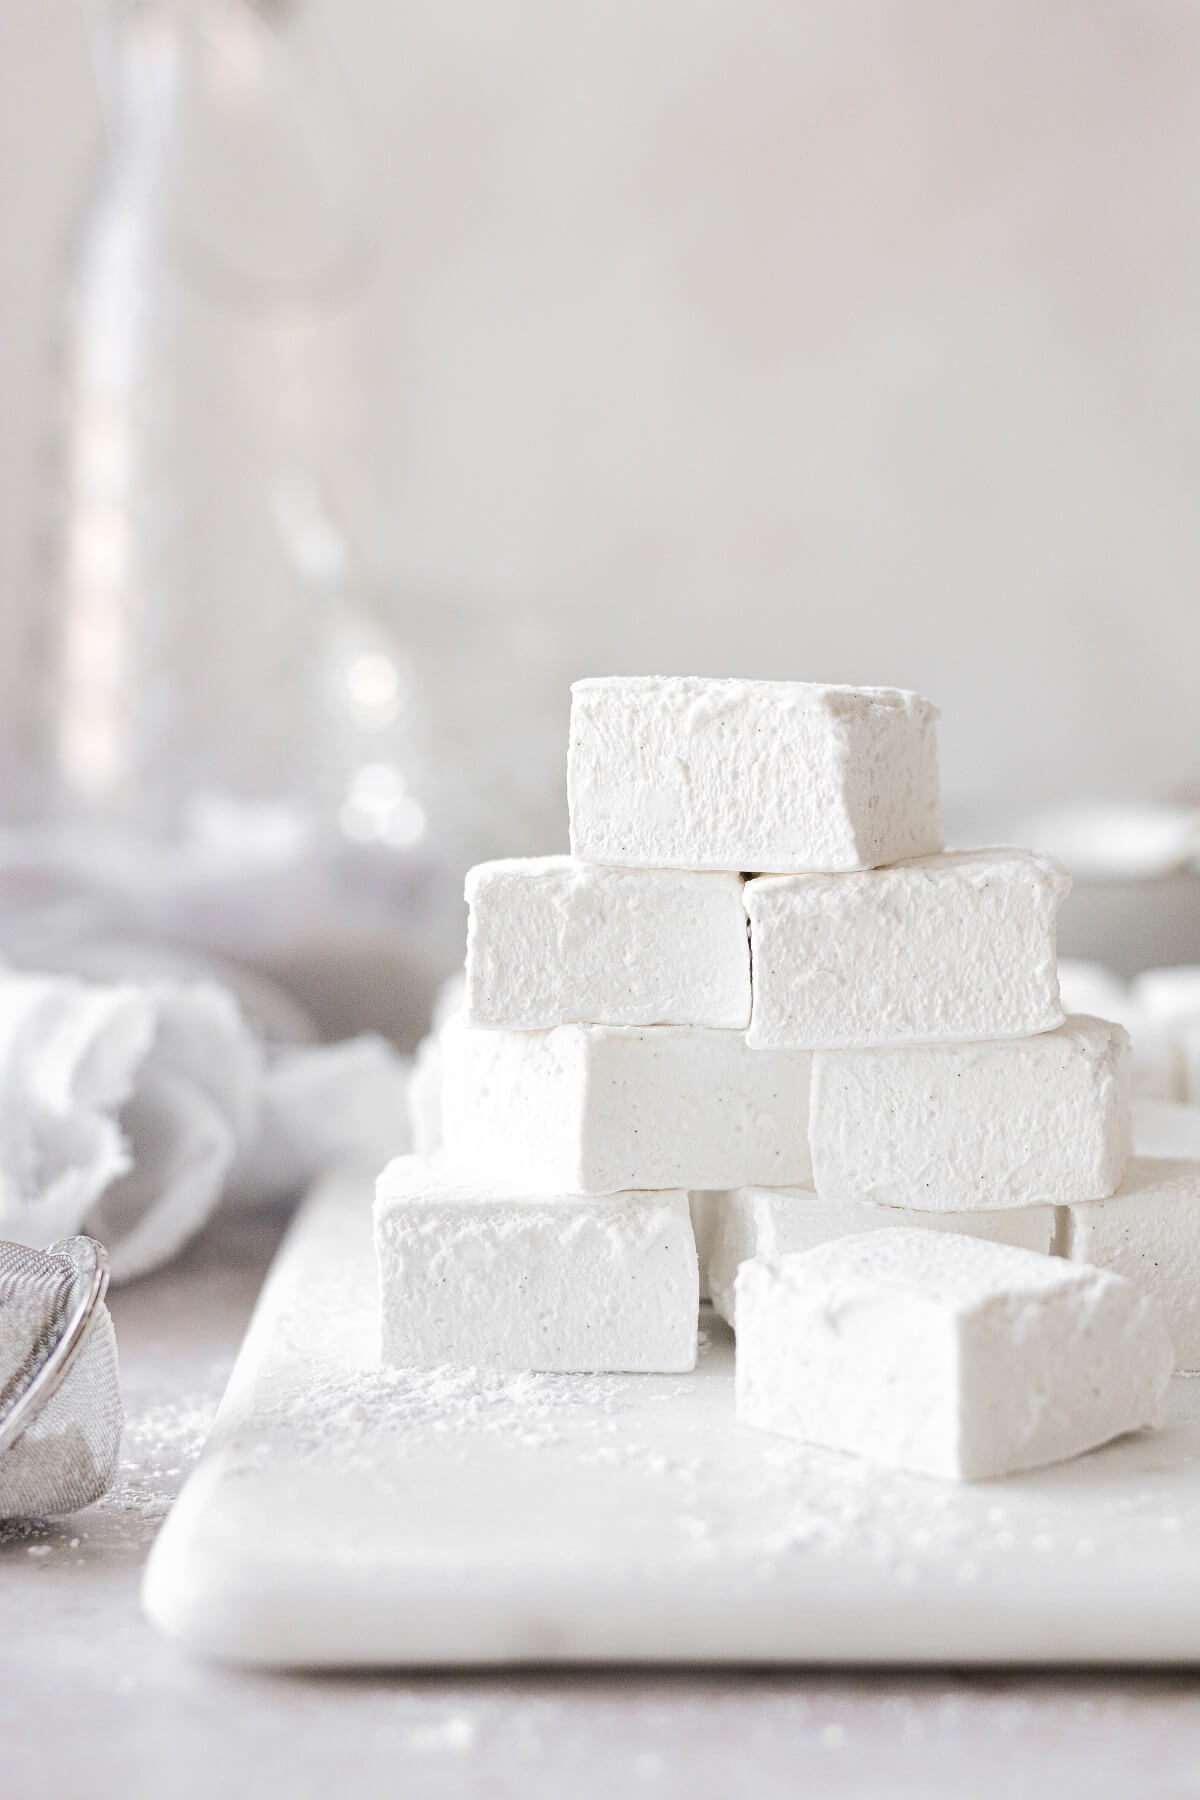
- To cut the marshmallows, turn the pan over onto a cutting board. The whole slab should fall out of the pan onto the cutting board if you prepped the pan with shortening/butter and powdered sugar.
- Grease a sharp chef’s knife with butter or shortening. Cut the marshmallow into 5 strips, then cut each strip into 5ths, to get 25 large marshmallows. If you like, you can cut each of those into 4ths, to get 100 small marshmallows. You’ll need to grease the knife again in between cuts. As you cut the marshmallows, dust the cut sides with powdered sugar to keep them from sticking.
- Store the marshmallows in an airtight container at room temperature. They will stay soft and fresh for about 2 weeks.
Be sure to read all of my BAKING FAQs where I discuss ingredients, substitutions and common baking questions, so that you can be successful in your own baking!
Frequently Asked Questions
How long do homemade marshmallows stay fresh?
They’ll stay soft and fresh for several weeks, kept in an airtight container at room temperature.
Can I freeze marshmallows?
They should not be refrigerated or frozen.
Can I use non-stick baking spray instead of shortening or butter?
I don’t recommend using non-stick baking spray for greasing the pan or utensils, as it can leave a yellowish residue.
Is it possible to make marshmallows without gelatin?
There are vegan alternatives to using gelatin, but this isn’t something I’ve experimented with.
Can I use just granulated sugar instead of the corn syrup?
You can try, but it’s riskier. The corn syrup is an invert sugar, and prevents crystallization as you cook the syrup, keeping the marshmallow smooth and silky, rather than grainy.
You Might Also Like

Please check out my Amazon Shop for a curated collection of some of my favorite cake pans from trusted brands, baking tools, ingredients, pretty things and fashion finds. I recommend products that I buy and use every day!
Did you love today’s recipe? Please rate the recipe and let me know in the comments what you thought! Also, be sure to follow Curly Girl Kitchen on Instagram, and tag me when you try one of my recipes so I can see all your delicious creations!
Homemade Vanilla Bean Marshmallows
All recipes on Curly Girl Kitchen are developed for high altitude at 5,280 feet. See FAQs for adjusting to higher or lower elevations.

Equipment
- Stand Mixer with Whisk Attachment
Ingredients
- 2 tbsp vegetable shortening or softened butter, for greasing the pan and utensils
- ⅔ cup cold water, divided
- 2 envelopes (1/4 oz each) unflavored powdered gelatin
- 1 cup granulated sugar
- ⅔ cup light corn syrup
- ⅛ tsp coarse Kosher salt (if using table salt, use half the amount)
- 2 tsp vanilla extract
- 1 tsp vanilla bean paste
- ½ cup powdered sugar, for coating the pan and the cut marshmallows
Instructions
- Grease the bottom and sides of the pan thoroughly with the shortening or butter, then dust with enough powdered sugar to coat the pan in a thin layer. This will keep the marshmallow from sticking to the pan.
- Pour 1/3 cup of the water into the bowl of your stand mixer. Sprinkle the gelatin over the water, but don't stir it in. Leave it to sit while you complete the next step.
- In a saucepan, stir together 1/3 cup of water with the granulated sugar, corn syrup and salt. If there are any grains of sugar on the sides of the pan, brush them off with a wet pastry brush.Over medium heat, cook the syrup (without stirring) until it reaches 240 degrees Fahrenheit. You can check the temperature with a candy thermometer or a digital instant read thermometer. This step might take around 10 minutes.
- Turn the mixer on to low speed, and slowly drizzle the boiling syrup into the gelatin mixture. Increase speed to medium (#6 on a Kitchen Aid stand mixer), and whip for about 10-11 minutes.The marshmallow should now be pure white, lukewarm, very sticky and thick, but not so thick that you won't be able to spread it into a pan. Beat in the vanilla extract and vanilla bean paste.
- Using a greased spatula, immediately scrape the marshmallow into the prepared pan. Lightly grease your hands with butter or shortening and press the marshmallow out evenly in the pan. Lightly sprinkle the top of the marshmallow with more powdered sugar.
- Cover the pan with a clean kitchen towel, and let sit at room temperature for 6 hours (or overnight) before cutting.
- To cut the marshmallows, turn the pan over onto a cutting board. The whole slab should fall out of the pan onto the cutting board if you prepped the pan with shortening/butter and powdered sugar.
- Grease a sharp chef's knife with butter or shortening. Cut the marshmallow into 5 strips, then cut each strip into 5ths, to get 25 large marshmallows. If you like, you can cut each of those into 4ths, to get 100 small marshmallows. You'll need to grease the knife again in between cuts. As you cut the marshmallows, dust the cut sides with powdered sugar to keep them from sticking.
- Store the marshmallows in an airtight container at room temperature. They will stay soft and fresh for about 2 weeks.
Notes
- Homemade marshmallows should not be refrigerated or frozen.
- I don’t recommend using non-stick baking spray for greasing the pan or utensils, as it can leave a yellowish residue.
 https://curlygirlkitchen.com/
I’m confused. Do you add all three sugar types to the pot, or just the granulated and corn syrup?
Melissa, the granulated sugar and the corn syrup go into the pot, and the powdered sugar is only used for coating the pan and the cut marshmallows to keep them from sticking.
Can you use a larger pan to make them thinner, and cookie cutters to cut them into shapes?
I’m sure you can.
Can I double this recipe and use a 9×13 pan/casserole dish?
P.S. I love all your recipes
That would work just fine.
I made them last night and tried them this morning – they’re incredible!!!
These are the best marshmallows I have ever made! I love that this is a small batch and not made in a 9×13. Wonderful flavor and perfect for gifting!
I live at 9000+ ft. Do i need to adjust the 240° temp for altitude?
Sue, most likely you do. I talk about the temperatures for candy making in this post, and how to adjust for various altitudes: https://curlygirlkitchen.com/high-altitude-old-fashioned-fudge/