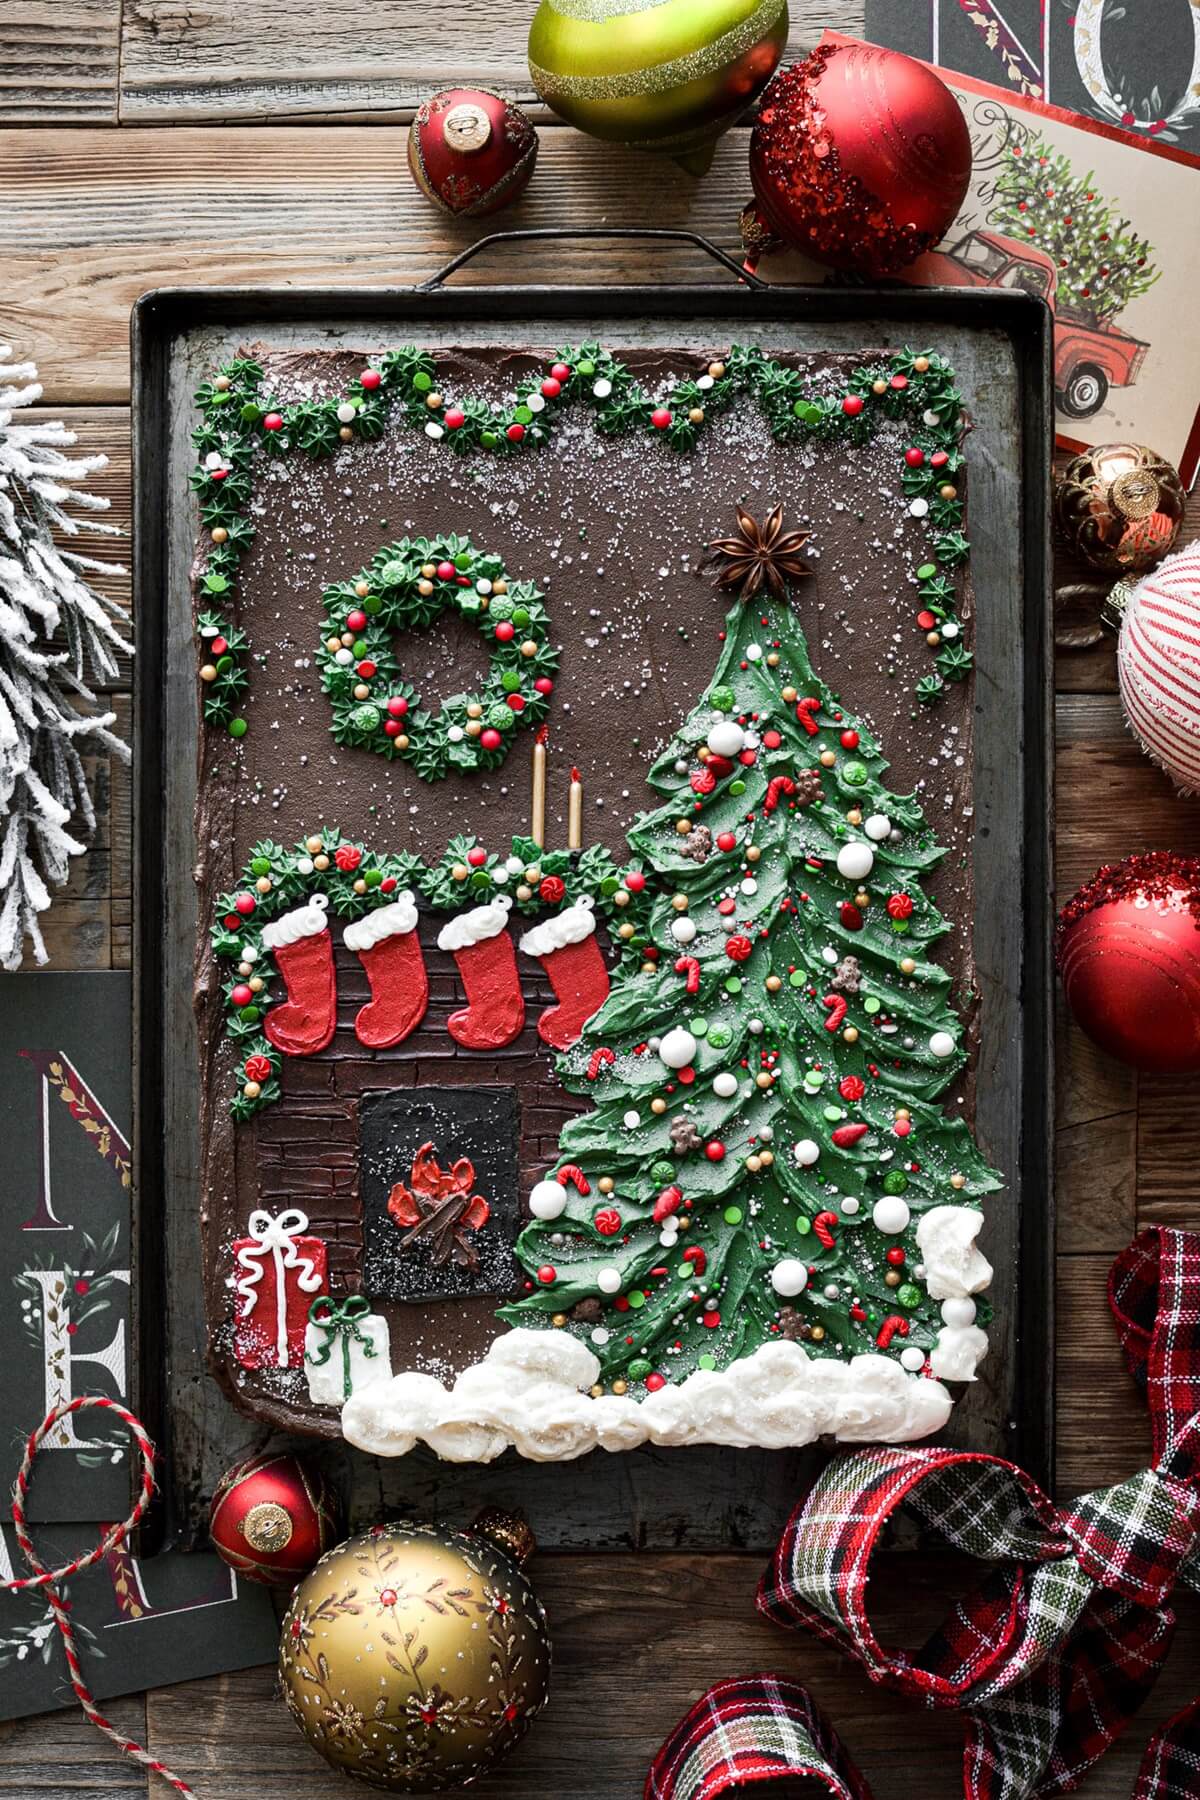
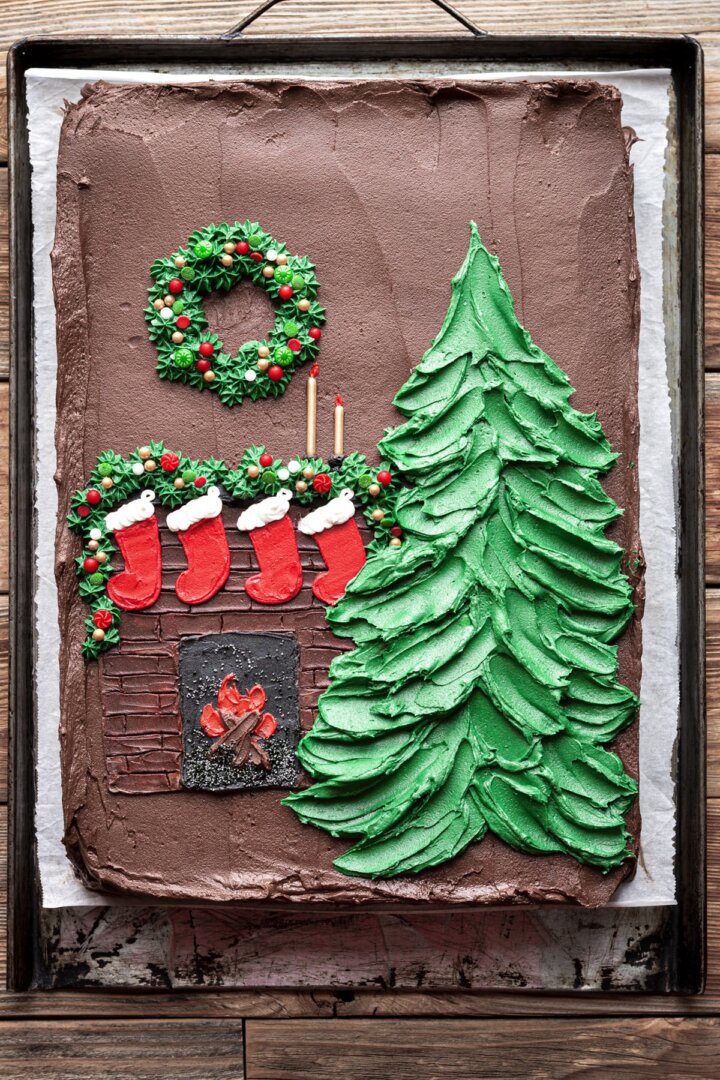
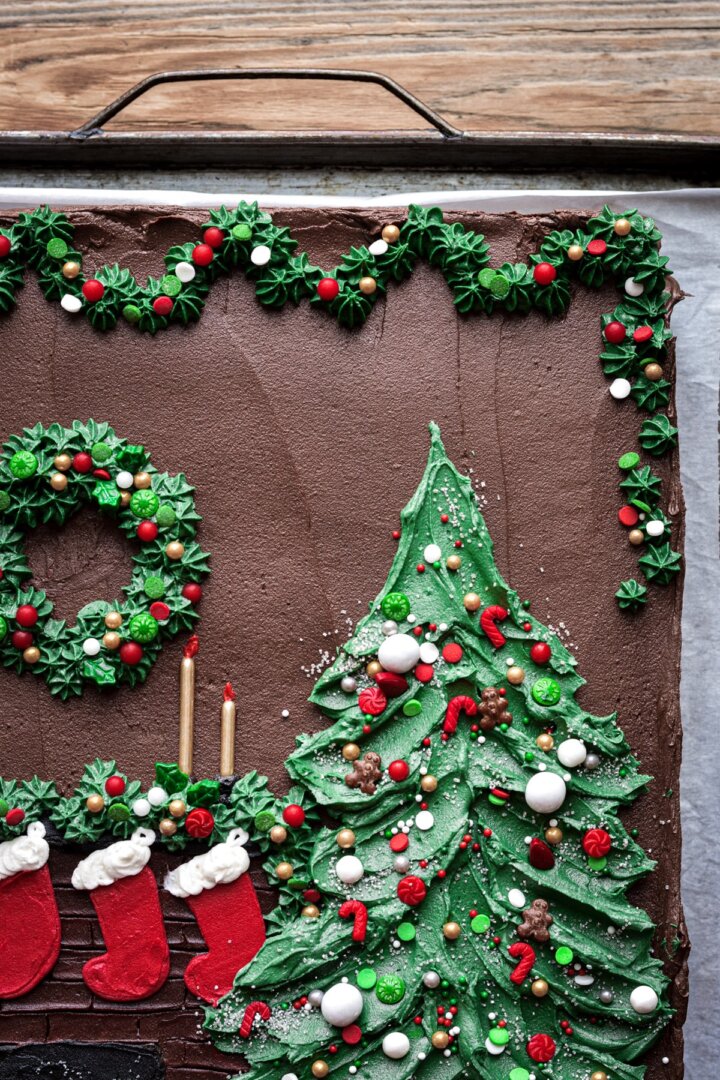
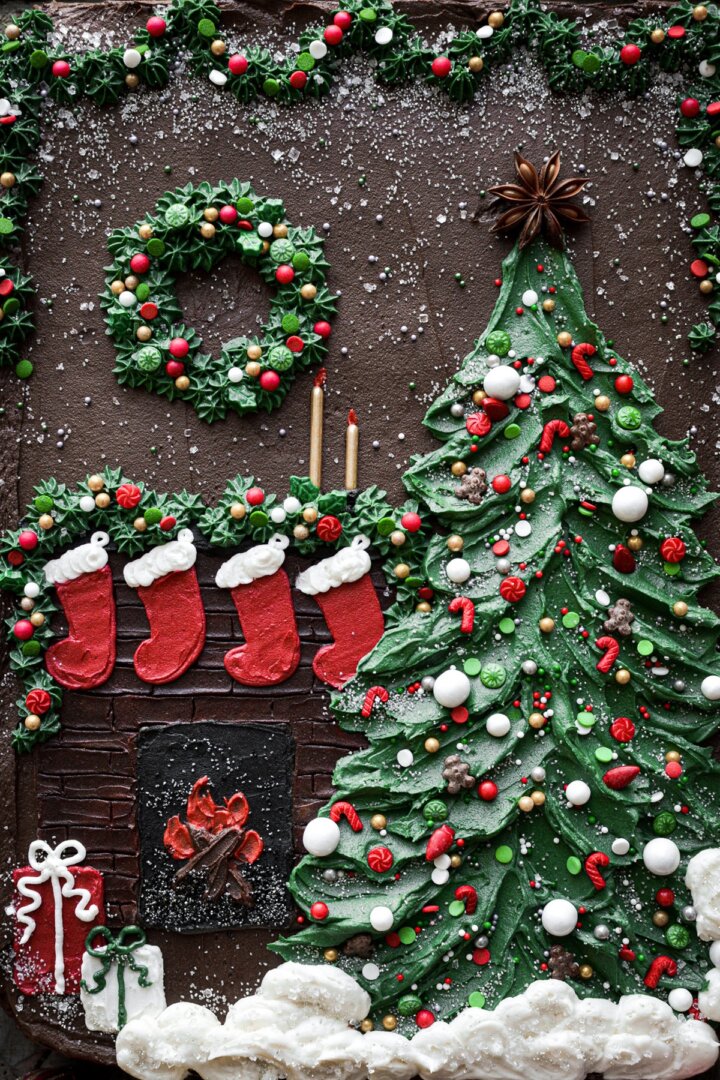
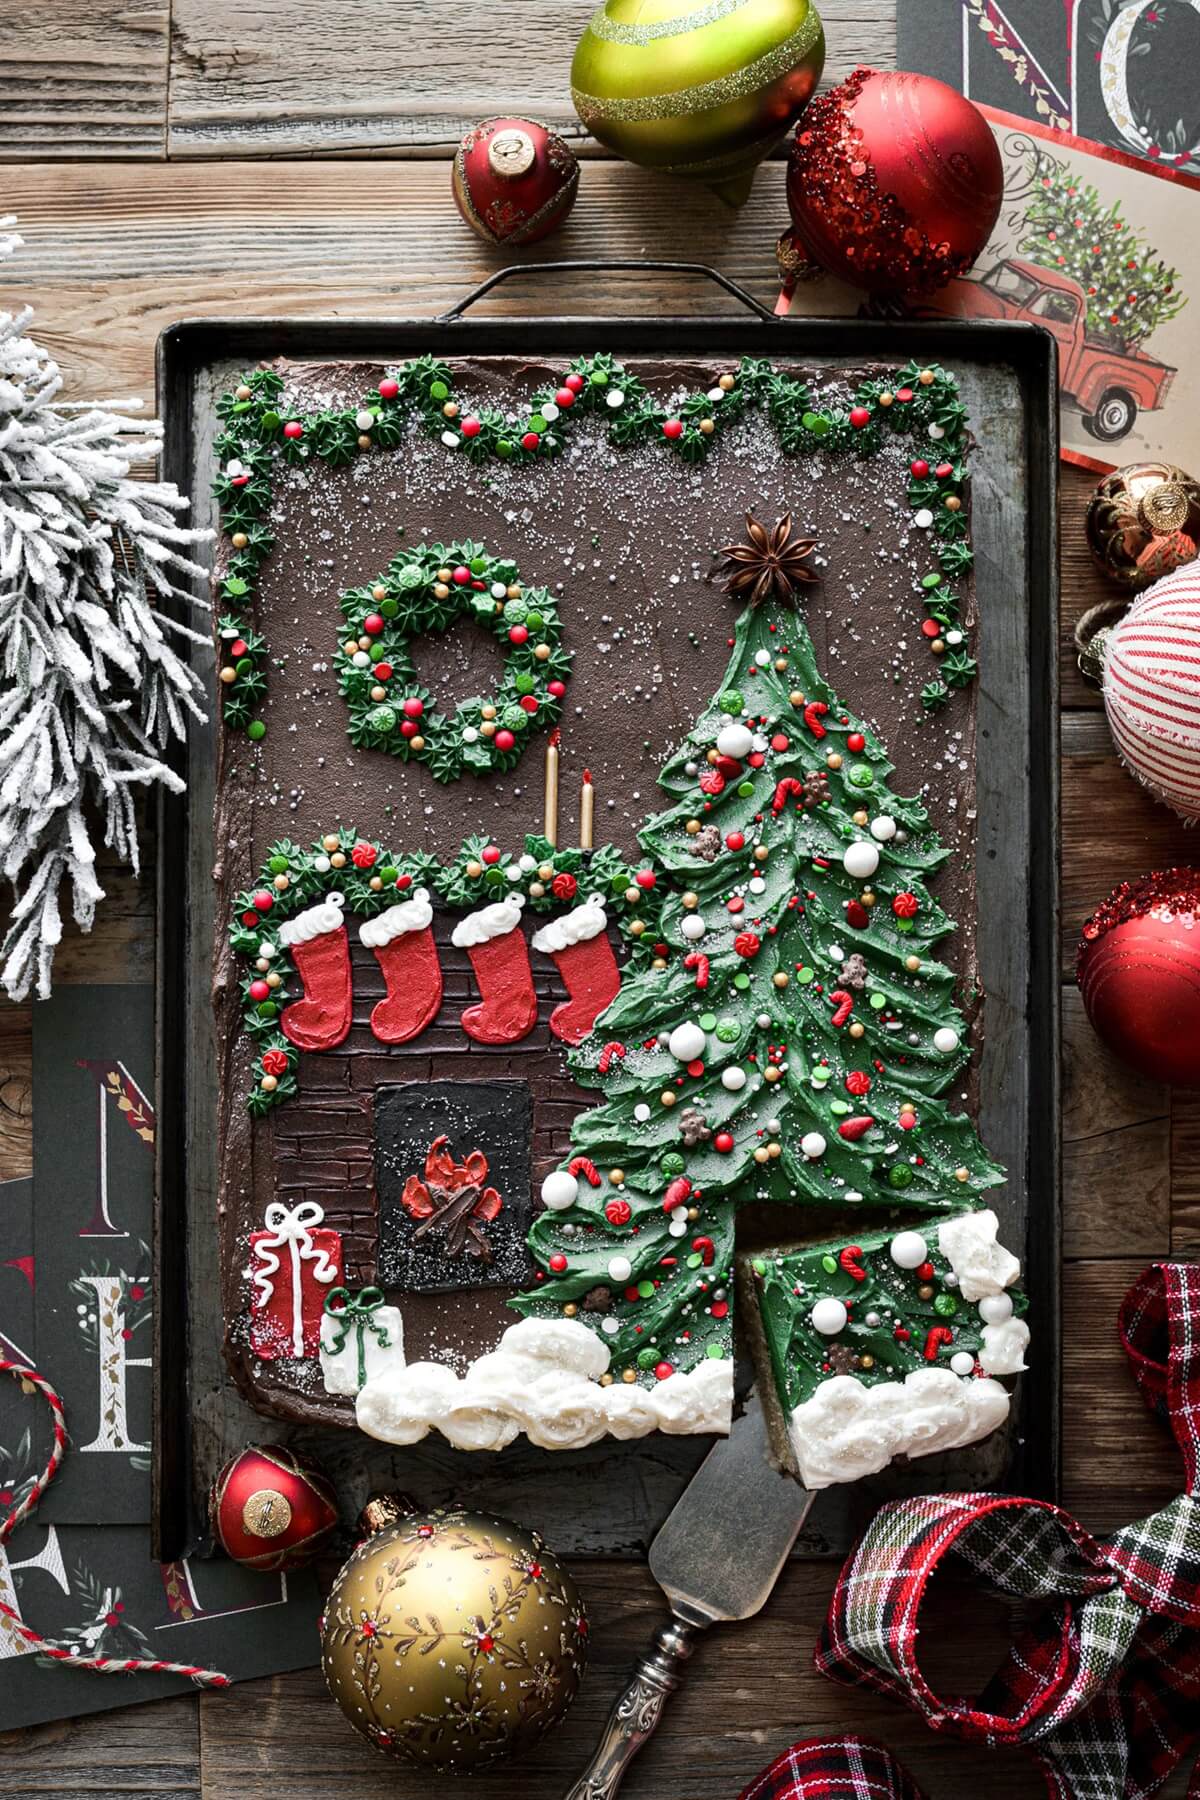
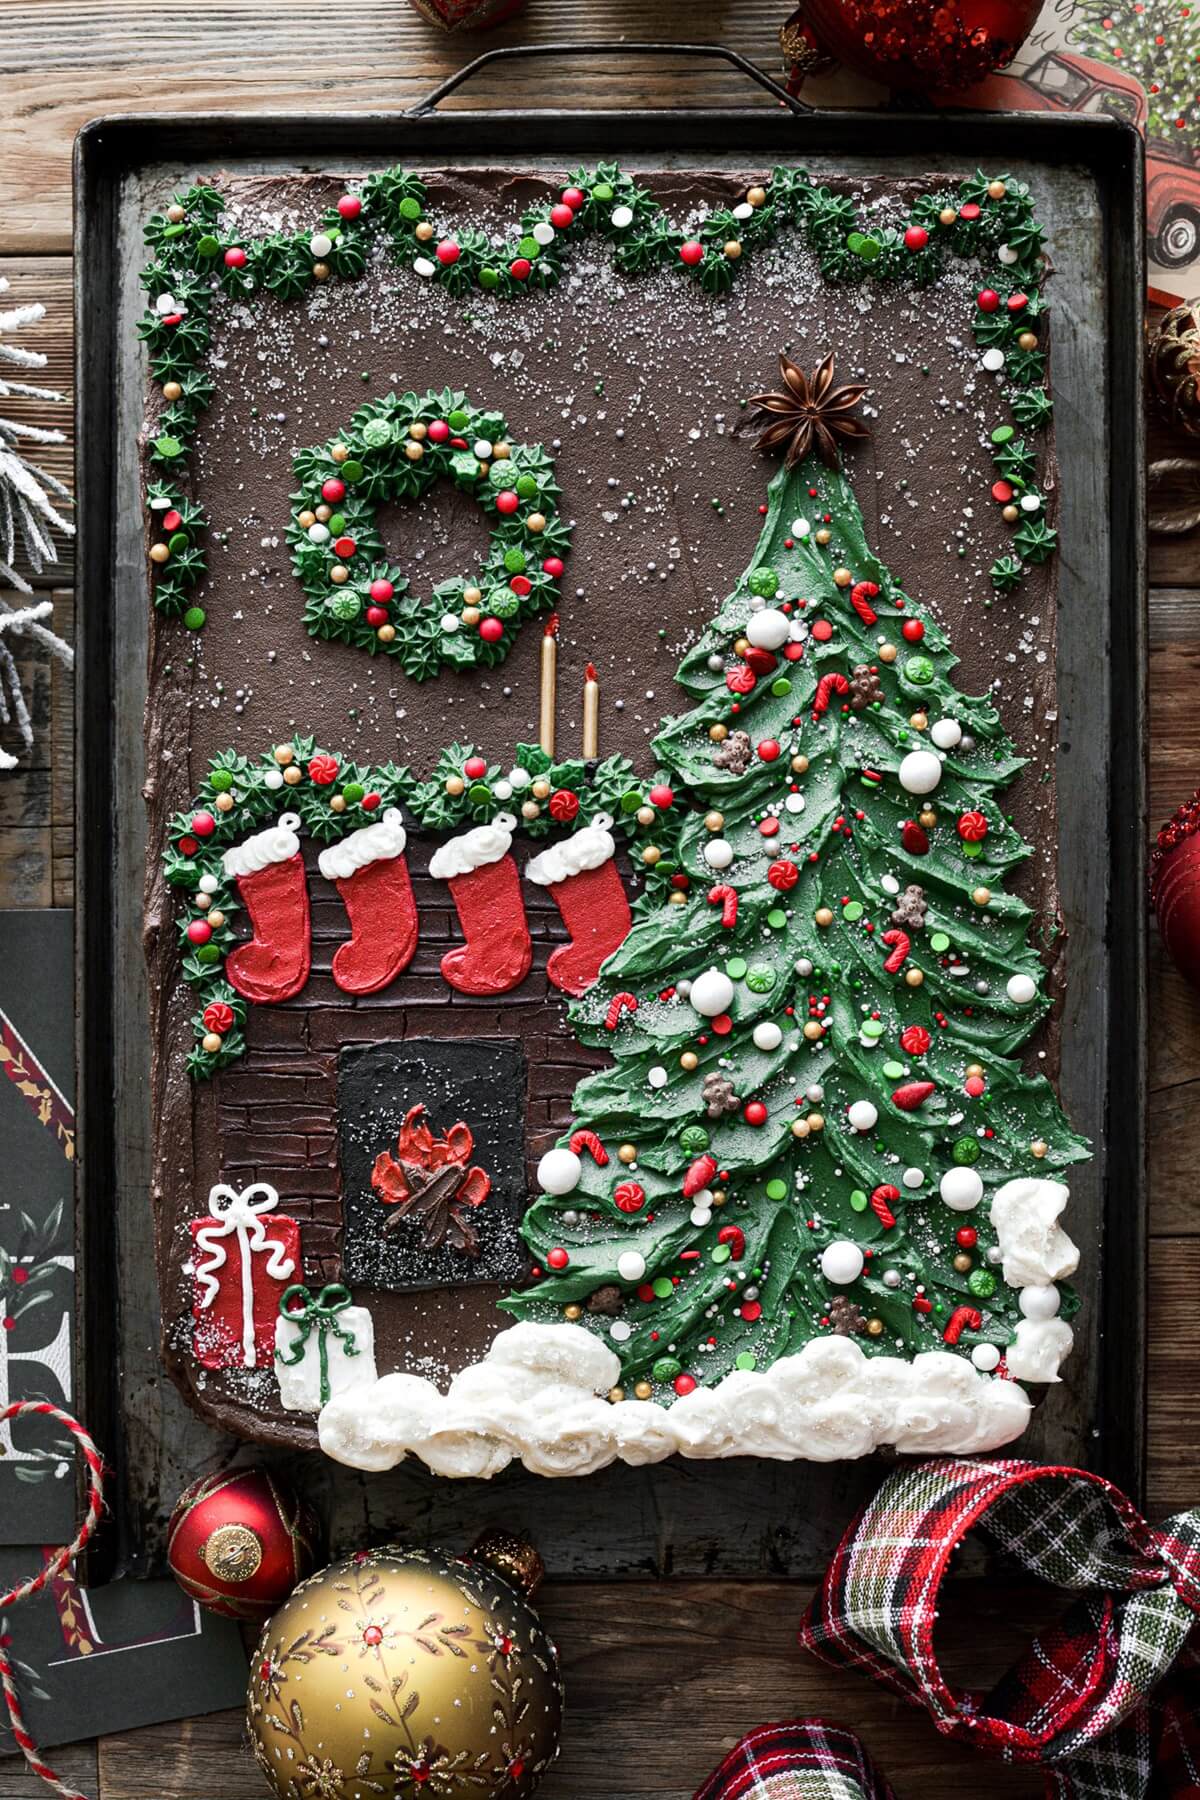
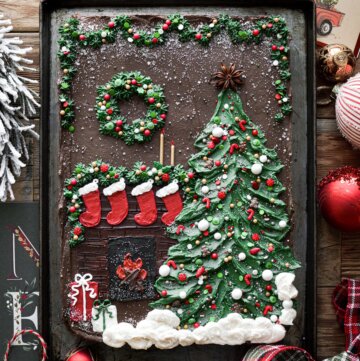
Today’s photo tutorial will demonstrate all the steps on how to decorate a Christmas tree sheet cake. Using a combination of piping tips and palette knives, you can decorate your Christmas tree cake with all buttercream (not fondant) to create a fireplace, stockings, wreath, garland and Christmas tree. Finishing touches like a star anise and sprinkle ornaments make this adorable holiday themed cake so warm and cozy, and just perfect for the dessert table when you’re home for the holidays.
You might also love this Hogsmeade Village Christmas cake, candy cane cake, gingerbread cake and snowman cake.
This site contains affiliate links. As an Amazon associate, I earn from qualifying purchases. This means that I may make a small commission if you purchase a product using those links. This in no way affects my opinion of those products and services. All opinions expressed on this site are my own.
Tools and Equipment
- 9×13 Baking Dish
- Stand Mixer with Paddle Attachment
- 12-Inch Disposable Piping Bags + Couplers
- Piping Tips, 2, 3, 4, 6, 12 and 18. You can find all of the piping tips I used in the Wilton Master Piping Tip Set.
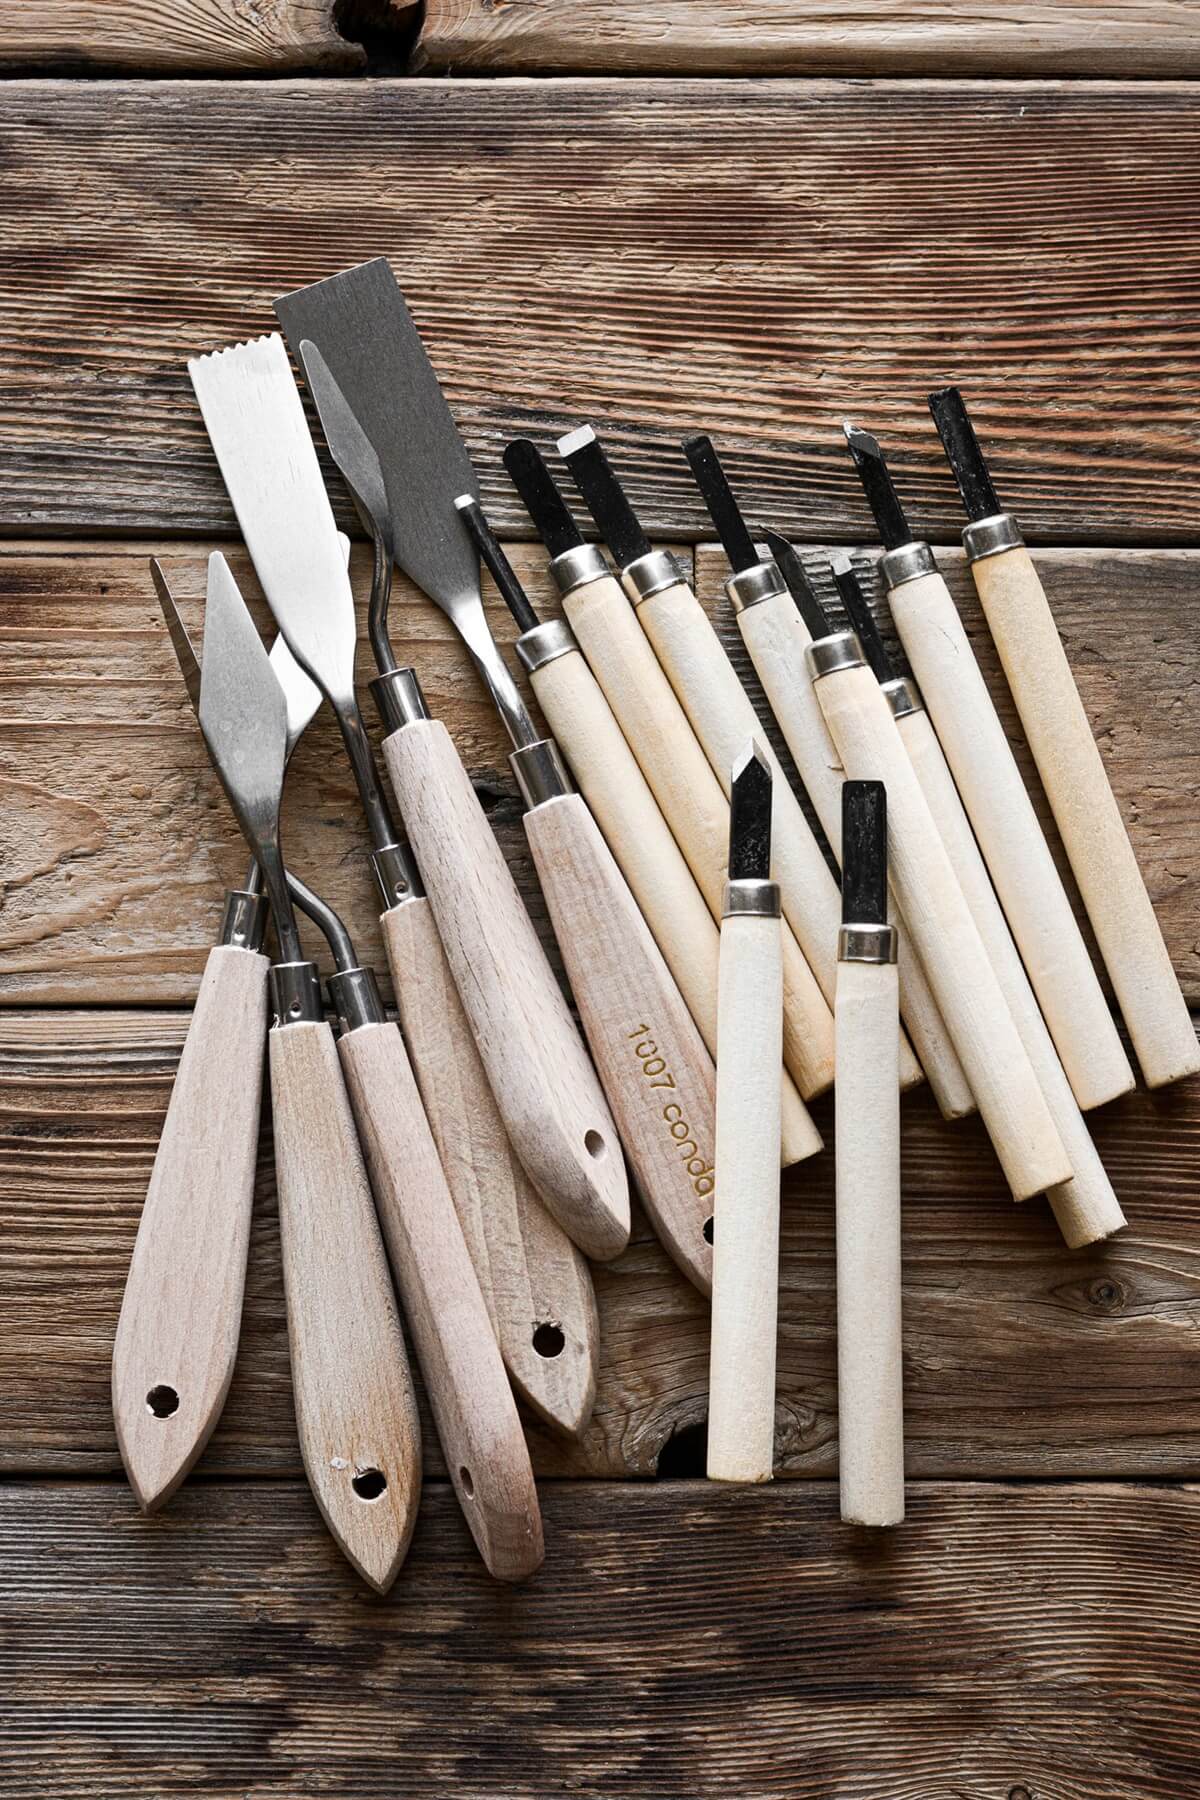
- Tapered Palette Knives, various sizes. Flexible palette knives or artist knives for painting will help you with today’s cake design.
See the recipe card at the end of the post for the full ingredients list and instructions.
Ingredients
- 1 recipe Vanilla Sheet Cake or Chocolate Sheet Cake
- ½ recipe Chocolate Buttercream
- 2x recipe Vanilla Buttercream
- Americolor Gel Food Coloring. Super Black, Super Red, Electric Yellow, Forest Green, Electric Green, Turquoise, Leaf Green
- Assorted Christmas Sprinkles
- White Sparkling Sugar
- Black Sanding Sugar
- Star Anise
Instructions
Cake
- Prepare the recipe for Vanilla Sheet Cake or Chocolate Sheet Cake as instructed. Cool completely.
- Turn the cake out onto a baking sheet or large serving platter.
Chocolate Buttercream
- Prepare 1/2 the recipe for Chocolate Buttercream as instructed.
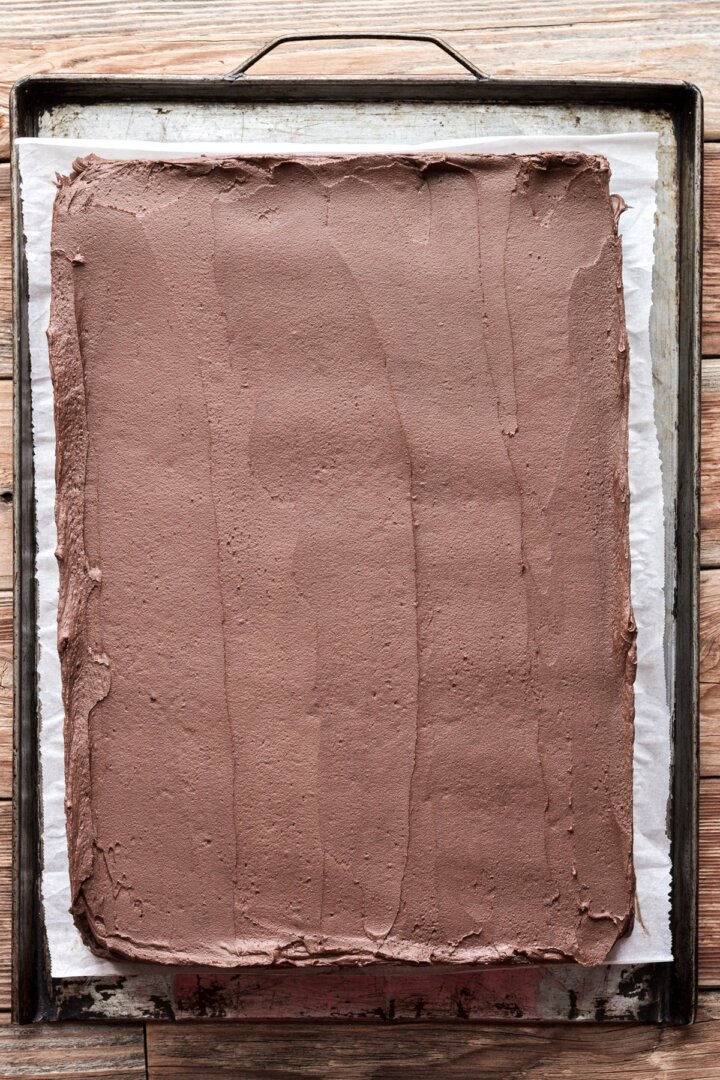
- Frost the cake all over with the chocolate buttercream, smoothing out the top the best you can. Make sure to reserve 1/2 cup of the chocolate buttercream to use for decorating.
- Refrigerate the cake for several hours, until the chocolate buttercream is firm and cold.
Vanilla Buttercream
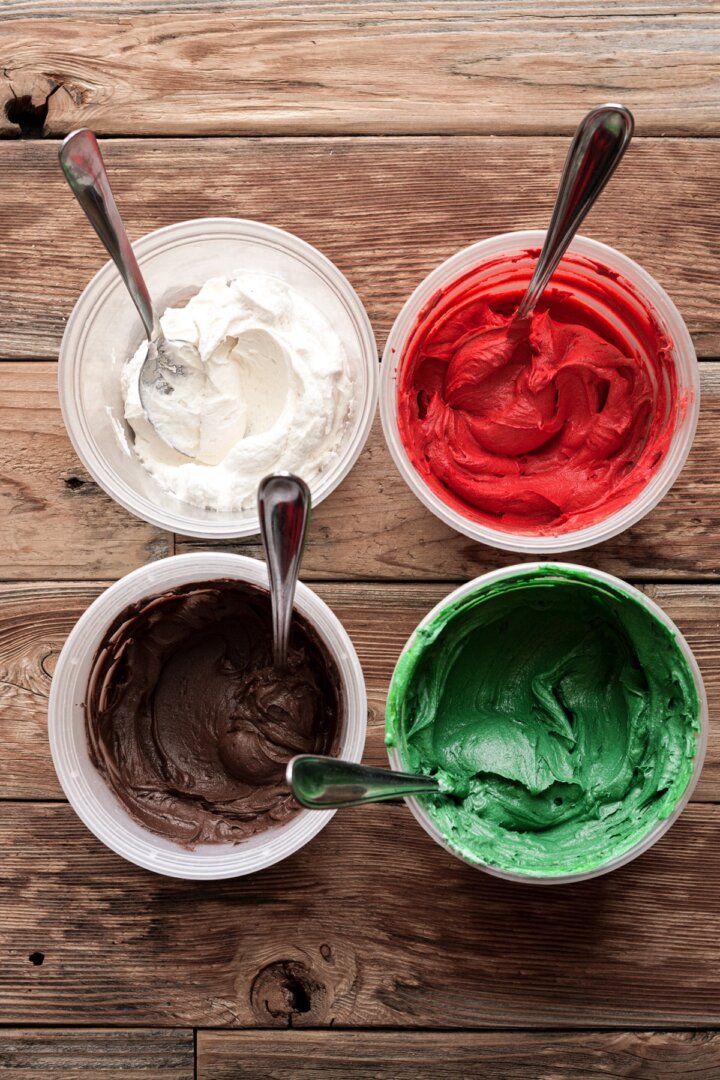
- Prepare 2x the recipe for Perfect American Vanilla Buttercream as instructed. Use half butter / half shortening for a whiter color.
- Use the Super Red gel food coloring to color 1/2 cup of the vanilla buttercream a deep red.
- Use the Super Black, Forest Green, Electric Green, Turquoise, and Leaf Green gel food coloring to color 1 1/4 cups of the vanilla buttercream a deep green. I start with a small drop of each color, then continue to add more of each until achieving the shade of green I want.
- Leave the rest of the vanilla buttercream white.
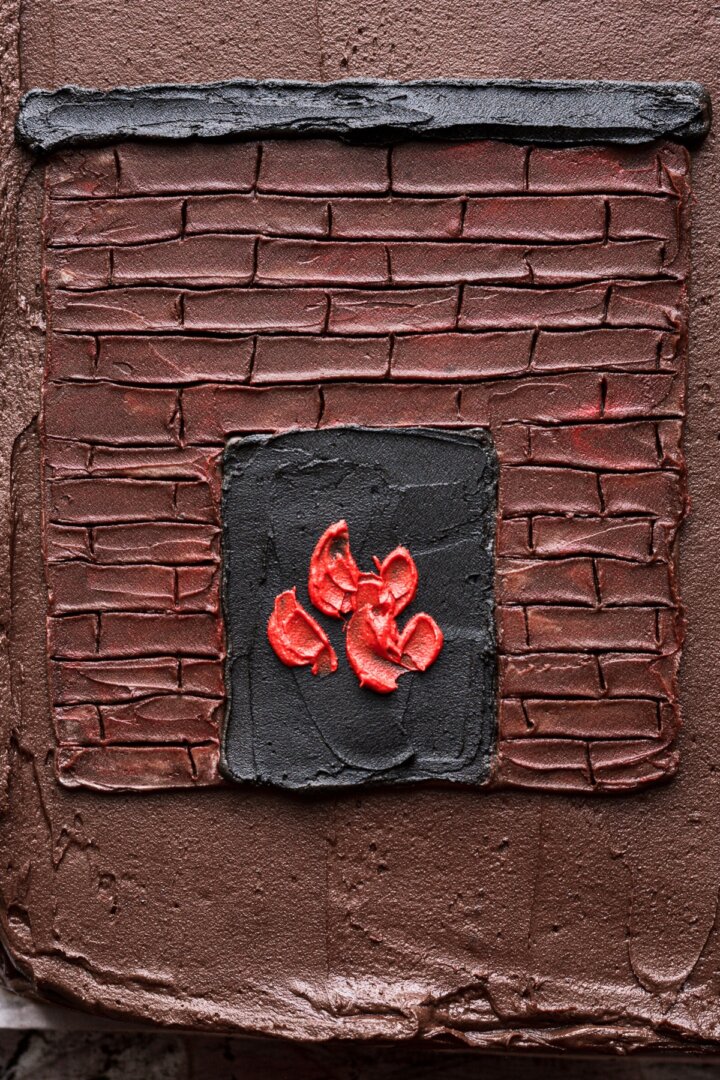
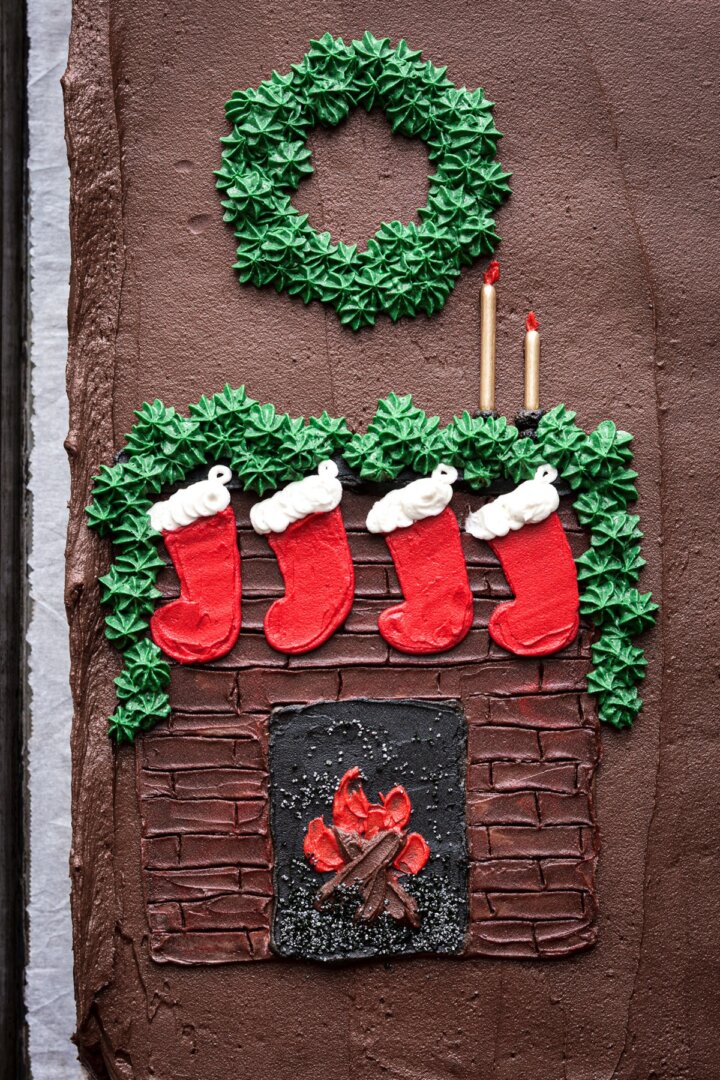
Decorating the Fireplace
- Fit a piping bag with a coupler and one of the small round tips, like #3 or #4. Fill with chocolate buttercream.
- In the lower left corner of the cake, pipe the outline for the fireplace, then fill in the outline. Lightly dab a small amount of the red and white buttercream on top of the brown, then use a palette knife to smooth it out.


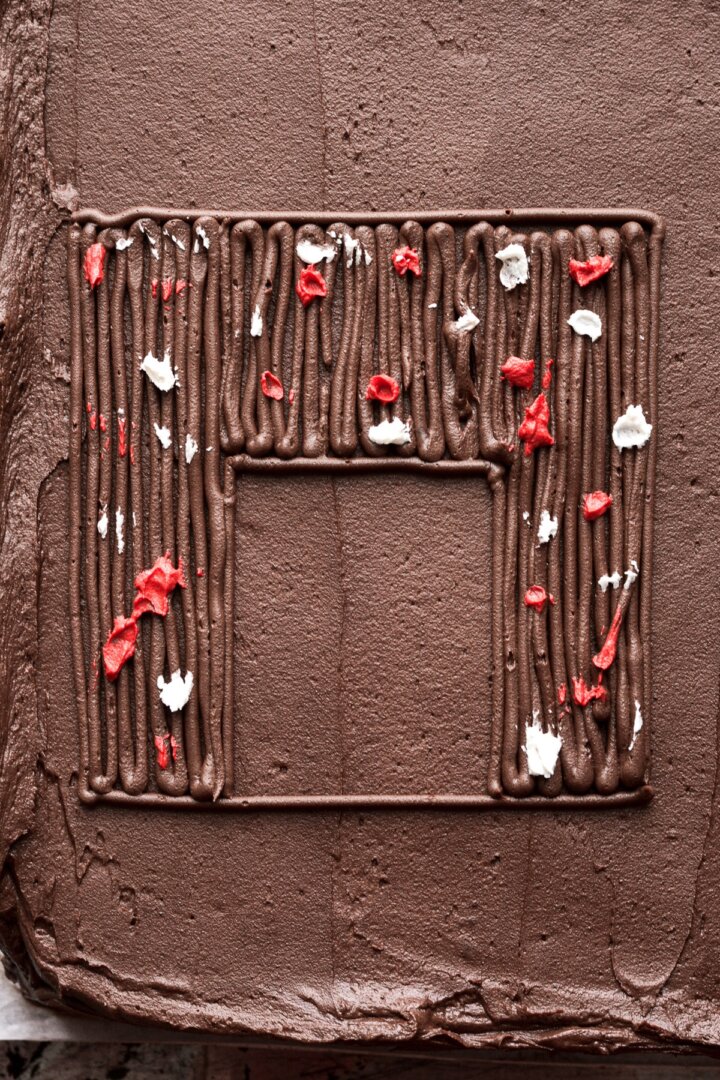

- Drag a toothpick through the buttercream to create the brick pattern.
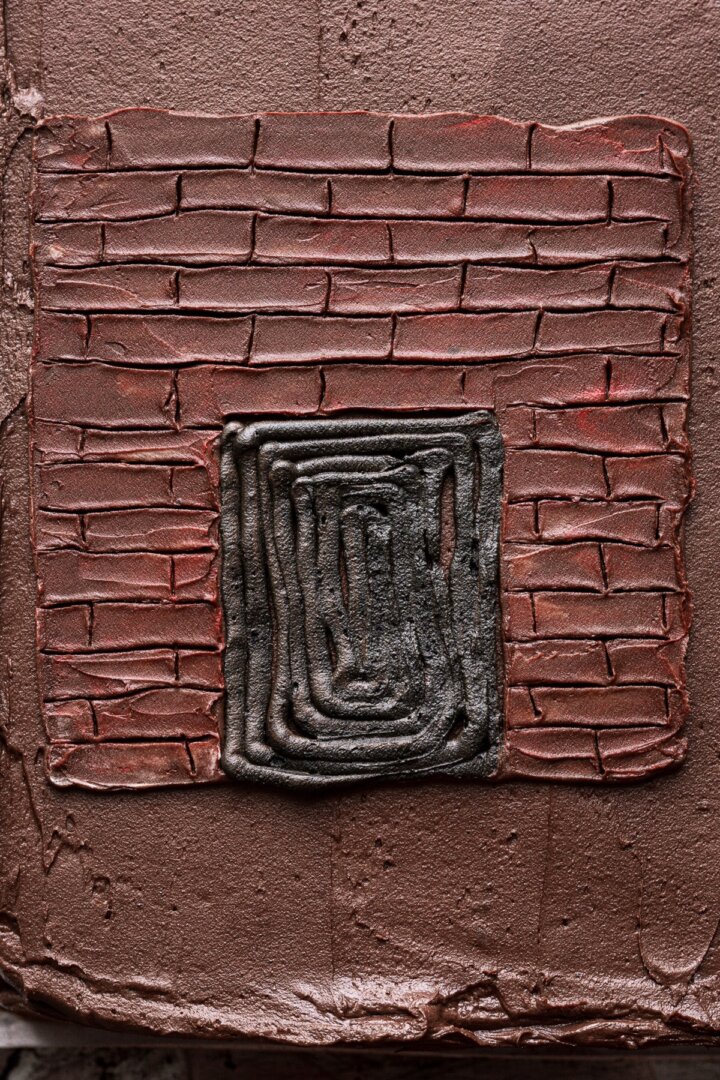
- Add a few drops of Super Black gel food coloring to a small amount of the chocolate buttercream. Fit a piping bag with a coupler and one of the small round tips, like #3 or #4. Fill with the black buttercream.
- Pipe the mantle above the bricks, and fill in the center of the fireplace. Use a palette knife to smooth out the black buttercream.

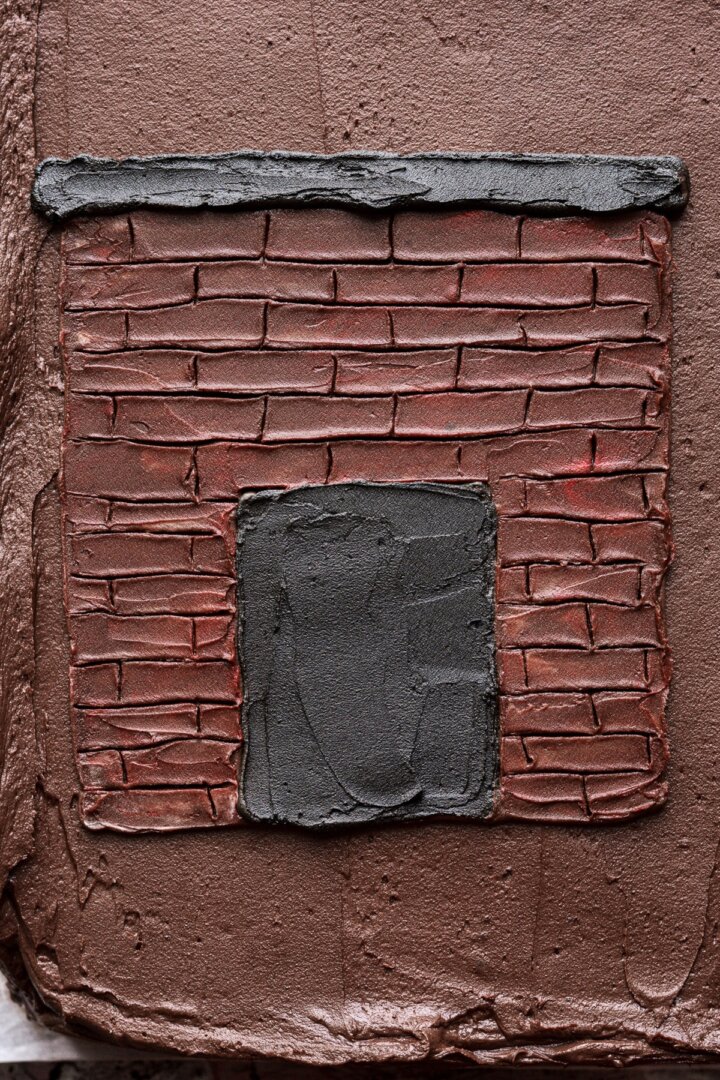
- Add a few drops of Electric Yellow gel food coloring to a small amount of the red buttercream, to make it more orange. Use a palette knife to paint some orange flames in the center of the fireplace.
- Use a palette knife to paint some chocolate brown logs over the flames.
- Sprinkle a little black sanding sugar around the logs to resemble coals and ashes.


Decorating the Stockings
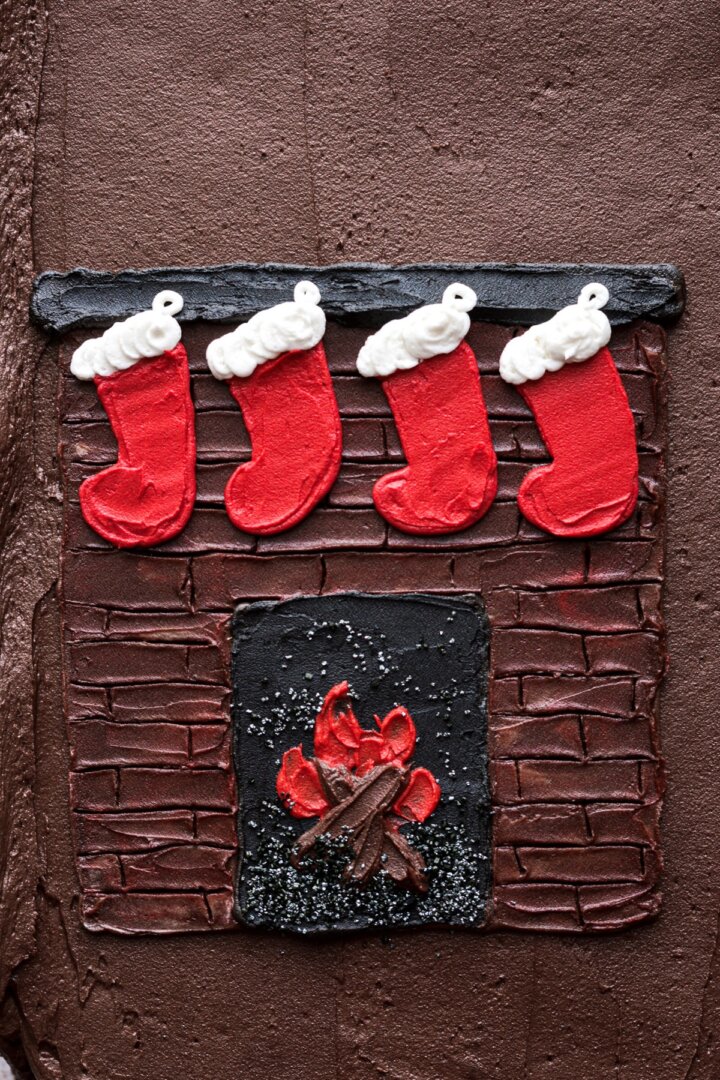
- Fit a piping bag with a coupler and a small round tip, and fill with the red buttercream.
- Pipe the outline of the stockings, then fill in the stockings and smooth the buttercream with a palette knife.
- Fit a piping bag with a coupler and a small round tip, and fill with white buttercream. Pipe some fluffy swirls on the top edge of the stockings, then pipe a small loop for them to hang on the mantle.

Decorating the Wreath and Garland
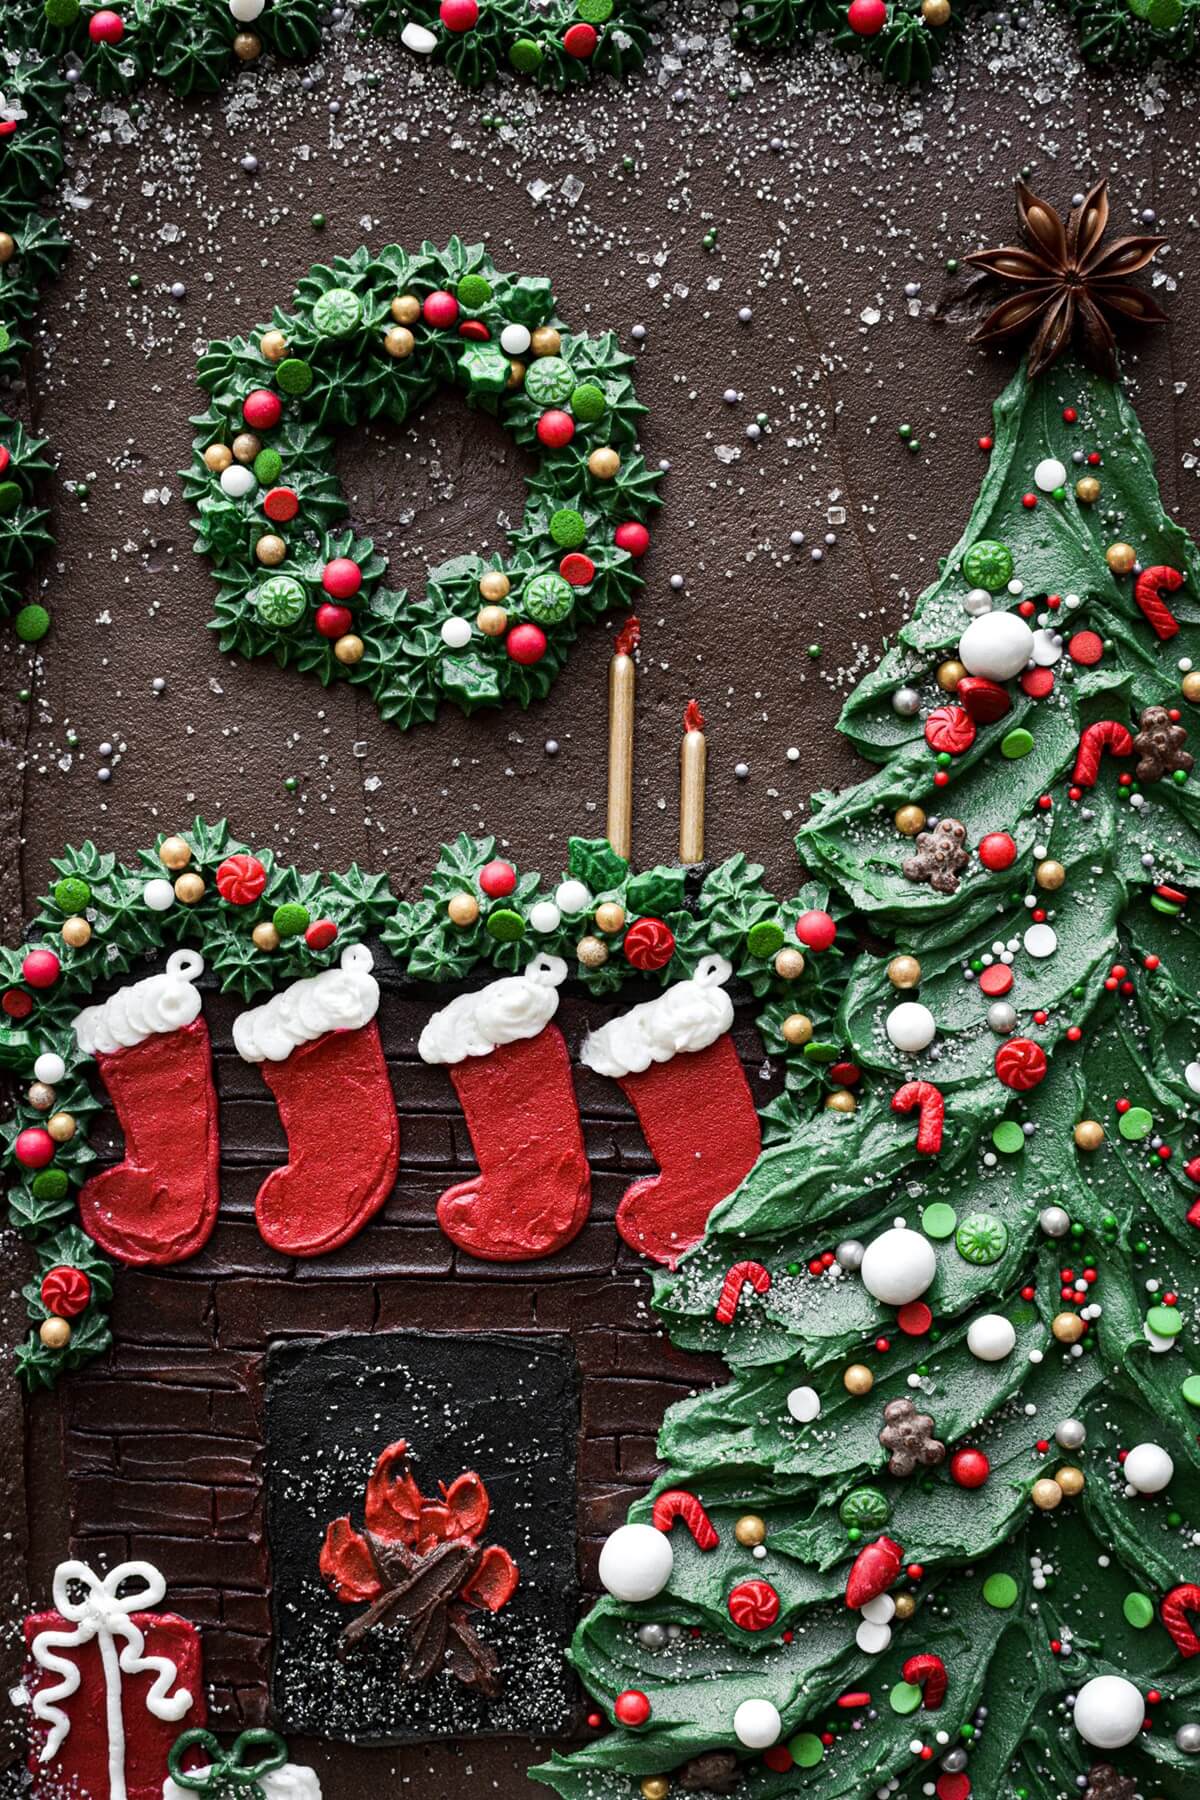
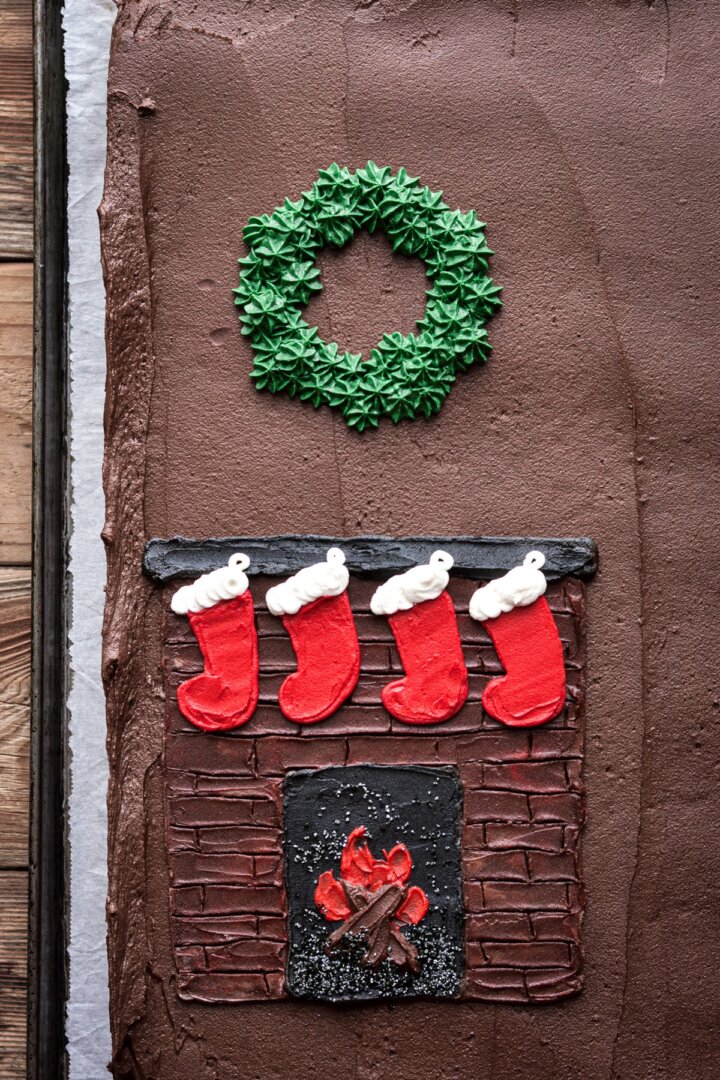
- Fit a piping bag with a coupler and a small star tip, such as #18, and fill with green buttercream. Pipe a wreath above the fireplace.
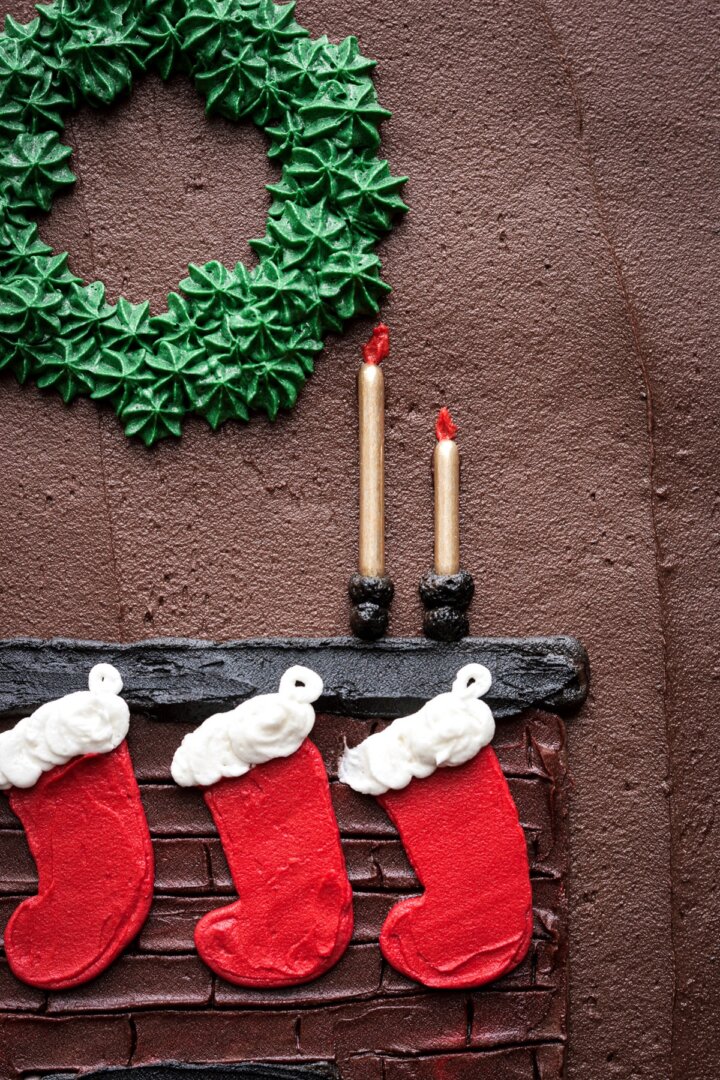
- If you have long gold sprinkle rods, you can use them to make candles sitting on the mantle. Use a palette knife to paint a small orange flame above each candle.
- Pipe some garland on the mantle, then decorate the wreath and garland with sprinkle ornaments.

Decorating the Christmas Tree
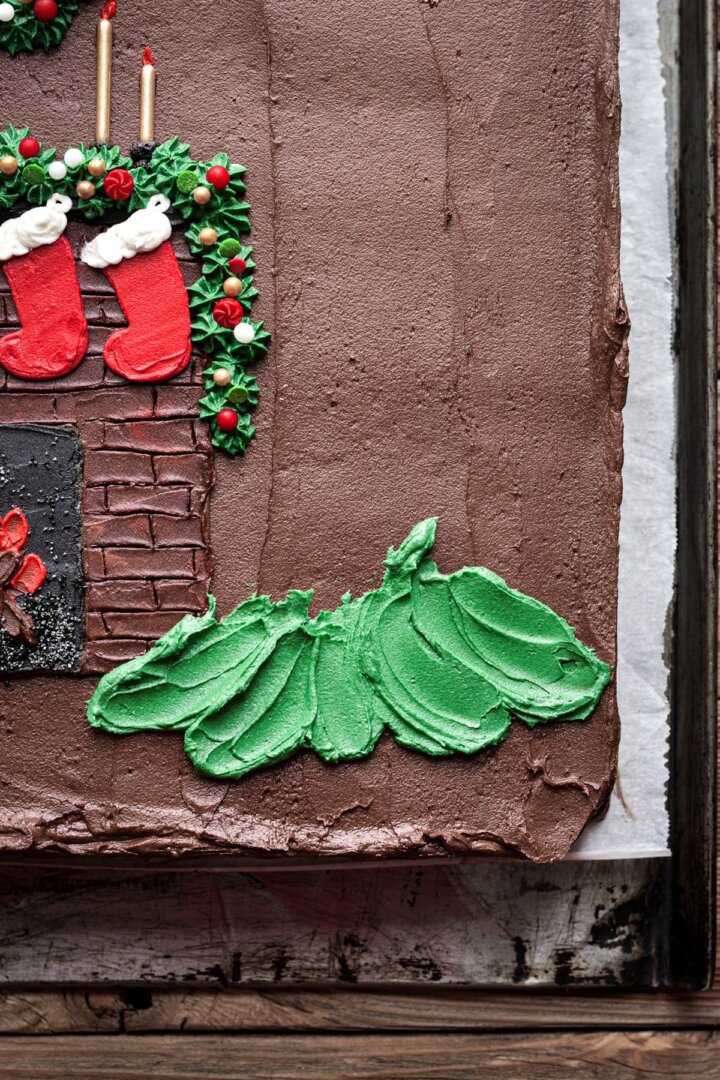
- Using a palette knife, paint branches for the Christmas tree, starting at the bottom and working your way up. This was trickier than I thought it would be, and I’d suggest practicing first on a piece of wax paper before you paint on your cake.
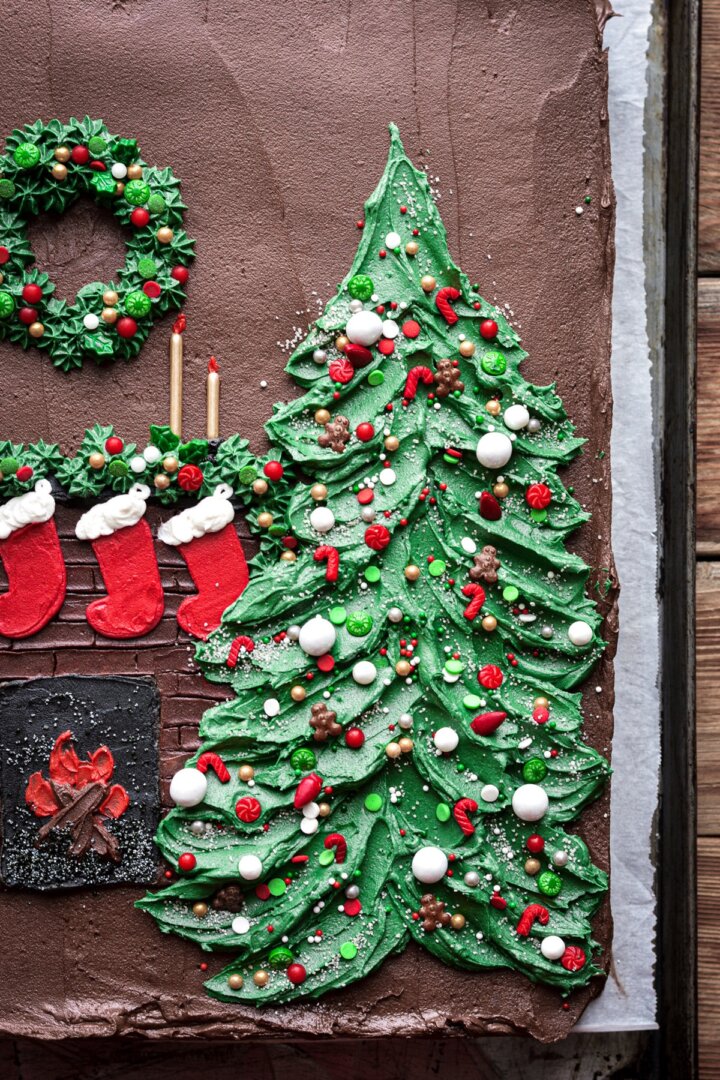
- Decorate the tree with sprinkle ornaments.
Finishing Touches
- Pipe some more green garland at the top edge of the cake, and decorate it with sprinkle ornaments.
- Add a few presents around the fireplace or Christmas tree.
- Use tip #12 to pipe some white buttercream around the base of the tree to resemble snow or a fluffy blanket.
- Add some sparkling sugar and top the tree with the star anise. Your Christmas tree sheet cake is done!
Be sure to read all of my BAKING FAQs where I discuss ingredients, substitutions and common questions with cake making, so that you can be successful in your own baking! I also suggest reading these comprehensive posts on making Perfect American Buttercream, How to Stack, Fill, Crumb Coat and Frost Layer Cakes and How to Use Piping Bags.
Frequently Asked Questions
What brand of food coloring do you use?
I use Americolor gel food coloring.
Can this cake be frozen?
Yes. You can freeze your fully decorated Christmas tree sheet cake in an airtight container for up to 2 weeks.
You Might Also Like

Please check out my Amazon Shop for a curated collection of some of my favorite cake pans from trusted brands, baking tools, ingredients, pretty things and fashion finds. I recommend products that I buy and use every day!
Did you love today’s recipe? Please rate the recipe and let me know in the comments what you thought! Also, be sure to follow Curly Girl Kitchen on Instagram, and tag me when you try one of my recipes so I can see all your delicious creations!
Christmas Tree Sheet Cake
All recipes on Curly Girl Kitchen are developed for high altitude at 5,280 feet. See FAQs for adjusting to higher or lower elevations.
Equipment
- 9×13 Baking Dish
- Stand Mixer with Paddle Attachment
- 12-Inch Disposable Piping Bags + Couplers
- Piping Tips, 2, 3, 4, 6, 12 and 18
- Tapered Palette Knives various sizes
Ingredients
- 1 recipe Vanilla Sheet Cake
- ½ recipe Chocolate Buttercream
- 2x recipe Vanilla Buttercream
- Americolor Gel Food Coloring Super Black, Super Red, Electric Yellow, Forest Green, Electric Green, Turquoise, Leaf Green
- Assorted Christmas Sprinkles
- White Sparkling Sugar
- Black Sanding Sugar
- Star Anise
Instructions
Cake
- Prepare the recipe for Vanilla Sheet Cake or Chocolate Sheet Cake as instructed. Cool completely.
- Turn the cake out onto a baking sheet or large serving platter.
Chocolate Buttercream
- Prepare 1/2 the recipe for Chocolate Buttercream as instructed.
- Frost the cake all over with the chocolate buttercream, smoothing out the top the best you can. Make sure to reserve 1/2 cup of the chocolate buttercream to use for decorating.
- Refrigerate the cake for several hours, until the chocolate buttercream is firm and cold.
Vanilla Buttercream
- Prepare 2x the recipe for Perfect American Vanilla Buttercream as instructed. Use half butter / half shortening for a whiter color.
- Use the Super Red gel food coloring to color 1/2 cup of the vanilla buttercream a deep red.
- Use the Super Black, Forest Green, Electric Green, Turquoise, and Leaf Green gel food coloring to color 1 1/4 cups of the vanilla buttercream a deep green. I start with a small drop of each color, then continue to add more of each until achieving the shade of green I want.
- Leave the rest of the vanilla buttercream white.
Decorating the Fireplace
- Fit a piping bag with a coupler and one of the small round tips, like #3 or #4. Fill with chocolate buttercream.
- In the lower left corner of the cake, pipe the outline for the fireplace, then fill in the outline. Lightly dab a small amount of the red and white buttercream on top of the brown, then use a palette knife to smooth it out.
- Drag a toothpick through the buttercream to create the brick pattern.
- Add a few drops of Super Black gel food coloring to a small amount of the chocolate buttercream. Fit a piping bag with a coupler and one of the small round tips, like #3 or #4. Fill with the black buttercream.
- Pipe the mantle above the bricks, and fill in the center of the fireplace. Use a palette knife to smooth out the black buttercream.
- Add a few drops of Electric Yellow gel food coloring to a small amount of the red buttercream, to make it more orange. Use a palette knife to paint some orange flames in the center of the fireplace.
- Use a palette knife to paint some chocolate brown logs over the flames.
- Sprinkle a little black sanding sugar around the logs to resemble coals and ashes.
Decorating the Stockings
- Fit a piping bag with a coupler and a small round tip, and fill with the red buttercream.
- Pipe the outline of the stockings, then fill in the stockings and smooth the buttercream with a palette knife.
- Fit a piping bag with a coupler and a small round tip, and fill with white buttercream. Pipe some fluffy swirls on the top edge of the stockings, then pipe a small loop for them to hang on the mantle.
Decorating the Wreath and Garland
- Fit a piping bag with a coupler and a small star tip, such as #18, and fill with green buttercream. Pipe a wreath above the fireplace.
- If you have long gold sprinkle rods, you can use them to make candles sitting on the mantle. Use a palette knife to paint a small orange flame above each candle.
- Pipe some garland on the mantle, then decorate the wreath and garland with sprinkle ornaments.
Decorating the Christmas Tree
- Using a palette knife, paint branches for the Christmas tree, starting at the bottom and working your way up. This was trickier than I thought it would be, and I'd suggest practicing first on a piece of wax paper before you paint on your cake.
- Decorate the tree with sprinkle ornaments.
Finishing Touches
- Pipe some more green garland at the top edge of the cake, and decorate it with sprinkle ornaments.
- Add a few presents around the fireplace or Christmas tree.
- Use tip #12 to pipe some white buttercream around the base of the tree to resemble snow or a fluffy blanket.
- Add some sparkling sugar and top the tree with the star anise.

Oh goodness, gracious me. I just chanced upon your blog. This Christmas holiday decorating is SO NEXT LEVEL. WOW!!! So beautiful. I cannot believe the amount of talent you have. CONGRATULATIONS!!!!
This is the most beautiful Christmas cake I have ever seen! I am going to a family Christmas brunch and am going to attempt to make this. My sister said, make it, but don’t eat it. It’s too beautiful to eat! LOL! Thank you for sharing and Merry Christmas!
Please share a photo with me on Instagram so I can see it! 🙂
What a beautiful, creative idea! Your tutorial is excellent… I love how you explain, then put the pictures below for reference. Makes it so much easier. It’s inspired me to try it!