
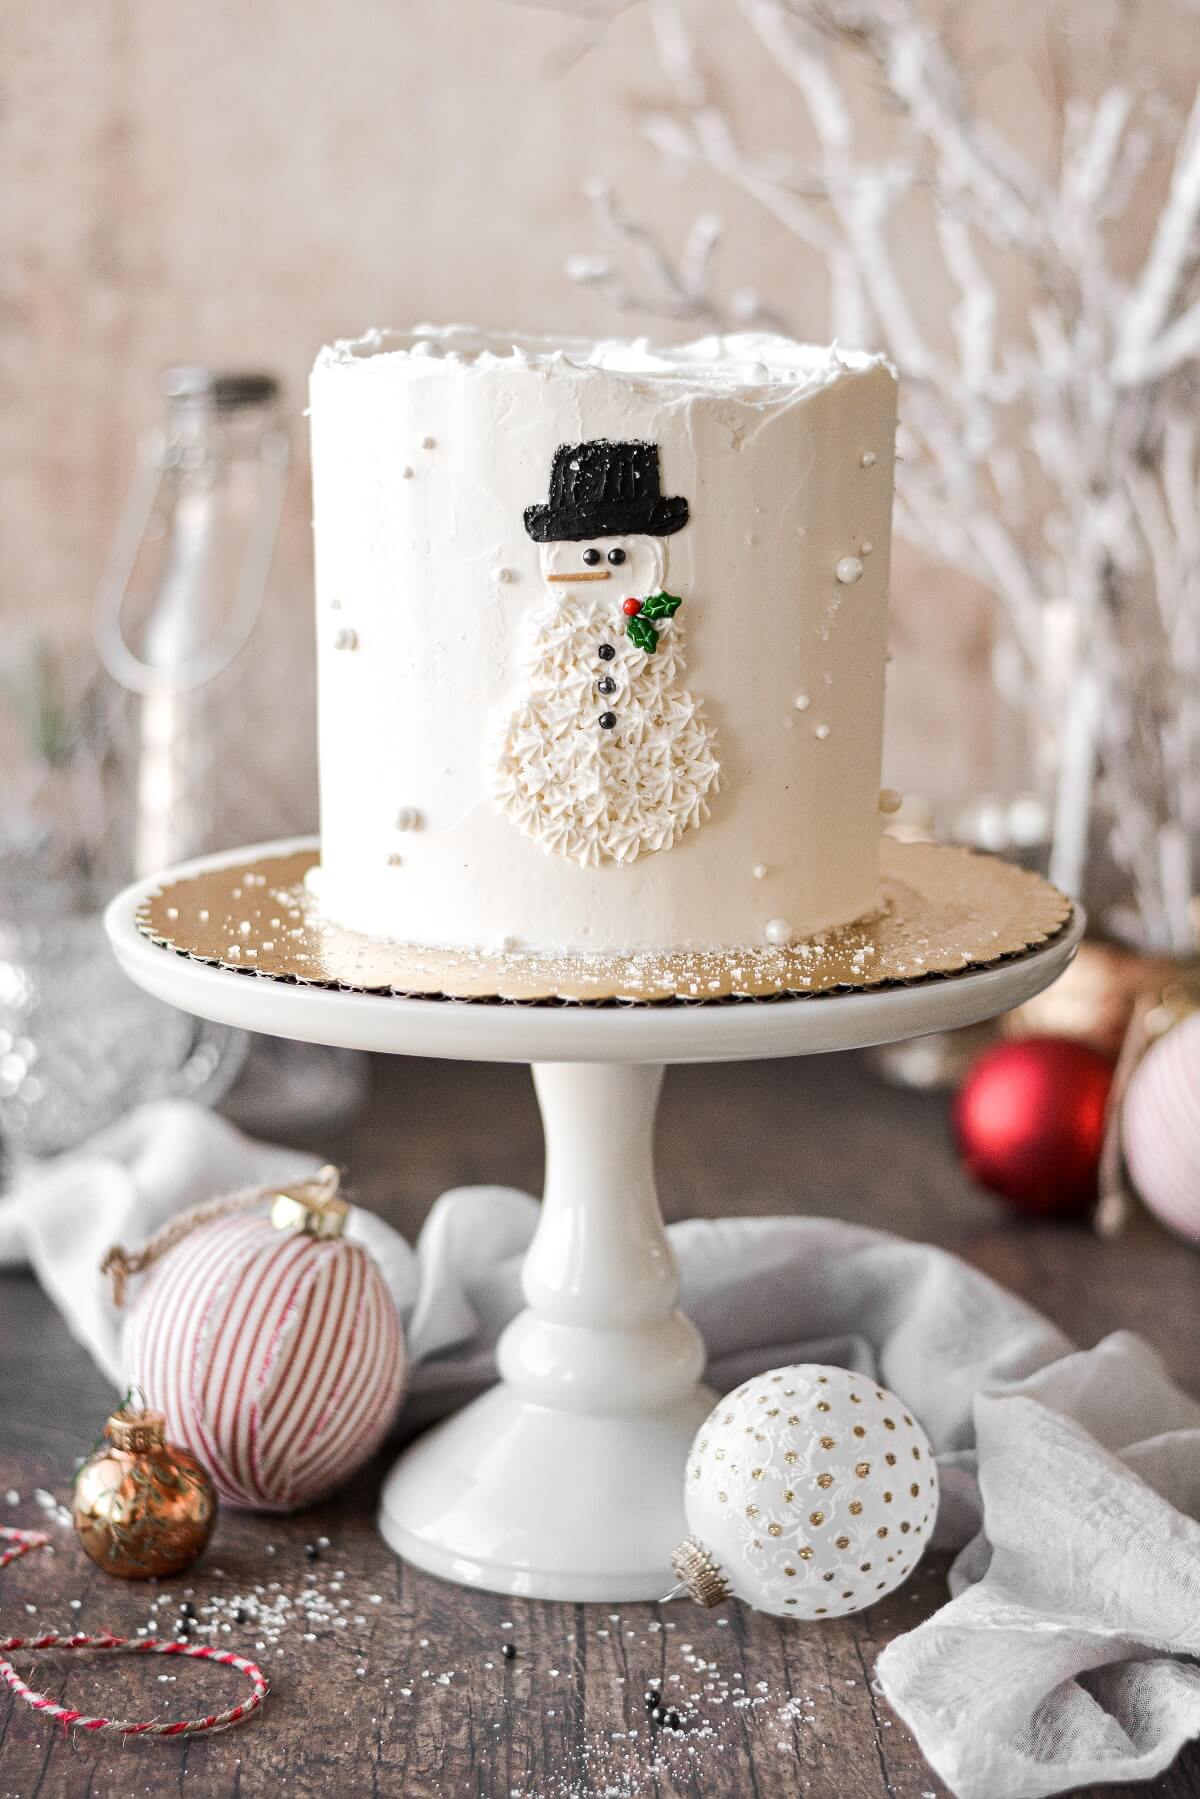
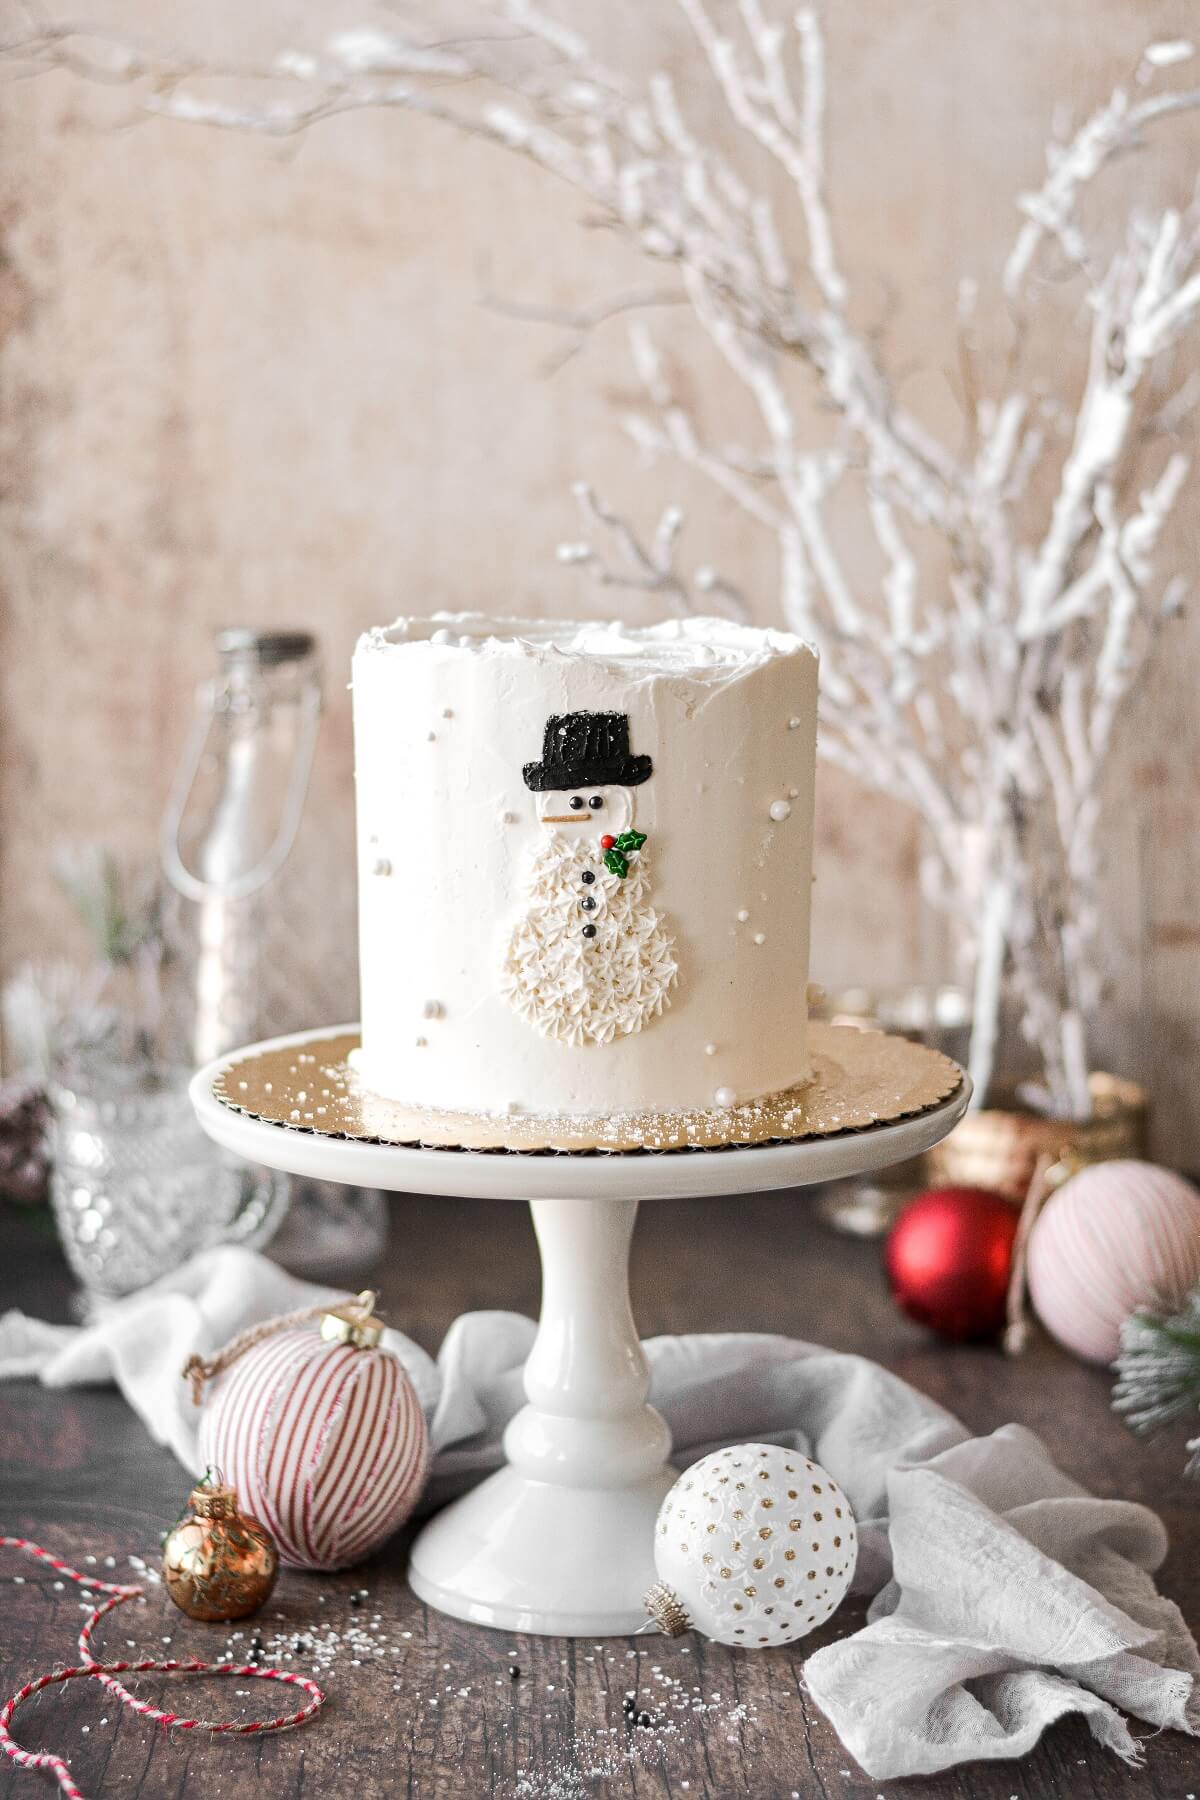
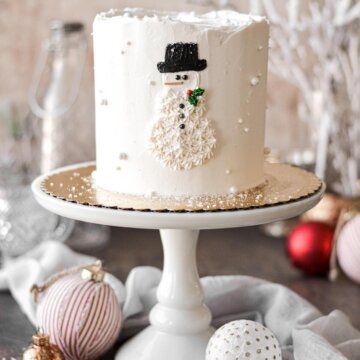
Today’s post is an easy, step-by-step tutorial for making this adorable snowman cake. There’s no fondant on this cake, so you’ll just need buttercream and sprinkles to make this cute Christmas cake that everyone will love!
Looking for more Christmas cake inspiration? Don’t miss this hot chocolate cake with homemade marshmallows, a North Pole cake with striped peppermint buttercream, and an eggnog cake with a buttercream Christmas tree.
This site contains affiliate links. As an Amazon associate, I earn from qualifying purchases. This means that I may make a small commission if you purchase a product using those links. This in no way affects my opinion of those products and services. All opinions expressed on this site are my own.
Why You’ll Love This Cake
So Quick and Easy. Even if you’re a beginner with cake decorating, you’ll find the piping techniques used on this cake to be really easy to do. You can always practice on a piece of wax paper first, before piping onto your cake.
Perfect for the Holidays. Everyone will love this cute snowman cake, and it makes an adorable centerpiece for Christmas dinner or a holiday party.
High Altitude Tested. I develop all the recipes on my site for Denver’s altitude of 5,280 feet. If you’re at a lower or higher elevation, please see my FAQs for guidance on adjusting recipes for your altitude.
See the FAQS section at the end of the post for sources on the sprinkles and sugar pearls.
Tools and Equipment
- 1 6-inch, 4-layer cake, frosted and chilled
- 1 cup vanilla buttercream
- white sugar pearls, various sizes
- white sparkling sugar
- piping bags and couplers
- piping tips #18 and #4
- 4-inch snowman cookie cutter, or a template drawn on wax paper and cut out
- black sugar pearls, for the eyes and buttons
- black gel food coloring
- small palette knife or icing spatula
- decorating tweezers, for placing the sprinkles
- orange, yellow or gold “jimmy” sprinkle, for the nose
- red sugar pearl + green holly leaves sprinkles
Instructions
Get everything ready.
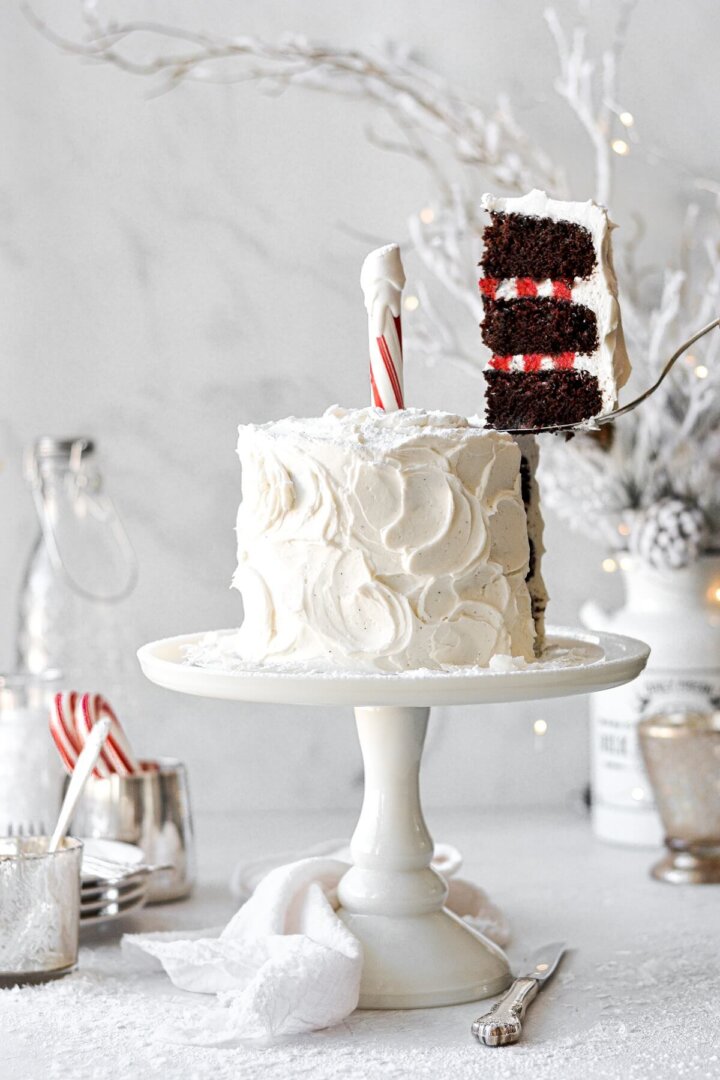
- Bake and frost your cake. You can make the cake any flavor, but the frosting will look best in white/vanilla. The size is also important. A 6-inch 4-layer cake gives the cake more height than a larger/shorter cake, and you need height for this snowman cake design.
- After frosting your cake, go ahead and add some white sugar pearls scattered over the frosting, before it crusts over. Chill the cake in the refrigerator for at least an hour, until the buttercream is firm and cold.
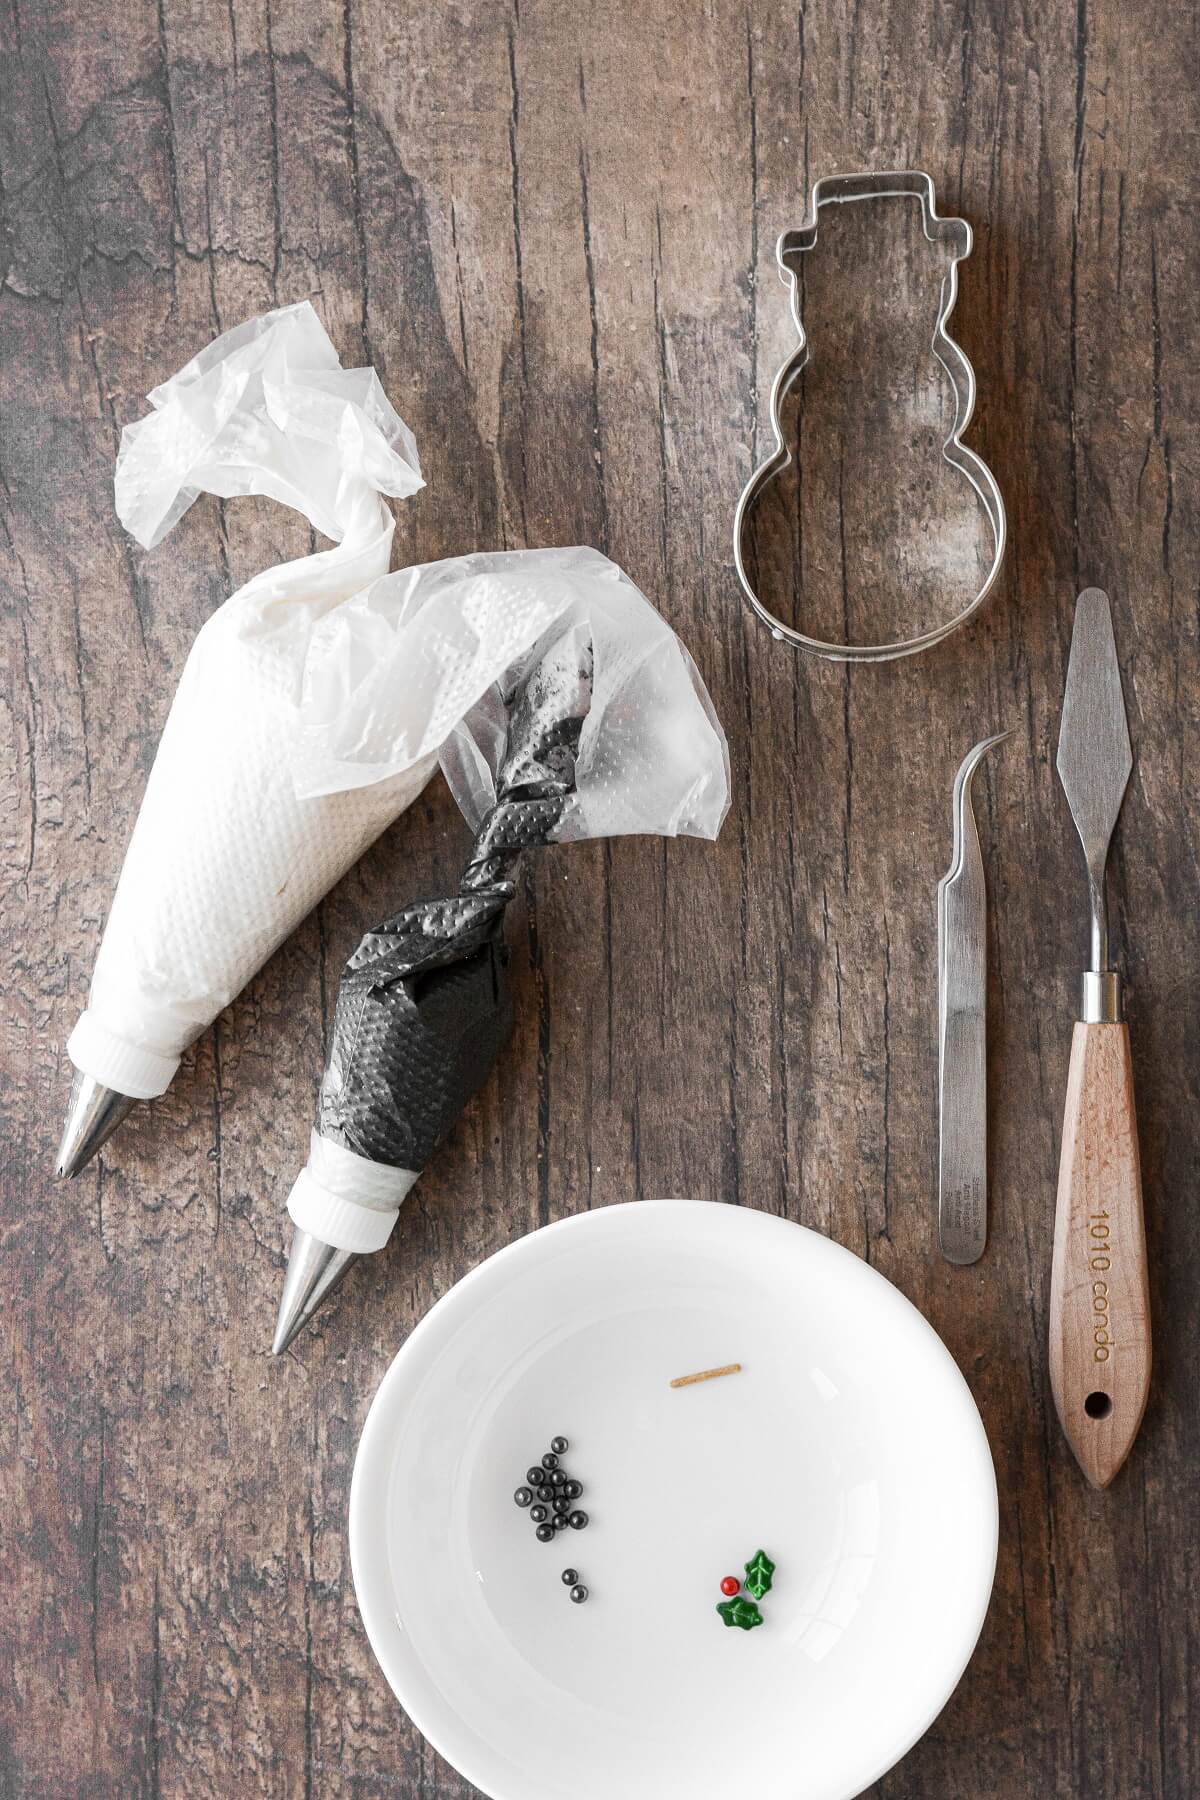
- Fit a piping bag with tip #18, and fill with about 1/2 cup of white buttercream.
- Fit a piping bag with tip #4, and fill with a few tablespoons of black buttercream.
Decorating step-by-step.
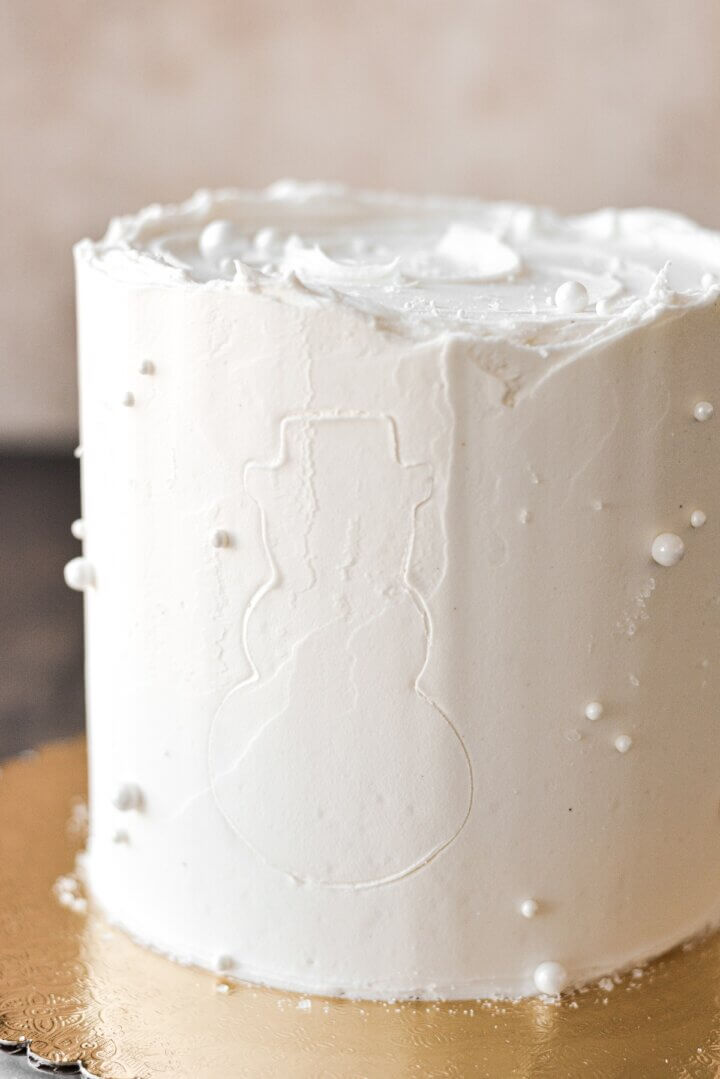
- If you have a snowman cutter, lightly press it against the side of the cake to mark your outline. If you drew a template on wax paper, press it lightly against the cake, use a toothpick to trace the outline, and then remove the paper.
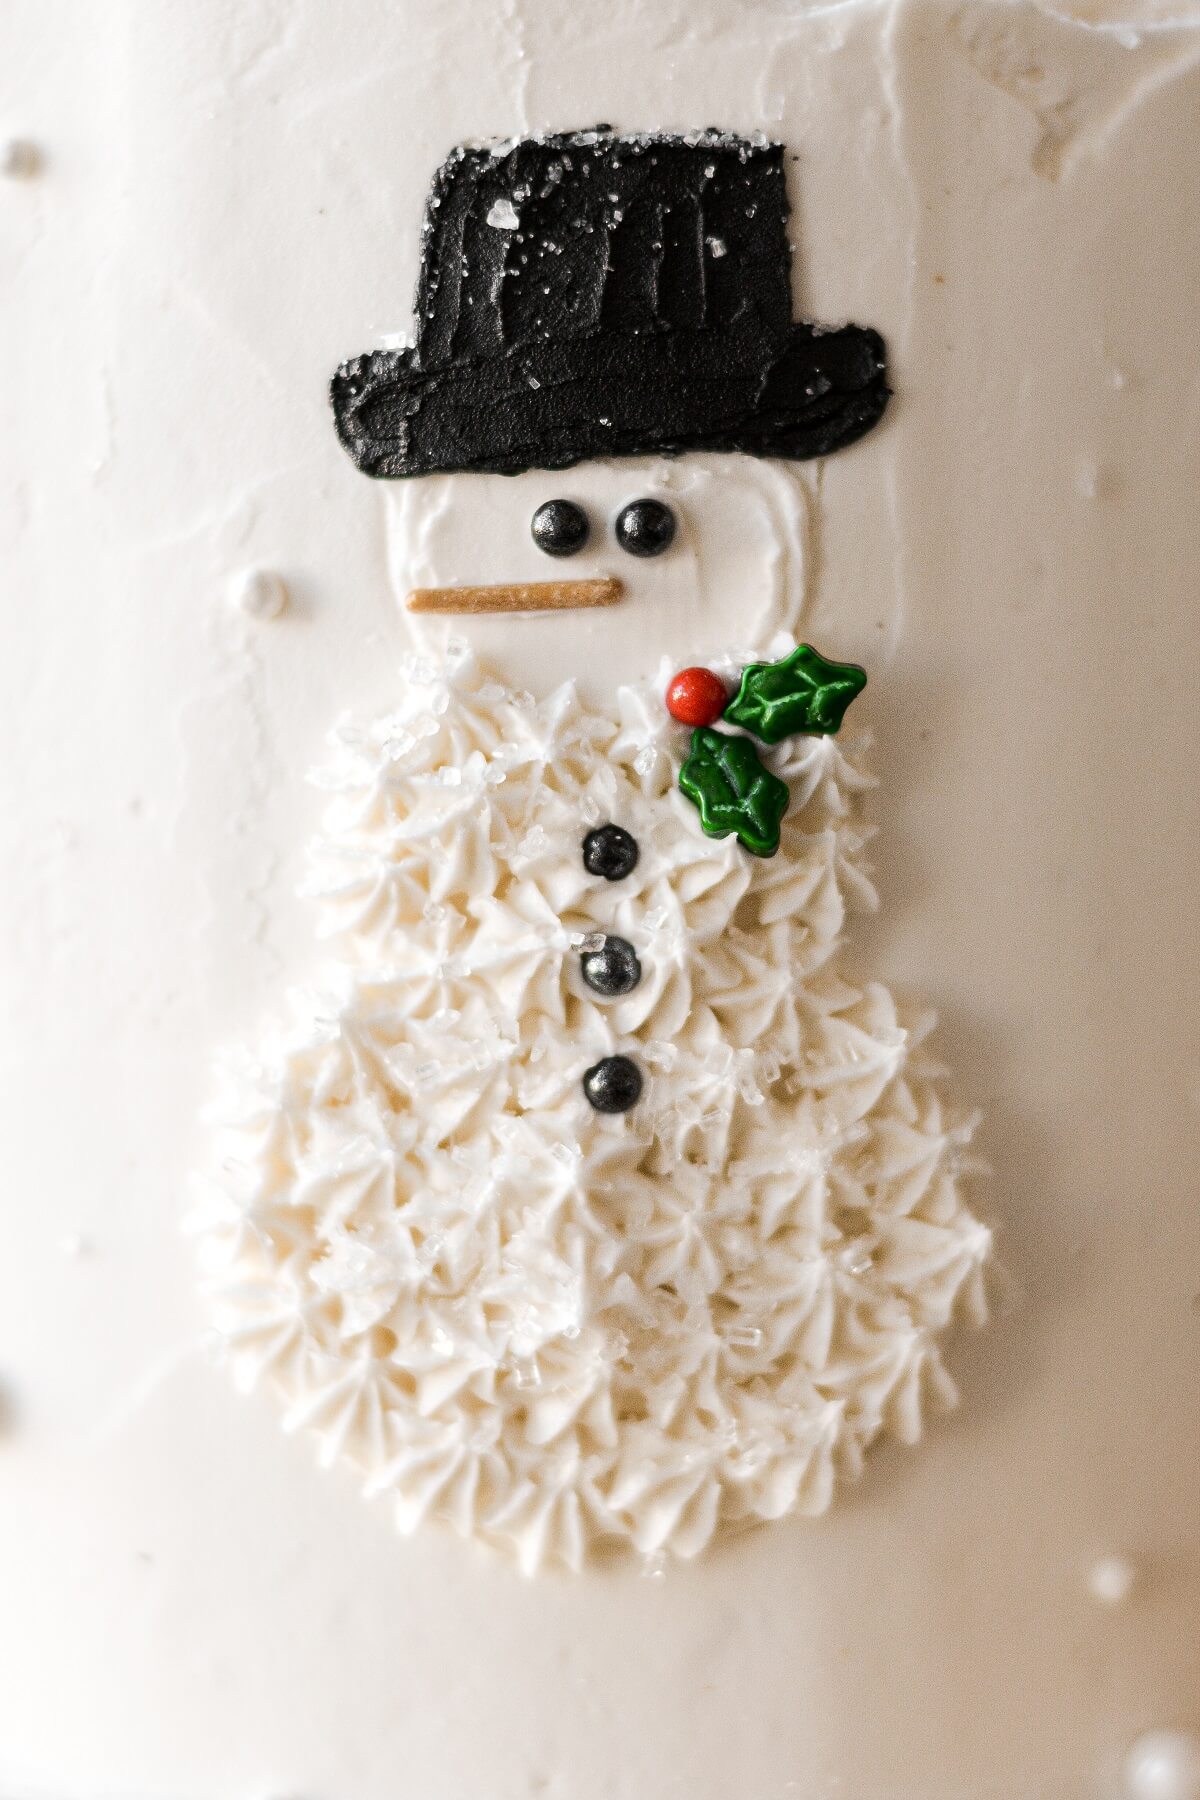
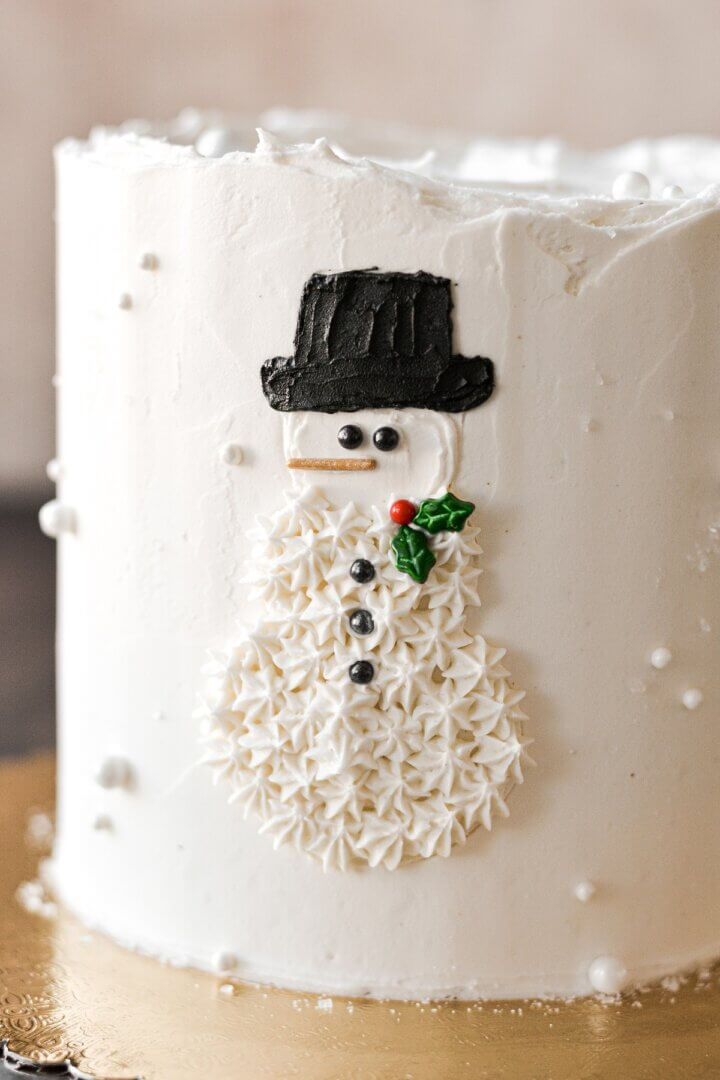
- Use a palette knife to lightly spread some white buttercream over the face.
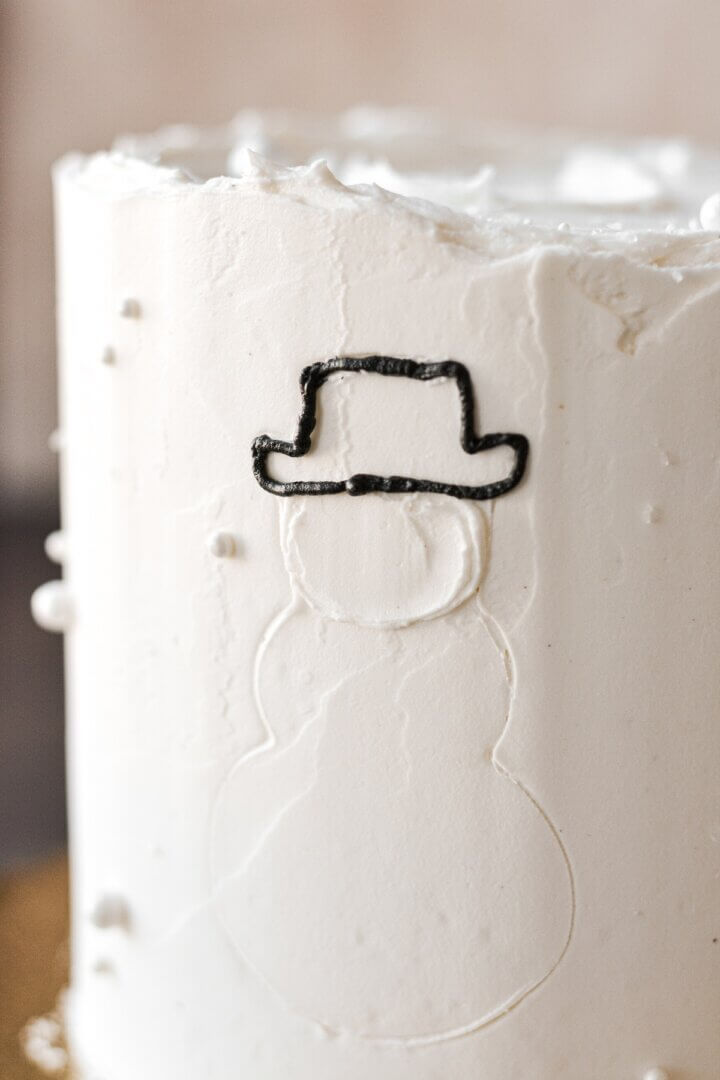
- Pipe the black buttercream for the hat, then use your palette knife to spread it out as smooth as possible.

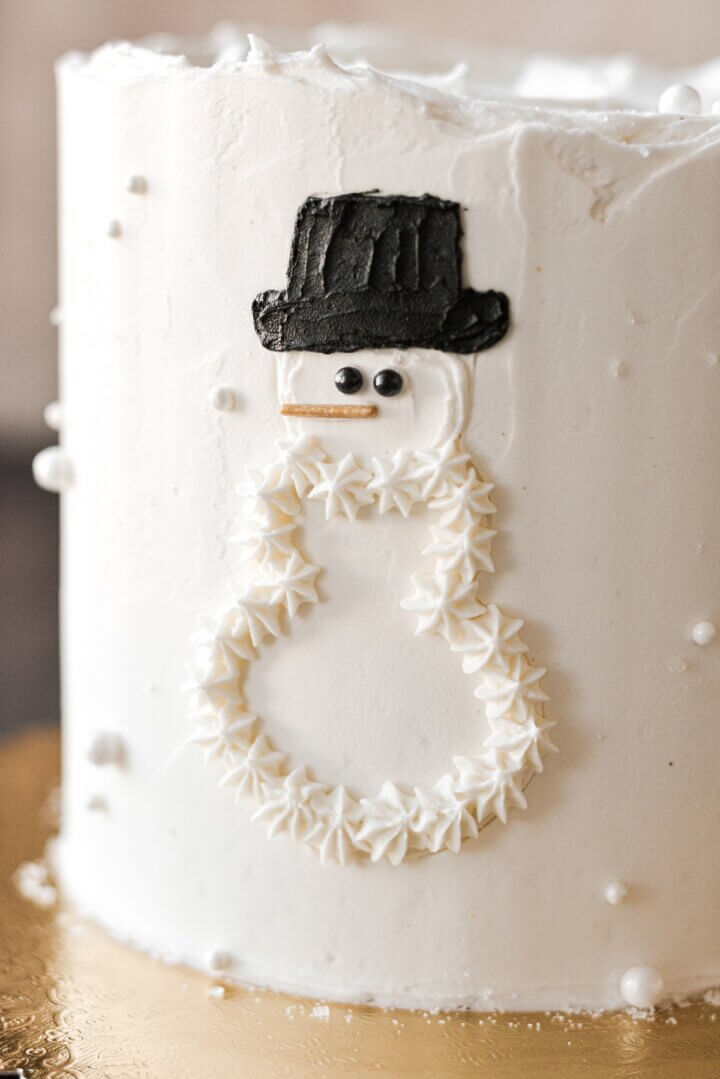
- Use tweezers to place the sprinkles for the eyes and nose on the face.
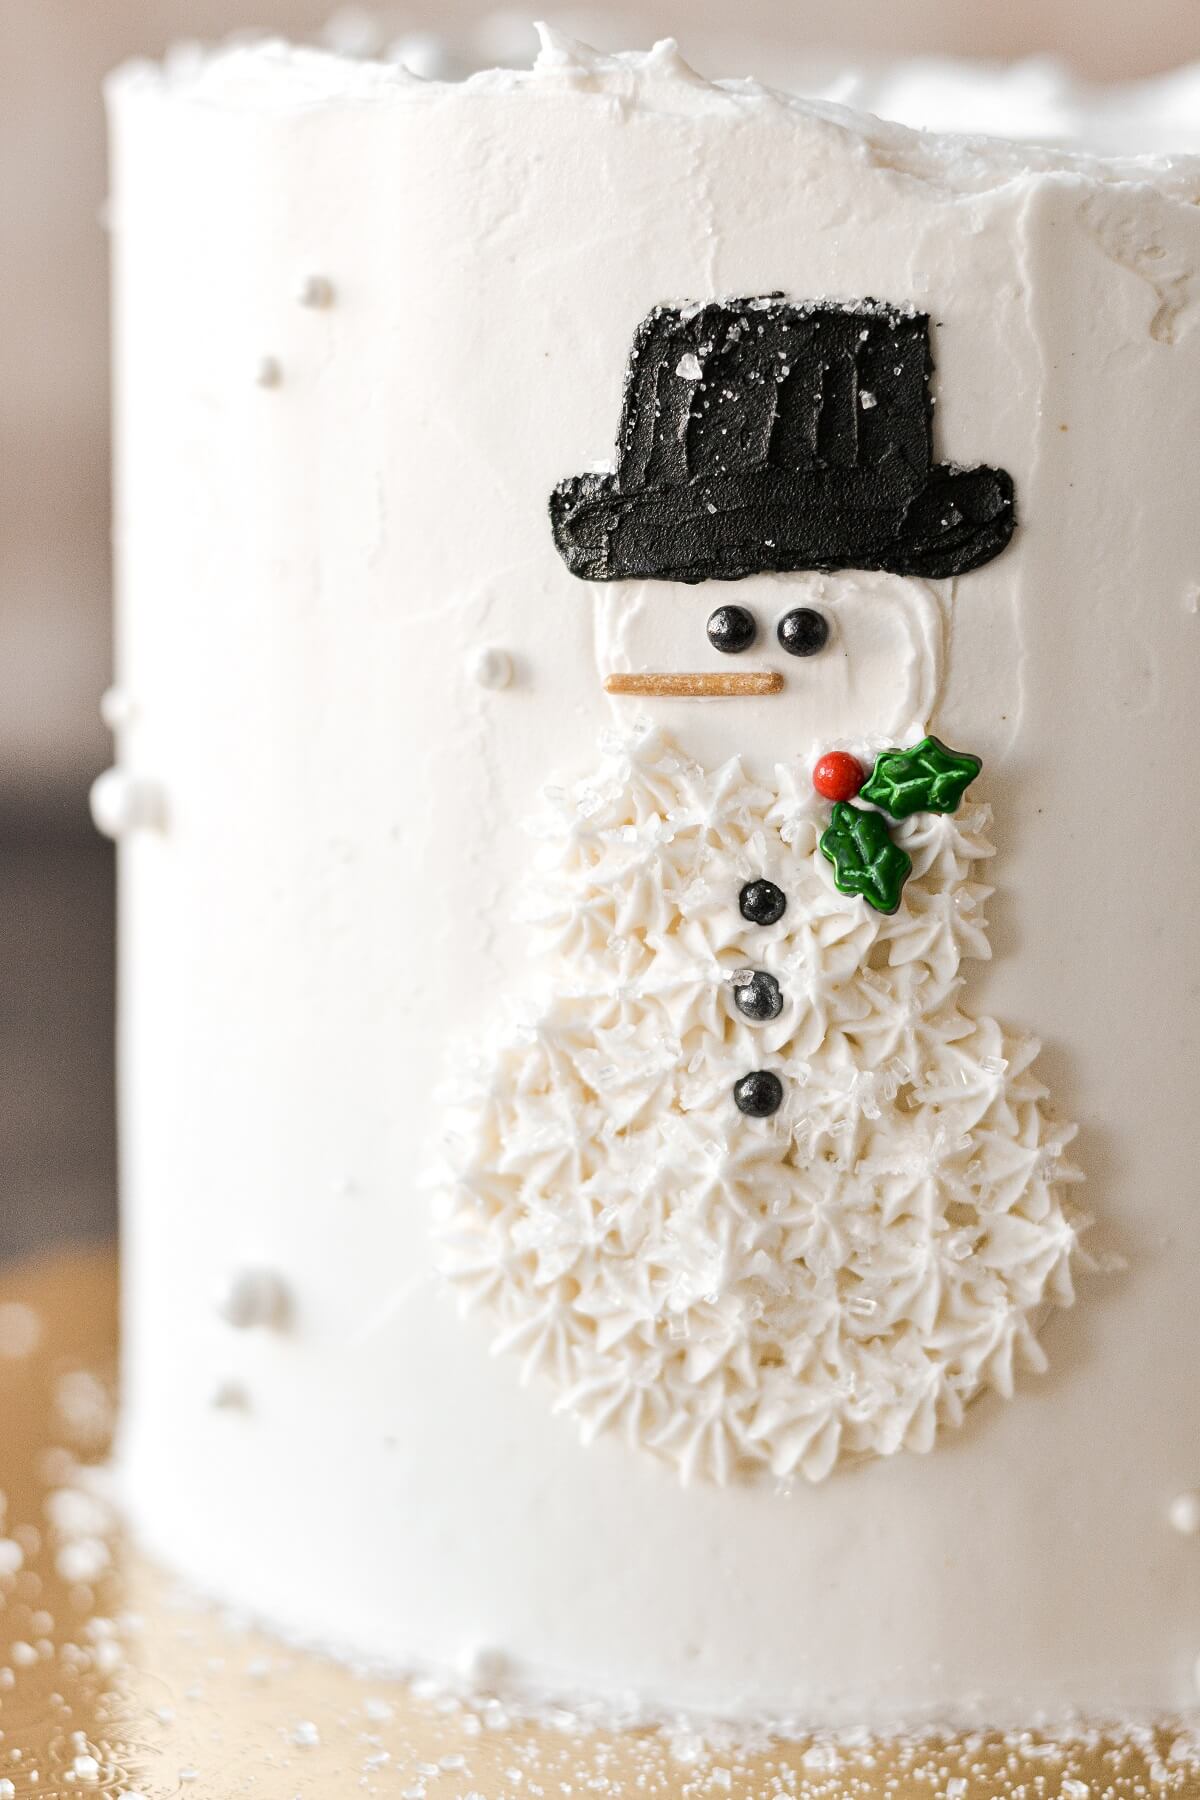
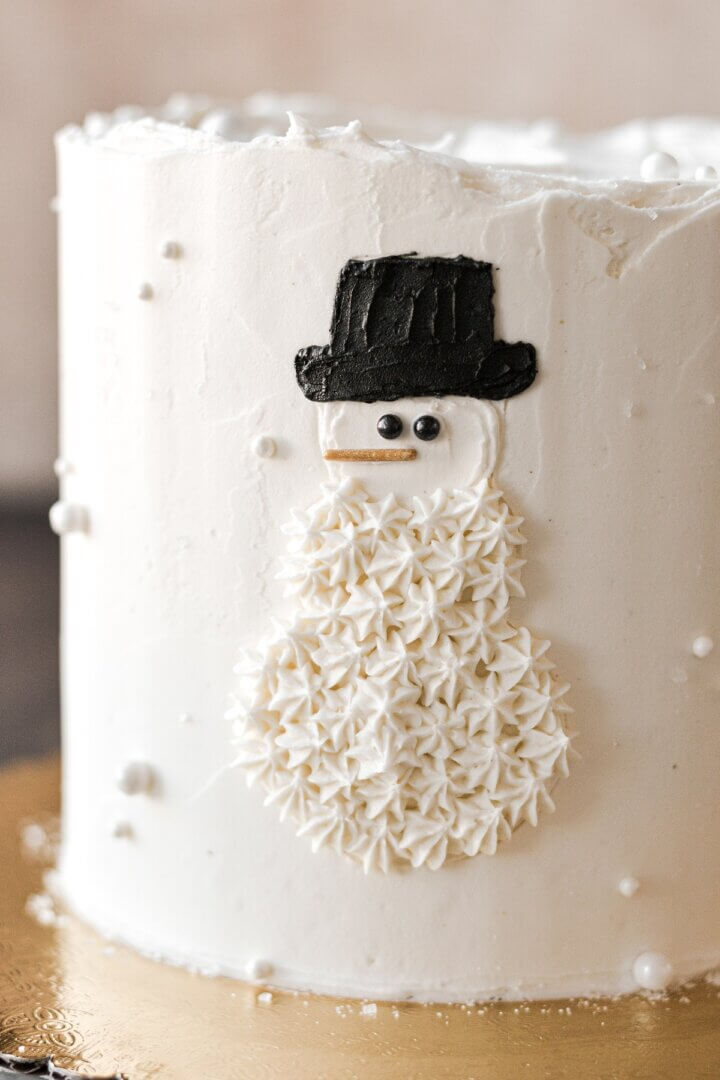
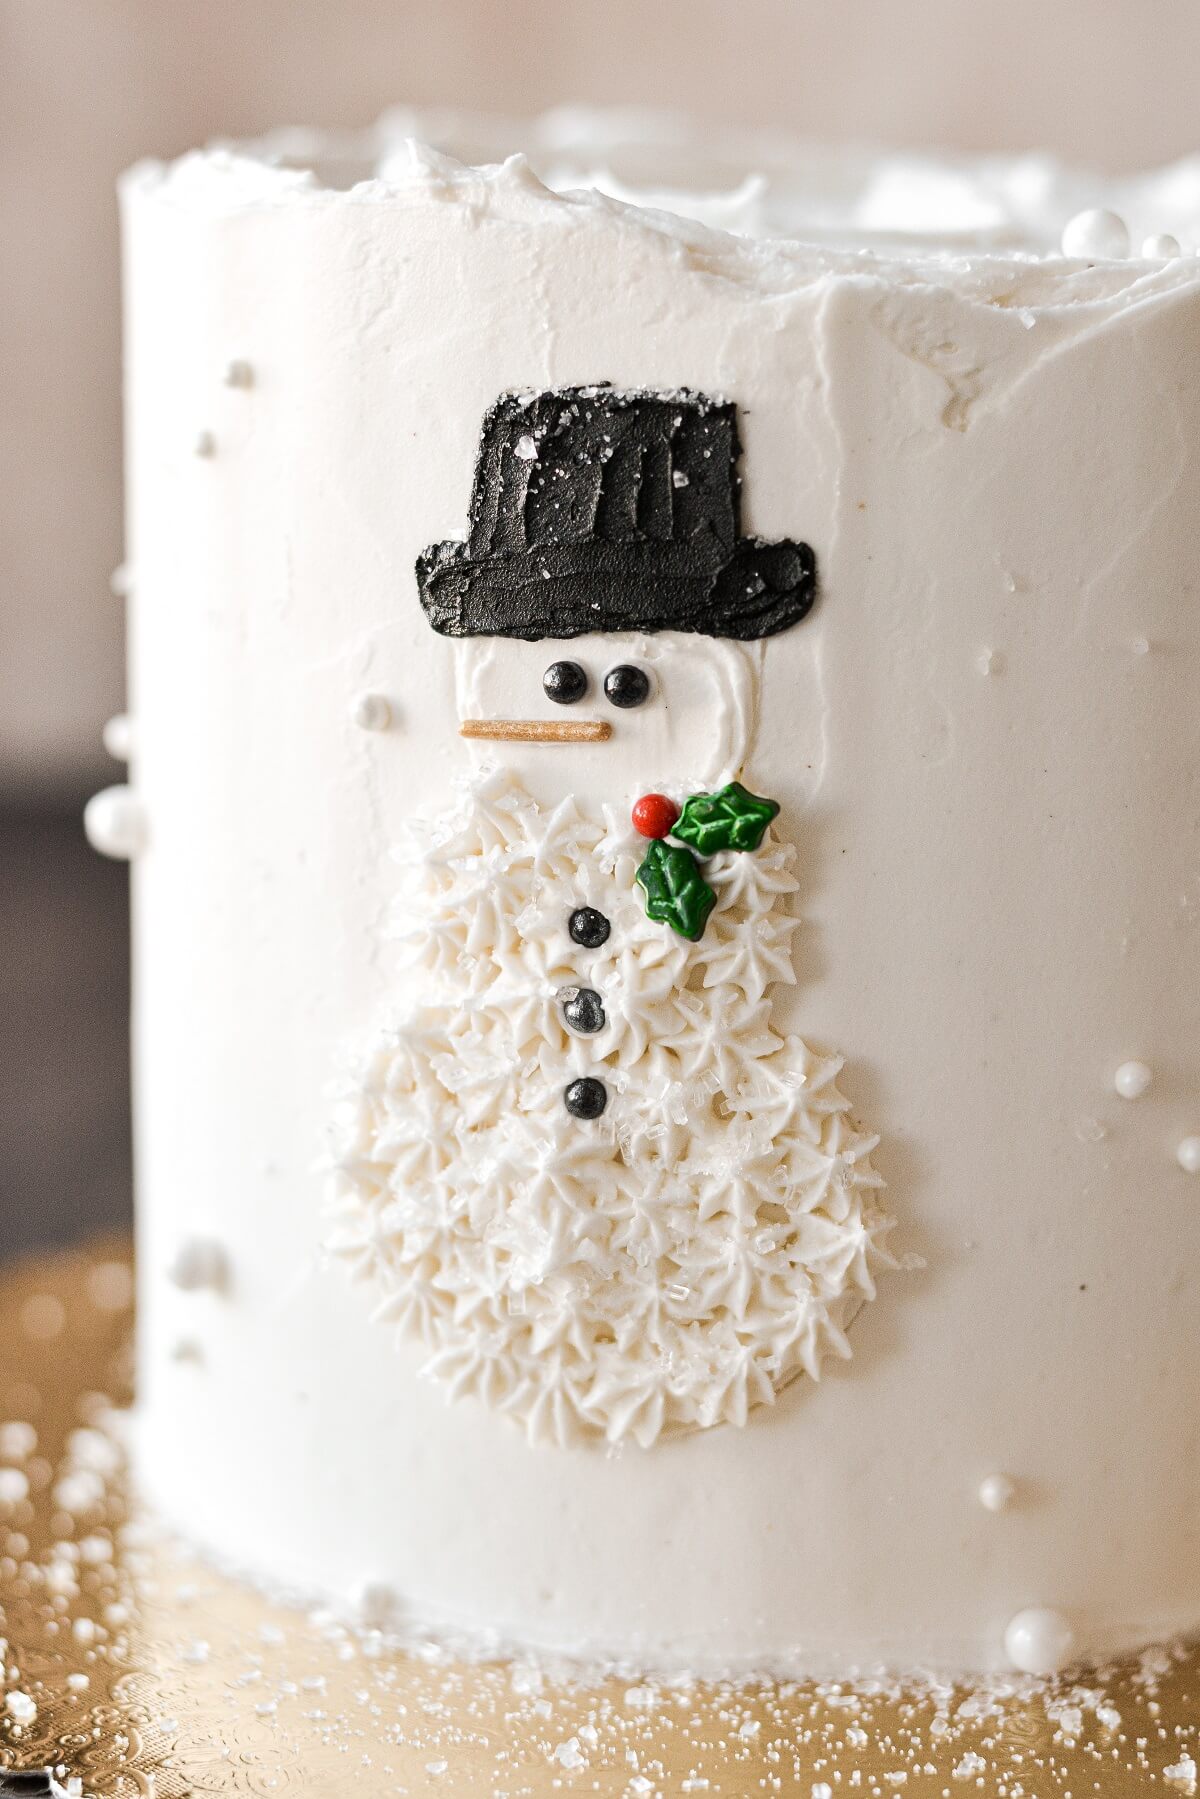
- With tip #18, pipe small stars all over the body of the snowman, then use tweezers to place the sprinkles for the buttons.
- Finish by adding the holly leaves and red sprinkles at his neck, and toss some of the white sparkling sugar onto the hat and body.
Be sure to read all of my BAKING FAQs where I discuss ingredients, substitutions and common questions with cake making, so that you can be successful in your own baking! I also suggest reading these comprehensive posts on making Perfect American Buttercream, How to Stack, Fill, Crumb Coat and Frost Layer Cakes and How to Use Piping Bags.
Frequently Asked Questions
Can I make this design on an 8 or 9 inch cake instead of 6 inch?
This design really looks better on a smaller taller cake. The extra height just works better for the shape of the snowman. You can bake any standard-sized layer cake in four 6-inch cake pans, which will give your cake the perfect height for this design. If you only have two 6-inch pans, just bake half the batter at a time, letting the extra batter rest at room temperature until you’re ready to bake it.
What buttercream did you use?
I only use American buttercream, and I have a comprehensive post all about buttercream. For today’s cake, I made 4x my buttercream recipe, which was plenty to frost the cake with enough leftover for piping the snowman.
Where did you find your sprinkles and cookie cutter?
- snowman cookie cutter
- white sugar pearls
- black sugar pearls (eyes and buttons)
- candy holly leaves
- white sparkling sugar
- gold jimmy (nose)
Can I freeze the cake after it’s frosted and decorated?
Yes, you can. Just place the cake in a bakery box and wrap it in plastic wrap to keep it airtight, or in an airtight cake carrier, and freeze it for up to 2 weeks. To thaw, place in the refrigerator to thaw for 24 hours, then let come to room temperature for 5-6 hours.
You Might Also Like
Please check out my Amazon Shop for a curated collection of some of my favorite cake pans from trusted brands, baking tools, ingredients, pretty things and fashion finds. I recommend products that I buy and use every day!
Did you love today’s recipe? Please rate the recipe and let me know in the comments what you thought! Also, be sure to follow Curly Girl Kitchen on Instagram, and tag me when you try one of my recipes so I can see all your delicious creations!
Snowman Cake
All recipes on Curly Girl Kitchen are developed for high altitude at 5,280 feet. See FAQs for adjusting to higher or lower elevations.

Ingredients
- 1 6-inch, 4-layer cake, frosted and chilled
- 1 cup vanilla buttercream
- white sugar pearls, various sizes
- white sparkling sugar
- piping bags and couplers
- piping tips #18 and #4
- 4-inch snowman cookie cutter, or a template drawn on wax paper and cut out
- black sugar pearls, for the eyes and buttons
- black gel food coloring
- small palette knife or icing spatula
- decorating tweezers, for placing the sprinkles
- orange, yellow or gold "jimmy" sprinkle, for the nose
- red sugar pearl + green holly leaves sprinkles
Instructions
- Bake and frost your cake. You can make the cake any flavor, but the frosting will look best in white/vanilla.The size is also important. A 6-inch 4-layer cake gives the cake more height than a larger/shorter cake, and you need height for this snowman cake design.
- After frosting your cake, go ahead and add some white sugar pearls scattered over the frosting, before it crusts over. Chill the cake in the refrigerator for at least an hour, until the buttercream is firm and cold.
- Fit a piping bag with tip #18, and fill with about 1/2 cup of white buttercream.
- Fit a piping bag with tip #4, and fill with a few tablespoons of black buttercream.
- If you have a snowman cutter, lightly press it against the side of the cake to mark your outline.If you drew a template on wax paper, press it lightly against the cake, use a toothpick to trace the outline, and then remove the paper.
- Use a palette knife to lightly spread some white buttercream over the face.
- Pipe the black buttercream for the hat, then use your palette knife to spread it out as smooth as possible.
- Use tweezers to place the sprinkles for the eyes and nose on the face.
- With tip #18, pipe small stars all over the body of the snowman, then use tweezers to place the sprinkles for the buttons.
- Finish by adding the holly leaves and red sprinkles at his neck, and toss some of the white sparkling sugar onto the hat and body.
 https://curlygirlkitchen.com/
Thank you for this beautiful recipe! I plan on making it next year!
Merry Christmas Heather
You are a very talented young lady! Everything you do is simply beautiful and your photos are the best I’ve seen. Most of my cakes are six inch layers. I can see four six inch layers would work best for this snowman cake. My question is did you use any kind of support between the four layers for this cake?
I didn’t use any supports.
Thanks for the response!