
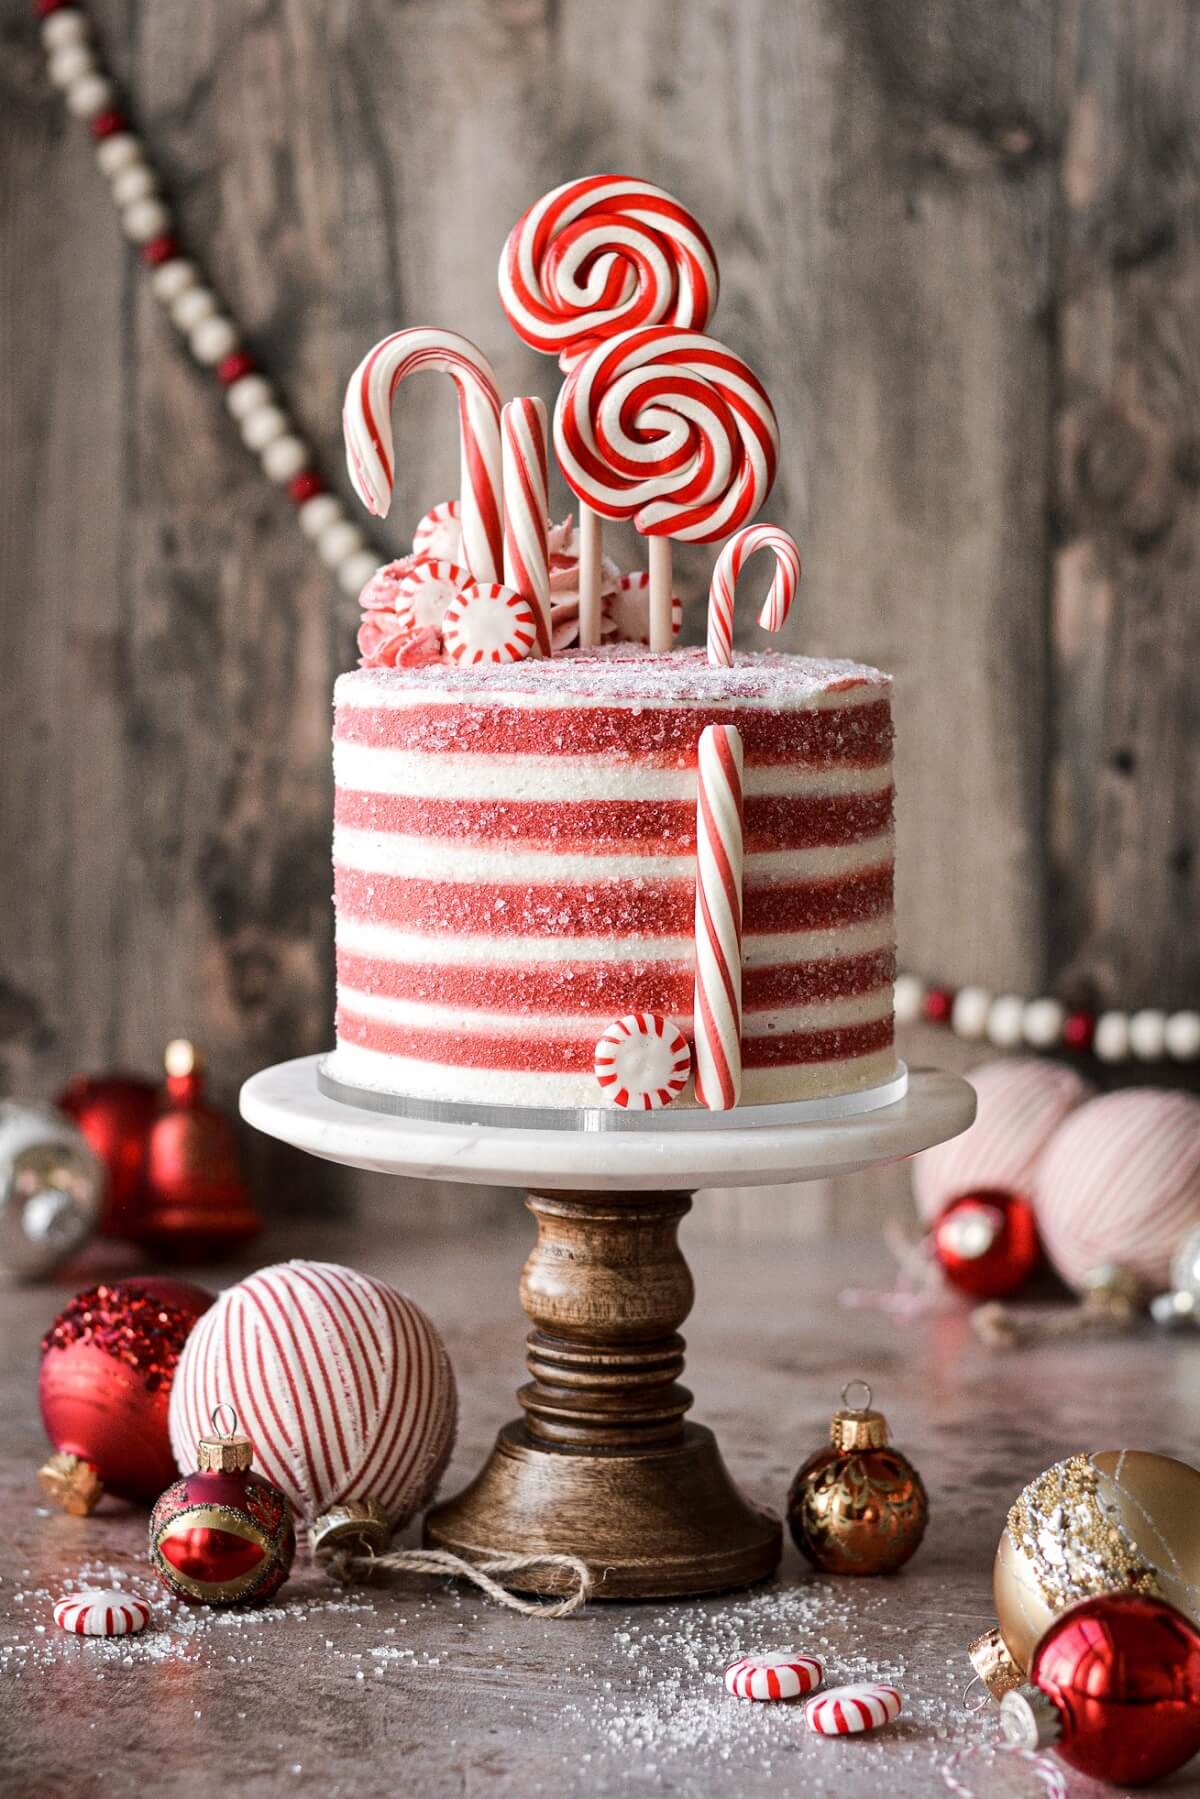
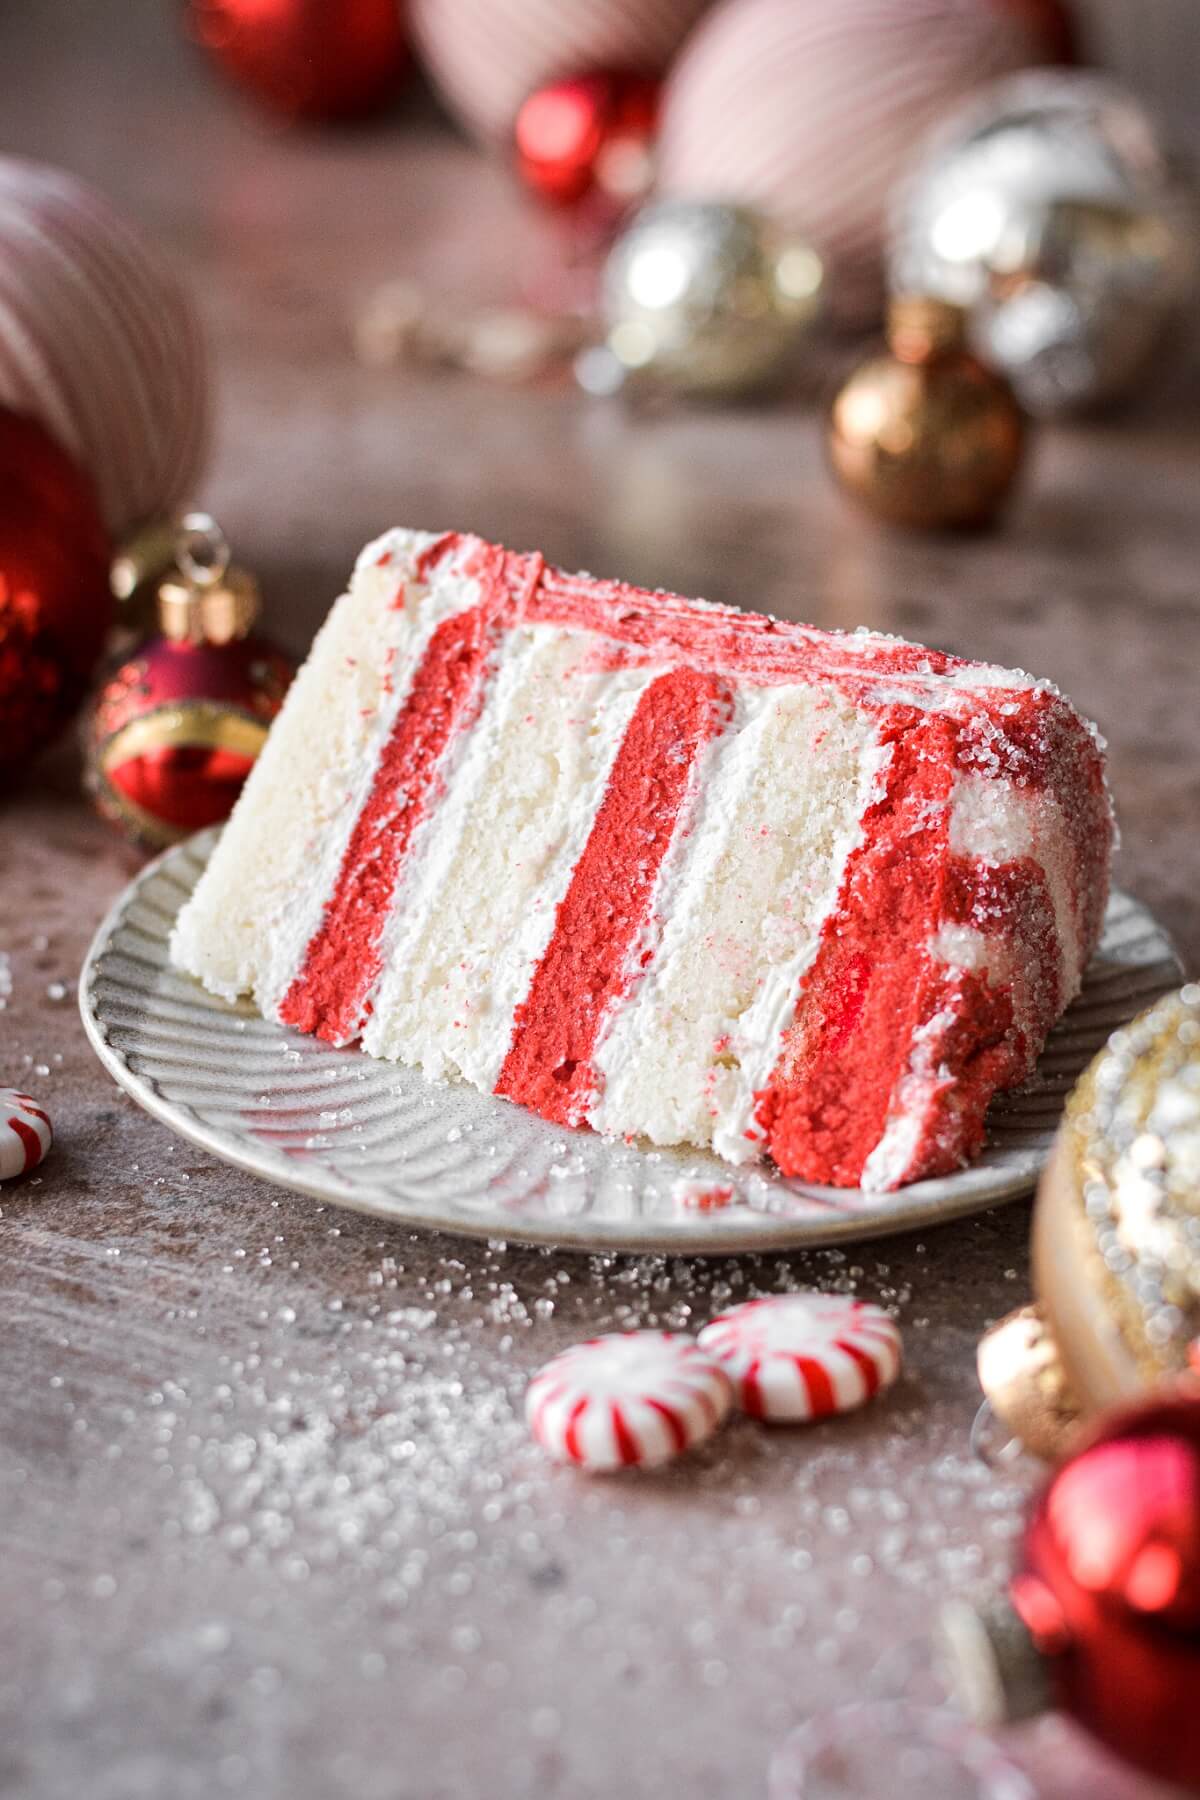
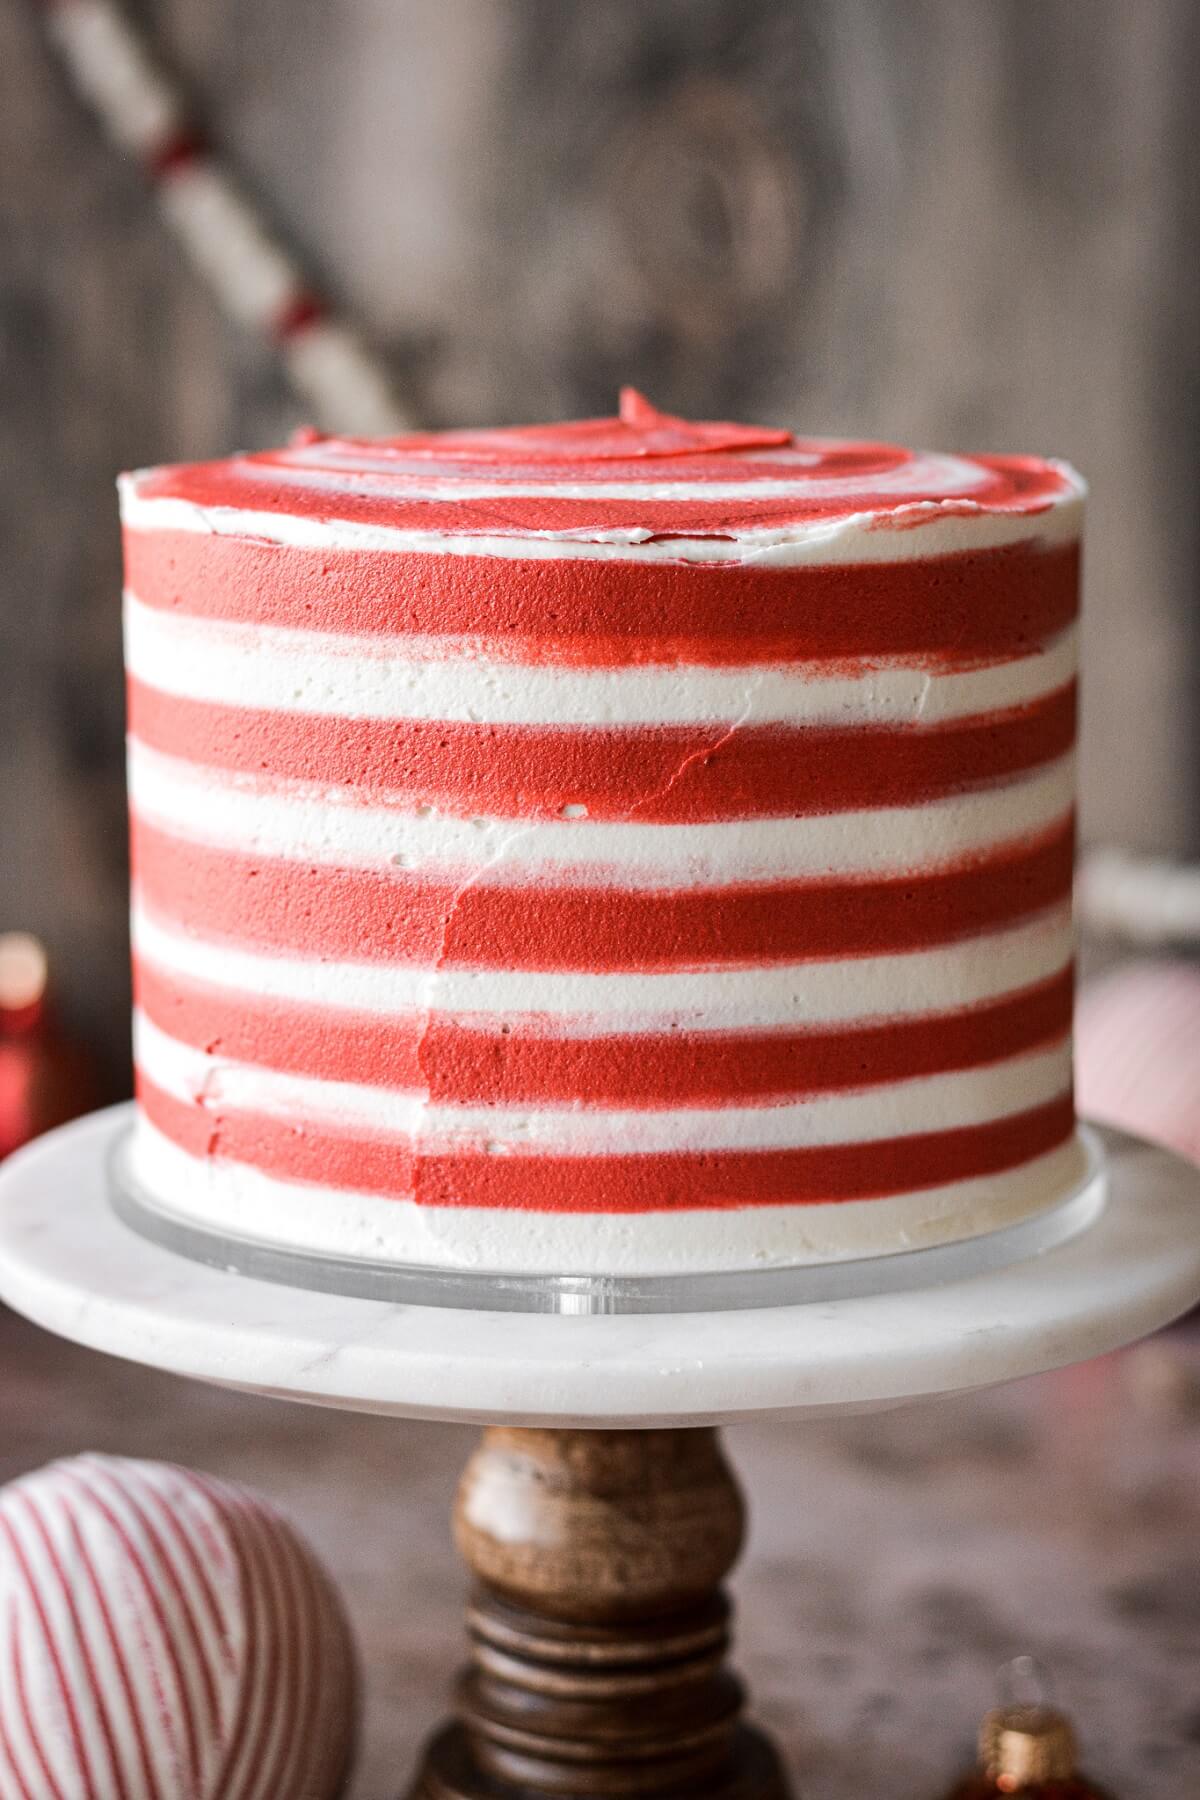
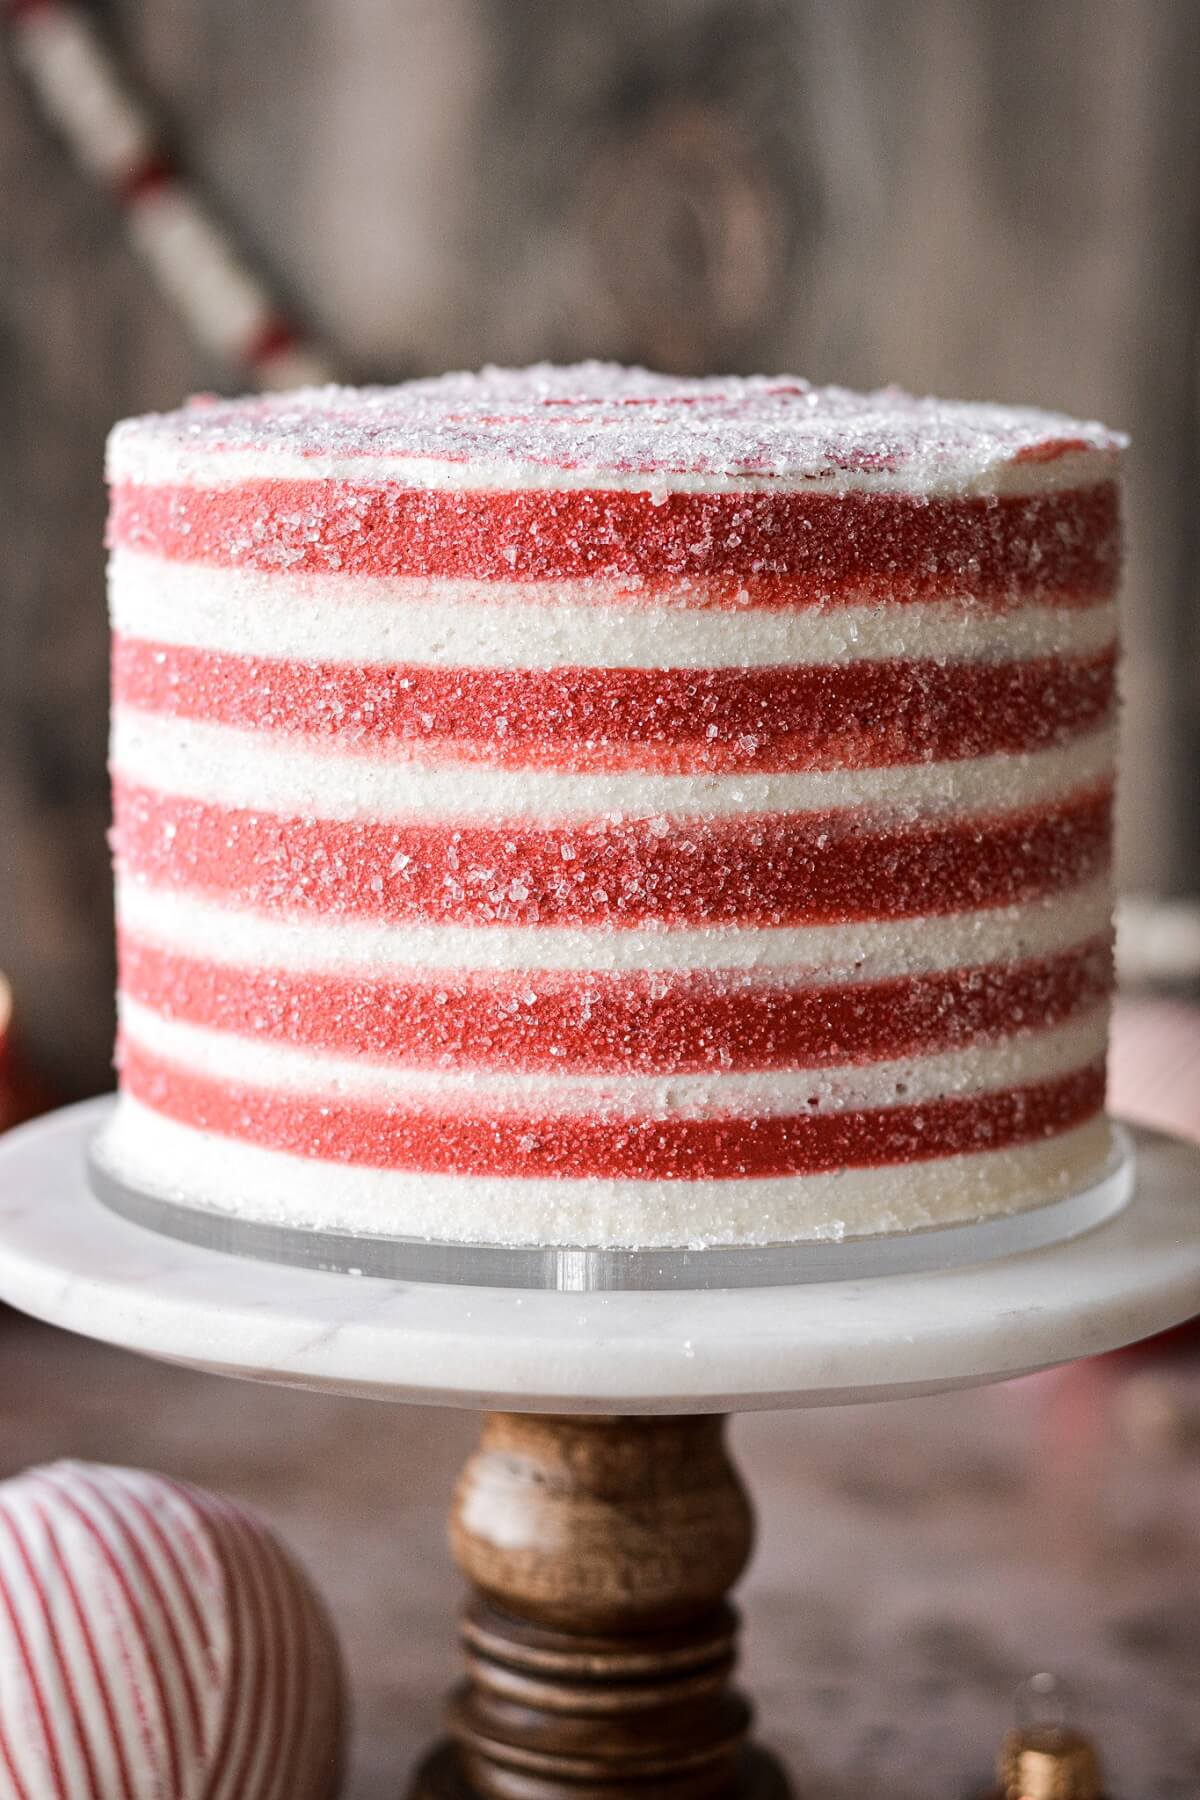
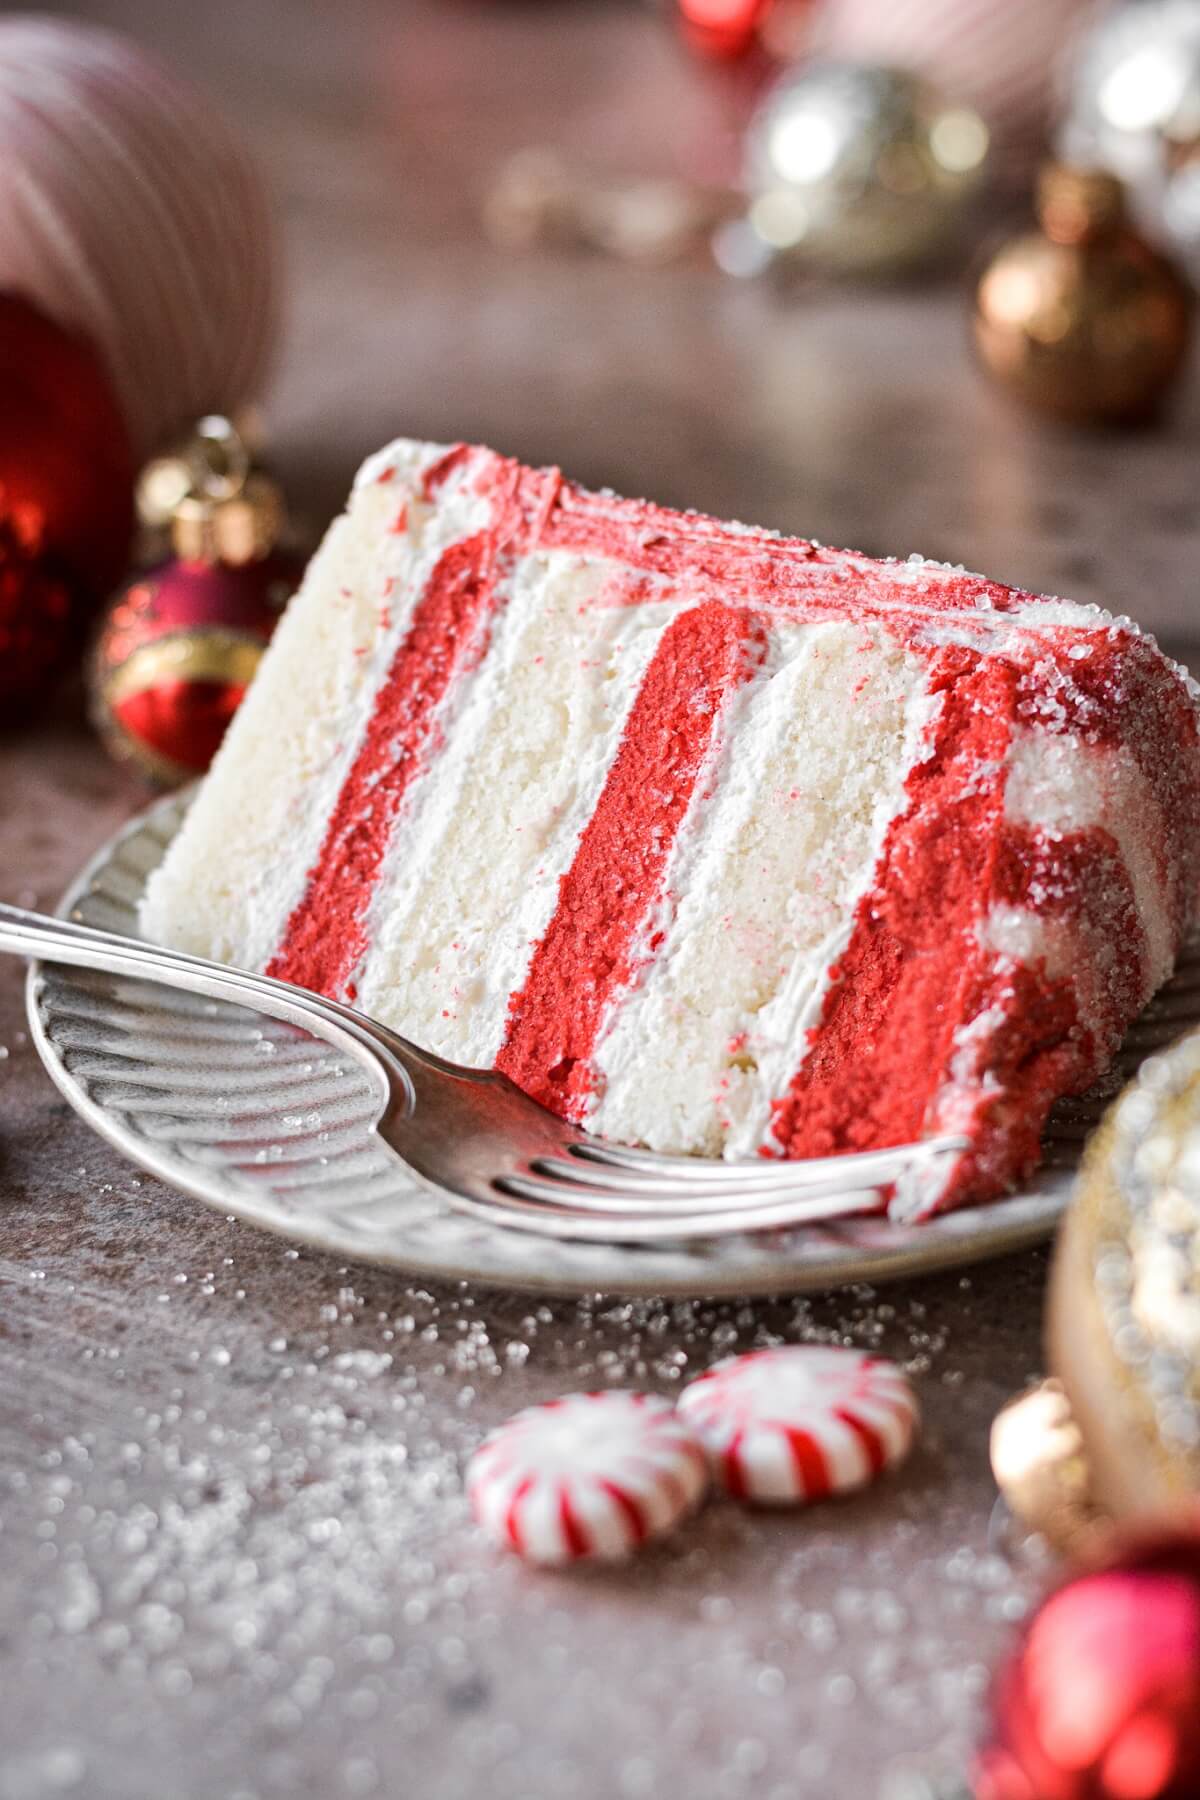
If a cake could have its own theme song, this whimsical candy cane cake would dance to the soundtrack of Elf, as he traipses through the candy cane forest to find his dad in New York City. This is a high altitude peppermint cake recipe, with six layers of soft and moist vanilla bean cake, frosted with red and white striped peppermint buttercream. This festive Christmas cake is perfect for the holidays!
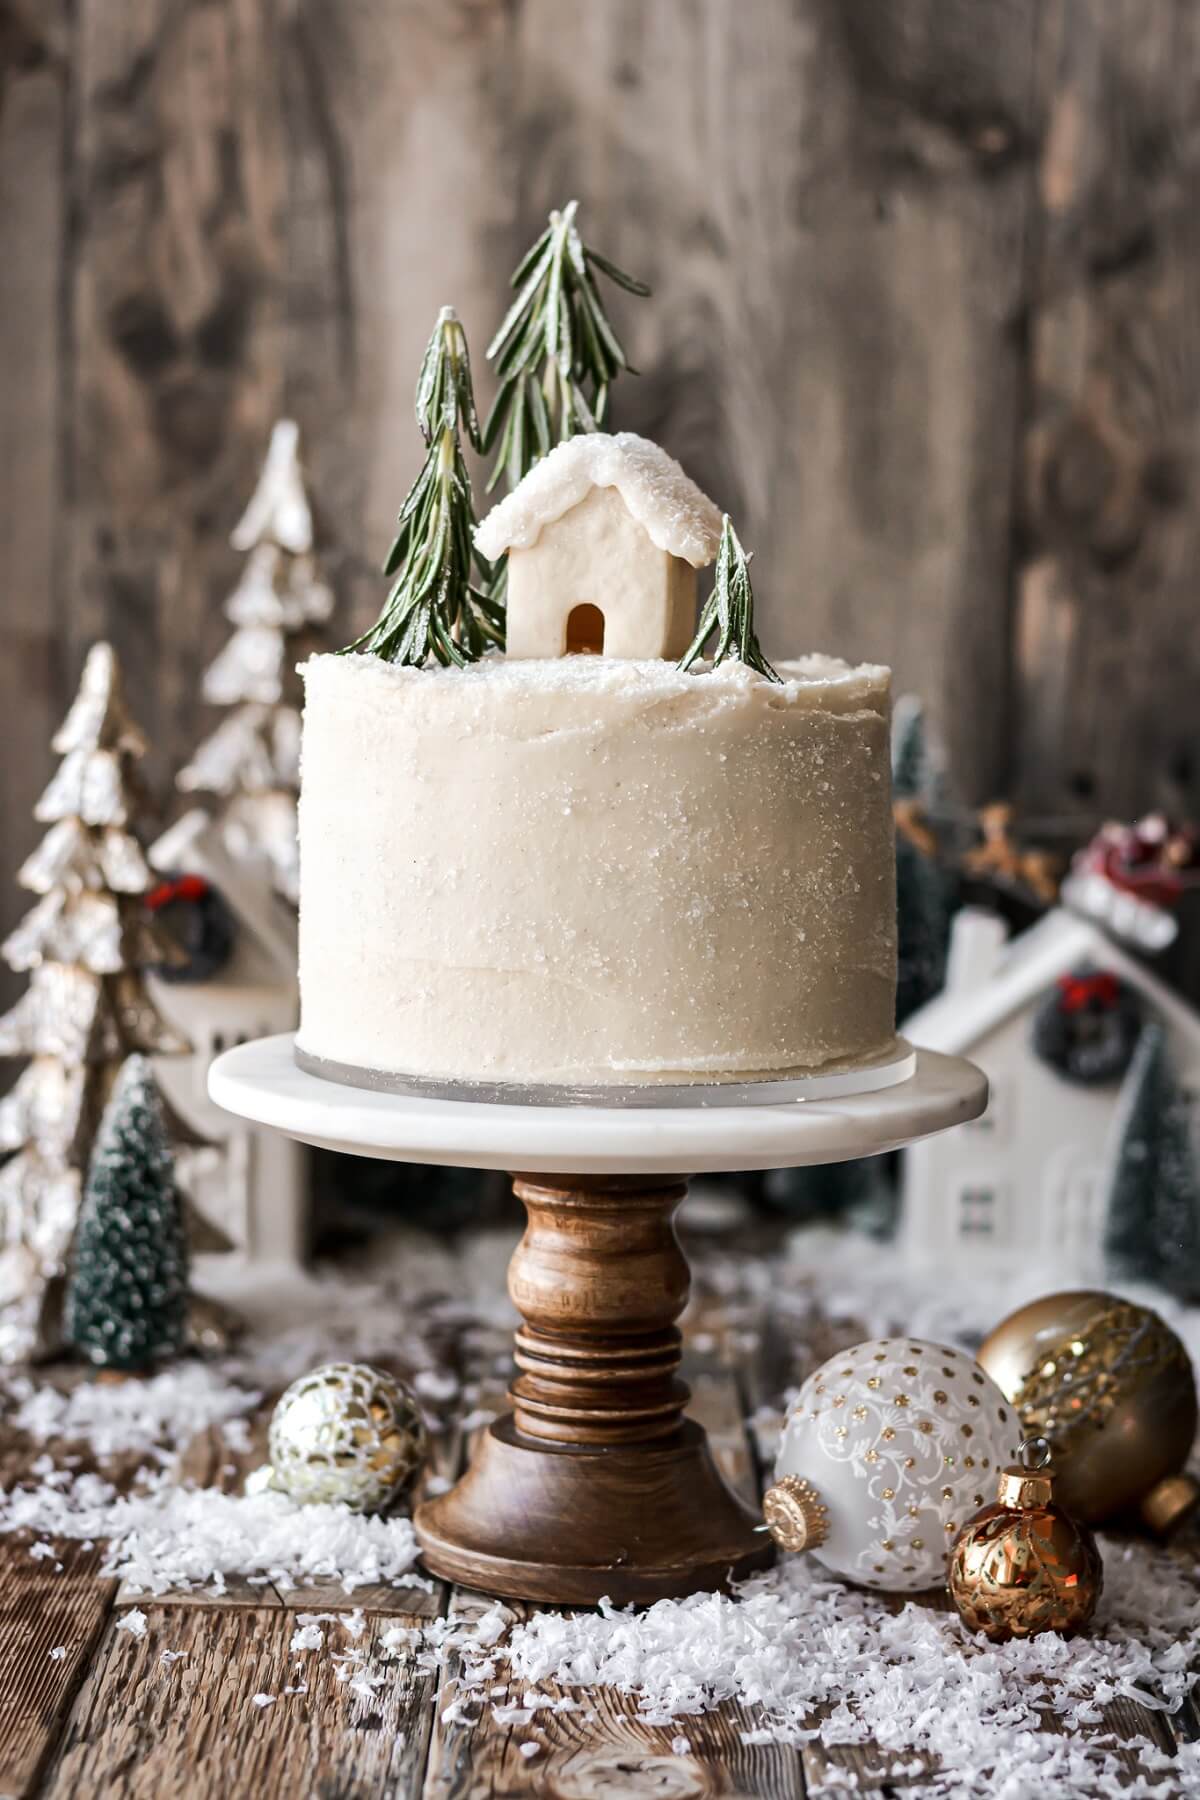
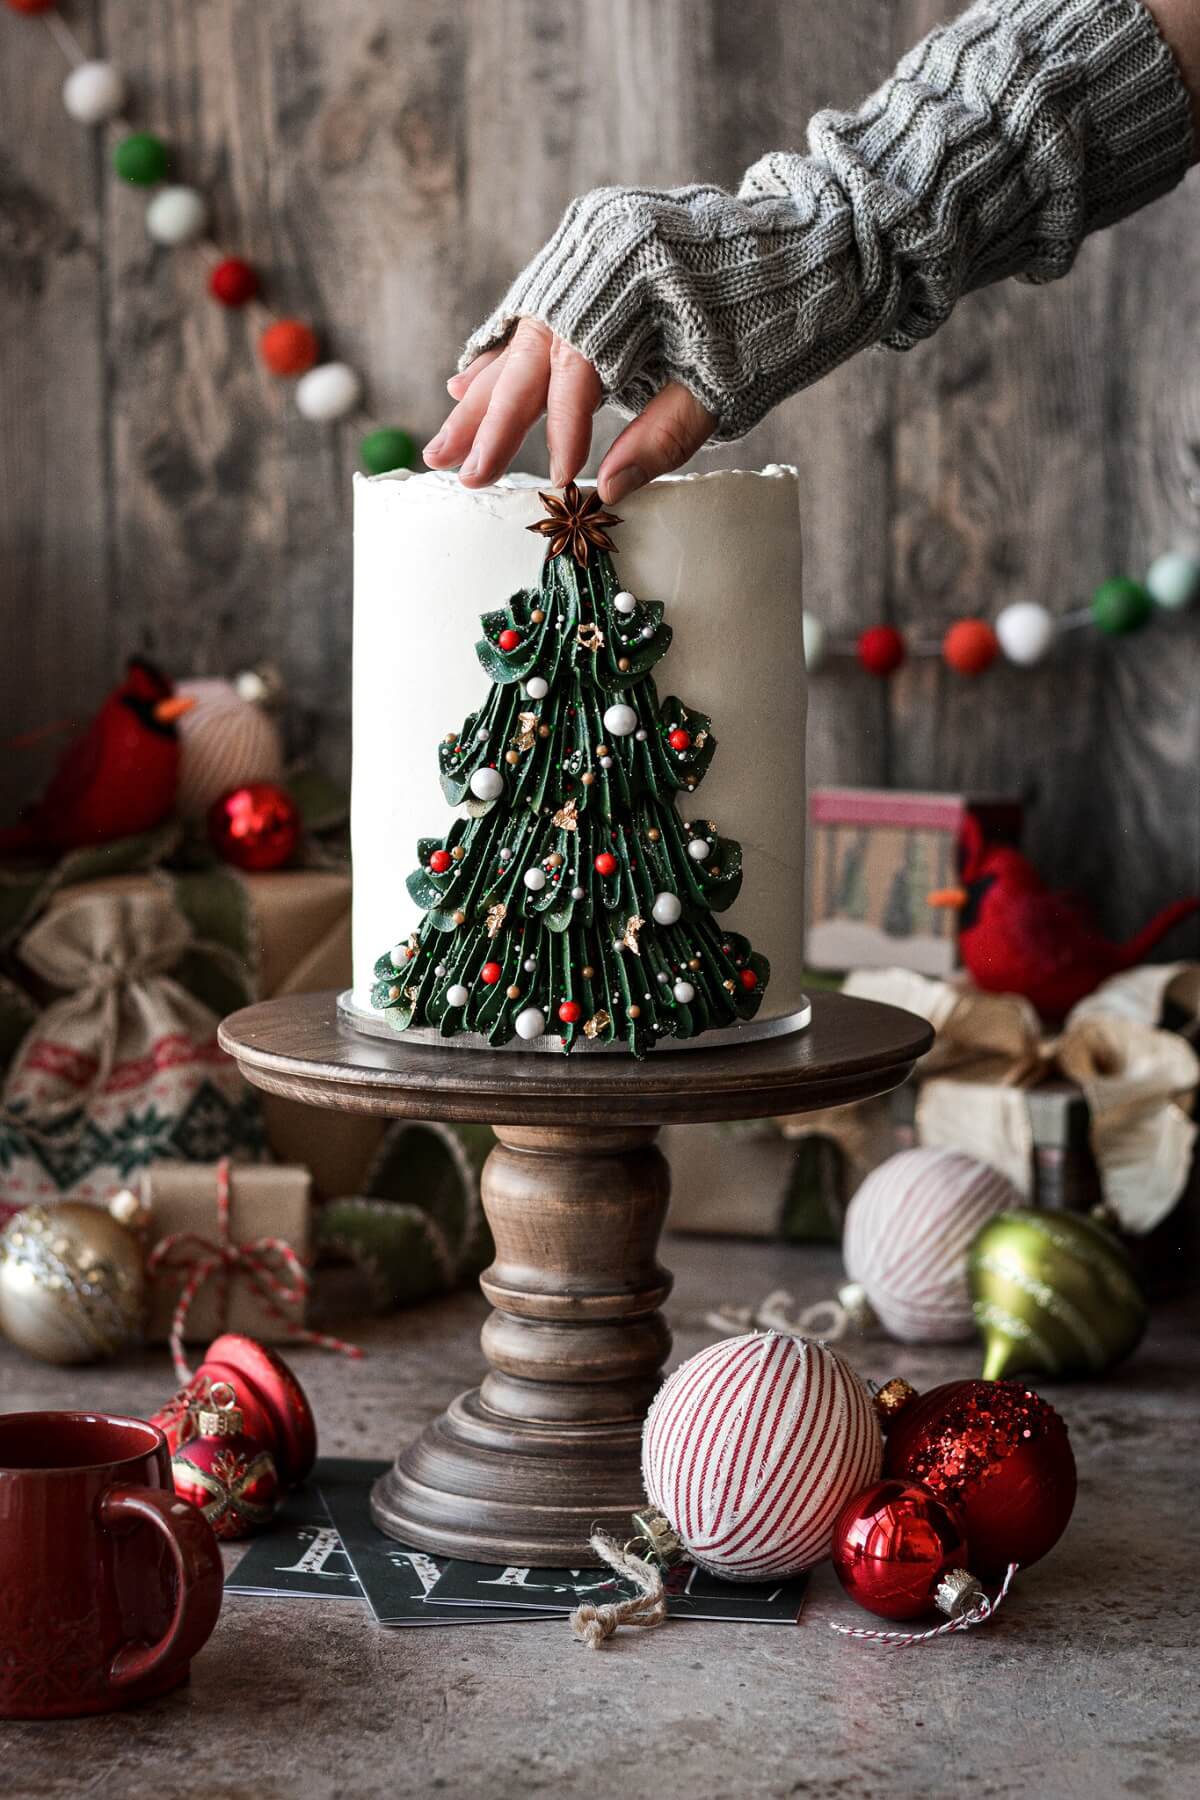
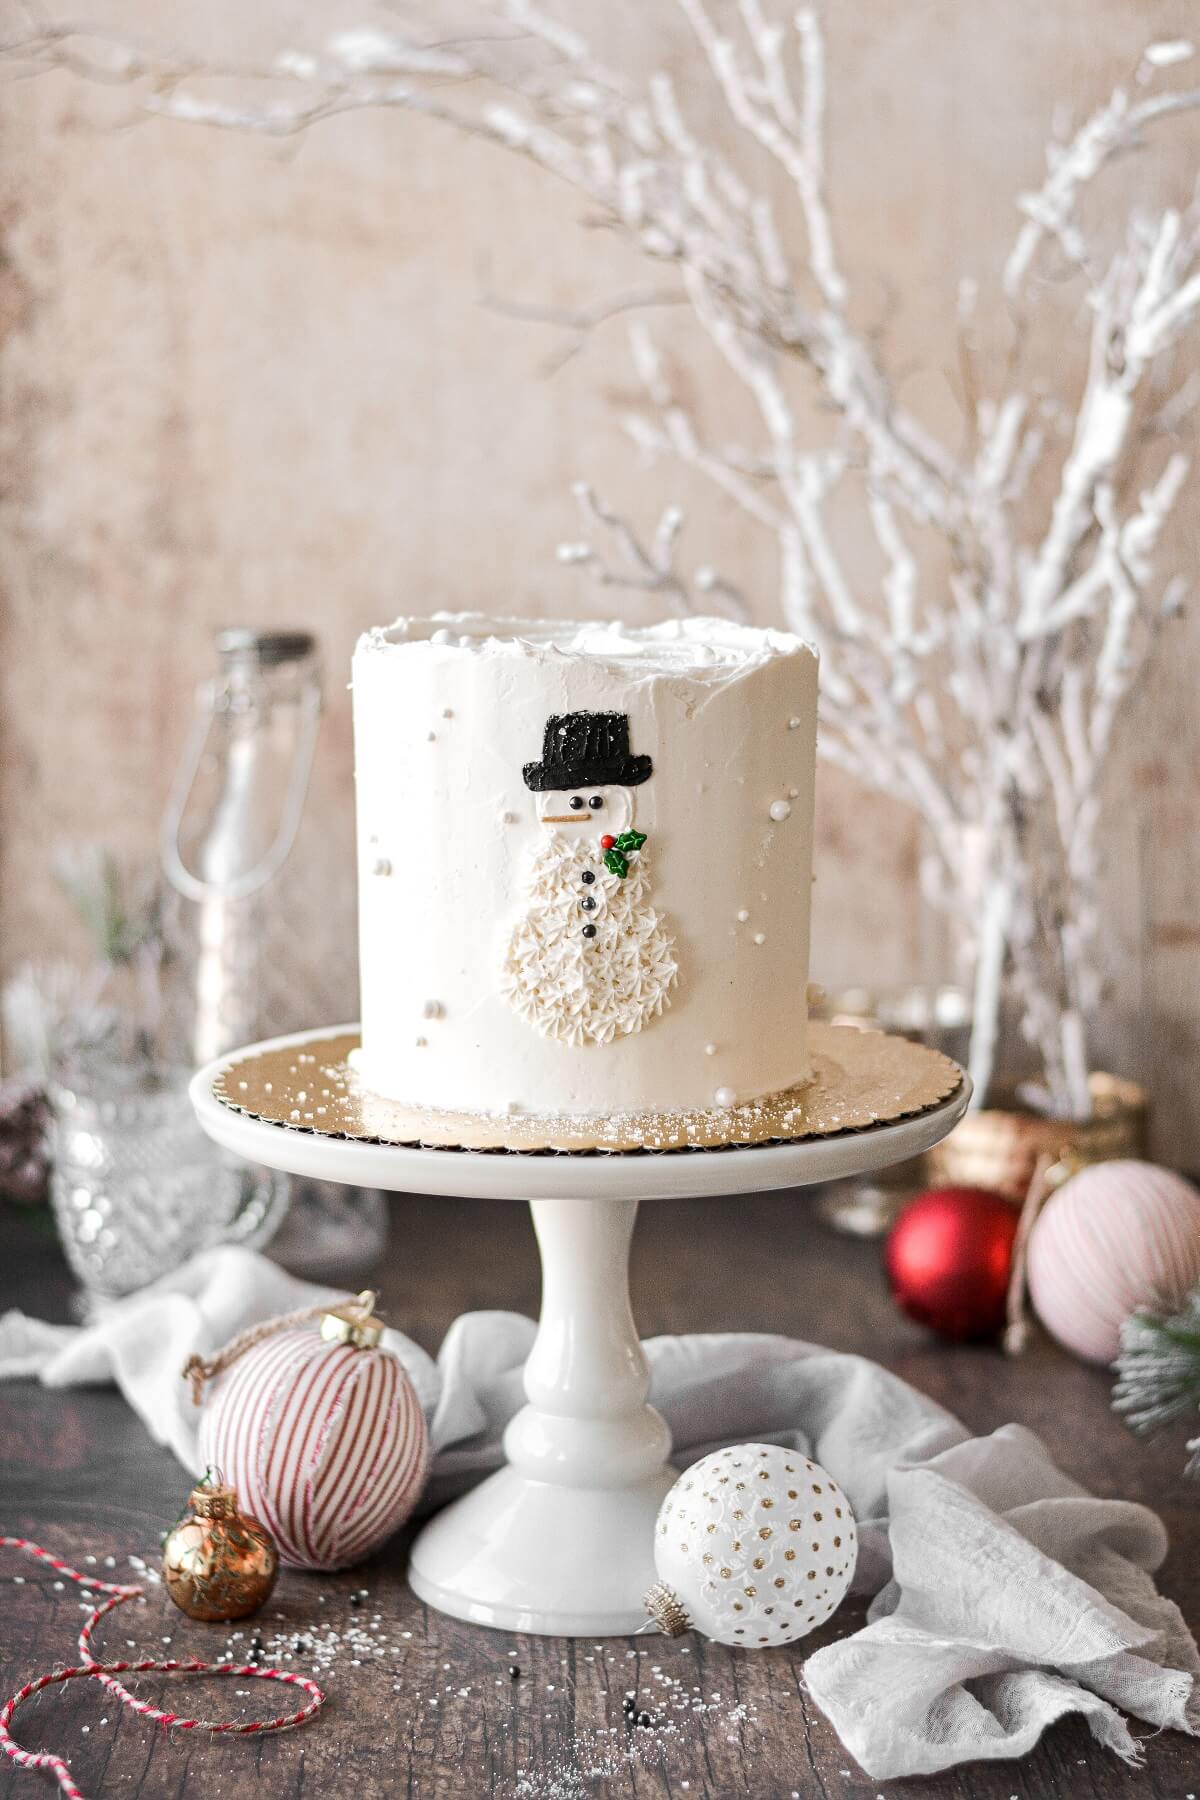
You might also love this gingerbread cake with mascarpone buttercream, buttercream Christmas tree cake tutorial, and a snowman Christmas cake.
This site contains affiliate links. As an Amazon associate, I earn from qualifying purchases. This means that I may make a small commission if you purchase a product using those links. This in no way affects my opinion of those products and services. All opinions expressed on this site are my own.
Why You’ll Love This Recipe
Step by Step Photos. If you’re intimidated by the red and white striped buttercream technique, I’ve included step-by-step photos today to help guide you through the cake decorating process.
High Altitude Tested. The vanilla peppermint cake recipe is high altitude tested, for Denver’s altitude of 5,280 feet.
Versatile Recipe. See the recipe variations section below for instructions on making a 4-layer cake instead of 6, or scaling this recipe up to a larger 8 inch cake. And if you don’t want to make the red and white cake layers inside, no problem! Red velvet cake would work well, and a chocolate cake with the peppermint striped buttercream would be fantastic. Who wouldn’t love a chocolate peppermint cake for a Christmas party?
See the recipe card at the end of the post for the full ingredients list and instructions.
Tools and Equipment
- 6-inch Cake Pans. You’ll need six 6-inch cake pans for today’s recipe. You could also get away with using 3 pans and then splitting the layers. I use Fat Daddio’s aluminum cake pans to bake all of my cakes.
- Stand Mixer with Paddle Attachment. While you can mix up the vanilla cake batter with a bowl and whisk, you need a stand mixer to make buttercream.
- Piping Bags + Couplers. You’ll need two 16-inch piping bags plus couplers for piping the red and white striped buttercream on your candy cane cake.
- Piping Tips. I used tip #12, which is a medium sized round tip.
- Cake Decorating Turntable. This is a necessary cake decorating tool, especially when doing a technique like striped buttercream. You’ll need to spin the cake as you smooth out the buttercream, and this is impossible to do without a turntable.
- Bench Scraper. To smooth the sides of the cake and blend the stripes together.
Ingredients
Cake
- Vanilla Cake. I used my trusted high altitude vanilla cake recipe, which I scaled down to 2/3 its size for today’s cake design. It’s easy to make, with a soft, fluffy moist texture and delicious vanilla flavor.
- Food Coloring. If you’re doing the red and white cake layers, you’ll need “super red” gel food coloring and “bright white” food coloring, which helps to brighten the white layers so they don’t look ivory or yellow.
Buttercream
- Perfect American Buttercream. You’ll need 4x my recipe for American buttercream. I recommend making it with half butter/half shortening for a white color.
- Peppermint Extract. I flavored the buttercream with peppermint extract, which gives the cake plenty of peppermint flavor, without needing to add it to the cake batter, too. Do not use mint extract, which tastes like spearmint.
Decorating
- Food Coloring. For the buttercream stripes, we’ll be using “super red” gel food coloring and “bright white” food coloring again.
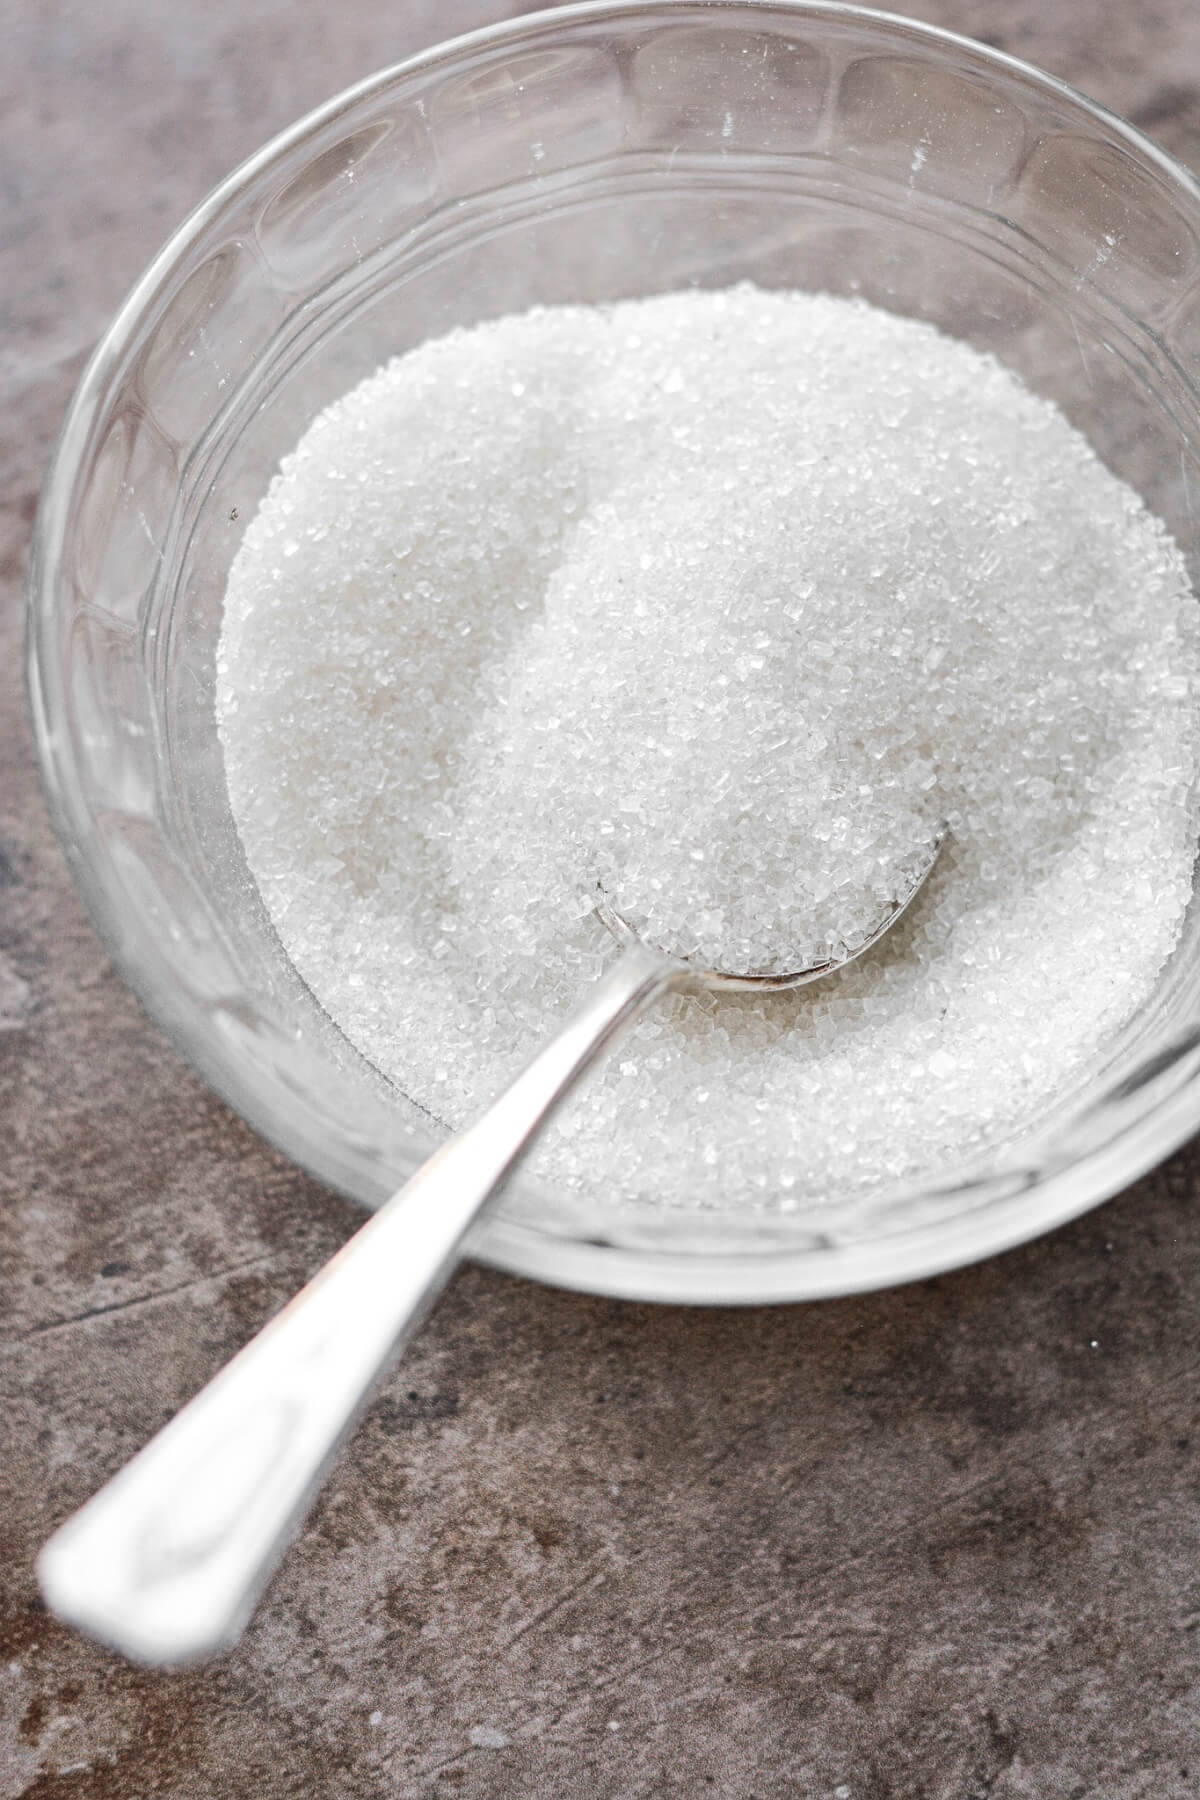
- Sugar. I scattered a combination of granulated sugar and coarse white sparkling sugar over the cake. The sugar makes it sparkle, and also helps to hide less-than-perfect stripes.
- Candy. An assortment of candy canes in different sizes, peppermint sticks, peppermint candy and lollipops will look beautiful on top of the candy cane cake.

Instructions
Bake the cake.
- Preheat the oven to 350 F, and position a rack in the center of the oven. Spray the bottoms of six 6-inch cake pans with non-stick baking spray.
- In a large bowl, sift together the flour, sugar, baking powder and salt. Whisk to combine well.
- In another large bowl, whisk together the eggs, egg white, buttermilk, melted butter, oil and vanilla extract until smooth.
- Add the dry ingredients to the wet, and whisk until mostly combined and smooth, about 10-15 seconds. Don’t over-mix, since you’ll be mixing the batter again when you add the food coloring.
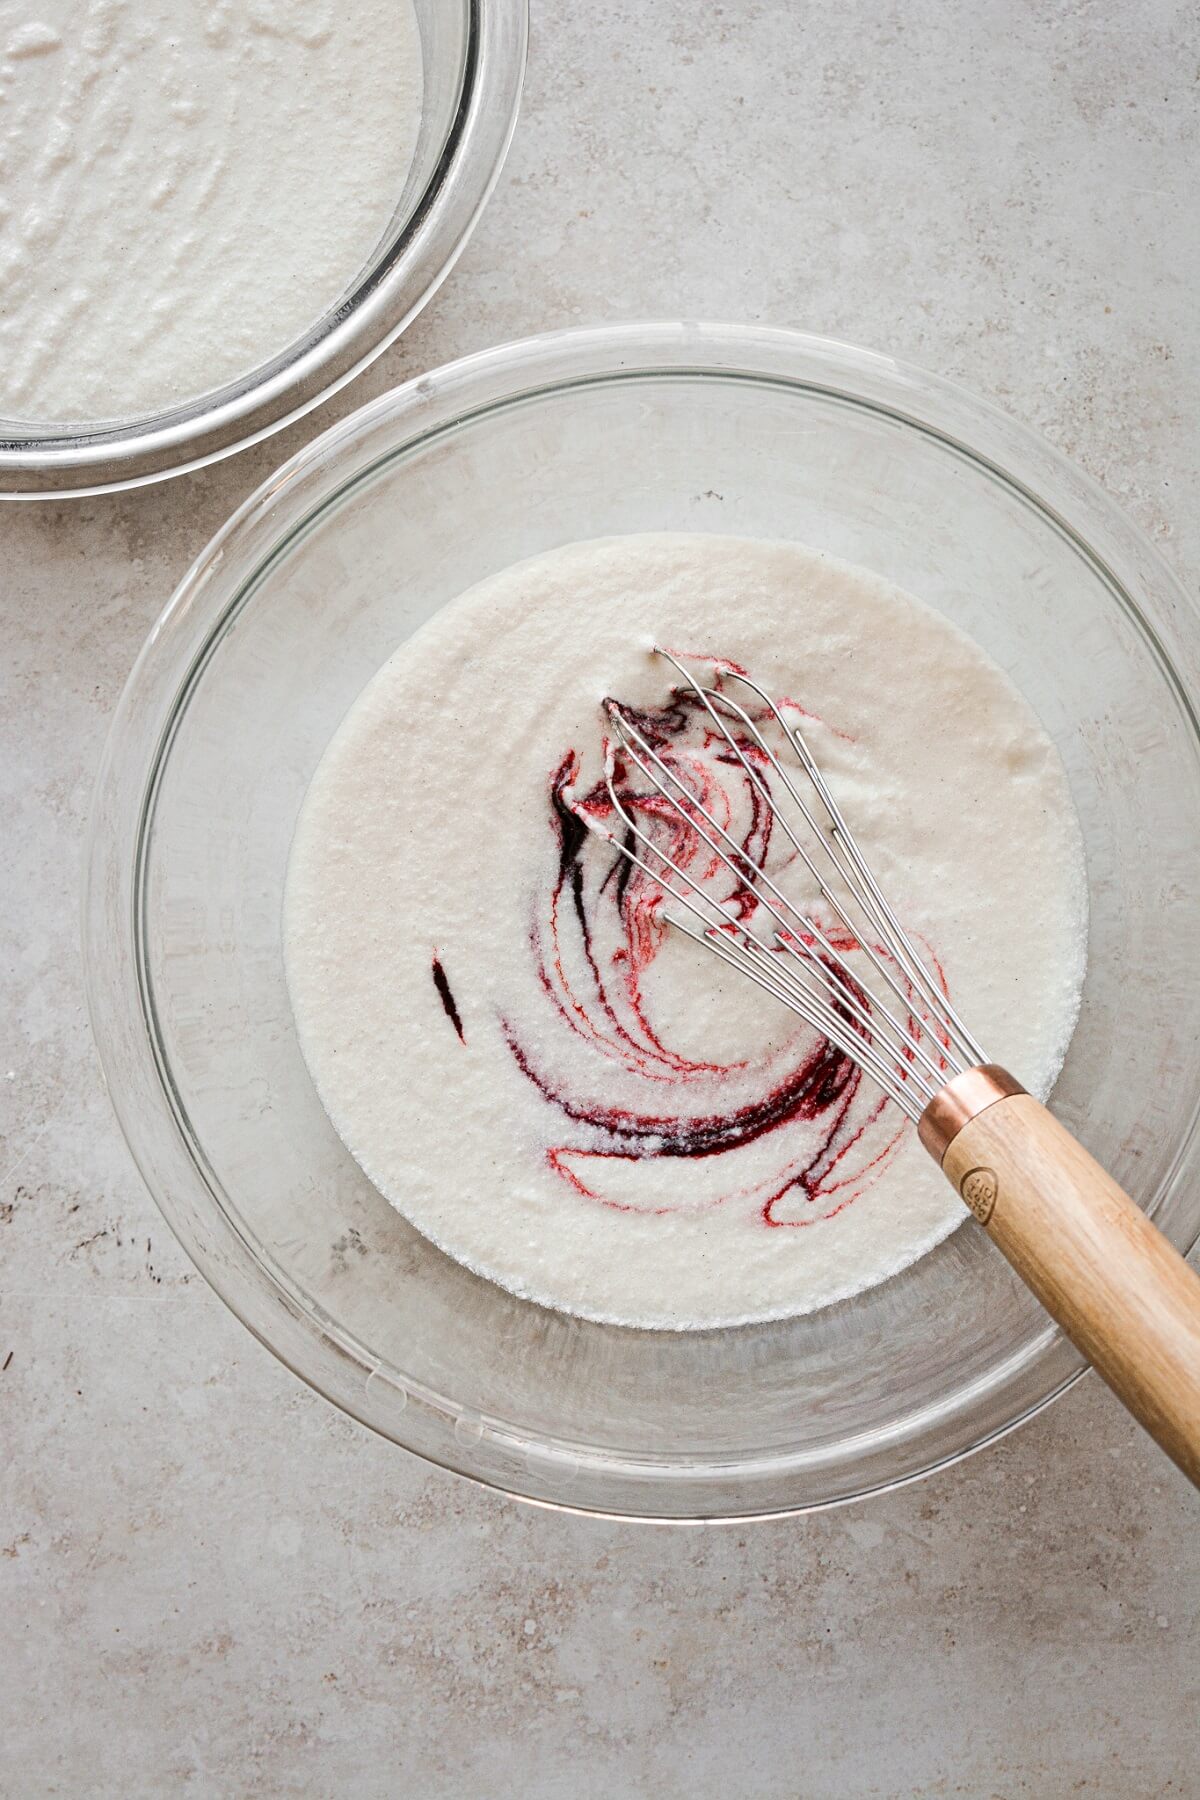
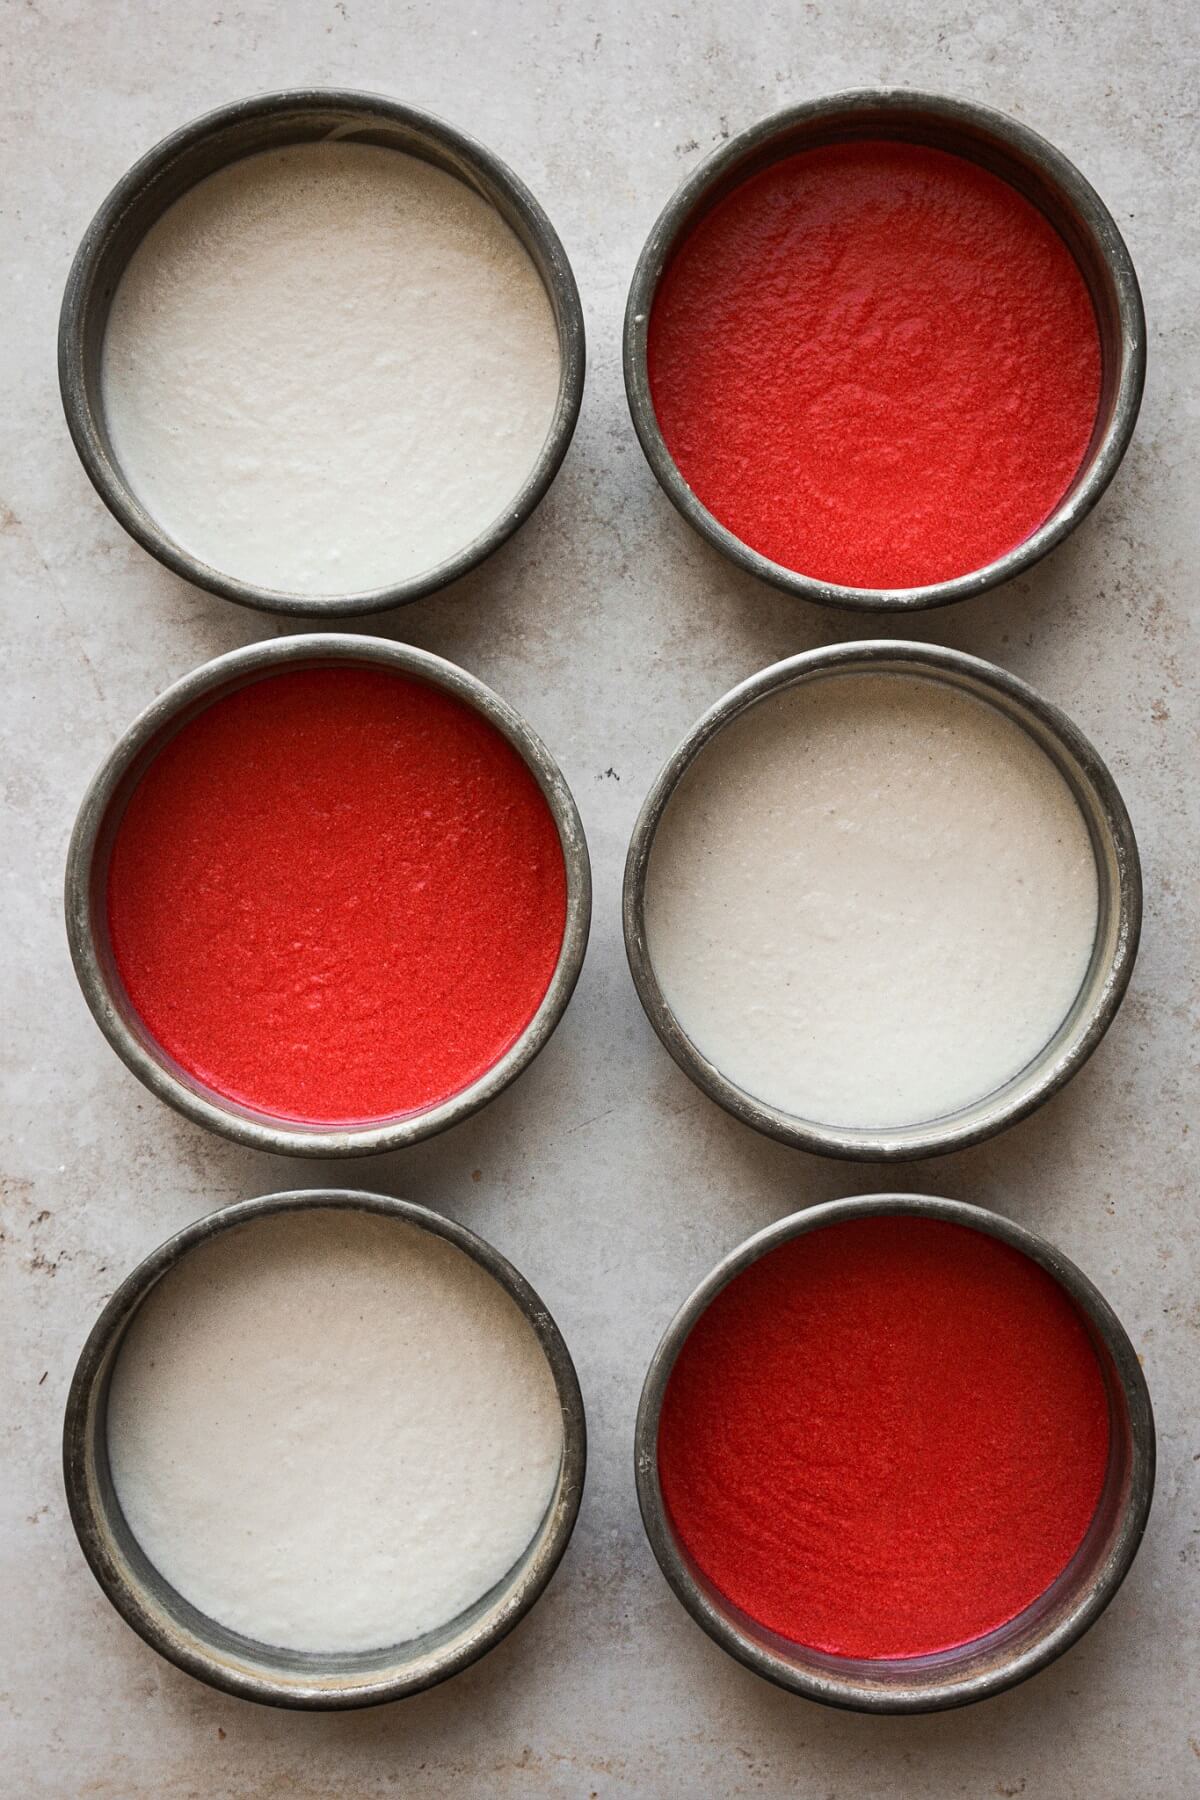
- Divide the batter evenly between two bowls. Add the red food coloring to one bowl of batter, and the white food coloring to the other bowl. Stir the coloring into the batter until combined.

- Divide the red cake batter between 3 cake pans, then divide the white cake batter between 3 cake pans.
- Bake on the center oven rack for about 13-15 minutes, until the centers spring back when lightly touched. Since there’s a small amount of batter in each pan, the layers will be fairly thin.
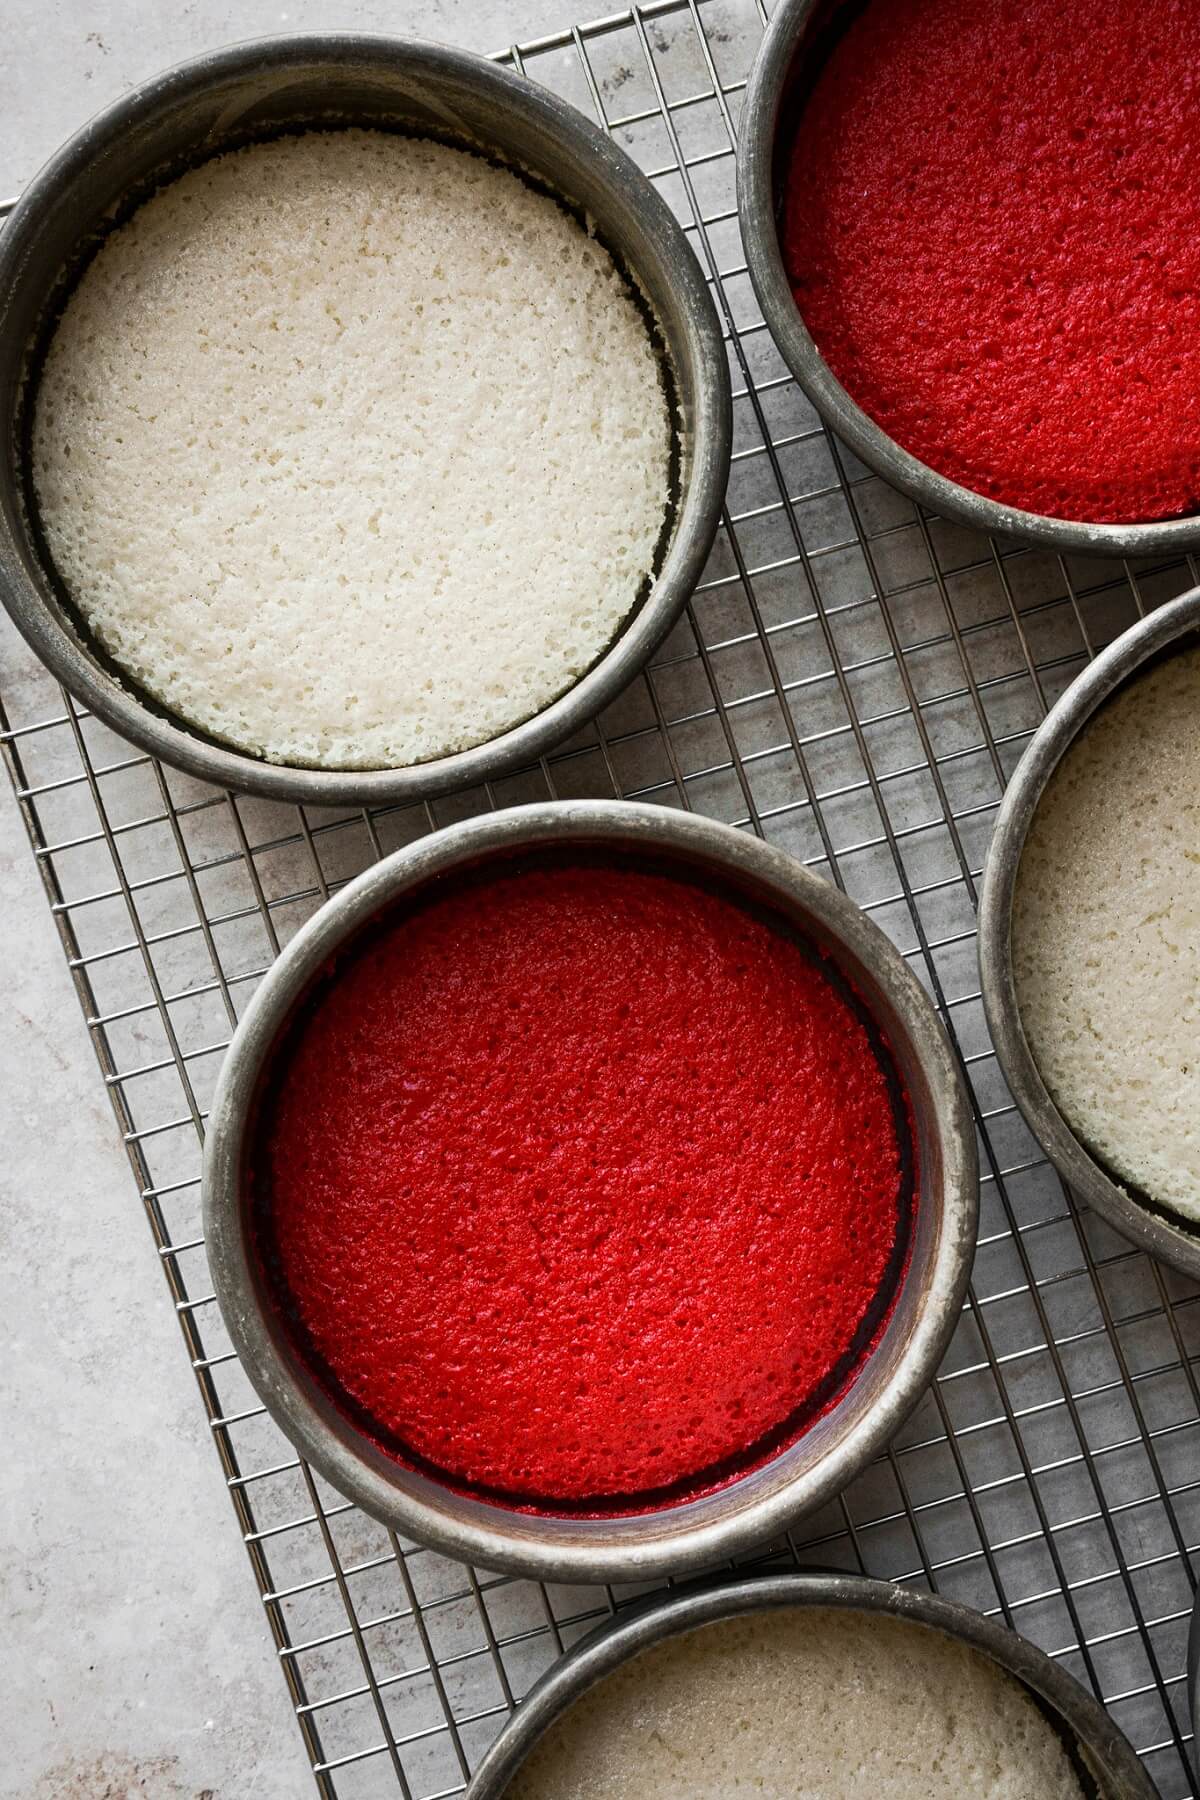
- Cool the cakes in the pans before assembling and frosting.
Make the buttercream.
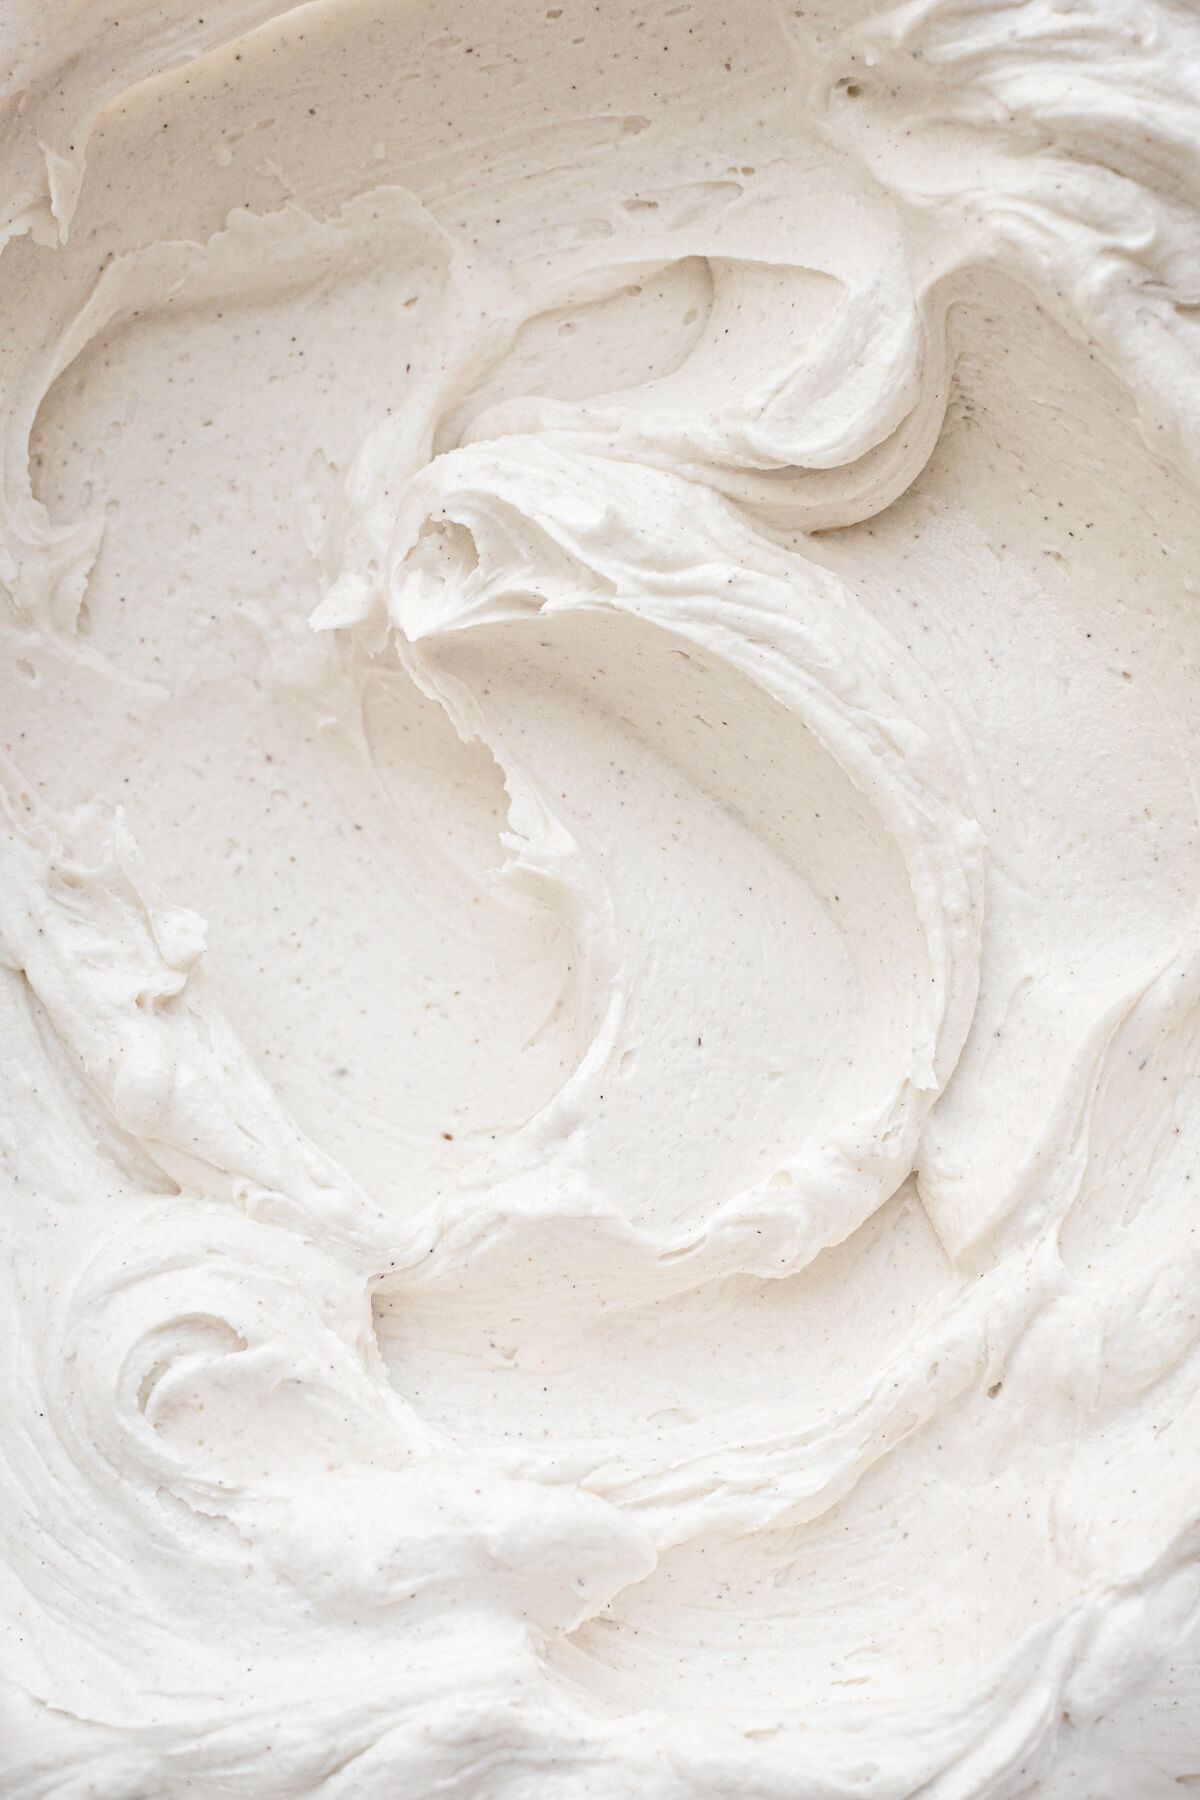
- In the bowl of your stand mixer fitted with the paddle attachment, beat the butter and shortening for 1 minute until smooth.
- With the mixer on low, add the powdered sugar by spoonfuls, the meringue powder, and the salt, mixing until combined but clumpy.
- Add the vanilla and peppermint extracts. Increase speed to medium and whip for 4-5 minutes, until very light and fluffy, stopping to scrape the bowl down several times. Turn the speed down to “stir” and mix for 1 more minute.
Crumb coat the cake.
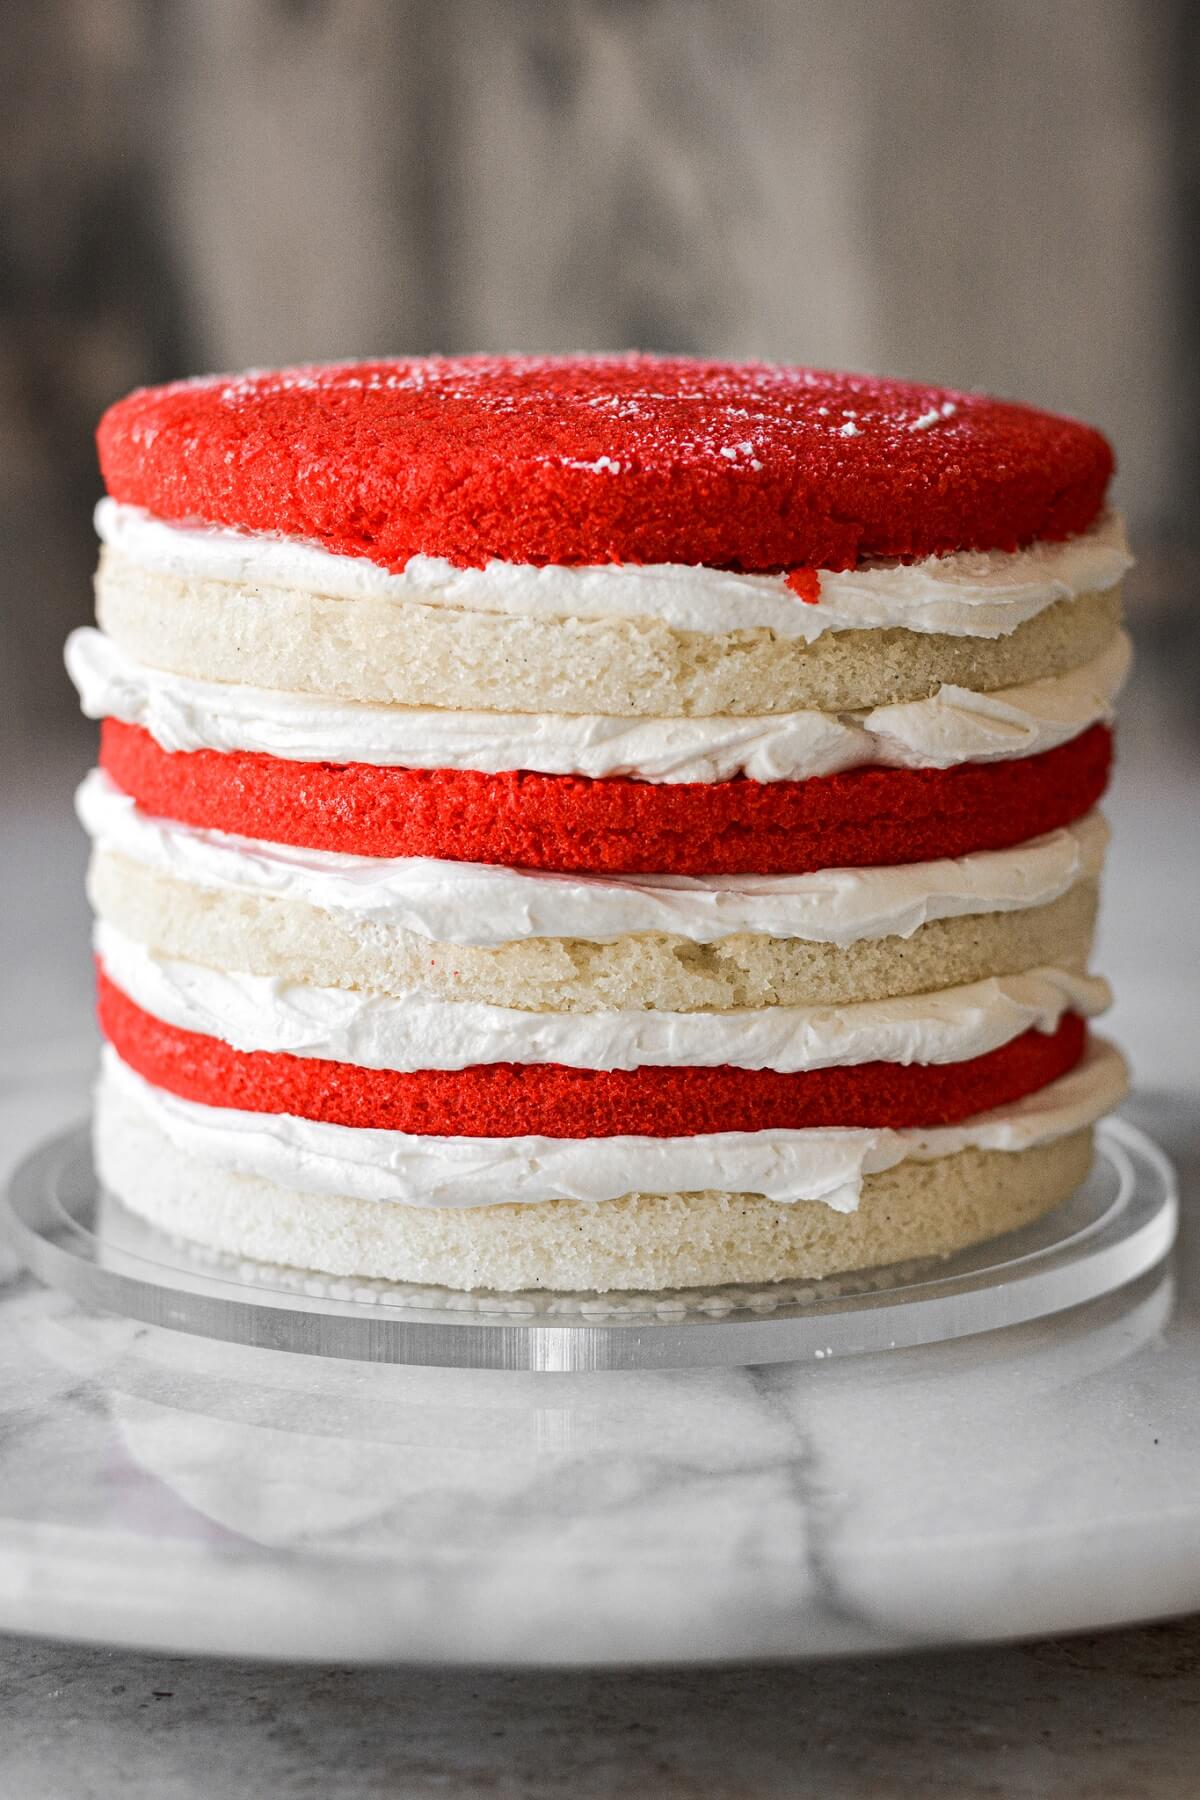
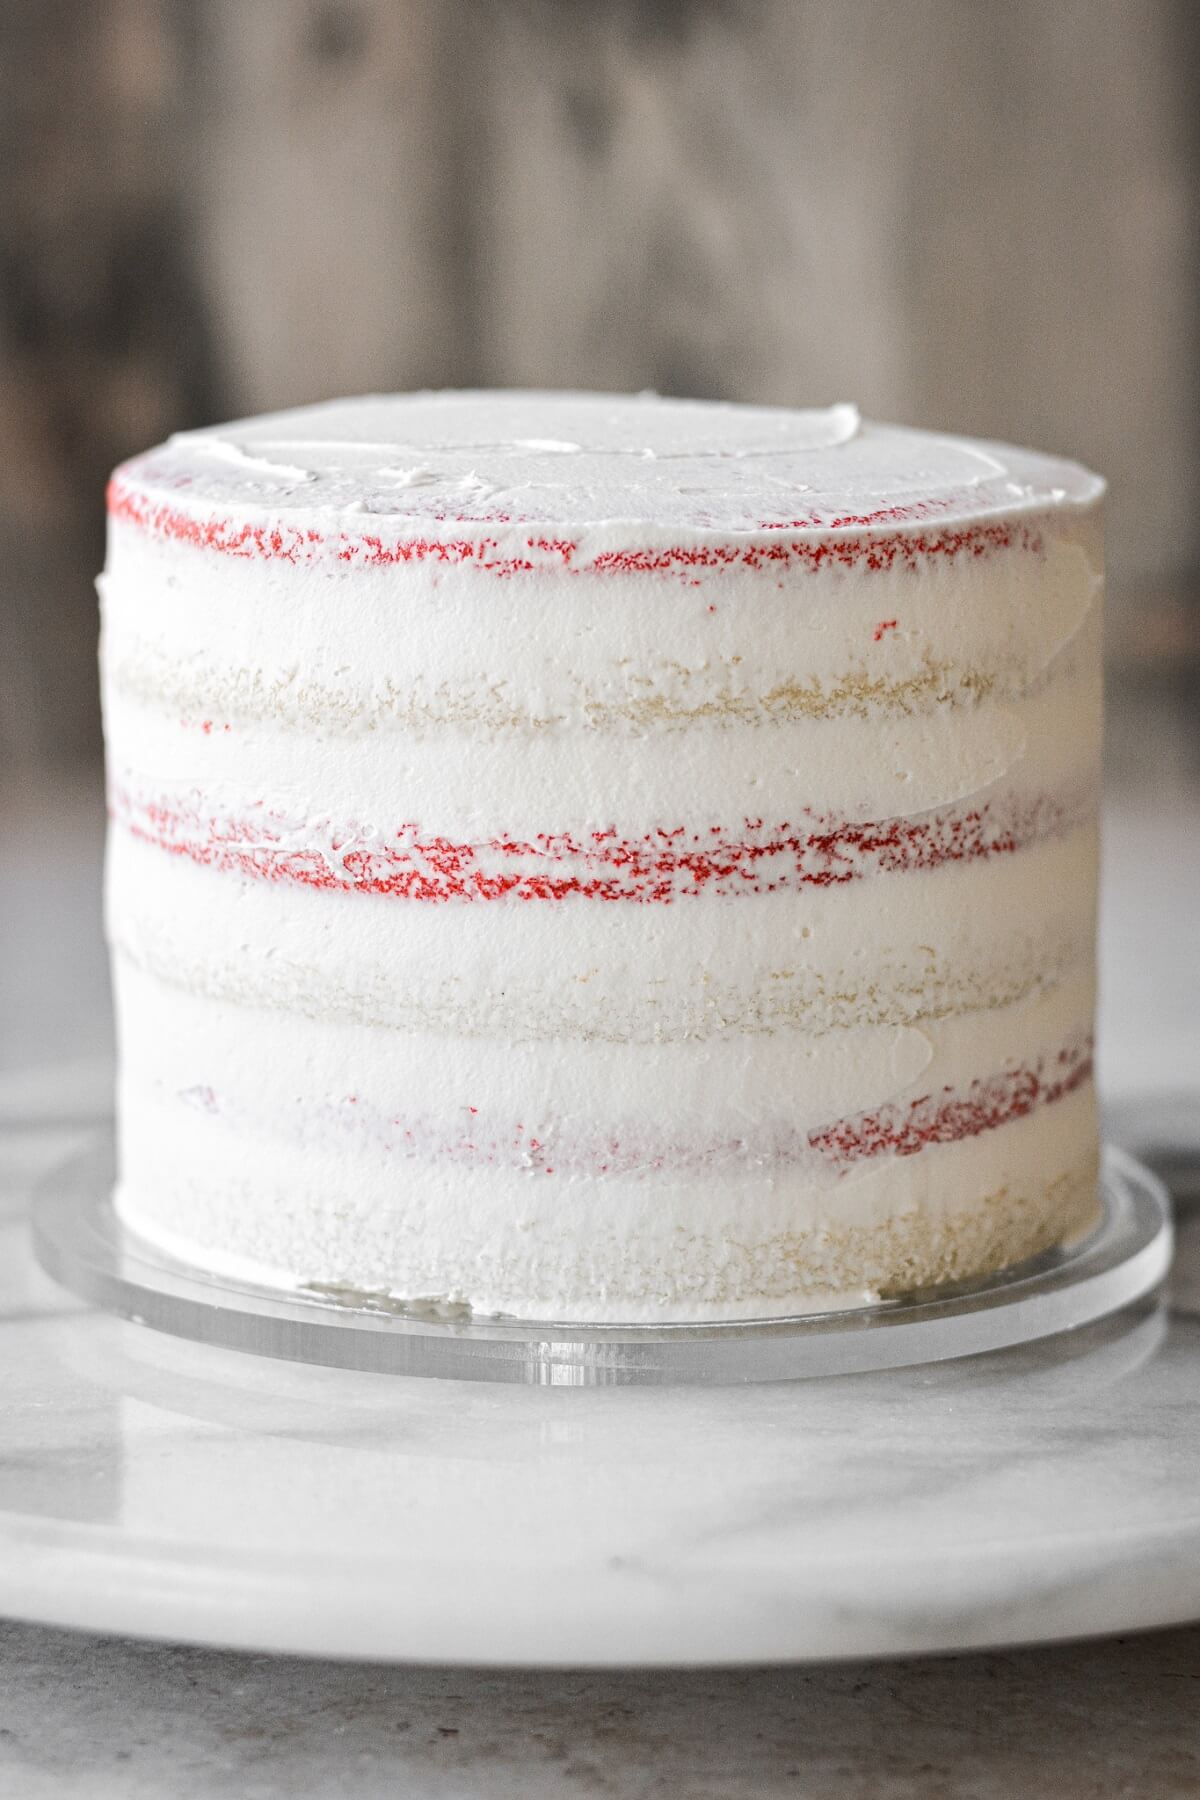
- Stack and fill the cooled cake layers with the buttercream, alternating the red and white cake layers as you assemble them.
- Frost the cake all over with a thin crumb coat of buttercream, and chill in the refrigerator for 30 minutes before you finish frosting and decorating the cake.
Color the buttercream red and white.
- While the crumb coated cake is chilling, divide the remaining buttercream evenly between two bowls.
- Use super red gel food coloring to tint one bowl of buttercream red. Even with a lot of food coloring, the red buttercream may have a coral or pink tint to it, but it will darken over the course of a few hours to a deeper red color.
- If your white buttercream looks too ivory, you can stir in a few drops of bright white food coloring to whiten and brighten it.
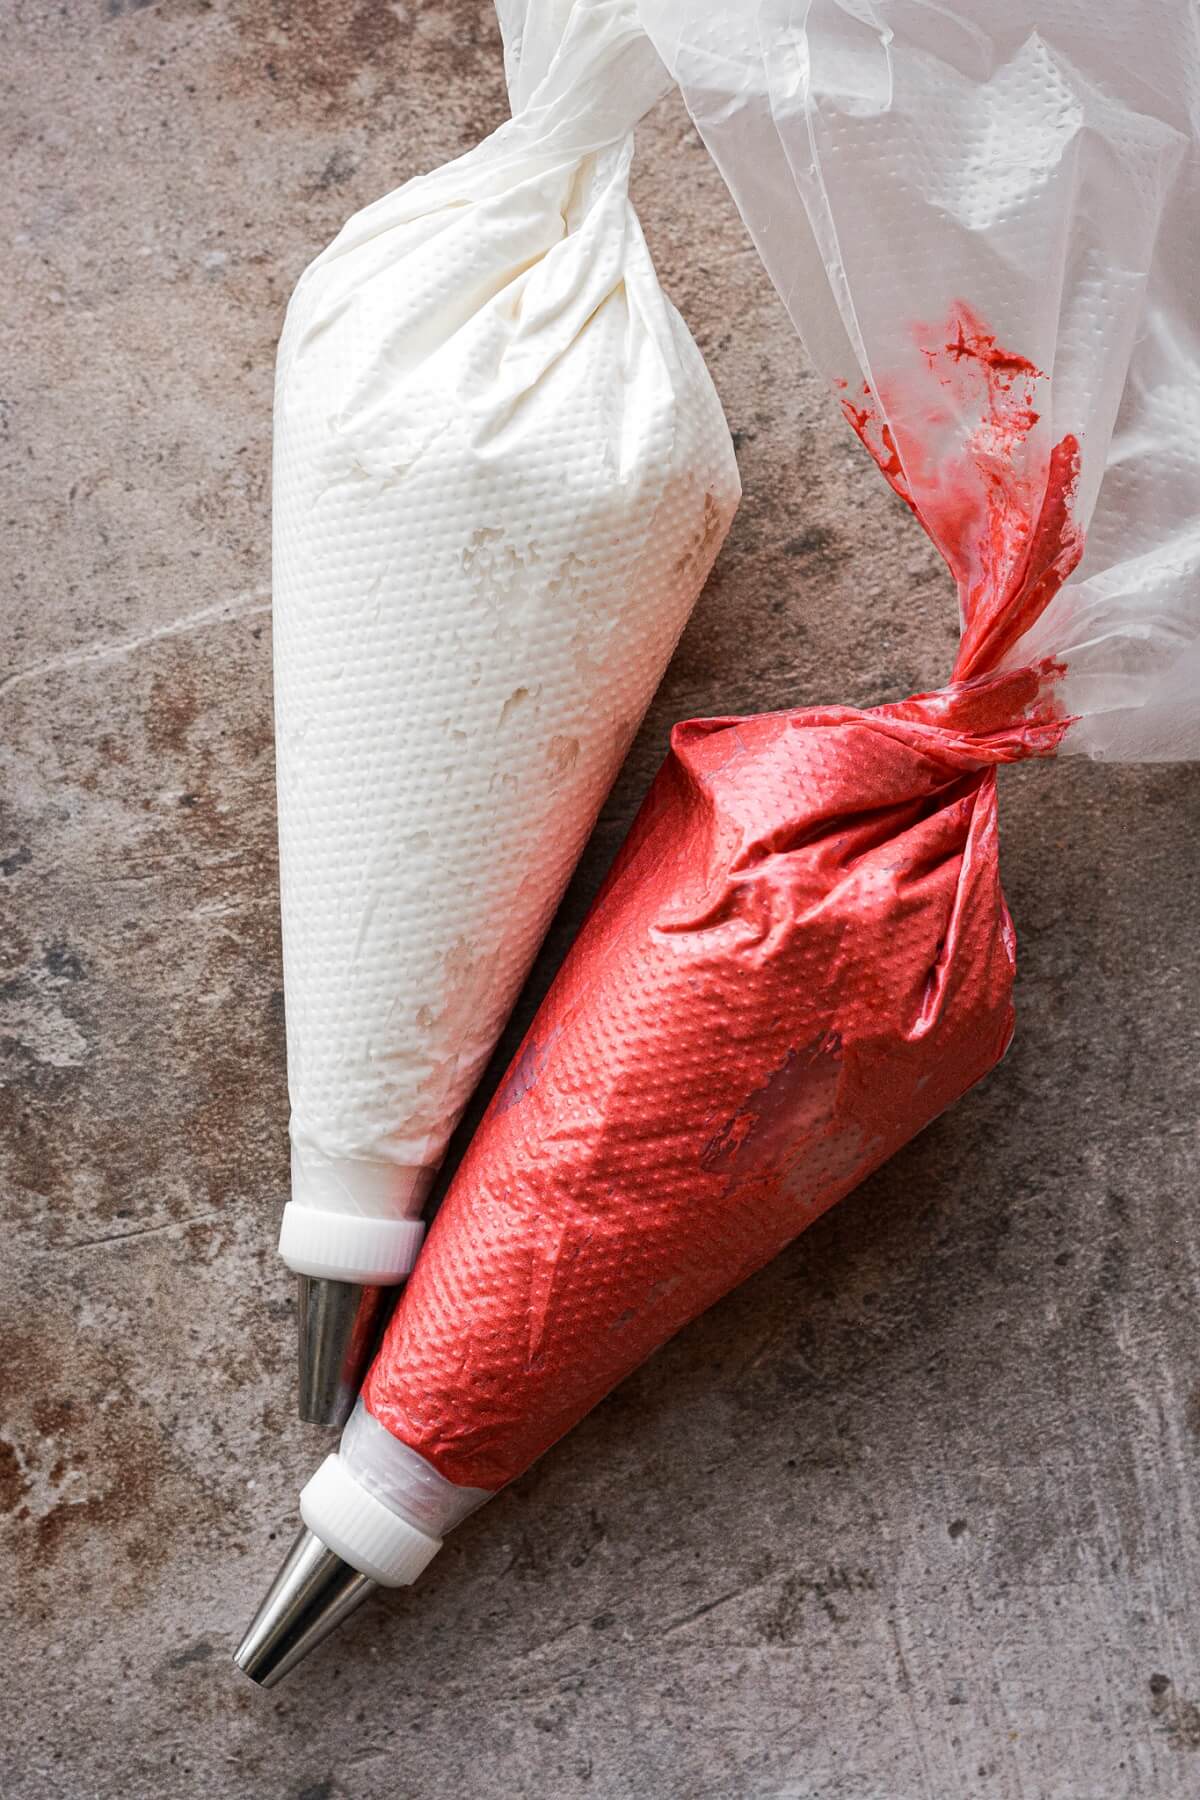
- Fit two piping bags with couplers and tips #12 (medium sized round tip). Fill one bag with white buttercream and one bag with red buttercream.
Pipe the buttercream stripes.
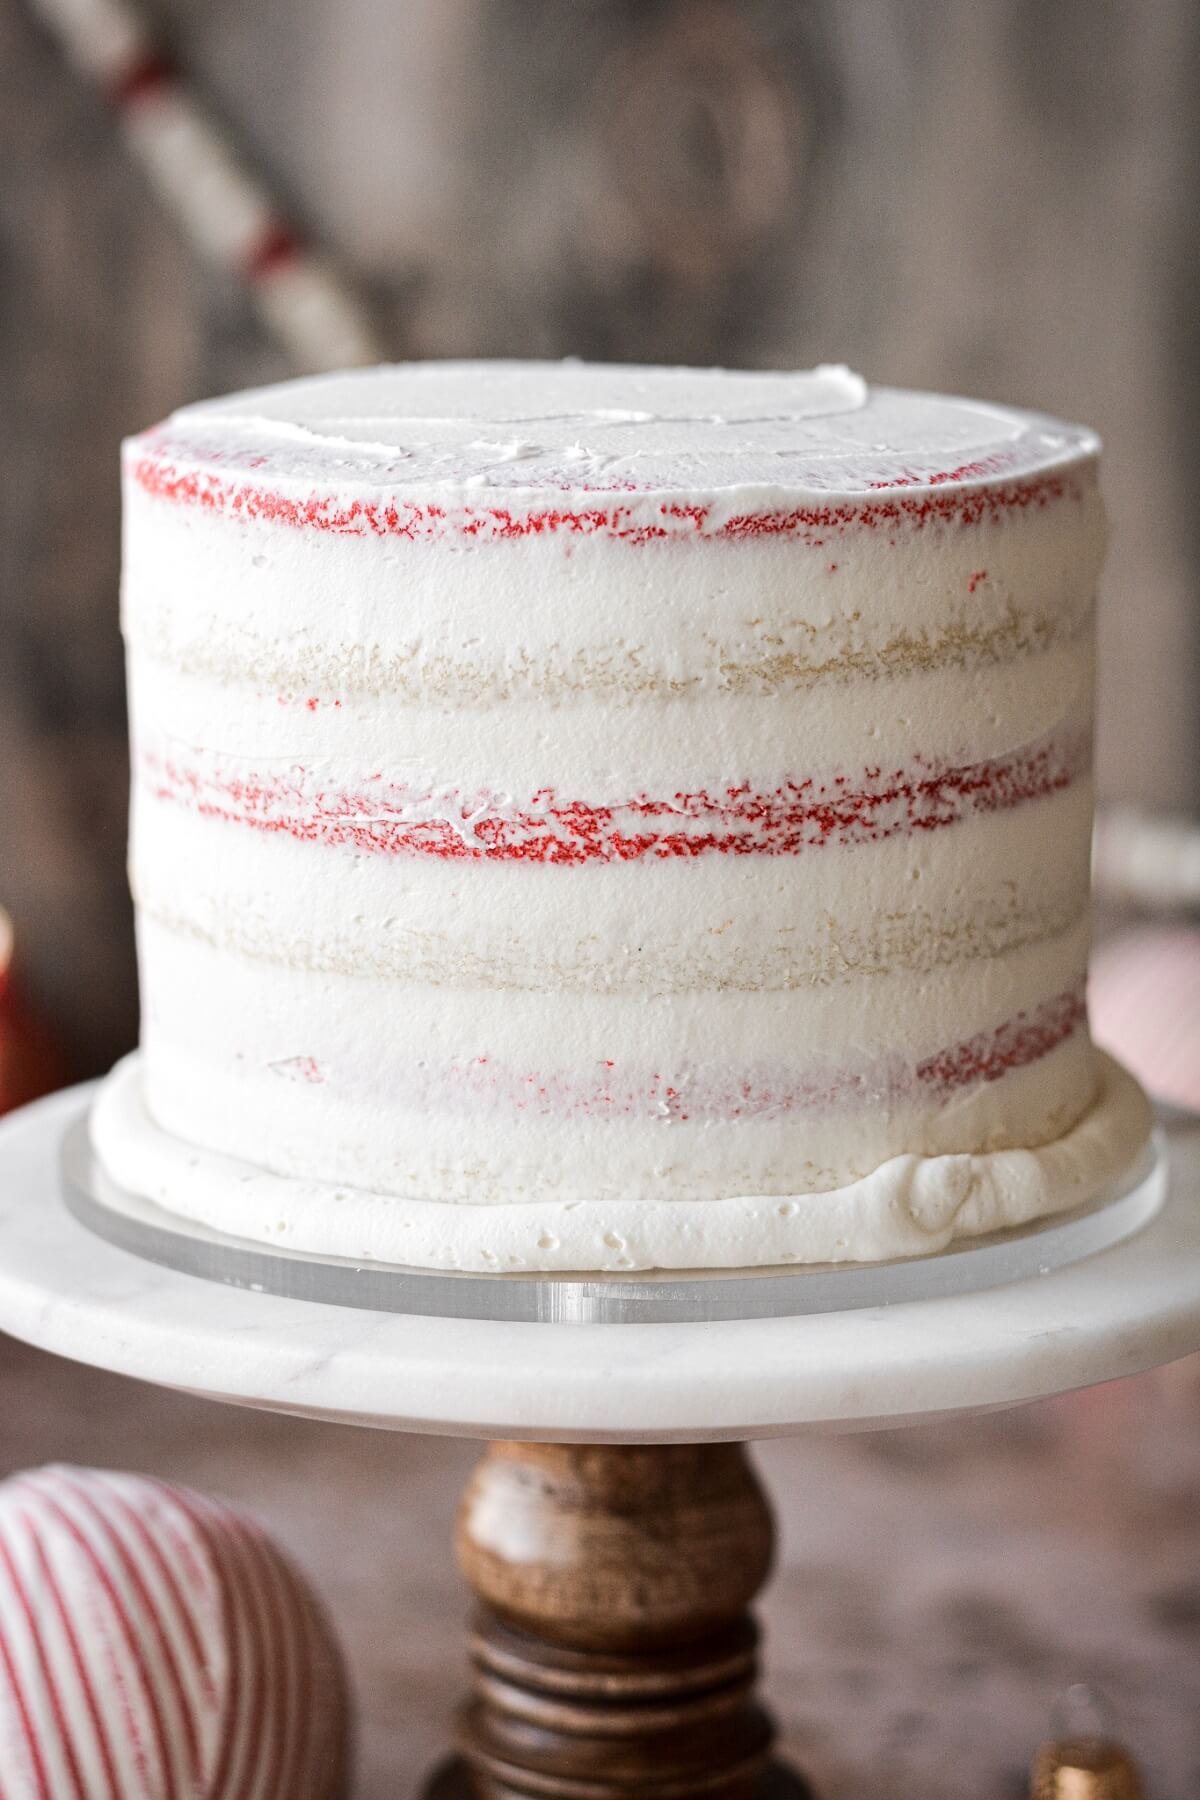
- Place your chilled, crumb coated cake on a cake decorating turntable.
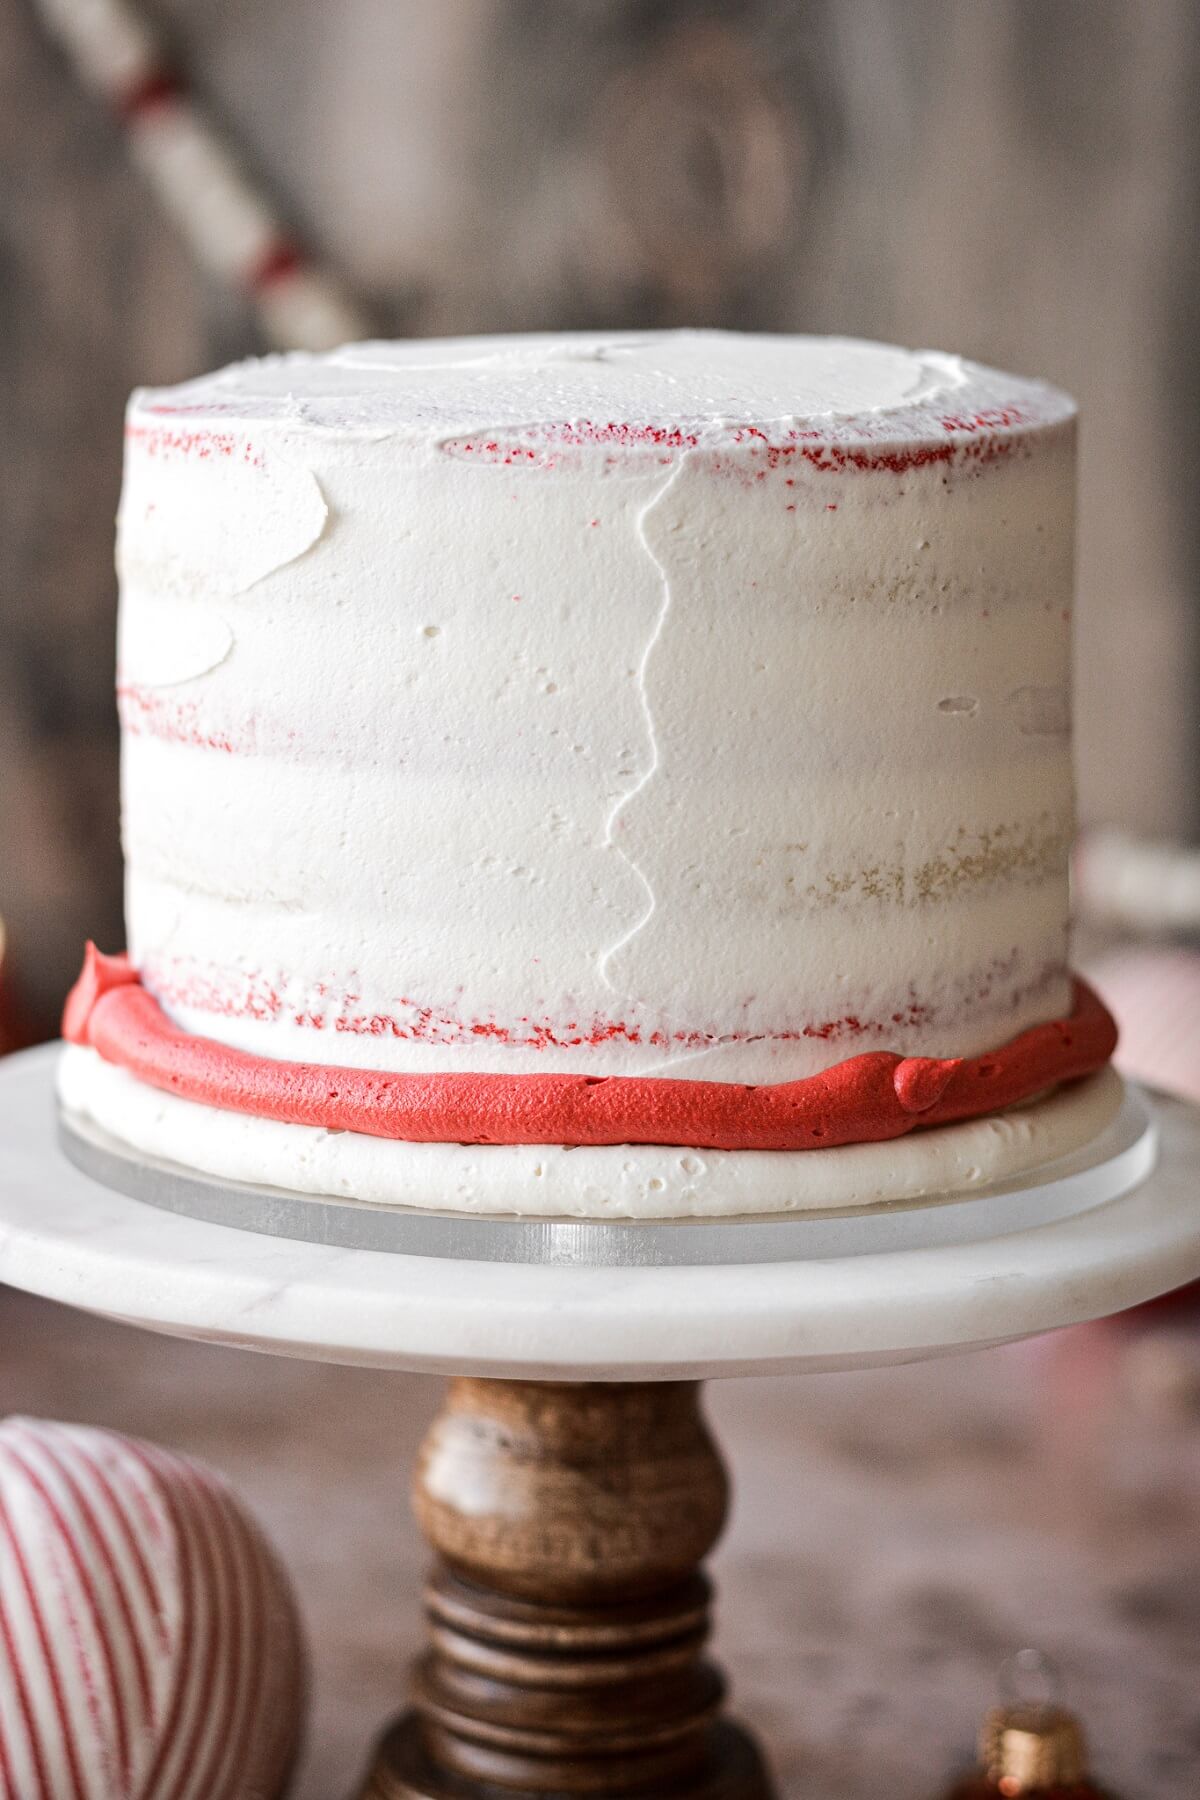
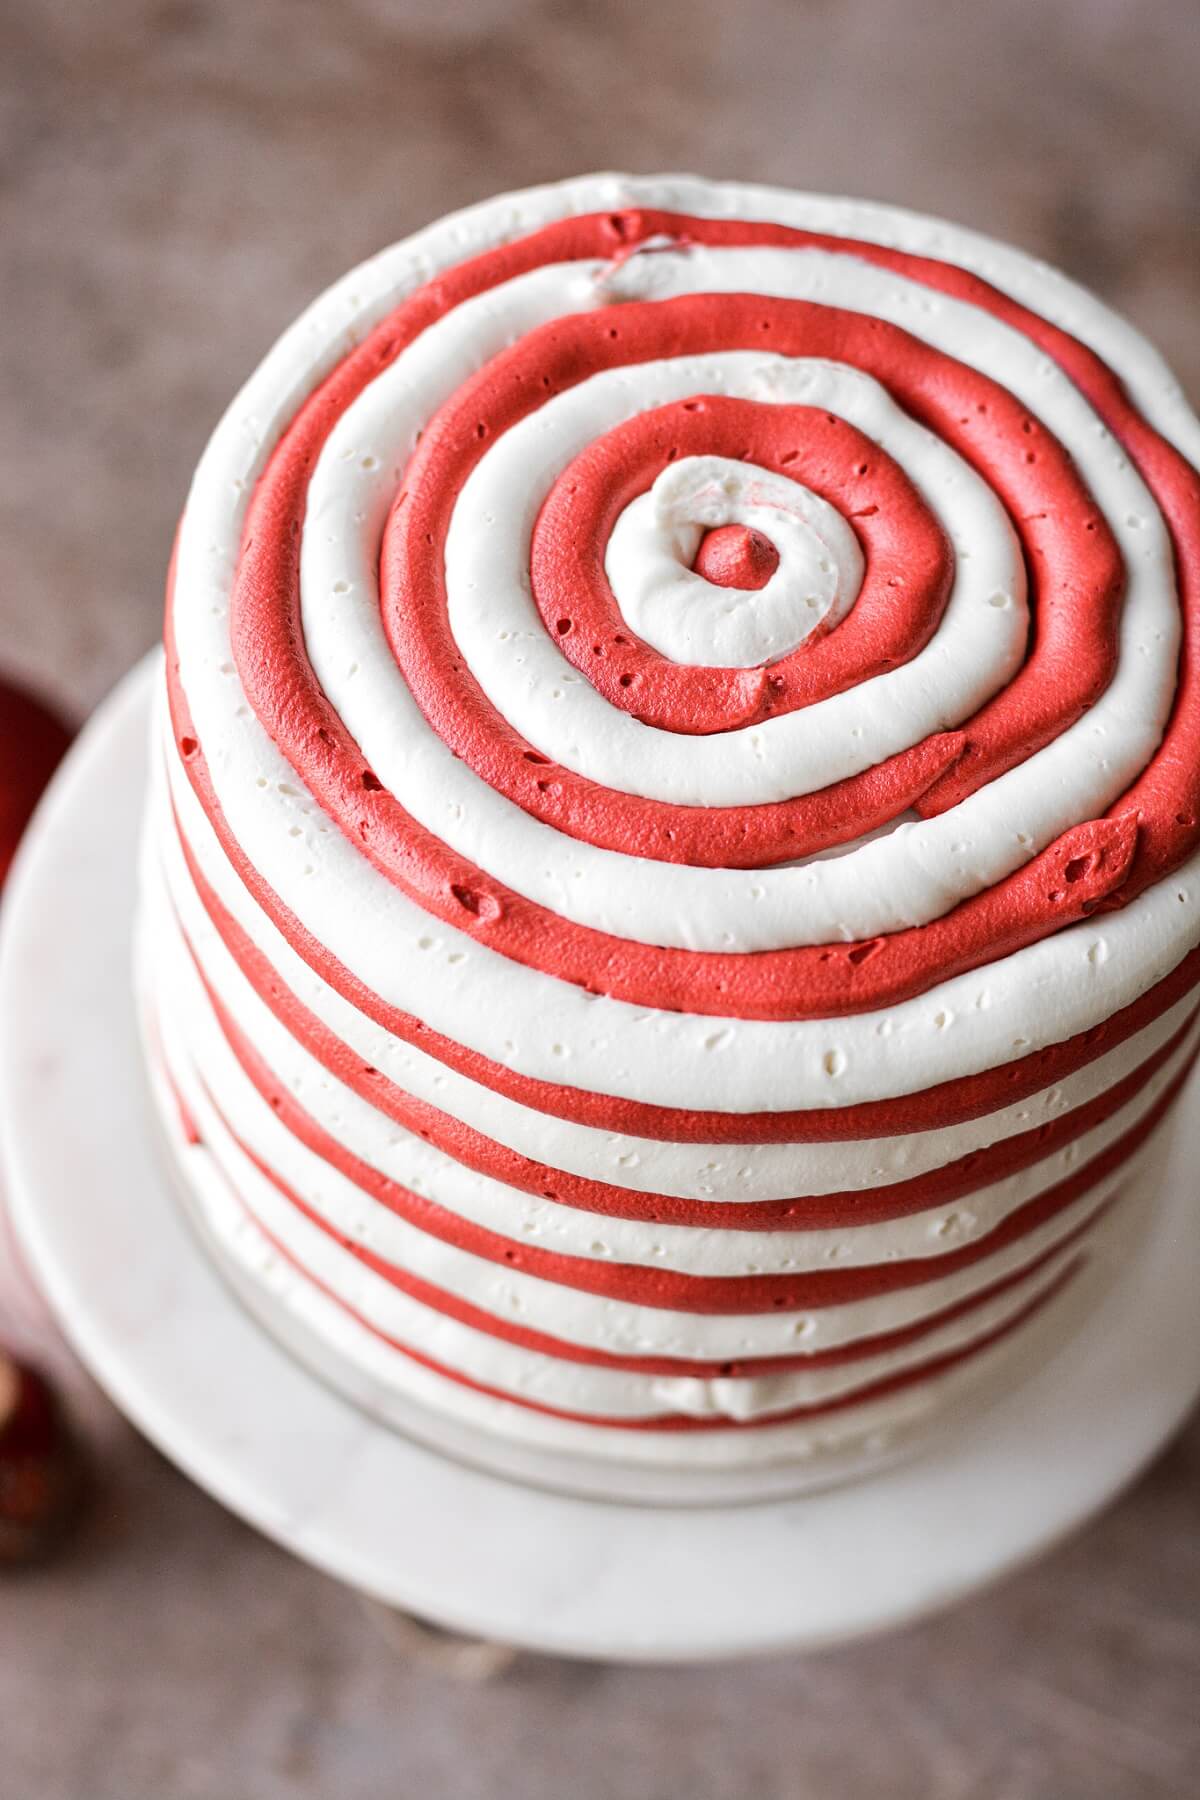
- Starting with the white buttercream, pipe a row of buttercream around the base of the cake. Then pipe a row of red buttercream right above the white. Continue to pipe rows of buttercream, alternating red and white as you work your way up the sides of the cake, ending on top.
- Be sure to pipe the rows close together, trying to keep them as straight and even as possible, and without any gaps in between.

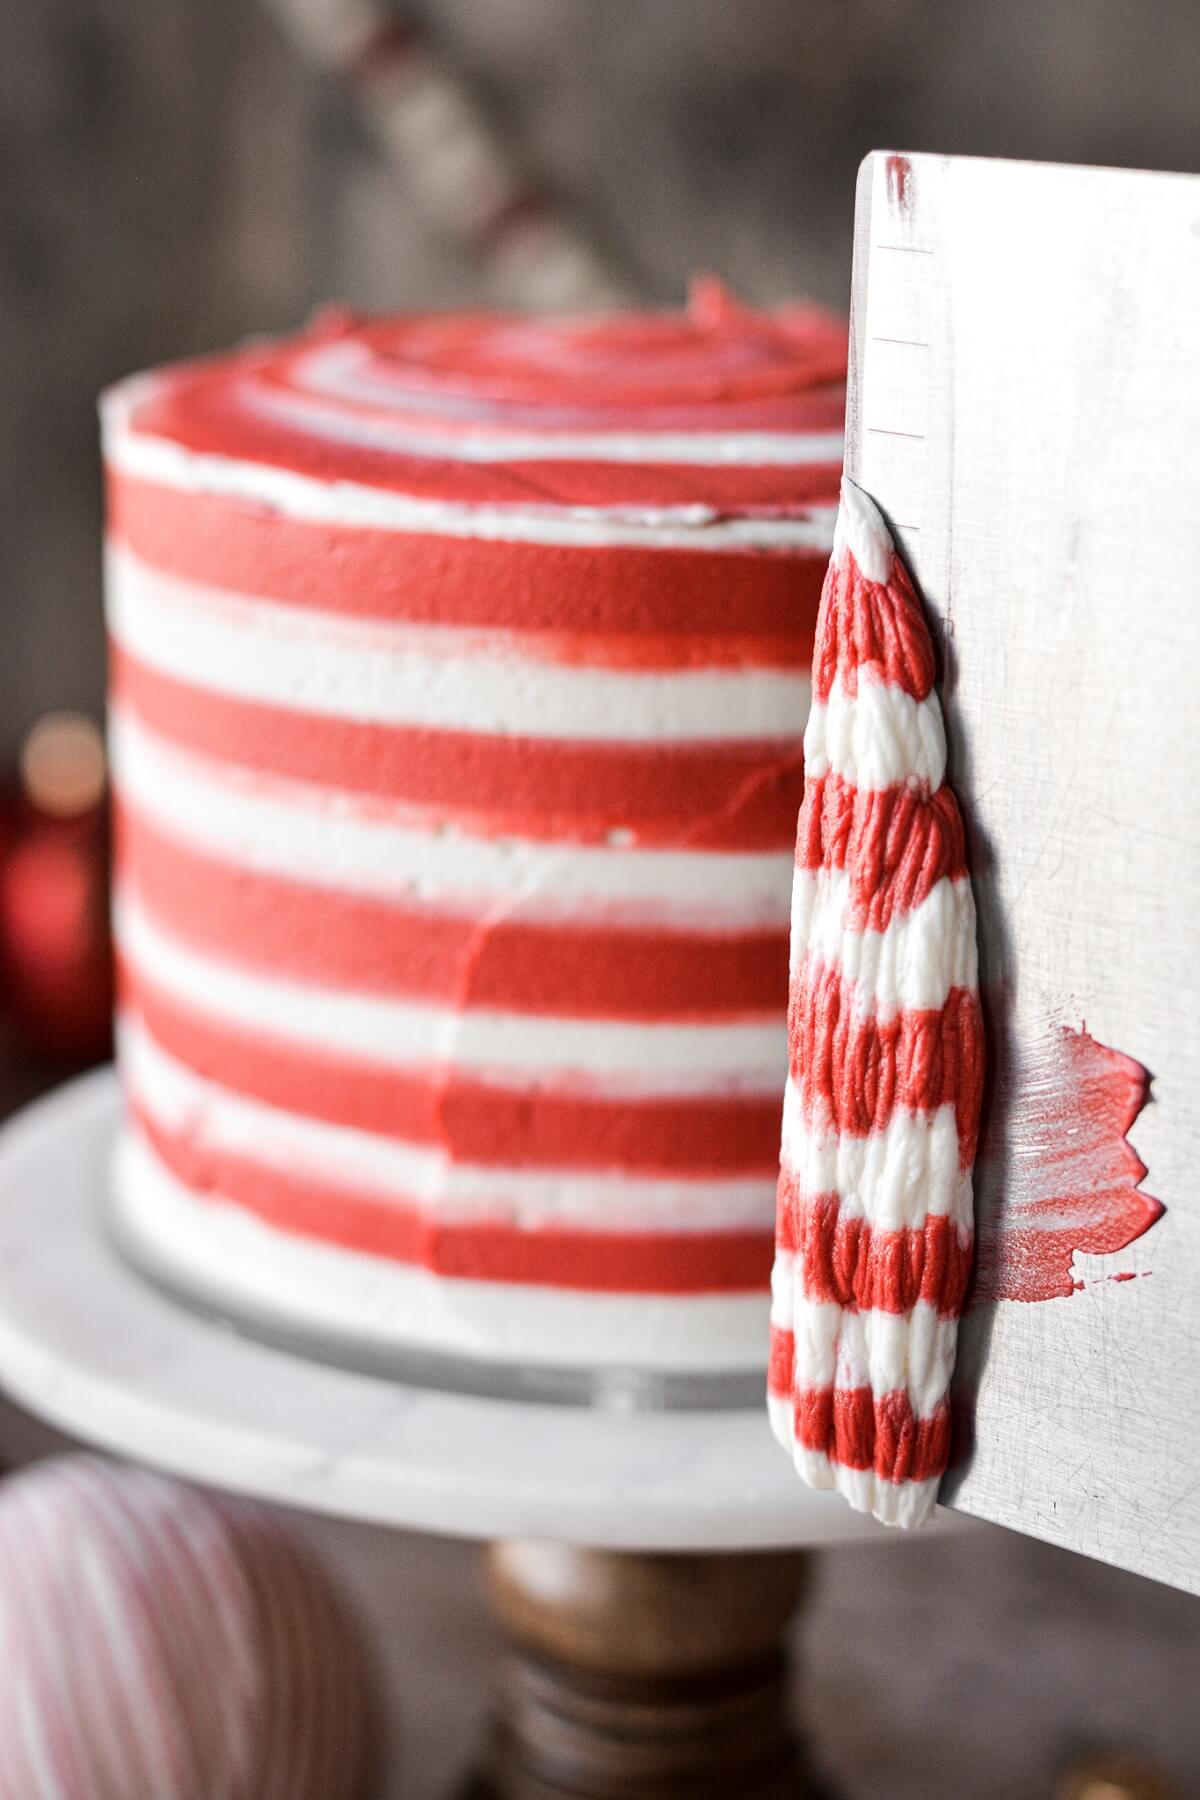
- Take your bench scraper and slowly spin the turntable as you sweep the bench scraper around the sides of the cake. The goal here is not to remove too much frosting, but to smooth out the lines and blend the stripes together. The more evenly you piped your rows of buttercream, the more even and straight the stripes will look.
- Scrape the excess frosting off the bench scraper into a bowl, and wipe the bench scraper clean before you go around the cake again. Repeat several times, until the sides and top of the cake is smooth.
Decorate with sugar and candy canes.
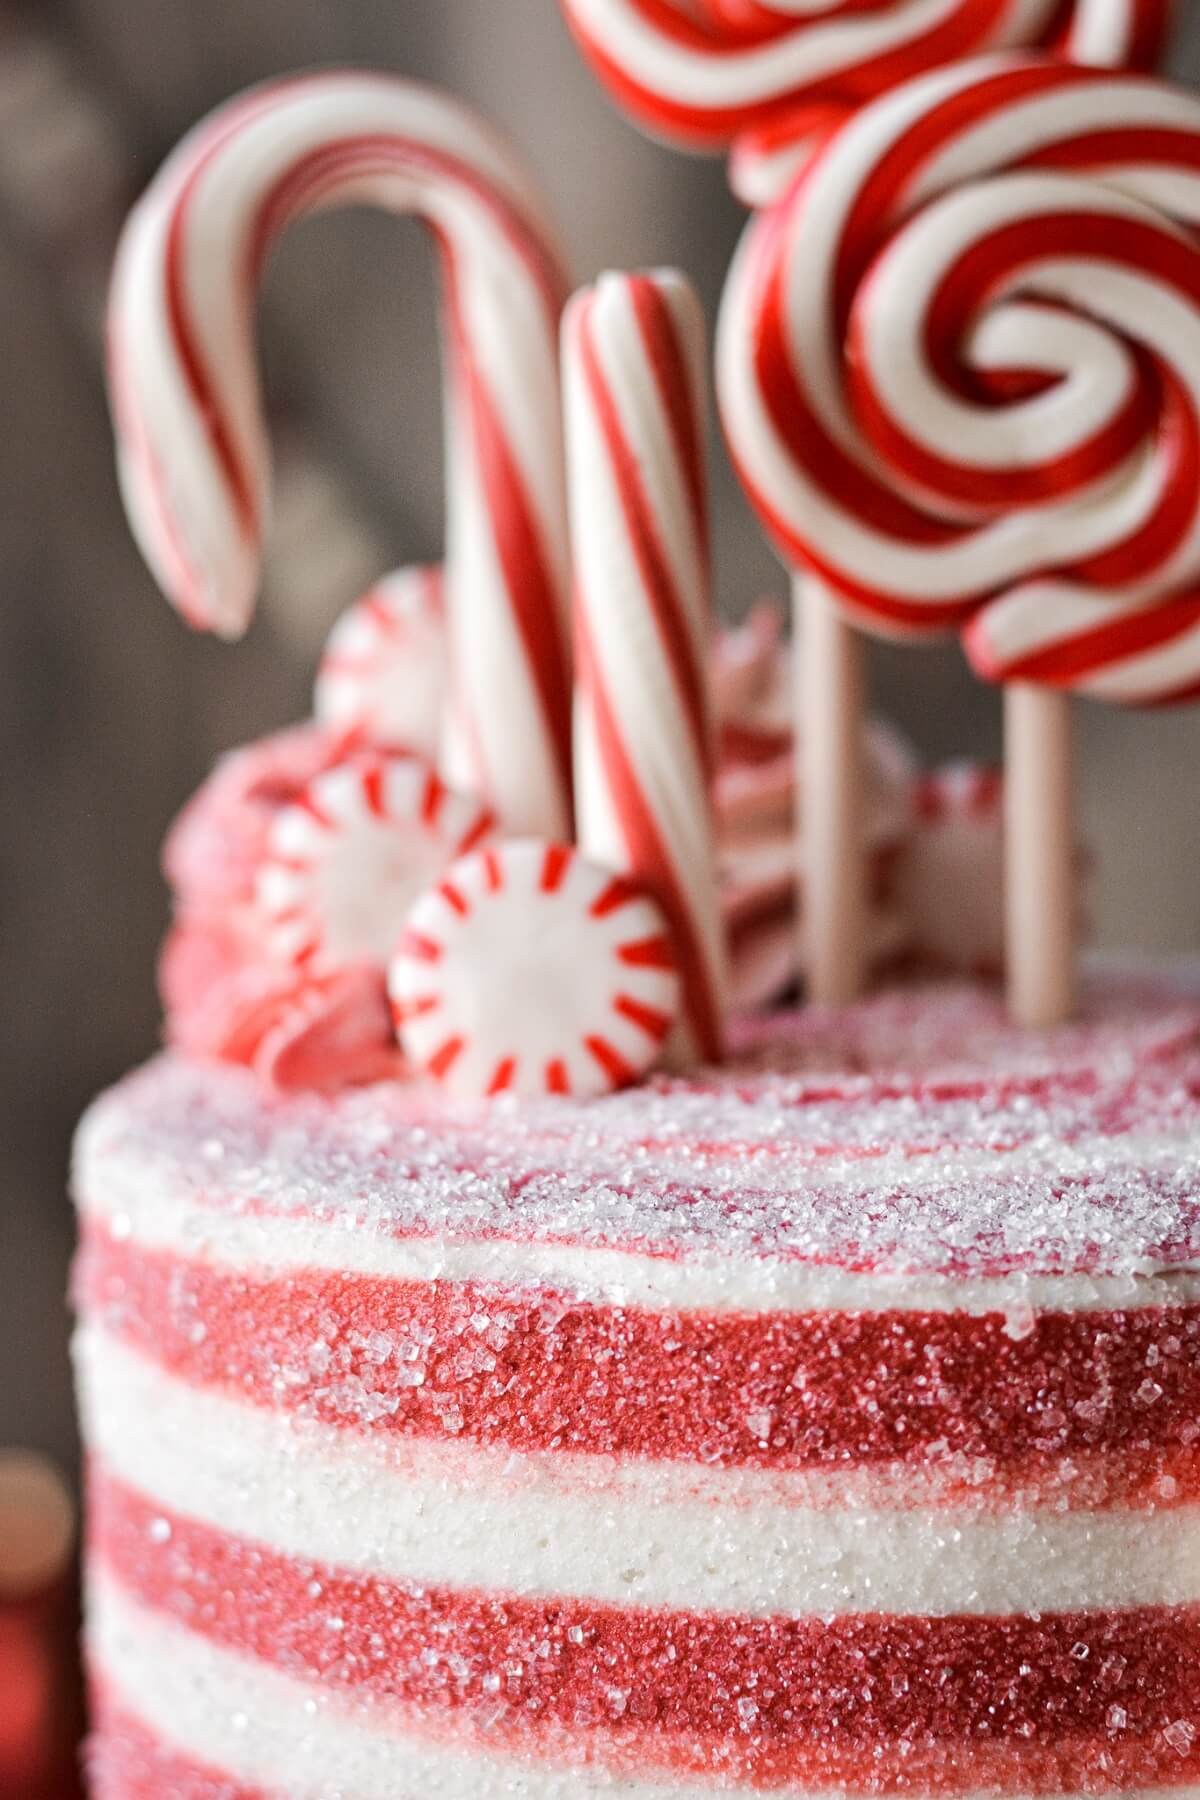
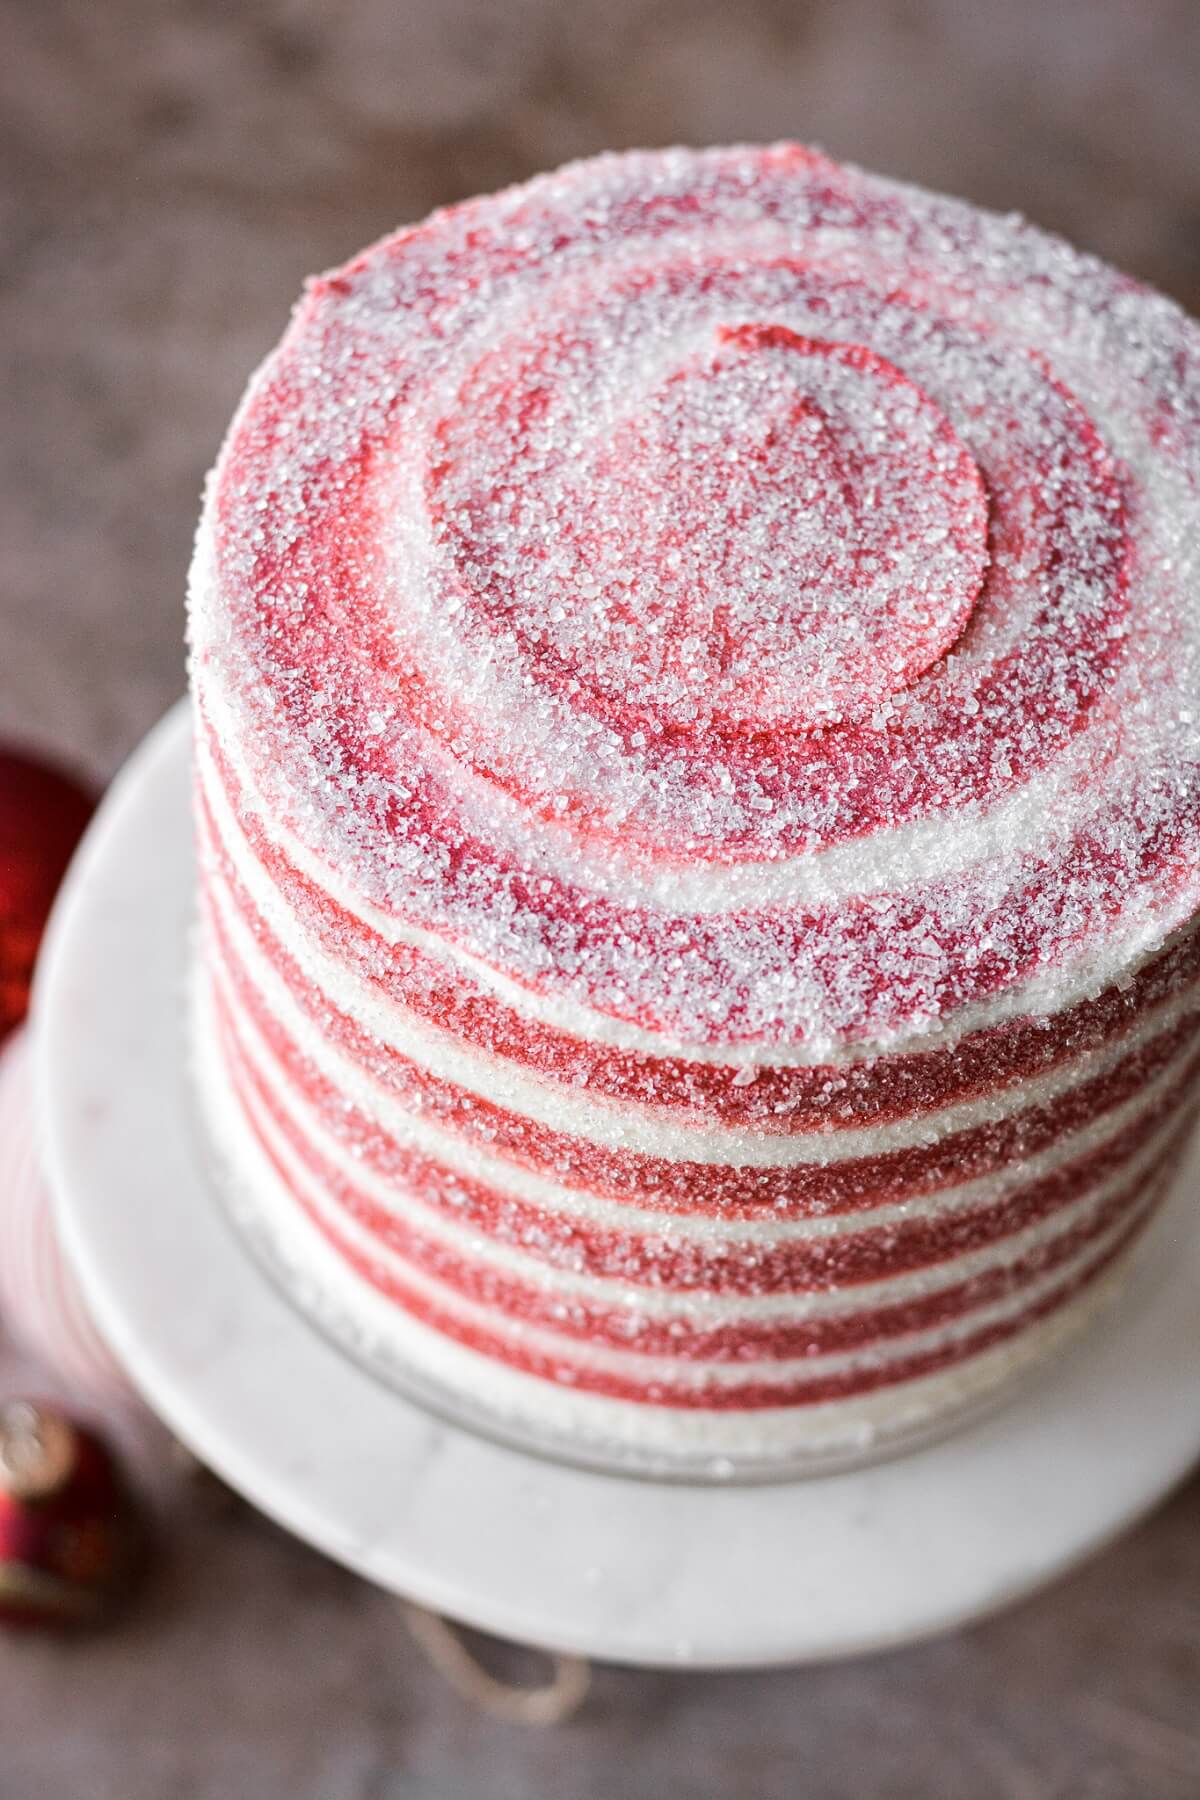
- In a small bowl, combine the granulated sugar and coarse white sparkling sugar. Toss the sugar all over the top and sides of the cake, before the frosting crusts over.
- Decorate your candy cane cake with candy canes in assorted sizes, peppermint candy, peppermint sticks and lollipops.
- If you have any leftover red and white buttercream, you can use it to pipe swirls on top of the cake.

Recipe Variations
- All Red Cake Layers. Instead of the alternating red and white cake layers, I also really like the idea of all the cake being red. The cake would still be striped inside, since the red cake would alternate with the white buttercream.
- Other Cake Flavors. You certainly don’t have to do a red and white cake inside, if you want to go another direction. A chocolate cake with the striped peppermint buttercream would be wonderful.
- 4-Layer Cake. If you don’t want to assemble six layers of cake, use 1/2 my vanilla cake recipe and bake it in four 6-inch cake pans.
- Standard 8-inch Cake. For a larger, 8-inch cake, use my full vanilla cake recipe. Increase the buttercream to 5x my American buttercream recipe. This cake size will yield 16 servings.
Be sure to read all of my BAKING FAQs where I discuss ingredients, substitutions and common questions with cake making, so that you can be successful in your own baking! I also suggest reading these comprehensive posts on making Perfect American Buttercream, How to Stack, Fill, Crumb Coat and Frost Layer Cakes and How to Use Piping Bags.
Frequently Asked Questions
Can I make this cake in advance?
- Cake. You can bake and cool the cake, wrap each layer individually in plastic wrap, and freeze for up to 3-6 months. Let thaw to room temperature or just slightly chilled (but not frozen) before assembling your cake.
- Buttercream. You can make the buttercream and store it in an airtight container in the freezer for up to 3-6 months. Mix it again for several minutes if it seems dry from the freezer.
- Assembled Cake. You can also freeze the fully assembled and frosted cake (without the candy decorations) in an airtight container or cake carrier for several weeks. Let thaw 24 hours in the refrigerator, then bring to room temperature before serving.
How should I store the leftover cake?
Keep leftover cake in an airtight container or cake carrier at room temperature for up to 3 days.
You Might Also Like
Please check out my Amazon Shop for a curated collection of some of my favorite cake pans from trusted brands, baking tools, ingredients, pretty things and fashion finds. I recommend products that I buy and use every day!
Did you love today’s recipe? Please rate the recipe and let me know in the comments what you thought! Also, be sure to follow Curly Girl Kitchen on Instagram, and tag me when you try one of my recipes so I can see all your delicious creations!
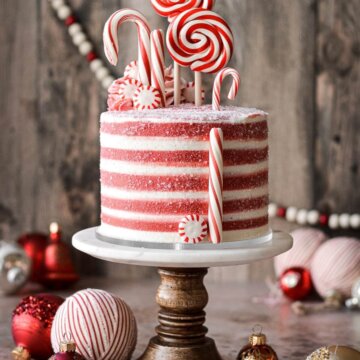
High Altitude Candy Cane Christmas Cake
All recipes on Curly Girl Kitchen are developed for high altitude at 5,280 feet. See FAQs for adjusting to higher or lower elevations.

Equipment
- Six 6-inch cake pans
- Stand Mixer with Paddle Attachment
- 2 16-inch Piping Bags + Couplers
- 2 Piping Tips #12
- Cake Decorating Turntable
- Bench Scraper
Ingredients
Cake
- 2 ⅓ cups cake flour, fluffed, spooned and leveled
- 1 cup granulated sugar
- 2 tsp baking powder
- ½ tsp coarse Kosher salt (if using table salt, use half the amount)
- 2 large eggs
- 1 large egg white (save the extra yolk for another use)
- 1 cup buttermilk
- ⅓ cup unsalted butter, melted
- ⅓ cup vegetable oil
- 1 ½ tsp vanilla bean paste or vanilla extract
- super red gel food coloring
- bright white food coloring (optional)
Buttercream
- 1 cup unsalted butter, softened to room temperature
- 1 cup vegetable shortening
- 4 cups powdered sugar
- 1 tbsp meringue powder (optional)
- ¼ tsp coarse Kosher salt (if using table salt, use half the amount)
- 2 tsp vanilla extract
- ¾ tsp peppermint (not mint) extract
Decorating
- super red gel food coloring
- 1 tbsp granulated sugar
- 2 tbsp coarse white sparkling sugar
- assorted candy canes, peppermint sticks, peppermint candy and lollipops
Instructions
Cake
- Preheat the oven to 350 F, and position a rack in the center of the oven. Spray the bottoms of six 6-inch cake pans with non-stick baking spray.
- In a large bowl, sift together the flour, sugar, baking powder and salt. Whisk to combine well.
- In another large bowl, whisk together the eggs, egg white, buttermilk, melted butter, oil and vanilla extract until smooth.
- Add the dry ingredients to the wet, and whisk until mostly combined and smooth, about 10-15 seconds. Don't over-mix, since you'll be mixing the batter again when you add the food coloring.
- Divide the batter evenly between two bowls. Add the red food coloring to one bowl of batter, and the white food coloring to the other bowl. Stir the coloring into the batter until combined.
- Divide the red cake batter between 3 cake pans, then divide the white cake batter between 3 cake pans.
- Bake on the center oven rack for about 13-15 minutes, until the centers spring back when lightly touched. Since there's a small amount of batter in each pan, the layers will be fairly thin.
- Cool the cakes in the pans before assembling and frosting.Note: This cake also looks really nice with ALL of the cake batter colored red, so you'll have 6 red layers of cake alternating with white buttercream.
Buttercream
- In the bowl of your stand mixer fitted with the paddle attachment, beat the butter and shortening for 1 minute until smooth. With the mixer on low, add the powdered sugar by spoonfuls, the meringue powder, and the salt, mixing until combined but clumpy. Add the vanilla and peppermint extracts. Increase speed to medium and whip for 4-5 minutes, until very light and fluffy, stopping to scrape the bowl down several times. Turn the speed down to "stir" and mix for 1 more minute.
- Stack and fill the cooled cake layers with the buttercream, alternating the red and white cake layers as you assemble them. Frost the cake all over with a thin crumb coat of buttercream, and chill in the refrigerator for 30 minutes before you finish frosting and decorating the cake.
Decorating
- While the crumb coated cake is chilling, divide the remaining buttercream evenly between two bowls. Use super red gel food coloring to tint one bowl of buttercream red.Even with a lot of food coloring, the red buttercream may have a coral or pink tint to it, but it will darken over the course of a few hours to a deeper red color.If your white buttercream looks too ivory, you can stir in a few drops of bright white food coloring to whiten and brighten it.
- Fit two piping bags with couplers and tips #12 (medium sized round tip). Fill one bag with white buttercream and one bag with red buttercream.
- Place your chilled, crumb coated cake on a cake decorating turntable.
- Starting with the white buttercream, pipe a row of buttercream around the base of the cake. Then pipe a row of red buttercream right above the white. Continue to pipe rows of buttercream, alternating red and white as you work your way up the sides of the cake, ending on top. Be sure to pipe the rows close together, trying to keep them as straight and even as possible, and without any gaps in between.
- Take your bench scraper and slowly spin the turntable as you sweep the bench scraper around the sides of the cake. The goal here is not to remove too much frosting, but to smooth out the lines and blend the stripes together. The more evenly you piped your rows of buttercream, the more even and straight the stripes will look.Scrape the excess frosting off the bench scraper into a bowl, and wipe the bench scraper clean before you go around the cake again. Repeat several times, until the sides and top of the cake is smooth.
- In a small bowl, combine the granulated sugar and coarse white sparkling sugar. Toss the sugar all over the top and sides of the cake, before the frosting crusts over.
- Decorate your cake with candy canes in assorted sizes, peppermint candy, peppermint sticks and lollipops.
- If you have any leftover red and white buttercream, you can use it to pipe swirls on top of the cake.
Notes
 https://curlygirlkitchen.com/
This is gorgeous!
If I only have 2 6 inch cake pans, could I bake two at a time, put the other two in the fridge while the others are baking?