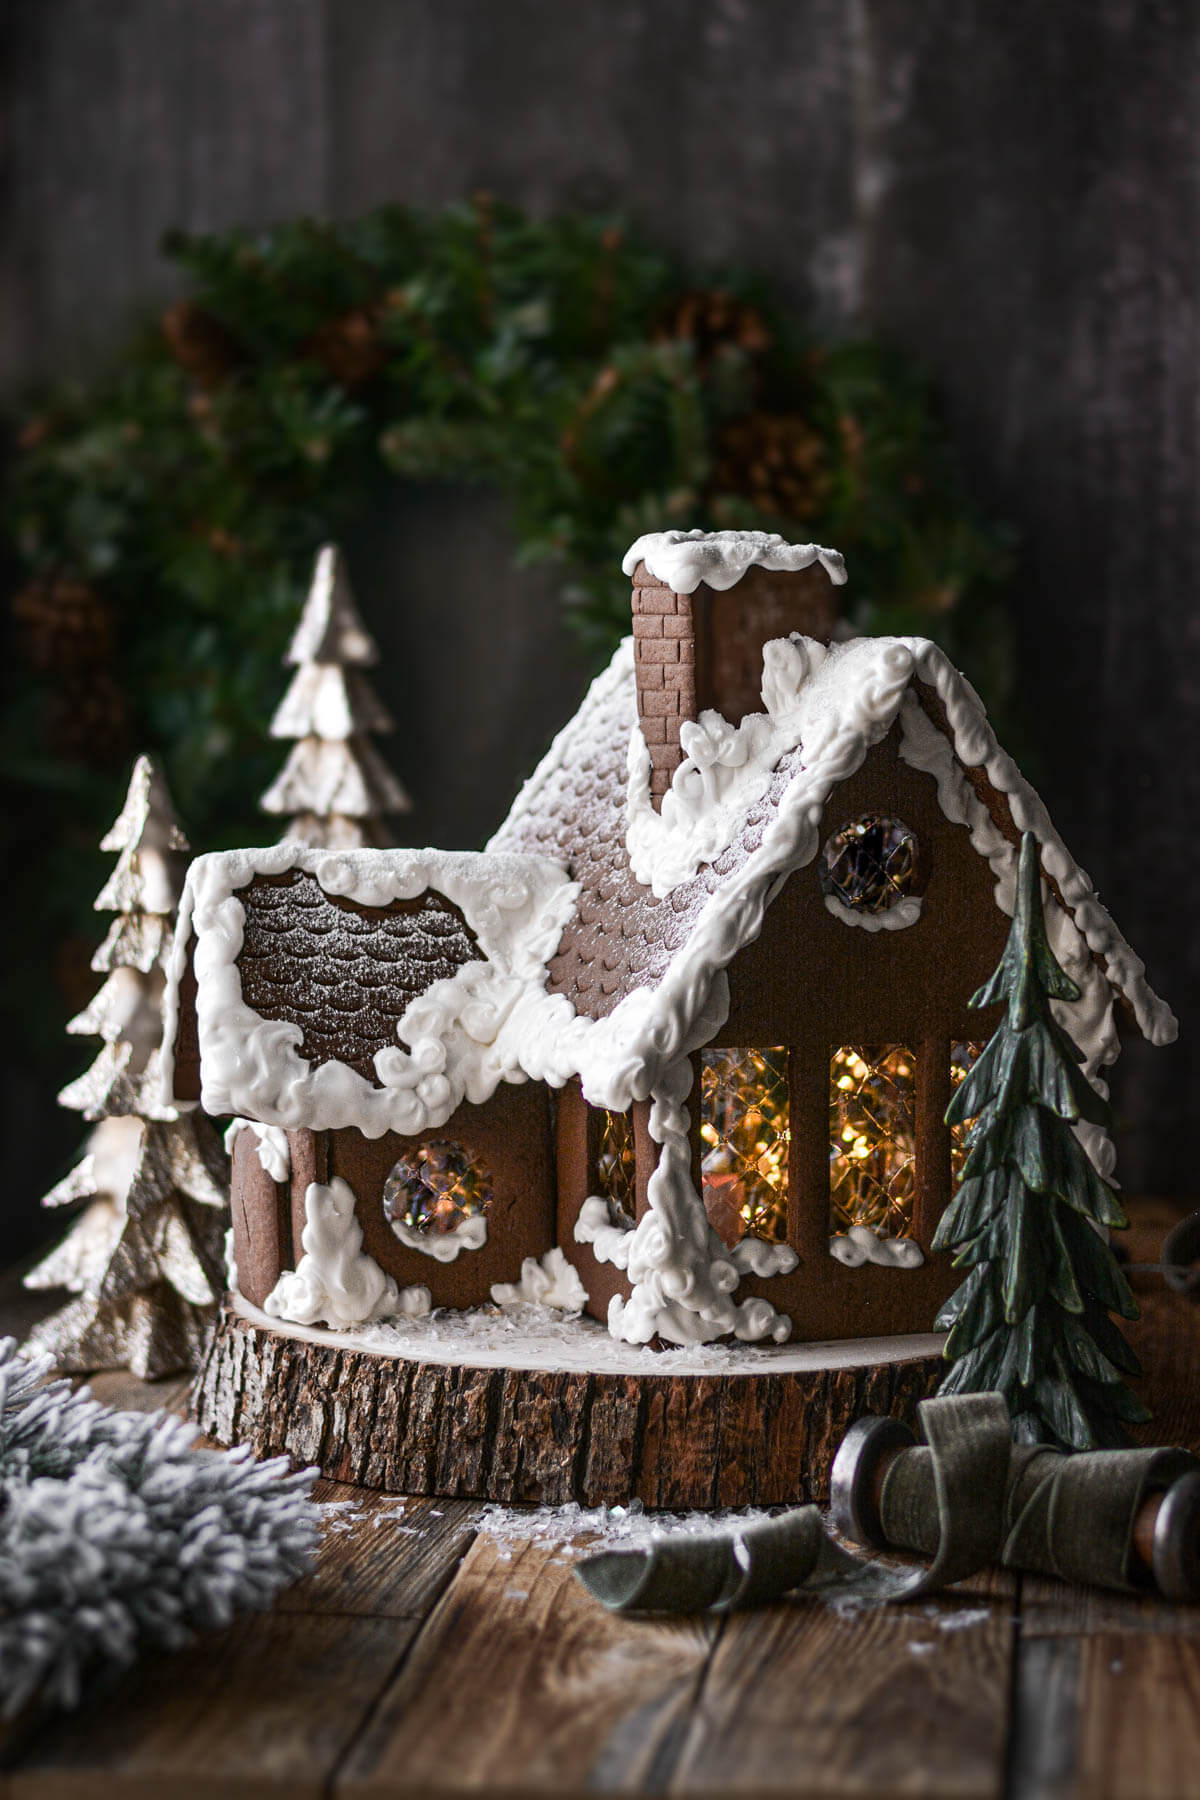
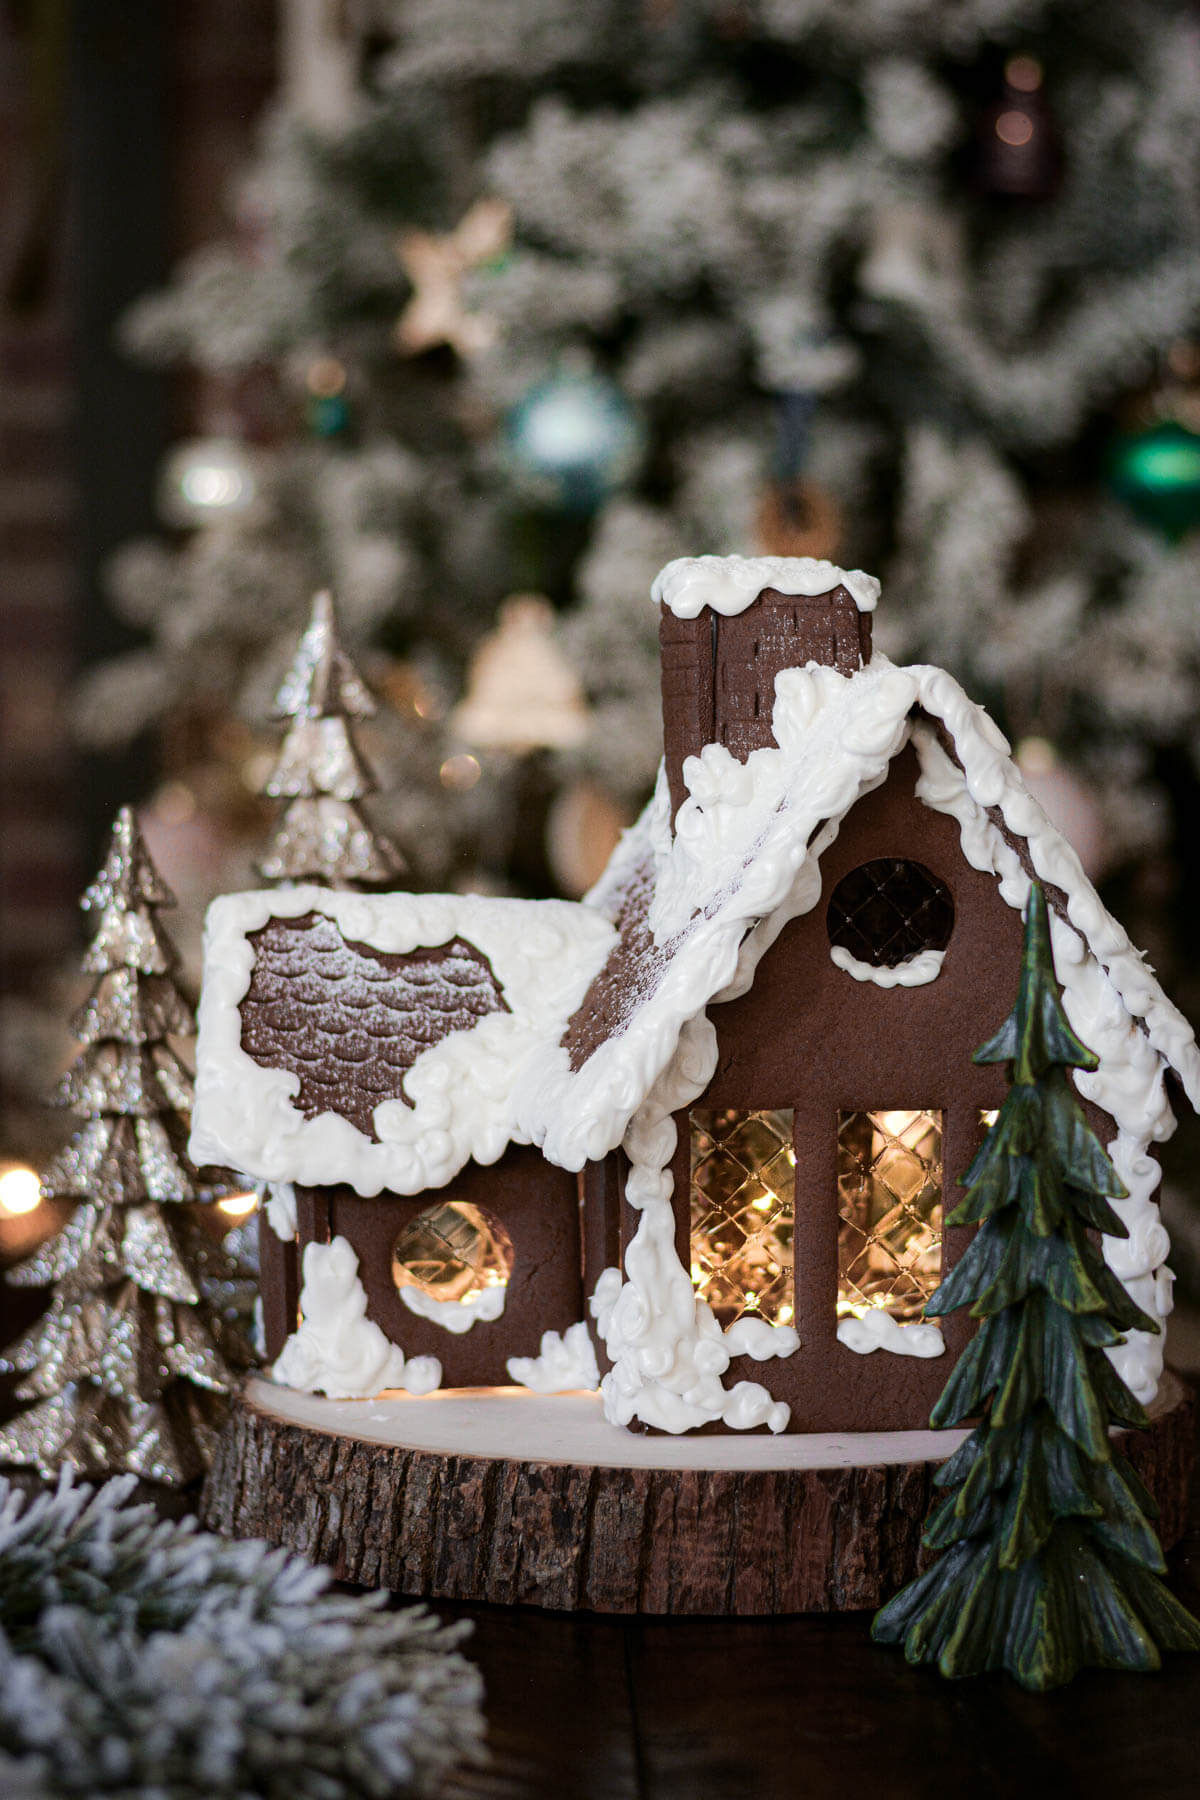
Today’s comprehensive post will teach you everything you need to know about how to make a gingerbread house from scratch. First, you’ll get a construction quality gingerbread cookie house recipe that’s high altitude tested, and works at low altitudes, too. The gingerbread recipe is strong and sturdy, ideal for making your own DIY gingerbread house for Christmas. Next, you’ll see how I designed the templates for my own house, so you can make your own template. Then, I’ve provided step-by-step photos showing how I assembled my house. And lastly, you’ll see how I added all the finishing details like clear windowpanes and royal icing snow drifts.
You might also like this Christmas tree sheet cake, Hogsmeade village Christmas cake, and candy cane striped cake.
This site contains affiliate links. As an Amazon associate, I earn from qualifying purchases. This means that I may make a small commission if you purchase a product using those links. This in no way affects my opinion of those products and services. All opinions expressed on this site are my own.
Why You’ll Love This Recipe
Family Activity. This is a fun family activity that you can do with your kids! Make one big house together, or a few different mini houses.
Gorgeous Christmas Decor. A homemade gingerbread house with lights inside makes a beautiful centerpiece for the dining room table at Christmas time.
High Altitude Tested. I develop all the recipes on my site for Denver’s altitude of 5,280 feet. If you’re at a lower or higher elevation, please see my FAQs for guidance on adjusting recipes for your altitude. Today’s recipe will work at any altitude without adjustments, though.

Tools and Equipment
- Saucepan. The cookie dough starts by melting together the sugar and molasses, before adding the remaining dough ingredients. Use a large saucepan so you can just mix the dough right in one pot.
- Baking Sheets + Parchment Paper.
- Construction Paper or Thin Cardboard. For drawing and cutting out your house templates. I made mine using empty cereal boxes.
- Sharp Knife or Rolling Wheel Pastry Cutter. For cutting out the dough.
- Rolling Pin.
- Large Spatula or Cake Lifter. This will be very helpful for transferring large pieces (like the sides and roof of the house) from your counter to the baking sheet, without tearing the unbaked dough.
- Microplane Zester. You can use this to gently shave any uneven edges of the house before assembling it.
- Piping Bag + Coupler + Small Round Tips. This will be used for applying the royal icing “glue”.
- Hot Glue Gun + Glue Sticks. If you don’t plan on letting anyone eat your gingerbread house (and I never do, after this much work), there’s no shame in using hot glue for the assembly. It sets and dries quickly, and securely bonds together the sides and roof of the house. If any of the hot glue is visible, you can cover it up later with royal icing.
See the recipe card at the end of the post for the full ingredients list and instructions.
Ingredients
Gingerbread
- Granulated Sugar and Molasses. This sweetens the dough, adds a strong molasses flavor and a rich color.
- Spices. Your house will smell wonderful with a blend of ginger, allspice, cinnamon and cloves.
- Baking Soda.
- Butter.
- Eggs.
- Cocoa Powder + Flour. I added a little cocoa powder simply to darken the dough a bit more, but you can also use just flour.
Royal Icing
- Powdered Sugar.
- Meringue Powder. The meringue powder is what sets the icing and makes it hard.
- Vanilla Extract.
- Water.

Instructions
Make the House Template
- You’ll need a house template, whether you make your own or print one you find online.
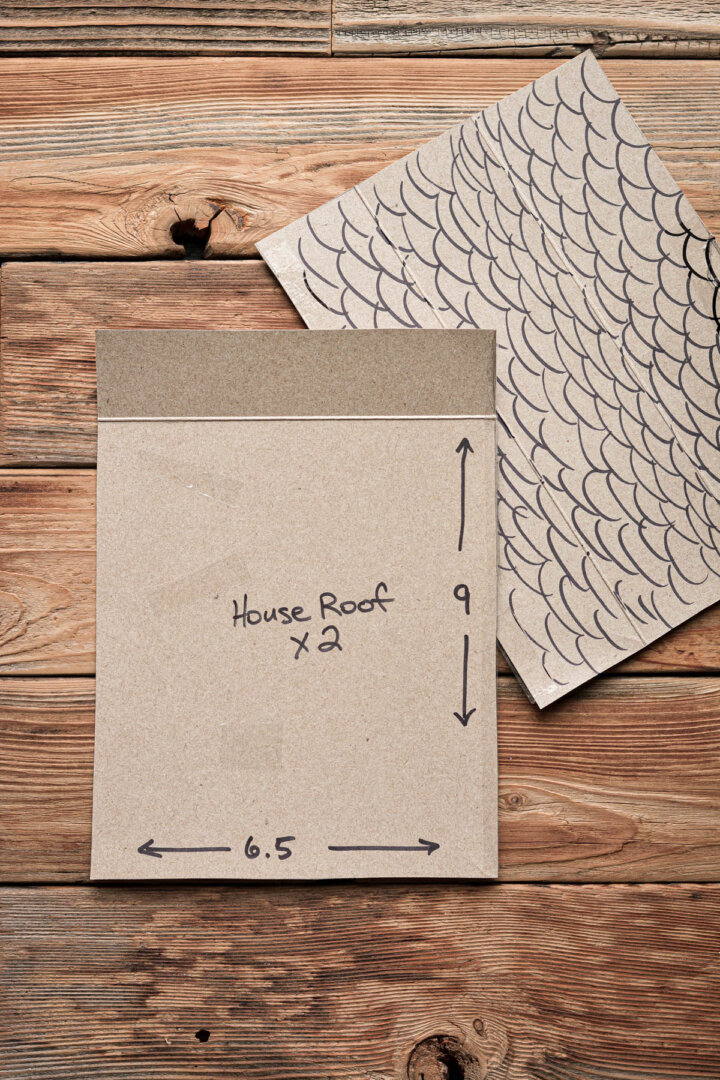
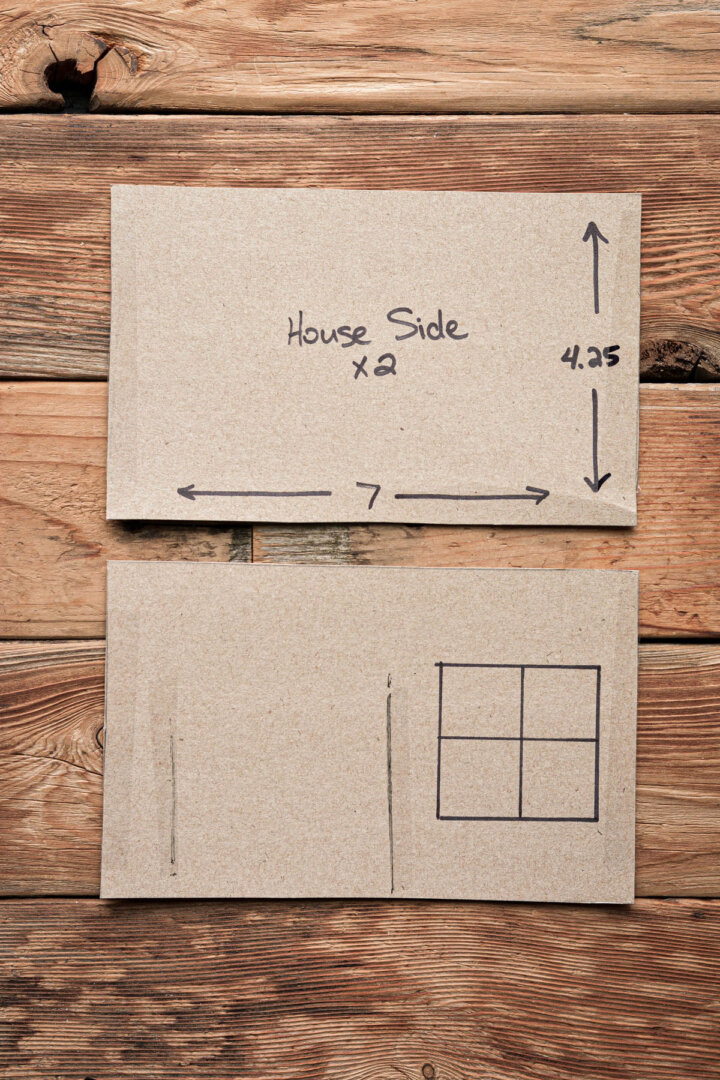
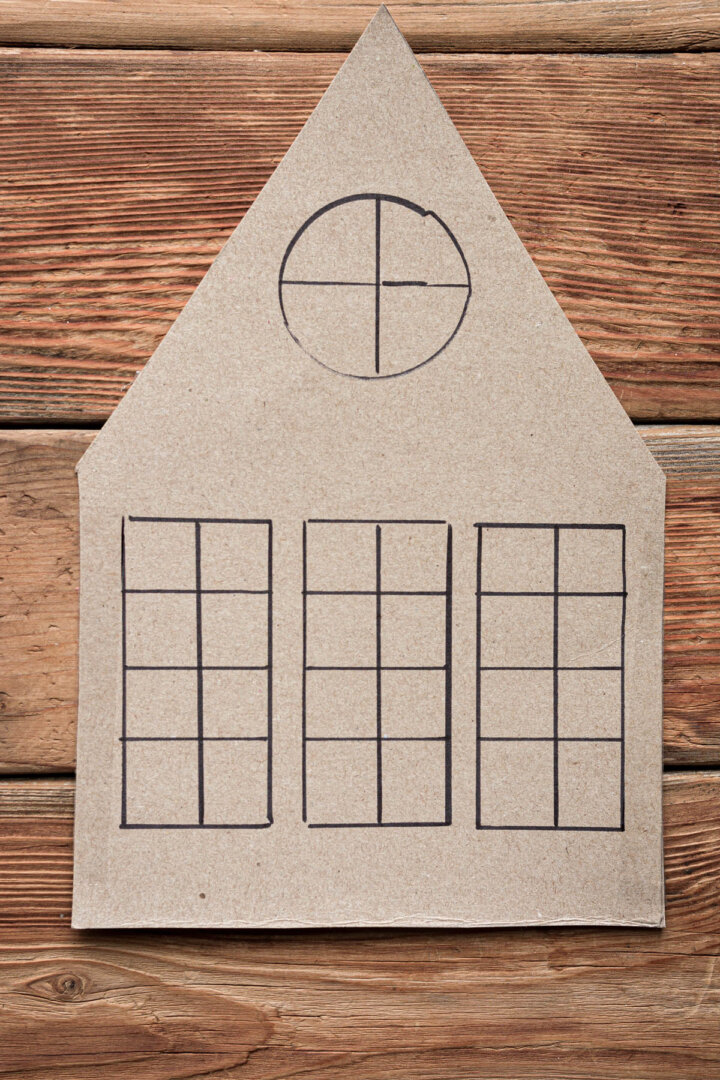
- I created mine using empty cereal boxes, and assembled the pieces together first to make sure they would all fit, before I used them to cut my dough.
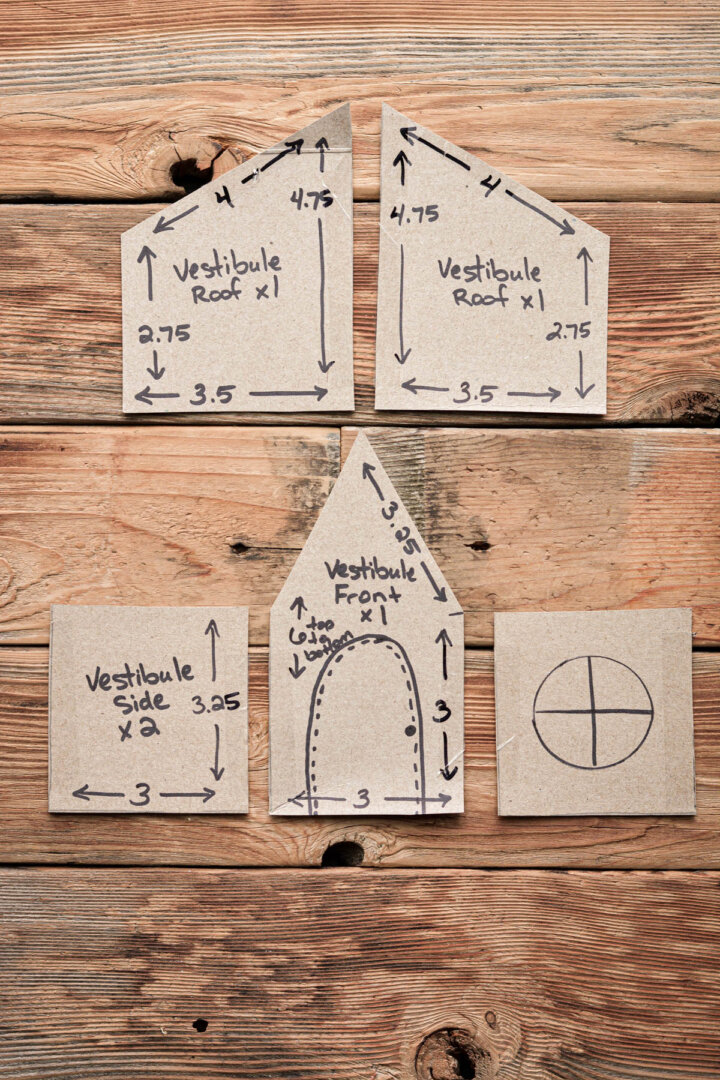
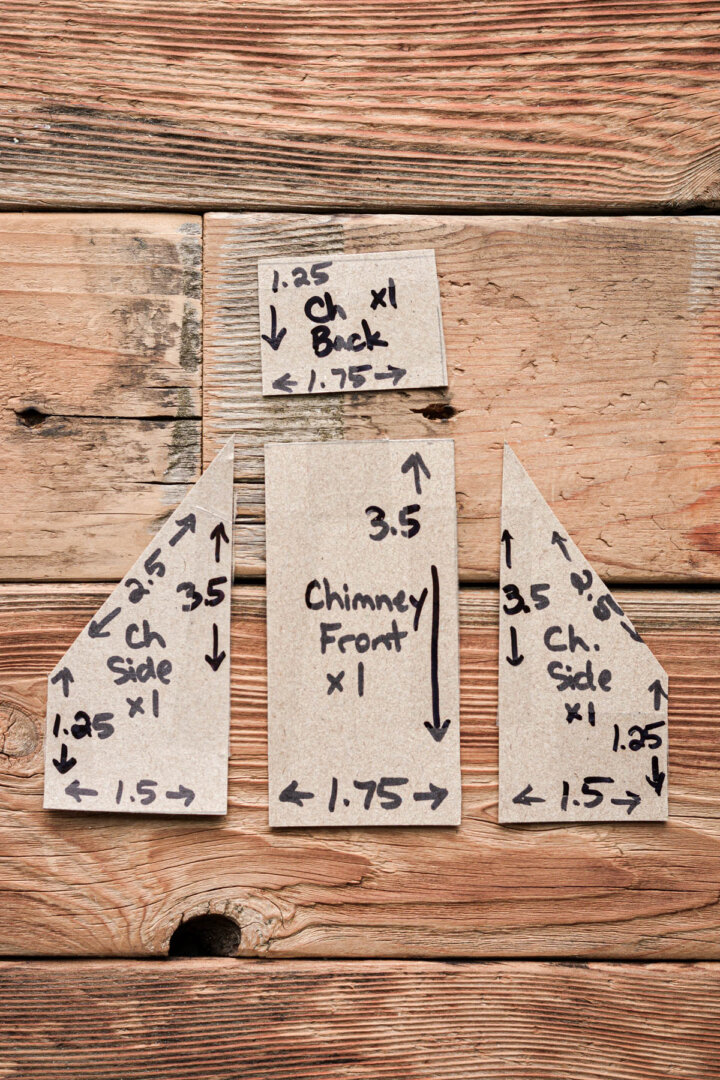
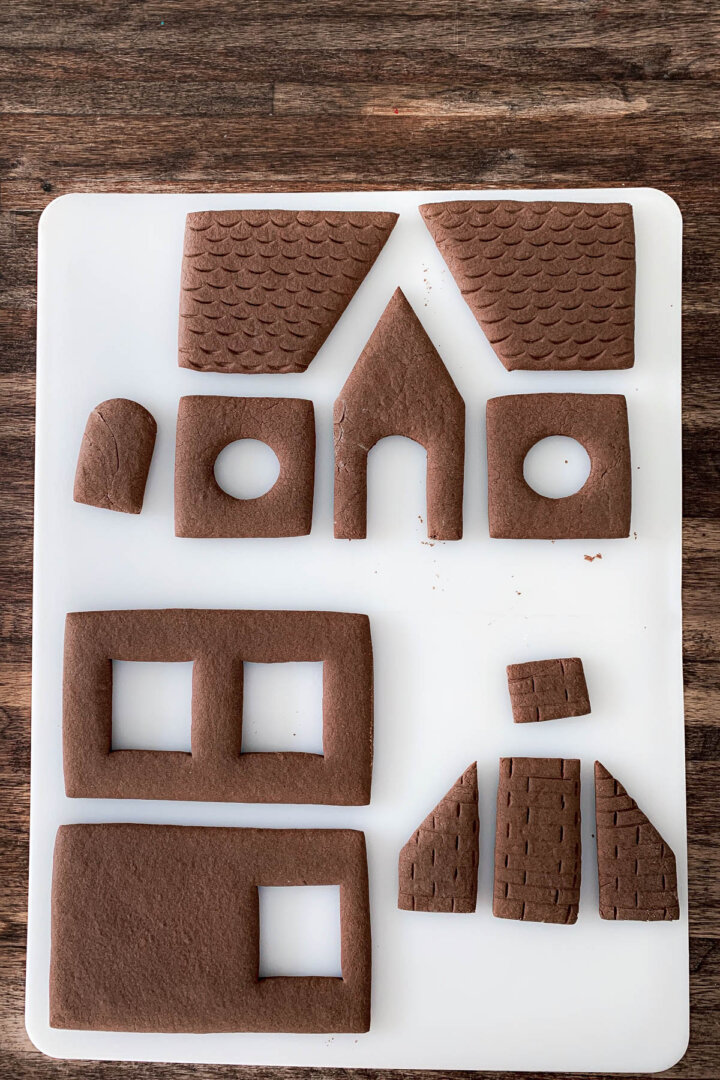
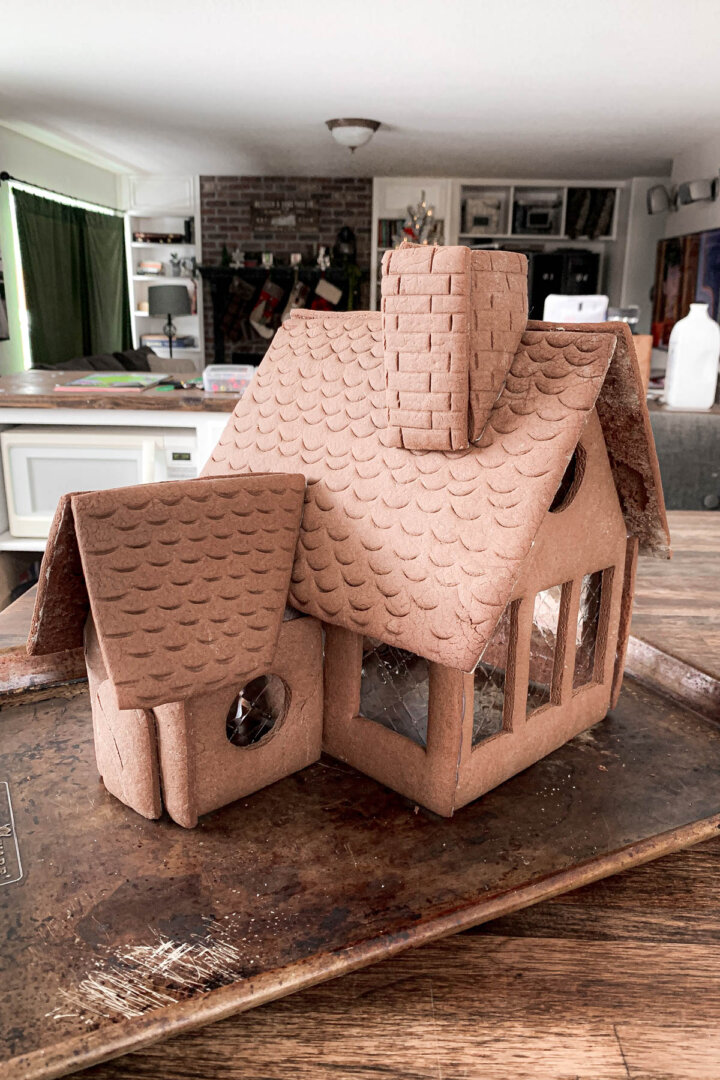
- For my house, I cut two roof pieces, two side pieces and two end pieces, to make the main body of the house. I also cut a few pieces for a chimney, as well as the sides, front door and roof for a vestibule or entryway.
- You can see in the next photos the exact dimensions for each piece, if you’d like to recreate this template yourself. The noted dimensions are in inches.


Make the Gingerbread Dough
- Preheat the oven to 325 F, and position a rack in the center of the oven. Line several baking sheets with parchment paper.
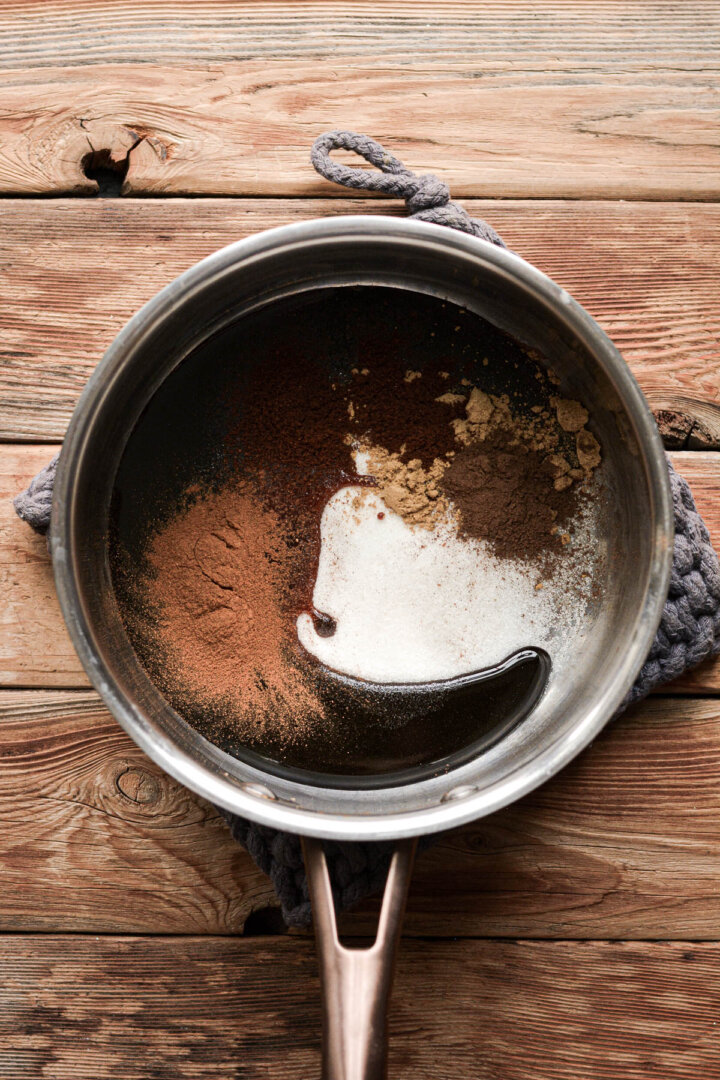
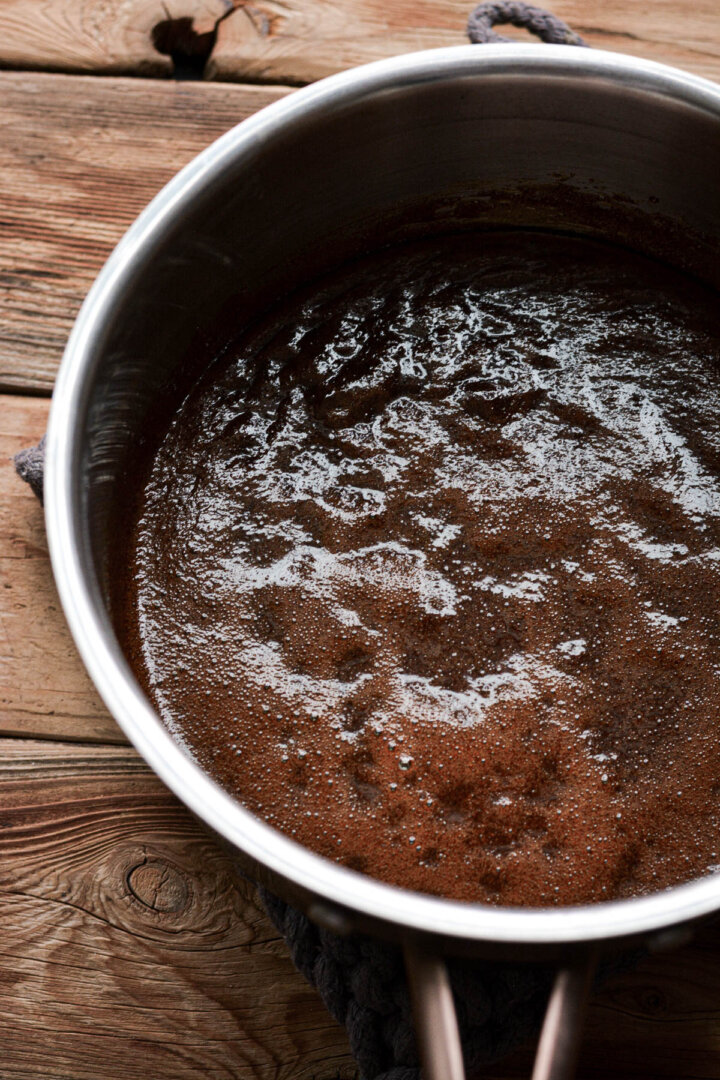
- In a saucepan, combine the sugar, molasses, ginger, allspice, cinnamon and cloves. Over medium heat while stirring frequently with a silicone spatula, bring the mixture to a boil. Remove from the heat.
- Stir in the baking soda; the mixture will foam up and become paler and fluffier. Then stir in the butter until completely melted.


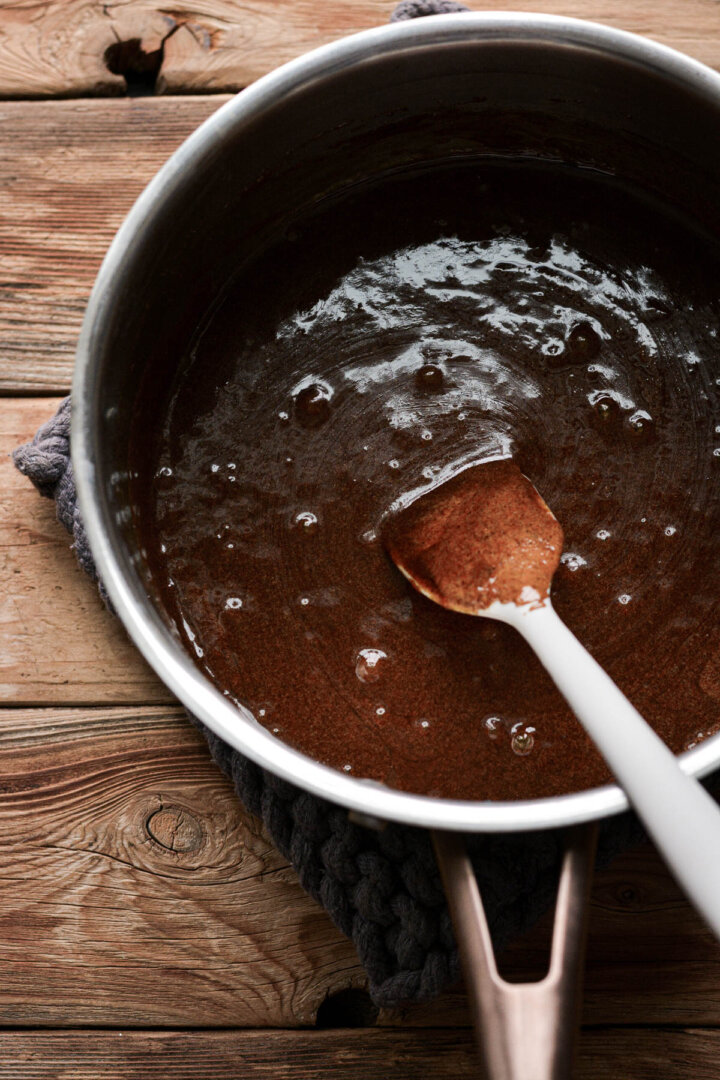
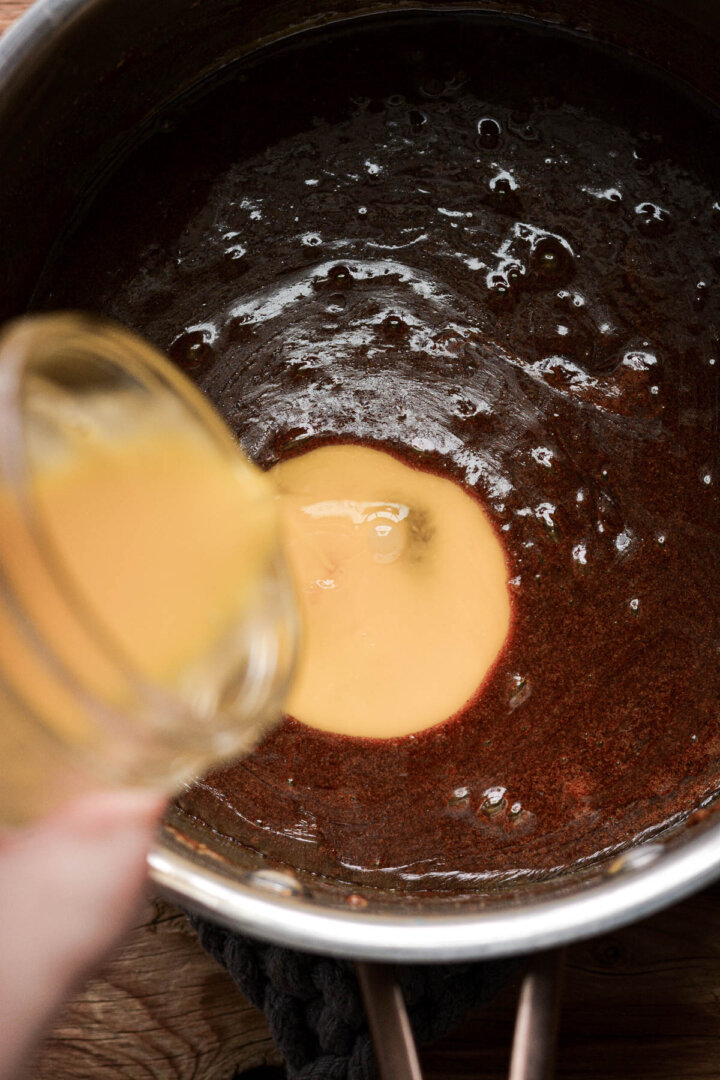
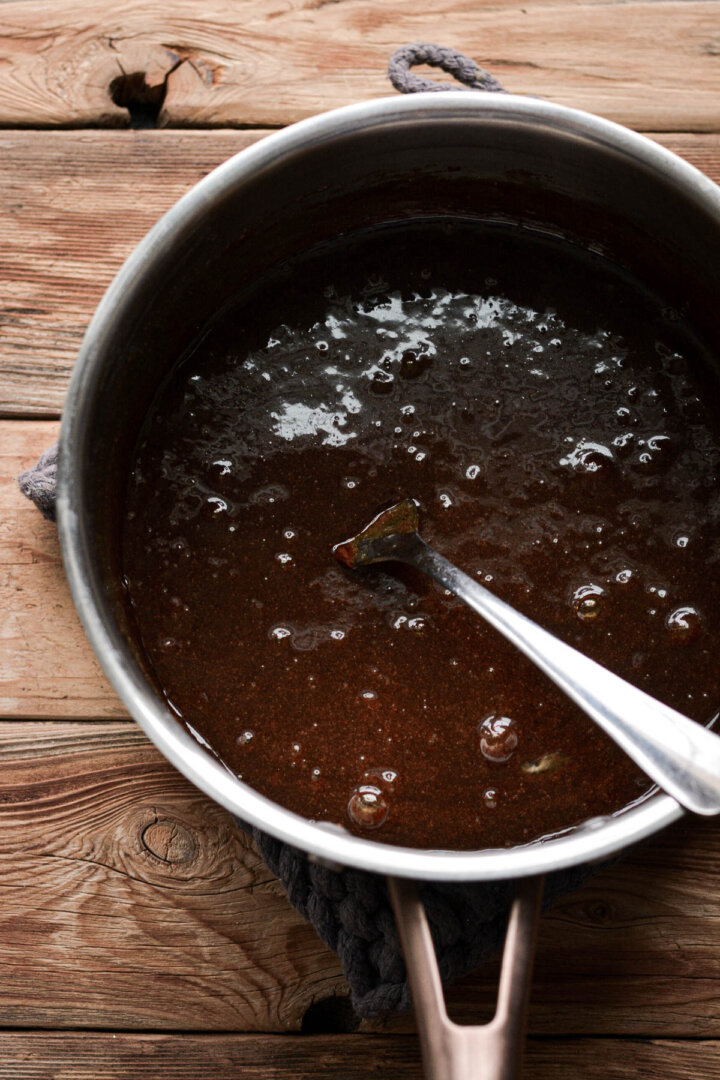
- Stir in the beaten eggs, then the flour and cocoa powder, until the dough starts to come together.
- Dump the dough out onto a clean work surface, and knead for several minutes until it smooths out. If it seems too damp or sticky, add a bit more flour. If it seems too dry or crumbly, add a little warm water.
- Cut the dough into 4ths, and wrap each portion in plastic wrap, working with just one portion at a time. This recipe makes enough dough for a fairly large house (like the one pictured), or 3-4 mini gingerbread houses.

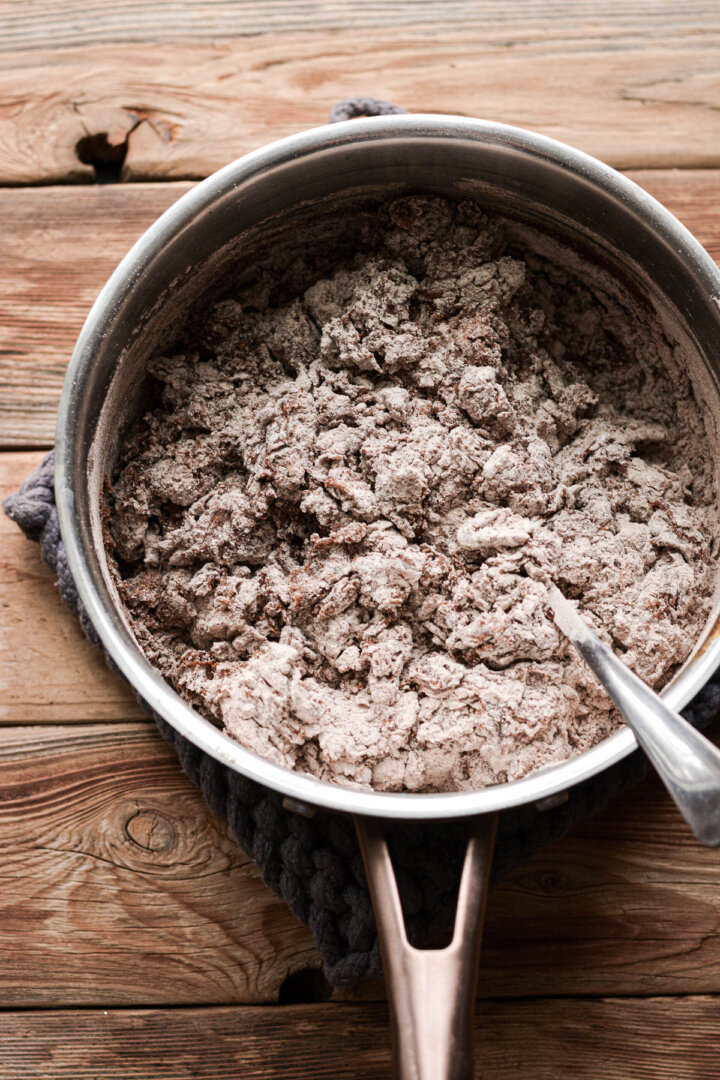

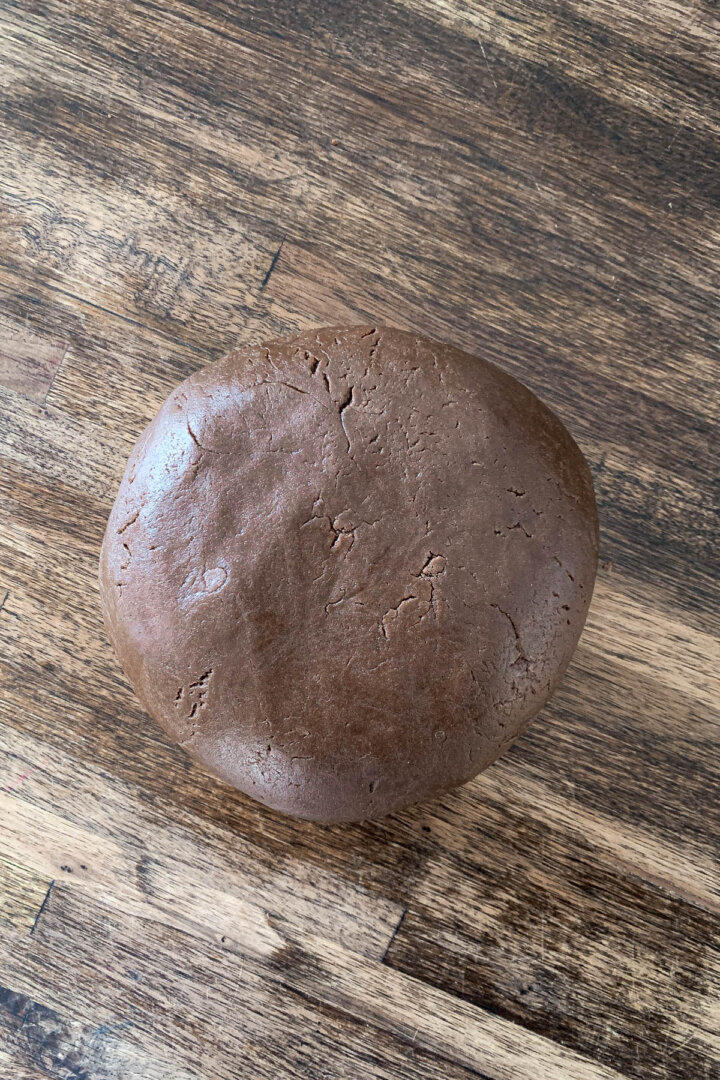
Roll and Cut the Dough
- Lightly flour the counter, and roll out the dough to just under 1/4 inch thick. You shouldn’t need to use too much extra flour, but if it sticks to the rolling pin, dust the dough lightly with flour.
- Cut your dough, using any type of template or cutter, then place the cut pieces on the parchment lined baking sheets. For larger pieces, you’ll need to use a very large spatula or cake lifter to transfer the dough to the baking sheet, so that you don’t tear or stretch the dough out of shape while transferring it.
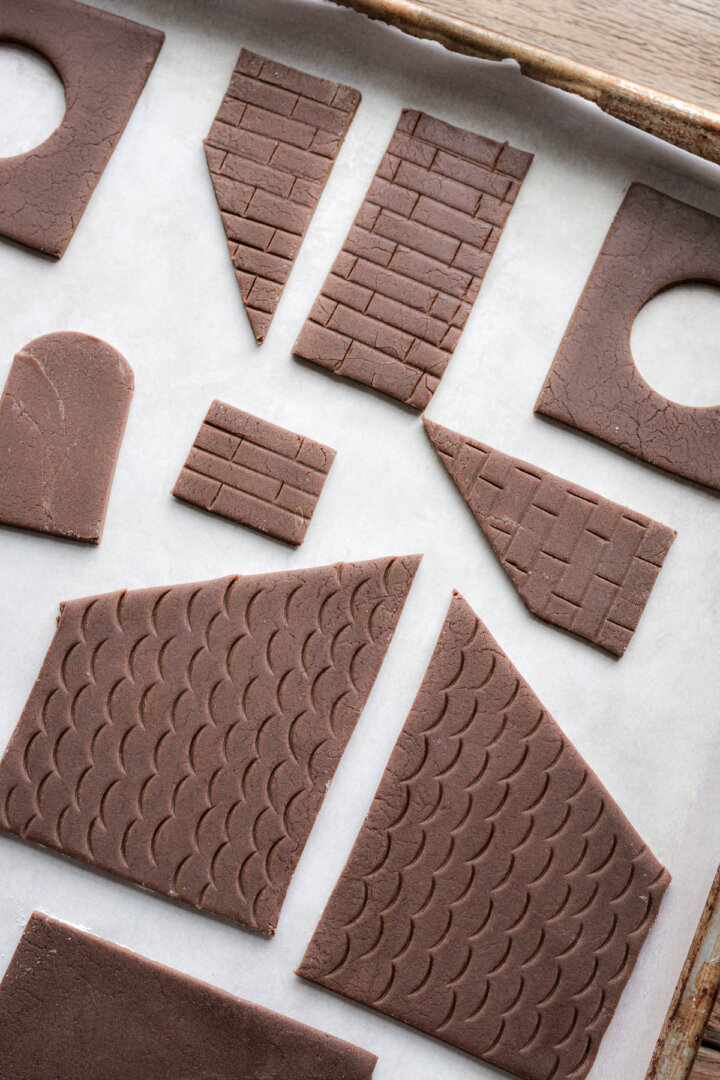
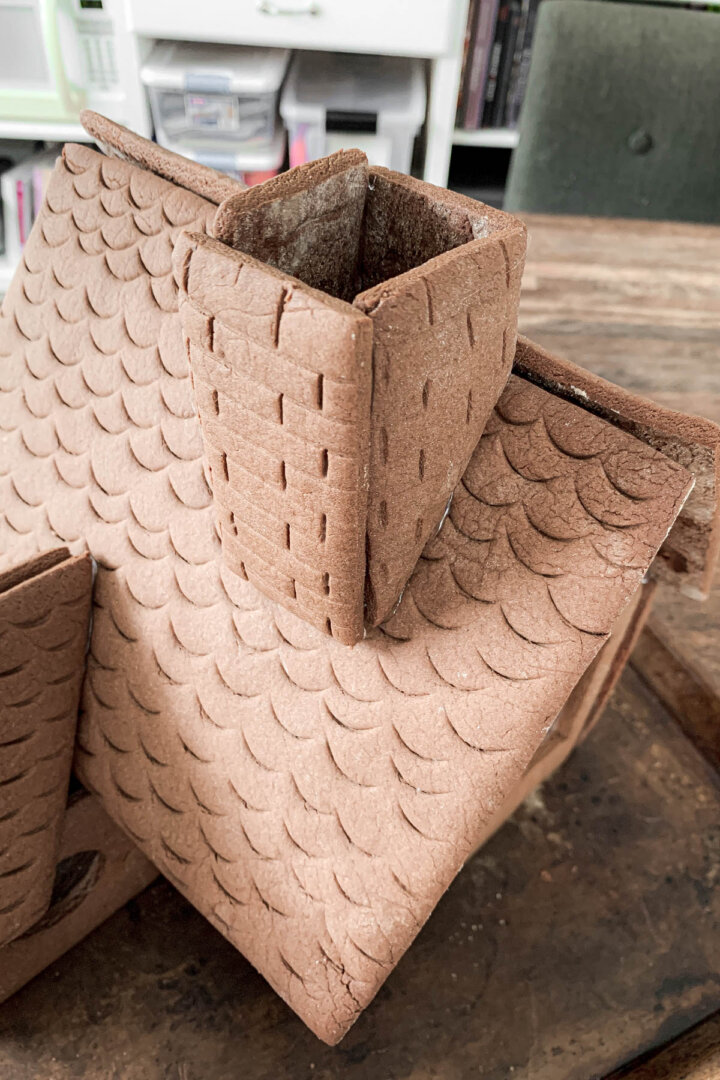
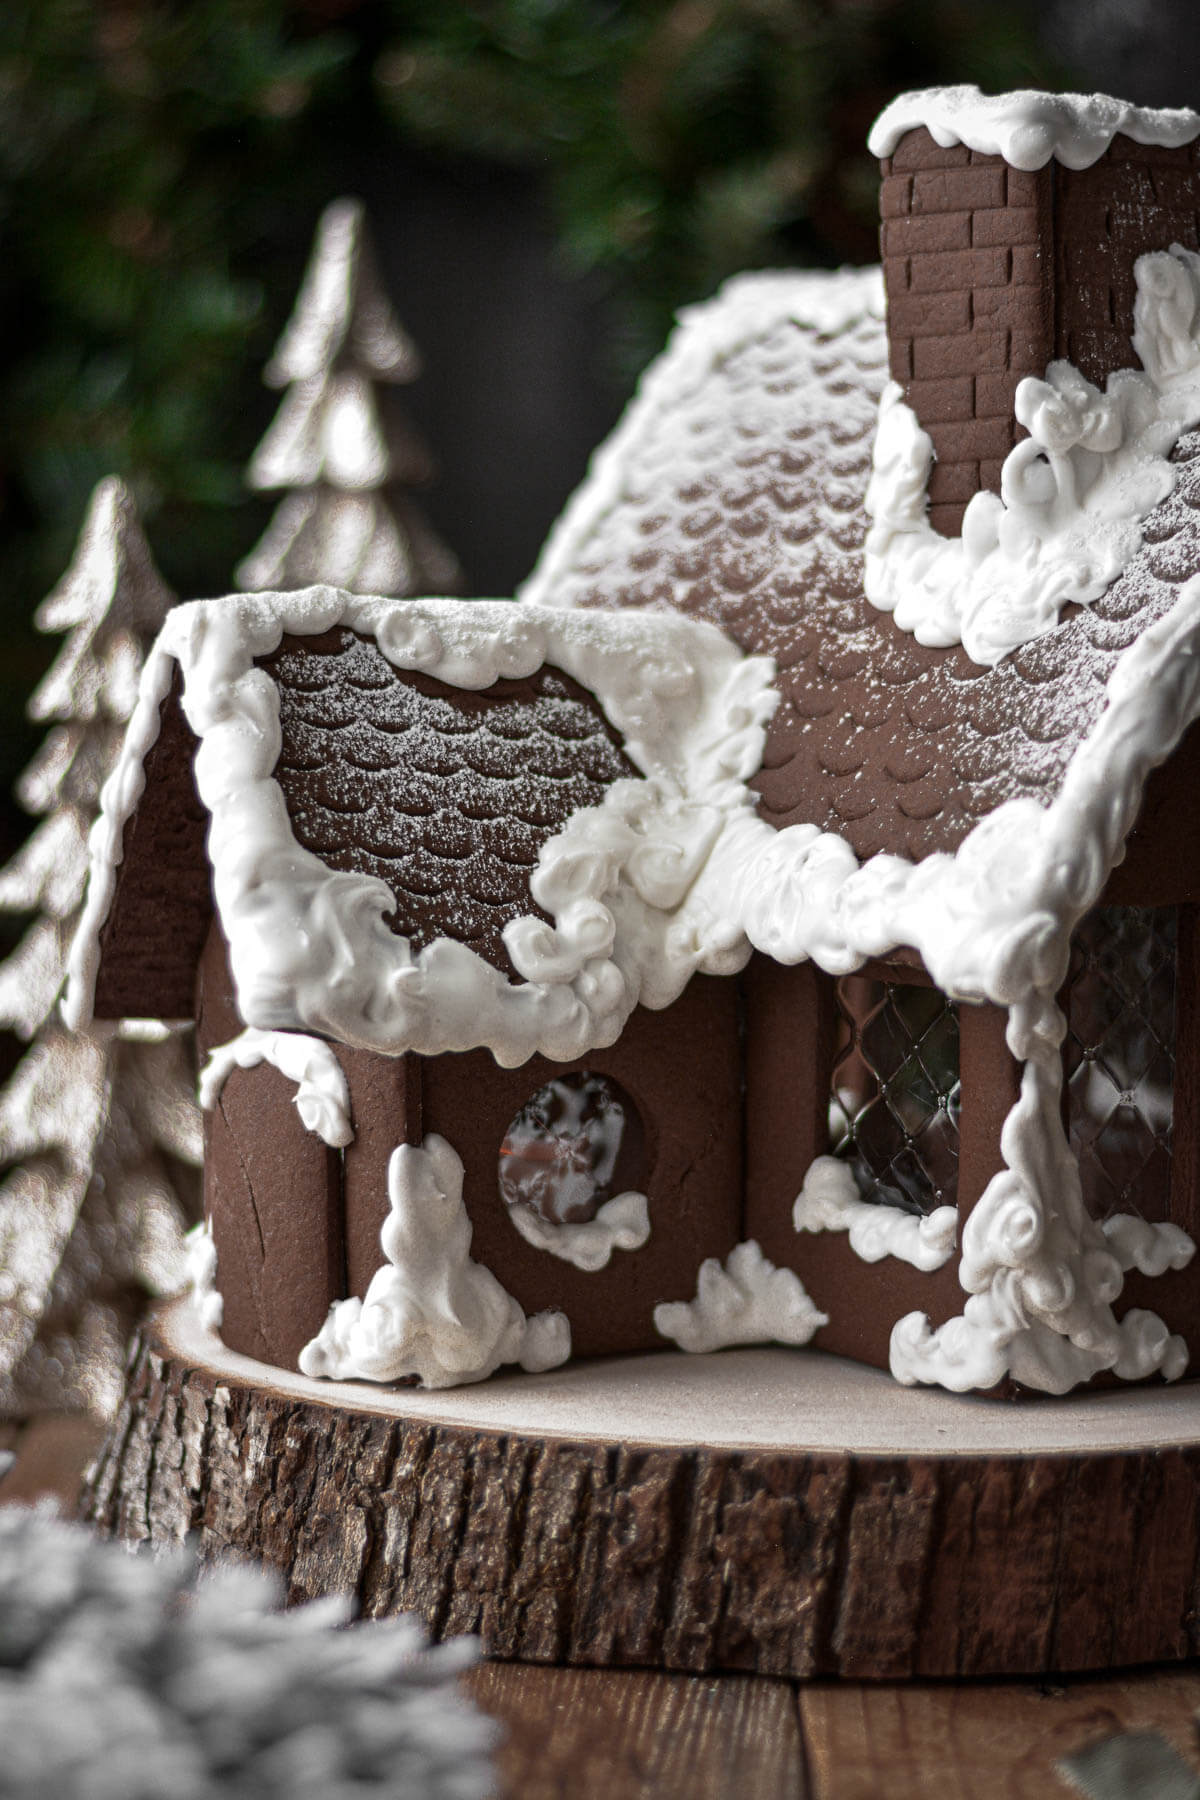
- If cutting out windows or doors, be sure to do that before baking the dough. You can also emboss the dough with various impressions. I used a spoon to emboss the roof pieces with a scalloped pattern, and the blunt side of a butter knife to emboss the chimney pieces with a brick pattern.
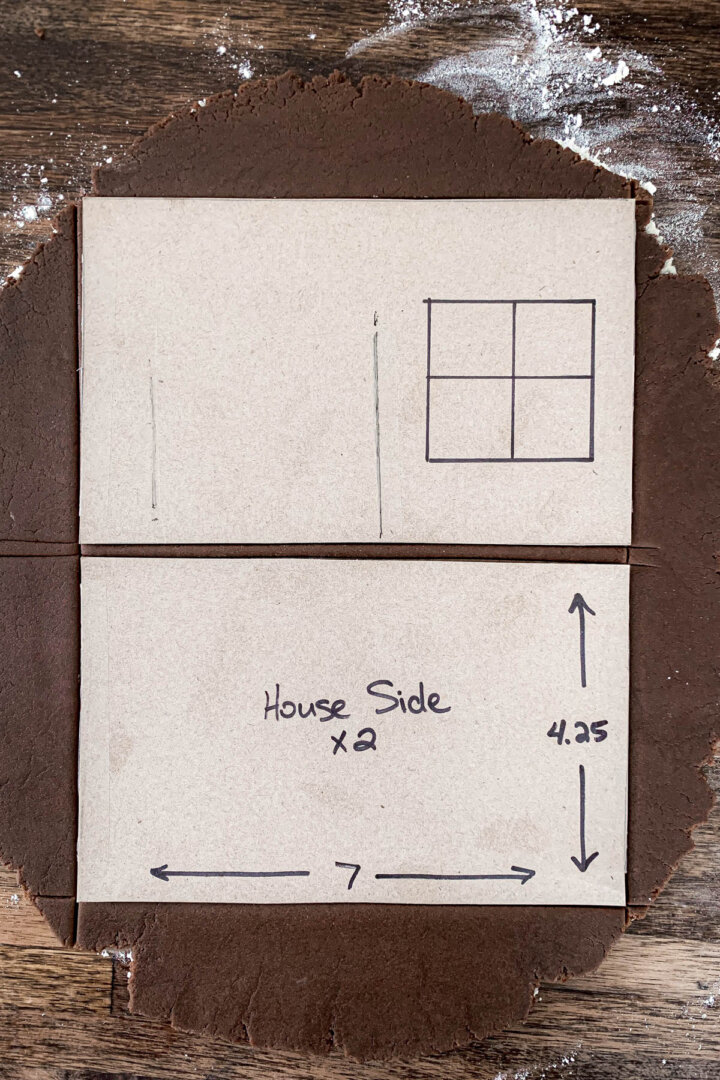
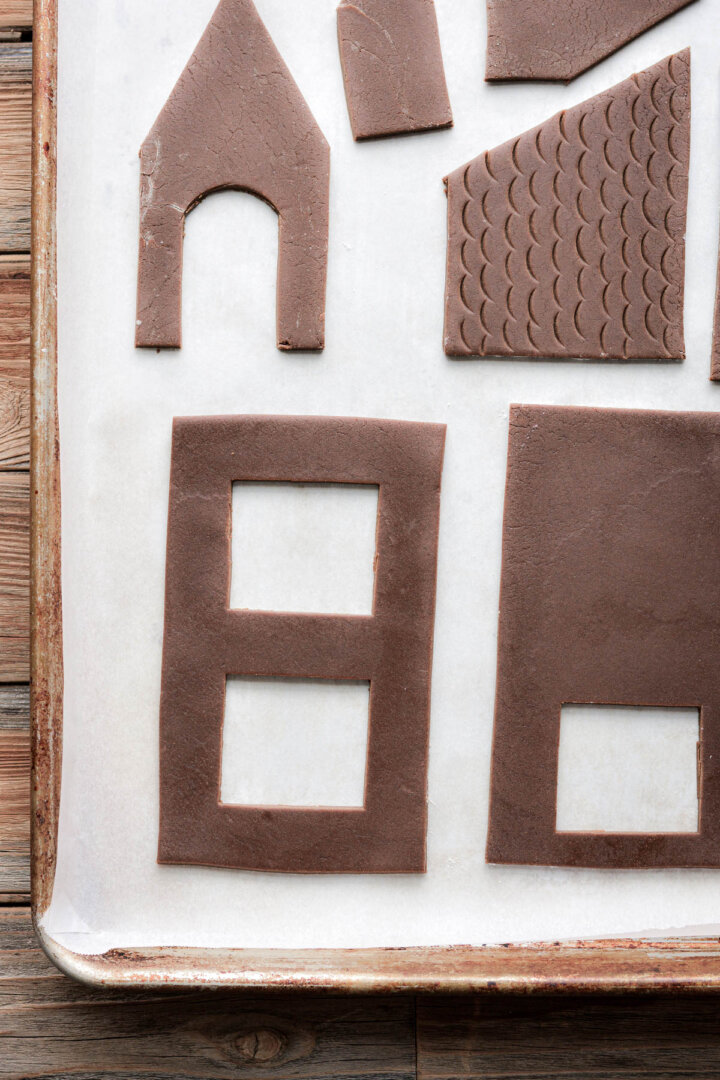
Bake the Gingerbread
- Bake the gingerbread pieces for about 15 minutes, or up to 20 minutes for very large pieces, until completely baked and hard.
- Let cool on the baking sheet completely.

Royal Icing
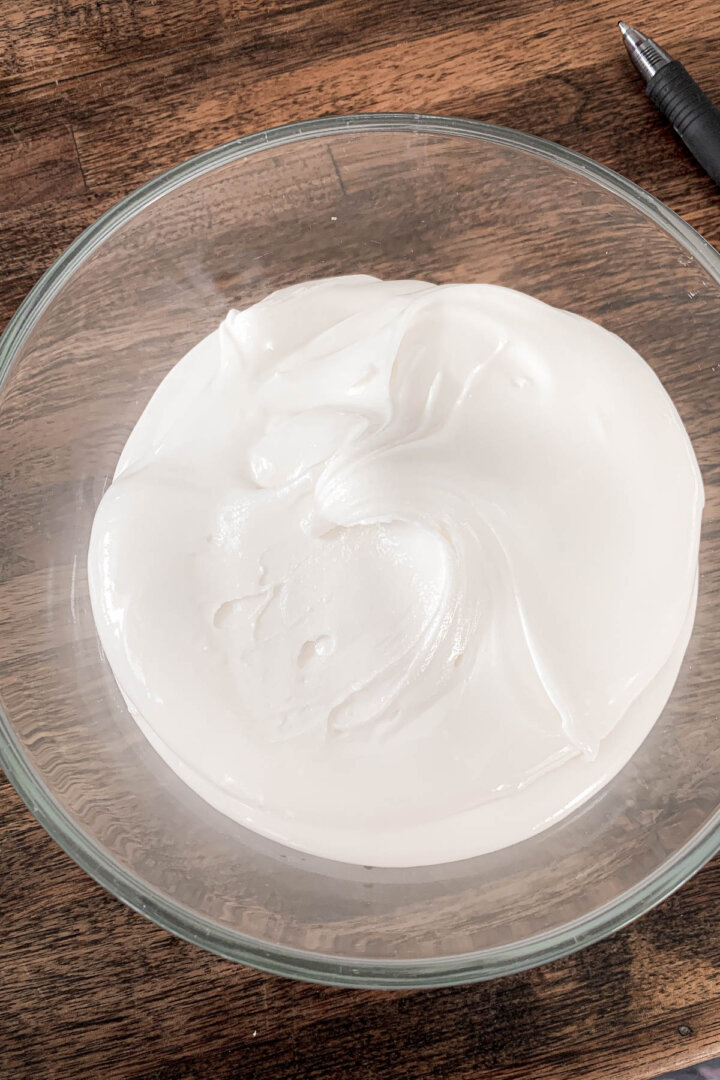
- For the royal icing, combine the powdered sugar and meringue powder. Using a whisk, stir in the vanilla and water, starting with just 5 1/2 tbsp water, then adding more as needed.
- For a stiff consistency to glue the house together, you should only add around 5 1/2 – 6 tbsp water. For a medium/stiff consistency for the icing “snow” to decorate the house, add around 6 1/2 – 7 tbsp water.
- You can start with a stiff consistency for construction, then add a small amount of water to slowly thin it out for decorating the assembled gingerbread house.
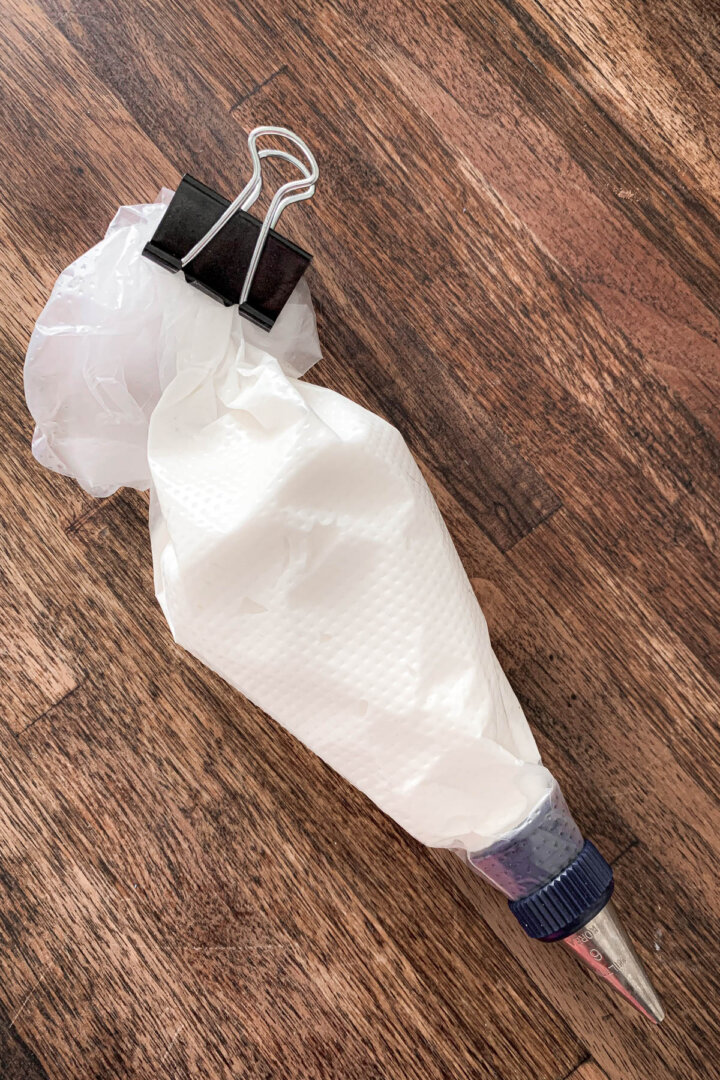
- Fit a piping bag with a coupler and a small round tip, and fill half full of icing. Secure the top of the bag with a rubber band or clip, since royal icing has a tendency to creep up and out the top of unsecured piping bags.
- Note: Another edible alternative to royal icing is to use liquid caramelized sugar to glue the house together. A non-edible option is to use hot glue – this is perhaps the easiest option, since the hot glue dries and sets very quickly, and makes a strong seal to hold the house together. If you don’t intend your gingerbread house to be eaten and it’s purely for decoration, there’s no shame in using hot glue.
Windows
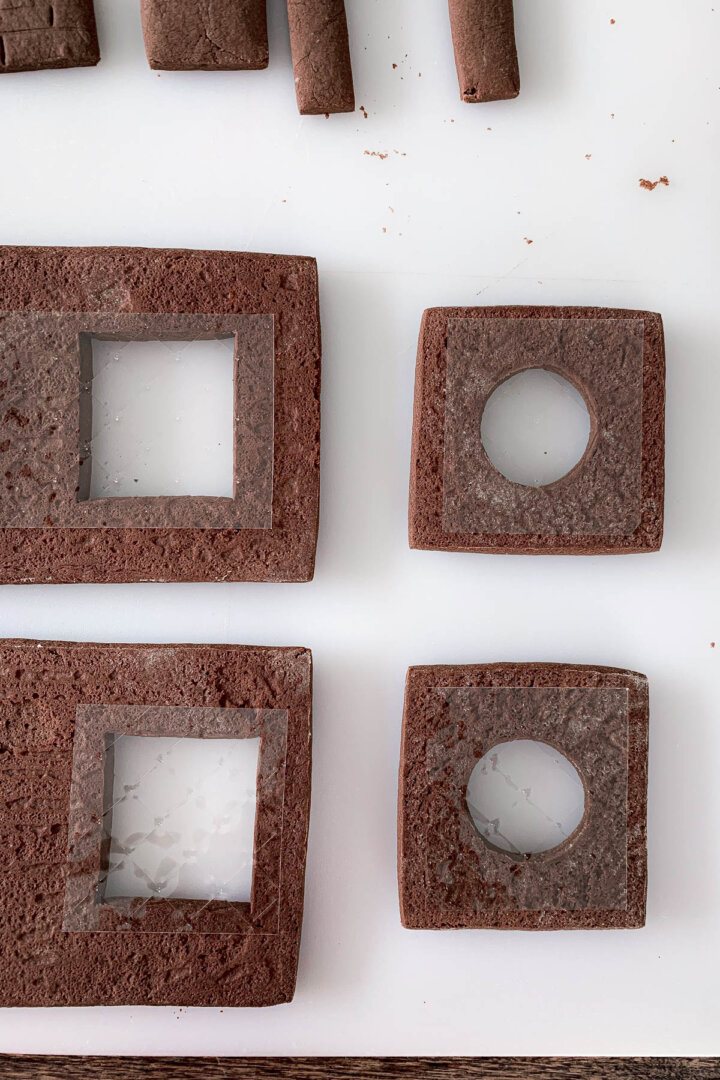
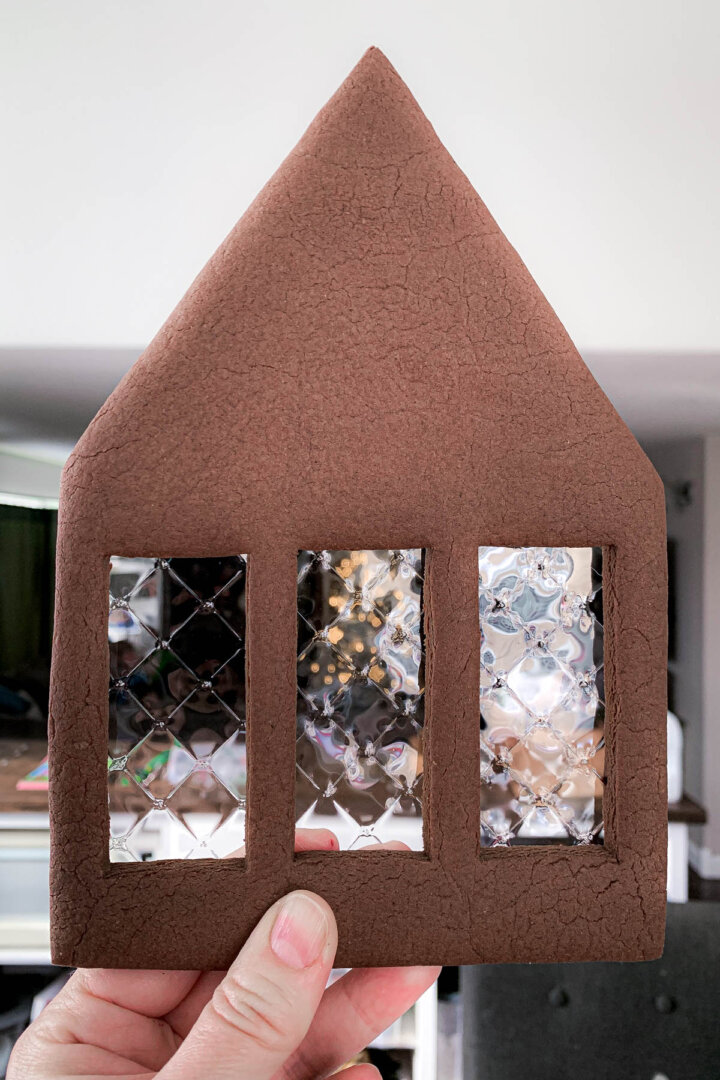
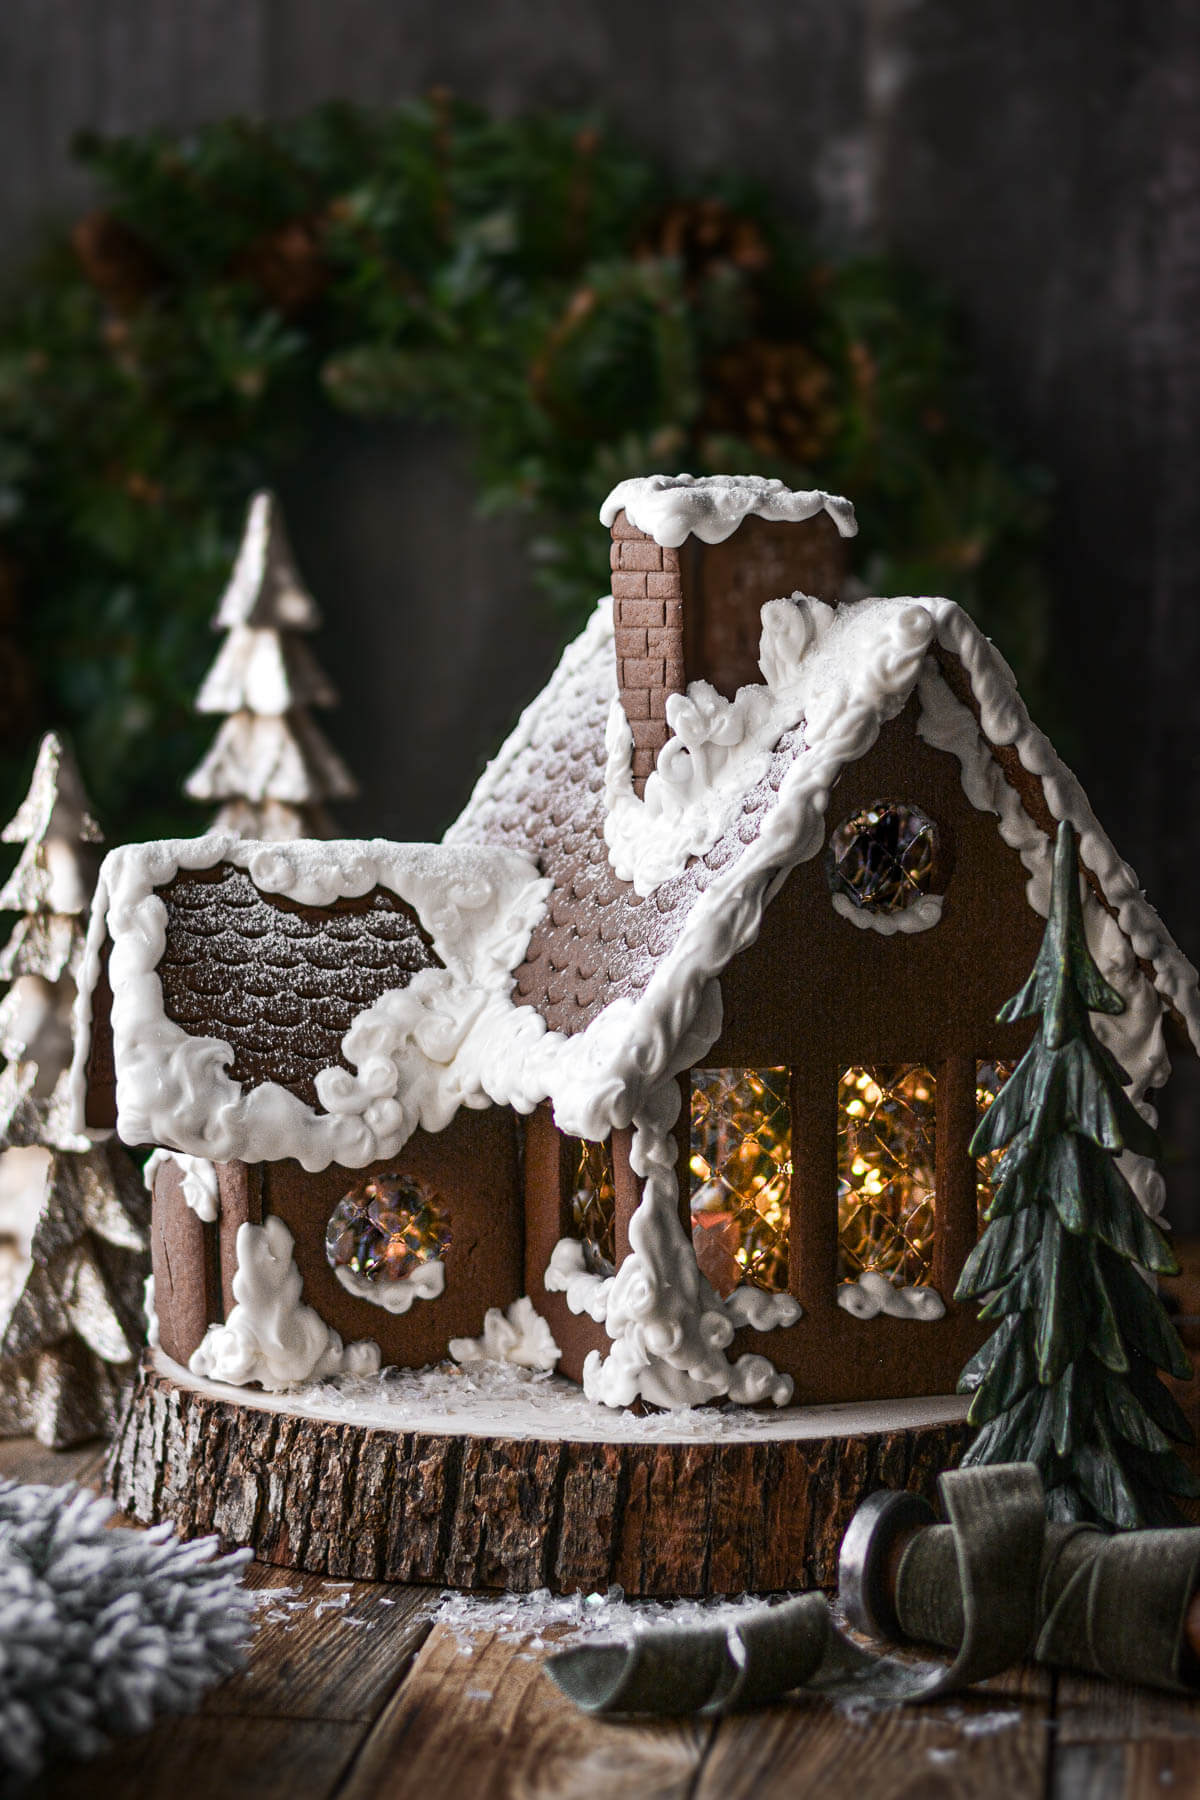
- I used clear gelatin sheets for the windows on my house, simply cutting them to fit and then gluing them onto the back of the pieces before assembling the house.
- Another popular option for gingerbread house windows is to use isomalt. This is a type of sugar substitute that you can sometimes buy in craft stores, and is commonly used in cake decorating.

Assembly
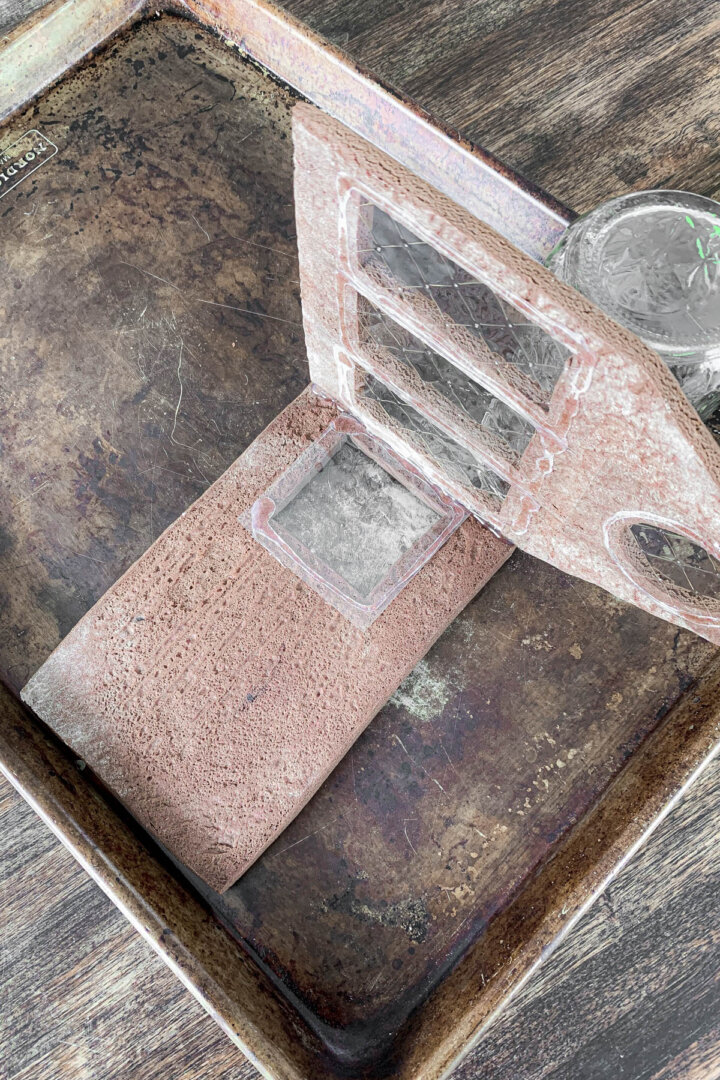
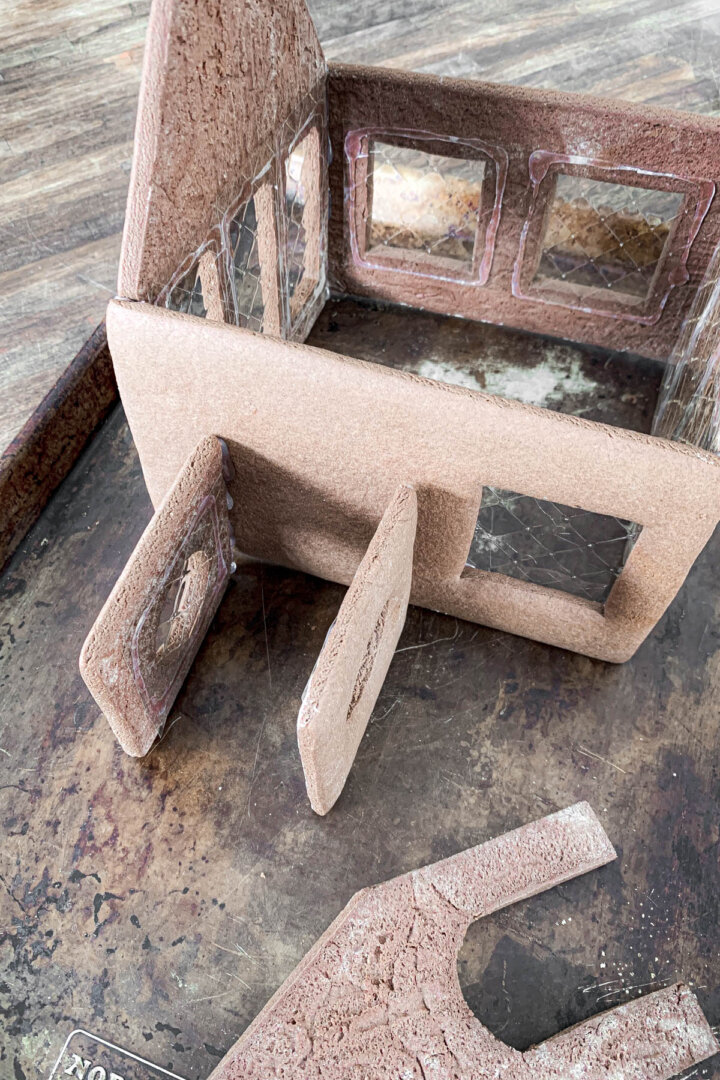
- Check your gingerbread pieces to make sure that they all fit together, and the edges are straight. If the edges are slightly curved or bowed, they won’t make good contact with the icing or glue, and your construction won’t be as solid. If needed, you can use a microplane zester to gently shave any bowed or uneven edges to make them perfectly straight.
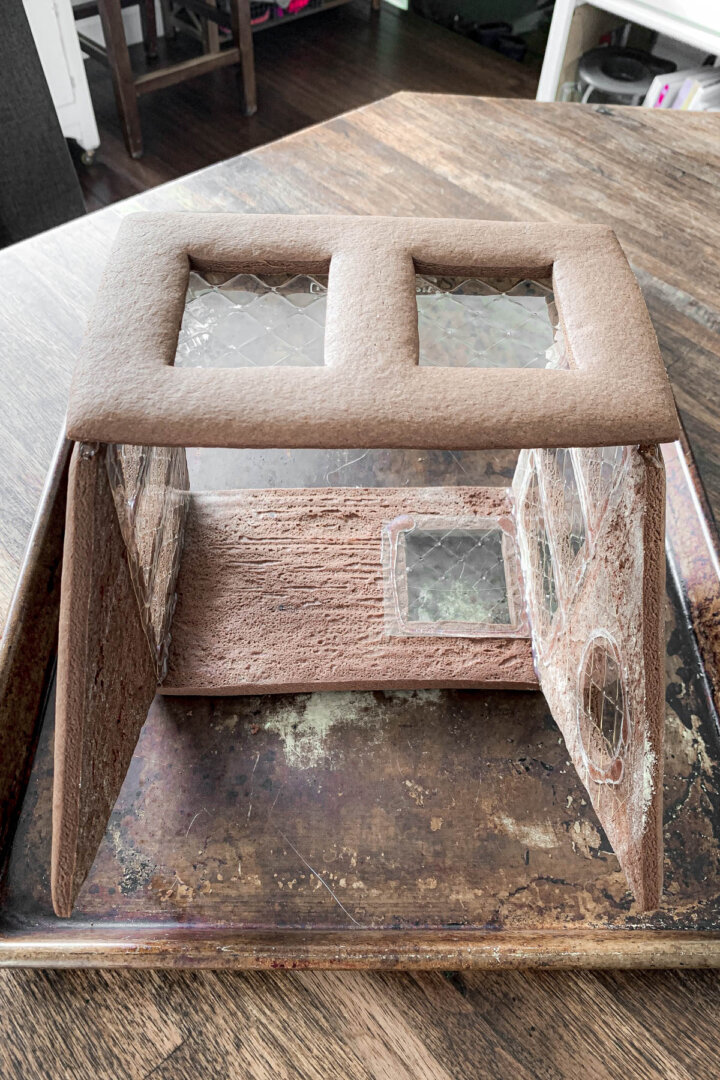
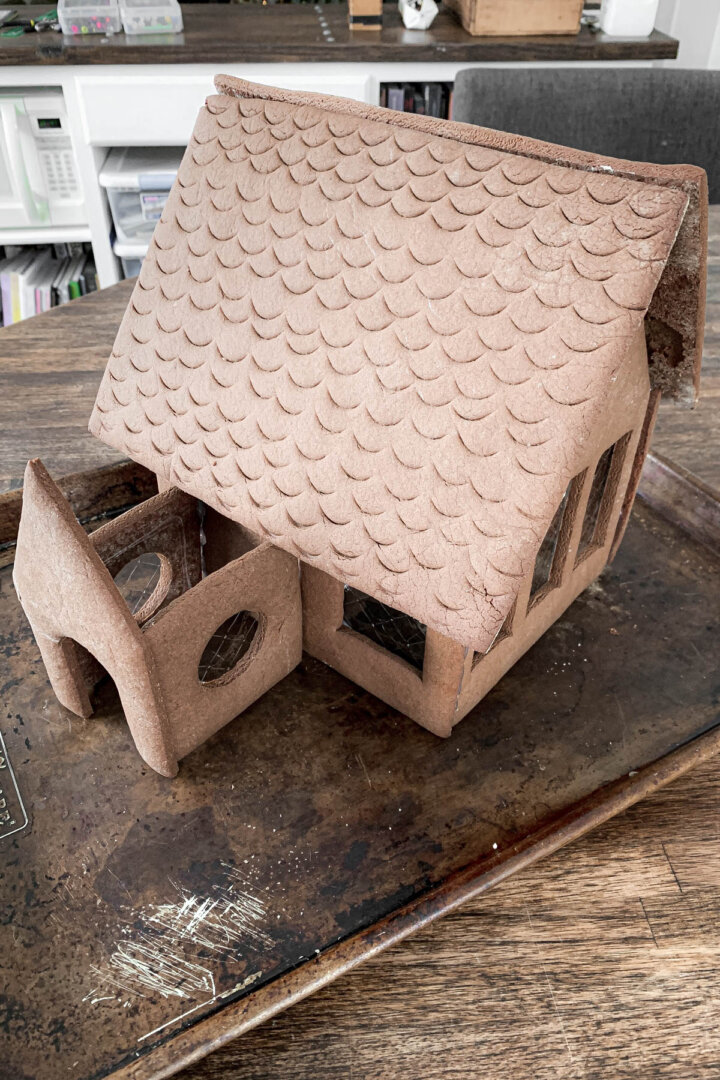
- Start by assembling the sides and ends of the house. You have to give the glue or royal icing enough time to dry and set before you move the pieces or add the roof. Most gingerbread house disasters are the result of not allowing enough time for the icing to harden.
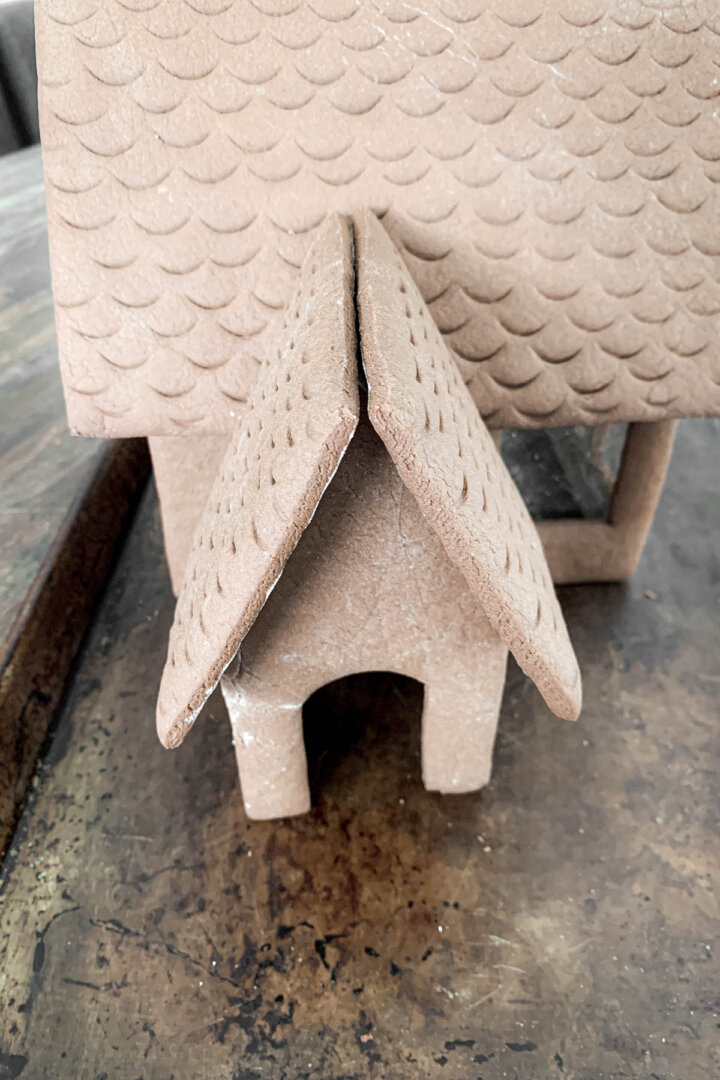
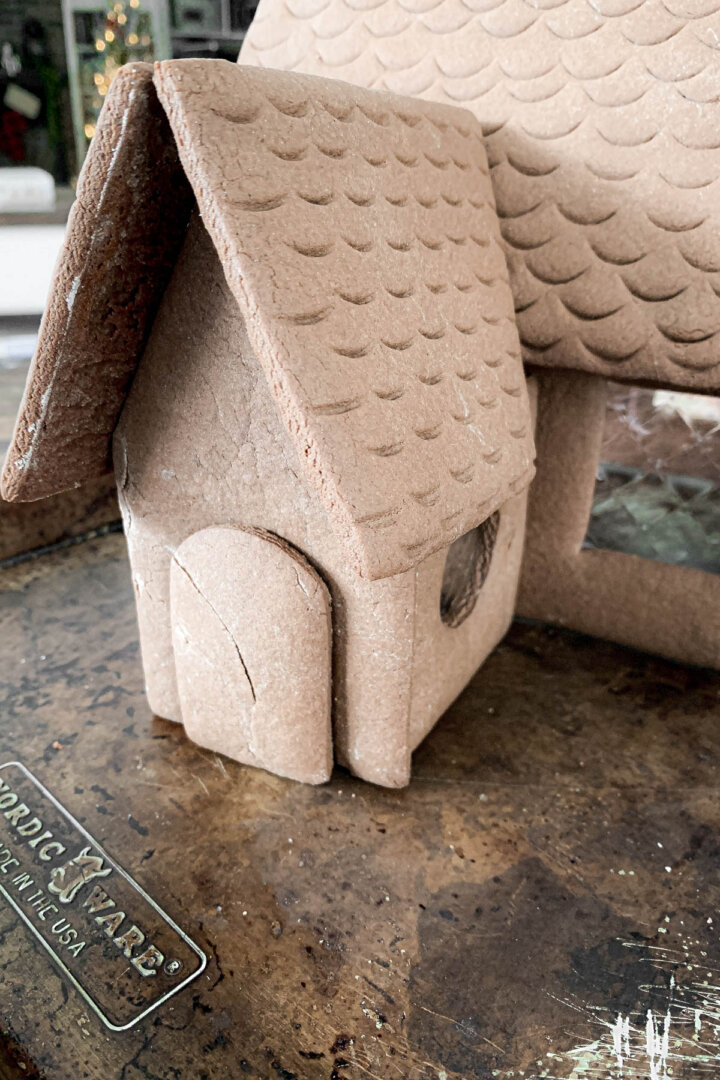
- Once the base of the house is secure with the sides, ends, and any other parts (like the front door vestibule I added to mine), you can attach the roof, and then the chimney.




Decorating
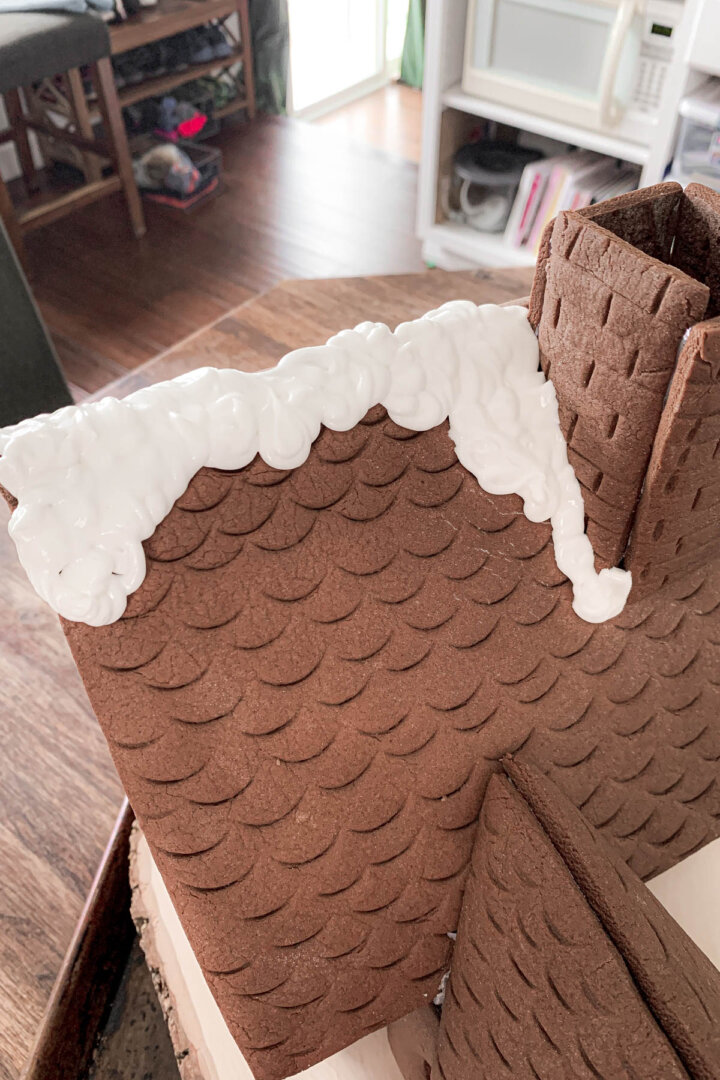
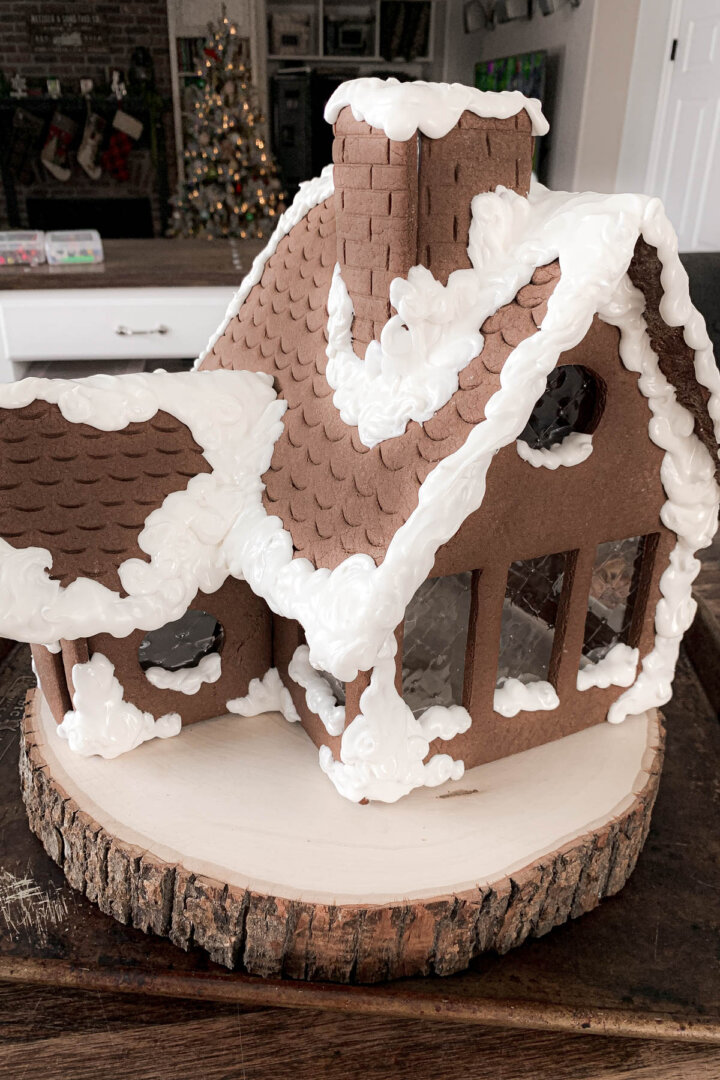
- To decorate my house, I chose not to pipe any intricate details that are typical of gingerbread houses. Instead, I simply decorated mine with lots and lots of swirly royal icing snow drifts to make it look like a cozy, snow covered cabin in the mountains.
- Using tip #6 on my piping bag, I piped snow drifts along the roof tops and edges, on top of the chimney, above the window sills, and around the base and corners of the house. This also helped to cover up any evidence of my having used hot glue to secure the house pieces together.
- If you’re decorating your house with candy, you have to add the candy quickly before the icing hardens and sets.
- Lastly, dust with a little powdered sugar, if desired. Allow the icing to fully harden and cure for about 24 hours, before attempting to move your house.




Be sure to read all of my BAKING FAQs where I discuss ingredients, substitutions and common baking questions, so that you can be successful in your own baking!
Frequently Asked Questions
Are gingerbread houses edible?
The gingerbread cookie dough is edible, yes. However, it’s not something that I’d personally want to eat, and I know my kids wouldn’t like it either, since it’s very dark, spicy, hard, and not sweet enough. But this is a recipe meant for construction, and it’s a good, strong dough that works well for building a gingerbread house. If you’re looking for a gingerbread cookie recipe for eating, you’ll love these soft and chewy gingerbread cookies.
Also, if you’re using anything non-edible to construct your house, such as hot glue, you cannot eat the assembled house.
How long will the house last?
If you want to keep your house to decorate with year after year, a homemade gingerbread house could last for several years or more, if packed and stored carefully.
What did you use for the windows?
I used gelatin sheets. They’re clear, with a pretty pattern on them that looks great used as windowpanes.
Another popular option for gingerbread house windows is to use isomalt. This is a type of sugar substitute that you can sometimes buy in craft stores.
You Might Also Like
Please check out my Amazon Shop for a curated collection of some of my favorite cake pans from trusted brands, baking tools, ingredients, pretty things and fashion finds. I recommend products that I buy and use every day!
Did you love today’s recipe? Please rate the recipe and let me know in the comments what you thought! Also, be sure to follow Curly Girl Kitchen on Instagram, and tag me when you try one of my recipes so I can see all your delicious creations!
High Altitude Gingerbread House Recipe
All recipes on Curly Girl Kitchen are developed for high altitude at 5,280 feet. See FAQs for adjusting to higher or lower elevations.
Equipment
- Saucepan
- Baking Sheets + Parchment Paper
Ingredients
Gingerbread
- ⅔ cup granulated sugar
- ⅔ cup light or dark molasses
- 1 tbsp ground ginger
- 2 tsp ground allspice
- 2 tsp ground cinnamon
- 2 tsp ground cloves
- 2 ½ tsp baking soda
- 1 cup unsalted butter
- 2 large eggs, lightly beaten
- ⅔ cup cocoa powder, sifted free of lumps (or replace with flour)
- 6 – 6 ½ cups all-purpose flour, fluffed, spooned and leveled
Royal Icing
- 4 cups powdered sugar
- 3 tbsp meringue powder
- 1 tsp vanilla extract
- 6-7 tbsp water
Instructions
Make the Gingerbread Dough
- Preheat the oven to 325 F, and position a rack in the center of the oven. Line several baking sheets with parchment paper.
- In a saucepan, combine the sugar, molasses, ginger, allspice, cinnamon and cloves. Over medium heat while stirring frequently with a silicone spatula, bring the mixture to a boil. Remove from the heat.
- Stir in the baking soda; the mixture will foam up and become paler and fluffier. Then stir in the butter until completely melted.
- Stir in the beaten eggs, then the flour and cocoa powder, until the dough starts to come together.
- Dump the dough out onto a clean work surface, and knead for several minutes until it smooths out. If it seems too damp or sticky, add a bit more flour. If it seems too dry or crumbly, add a little warm water.
- Cut the dough into 4ths, and wrap each portion in plastic wrap, working with just one portion at a time. This recipe makes enough dough for a fairly large house (like the one pictured), or 3-4 mini gingerbread houses.
Roll and Cut the Dough
- Lightly flour the counter, and roll out the dough to just under 1/4 inch thick. You shouldn't need to use too much extra flour, but if it sticks to the rolling pin, dust the dough lightly with flour.
- Cut your dough, using any type of template or cutter, then place the cut pieces on the parchment lined baking sheets. For larger pieces, you'll need to use a very large spatula or cake lifter to transfer the dough to the baking sheet, so that you don't tear or stretch the dough out of shape while transferring it.
- If cutting out windows or doors, be sure to do that before baking the dough. You can also emboss the dough with various impressions. I used a spoon to emboss the roof pieces with a scalloped pattern, and the blunt side of a butter knife to emboss the chimney pieces with a brick pattern.
Bake the Gingerbread
- Bake the gingerbread pieces for about 15 minutes, or up to 20 minutes for very large pieces, until completely baked and hard.
- Let cool on the baking sheet completely.
Royal Icing
- For the royal icing, combine the powdered sugar and meringue powder. Using a whisk, stir in the vanilla and water, starting with just 5 1/2 tbsp water, then adding more as needed.
- For a stiff consistency to glue the house together, you should only add around 5 1/2 – 6 tbsp water. For a medium/stiff consistency for the icing "snow" to decorate the house, add around 6 1/2 – 7 tbsp water.
- You can start with a stiff consistency for construction, then add a small amount of water to slowly thin it out for decorating the assembled gingerbread house.
- Fit a piping bag with a coupler and a small round tip, and fill half full of icing. Secure the top of the bag with a rubber band or clip, since royal icing has a tendency to creep up and out the top of unsecured piping bags.
- Note: Another edible alternative to royal icing is to use liquid caramelized sugar to glue the house together. A non-edible option is to use hot glue – this is perhaps the easiest option, since the hot glue dries and sets very quickly, and makes a strong seal to hold the house together. If you don't intend your gingerbread house to be eaten and it's purely for decoration, there's no shame in using hot glue.
Windows
- I used clear gelatin sheets for the windows on my house, simply cutting them to fit and then gluing them onto the back of the pieces before assembling the house.
- Another popular option for gingerbread house windows is to use isomalt. This is a type of sugar substitute that you can sometimes buy in craft stores.
Assembly
- Check your gingerbread pieces to make sure that they all fit together, and the edges are straight. If the edges are slightly curved or bowed, they won't make good contact with the icing or glue, and your construction won't be as solid. If needed, you can use a microplane zester to gently shave any bowed or uneven edges to make them perfectly straight.
- Start by assembling the sides and ends of the house. You have to give the glue or royal icing enough time to dry and set before you move the pieces or add the roof. Most gingerbread house disasters are the result of not allowing enough time for the icing to harden.
- Once the base of the house is secure with the sides, ends, and any other parts (like the front door vestibule I added to mine), you can attach the roof, and then the chimney.
Decorating
- To decorate my house, I chose not to pipe any intricate details that are typical of gingerbread houses. Instead, I simply decorated mine with lots and lots of swirly royal icing snow drifts.
- Using tip #6 on my piping bag, I piped snow drifts along the roof lines and edges, on top of the chimney, above the window sills, and around the base and corners of the house. This also helped to cover up any evidence of my having used hot glue to secure the house pieces together.
- If you're decorating your house with candy, you have to add the candy quickly before the icing hardens and sets.
- Lastly, dust with a little powdered sugar, if desired. Allow the icing to fully harden and cure for about 24 hours, before attempting to move your house.


This gingerbread house recipe turned out fantastic! I subbed flour instead of the cocoa powder, and the color was still great. It had fine structural integrity, and the taste wasn’t bad at all. The kids had fun building houses and munching on scraps. Thank you for another win!
I’m so glad you loved it!
The prettiest sweet house ever!! I have been trying to make one for a few weeks now and have a terrible time finding templates that are big enough I have been looking everywhere for beautiful large gingerbread house cutters to no avail do you have any insight 🩷🩷 the templates you down load are very hard to use when they are paper
I think it’s best to trace them onto thin cardboard, like I did, which is much sturdier than paper. I used empty cereal boxes. It was very easy to place them on the dough and cut around them.