
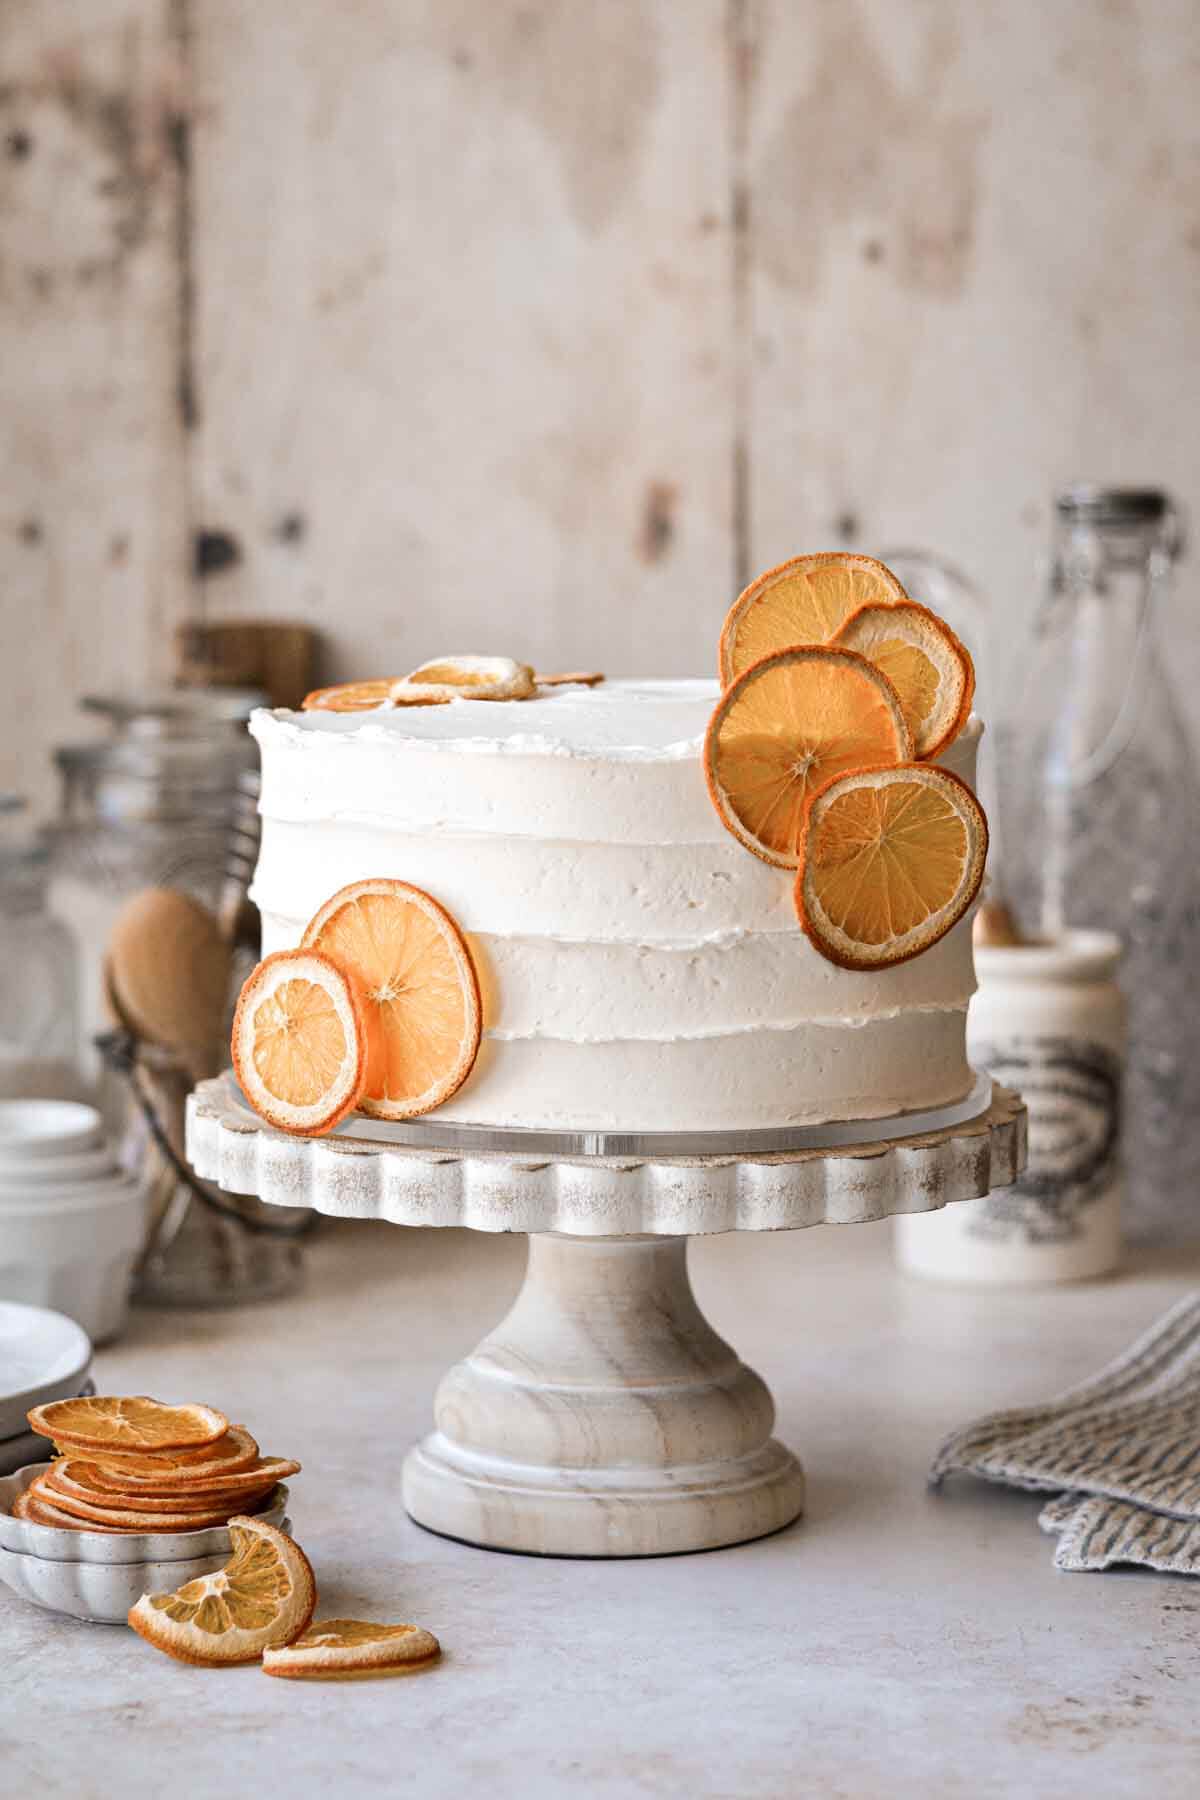
This high altitude orange cake is soft, tender and moist, flavored with fresh orange zest and orange juice, and frosted with fluffy orange buttercream. Decorate your cake with dried orange slices for a beautiful finish.
You might also love these high altitude recipes for orange creamsicle cake, orange poppy seed loaf cake, and lemon cake.
This site contains affiliate links. As an Amazon associate, I earn from qualifying purchases. This means that I may make a small commission if you purchase a product using those links. This in no way affects my opinion of those products and services. All opinions expressed on this site are my own.
Why You’ll Love This Cake
Perfectly Fluffy and Moist. This cake is so light, fluffy and moist, full of wonderful fresh orange flavor, with a perfectly sweet orange buttercream.
Easy to Make. While you do need a stand mixer for the buttercream, the cake batter is simple to mix up with a bowl and whisk.
Better Than Box Mix. It’s incredibly important to me to have a thorough archive of reliable, from scratch, high-altitude tested cake recipes on my blog that people can turn to any time they need a cake for any occasion. I want to inspire confidence in bakers that they can make a homemade cake that is just as easy, and a million times better, than using a boxed mix. And this cake does it! With fresh orange flavor and natural ingredients, you can taste the difference.
High Altitude Tested. I develop all the recipes on my site for Denver’s altitude of 5,280 feet. If you’re at a lower or higher elevation, please see my FAQs for guidance on adjusting recipes for your altitude.

See the recipe card at the end of the post for the full ingredients list and instructions.
Ingredients
- Cake Flour. Cake flour is preferred for a very light and fluffy cake, but all-purpose flour can also be used.
- Orange Zest and Juice. For the cake, zest a navel orange, then rub the zest into the sugar before mixing up the cake batter. This simple step will add so much fresh orange flavor. You can juice fresh oranges for the juice in the cake, too, although I used bottled “Simply Orange” orange juice.

Instructions
Cake
- Preheat the oven to 350F, and position a rack in the center of the oven. Spray three 8-inch cake pans with non-stick baking spray, line the bottoms of the pans with circles of parchment paper, and lightly spray the paper, too.
- In a large bowl, use your fingers to rub the orange zest into the sugar until moist and fragrant.
- Sift in the flour, baking powder and salt, then whisk until evenly combined.
- Separately, whisk together the eggs, milk, orange juice, oil, melted butter and vanilla extract. Add the wet ingredients to the dry and whisk for about 15-30 seconds, until smooth.
- Divide the batter between the pans. Bake on the center oven rack for about 25-30 minutes, until a cake tester comes out clean and the centers of the cakes spring back when lightly touched.
- Set the pans on a cooling rack, cover loosely with a clean kitchen towel and cool completely before frosting.


Buttercream
- In the bowl of your stand mixer fitted with the paddle attachment, beat the butter for 1 minute until smooth.
- With the mixer on low, gradually add the powdered sugar, meringue powder, salt and extracts, mixing to combine.
- Increase speed to medium and whip for 4-5 minutes, scraping the bowl occasionally, until very light and fluffy. If the buttercream is too thick, beat in a little milk, one tablespoon at a time.
- Remove the cooled cakes from the pans and peel the paper off the cakes. Stack and fill the cakes, then frost all over with a thin crumb coat of buttercream. Chill 20 minutes. Frost with a final coat of buttercream and decorate with dried orange slices.


Dried oranges are not the same thing as candied orange slices, and are intended only as a garnish and not to be eaten, since they will taste bitter and not sweet. Click here for a recipe for Candied Orange Peel.
How to Make Dried Orange Slices for Garnish
Making dried orange slices to decorate a cake is incredibly easy, and while they do have to dry in the oven for a few hours, there’s very little active prep time. They retain a beautiful color when dried on low heat, and can be made ahead of time and stored for later, as well. You can follow this exact process for oranges, lemons, limes and grapefruit.
- Preheat the oven to 175F, and line a baking sheet with parchment paper.
- Thinly slice the oranges – about 1/8 of an inch thick is just right.
- Lay the orange slices in a single layer on the baking sheet.
- Bake on the center oven rack for 2-3 hours, turning the oranges over every 30 minutes and rotating the pan if you have hot spots in your oven, until mostly dry and still vivid in color; don’t let them get overly brown, or they won’t look as pretty.
- Turn off the oven and let them finish drying for several more hours, or overnight.
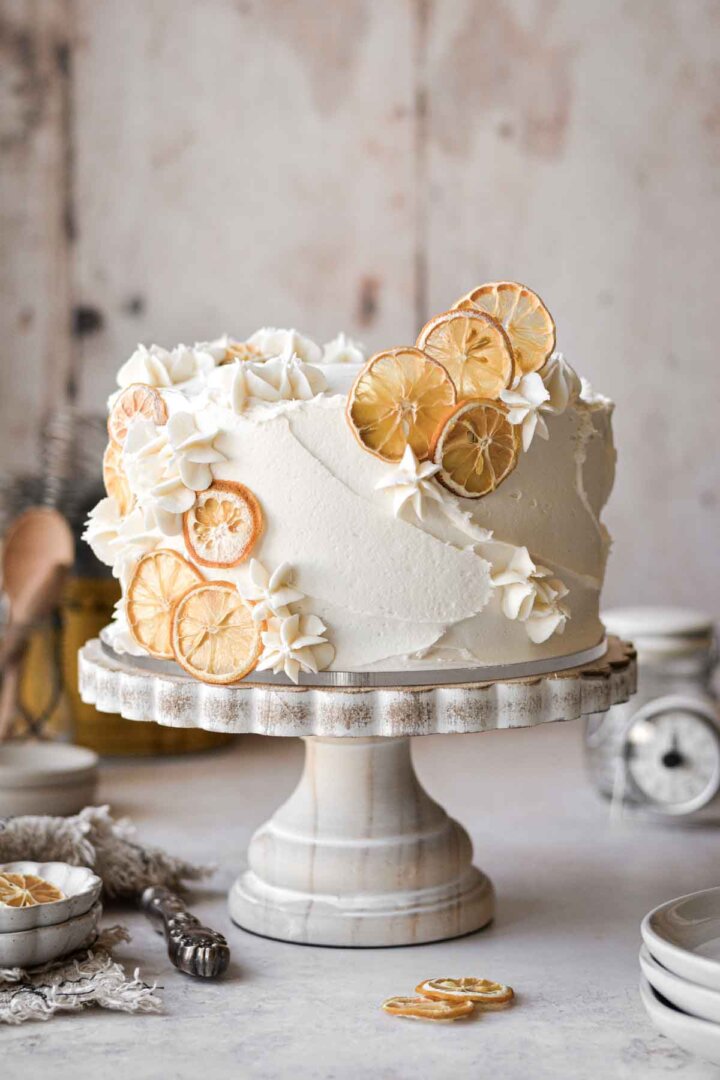
- Place the dried orange slices on the cake, using a bit of buttercream as “glue”.
- Any leftover orange slices can be stored in an airtight container for as long as they still retain their color.


Be sure to read all of my BAKING FAQs where I discuss ingredients, substitutions and common questions with cake making, so that you can be successful in your own baking! I also suggest reading these comprehensive posts on making Perfect American Buttercream, How to Stack, Fill, Crumb Coat and Frost Layer Cakes and How to Use Piping Bags.
Frequently Asked Questions
You will need fresh orange zest, but you can use either freshly squeezed orange juice, or bottled. I love Simply Orange pulp-free orange juice, and always have it in the refrigerator.
For an orange poppy seed cake, you can add 2 tbsp poppy seeds to the cake batter.
For a smaller cake, you can make half the recipe and use three 6-inch cake pans.

You Might Also Like


Please check out my Amazon Shop for a curated collection of some of my favorite cake pans from trusted brands, baking tools, ingredients, pretty things and fashion finds. I recommend products that I buy and use every day!
Did you love today’s recipe? Please rate the recipe and let me know in the comments what you thought! Also, be sure to follow Curly Girl Kitchen on Instagram, and tag me when you try one of my recipes so I can see all your delicious creations!

High Altitude Orange Cake
All recipes on Curly Girl Kitchen are developed for high altitude at 5,280 feet. See FAQs for adjusting to higher or lower elevations.

Equipment
- Stand Mixer with Paddle Attachment
- 8-inch cake pans (x3)
Ingredients
Cake
- 1 ½ cups granulated sugar
- 2 tsp freshly grated orange zest (from 1 navel orange)
- 3 cups cake flour (preferred), or all-purpose flour, fluffed, spooned and leveled
- 2 ½ tsp baking powder
- ½ tsp coarse Kosher salt (if using table salt, use half the amount)
- 3 large eggs
- ½ cup whole milk
- 1 cup orange juice
- ½ cup vegetable oil
- ½ cup unsalted butter, melted
- 1 tsp vanilla extract
Buttercream
- 2 cups unsalted butter, softened to room temperature
- 4 cups powdered sugar
- 1 tbsp meringue powder (optional)
- ¼ tsp coarse Kosher salt (if using table salt, use half the amount)
- 1 tsp orange extract
- 1 tsp vanilla extract
Instructions
Cake
- Preheat the oven to 350F, and position a rack in the center of the oven. Spray three 8-inch cake pans with non-stick baking spray, line the bottoms of the pans with circles of parchment paper, and lightly spray the paper, too.
- In a large bowl, use your fingers to rub the orange zest into the sugar until moist and fragrant.
- Sift in the flour, baking powder and salt, then whisk until evenly combined.
- Separately, whisk together the eggs, milk, orange juice, oil, melted butter and vanilla extract. Add the wet ingredients to the dry and whisk for about 15-30 seconds, until smooth.
- Divide the batter between the pans. Bake on the center oven rack for about 25-30 minutes, until a cake tester comes out clean and the centers of the cakes spring back when lightly touched.
- Set the pans on a cooling rack, cover loosely with a clean kitchen towel and cool completely before frosting.
Buttercream
- In the bowl of your stand mixer fitted with the paddle attachment, beat the butter for 1 minute until smooth.
- With the mixer on low, gradually add the powdered sugar, meringue powder, salt and extracts, mixing to combine.
- Increase speed to medium and whip for 4-5 minutes, scraping the bowl occasionally, until very light and fluffy. If the buttercream is too thick, beat in a little milk, one tablespoon at a time.
- Remove the cooled cakes from the pans and peel the paper off the cakes. Stack and fill the cakes, then frost all over with a thin crumb coat of buttercream. Chill 20 minutes. Frost with a final coat of buttercream and decorate with dried orange slices.
Notes
 https://curlygirlkitchen.com/
Very moist and delicious! Frosting has the perfect amount of sweetness and soooo creamy!
What kind of OJ (fresh squeezed or carton)?
I usually use Simply Orange orange juice, but freshly squeezed works too!
I made this for my nephews birthday (he wanted and orange flavored cake shaped like a pineapple). Cake was delicious, moist, full of orange flavor and held up well to stacking.
How did you make those slices stay in place?
They stick to the buttercream.
Did you have to stick them immediately after frosting cake or can it be done next day?
It’s fine to do them the next day. If the frosting on the cake has crusted over, though, just save a little bit of the frosting to use as “glue” to stick the orange slices on.
Can I use 2 9 inch cake pans instead?
That will work just fine.
Can I use Swiss Meringue buttercream instead of ABC in this recipe?
I’m sure that would be great!
Can this recipe be made into cupcakes?
I live at 4800 feet, would the high altitude cake work? Is this cake sturdy enough to make several layers for a wedding? I’m going to get brave for my daughters wedding.
This cake should work great at your altitude. For a tiered cake, just be sure to use a good support system of dowels and cake boards.
Several people are telling me the cake I baked (following this recipe) is the best cake they have ever eaten. It turned out perfectly!
How do you make the dried orange slices?
The instructions are in the body of this post.