
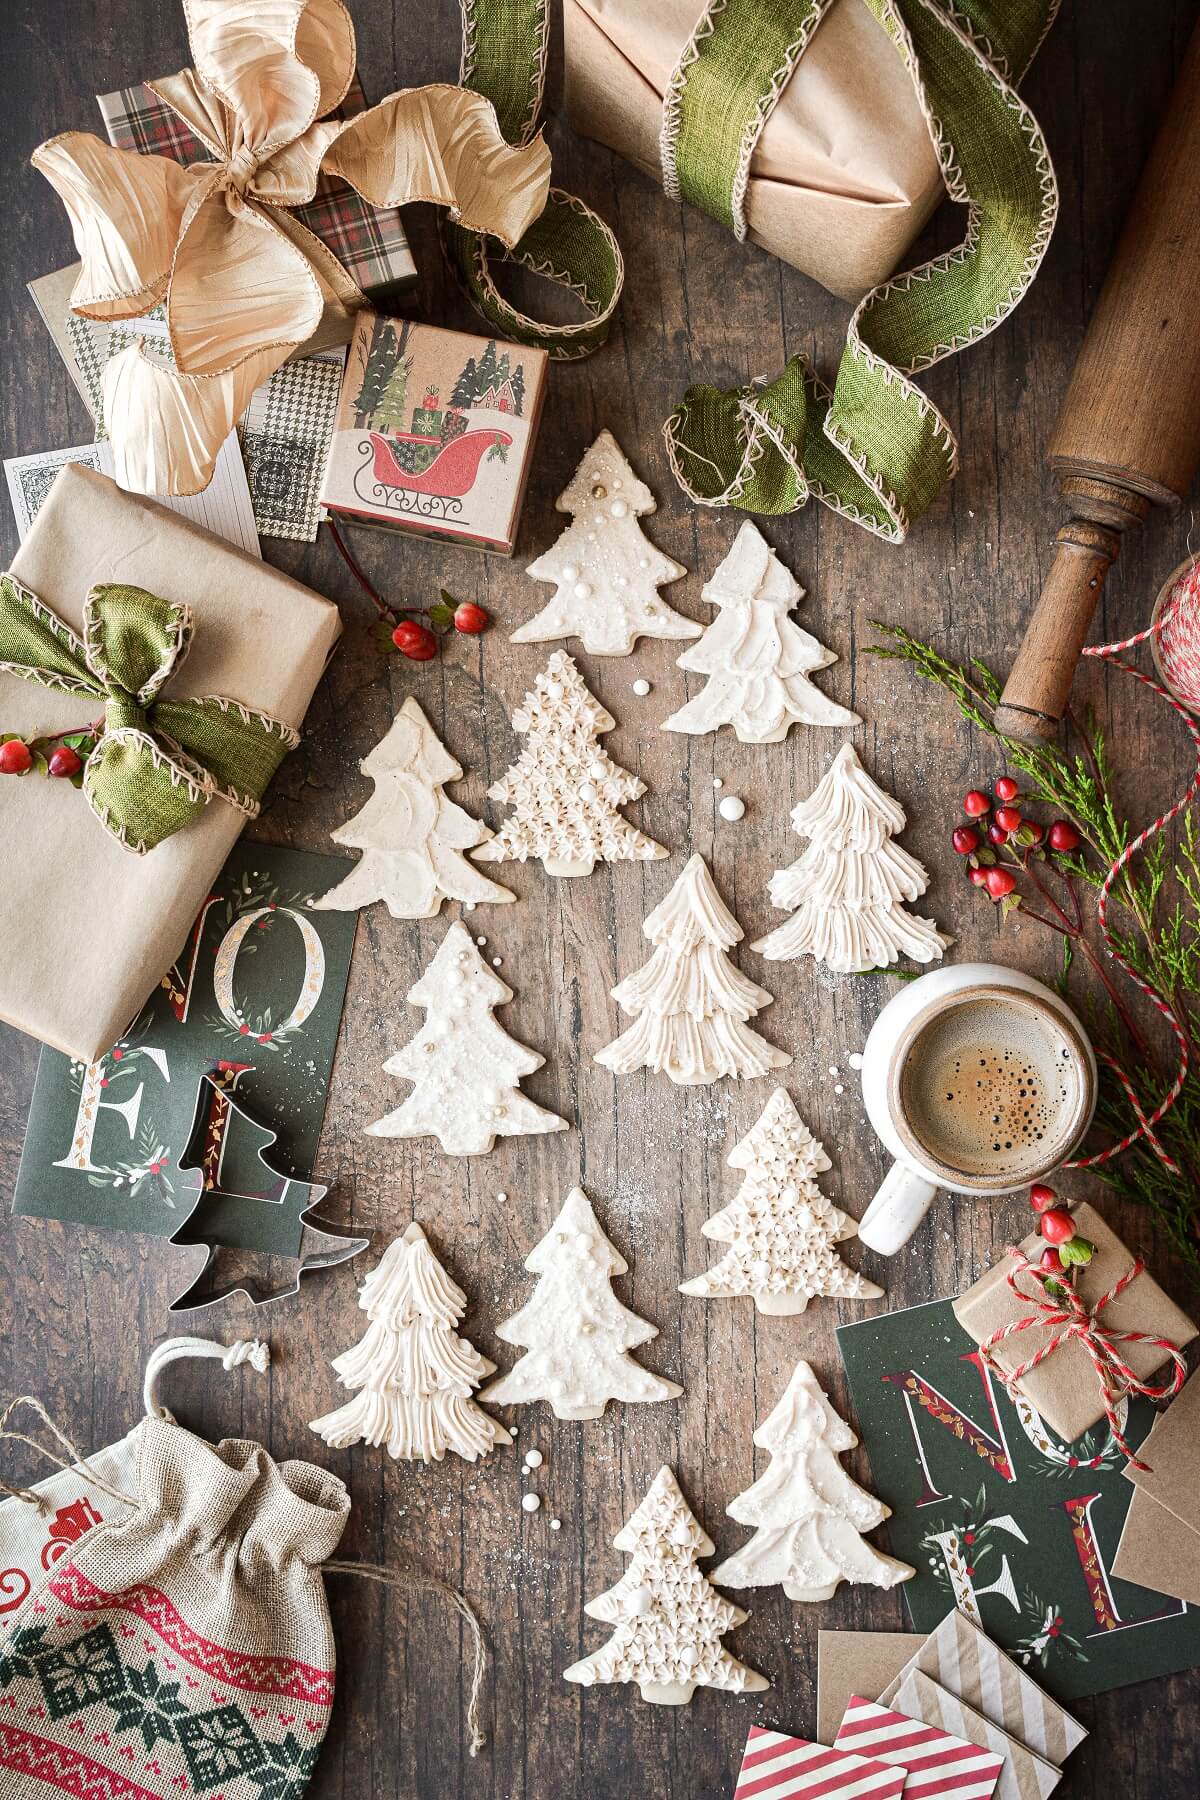
In today’s post, follow my step-by-step photos to learn how to make beautifully decorated Christmas tree cookies frosted with fluffy buttercream for a festive holiday treat. I’ve included four elegant styles for a gorgeous assortment of the most tempting and delicious Christmas tree sugar cookies. And as a bonus, I’ve also included a tutorial for decorating the cutest little buttercream frosted snowman sugar cookies you’ve ever seen! So be sure to scroll all the way through the post so as not to miss any of the decorating details.
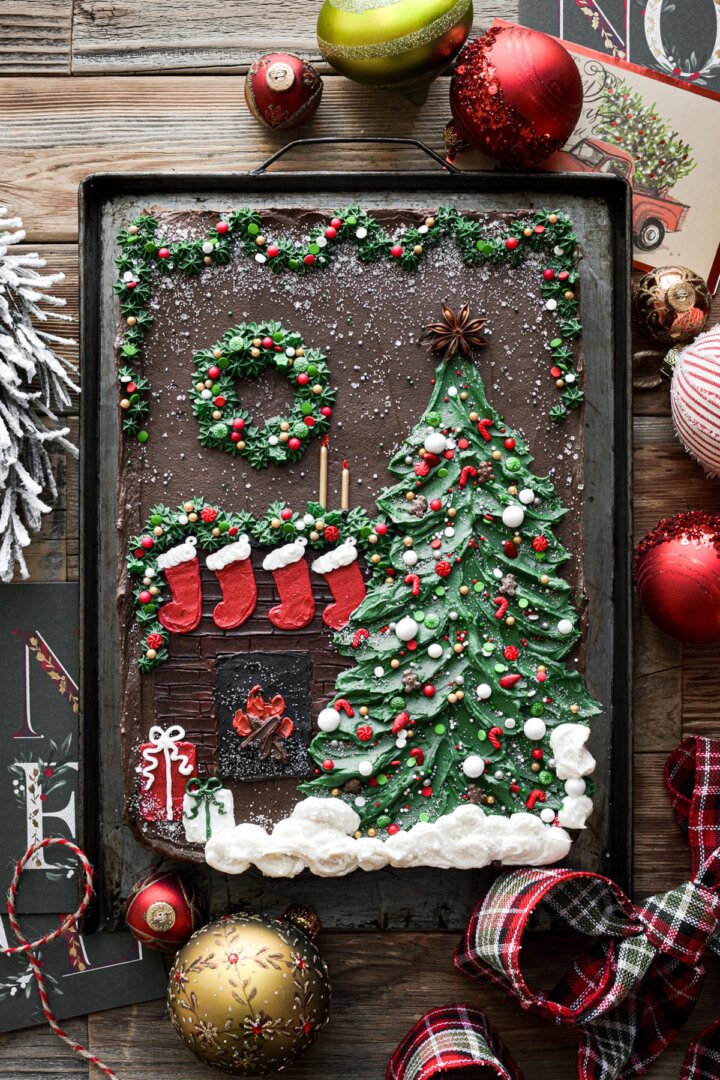
Looking for more inspiration for your Christmas baking? Don’t miss these classic Linzer cookies with bourbon cherry jam, pink peppermint candy cane ice cream, and eggnog cake with a buttercream Christmas tree.
This site contains affiliate links. As an Amazon associate, I earn from qualifying purchases. This means that I may make a small commission if you purchase a product using those links. This in no way affects my opinion of those products and services. All opinions expressed on this site are my own.
Why You’ll Love This Recipe
Adaptable for All Skill Levels. With four styles in today’s post, only two require the use of a piping bag. And if you’re a little inexperienced using a piping bag, you’ll find these techniques to be really easy to learn. Practice a few times on a piece of wax paper before you pipe onto your cookies.
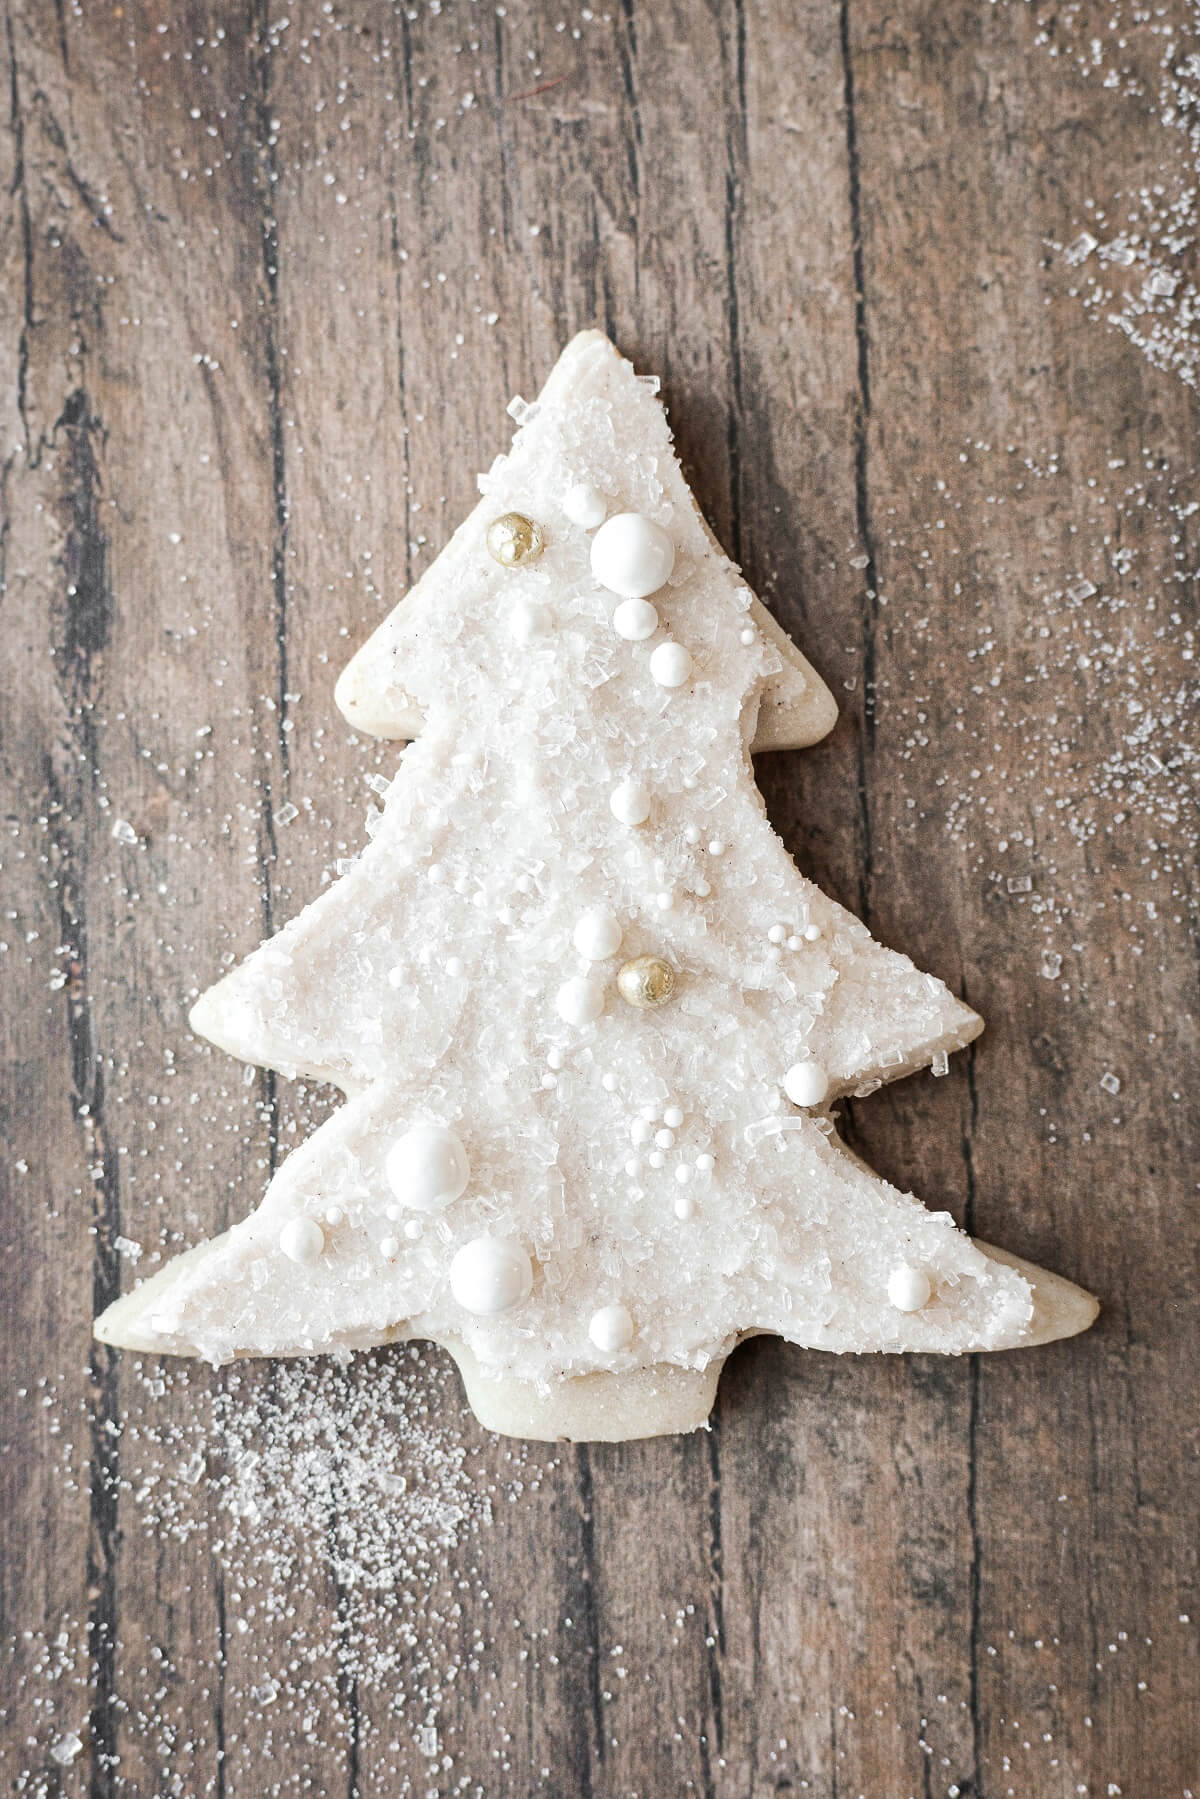
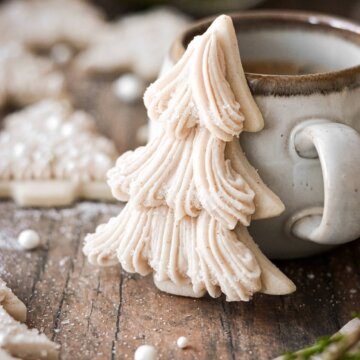
So Elegant. With the white on white color palette, these cookies are elegant and sophisticated for the holidays.
Absolutely Delicious. I mean, a Christmas cookie is only good if it tastes as great as it looks, right? The sugar cookies are soft and perfumed with vanilla bean, and the buttercream is the perfect sweet finish.
High Altitude Tested. I develop all the recipes on my site for Denver’s altitude of 5,280 feet. If you’re at a lower or higher elevation, please see my FAQs for guidance on adjusting recipes for your altitude.
Equipment and Tools
- Food Processor or Pastry Cutter. A food processor is easiest for making the sugar cookie dough, but if you don’t have one, you can use a pastry cutter instead.
- Rolling Pin and Cookie Cutters.
- Small Palette Knife or Icing Spatula.
- Piping Bags and Piping Tips (#18 & #22).
See the recipe card at the end of the post for the full ingredients list and instructions.
Ingredients
- Vanilla Sugar Cookie Dough. You need a no-spread sugar cookie recipe that also tastes great.
- American Buttercream. You can use absolutely any flavor of buttercream that you like. I had some leftover snickerdoodle buttercream, and the pretty champagne color is just from the spices I added to the buttercream.
- White, Gold and Silver Sugar Pearls. In various sizes.
- Coarse White Sparkling Sugar.
- White Sanding Sugar.
Instructions
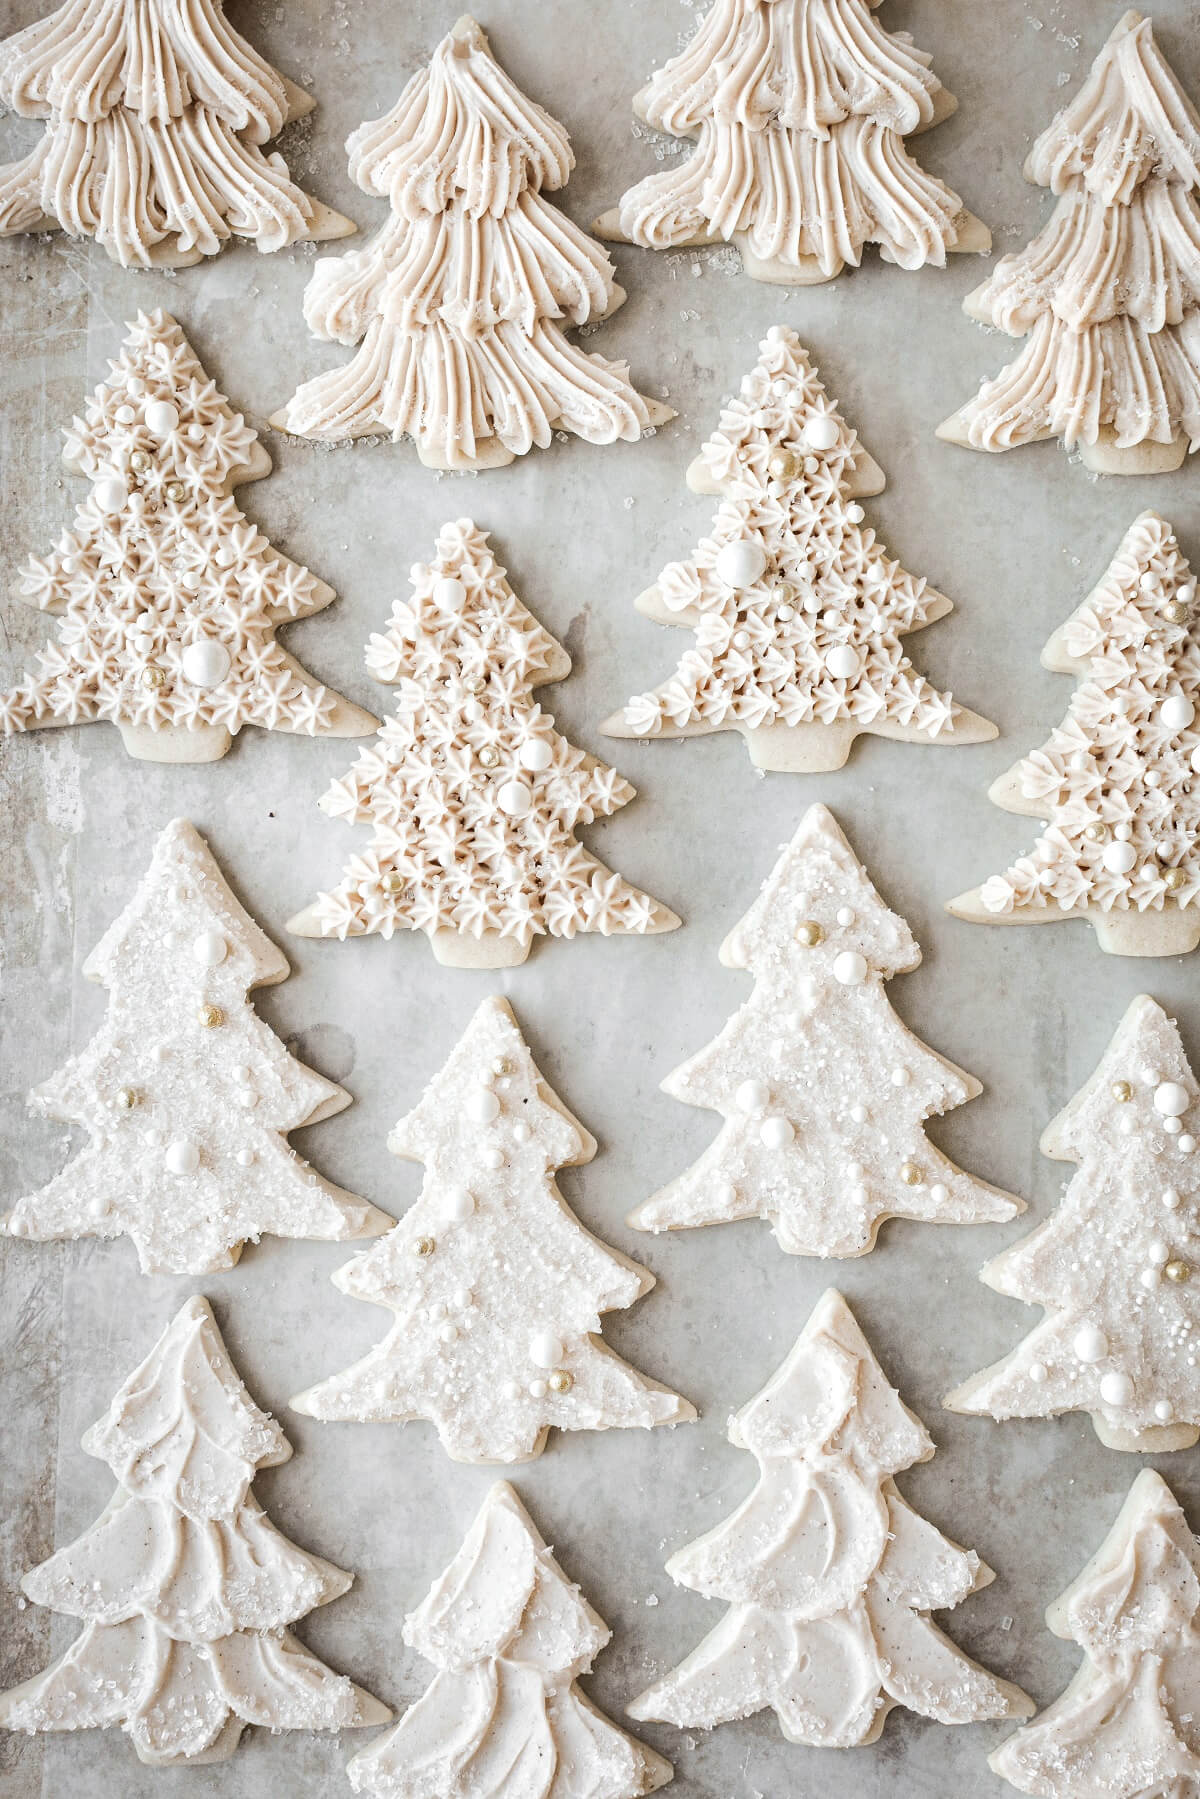
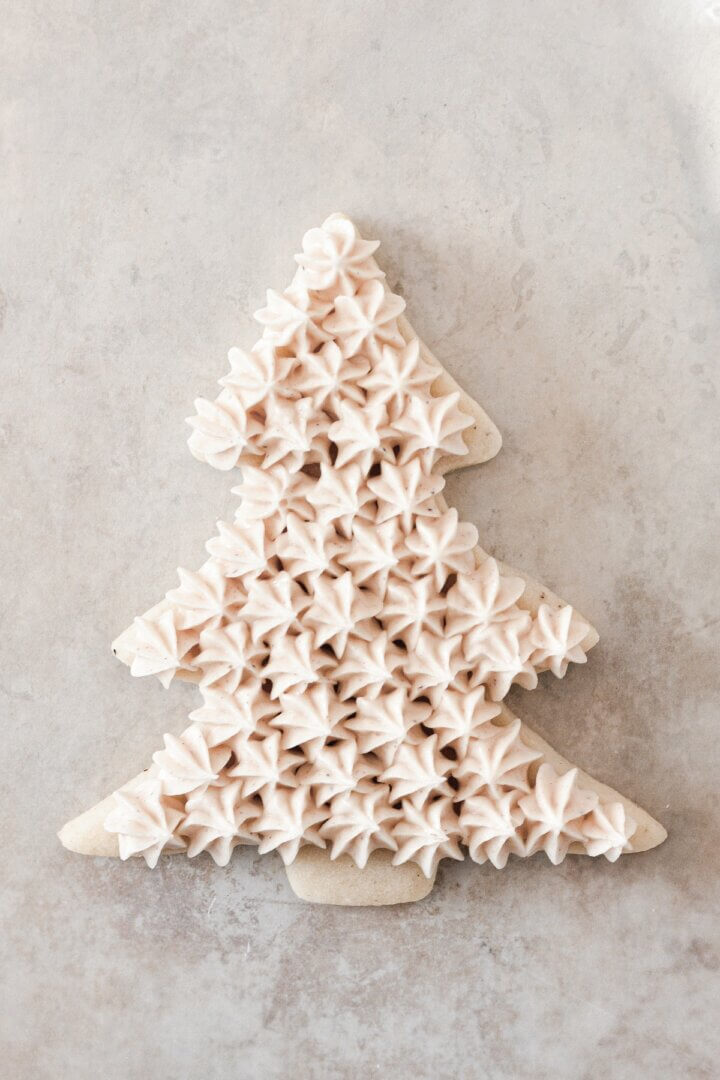
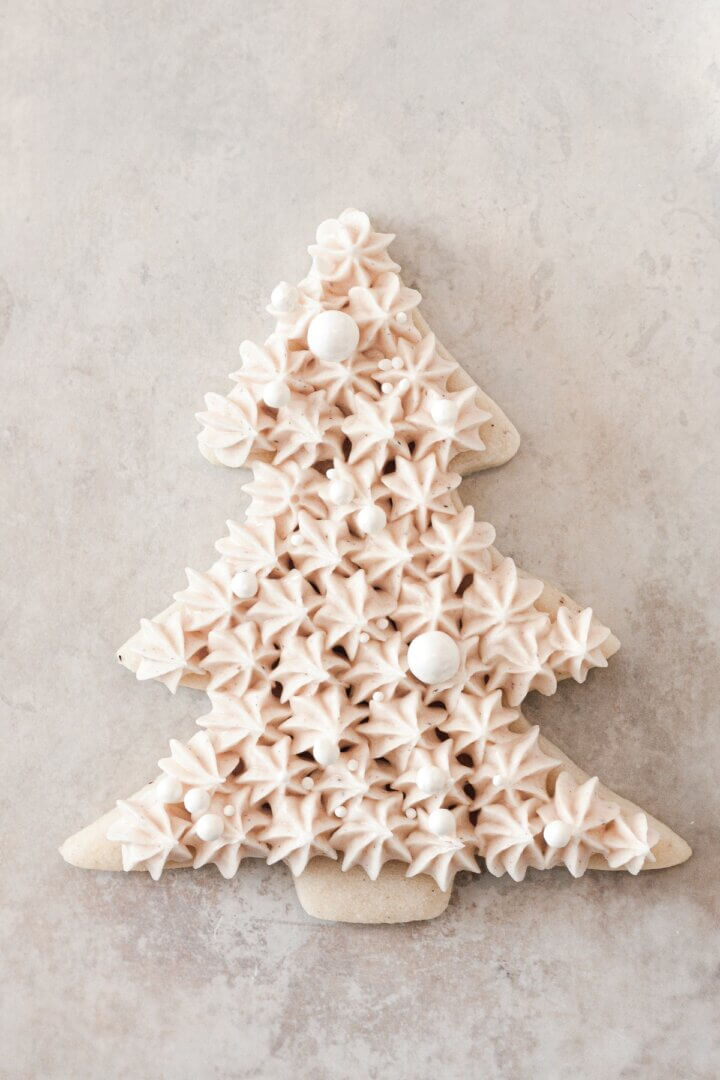
Style 1: Stars
- Fit a piping bag with tip #18 and fill with buttercream. Pipe small stars all over the cookies.
- Scatter with sugar pearls, then sprinkle lightly with sparkling sugar.
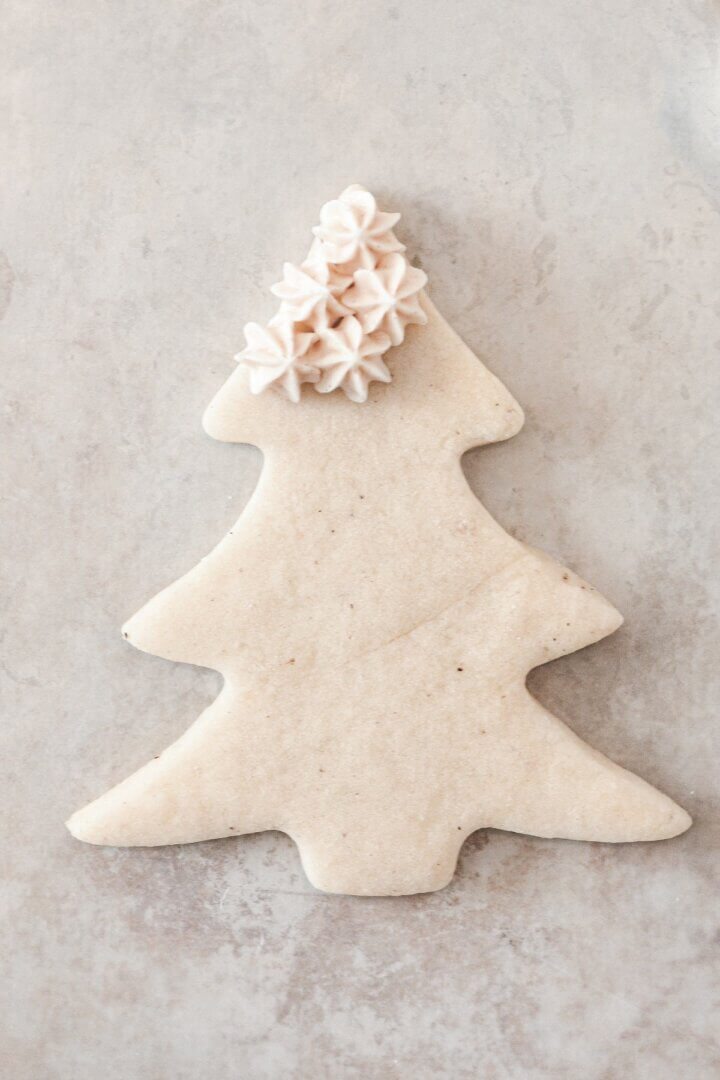
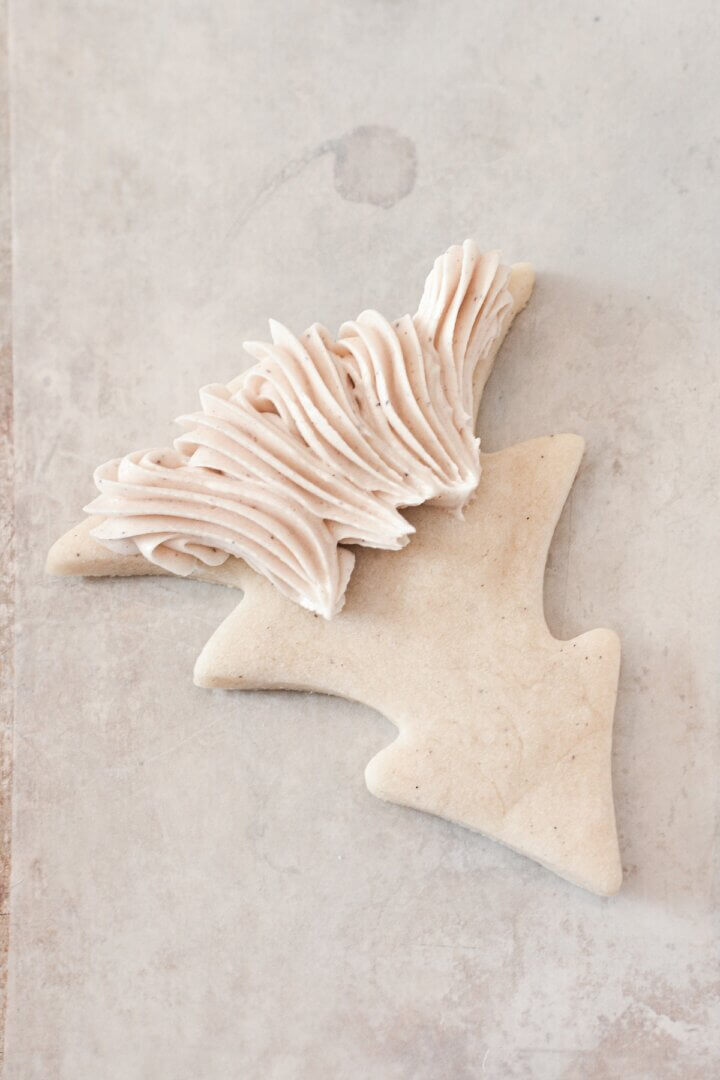
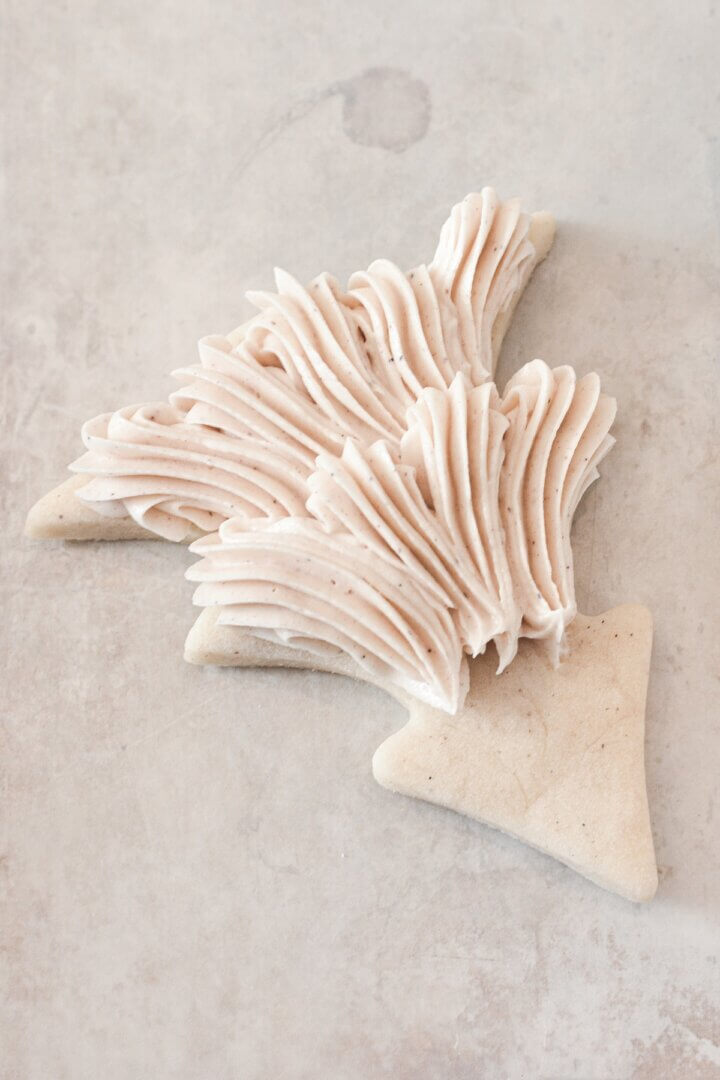
TIP: It’s easiest to pipe the swoops with the cookie turned upside down. To form the rounded base of each branch, begin squeezing the buttercream as you push forward slightly, then pull back. If you’re not familiar with this technique, practice it a few times on wax paper until you like how it looks. This is similar to the technique used to pipe a “shell” border around a cake.
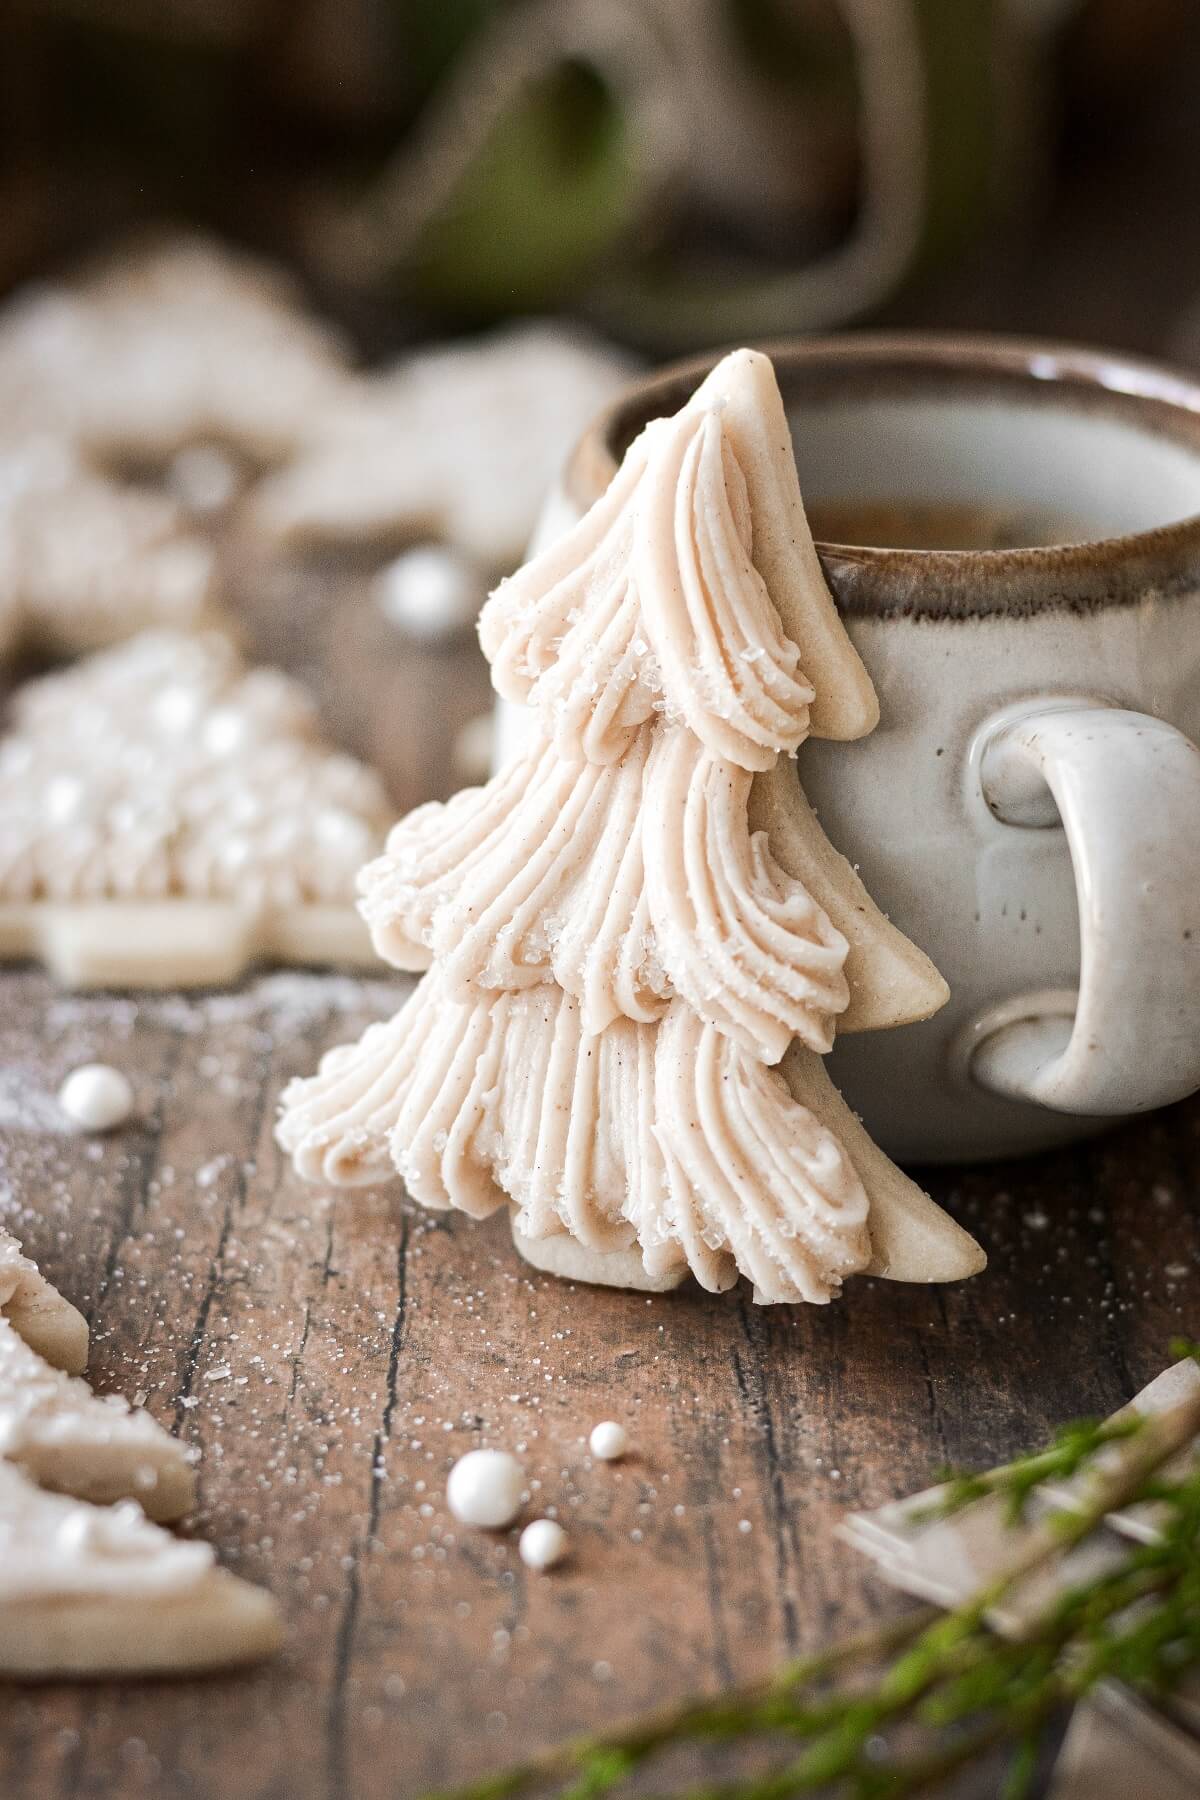
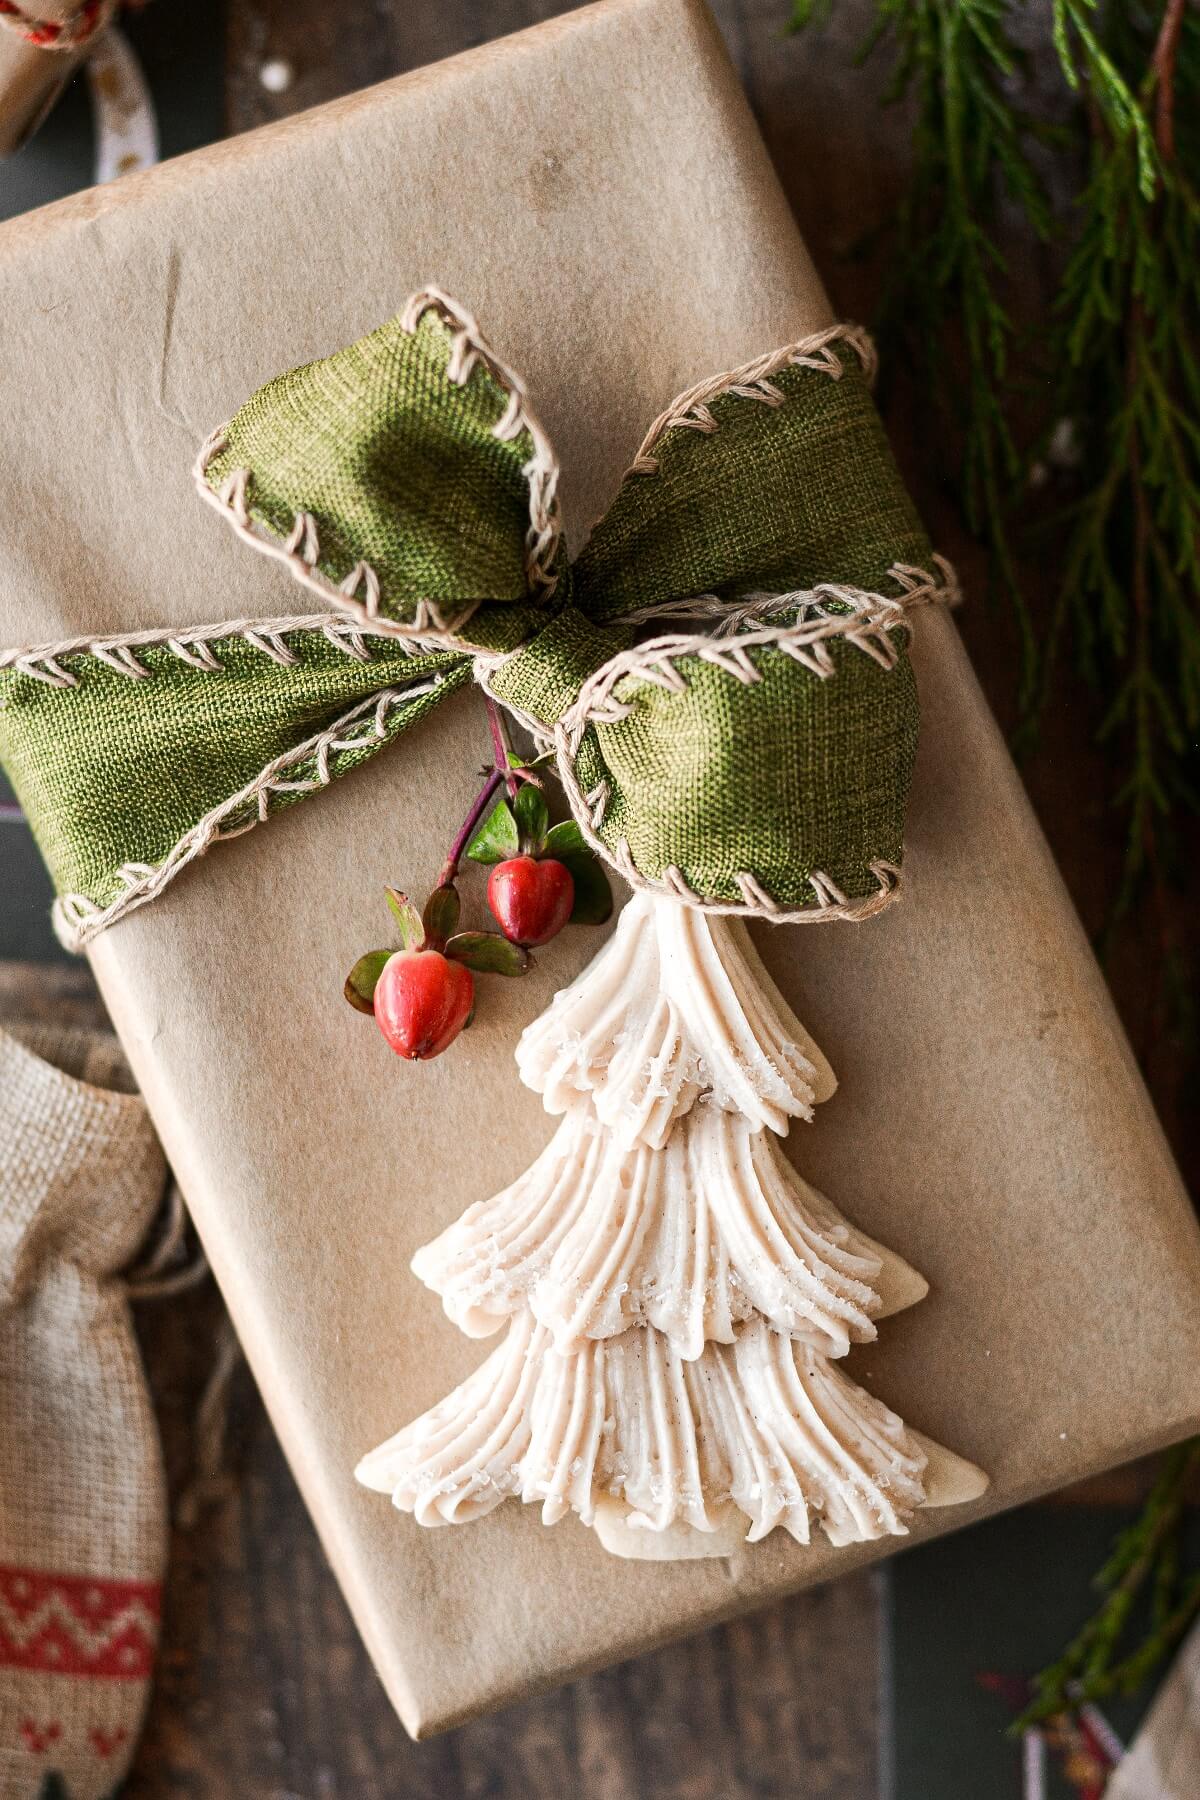
Style 2: Swooping Branches
- Fit a piping bag with tip #22. Starting at the bottom of the cookie, pipe a row of swoops to form the bottom row of branches. Repeat with a second and third row, finishing at the top of the cookie.
- Lightly sprinkle coarse sparkling sugar along the bottom edge of each row of branches.

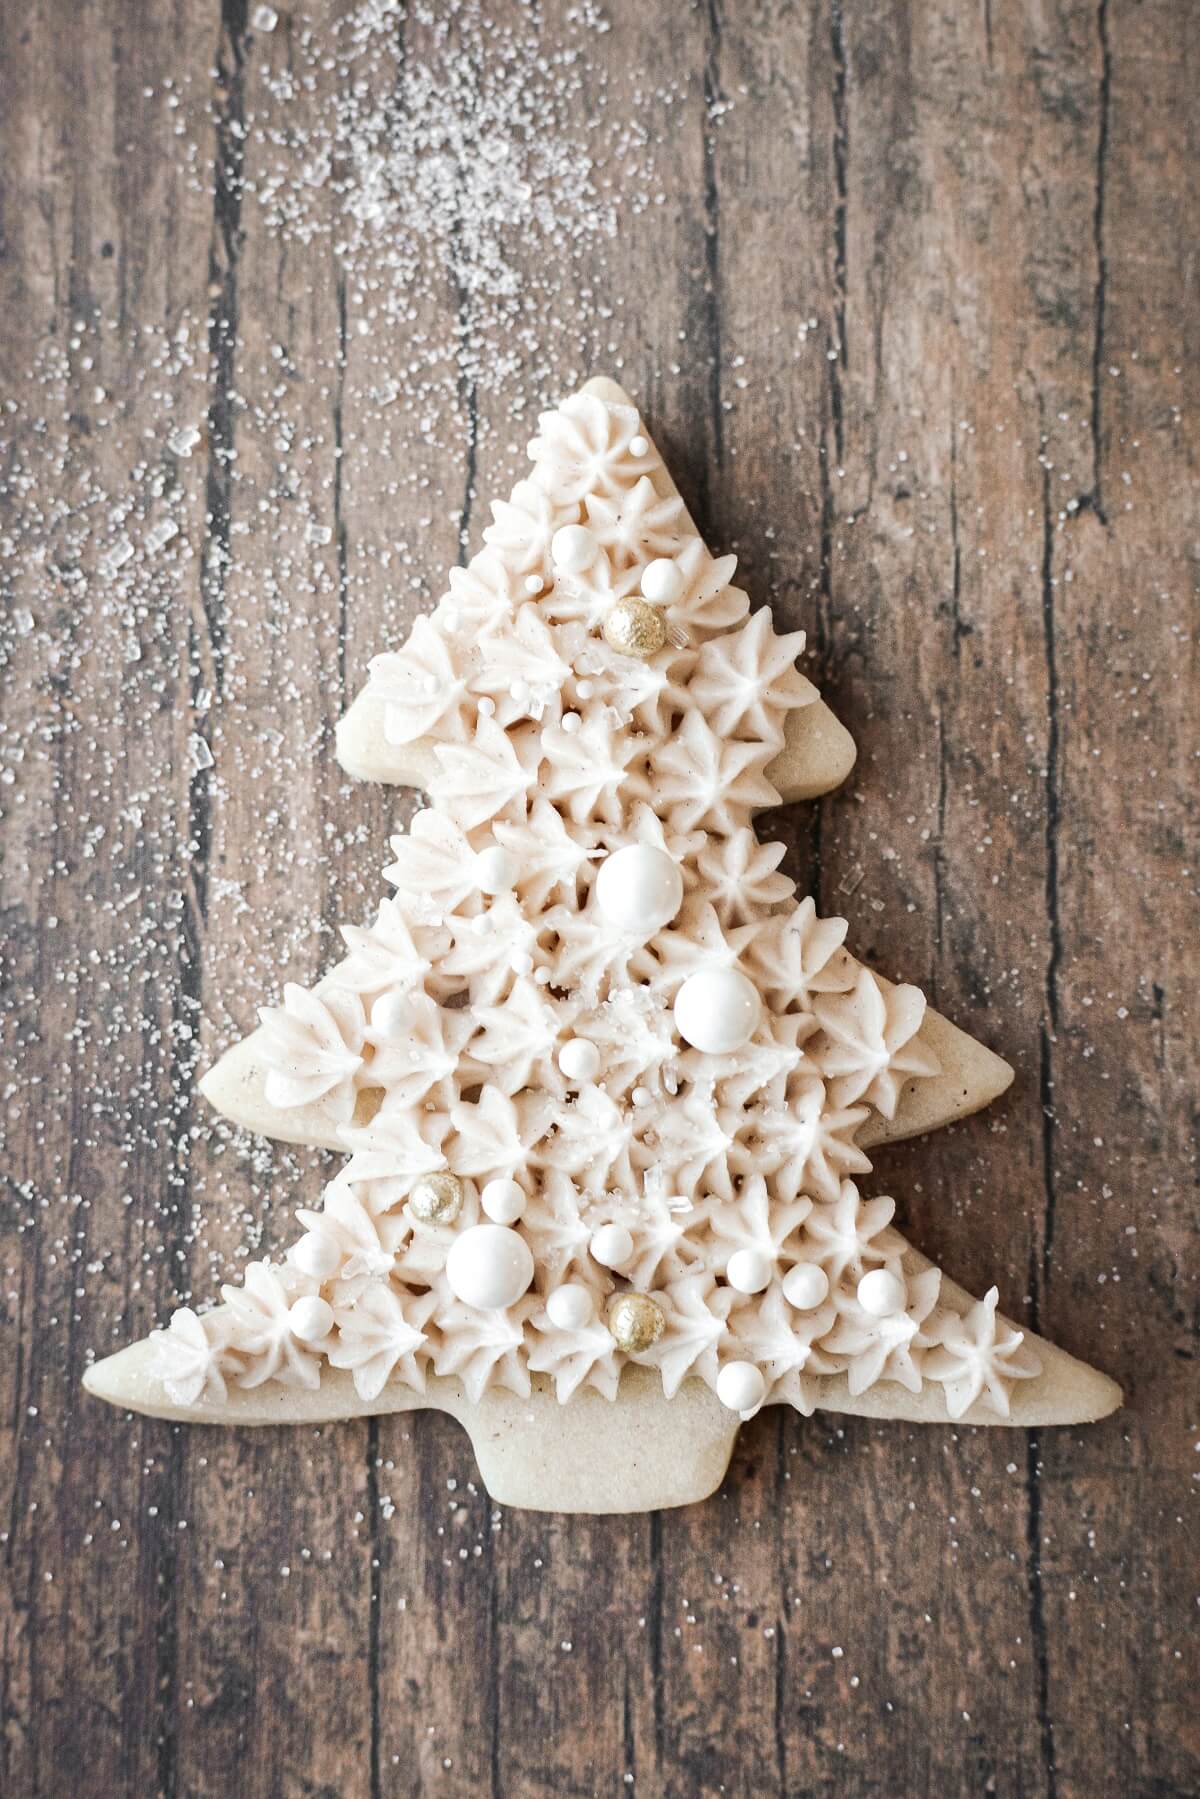
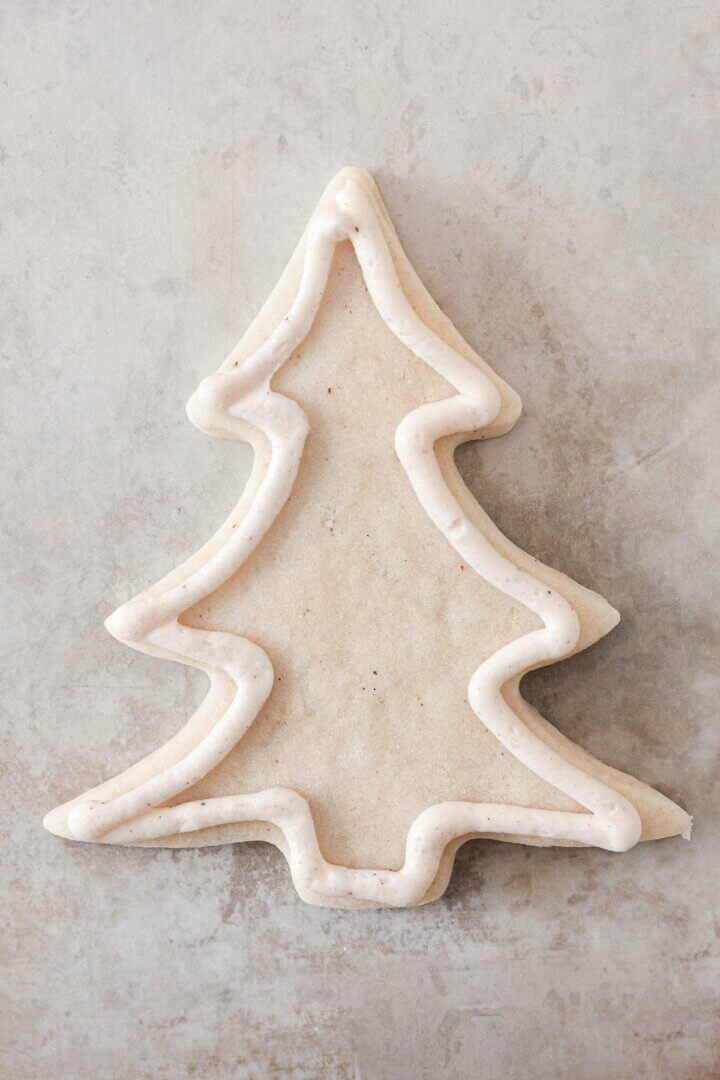
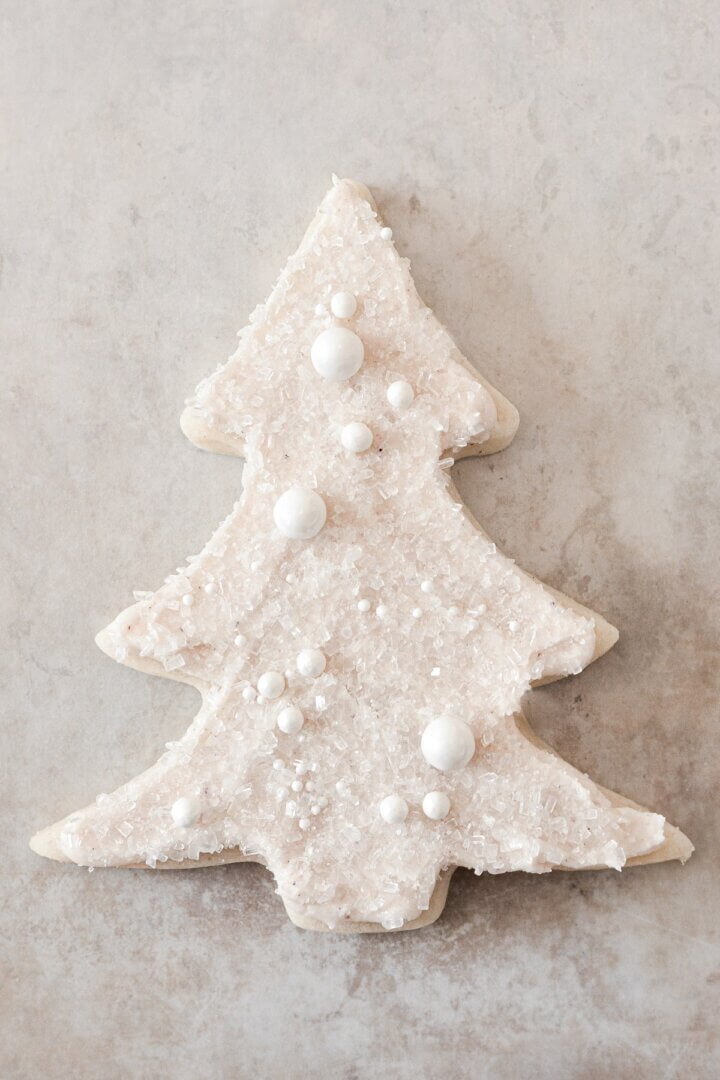
Style 3: Sparkling
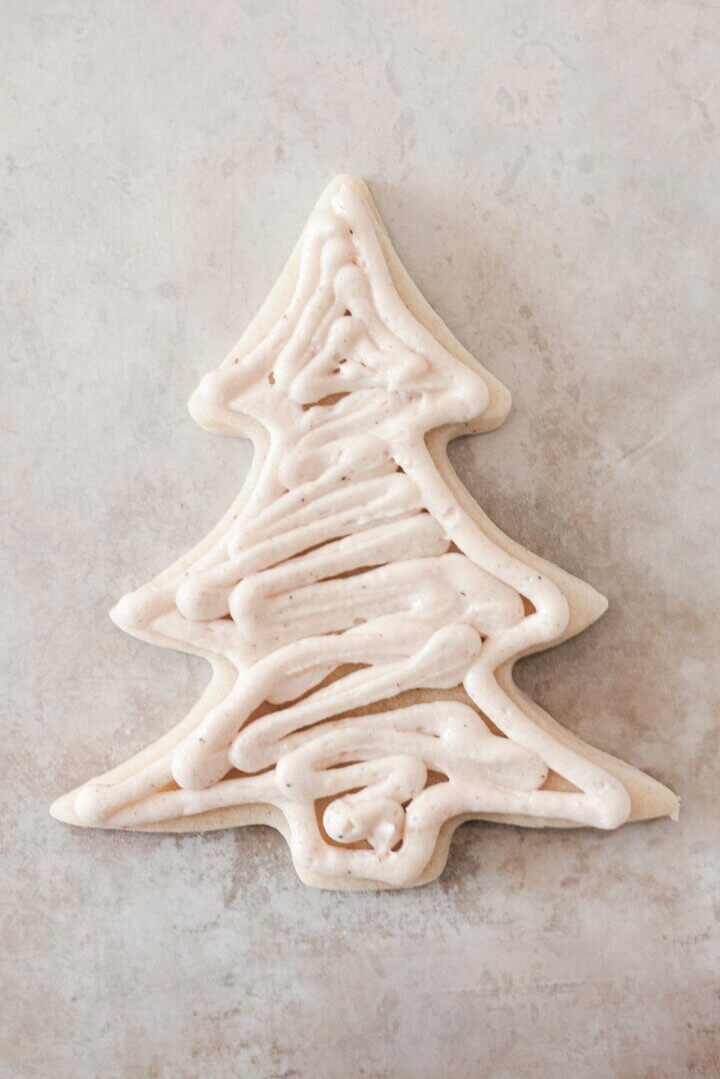
- Spread (or pipe) buttercream all over the cookie. You can smooth it out with a palette knife or leave it slightly textured.
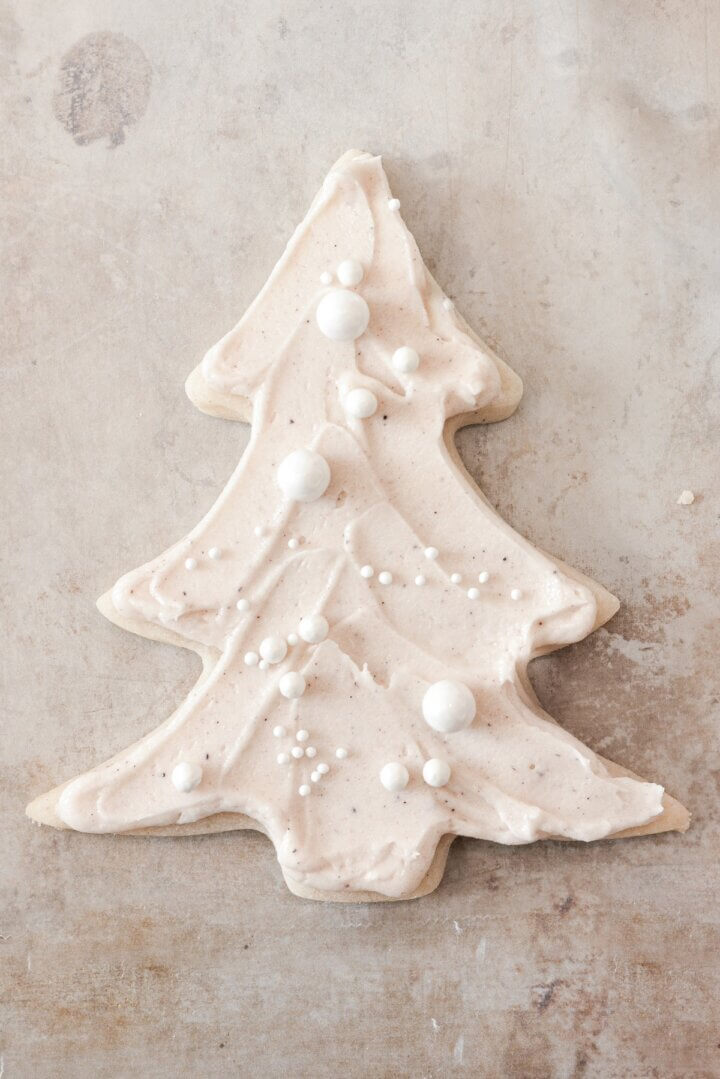
- Sprinkle your larger sugar pearls onto the buttercream first, then your smaller sugar pearls.
- Holding the cookie over a bowl to catch the falling sugar, sprinkle it generously with sparkling sugar or sanding sugar (I like to use a combination of both).
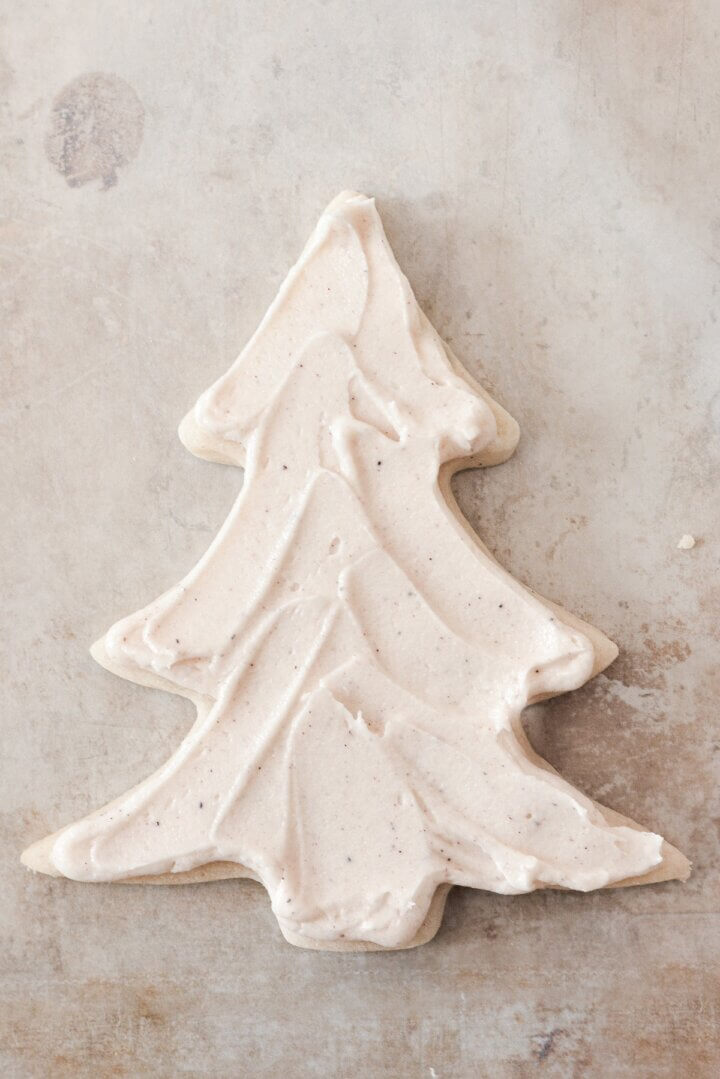
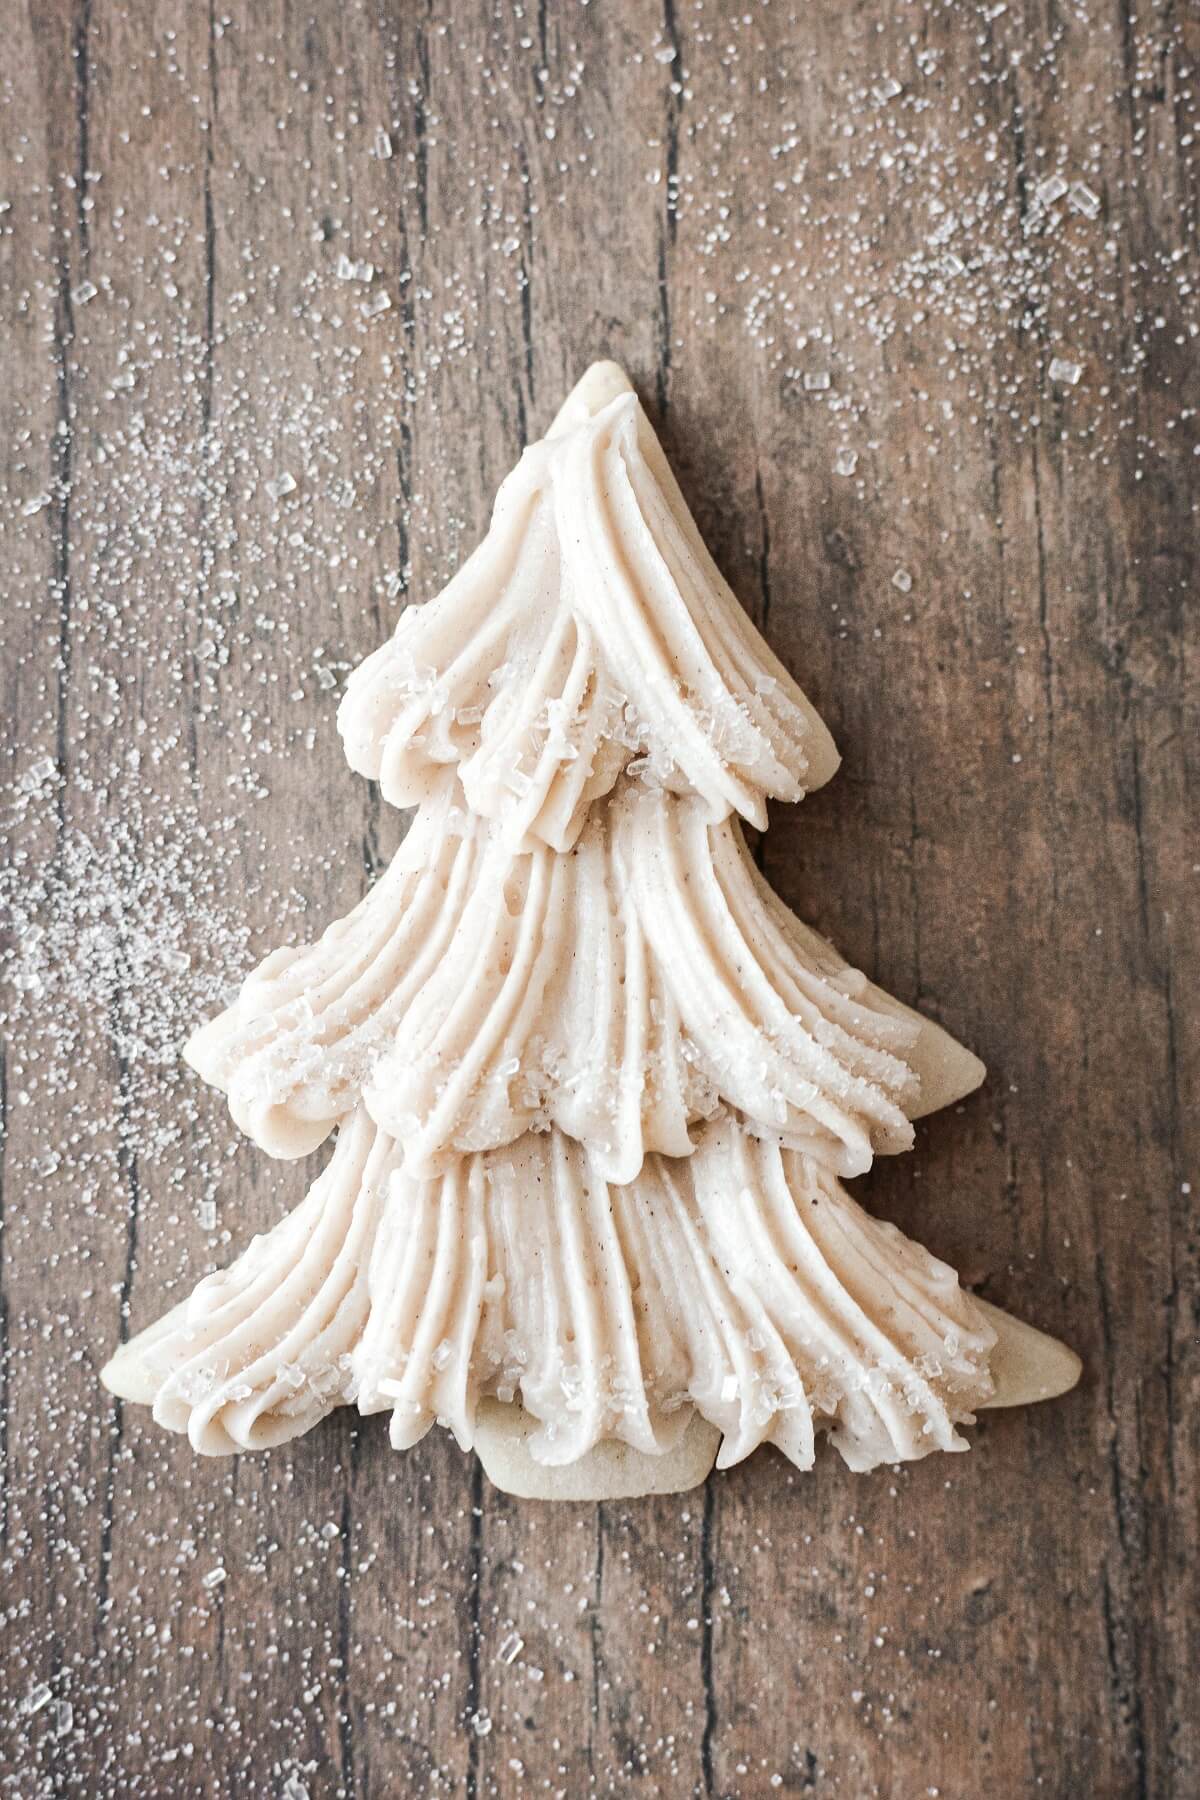
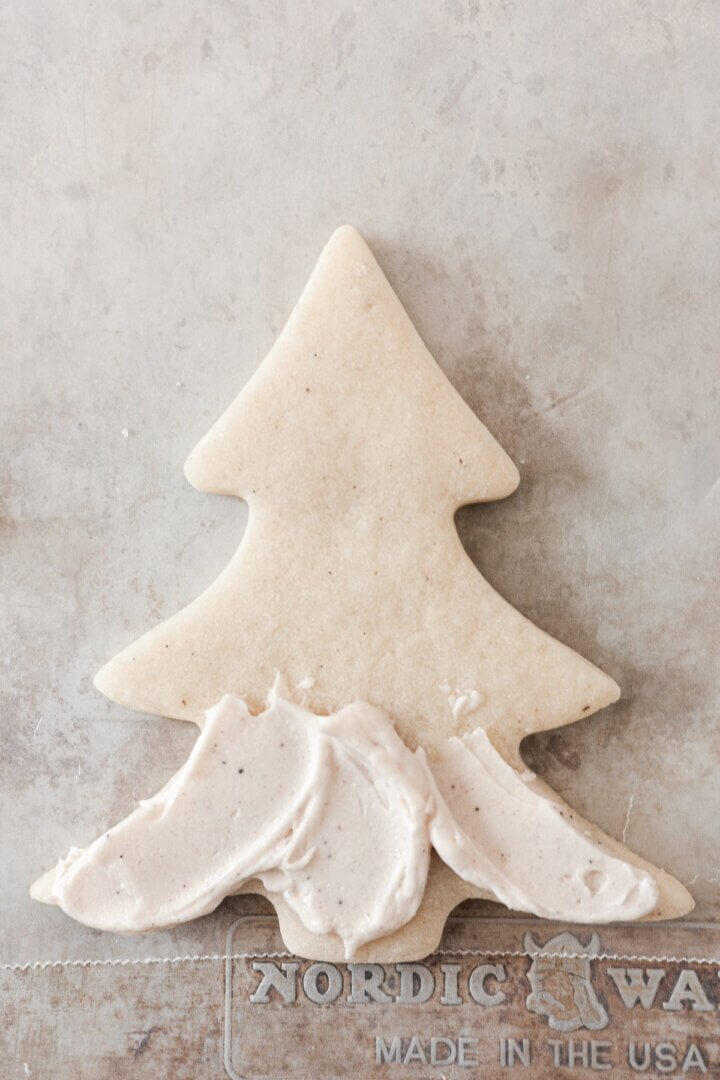
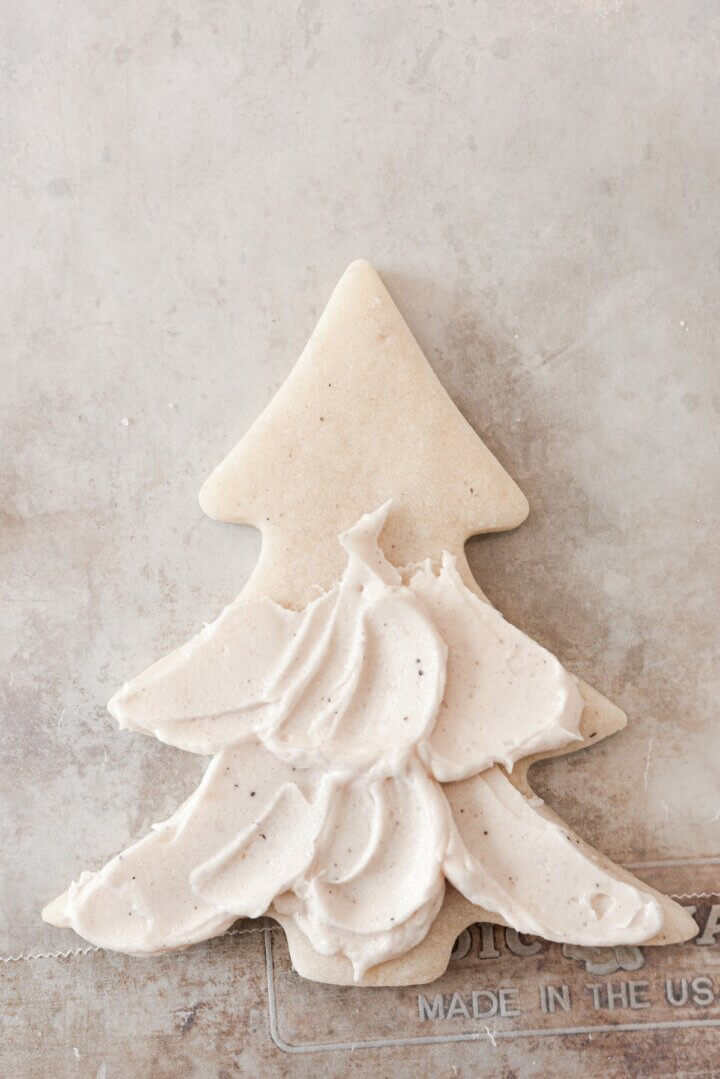
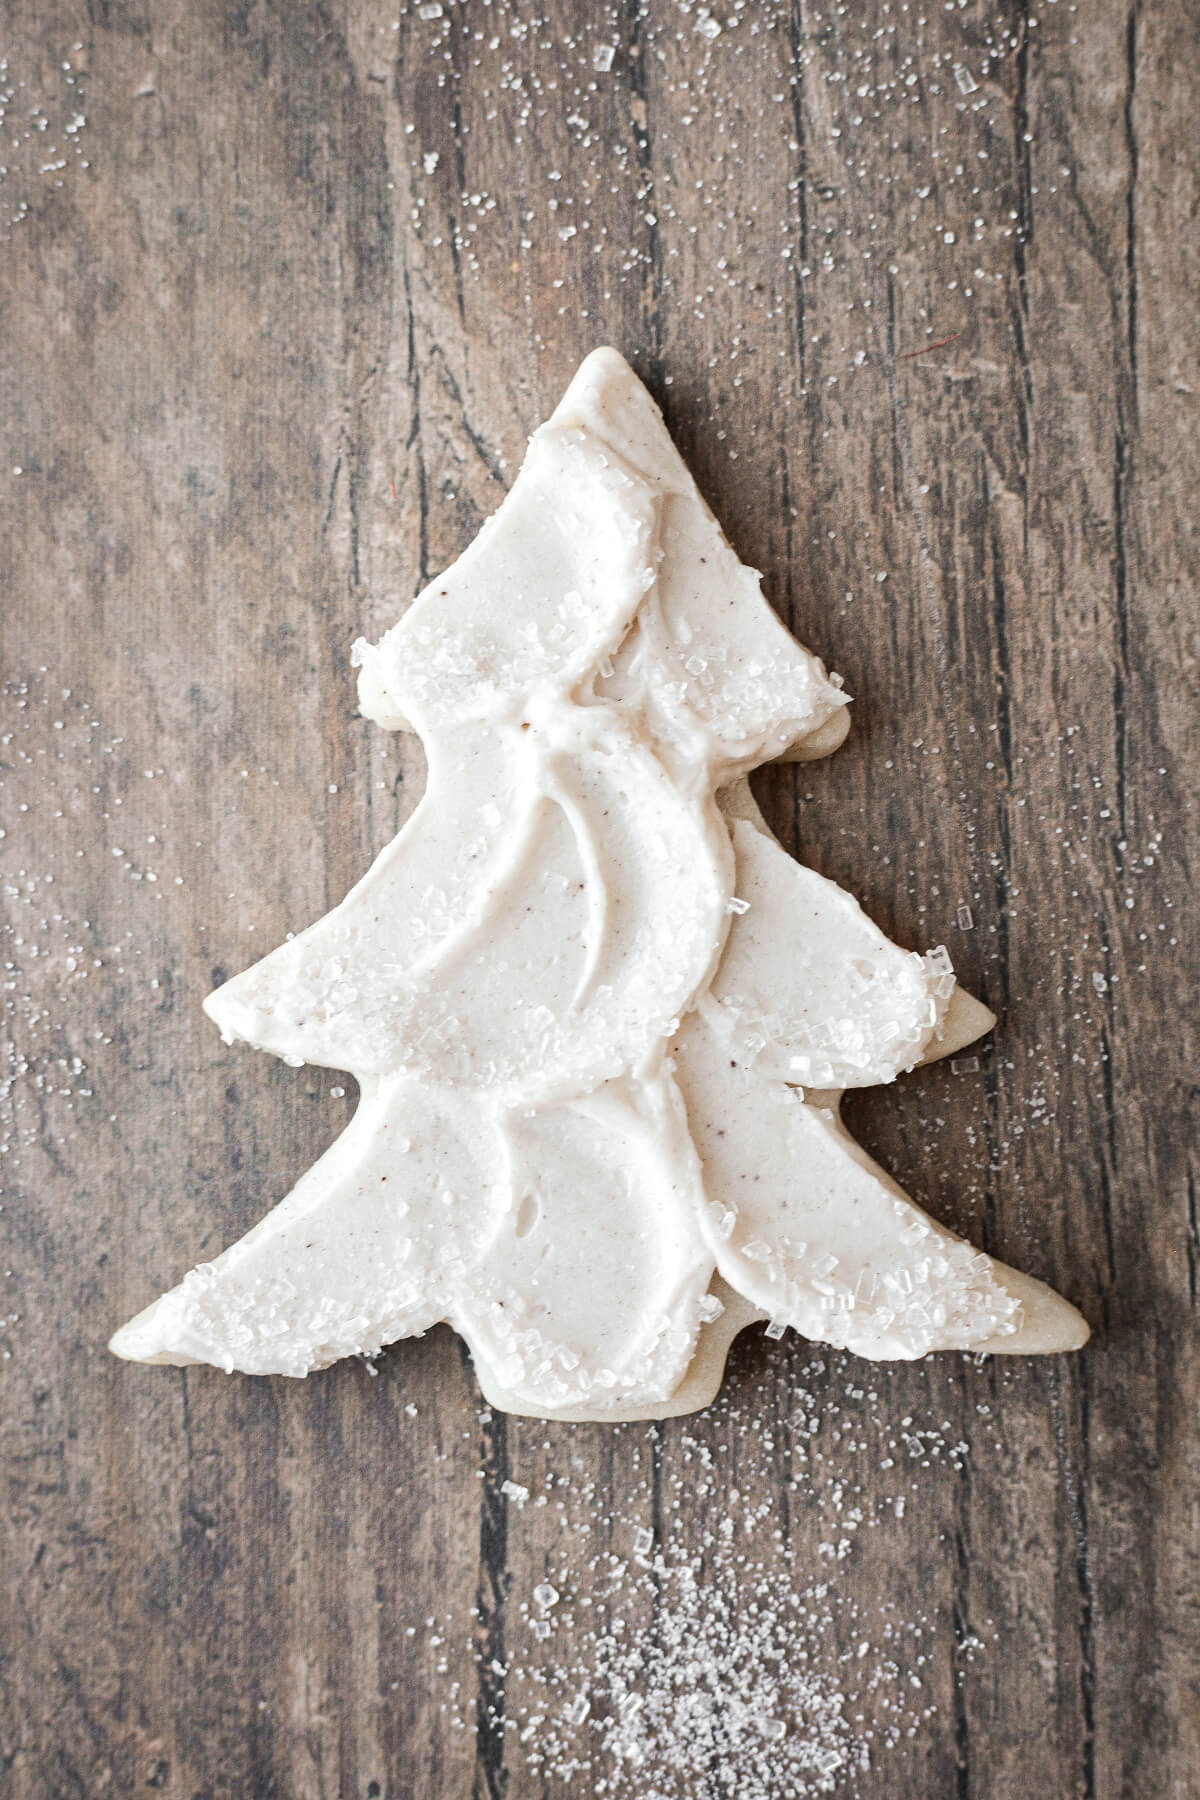
Style 4: Textured Branches
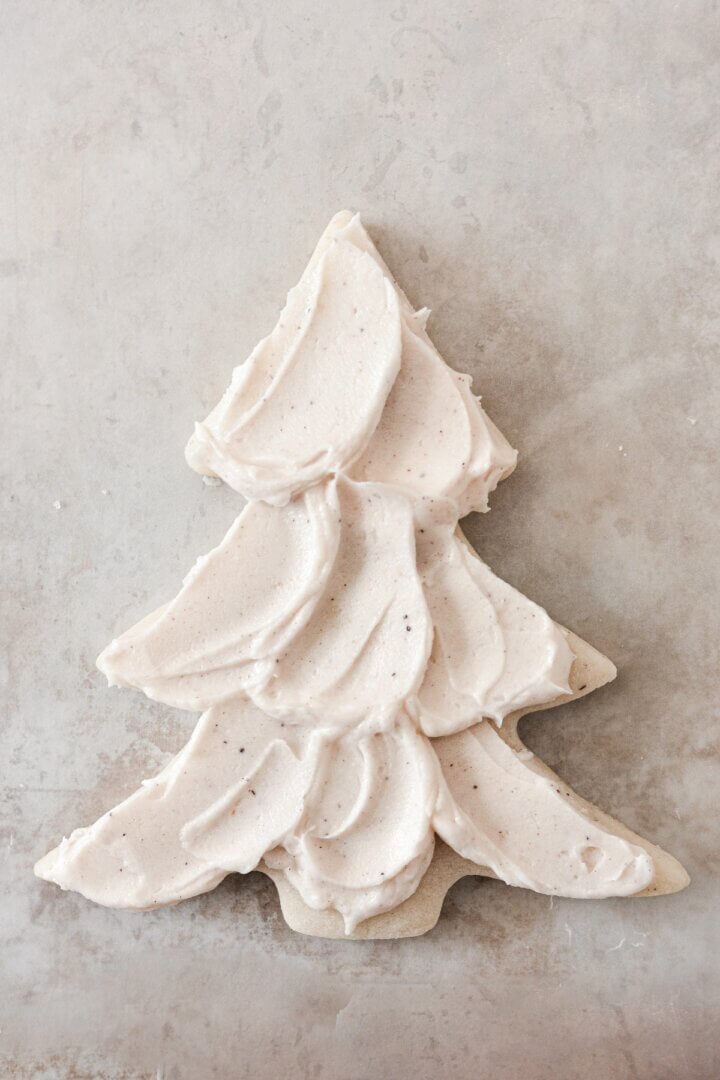
- Starting at the bottom of the cookie, use a small pallet knife to spread on the buttercream, leaving it textured to look like tree branches. Repeat with two more rows, ending at the top of the cookie. The more textured you make the buttercream, the better this design will look.
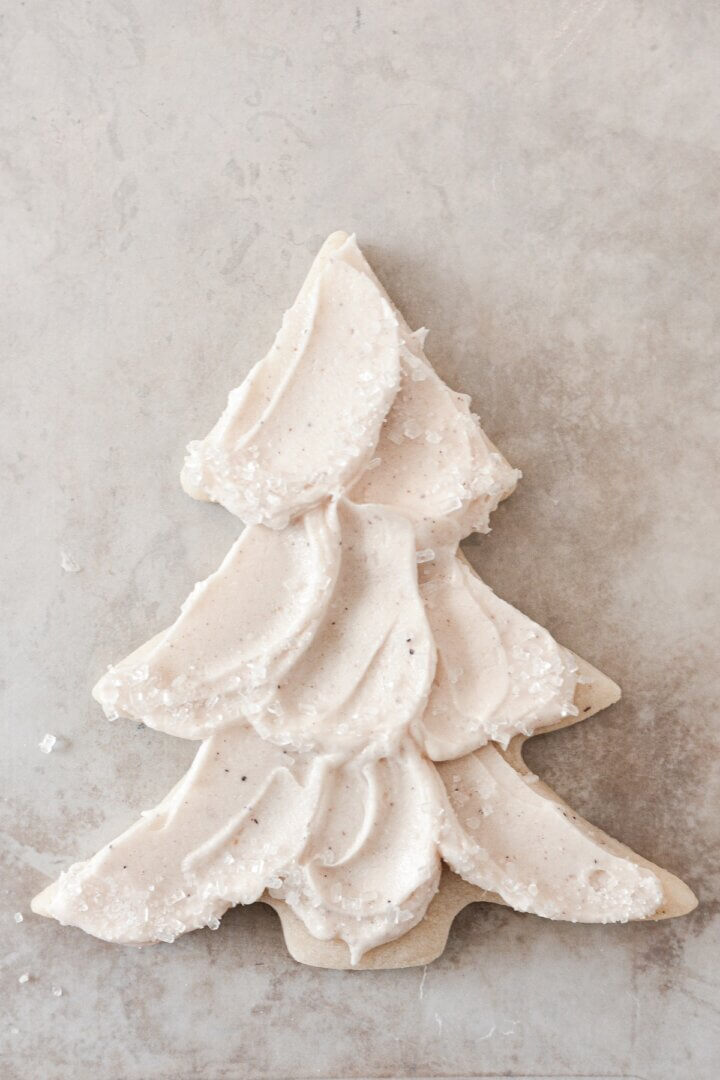
- Sprinkle coarse sparkling sugar just along the edge of some of the ripples.
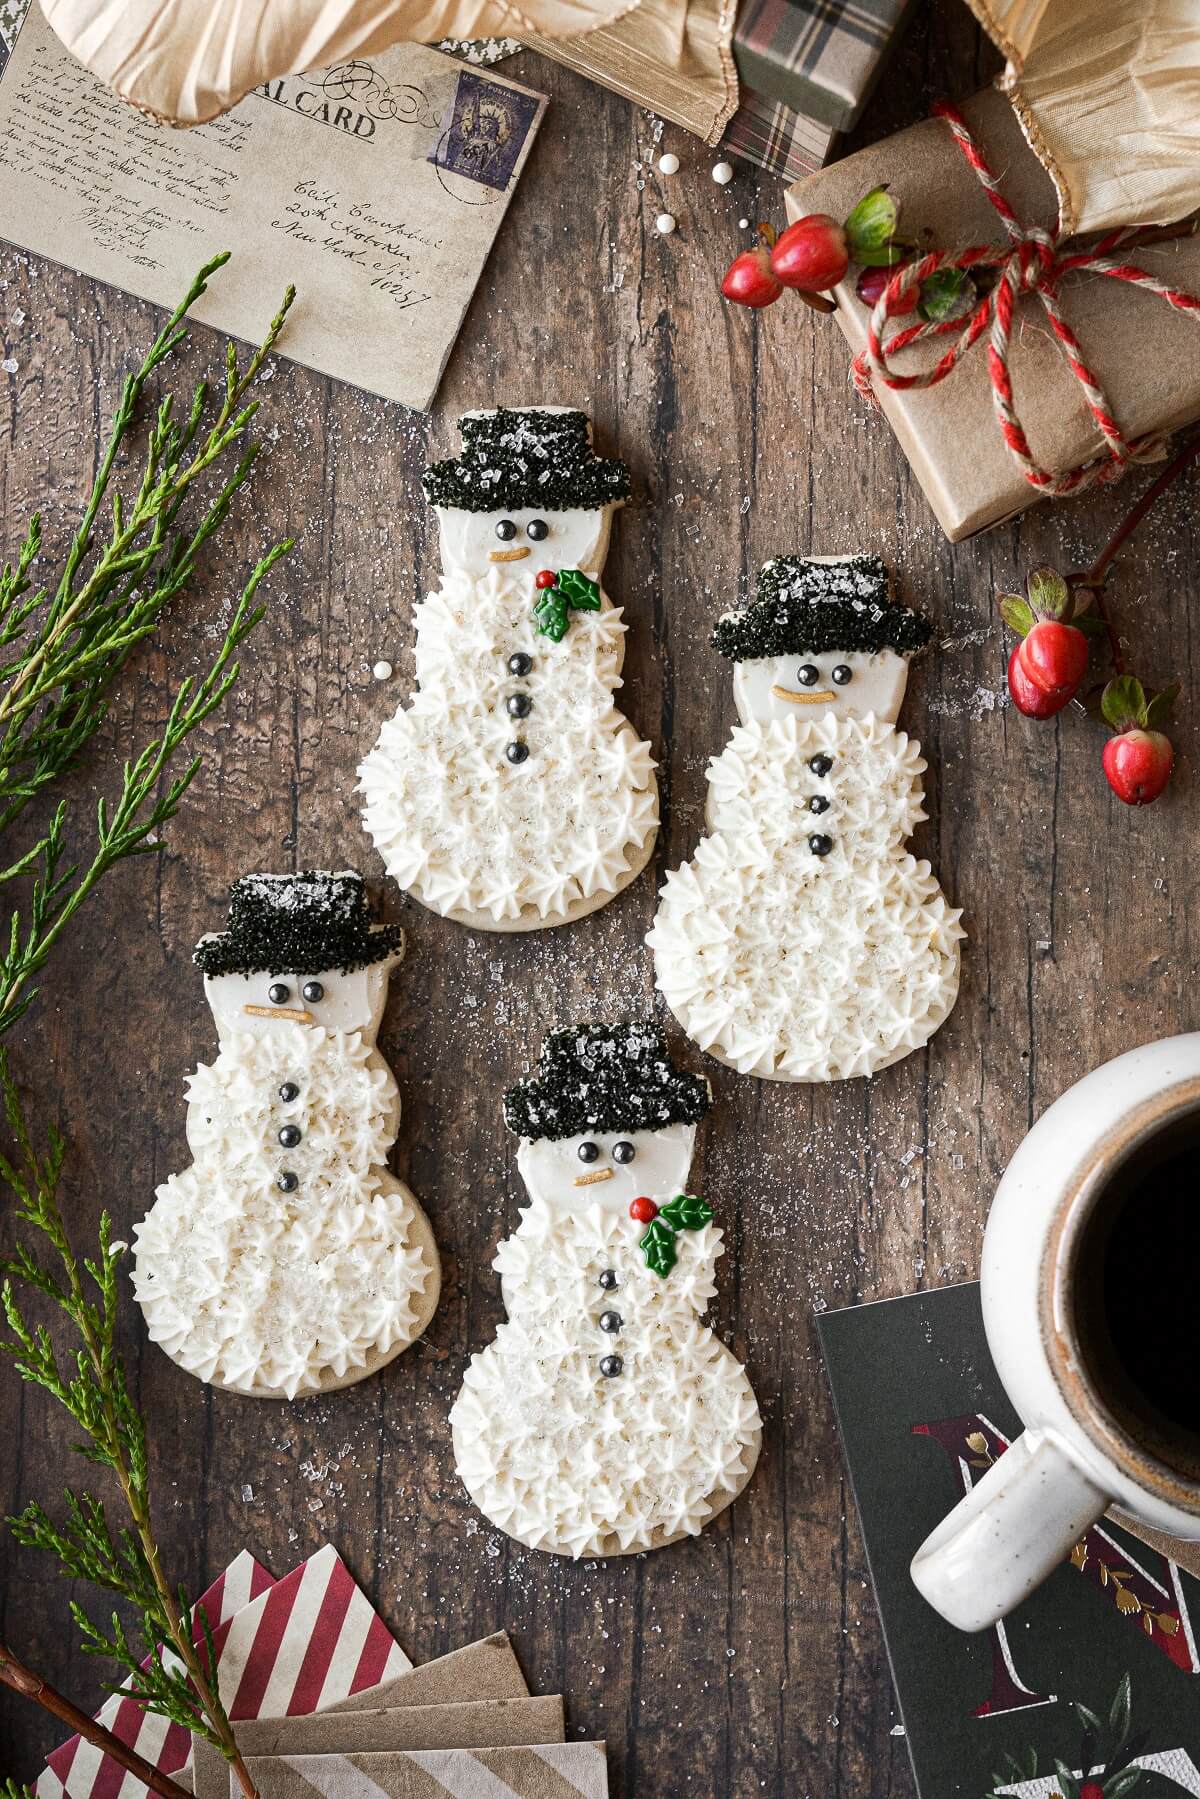
Bonus: How to Decorate a Snowman Cookie
As long as I was already rolling and cutting out sugar cookie dough, I decided to do a few snowmen cookies, too, which I knew my kids would love. This is another design done in just buttercream, with no royal icing. And it’s easy enough for all skill levels.
Things You’ll Need
- snowman cookies, baked and cooled.
- white buttercream.
- black sanding sugar.
- black sugar pearls.
- yellow, gold or orange “jimmy” sprinkle.
- coarse white sparkling sugar.
- piping bag + piping tip #18.
- small icing spatula.

Instructions
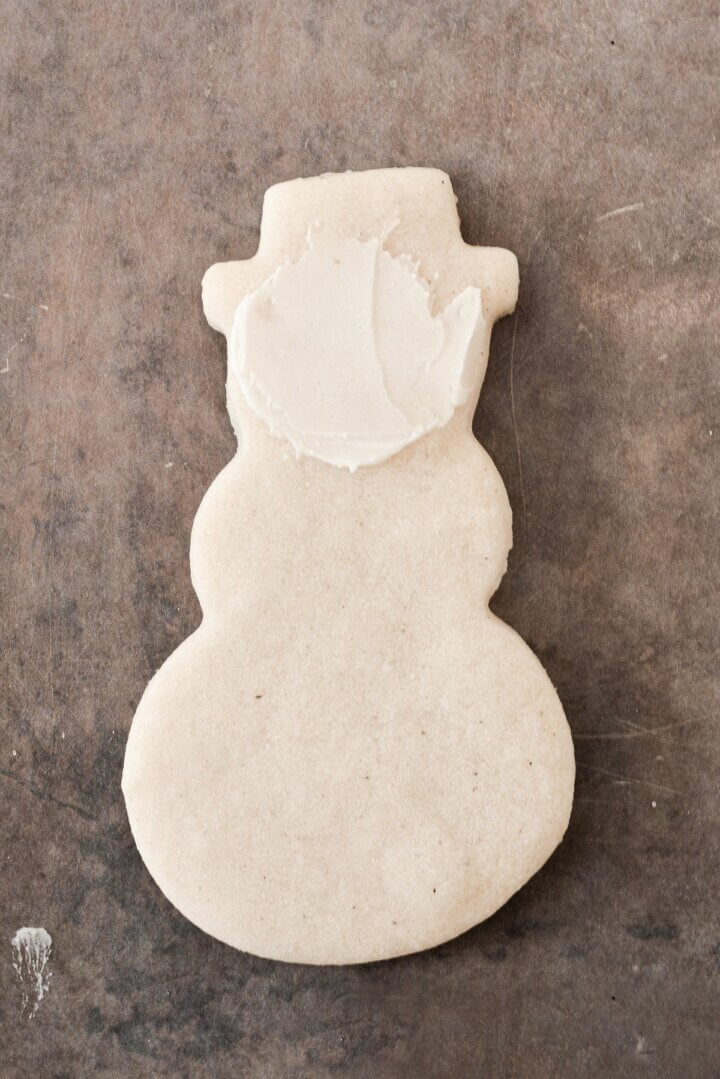
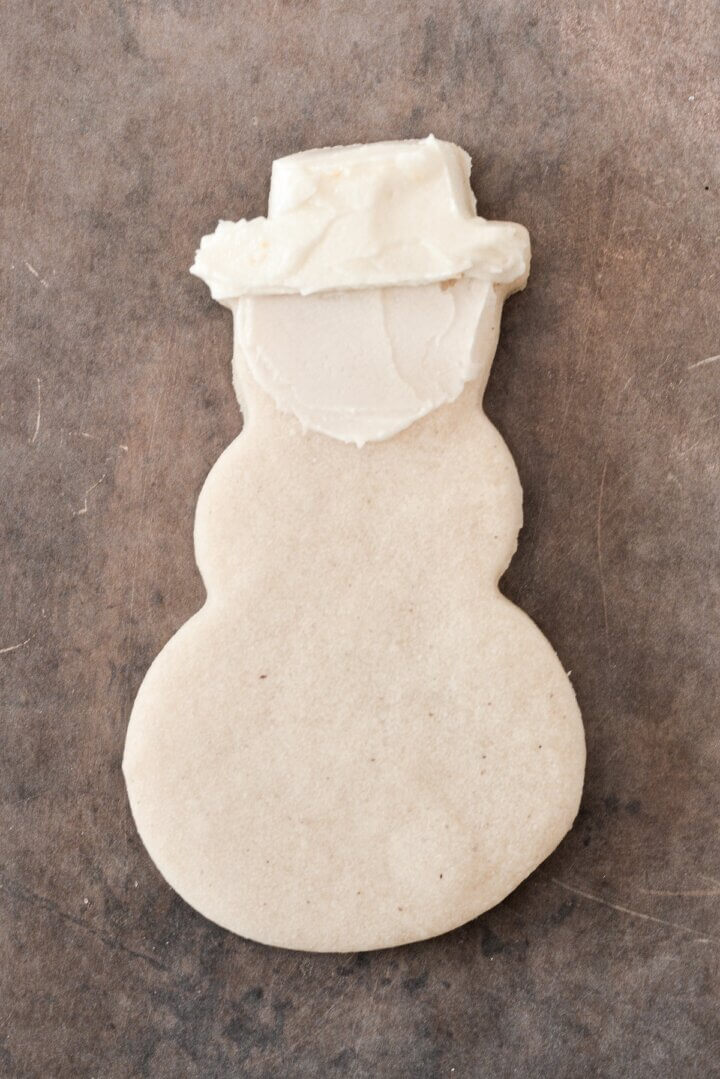
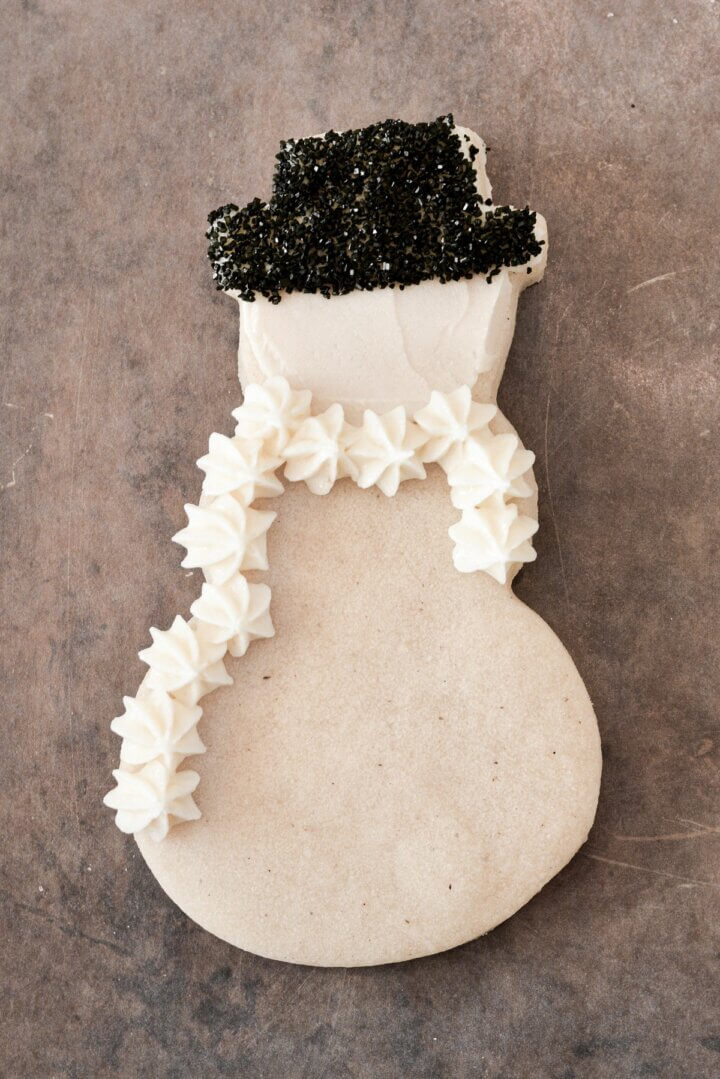
- Spread a thin layer of buttercream over the face, then spread (or pipe) a thicker layer of buttercream over the hat.
- Hold the cookie upside down over a bowl to catch the falling sugar, and carefully sprinkle the black sanding sugar over the hat, taking care not to get sugar on the face. I used a spoon to scoop up the black sugar and gently sprinkle it over the hat.

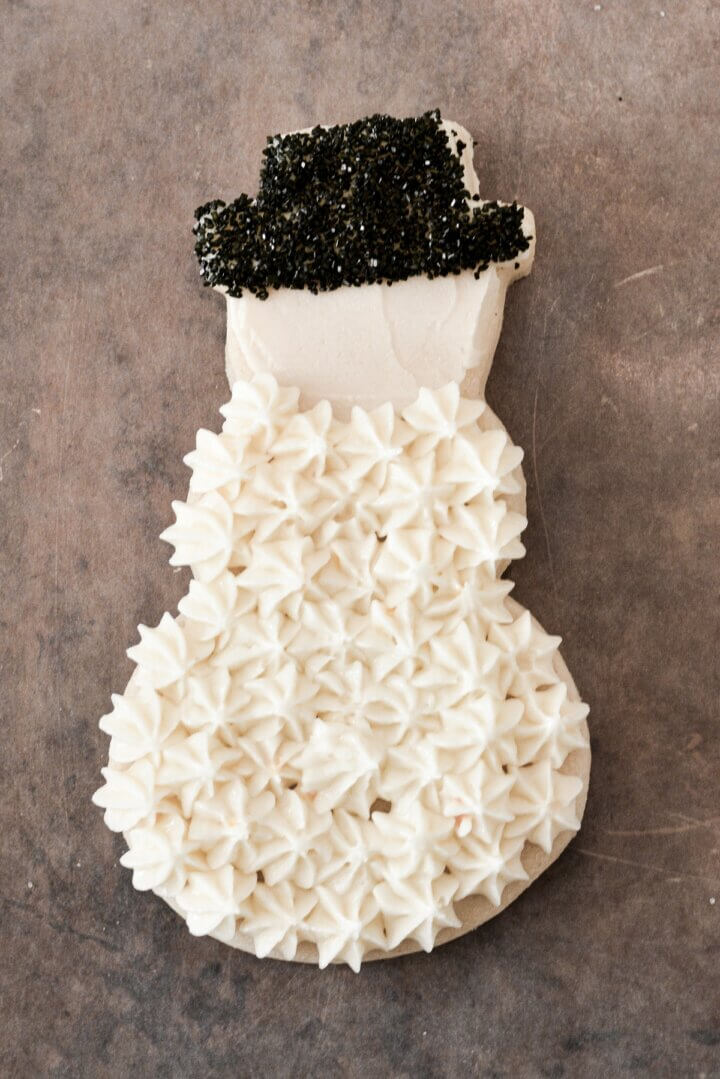
- Fit a piping bag with tip #18 and fill with buttercream. Pipe small stars all over the body of the snowman.
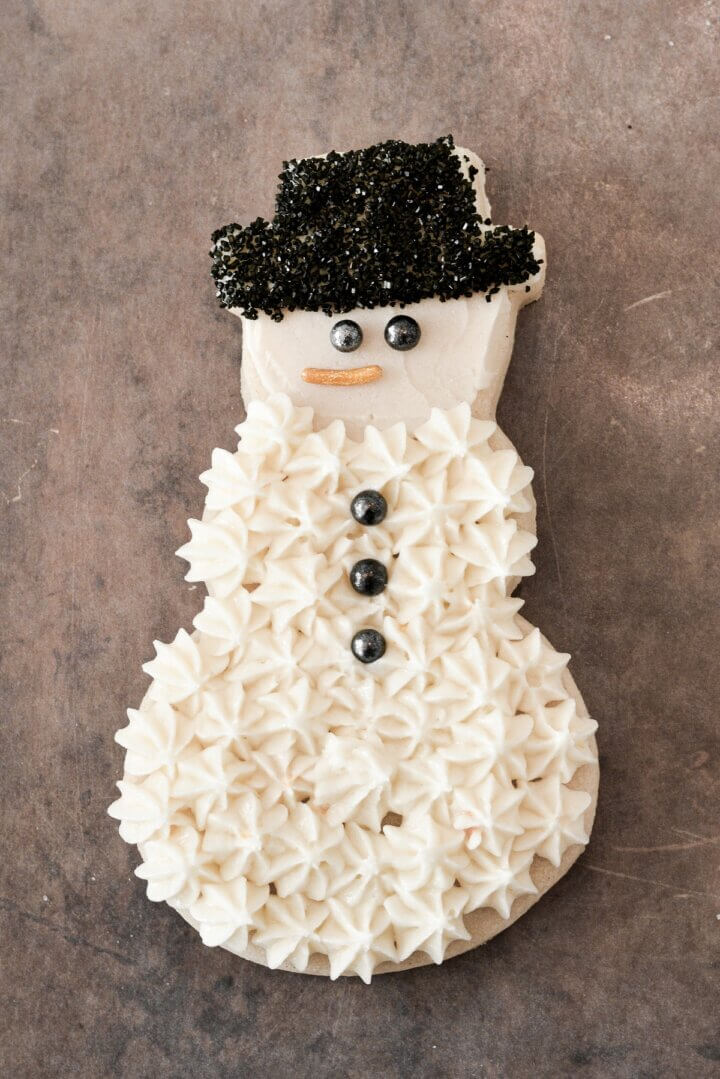
- Use a pair of tweezers to place the black sugar pearls for the eyes and the buttons, and a jimmy sprinkle for the nose.
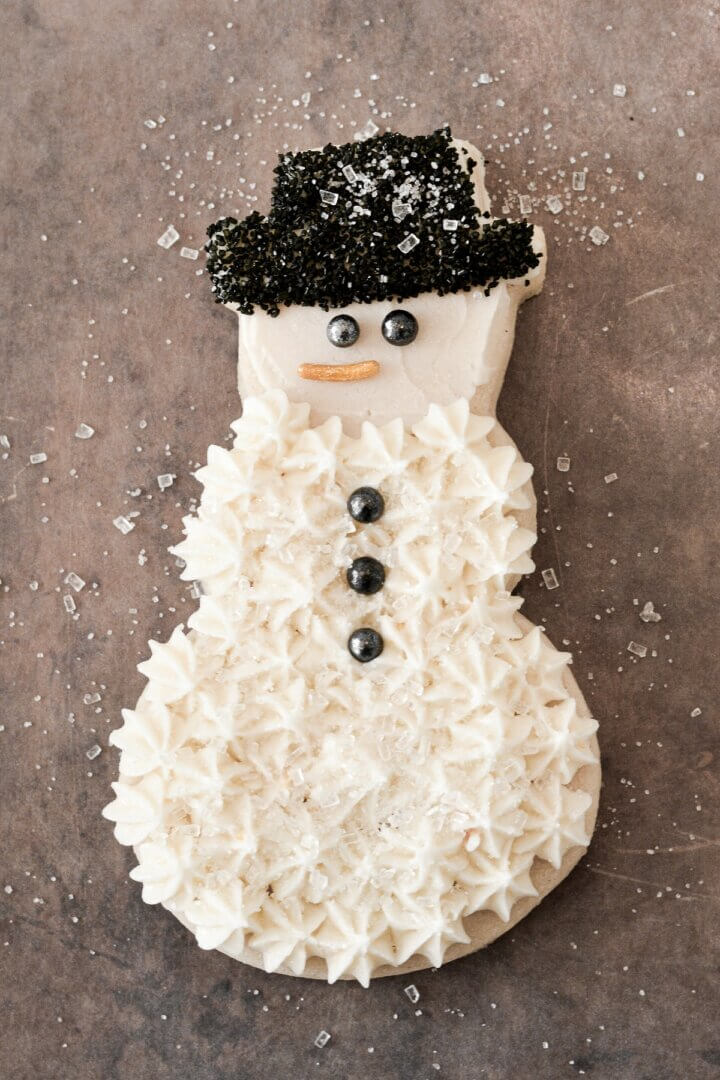
- Finish by sprinkling the hat and body with coarse white sparkling sugar.
TIP: If you like, you could tint some buttercream with black gel food coloring for the hat, instead of using the sanding sugar. Another cute touch would be to pipe a red scarf around his neck.
Just One More Christmas Cookie
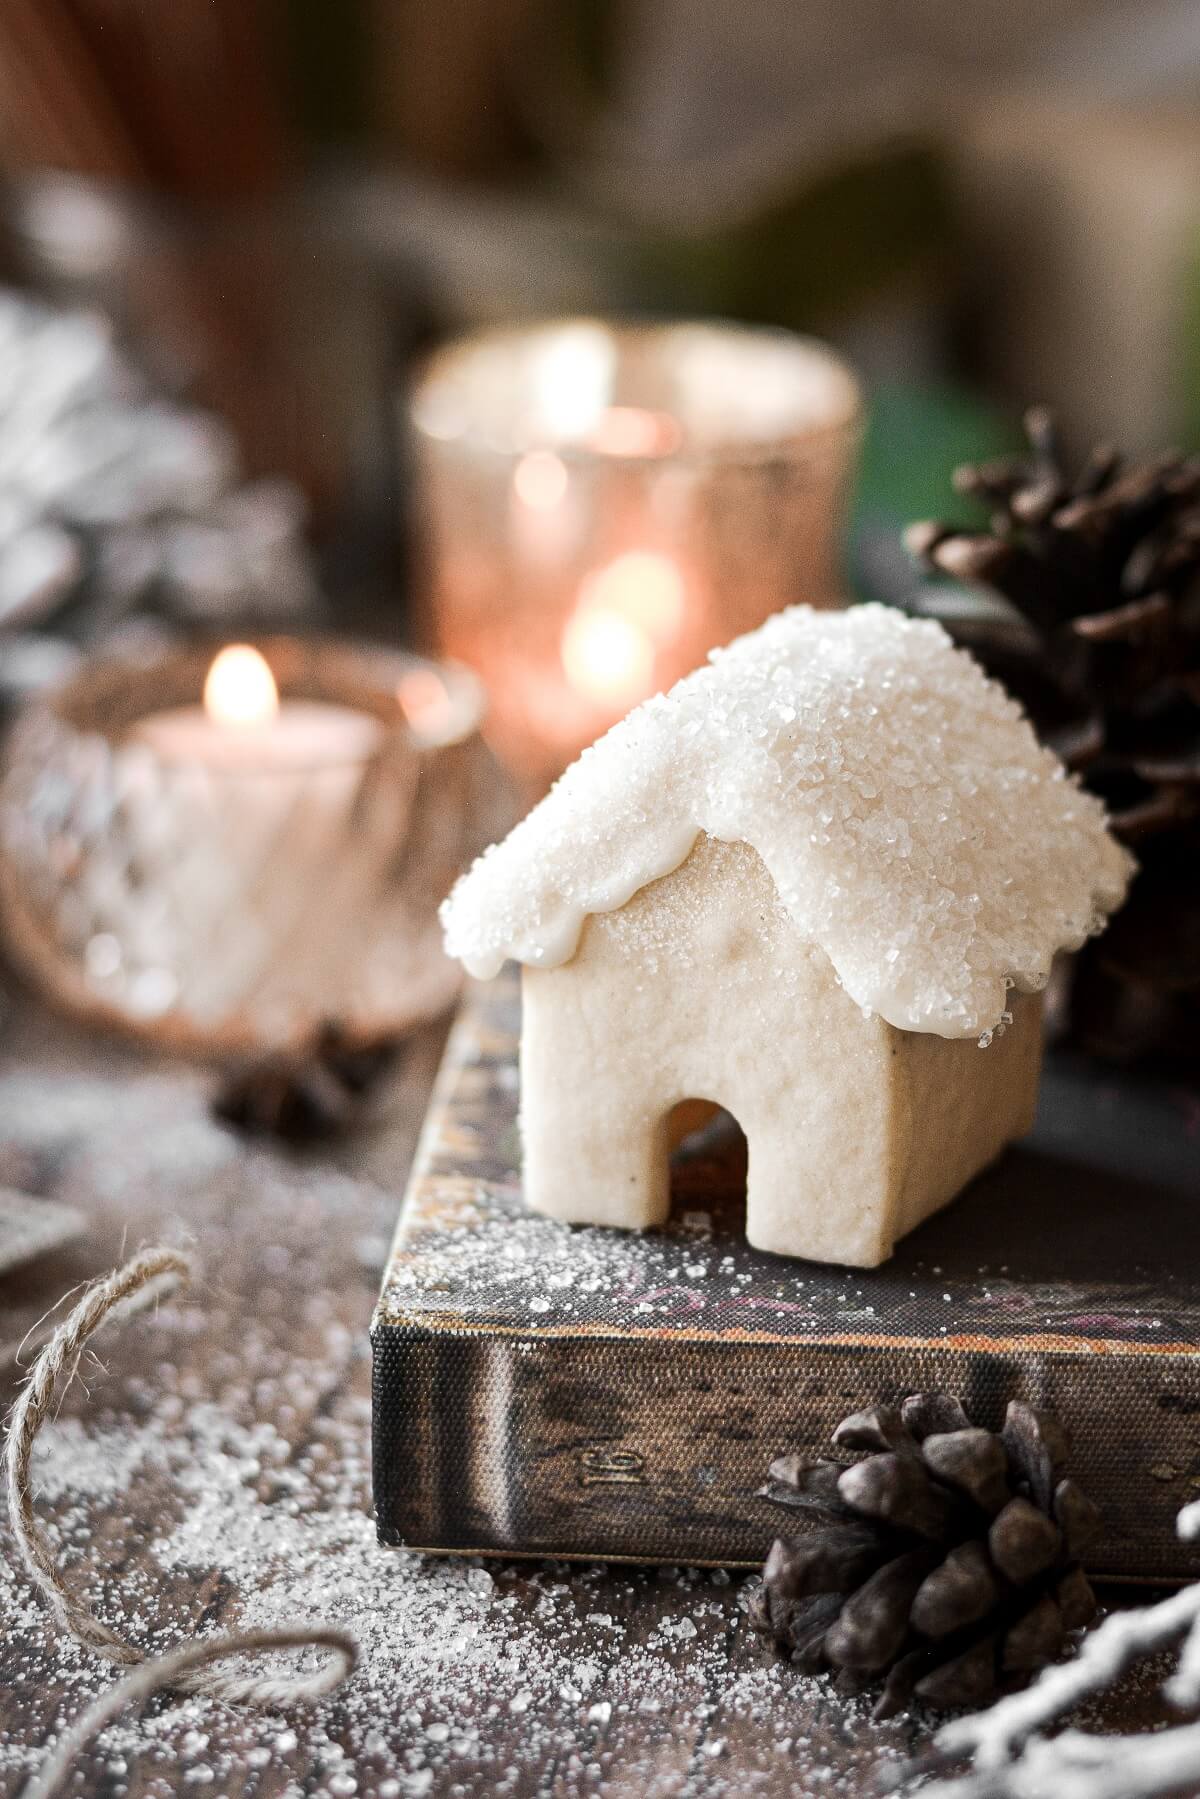
There’s just one more cookie I had to share in today’s post, and that’s these mini houses. I mean, how cute are they? If you make something this pretty, do you let people eat it, or just keep it to look at?
- Cookie Cutter. You’ll need a mini gingerbread house cookie cutter to cut the sides of the house and the roof. Of course, you could also draw your own template on card stock and use that to cut the pieces.
- Cookie Dough. You’ll need a no-spread sugar cookie dough, such as the one in today’s post.
- Royal Icing. Royal icing is essential for “gluing” together the house, and for covering the roof of the house like drifts of snow.
- Coarse White Sugar. Before the icing on the roof sets and dries, sprinkle it with sparkling sugar.
Be sure to read all of my BAKING FAQs where I discuss ingredients, substitutions and common baking questions, so that you can be successful in your own baking!
Frequently Asked Questions
Can I make the dough or bake the cookies in advance?
Yes, absolutely. After making the dough, wrap it well in plastic wrap. You can refrigerate it for up to 5 days, or freeze the dough for up to 3-6 months. Let thaw, and warm up enough to be able to roll it out without difficulty.
You can bake the cookies and store them in an airtight container in the freezer for up to 3-6 months, until you’re ready to decorate them.
What buttercream did you use for your cookies?
I always use American buttercream. For the Christmas tree cookies, I used snickerdoodle buttercream, and for the snowman cookies, I used a white chocolate orange buttercream.
How should I store the frosted cookies?
With cookies decorated with royal icing, the icing dries hard, allowing the cookies to be stacked. But with buttercream frosting, although it crusts over on the surface, it remains soft underneath, so the cookies cannot be stacked without ruining them. So you’ll need to store the frosted cookies in a single layer in airtight containers, refrigerated for 1-2 weeks. Let them warm up to room temperature for serving.
Can I freeze the frosted cookies?
Yes, you can, although I don’t recommend freezing them for more than a few weeks, since buttercream can start to get dry and crumbly if it’s frozen for too long. Even in the freezer, the cookies need to be stored in a single layer in airtight containers.
Where did you get your cookie cutters?
- snowman cookie cutter
- I’ve had my Christmas tree cookie cutter for years, and can’t find that exact shape. This cookie cutter is similar, and I also really like the wonky shape of this one.
You Might Also Like

Please check out my Amazon Shop for a curated collection of some of my favorite cake pans from trusted brands, baking tools, ingredients, pretty things and fashion finds. I recommend products that I buy and use every day!
Did you love today’s recipe? Please rate the recipe and let me know in the comments what you thought! Also, be sure to follow Curly Girl Kitchen on Instagram, and tag me when you try one of my recipes so I can see all your delicious creations!
Christmas Tree Sugar Cookies with Buttercream Frosting
All recipes on Curly Girl Kitchen are developed for high altitude at 5,280 feet. See FAQs for adjusting to higher or lower elevations.

Equipment
- Food Processor or Pastry Cutter
- Rolling Pin and Cookie Cutters
- Small Palette Knife
- Piping Bags and Piping Tips (#18 & #22)
Ingredients
- 1 batch Vanilla Sugar Cookie Dough
- 2 cups American Buttercream, any flavor
- white, gold and silver sugar pearls, various sizes
- white sparkling sugar
- white sanding sugar
Instructions
Getting Ready
- Make the sugar cookie dough, then roll, cut and bake your Christmas tree cookies, as instructed in my Perfect Vanilla Sugar Cookies post.
- Make the buttercream, and organize your piping bags, piping tips, sparkling sugar and sugar pearls.
Style 1: Stars
- Fit a piping bag with tip #18 and fill with buttercream. Pipe small stars all over the cookies.
- Scatter with sugar pearls, then sprinkle lightly with sparkling sugar.
Style 2: Swooping Branches
- Fit a piping bag with tip #22. Starting at the bottom of the cookie, pipe a row of swoops to form the bottom row of branches. Repeat with a second and third row, finishing at the top of the cookie.
- Lightly sprinkle coarse sparkling sugar along the bottom edge of each row of branches.
Style 3: Sparkling
- Spread (or pipe) buttercream all over the cookie. You can smooth it out with a palette knife or leave it slightly textured.
- Sprinkle your larger sugar pearls onto the buttercream first, then your smaller sugar pearls.
- Holding the cookie over a bowl to catch the falling sugar, sprinkle it generously with sparkling sugar or sanding sugar (I like to use a combination of both).
Style 4: Textured Branches
- Starting at the bottom of the cookie, use a small pallet knife to spread on the buttercream, leaving it textured to look like tree branches. Repeat with two more rows, ending at the top of the cookie. The more textured you make the buttercream, the better this design will look.
- Sprinkle coarse sparkling sugar just along the edge of some of the ripples.
Notes
 https://curlygirlkitchen.com/
Oh my goodness!! I am not a great cook and definitely not a great baker. Since moving to Colorado 25 yrs ago I had all but given up on making great cookies!! I made your no spread sugar cookies last night in the shape of hearts for Valentine’s Day. They came out perfect!!!! Thank you for the high altitude recipes and thorough instructions.
I’m so glad! I have so many cookie recipes for high altitude, so I hope you find many more that you love. 🙂
HI,
I came across your blog and Love it! I live in Saginaw Michigan and it’s a lower altitude so I was wondering if I had to adjust your buttercream recipe for my Christmas cookies.
Thank you.
Hugs,
Teresa
Teresa, no changes needed for buttercream. 🙂
How do you recommend storing and packaging for Christmas gifts? Thank you!
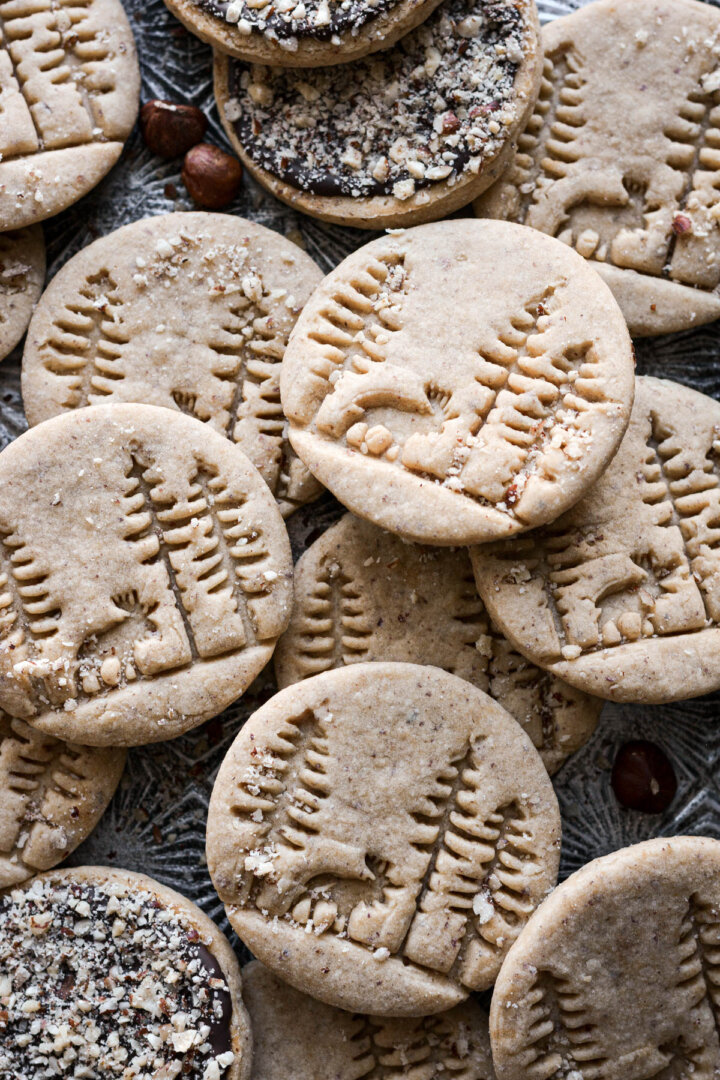
Buttercream frosted cookies need to be packed in a single layer so the frosting isn’t ruined, which does make them tricky to give as gifts. Cookie tins or bakery boxes lined with wax paper would probably work best. I would probably first fill the tin with cookies that can be stacked, like these sparkling sugar coated almond cookies, then arrange a few of the frosted ones on top.
https://curlygirlkitchen.com/almond-sugar-cookies-christmas-trees/
You can also freeze these in airtight containers until you’re ready to put together gift boxes. I have more tips about Christmas cookie gift boxes in this post: https://curlygirlkitchen.com/christmas-cookie-box-recipes/
Where is your recipe for the snickerdoodle buttercream?
It was from this cake: https://curlygirlkitchen.com/snickerdoodle-cake/
Hi. Can I check where did you get your cookie cutter from? I looked through your FAQ but couldn’t find it!
To me the cookie cutter looks a lot like this one from Williams and Sonoma. https://www.williams-sonoma.com/products/ws-copper-cookie-cutter/?catalogId=79&sku=1155517&cm_ven=PLA&cm_cat=Google&cm_pla=Bakeware%20%3E%20Cookie%20Cutters%20%26%20Pancake%20Molds&cm_ite=1155517_14571727833_aud-1967894174593%3Apla-1418851096061&gad_source=1&gbraid=0AAAAADrs9cFAH-GT0Q4KYRijCIkkfSCXT&gclid=Cj0KCQiApNW6BhD5ARIsACmEbkXKTWBYZ9FaMO80-LhMRixUhux1mbXkPXZV87AUEQSfz6qp5wvbXRwaAradEALw_wcB
Your American Buttercream frosting is the very best I have ever made and had! I had already made my cutout sugar cookies but came across your page. This is a frosting I will make tomorrow as. chocolate buttercream to frost a cake! It’s not so sweet but buttery and creamy! Absolutely love it! Thank you for sharing!