
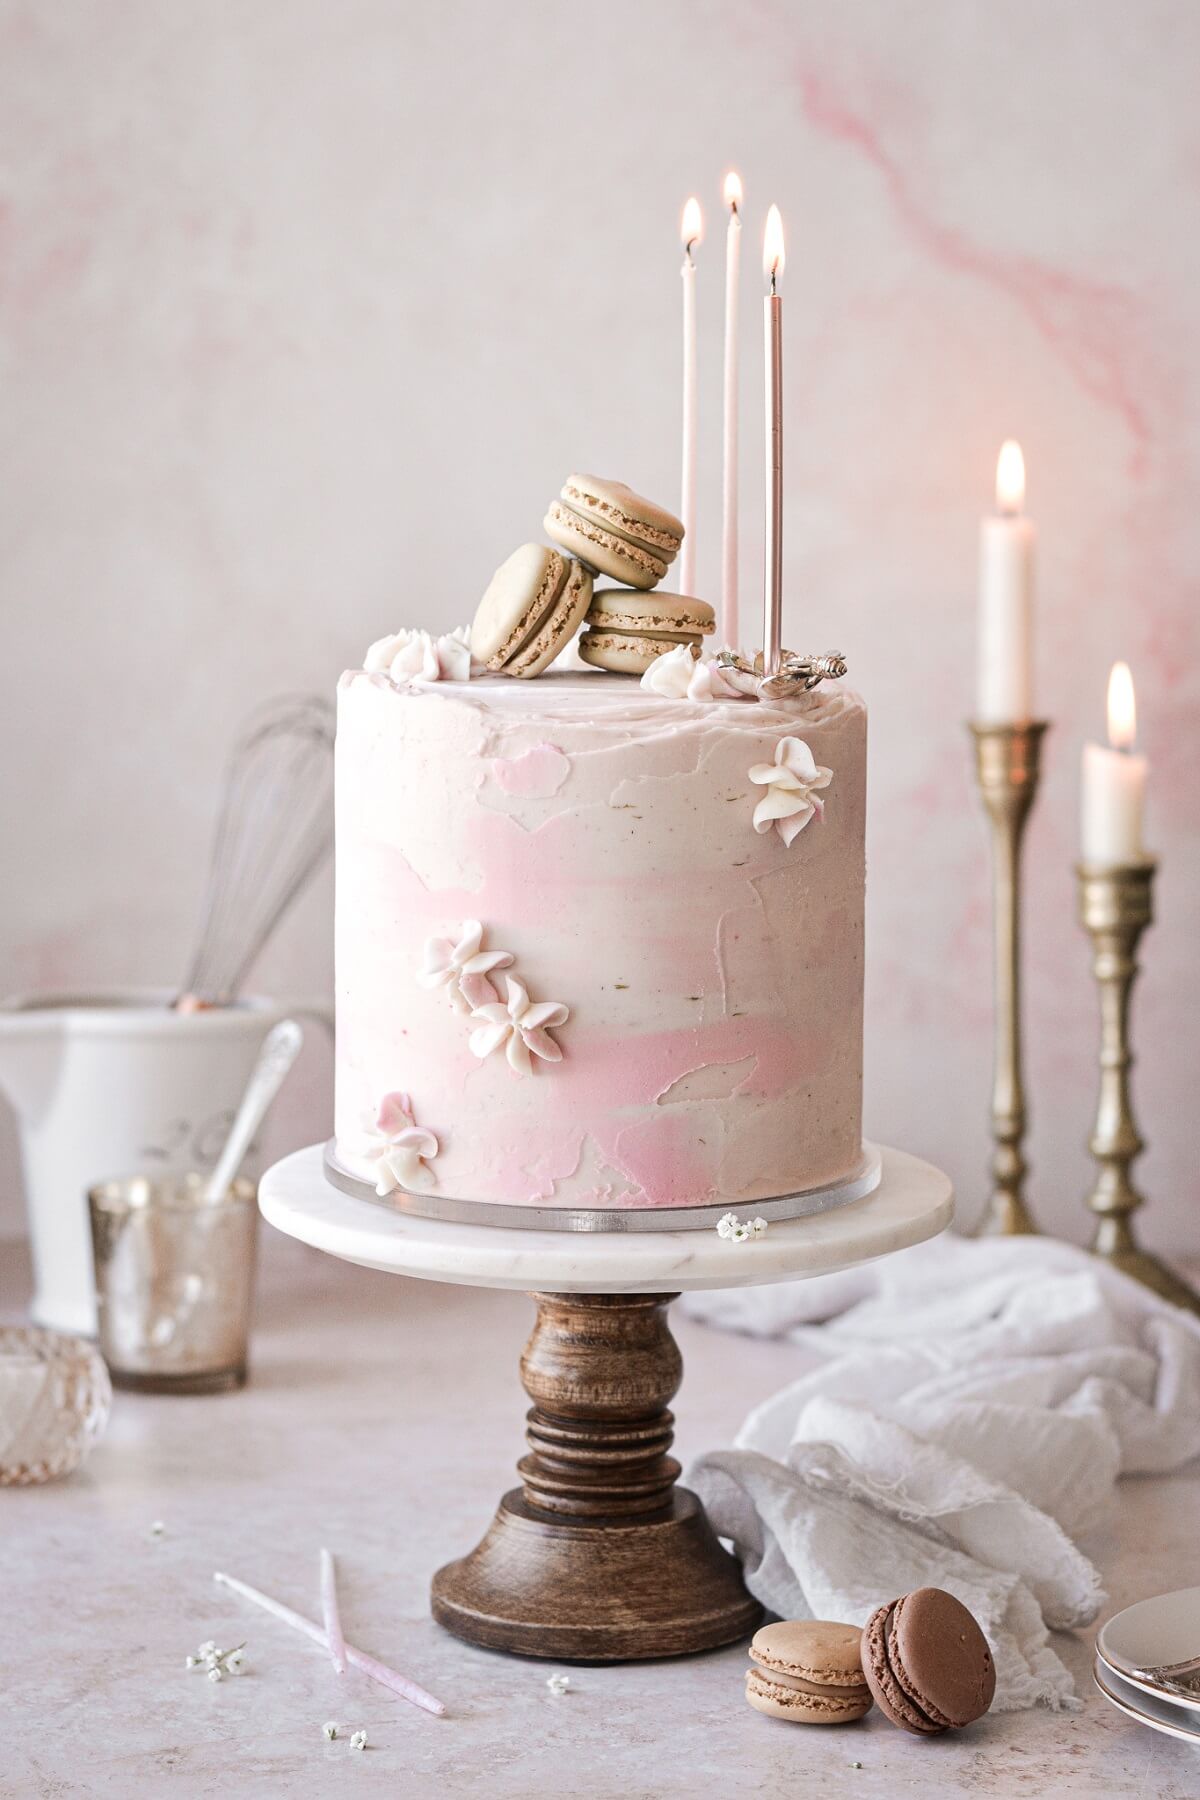
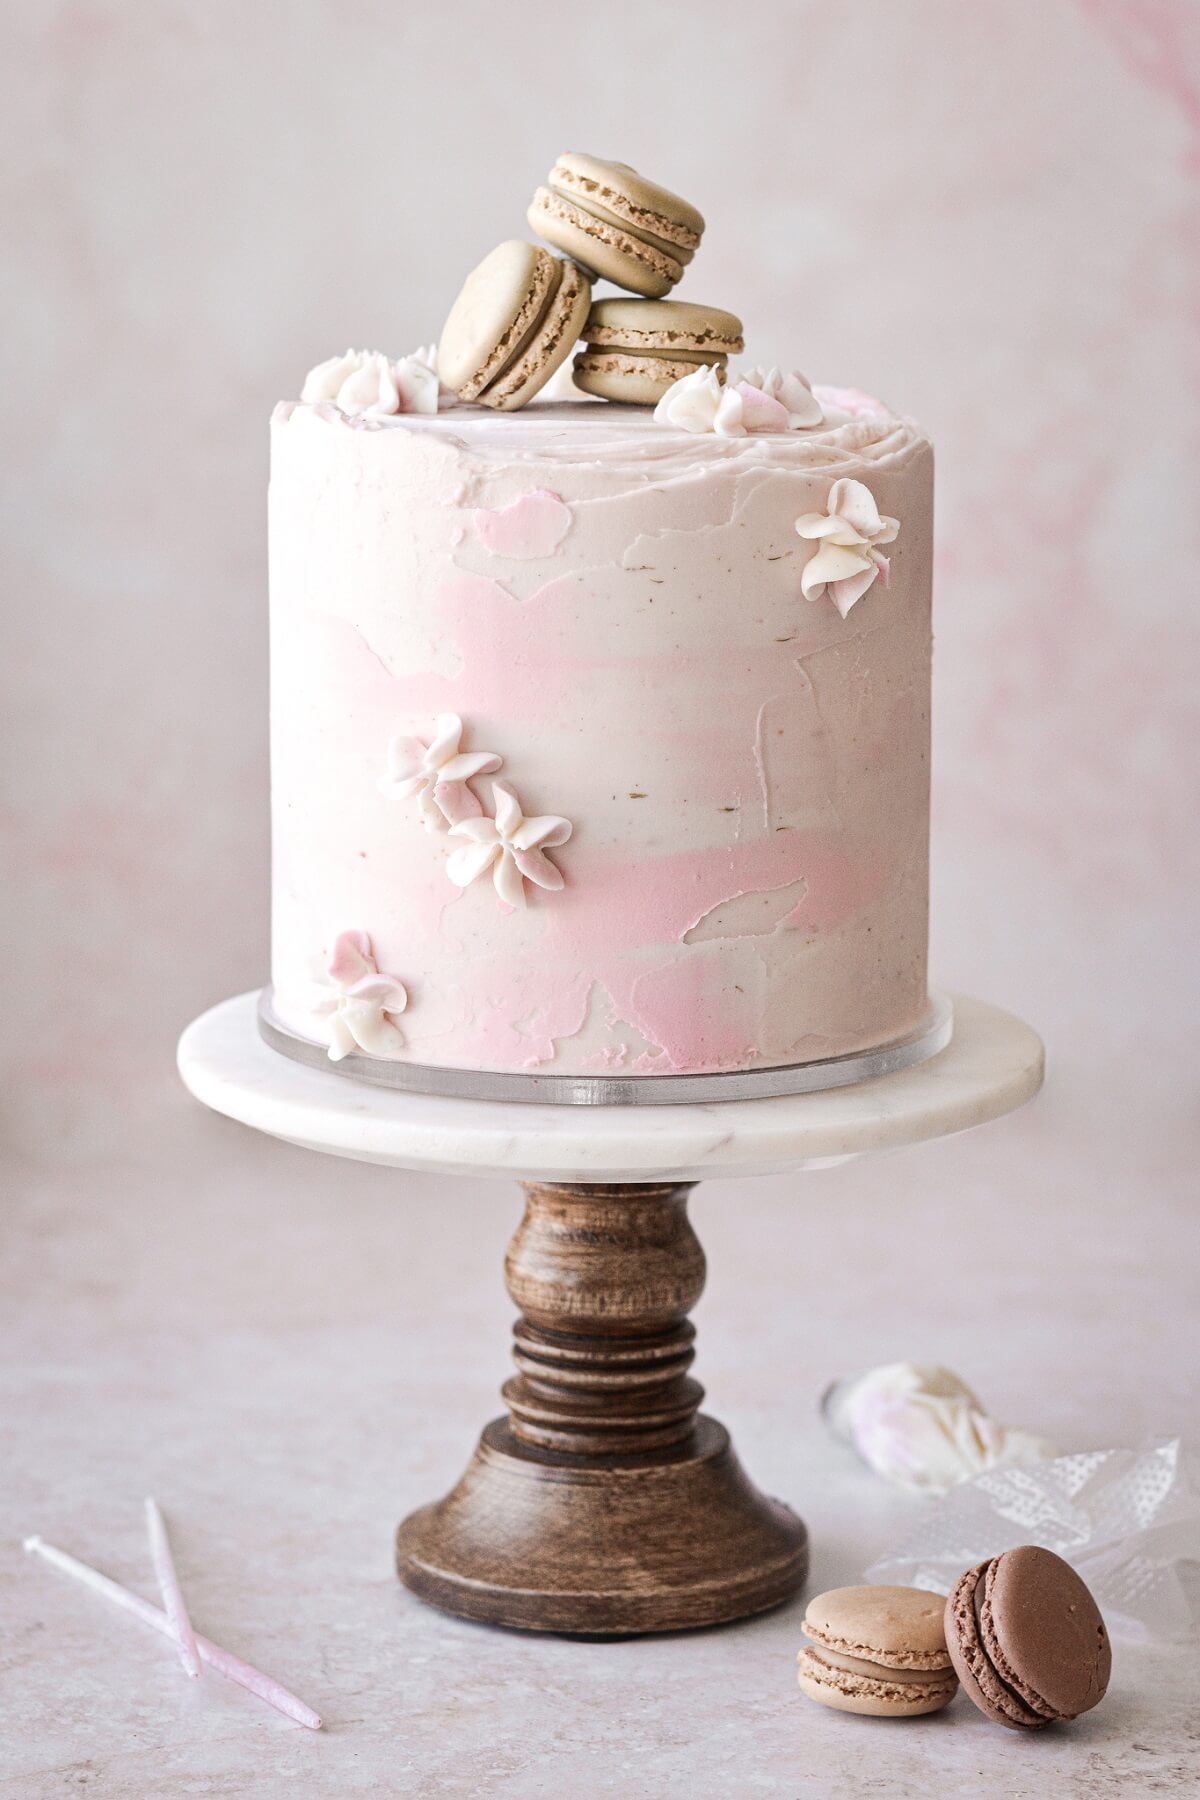
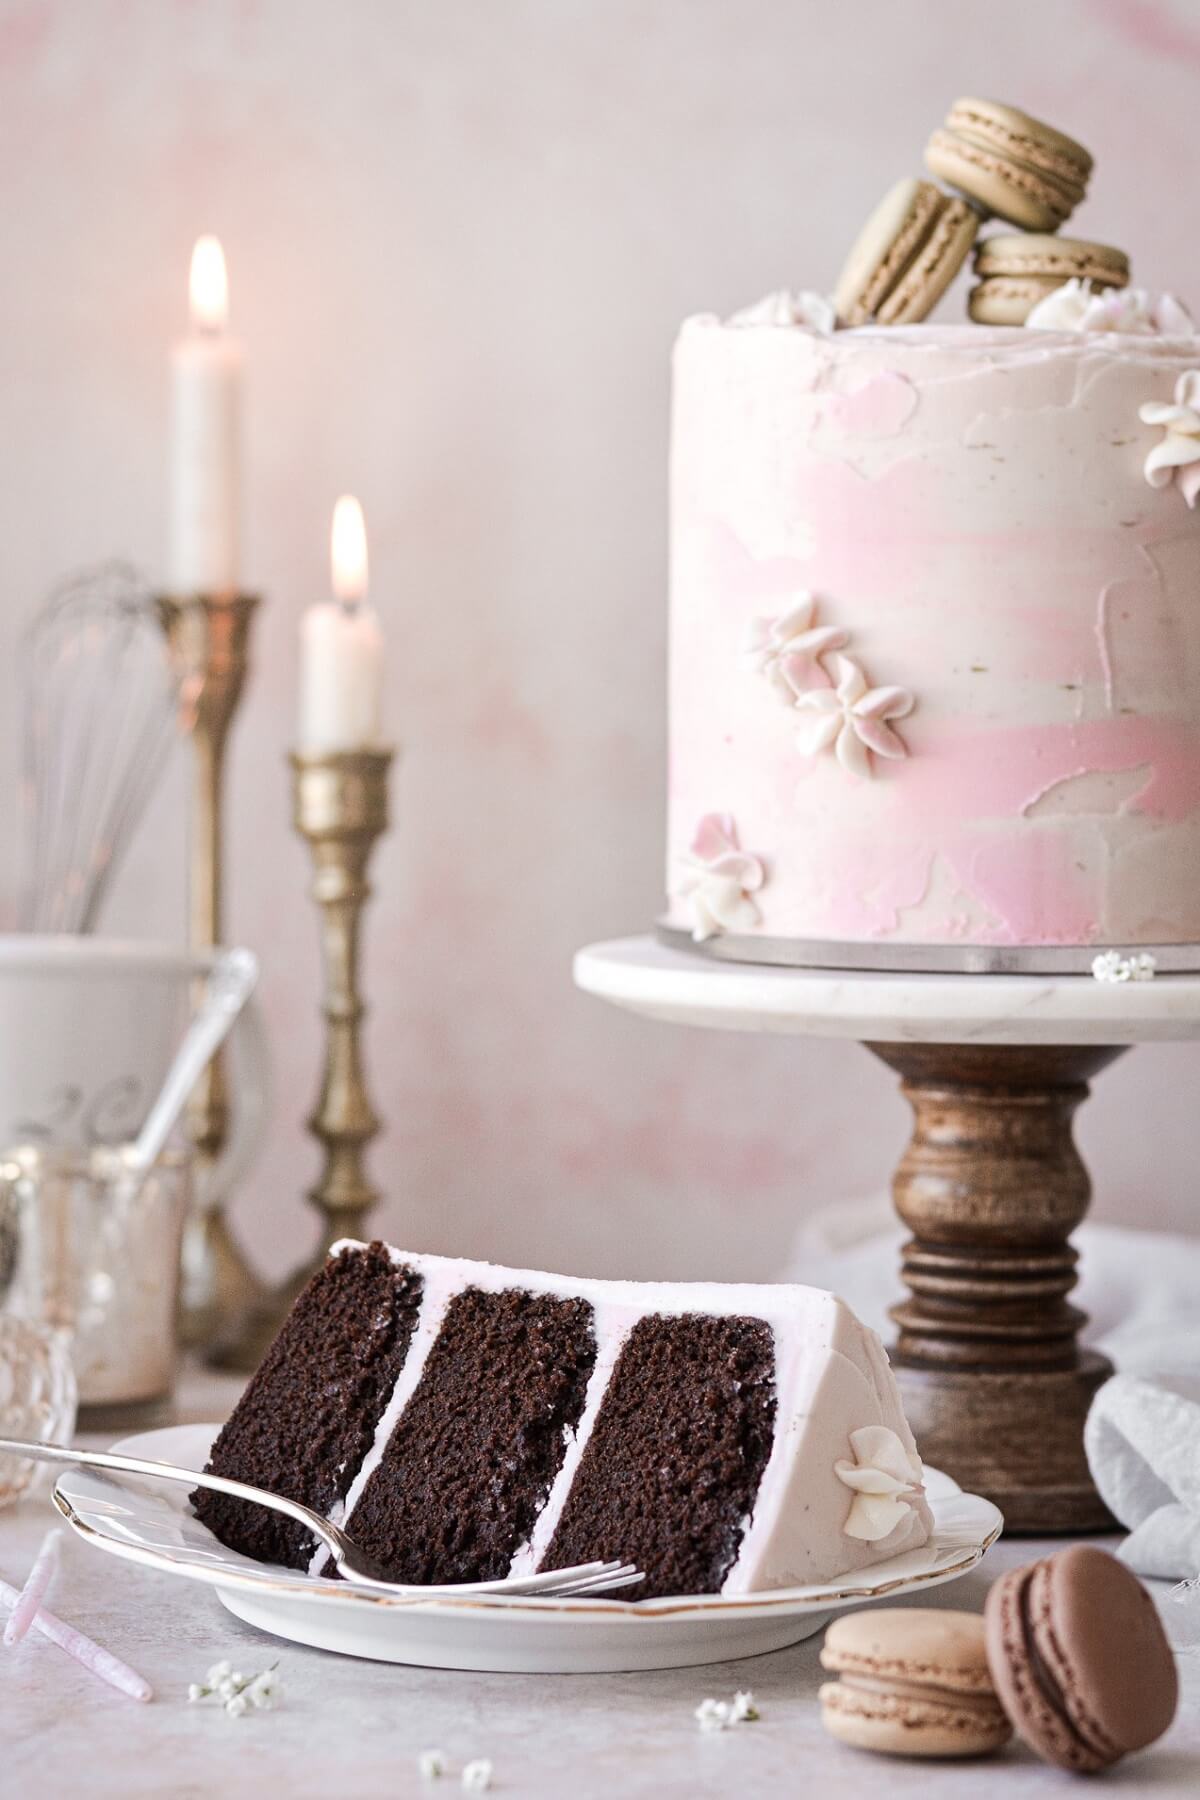
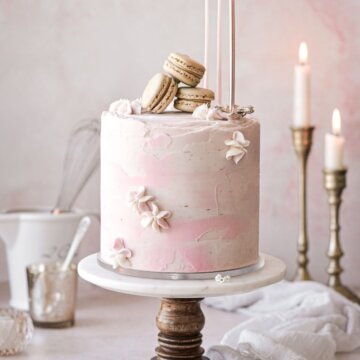
An easy cake decorating tutorial for a textured watercolor buttercream cake with piped drop flowers and French macarons. This stunningly beautiful design is perfect for Easter, Mother’s Day, a baby’s smash cake, or other spring celebration or birthday. In just a few simple steps, you can decorate your own cake with the prettiest watercolor buttercream design in any colors you like.
For more helpful tips, don’t miss these posts on How to Stack, Fill, Crumb Coat and Frost a Layer Cake and How to Make Perfect American Buttercream.
This site contains affiliate links. As an Amazon associate, I earn from qualifying purchases. This means that I may make a small commission if you purchase a product using those links. This in no way affects my opinion of those products and services. All opinions expressed on this site are my own.
Why You’ll Love This Design
Easy and Simple. You’ll be amazed at how easy it is to create the design on this textured watercolor buttercream cake! After frosting and chilling my cake, I only spent maybe 10 minutes doing the decorating and final touches.
Perfect for Spring. I wanted to post this tutorial in time for Easter, but honestly, it would be gorgeous for any spring or summer event. Think Mother’s Day and birthdays, a baby’s smash cake photo session, baby showers and weddings.
Versatile. Choose your color palette and make this design your own!
Ingredients and Tools
- Bench Scraper. This is absolutely a necessary tool for smoothing the sides of your cake and blending the buttercream.
- Offset Icing Spatula. Use this for applying the buttercream as you stack, fill and frost your cake.
- Cake Decorating Turntable. Another tool that a cake decorator can’t live without. You simply can’t spin a cake smoothly without a quality turntable.
- Piping Bag + Tip 2D. For piping the simple drop flowers. Buy Tip 2D here.
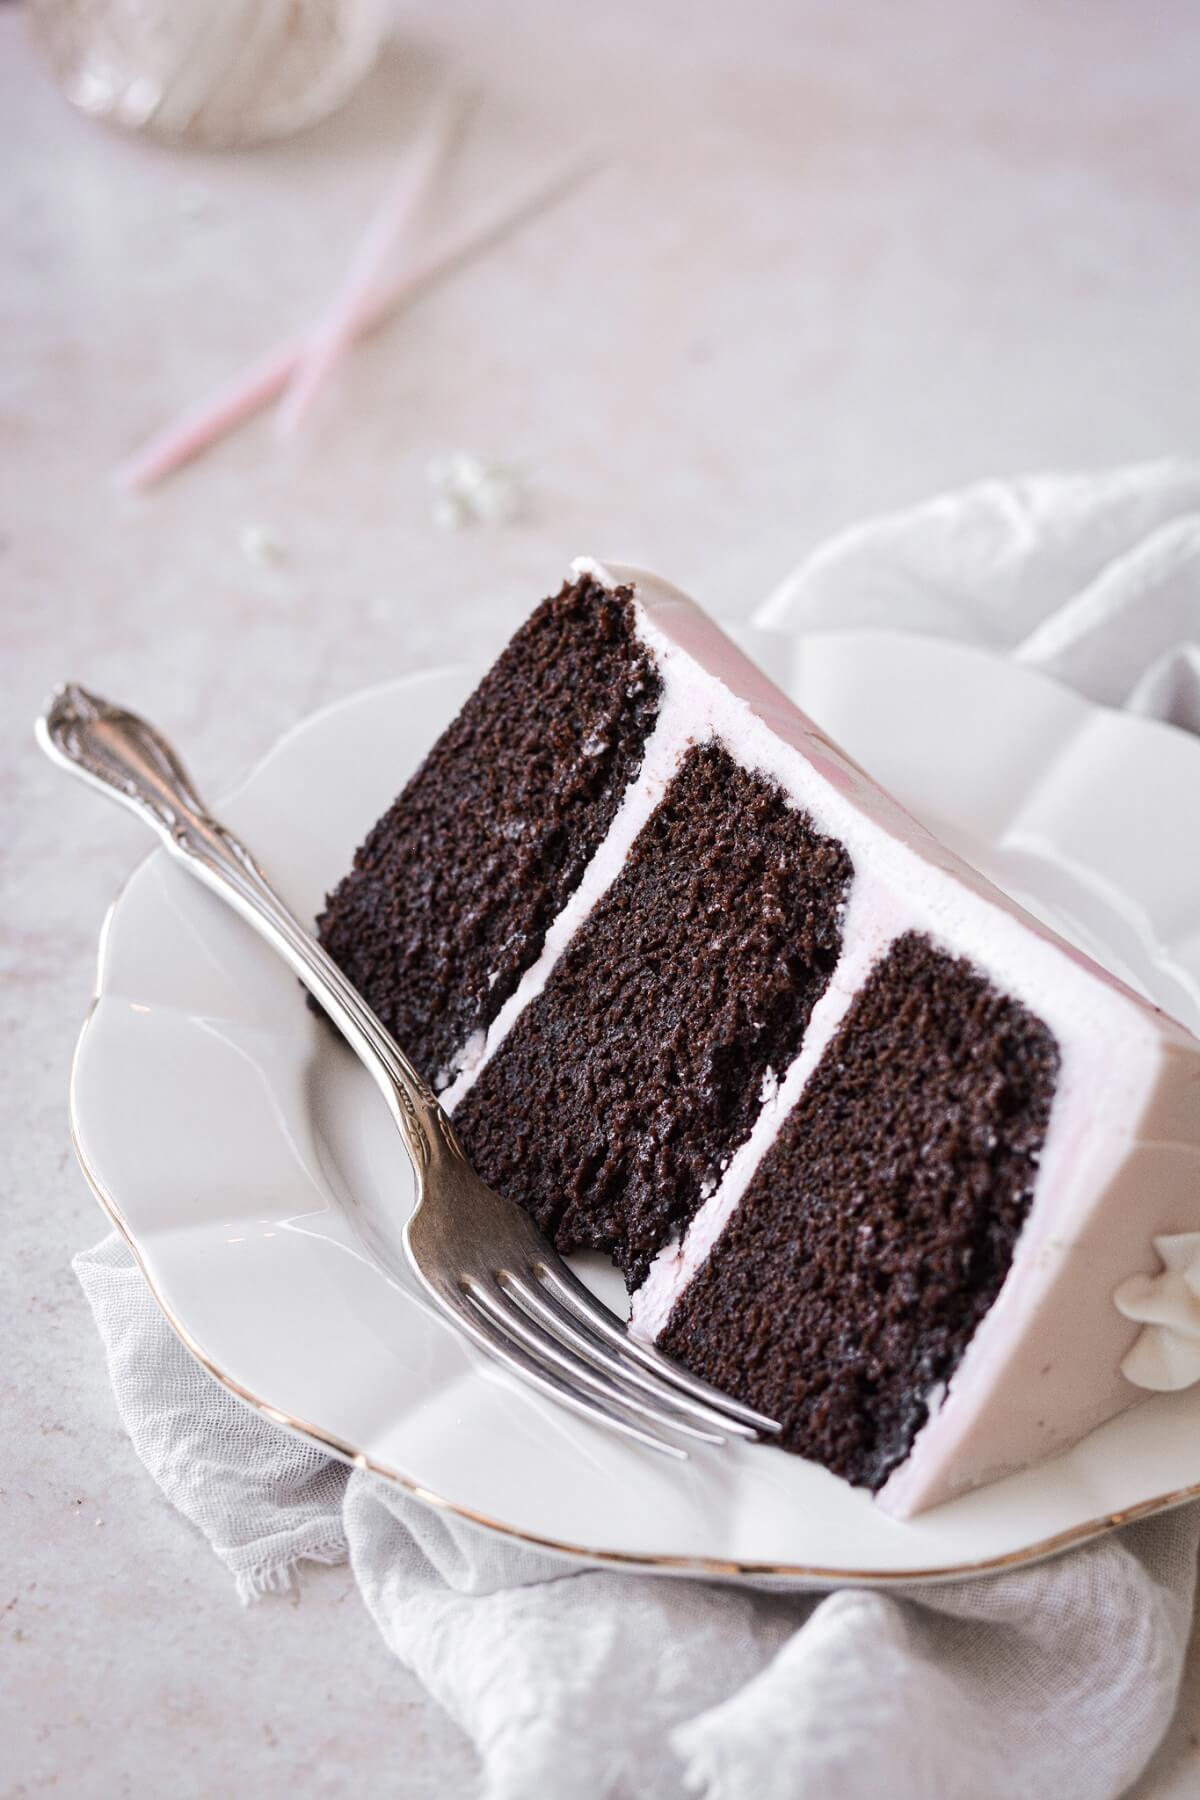
- Frosted Layer Cake. Your cake can be any size and flavor that you like. For reference, mine is a three-layer 6-inch cake that’s about 6 inches tall.
- Buttercream. In addition to the buttercream used to frost your cake, you’ll need about 3/4 cup extra buttercream for the textured watercolor design.
- Gel Food Coloring. For tinting your buttercream.
Instructions
Getting Started
- Before starting on the watercolor design, your cake should be assembled, frosted and thoroughly chilled. See this post for tips on How to Stack, Fill, Crumb Coat and Frost Layer Cakes. I assembled and frosted my cake with the base coat of buttercream at night, and refrigerated it overnight before decorating it the next morning. If you don’t have that much time, make some freezer space and freeze your cake for 1-2 hours so that the base coat of buttercream is very cold and firm.
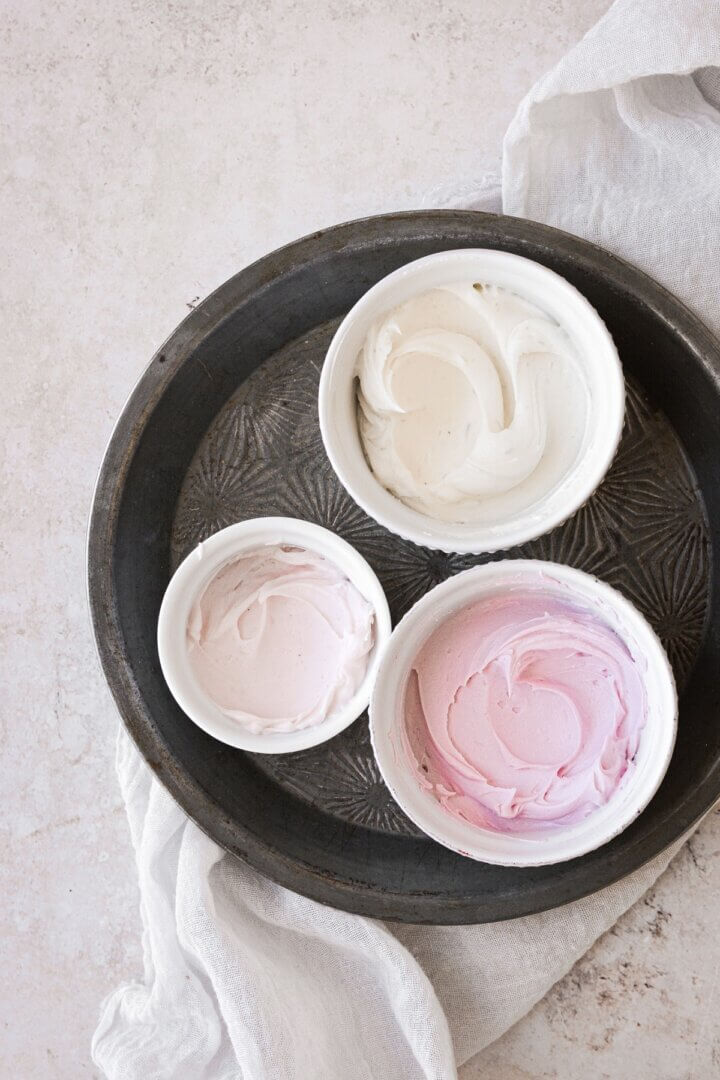
- Divide the 3/4 cup buttercream into several bowls, and tint each portion with gel food coloring. You can use as many different colors as you like, depending on the look you’re going for.

Decorating Your Cake
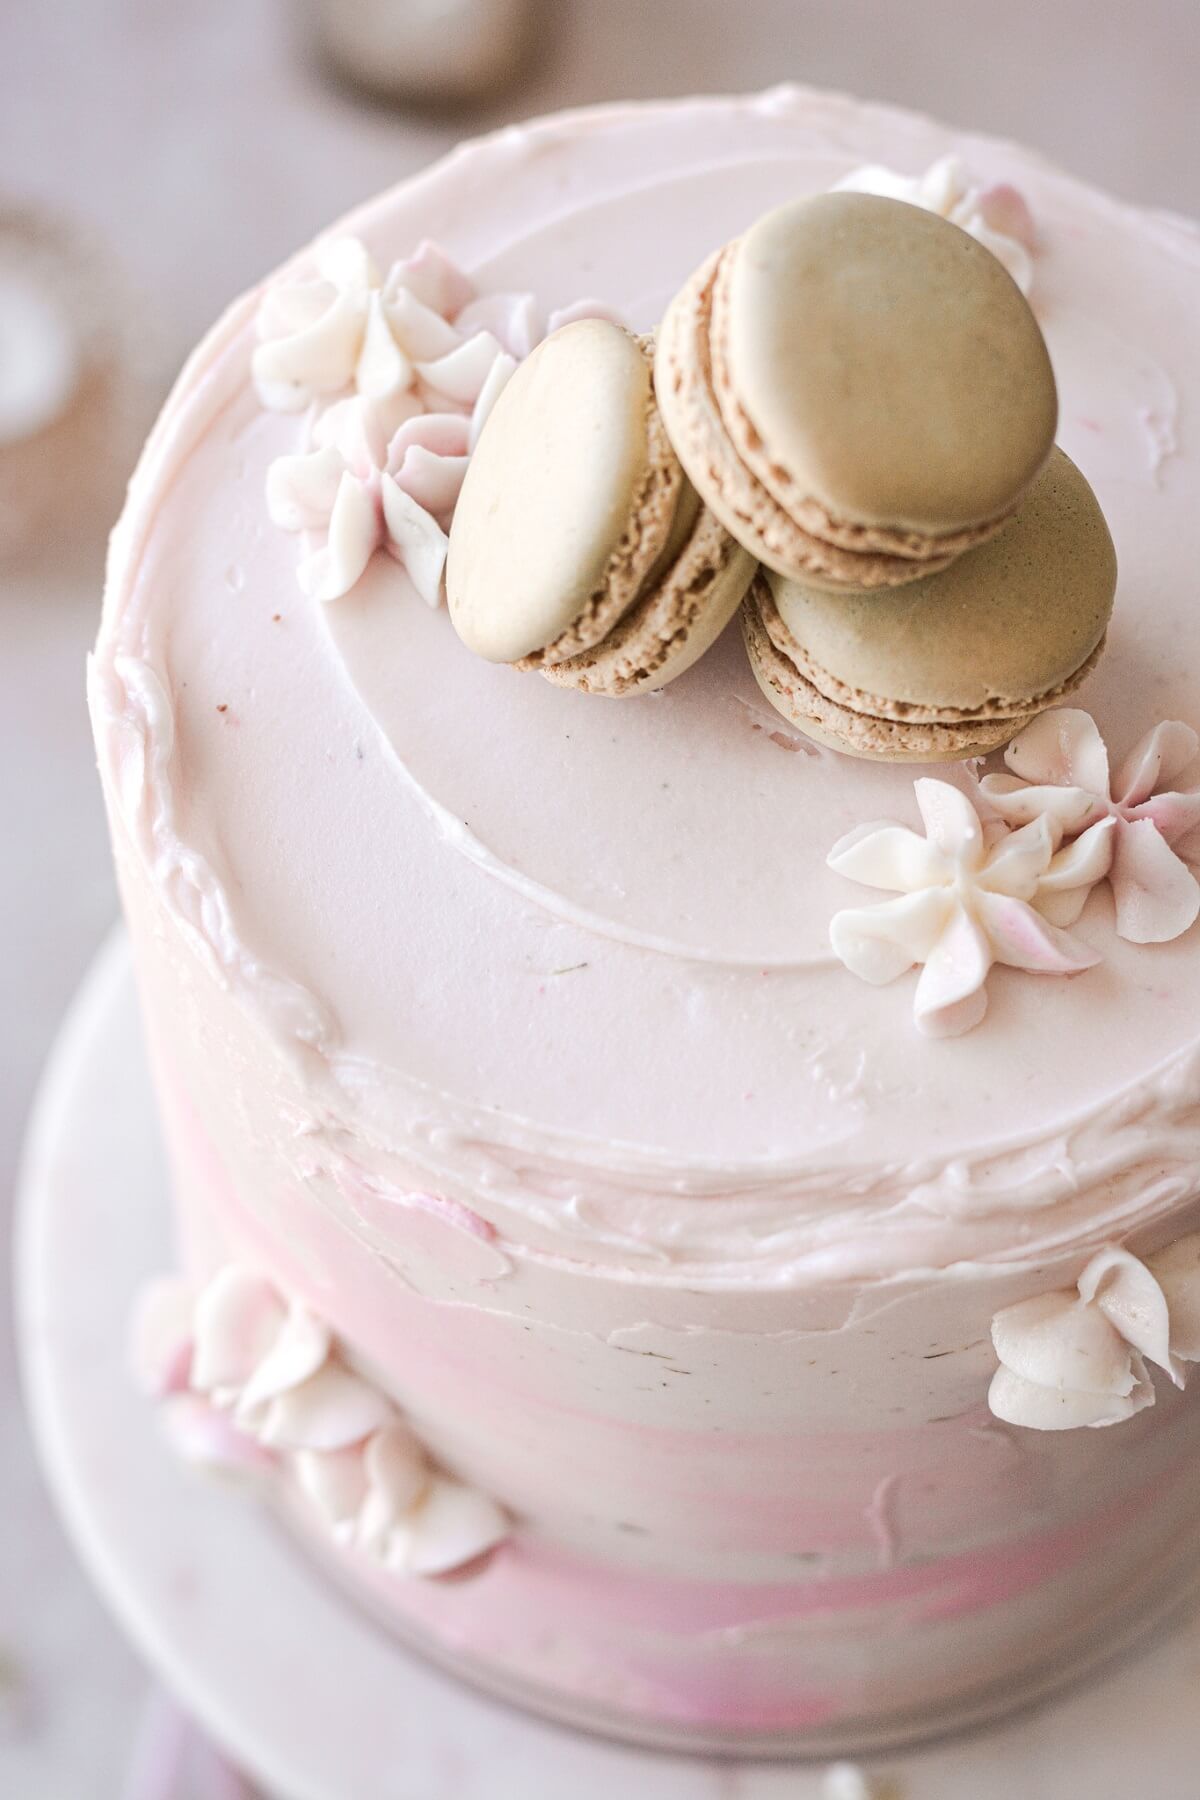
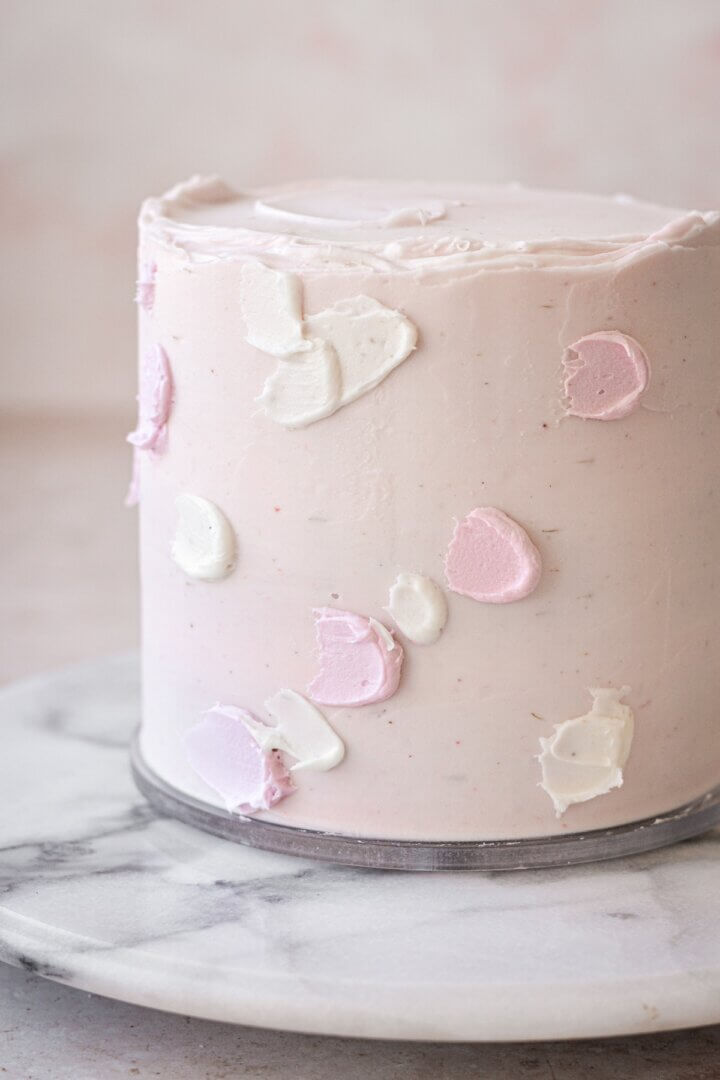
- Place the chilled cake on your cake decorating turntable. Randomly dab the tinted buttercream around the cake. The less buttercream you add, the more textured your final design will be, and the more buttercream you add, the smoother and more blended together it will look. Note that I barely added any buttercream during this step, and my design has a nice textured look to it.
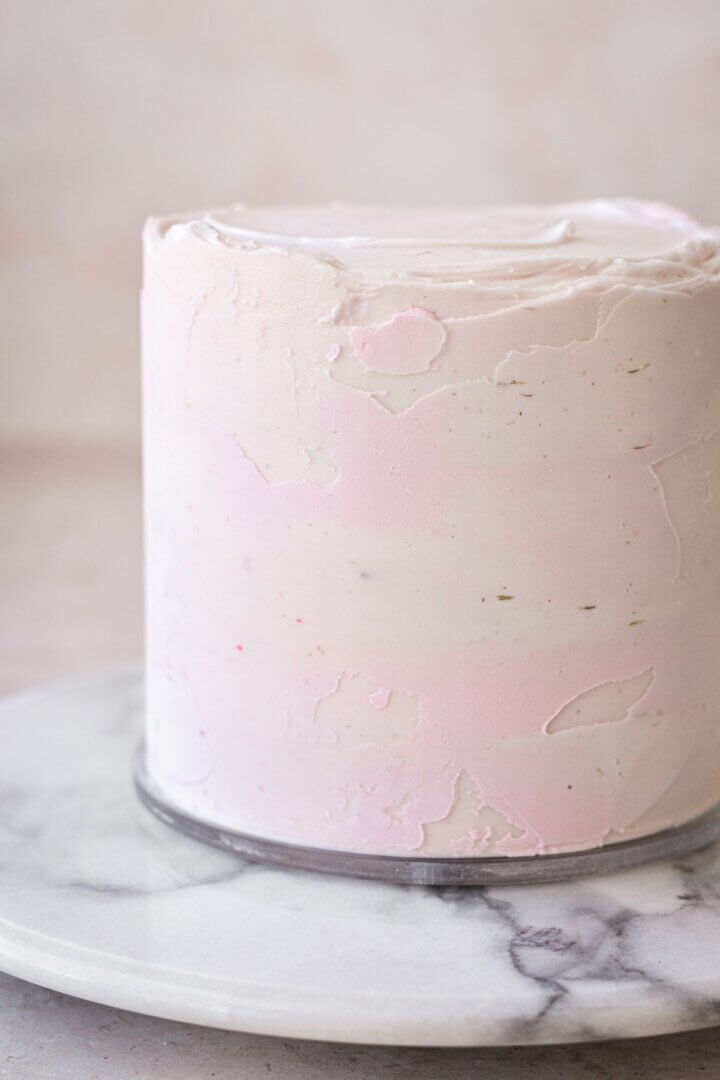
- Now take your bench scraper and lightly sweep it around the sides of the cake as you spin the turntable. You should just barely skim the surface of the cake as you’re smoothing it. If there are any gaps you want to fill in, simply dab more buttercream on that area and smooth it again with your bench scraper.
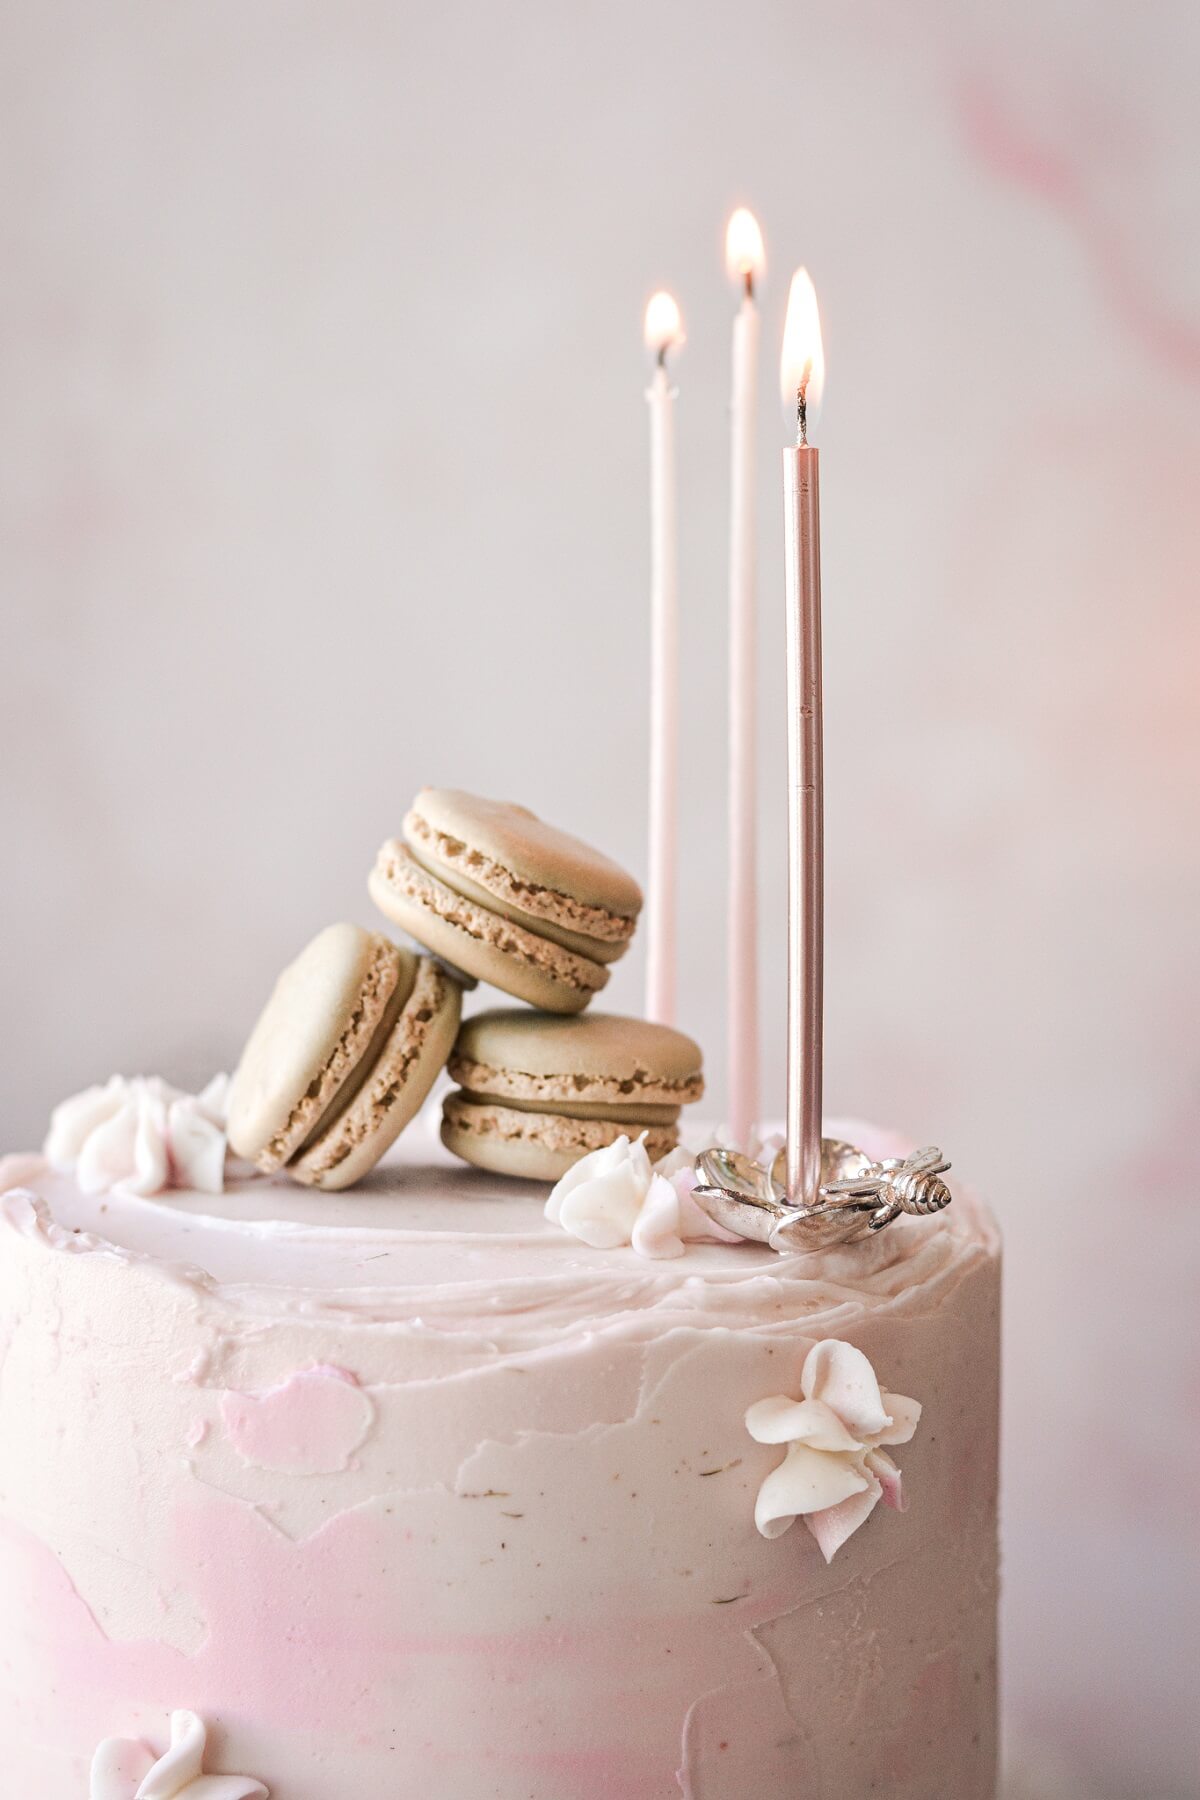
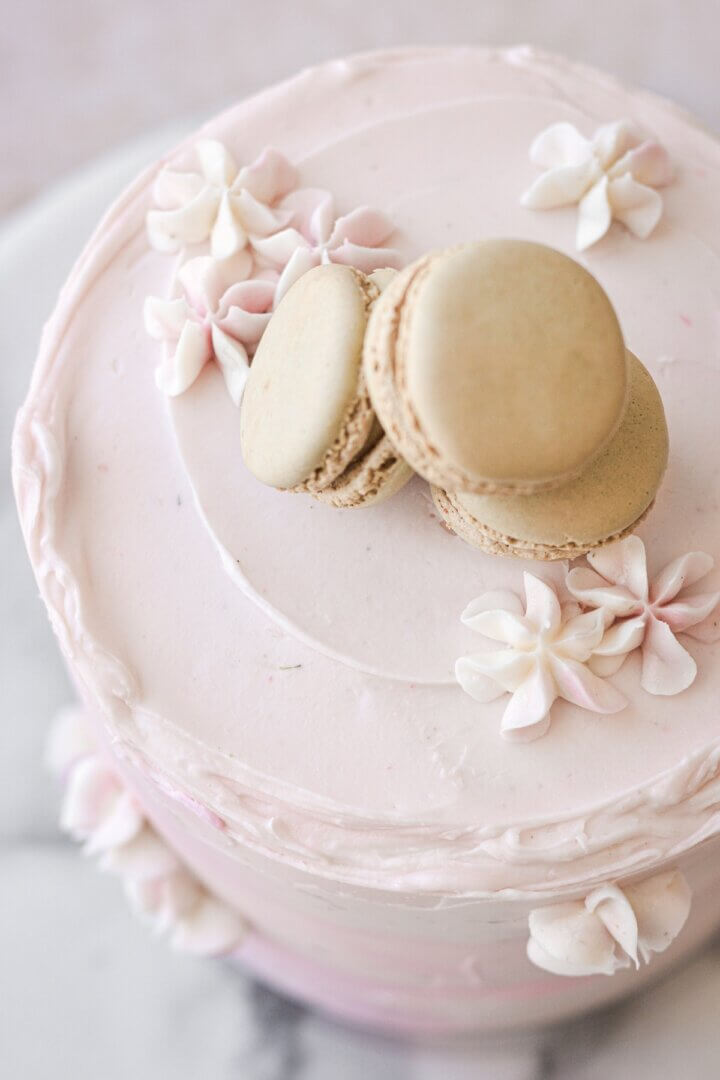
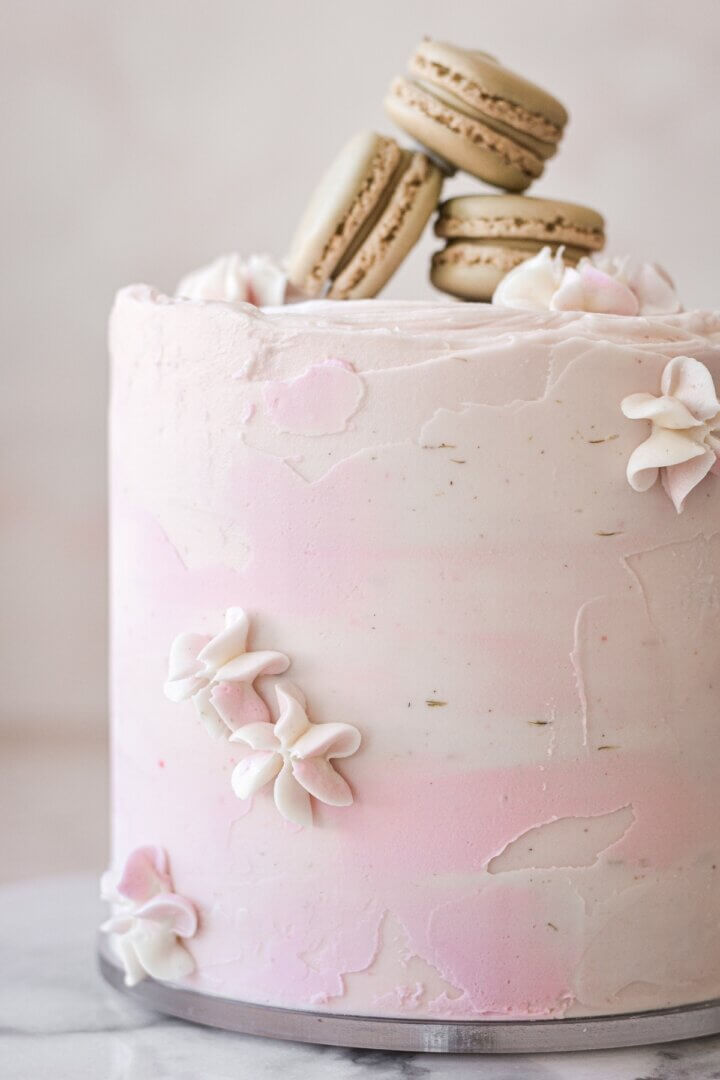
- When you’re happy with how the buttercream is blended, fit a piping bag with tip #2D, fill with buttercream, and pipe a few drop flowers onto the cake.
- Let the cake warm up at room temperature for 3-4 hours before serving.
Be sure to read all of my BAKING FAQs where I discuss ingredients, substitutions and common questions with cake making, so that you can be successful in your own baking! I also suggest reading these comprehensive posts on making Perfect American Buttercream, How to Stack, Fill, Crumb Coat and Frost Layer Cakes and How to Use Piping Bags.
Frequently Asked Questions
What gel food colors did you use for your buttercream?
I actually didn’t use any food coloring. All the buttercream I used on my cake was from my freezer stash of leftover buttercream, and each one happened to be naturally colored. The pale pink base coat of buttercream is a mixture of cranberry buttercream and lemon buttercream to make the blush color. The deeper purple/pink color is this blueberry buttercream. And the white is this lavender lemon buttercream. All the flavors and colors are perfectly complementary to each other.
What cake is inside?
This is my high altitude chocolate cake recipe.
What piping tip did you use for the flowers?
I used the drop flower tip, #2D.
Why doesn’t the watercolor buttercream on my cake look as textured as yours?
There could be two reasons. One, your base coat of buttercream isn’t cold enough. It’s important for the base to be very cold and firm, so that the colors you add on top skim over the surface, rather than mixing in with the base coat. Two, you added too much buttercream on top of the base coat. For more texture, use less buttercream. For less texture and a more blended together look, add more buttercream on top.
Where is the silver candle holder on top of the cake from?
The silver plated candle holder is from a shop called Silver Celebrations London. Sadly, they have closed down.
You Might Also Like

Please check out my Amazon Shop for a curated collection of some of my favorite cake pans from trusted brands, baking tools, ingredients, pretty things and fashion finds. I recommend products that I buy and use every day!
Did you love today’s recipe? Please rate the recipe and let me know in the comments what you thought! Also, be sure to follow Curly Girl Kitchen on Instagram, and tag me when you try one of my recipes so I can see all your delicious creations!
Textured Watercolor Buttercream Cake
All recipes on Curly Girl Kitchen are developed for high altitude at 5,280 feet. See FAQs for adjusting to higher or lower elevations.

Equipment
- Bench Scraper
- Offset Icing Spatula
- Cake Decorating Turntable
- Piping Bag + Tip 2D
Ingredients
- 1 Layer Cake, assembled, frosted and well chilled
- ¾ cup buttercream
- gel food coloring
Instructions
- Before starting on the watercolor design, your cake should be assembled, frosted and thoroughly chilled. See this post for tips on How to Stack, Fill, Crumb Coat and Frost Layer Cakes.I assembled and frosted my cake with the base coat of buttercream at night, and refrigerated it overnight before decorating it the next morning. If you don't have that much time, make some freezer space and freeze your cake for 1-2 hours so that the base coat of buttercream is very cold and firm.
- Divide the 3/4 cup buttercream into several bowls, and tint each portion with gel food coloring. You can use as many different colors as you like, depending on the look you're going for.
- Place the chilled cake on your cake decorating turntable. Randomly dab the tinted buttercream around the cake.The less buttercream you add, the more textured your final design will be, and the more buttercream you add, the smoother and more blended together it will look. Note that I barely added any buttercream during this step, and my design has a nice textured look to it.
- Now take your bench scraper and lightly sweep it around the sides of the cake as you spin the turntable. You should just barely skim the surface of the cake as you're smoothing it. If there are any gaps you want to fill in, simply dab more buttercream on that area and smooth it again with your bench scraper.
- When you're happy with how the buttercream is blended, fit a piping bag with tip #2D, fill with buttercream, and pipe a few drop flowers onto the cake.
- Let the cake warm up at room temperature for 3-4 hours before serving.
 https://curlygirlkitchen.com/
Leave a Reply