
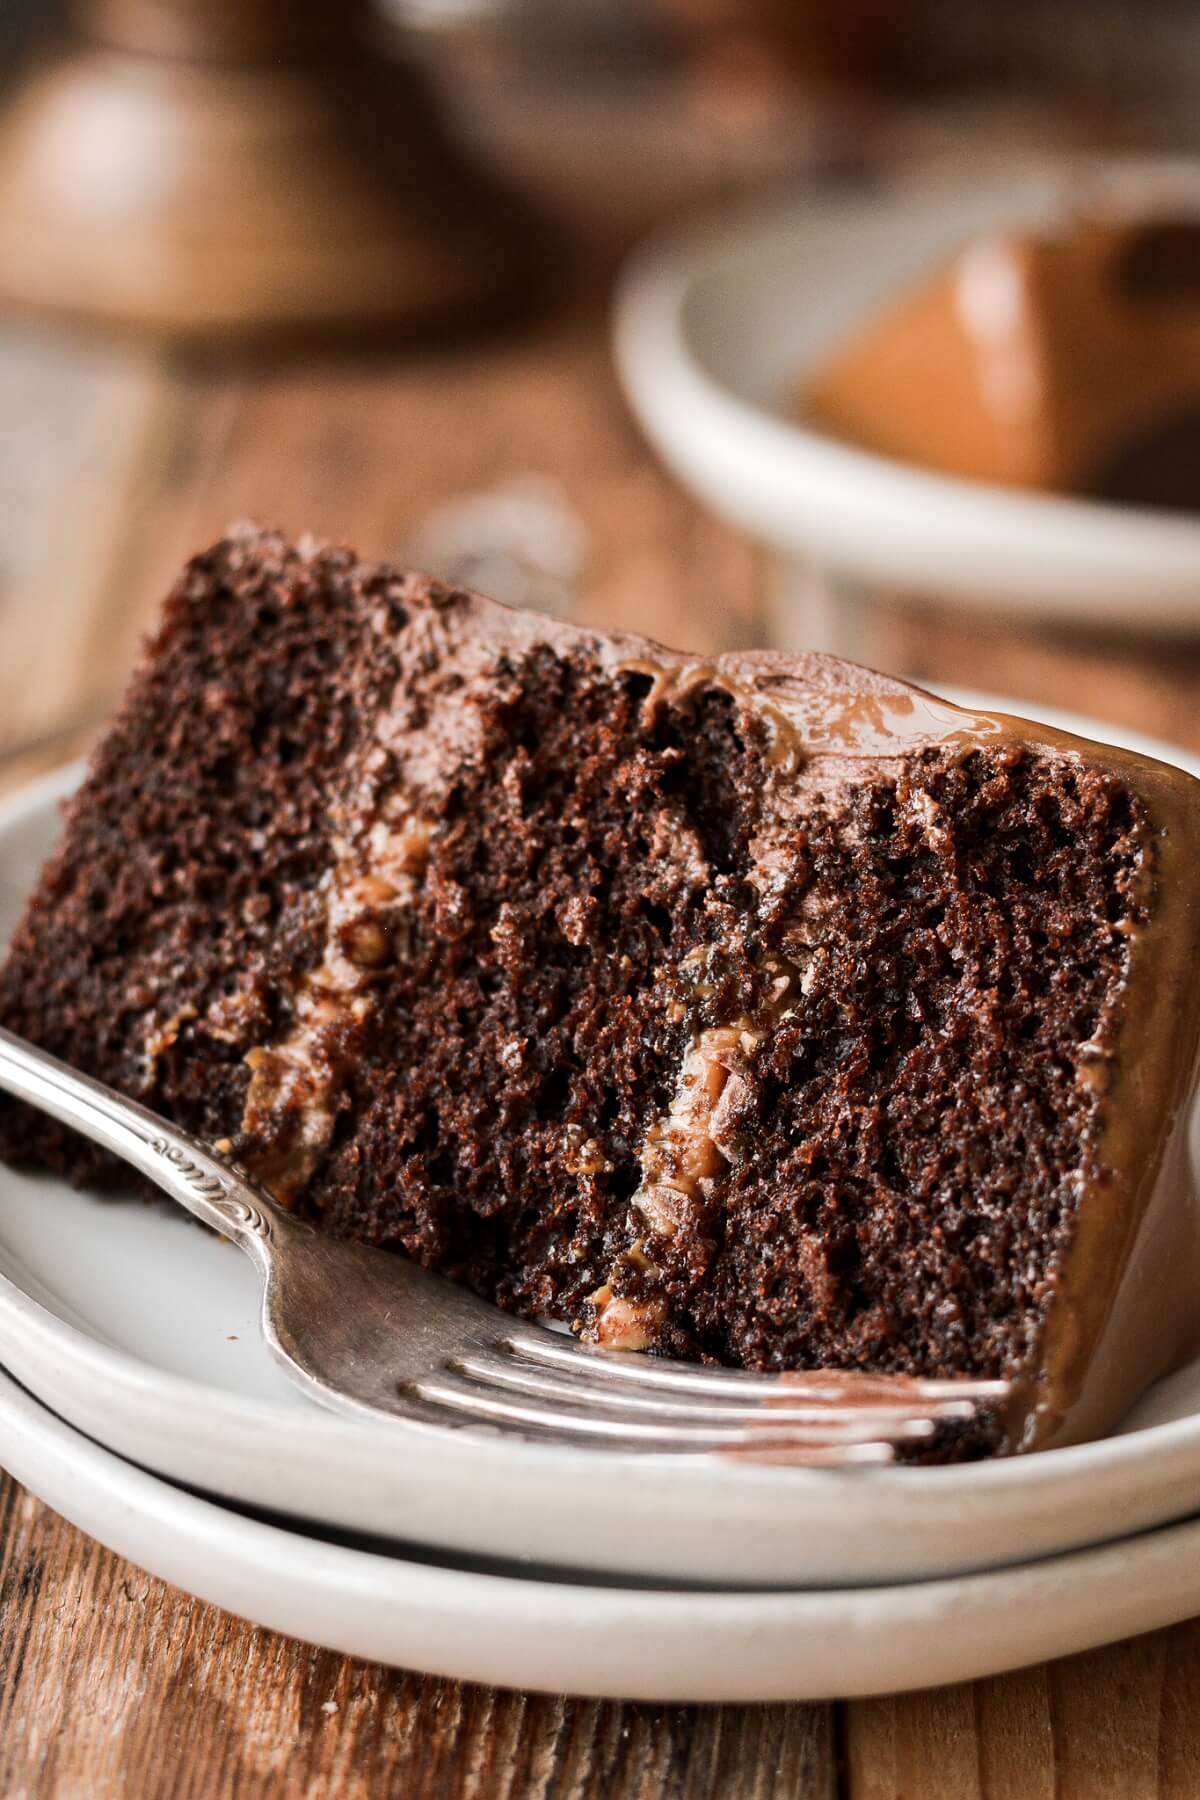
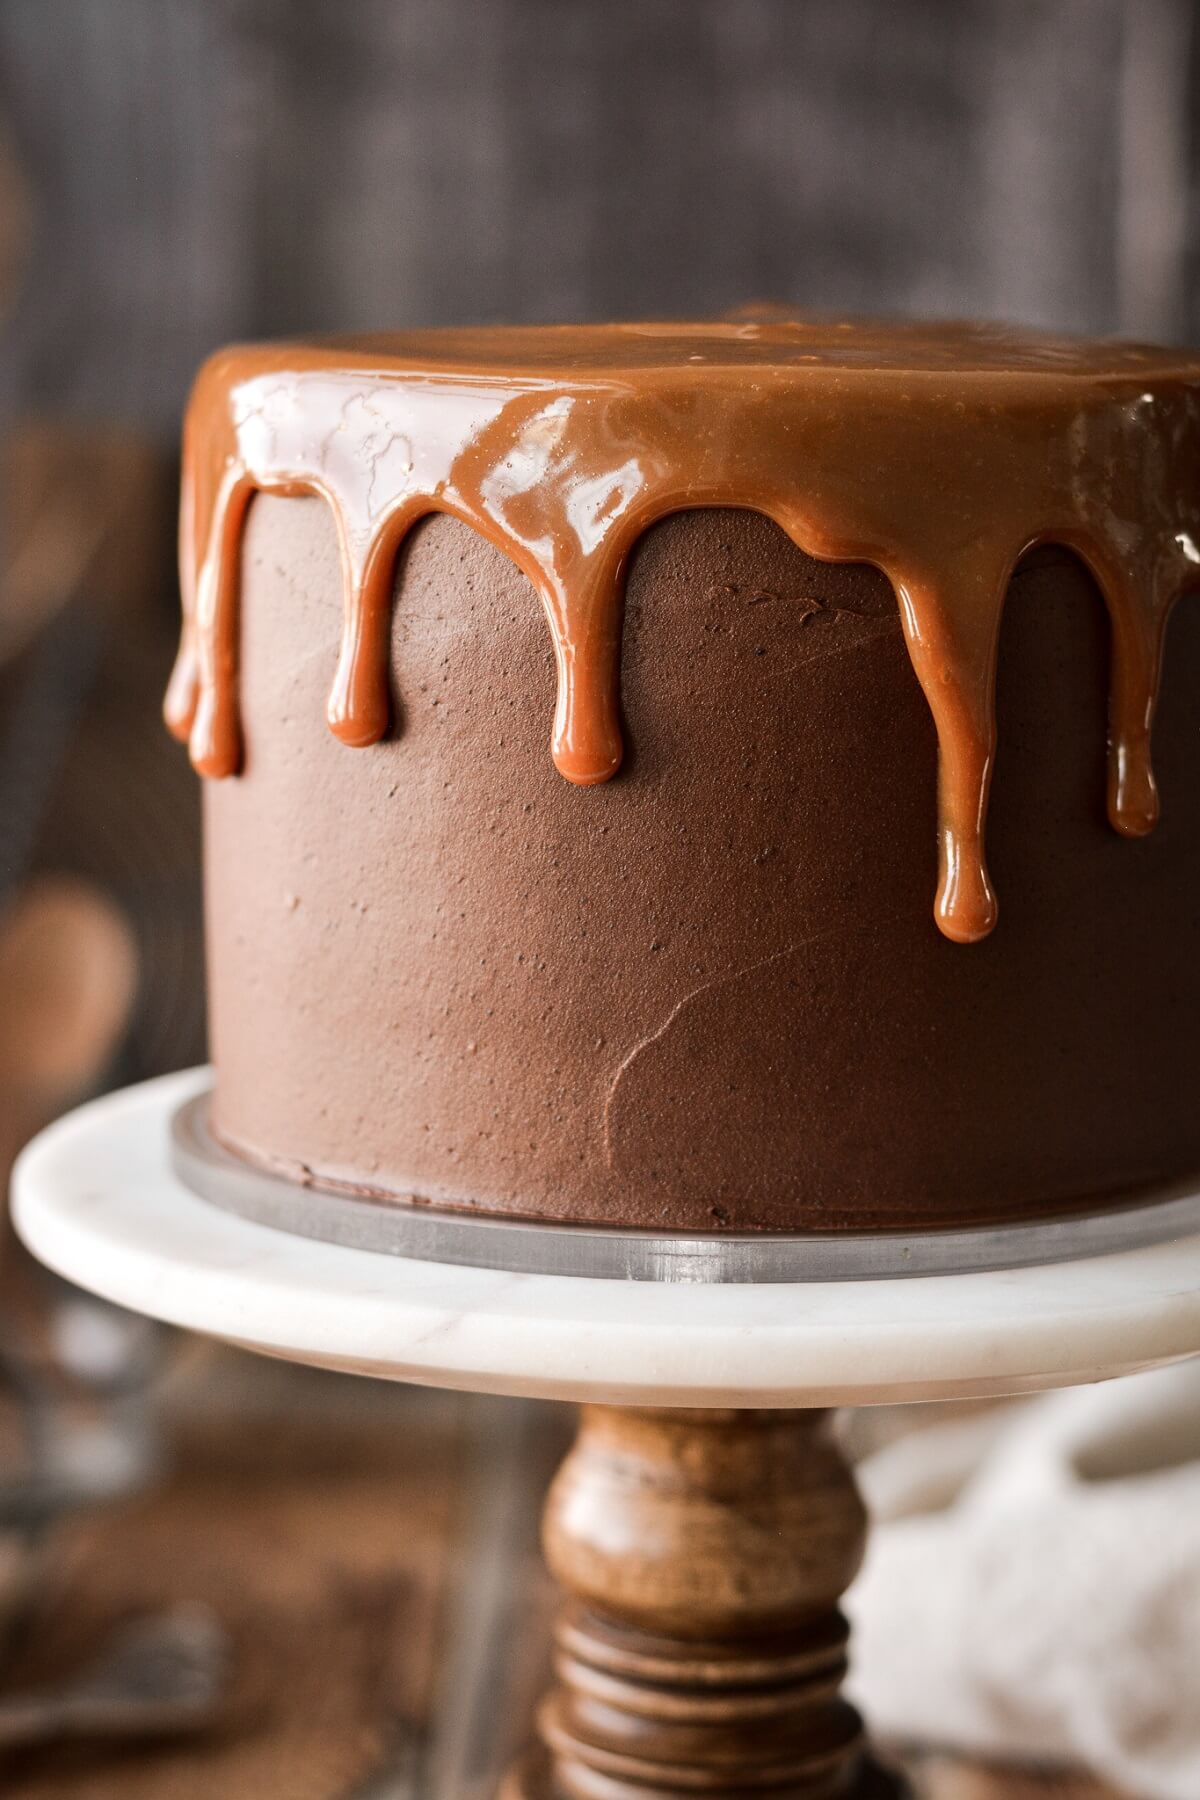
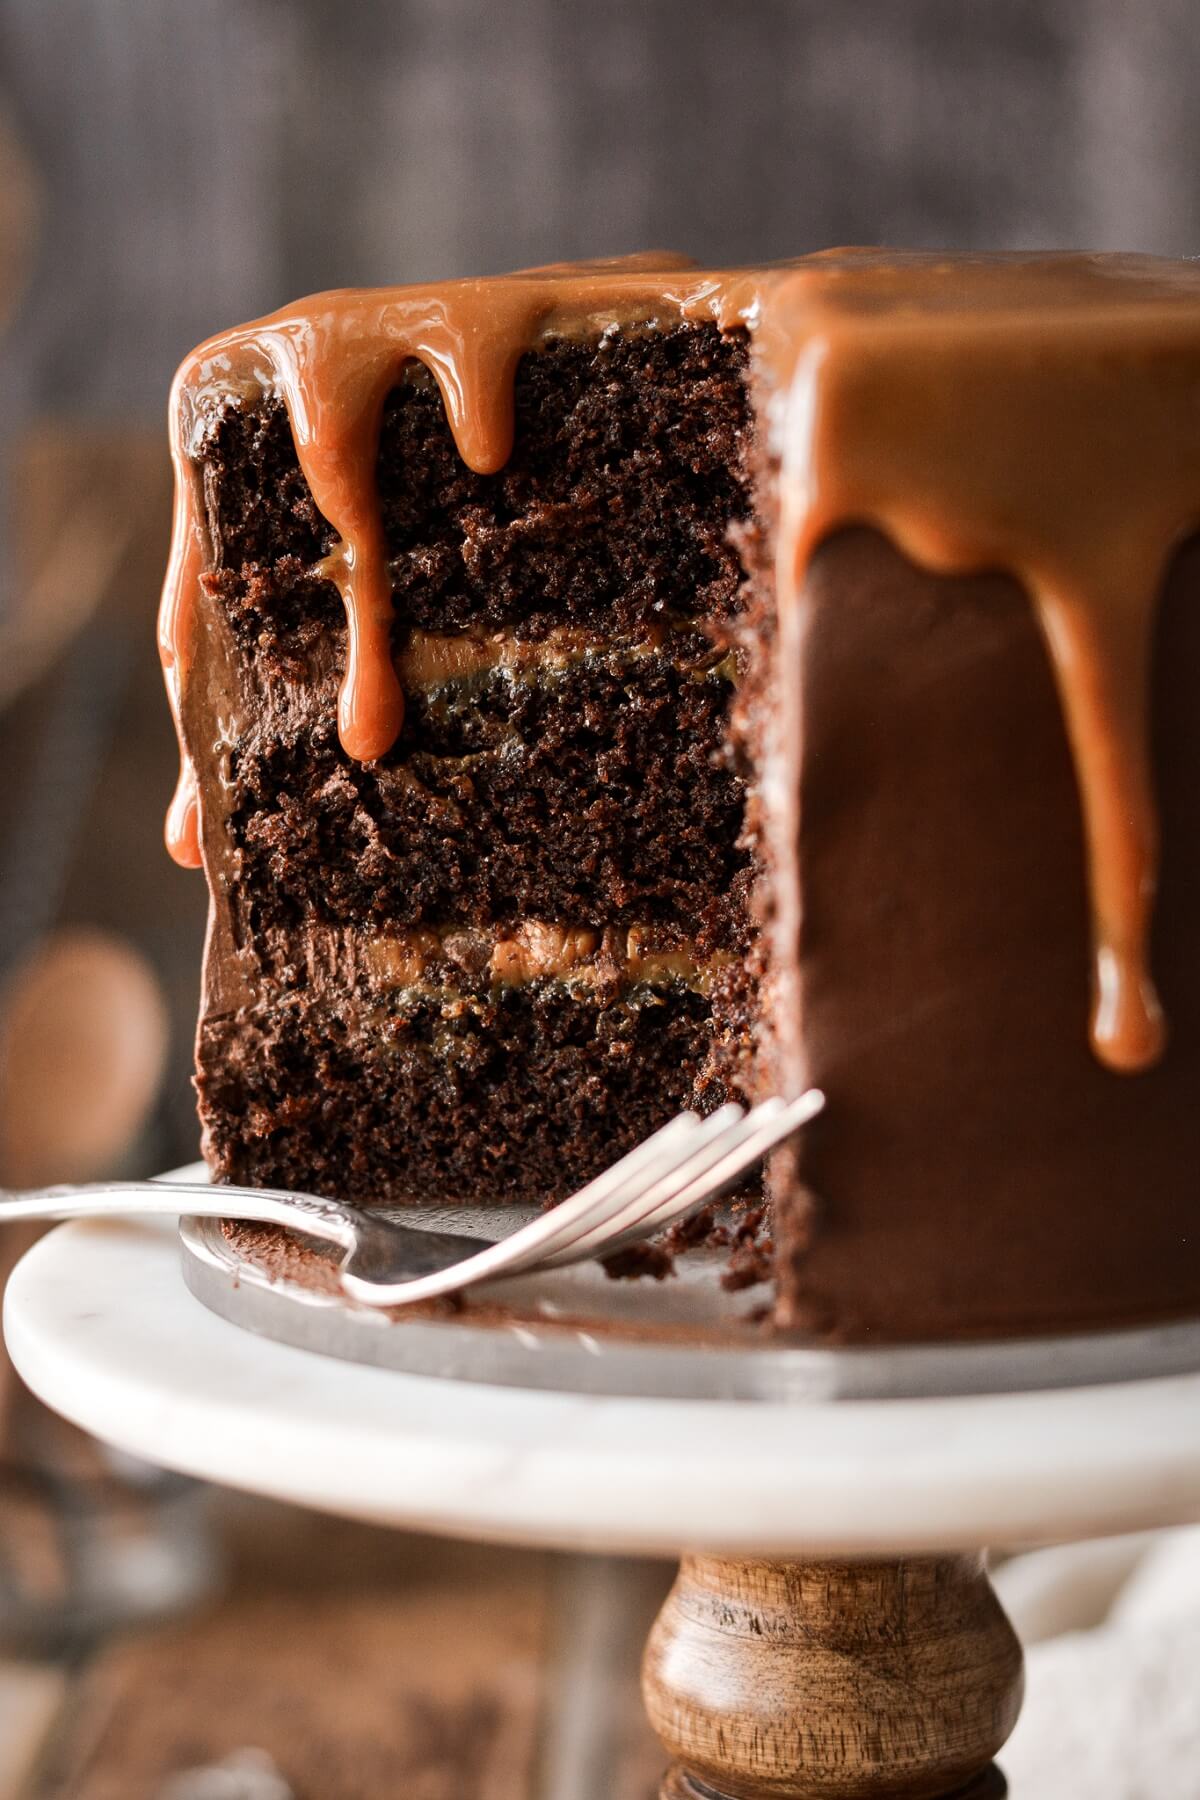
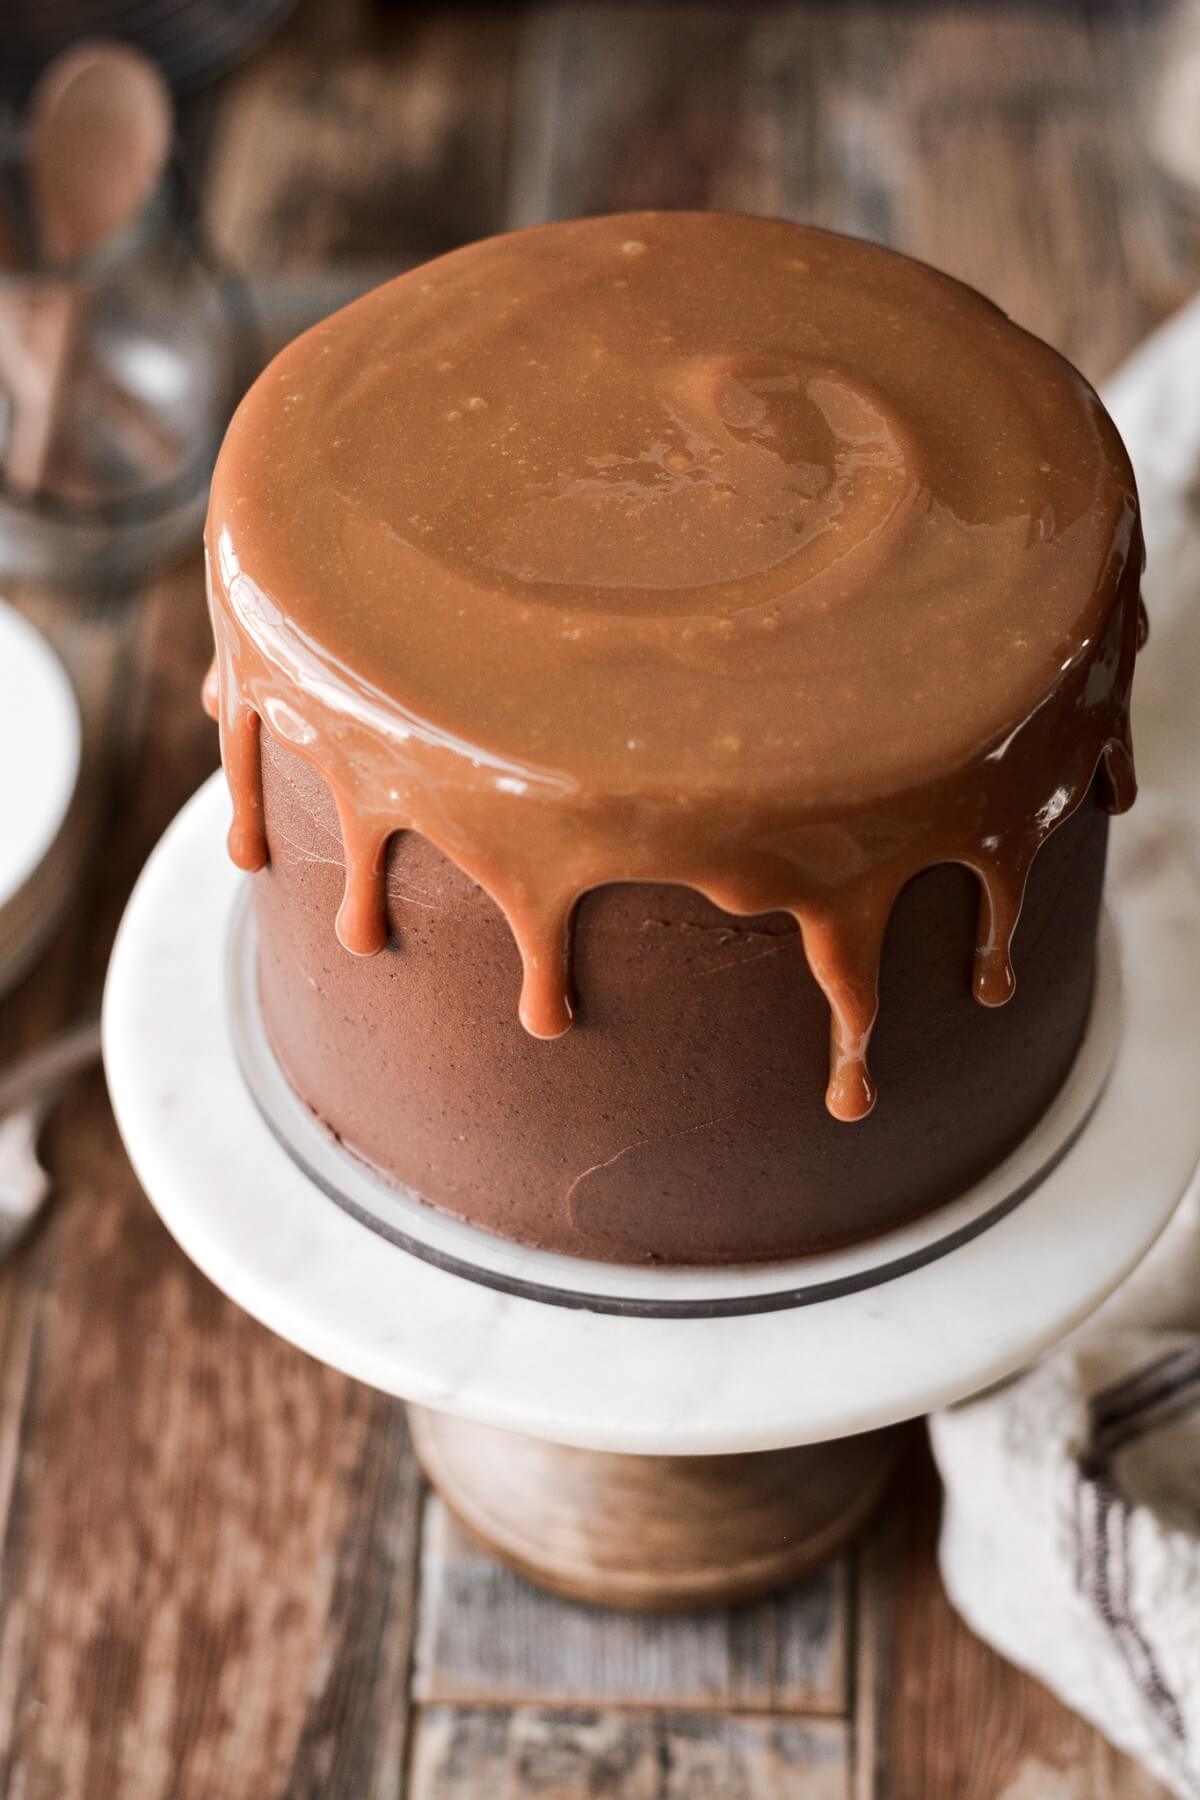
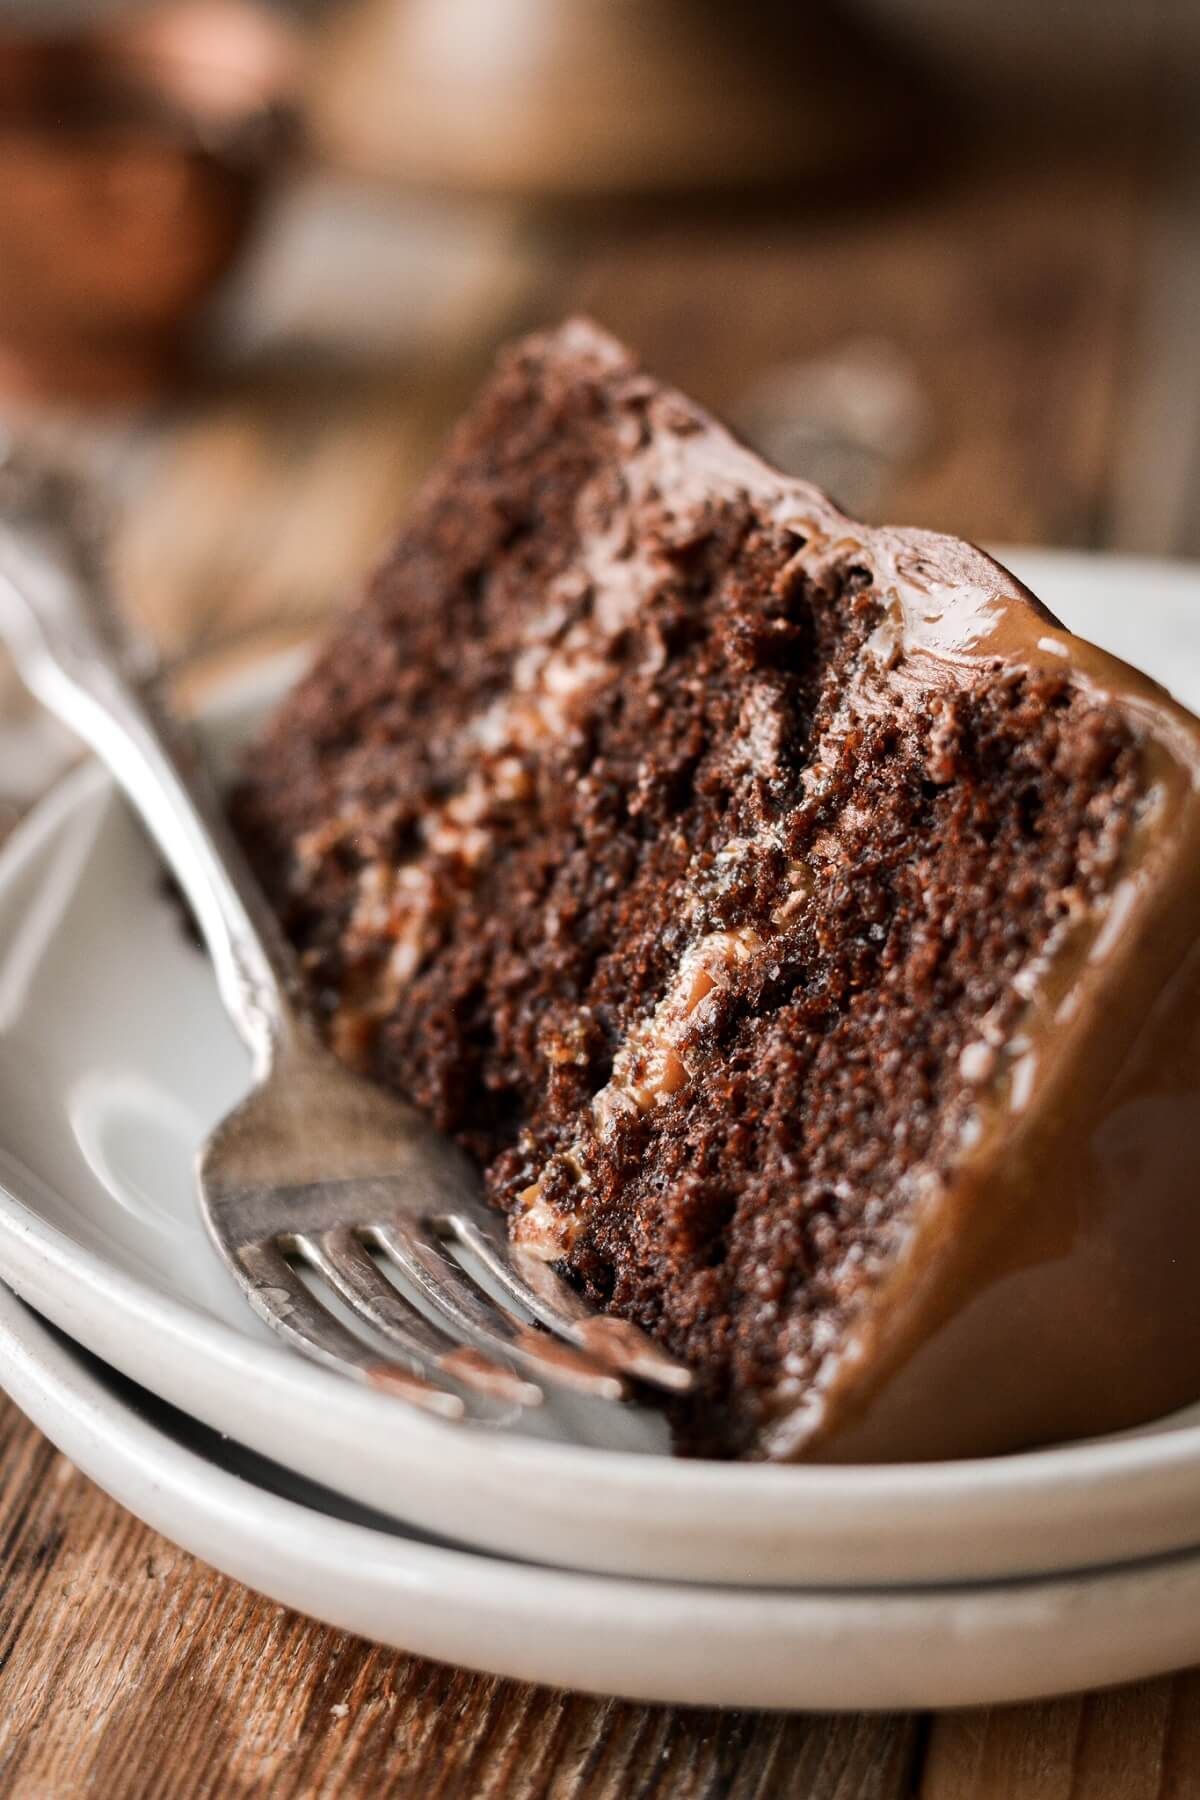
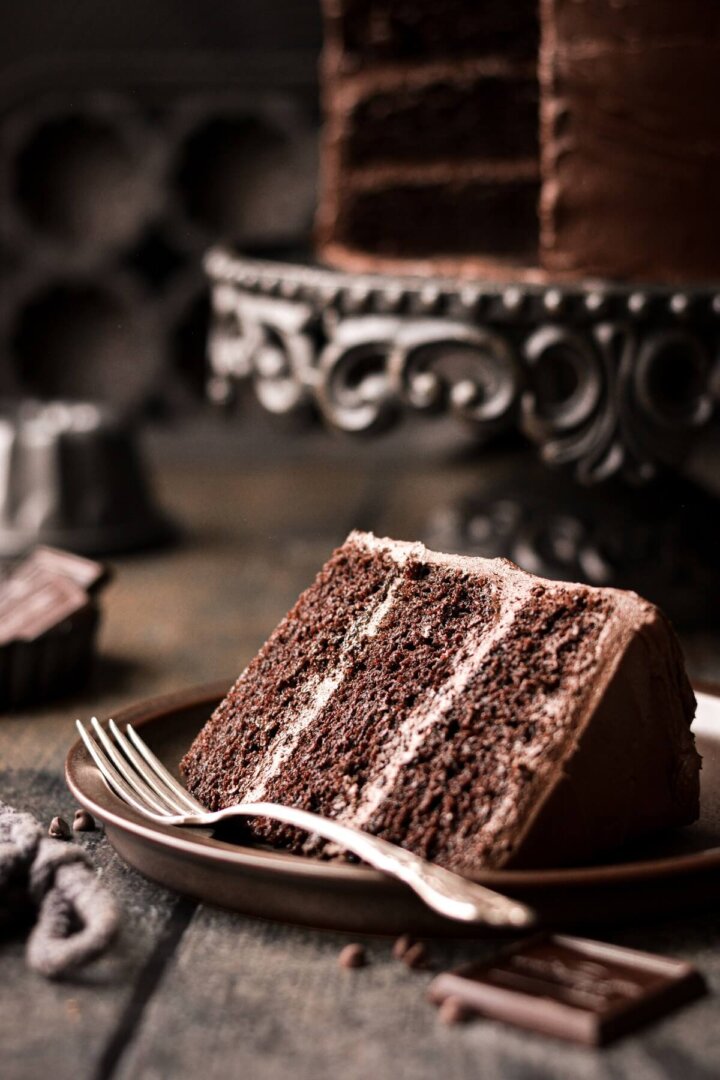
If you love dark chocolate, buttery caramel and crunchy toffee, you’ll love this high altitude chocolate caramel cake. This cake has three layers of soft, incredibly moist chocolate cake filled with dulce de leche and crunchy toffee bits. The cake is frosted with fluffy chocolate caramel buttercream and finished with the most tempting caramel drip. This decadent cake makes a perfect dessert for any occasion!
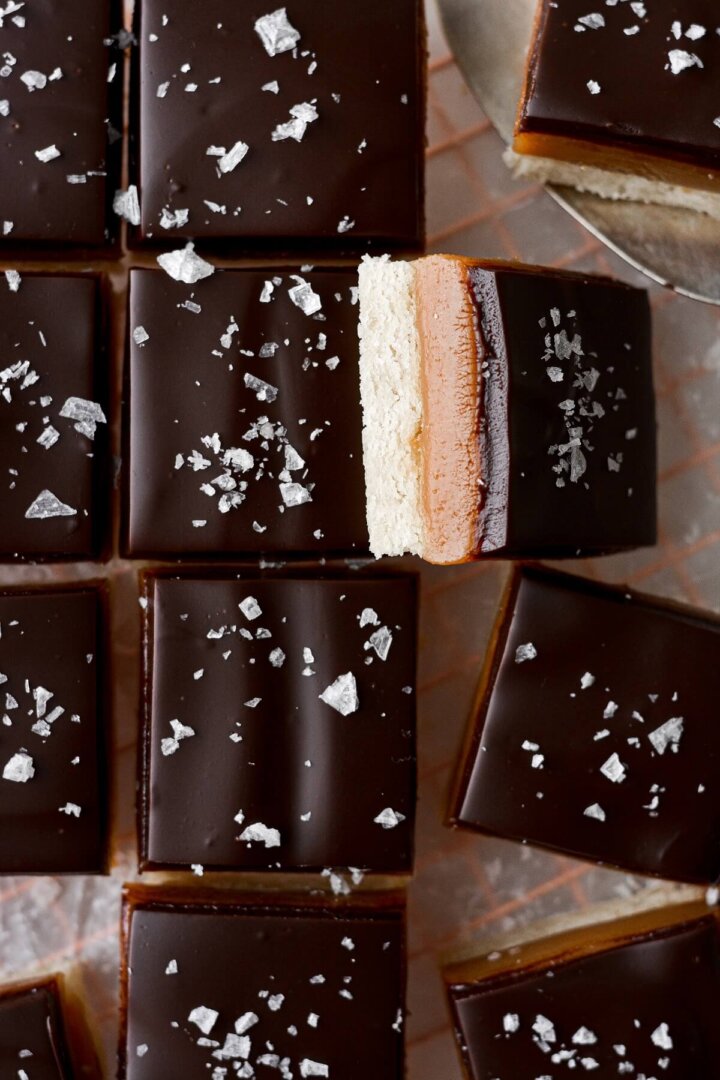
Looking for more recipes like this one? You’ll love this chocolate caramel tart, chocolate truffle cupcakes and homemade salted caramel sauce.

This site contains affiliate links. As an Amazon associate, I earn from qualifying purchases. This means that I may make a small commission if you purchase a product using those links. This in no way affects my opinion of those products and services. All opinions expressed on this site are my own.
Why You’ll Love This Recipe
Chocolate. Caramel. Toffee. I mean, is there a better, more delicious combination than chocolate, caramel and toffee all in one incredible cake? The chocolate cake is rich and dark, the caramel is sweet, creamy and buttery, and the toffee bits add the most wonderful crunch.
Stays Moist for Days. The chocolate cake stays soft and moist for days, and is truly the best high altitude chocolate cake you’ll ever make.
High Altitude Tested. I develop all the recipes on my site for Denver’s altitude of 5,280 feet.
See the recipe card at the end of the post for the full ingredients list and instructions.
Ingredients
Chocolate Cake
- All-Purpose Flour. Gives the cake strength and structure.
- Granulated Sugar. Adds sweetness and moisture.
- Cocoa Powder. Be sure to use unsweetened, Dutch-processed cocoa powder, not “natural” cocoa powder.
- Espresso Powder. Instant espresso powder deepens the flavor of the chocolate and adds acidity for a more tender cake.
- Baking Powder + Baking Soda. Leavens the cake, making it rise light and fluffy.
- Coarse Kosher Salt. Balances the sweetness.
- Eggs. Add structure and richness.
- Milk + Sour Cream. Whole milk and full fat sour cream adds richness, flavor and acidity, for a light, tender cake crumb.
- Vegetable Oil. Keeps the cake moist and light.
- Vanilla Extract. Use a good-quality vanilla extract for the best flavor.
Chocolate Caramel Buttercream
- Unsalted Butter. Butter is fat, and when it’s whipped with the powdered sugar, it makes the buttercream silky, light and fluffy.
- Powdered Sugar. Sweetens and thickens the buttercream.
- Cocoa Powder. You don’t have to use a Dutch-processed cocoa powder for the buttercream, but use a good-quality cocoa powder that tastes great, since your chocolate buttercream will only taste as good as the cocoa powder.
- Espresso Powder. The coffee notes complement the cocoa powder, and adds bitterness to balance the sweetness of the sugar and caramel sauce.
- Coarse Kosher Salt. Balances the sweetness and enhances the chocolate flavor.
- Meringue Powder. Stabilizes the buttercream and improves the texture.
- Caramel Sauce. A little caramel sauce whipped into the buttercream adds a lovely, complementary caramel flavor.
- Vanilla Extract. Use a good-quality vanilla extract for the best flavor.
Caramel Filling
- Dulce de Leche. For the caramel filling in the cake, I like to use prepared dulce de leche. This is a milk-based caramel, and since it’s thicker than caramel sauce, it makes a more stable cake filling that isn’t as slippery. I always use Nestle La Lechera Dulce De Leche.
- Toffee Bits. Adds crunch and texture between each cake layer.
Caramel Drip
- Dulce de Leche + Caramel Sauce. Caramel drip is a little trickier to get right than a ganache drip. Caramel sauce tends to be a little too thin, so it drips too quickly. And dulce de leche is too thick to use as a drip. So my solution is to combine the two together to create a caramel sauce with the perfect consistency for slowly dripping over the edges of a cake.
Instructions
Bake the cake.
- Preheat the oven to 350 F, and position a rack in the center of the oven. Spray the bottoms of three 6-inch round cake pans with non-stick spray.
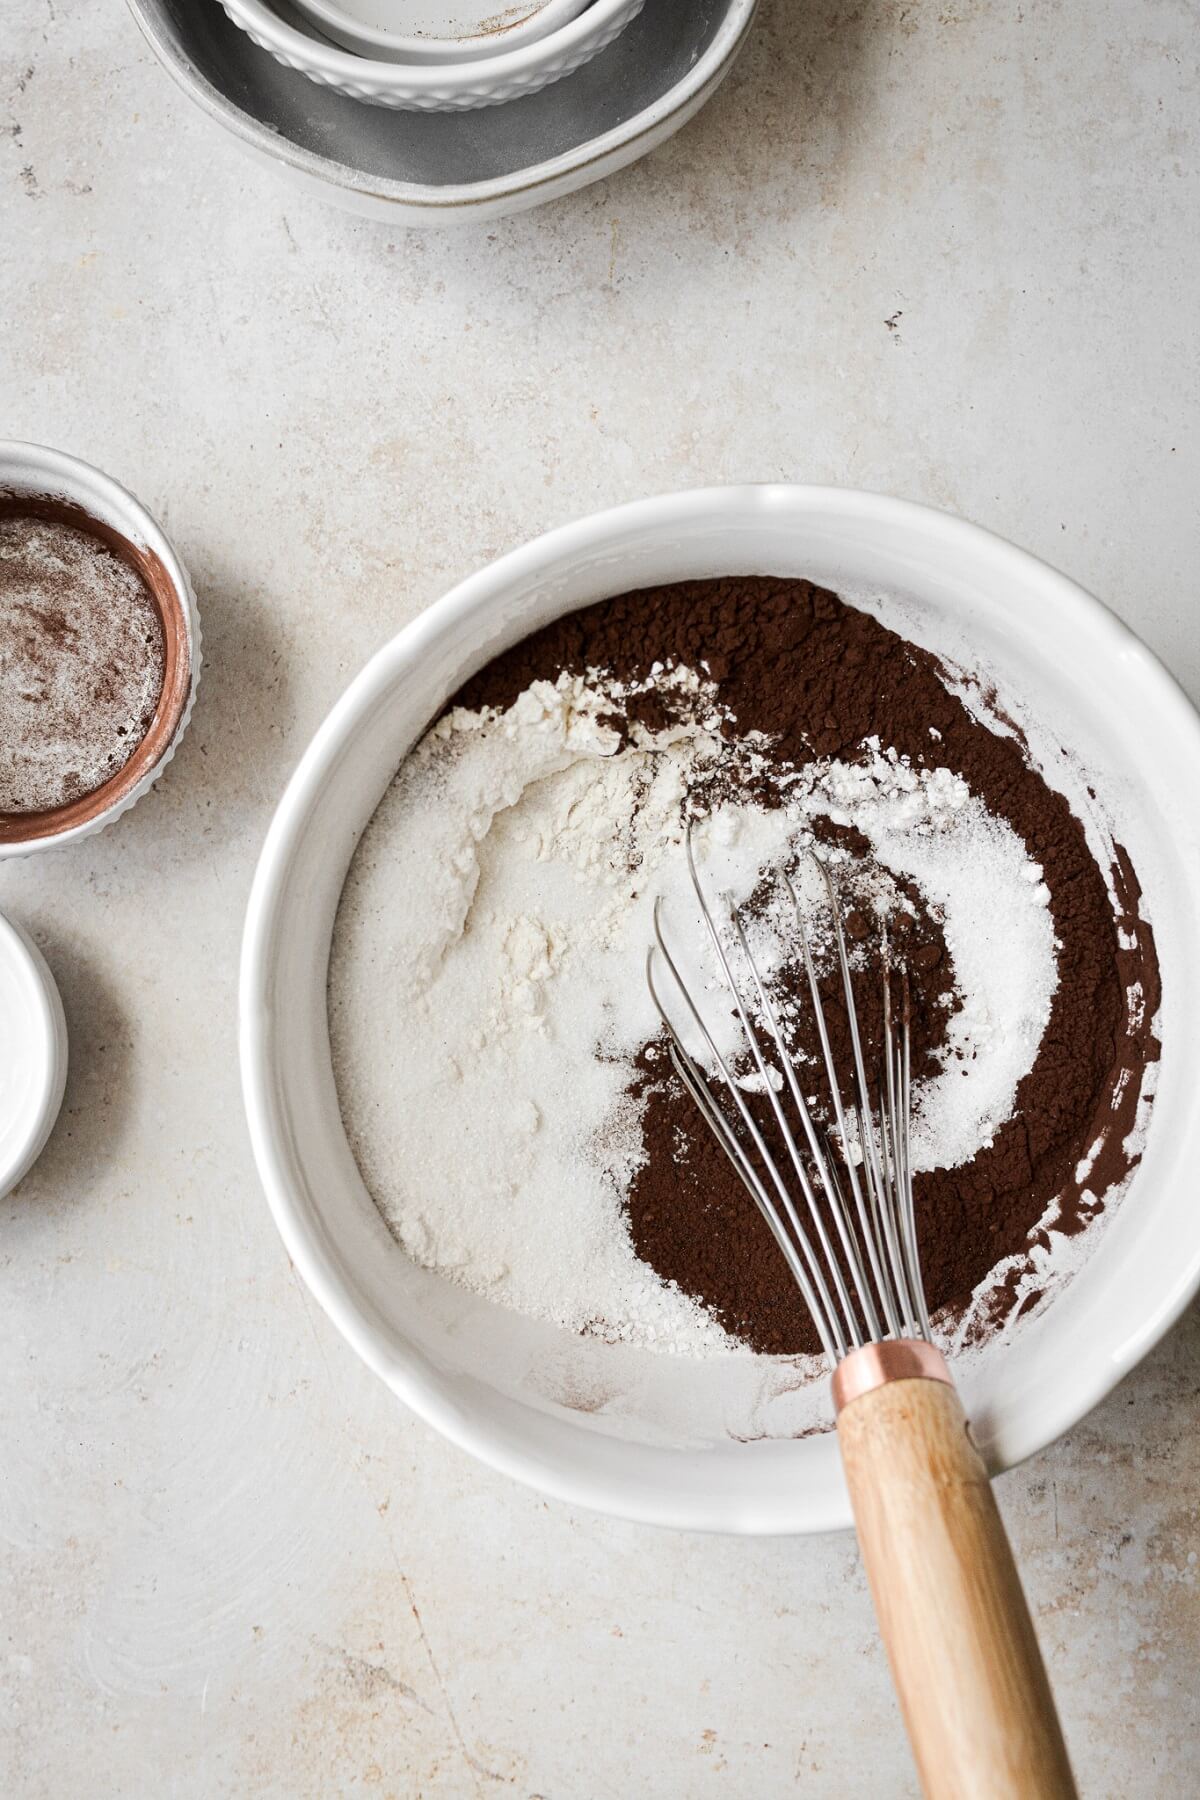
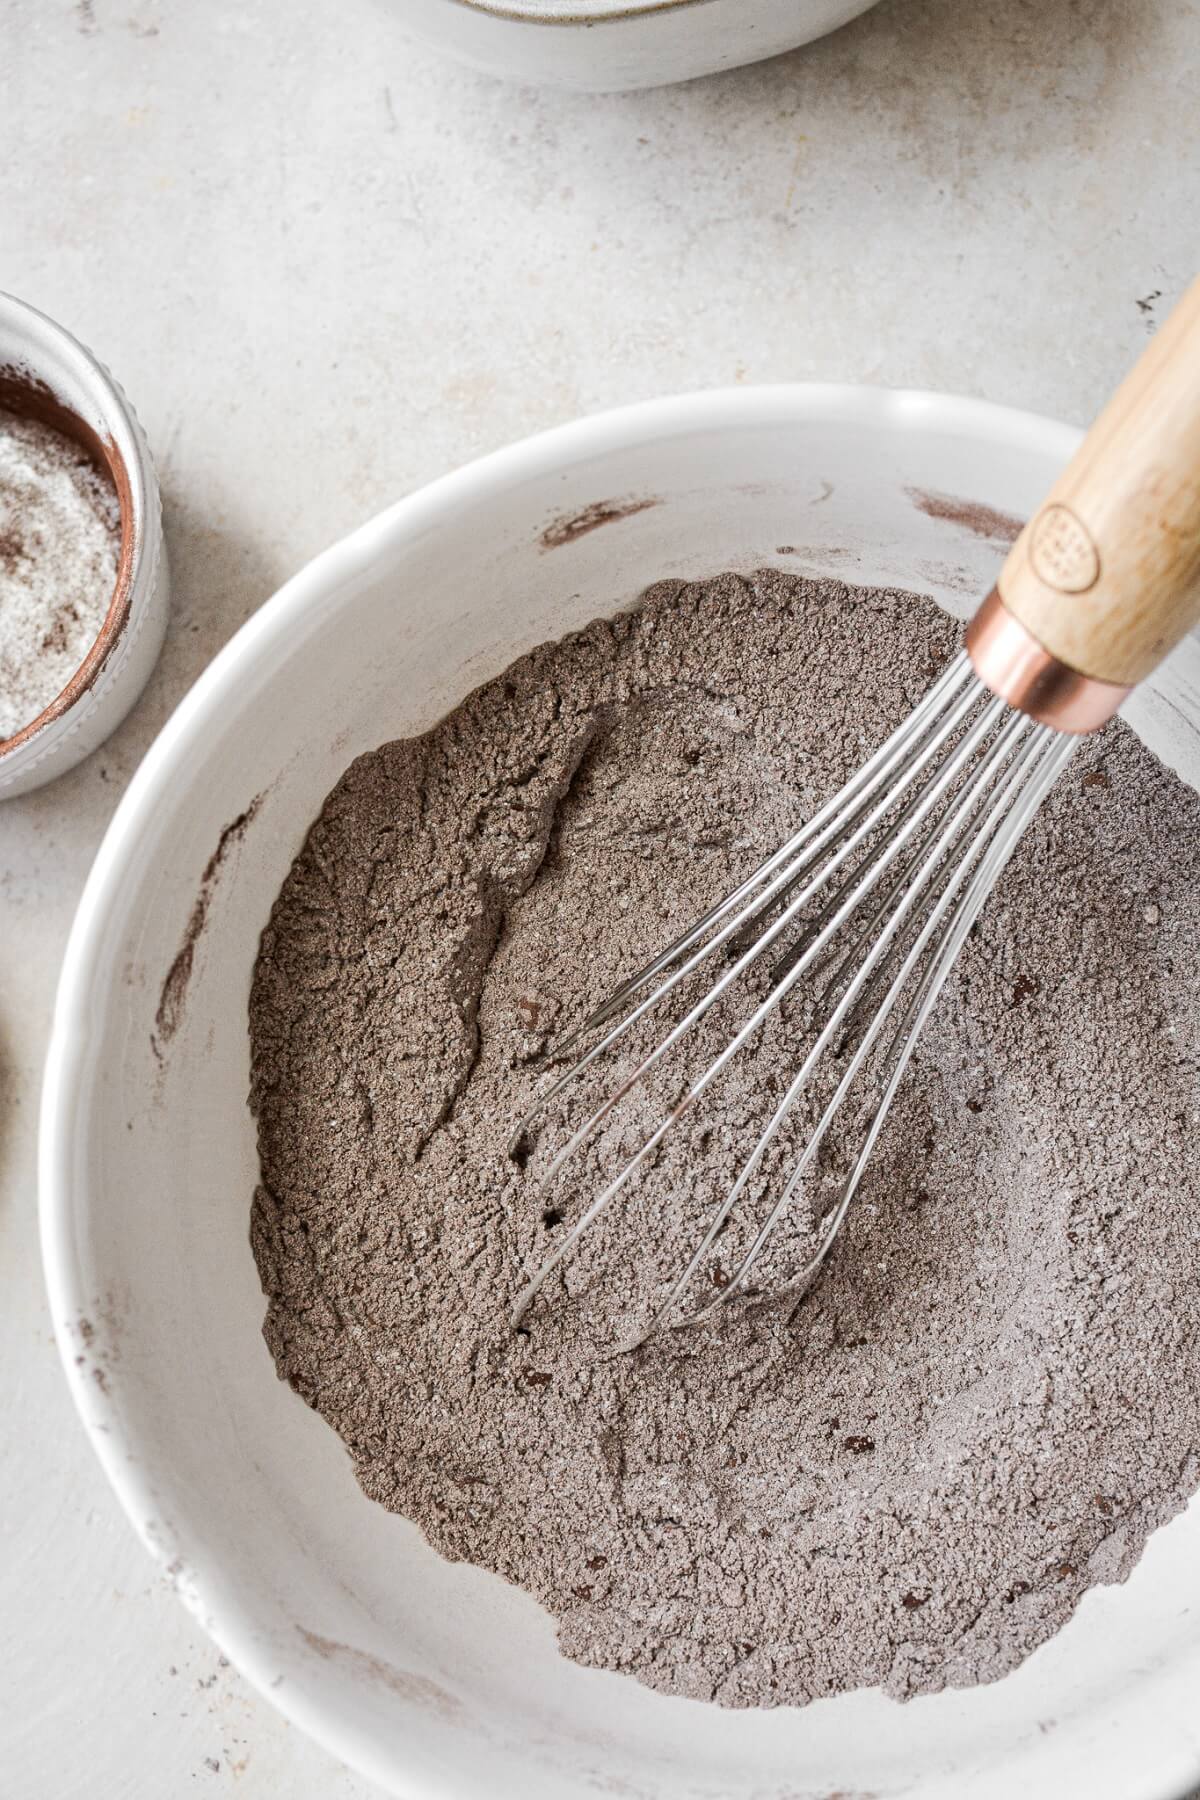
- In a bowl, sift together the flour, sugar, cocoa powder, espresso powder, baking soda, baking powder and salt, then whisk until completely combined.
- In a separate bowl, whisk together the eggs, milk, sour cream, oil and vanilla until smooth. Add the dry ingredients to the wet, and whisk just until combined.
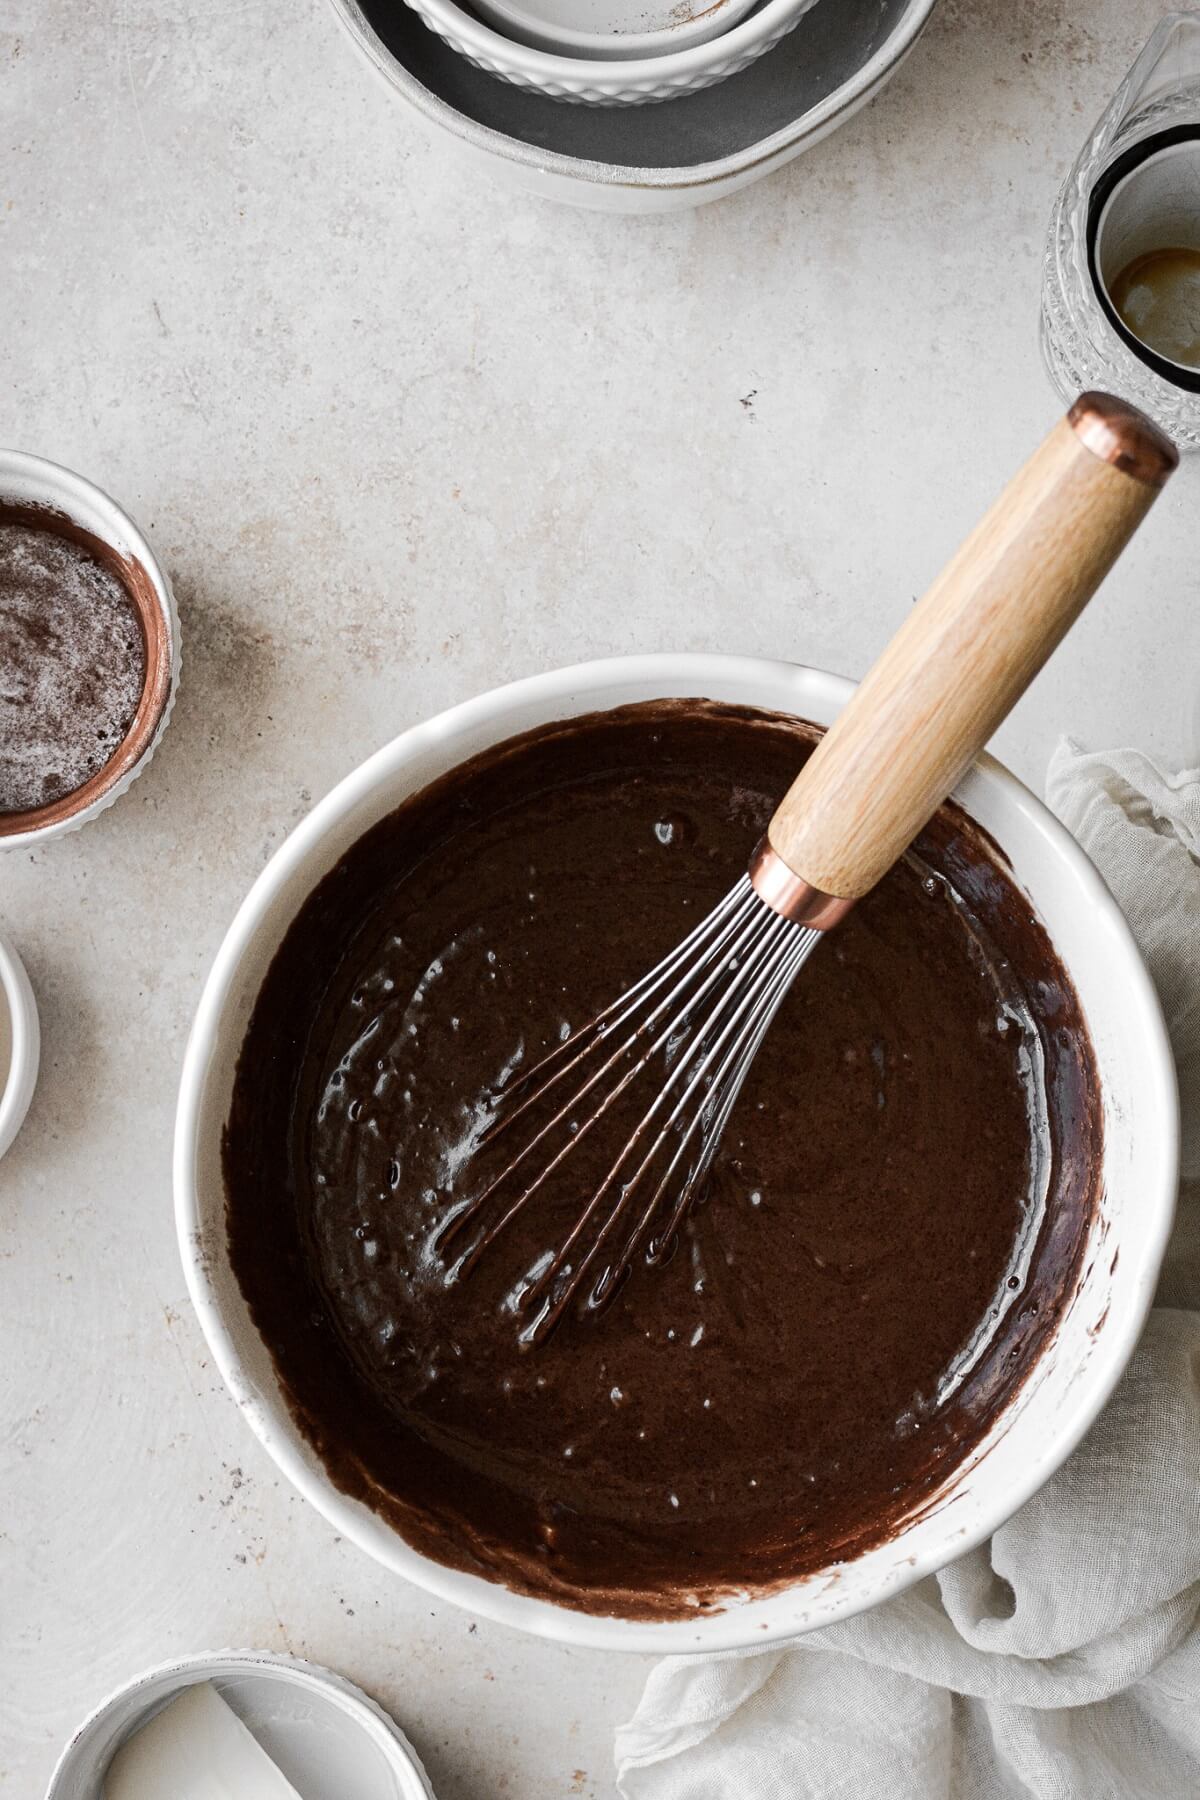
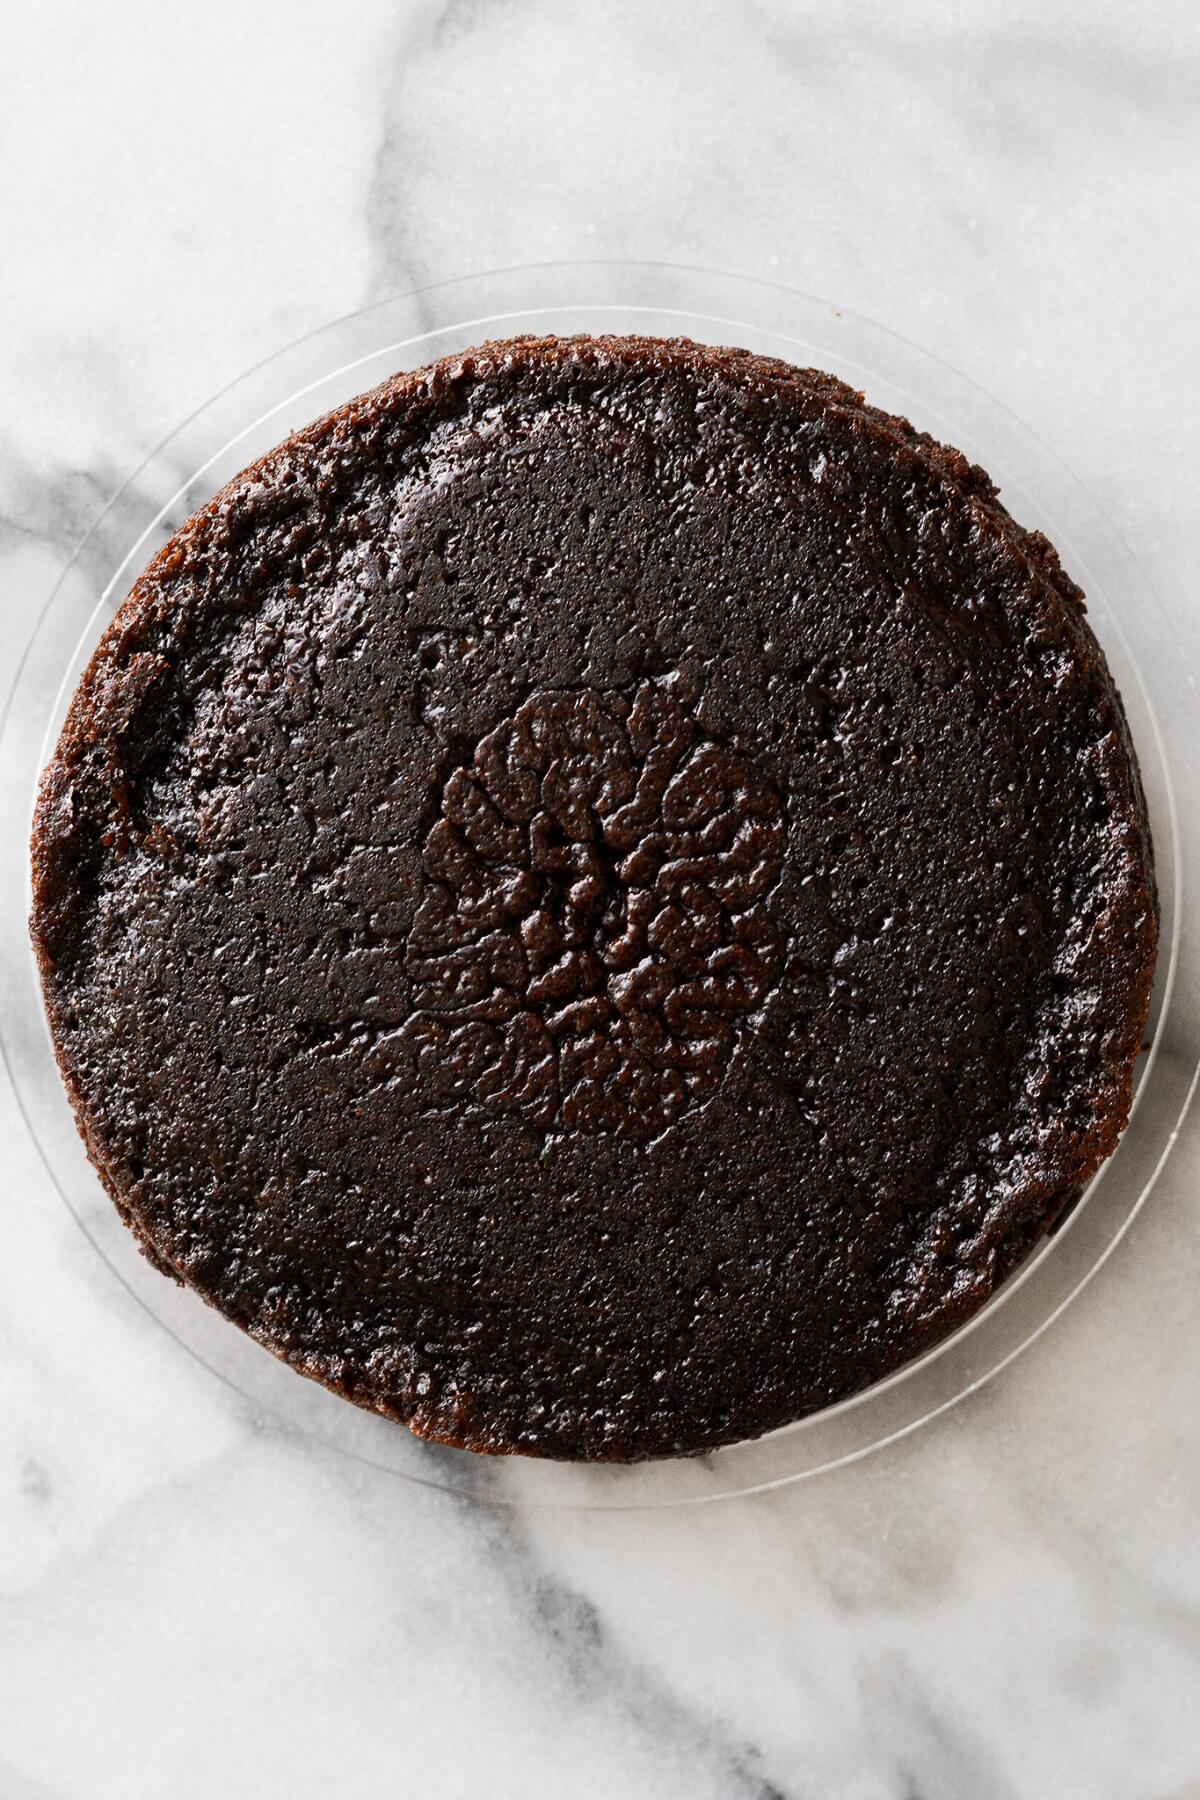
- Divide the batter between the pans. Tap the pans lightly on the counter a few times to pop any large air bubbles. Bake the cakes on the center rack for about 20-25 minutes, until a toothpick or cake tester comes out clean or with moist crumbs clinging to it, and the tops spring back when gently touched.
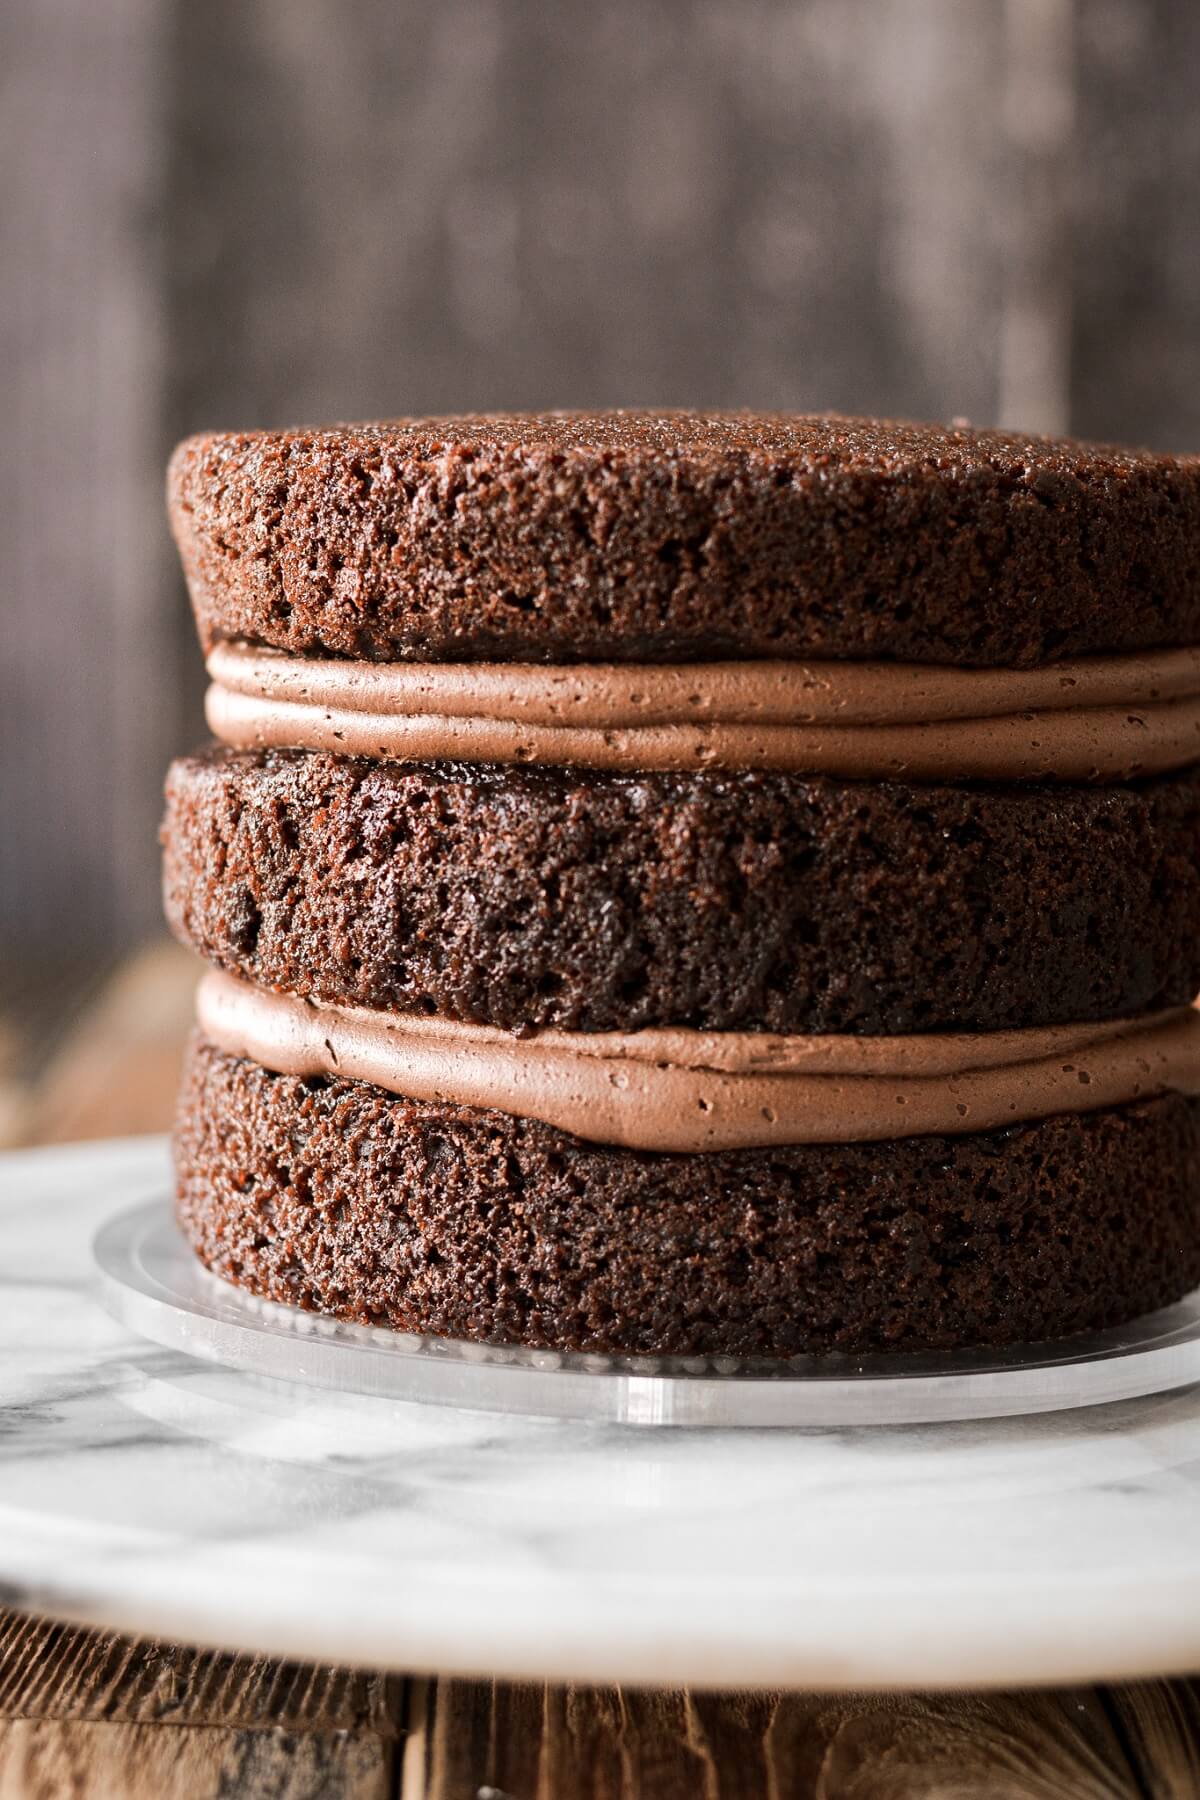
- Set the pans on a cooling rack, cover loosely with a clean kitchen towel and cool completely before frosting. Once the cakes are cool, remove from the pans, wrap individually in plastic wrap, and chill in the refrigerator for several hours. Chilling the cake layers is an optional step, but it makes the cake more stable when assembling with a slippery filling like caramel.
Make the buttercream.
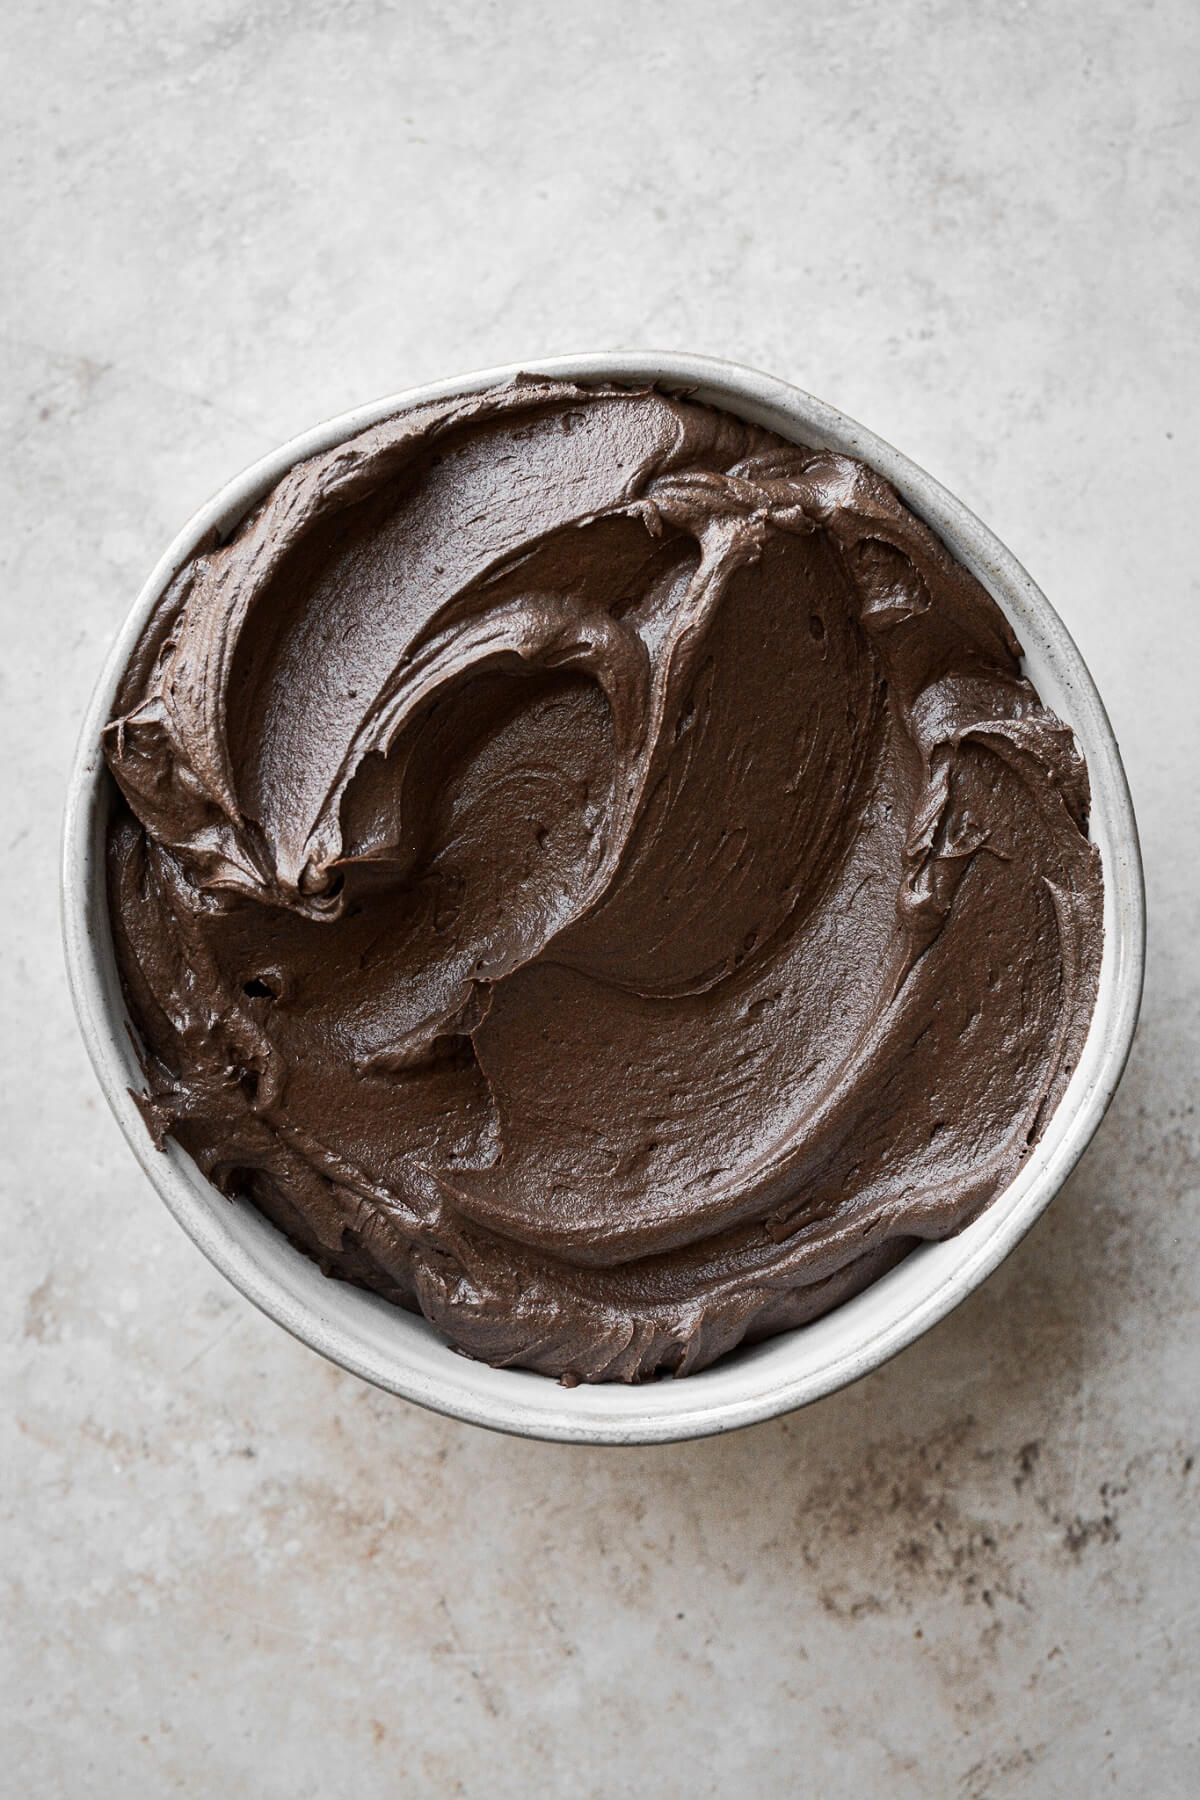
- In the bowl of your stand mixer fitted with the paddle attachment, beat the butter for one minute until smooth.
- Add the powdered sugar, cocoa powder, meringue powder, espresso powder and salt, and mix on low to combine. Add the caramel sauce and vanilla.
- Whip on medium speed (#6 on a Kitchen Aid mixer), scraping the bowl down several times, for 4-5 minutes, until very light and fluffy. Turn the speed down to “stir” and mix for 1 more minute.
Fill and frost the cake.
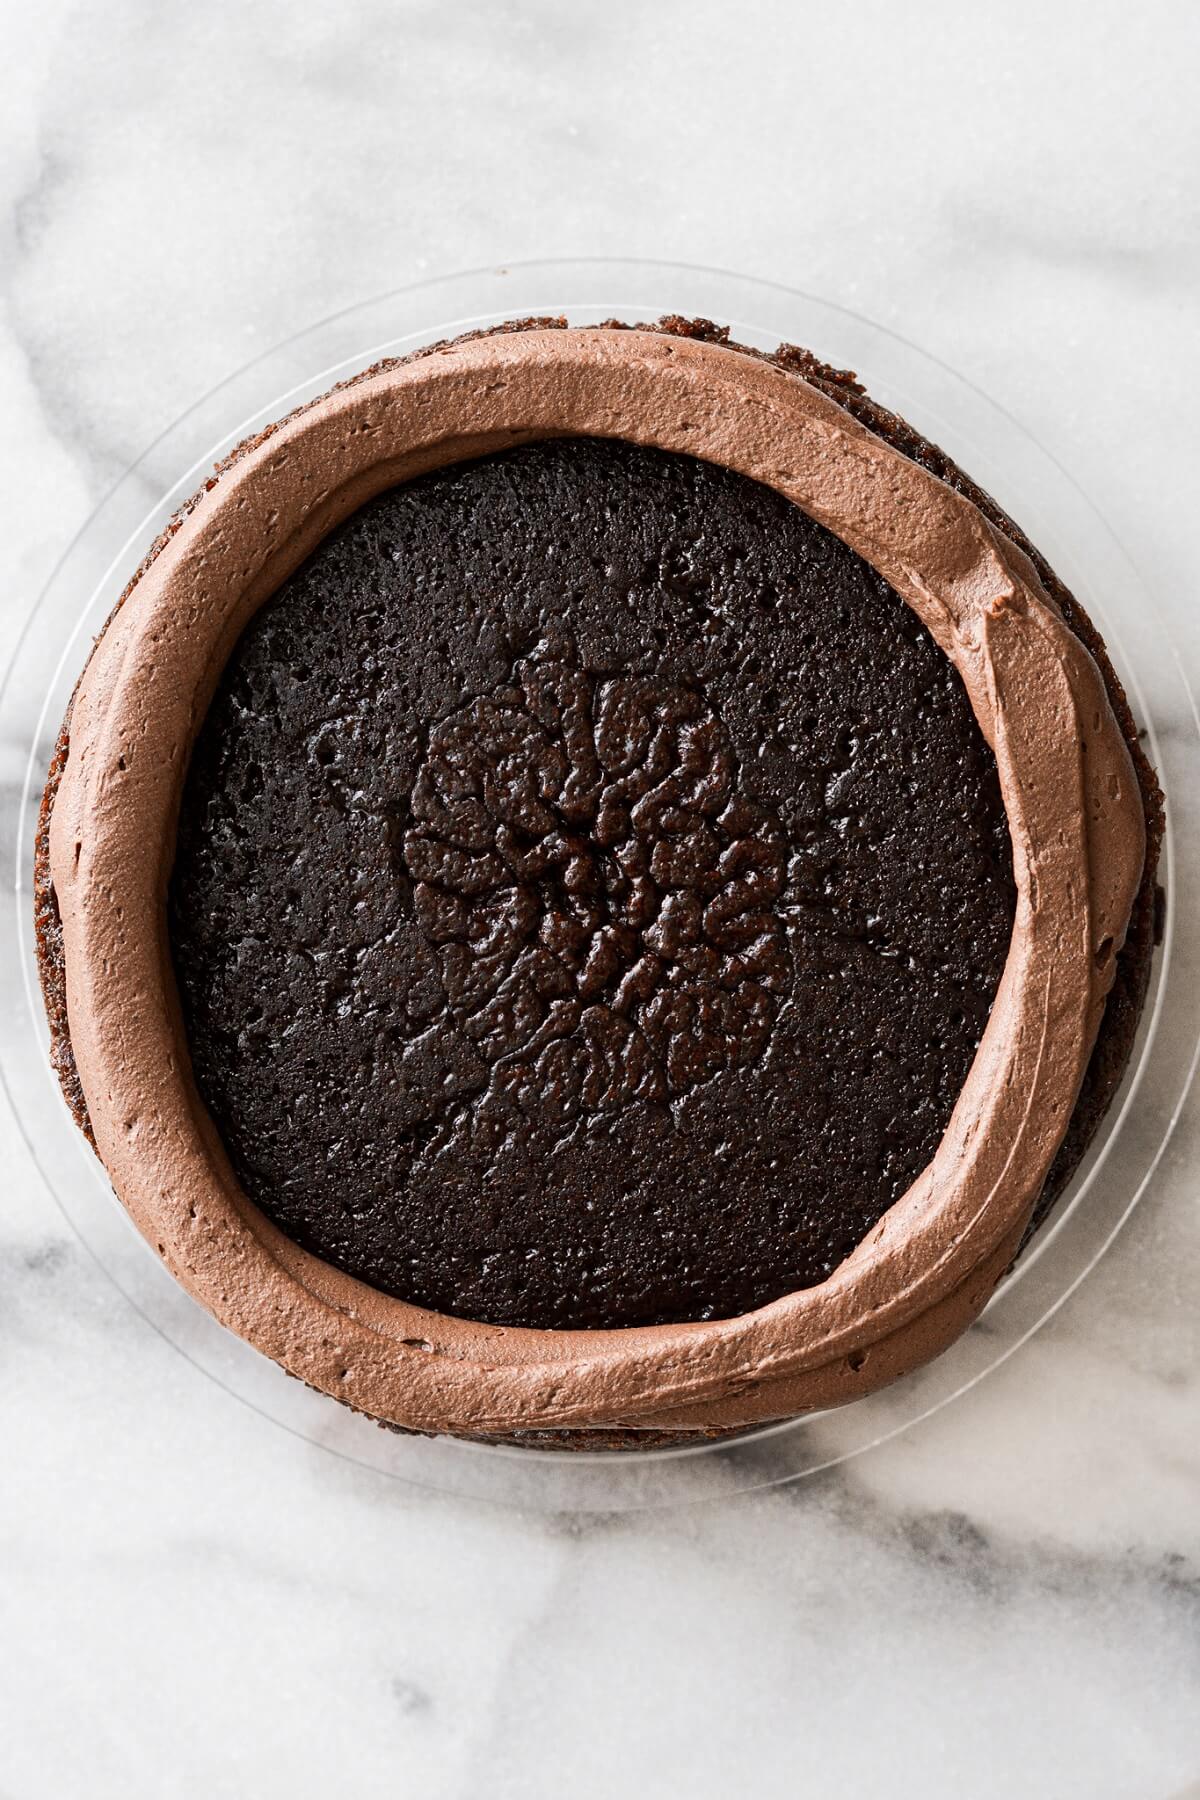
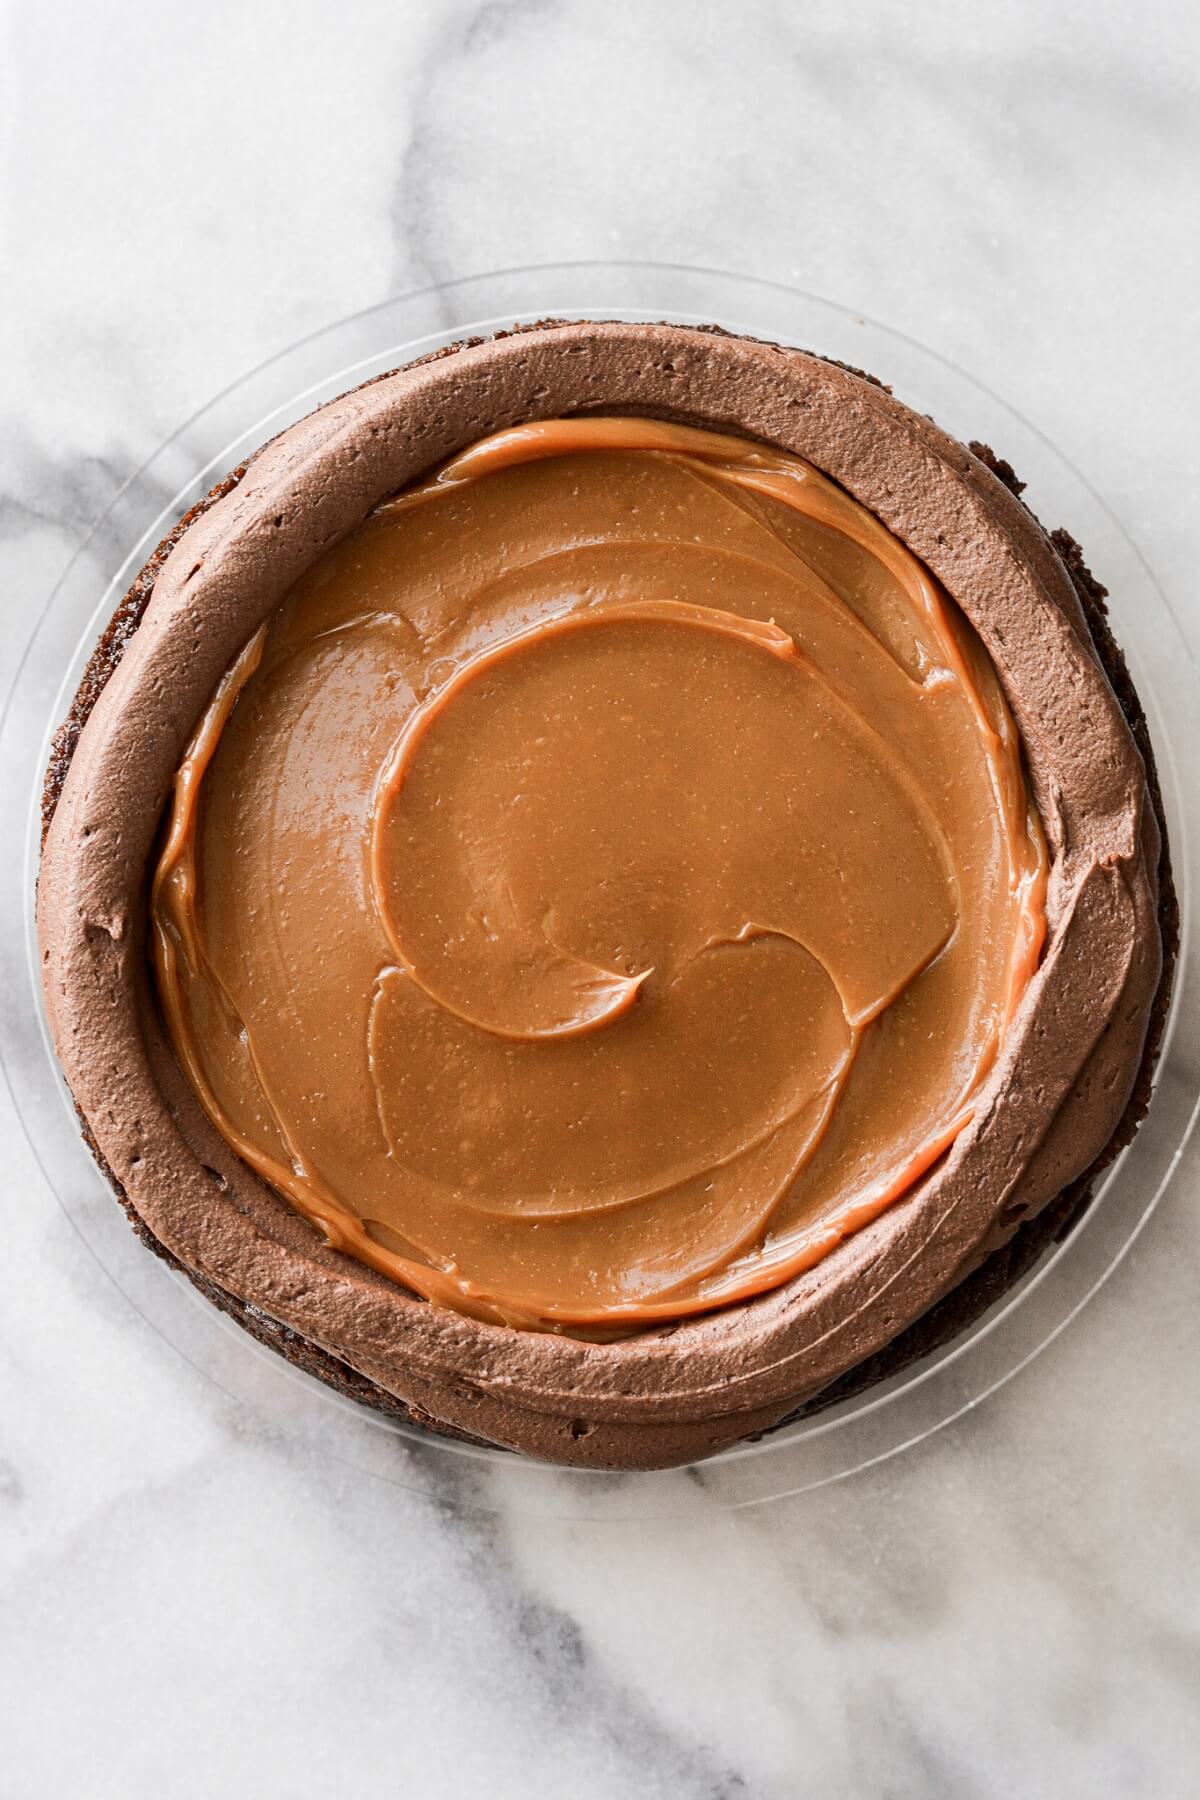
- Place one layer of cake on a cake board. Fit a piping bag with a round piping tip, and fill with the chocolate buttercream. Pipe a border of buttercream around the edge of the cake – this will act as a “dam” to hold in the filling.
- Spread 3 tablespoons of dulce de leche onto the cake, inside the border of buttercream. Sprinkle the dulce de leche with 3 tablespoons of toffee bits.
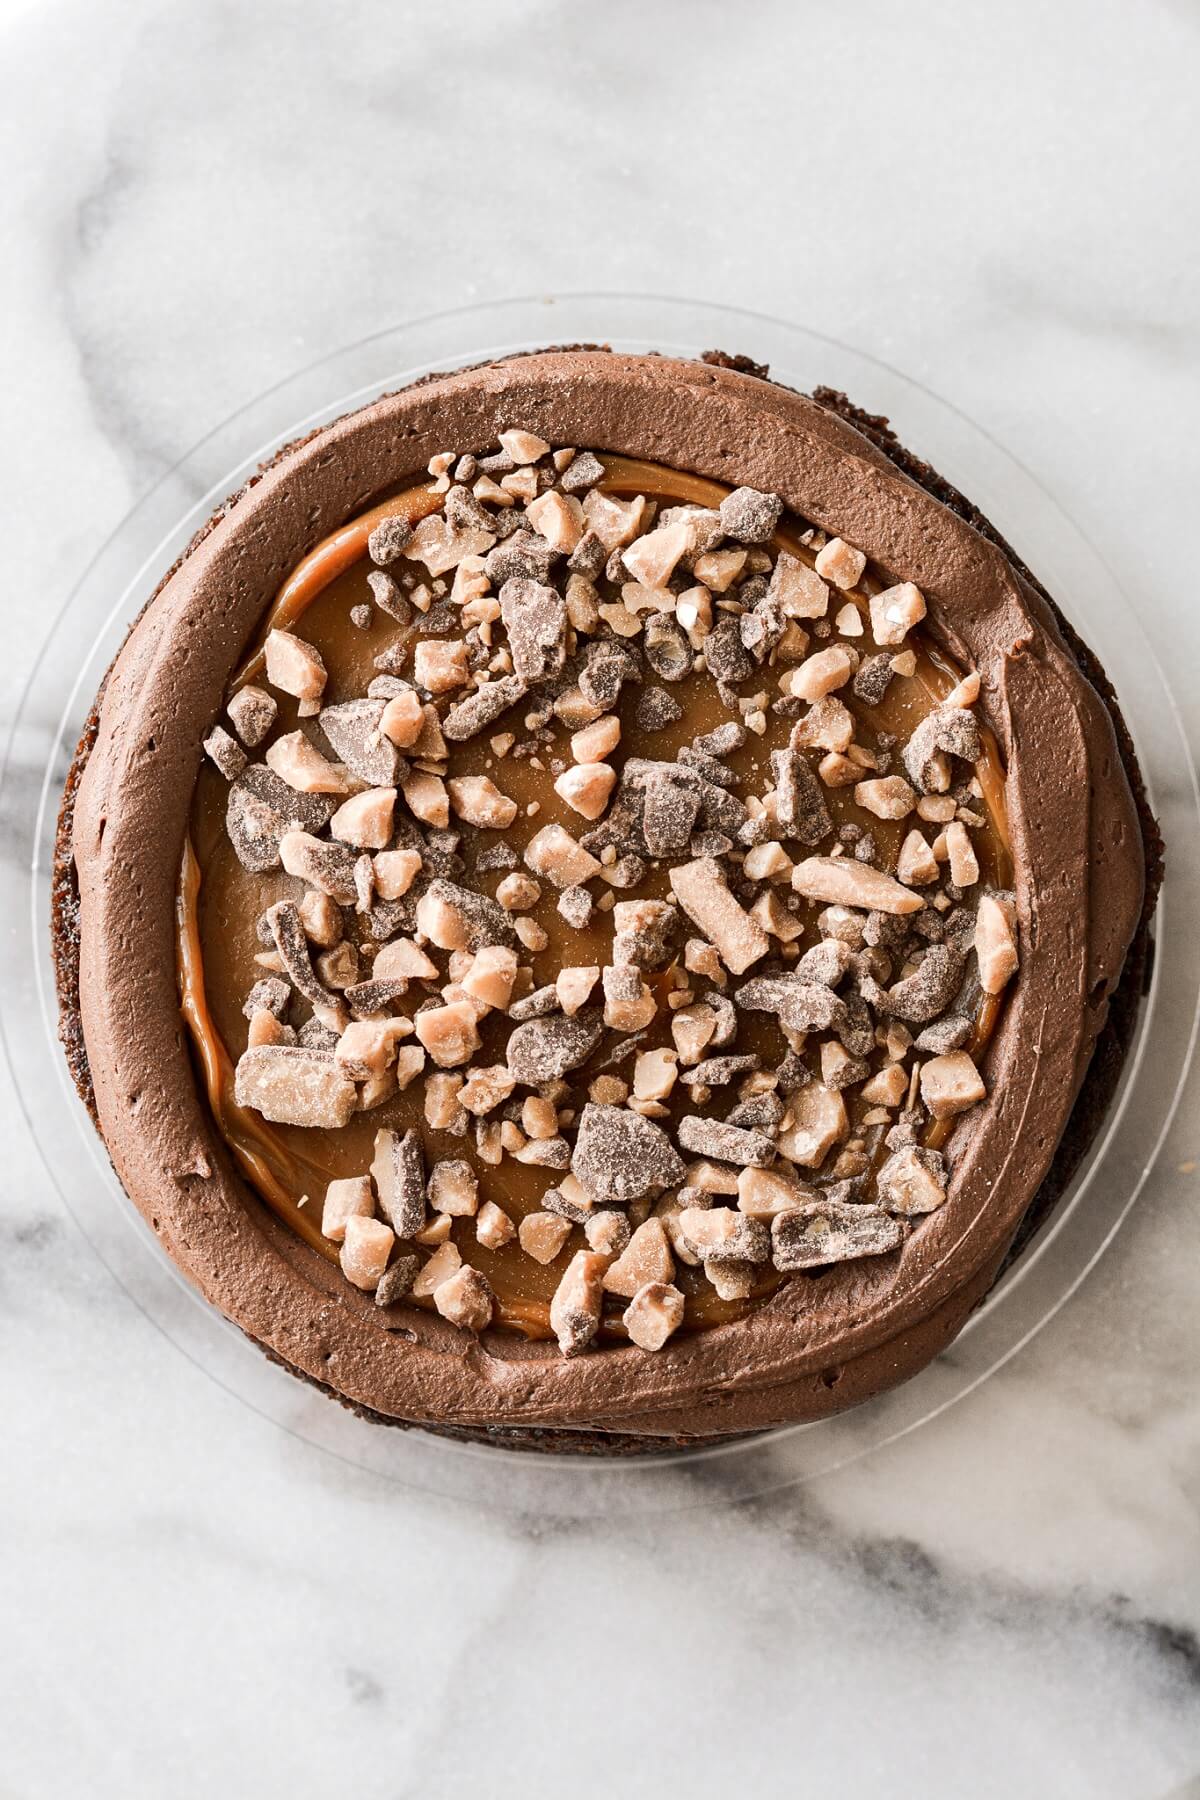
- Repeat the above 2 steps with the second layer of cake. Finish by placing the third layer of cake on top.
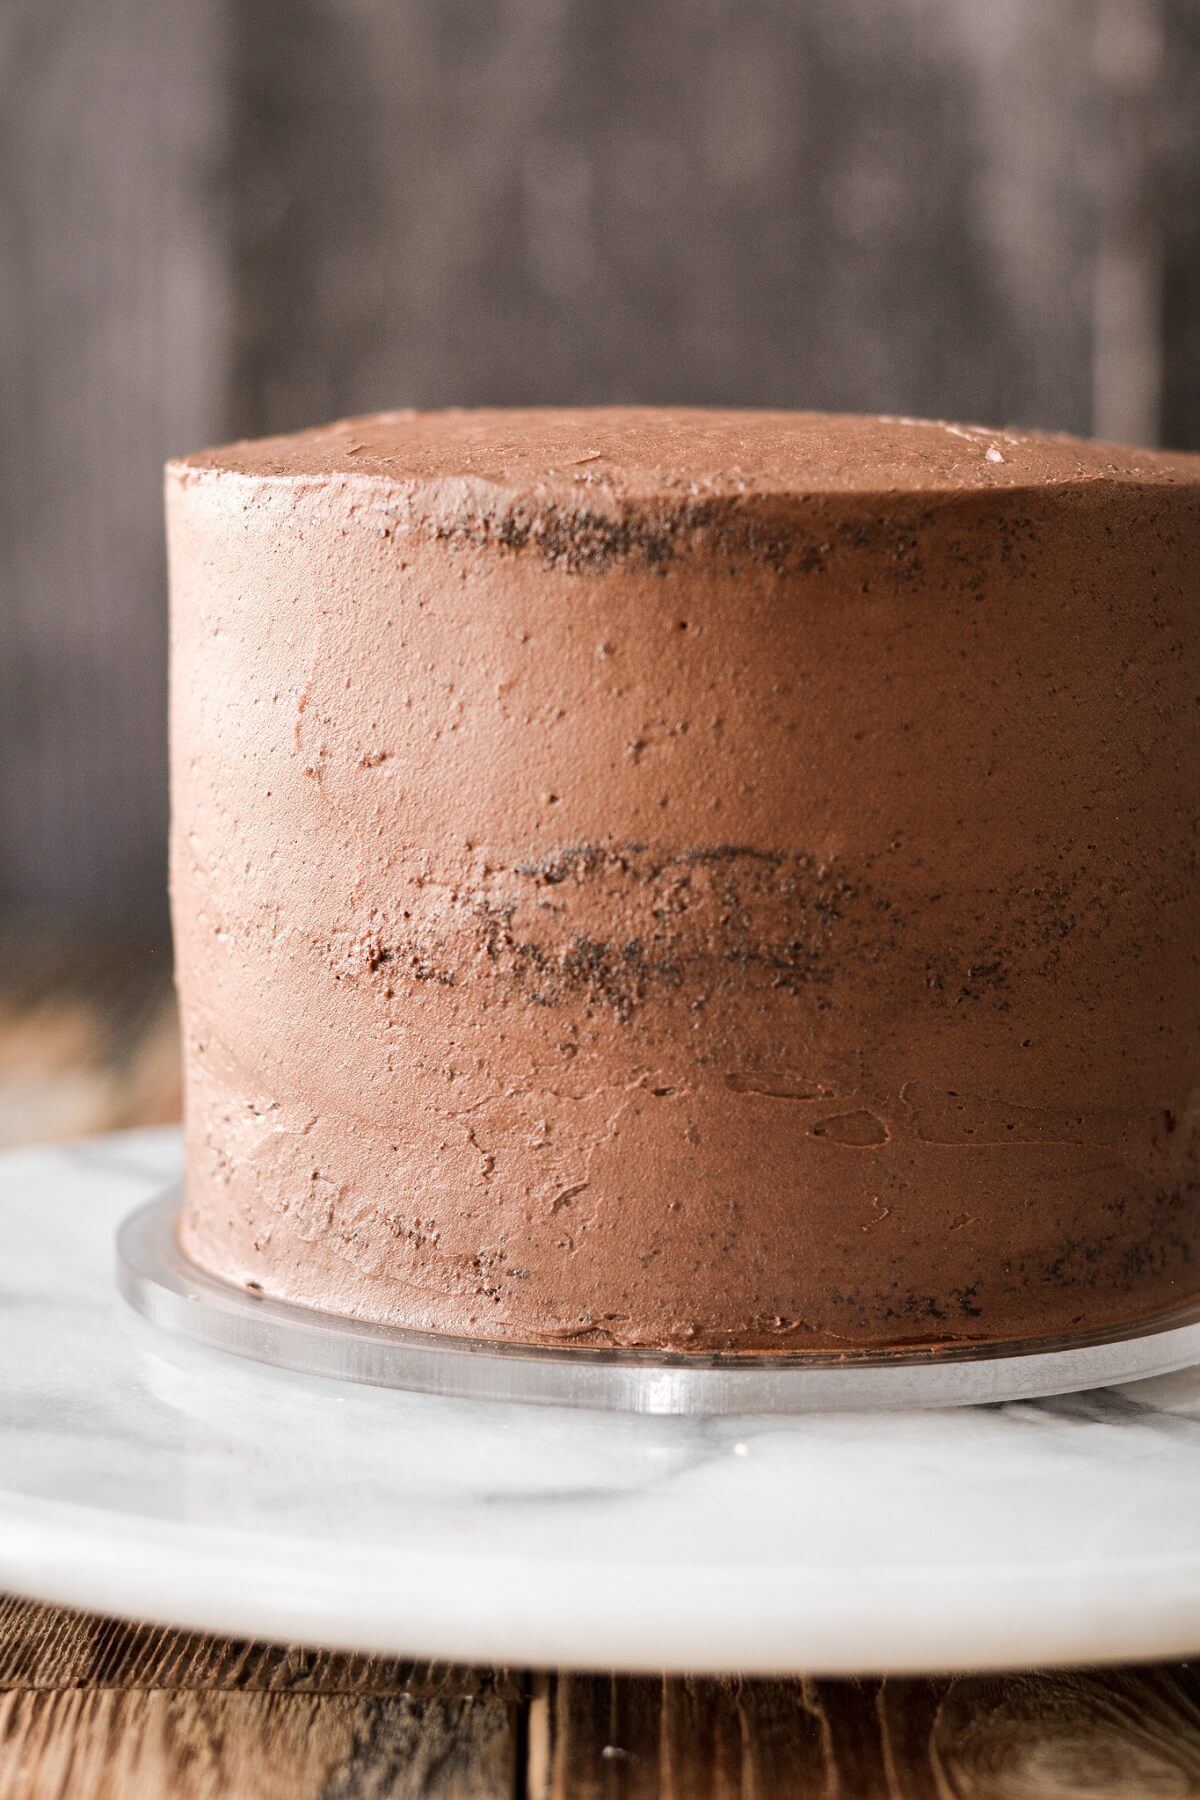
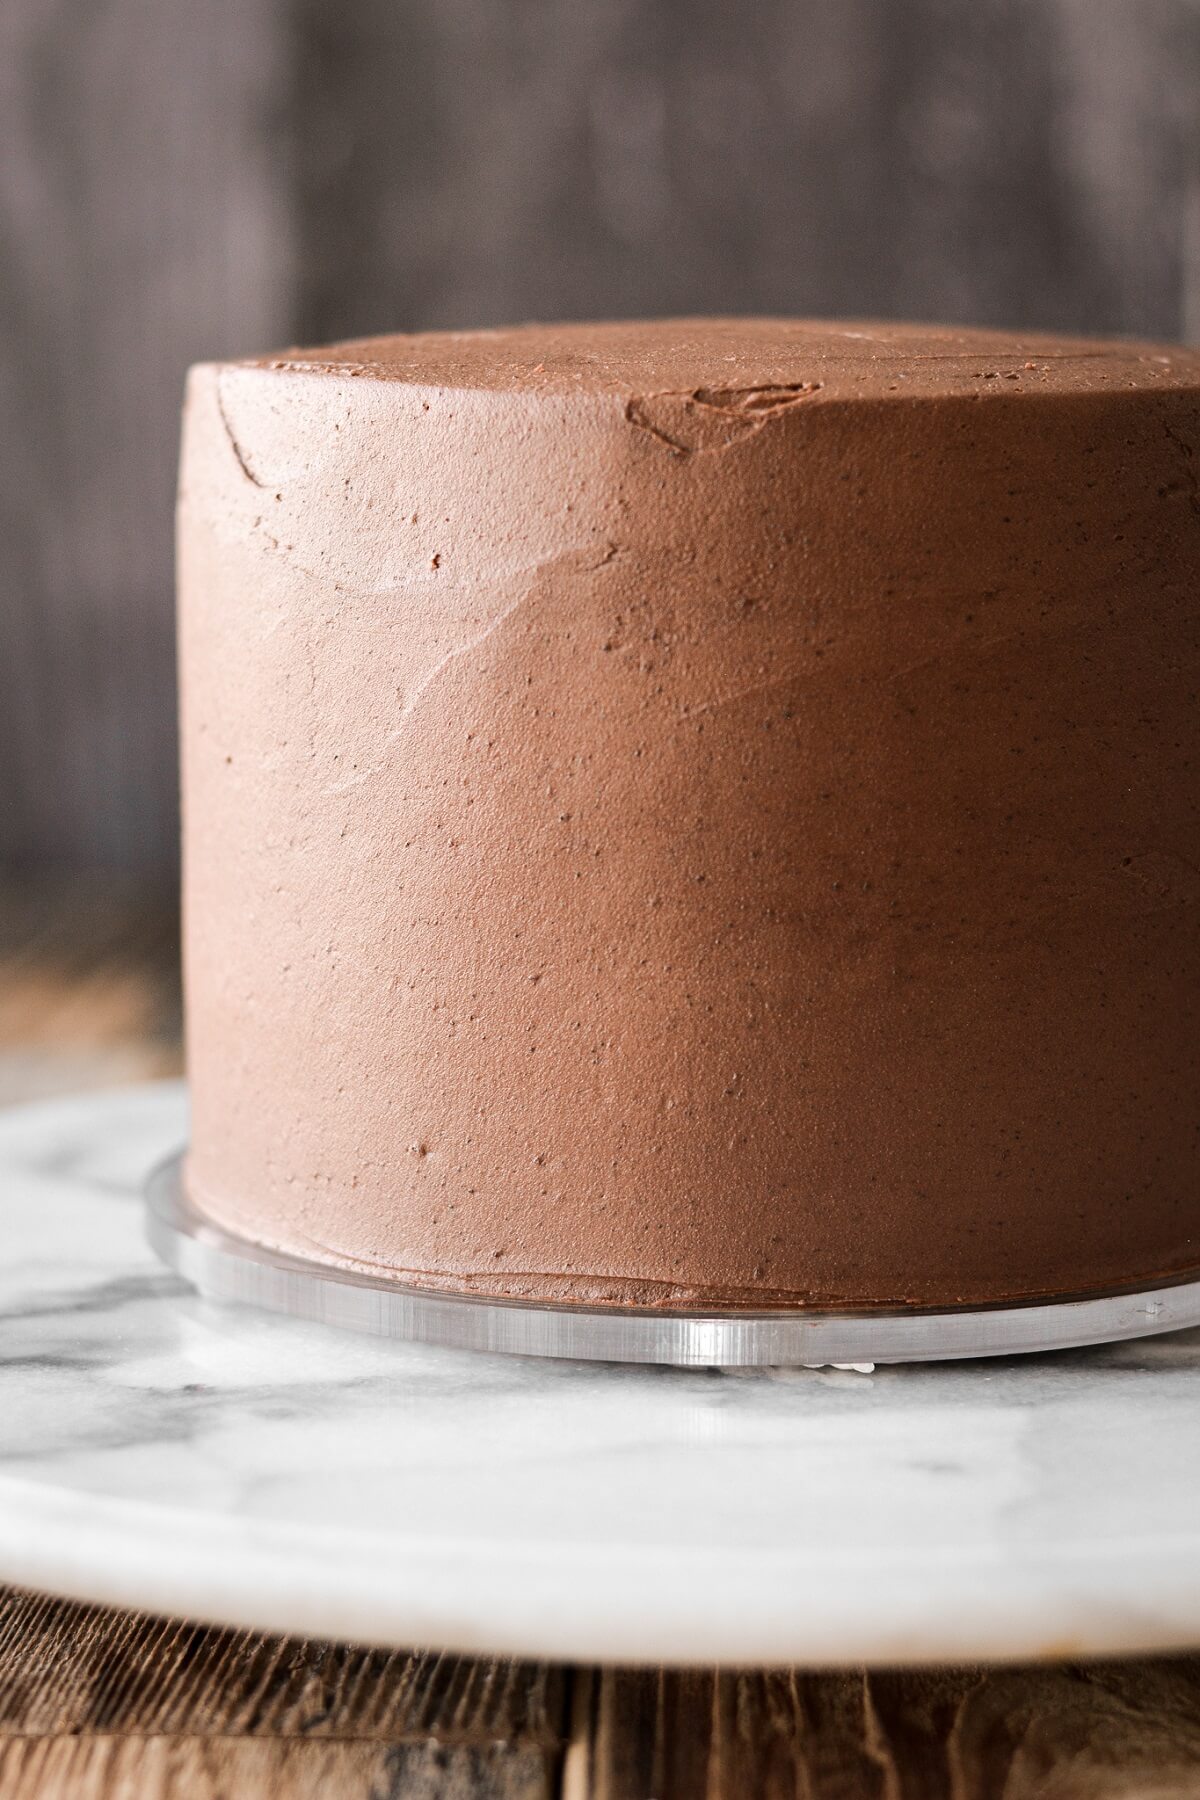
- Frost the cake all over with a thin crumb coat of chocolate buttercream, then refrigerate for 30 minutes to chill the crumb coat. Frost the cake with a final layer of buttercream.
Add the caramel drip.
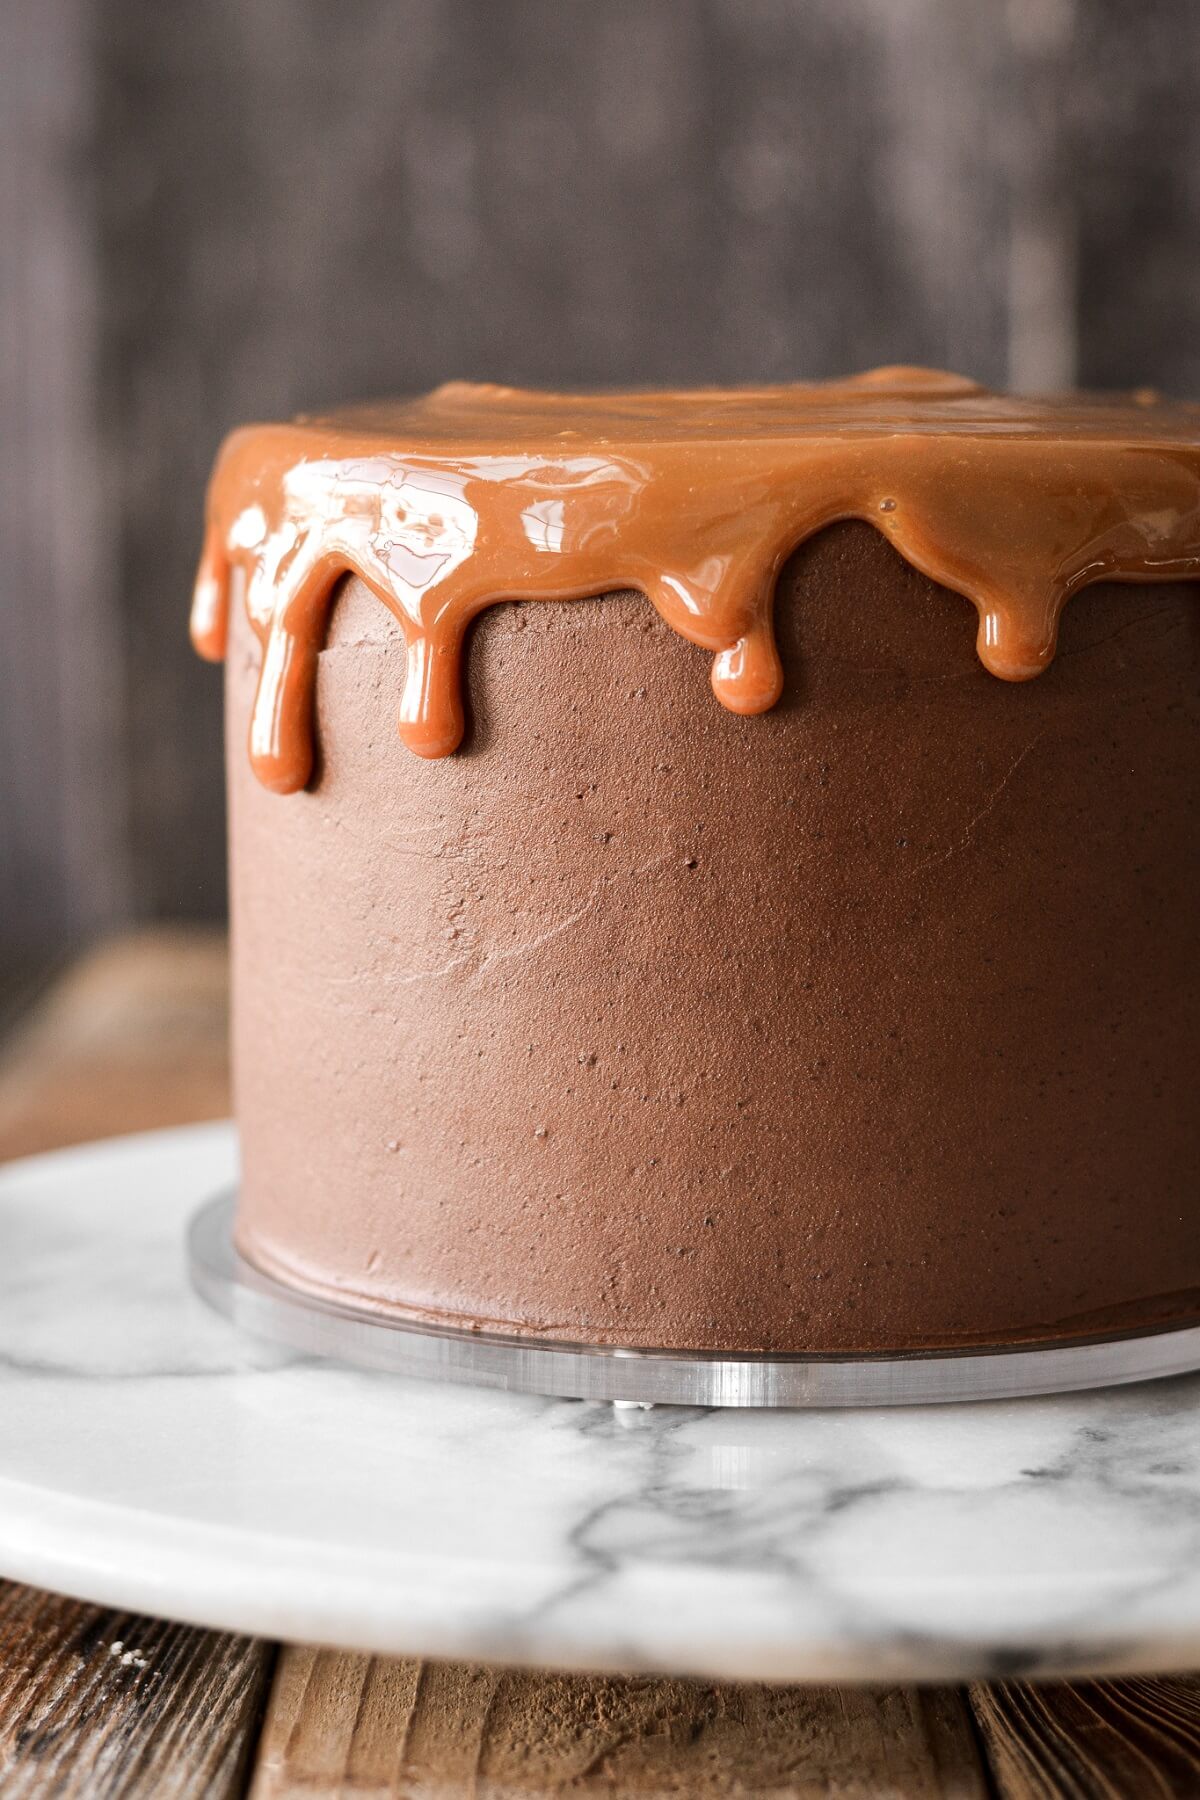
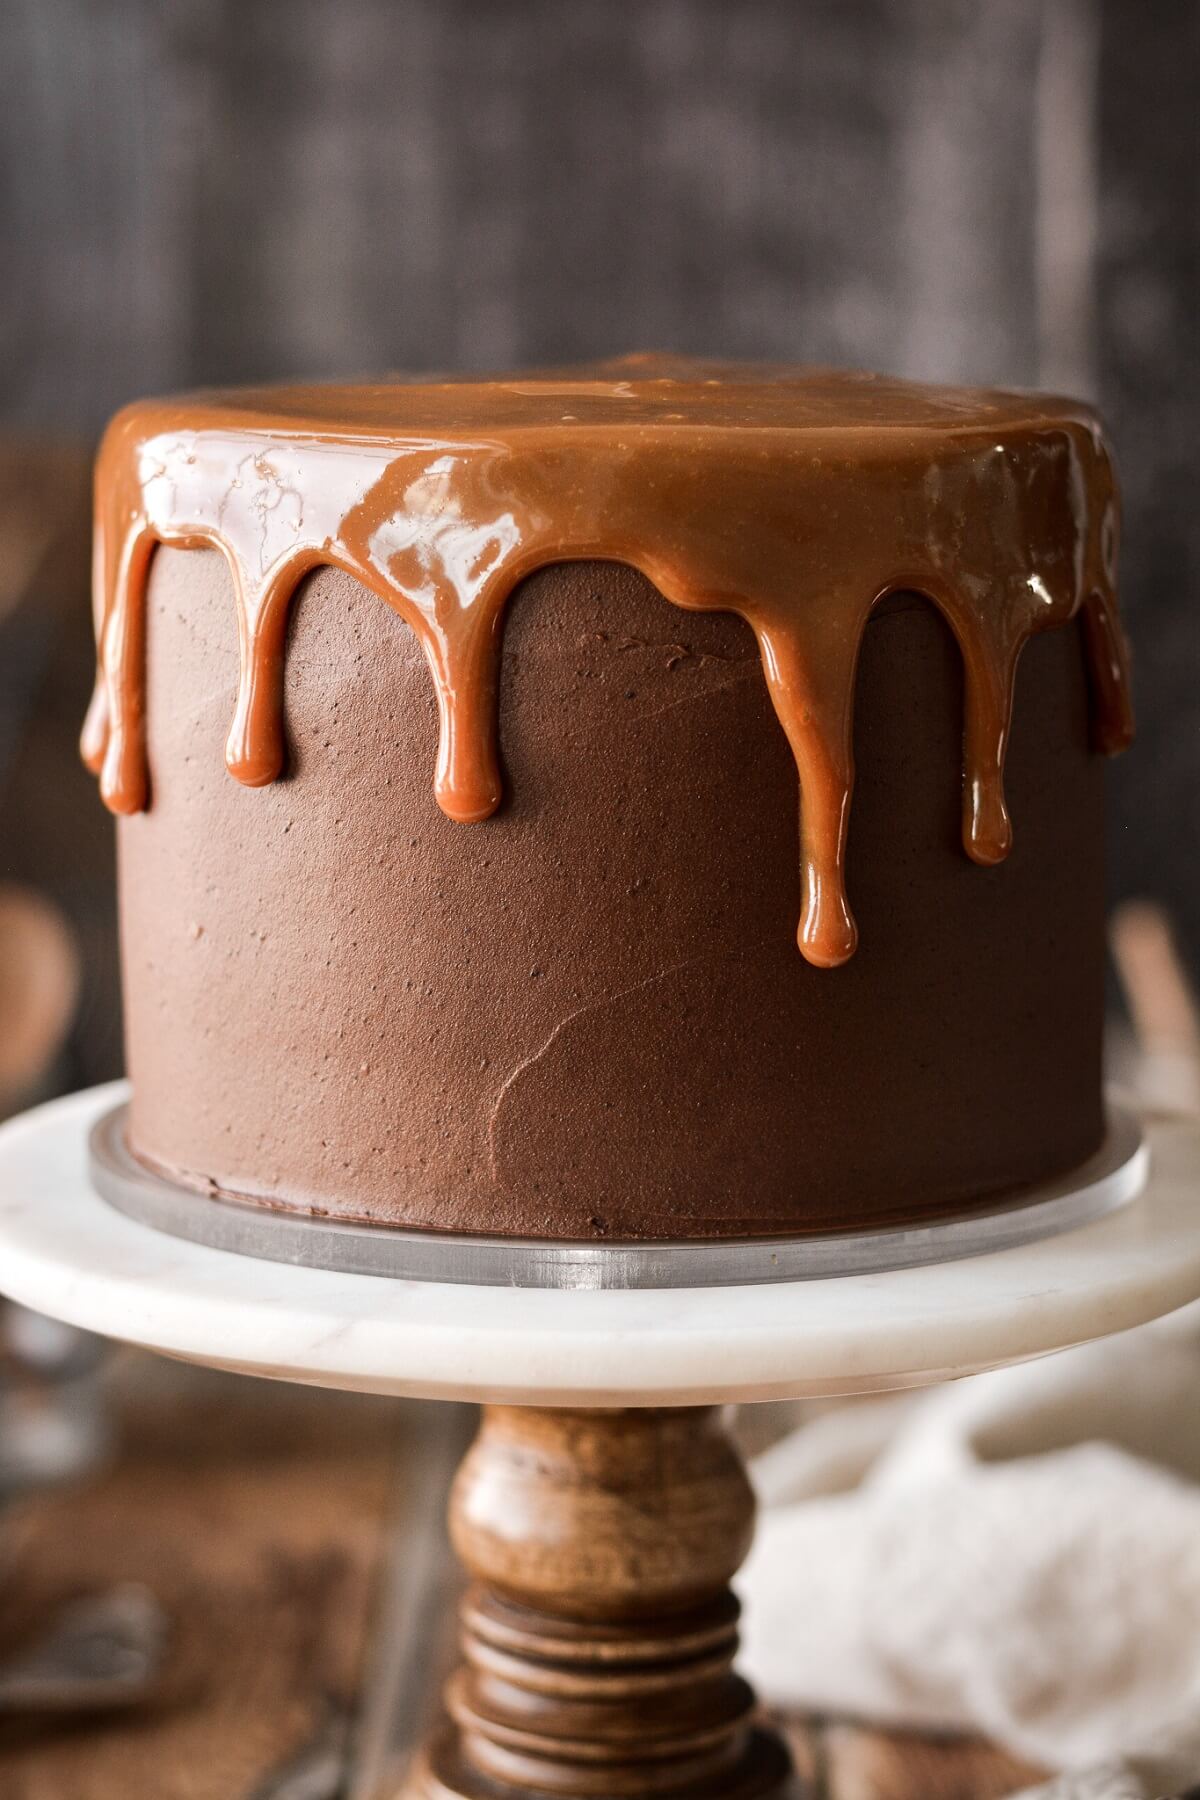
- In a bowl, stir together the caramel sauce and the dulce de leche. With a small offset spatula, spread the caramel mixture on top of the cake. Gently spread it towards the edges, encouraging it to drip over the sides of the cake.
- Caramel drips pretty slowly, but don’t be tempted to add more on top. After 15-20 minutes, the drips down the sides of the cake should be a bit longer. If it drips too quickly, just set the cake in the refrigerator to chill it and slow down the drips. (The next images show the caramel drip 5 minutes after being applied, and then 20 minutes after being applied.)
Recipe Variations
- 8-inch Cake. For a larger 8-inch three layer cake, double the cake recipe (or refer to the full chocolate cake recipe here). Increase the buttercream by 1 1/2 times. Use another tablespoon or two of caramel/dulce de leche for the filling and the caramel drip.
- Add Bourbon. Sometimes when I make this chocolate caramel cake, I brush the cake with a little bourbon before assembling the cake layers. Don’t add too much, or the cake will become too moist and can fall apart. A tablespoon or so per layer is plenty.
Be sure to read all of my BAKING FAQs where I discuss ingredients, substitutions and common questions with cake making, so that you can be successful in your own baking! I also suggest reading these comprehensive posts on making Perfect American Buttercream, How to Stack, Fill, Crumb Coat and Frost Layer Cakes and How to Use Piping Bags.
Frequently Asked Questions
Can I make the chocolate cake in advance?
Yes, you can make the cake in advance. After baking and cooling the cake layers, wrap them well in plastic wrap and freeze until needed, up to 3-6 months. You can also freeze the fully frosted and assembled cake (without the caramel drip) for up to 1 month, in an airtight container. Thaw the cake overnight, then add the caramel drip before serving.
How should I store the leftover cake?
Leftover cake should be stored in an airtight container at room temperature for up to 3 days.
What kind of caramel sauce did you use?
For the dulce de leche filling, I used Nestle La Lechera Dulce de Leche. For the caramel drip, I combined dulce de leche with Mrs. Richardson’s Caramel Sauce.
You Might Also Like


Please check out my Amazon Shop for a curated collection of some of my favorite cake pans from trusted brands, baking tools, ingredients, pretty things and fashion finds. I recommend products that I buy and use every day!
Did you love today’s recipe? Please rate the recipe and let me know in the comments what you thought! Also, be sure to follow Curly Girl Kitchen on Instagram, and tag me when you try one of my recipes so I can see all your delicious creations!

High Altitude Chocolate Caramel Toffee Cake
All recipes on Curly Girl Kitchen are developed for high altitude at 5,280 feet. See FAQs for adjusting to higher or lower elevations.

Equipment
- Stand Mixer with Paddle Attachment
Ingredients
Chocolate Cake
- 1 cup all-purpose flour, fluffed, spooned and leveled
- ¾ cup + 2 tbsp granulated sugar
- 6 tbsp unsweetened, Dutch-processed cocoa powder
- 1 tbsp instant espresso powder or instant coffee
- ½ tsp baking soda
- ¼ tsp baking powder
- ½ tsp coarse Kosher salt (if using table salt, use half the amount)
- 2 large eggs
- ½ cup whole milk
- ½ cup full-fat sour cream
- ½ cup vegetable oil
- 1 ½ tsp vanilla extract
Chocolate Buttercream
- 1 cup unsalted butter, softened to room temperature
- 1 ½ cups powdered sugar
- ½ cup unsweetened Dutch-processed cocoa powder
- 1 ½ tsp meringue powder (optional)
- 1 ½ tsp instant espresso powder or instant coffee
- ⅛ tsp coarse Kosher salt (if using table salt, use half the amount)
- ¼ cup salted caramel sauce or dulce de leche
- 1 tsp vanilla extract
Caramel Filling
- 6 tbsp dulce de leche
- 6 tbsp toffee bits
Caramel Drip
- ¼ cup salted caramel sauce
- ¼ cup dulce de leche
Instructions
Cake
- Preheat the oven to 350 F, and position a rack in the center of the oven. Spray the bottoms of three 6-inch round cake pans with non-stick spray.
- In a bowl, sift together the flour, sugar, cocoa powder, espresso powder, baking soda, baking powder and salt, then whisk until completely combined.
- In a separate bowl, whisk together the eggs, milk, sour cream, oil and vanilla until smooth. Add the dry ingredients to the wet, and whisk just until combined.
- Divide the batter between the pans. Tap the pans lightly on the counter a few times to pop any large air bubbles. Bake the cakes on the center rack for about 20-25 minutes, until a toothpick or cake tester comes out clean or with moist crumbs clinging to it, and the tops spring back when gently touched.
- Set the pans on a cooling rack, cover loosely with a clean kitchen towel and cool completely before frosting. Once the cakes are cool, remove from the pans, wrap individually in plastic wrap, and chill in the refrigerator for several hours. Chilling the cake layers is an optional step, but it makes the cake more stable when assembling with a slippery filling like caramel.
Buttercream
- In the bowl of your stand mixer fitted with the paddle attachment, beat the butter for one minute until smooth.
- Add the powdered sugar, cocoa powder, meringue powder, espresso powder and salt, and mix on low to combine. Add the caramel sauce and vanilla.
- Whip on medium speed (#6 on a Kitchen Aid mixer), scraping the bowl down several times, for 4-5 minutes, until very light and fluffy. Turn the speed down to "stir" and mix for 1 more minute.
Filling & Assembly
- Place one layer of cake on a cake board. Fit a piping bag with a round piping tip, and fill with the chocolate buttercream. Pipe a border of buttercream around the edge of the cake – this will act as a "dam" to hold in the filling.
- Spread 3 tablespoons of dulce de leche onto the cake, inside the border of buttercream. Sprinkle the dulce de leche with 3 tablespoons of toffee bits.
- Repeat the above 2 steps with the second layer of cake. Finish by placing the third layer of cake on top.
- Frost the cake all over with a thin crumb coat of chocolate buttercream, then refrigerate for 30 minutes to chill the crumb coat. Frost the cake with a final layer of buttercream.
Caramel Drip
- In a bowl, stir together the caramel sauce and the dulce de leche. With a small offset spatula, spread the caramel mixture on top of the cake. Gently spread it towards the edges, encouraging it to drip over the sides of the cake.
- Caramel drips pretty slowly, but don't be tempted to add more on top. After 15-20 minutes, the drips down the sides of the cake should be a bit longer. If it drips too quickly, just set the cake in the refrigerator to chill it and slow down the drips.
Notes
 https://curlygirlkitchen.com/
Do I need to make adjustments for making this cake at sea level?
Yes, you’ll probably need to make a few minor adjustments to the cake, such as decreasing the flour by several tablespoons, and slightly increasing the leavening. This article has good guidelines on making adjustments: https://www.kingarthurbaking.com/learn/resources/high-altitude-baking
I made this for my nephews birthday. It was a hit! Thanks for sharing you recipes.
This one came out great! Thank you for another fantastic recipe.