
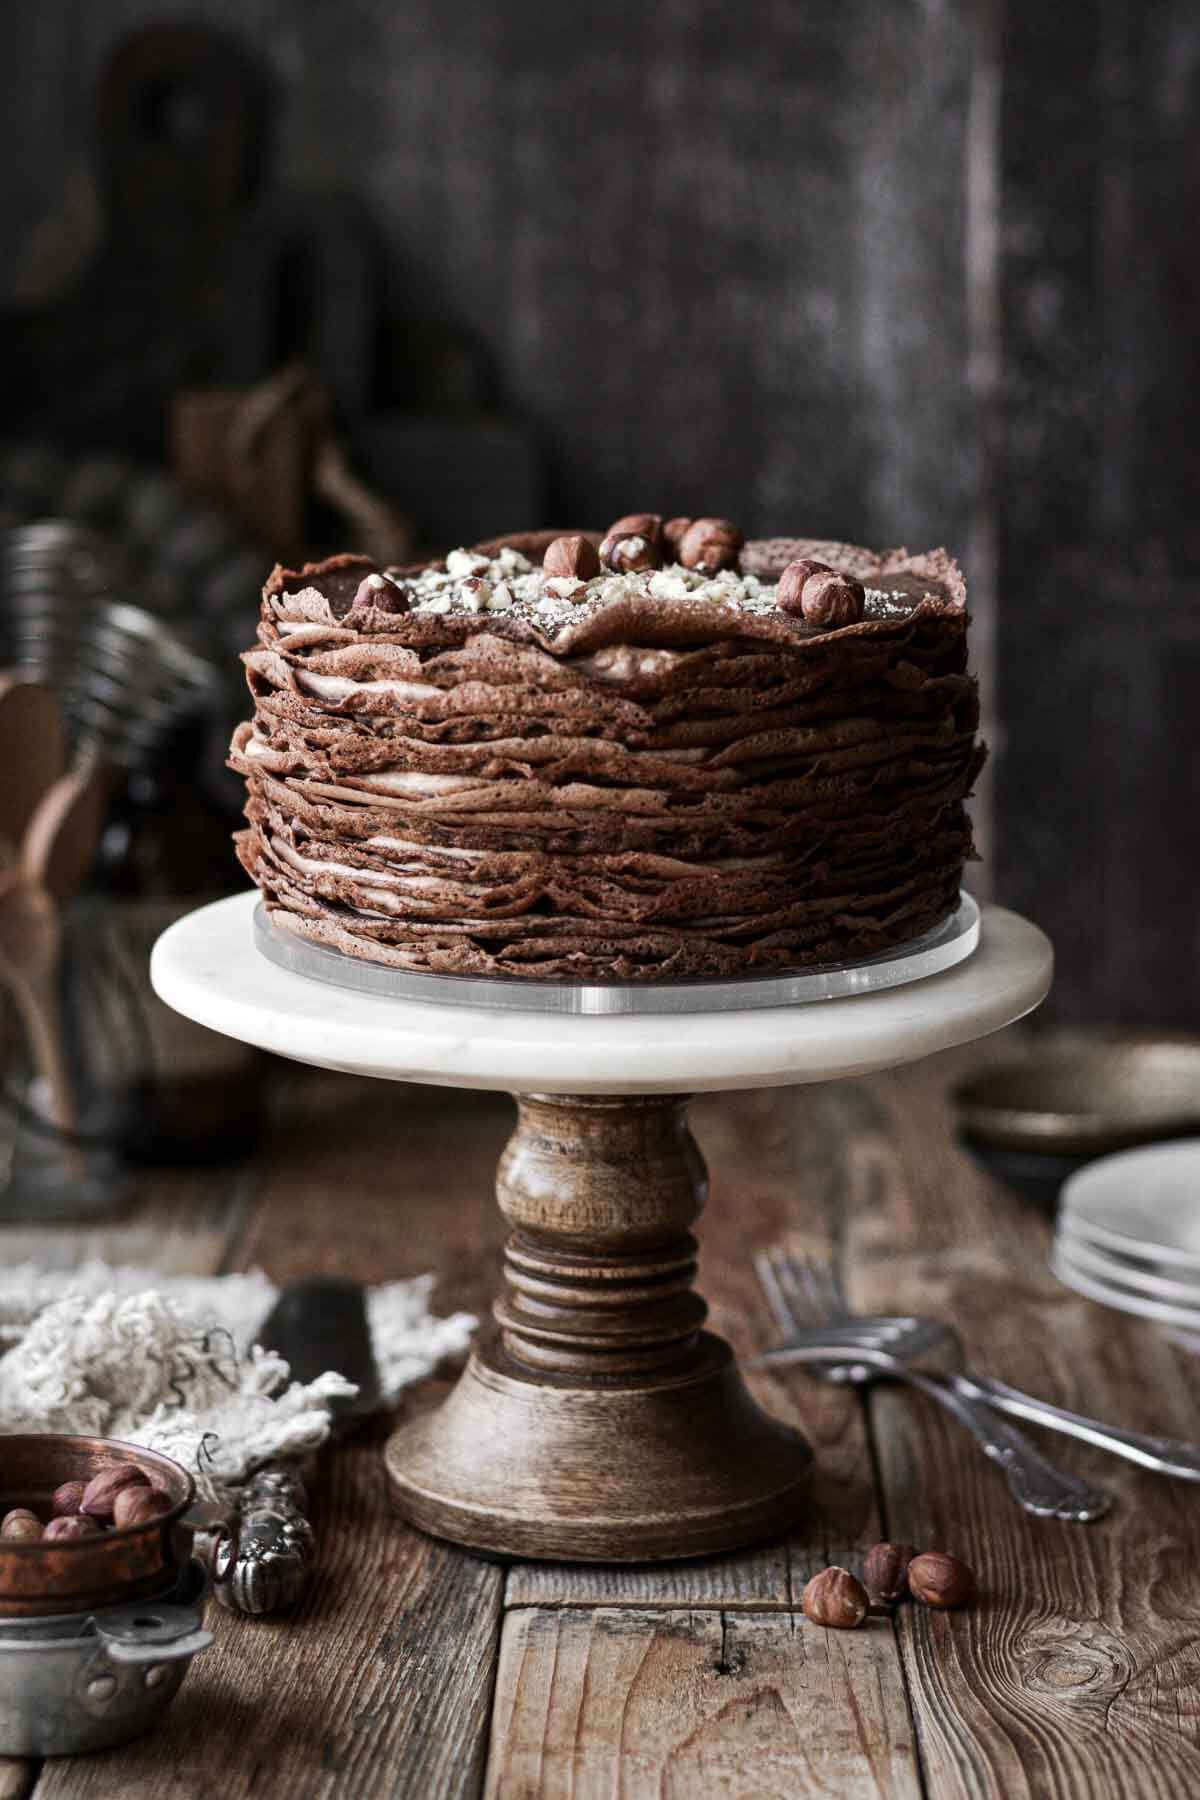
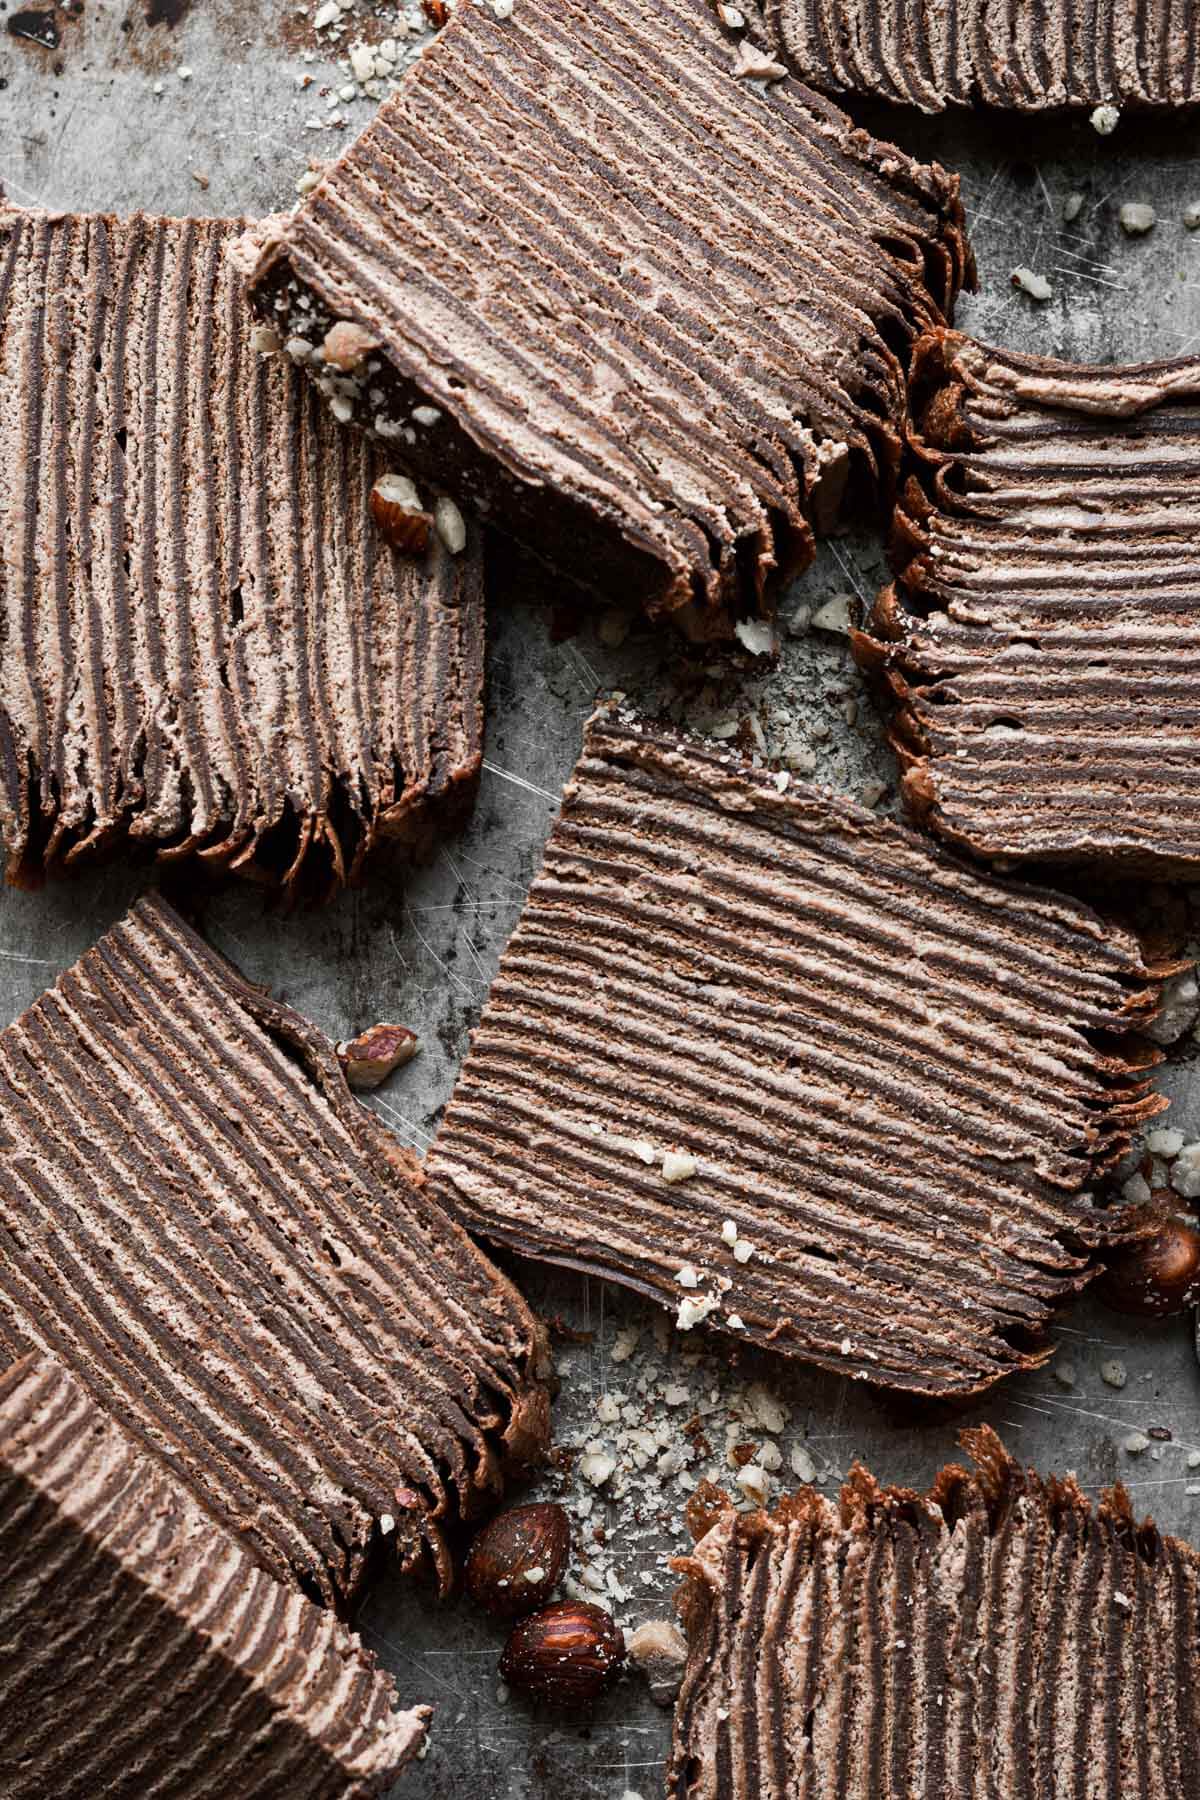
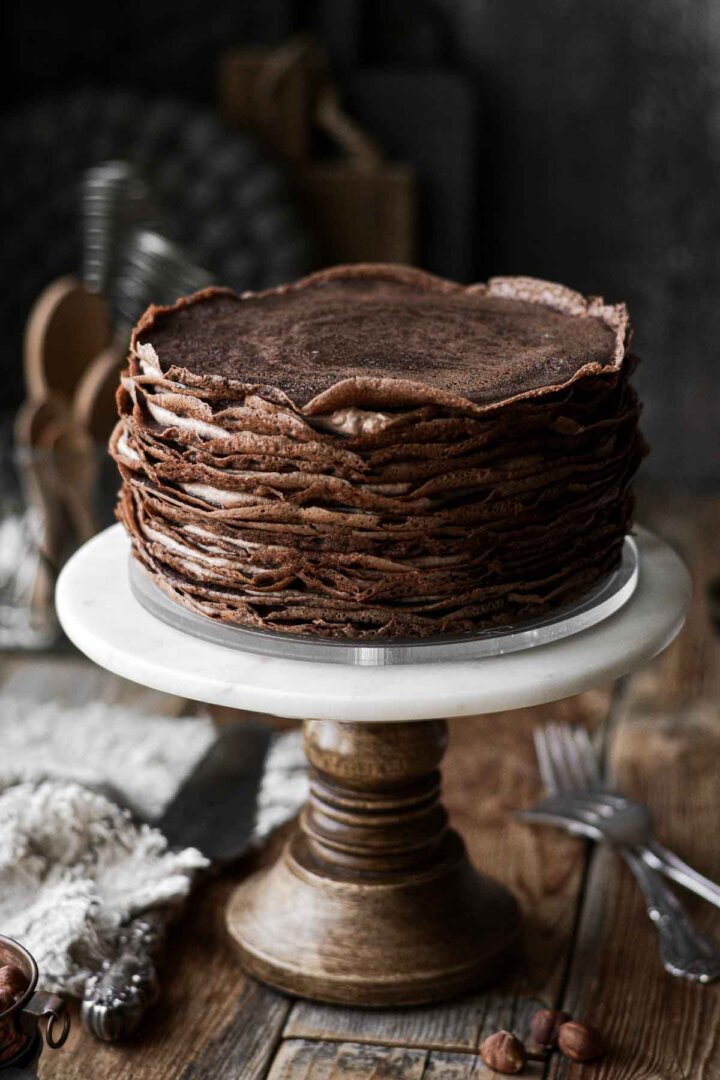
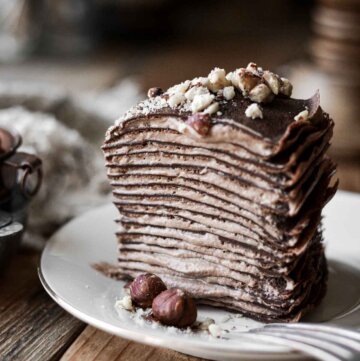
High altitude tested, homemade chocolate crepes, layered with chocolate hazelnut whipped cream, makes a beautiful cake that’s surprisingly easy to make. This chocolate hazelnut crepe cake is a petite 6-inch size and looks gorgeous decorated simply with chopped hazelnuts.
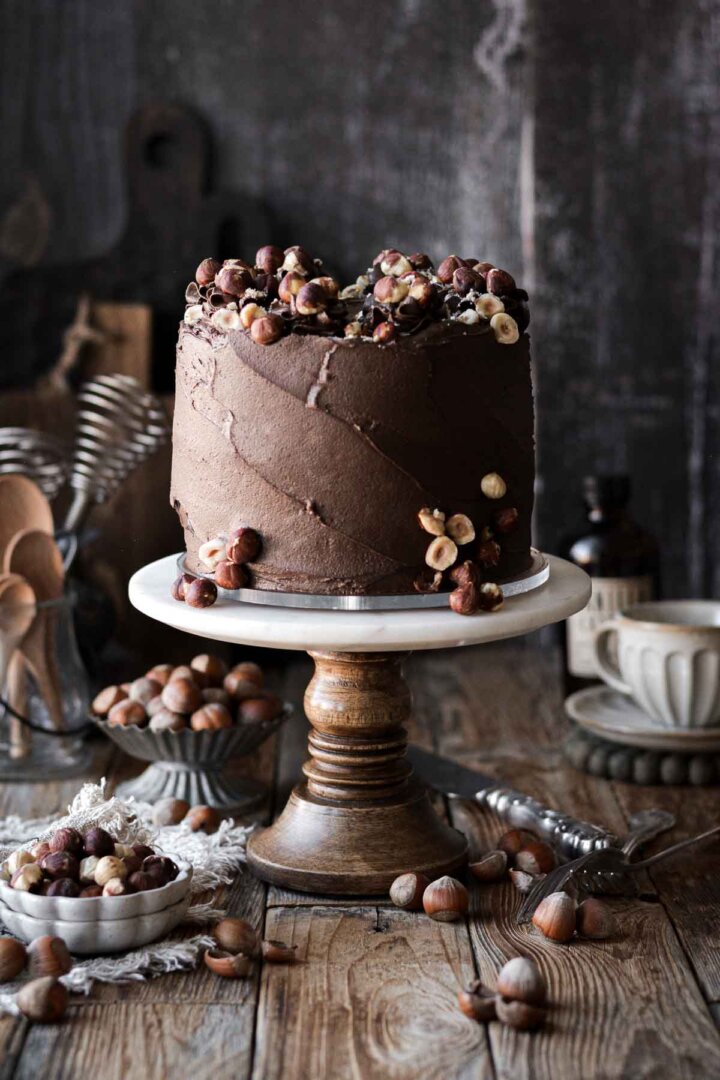
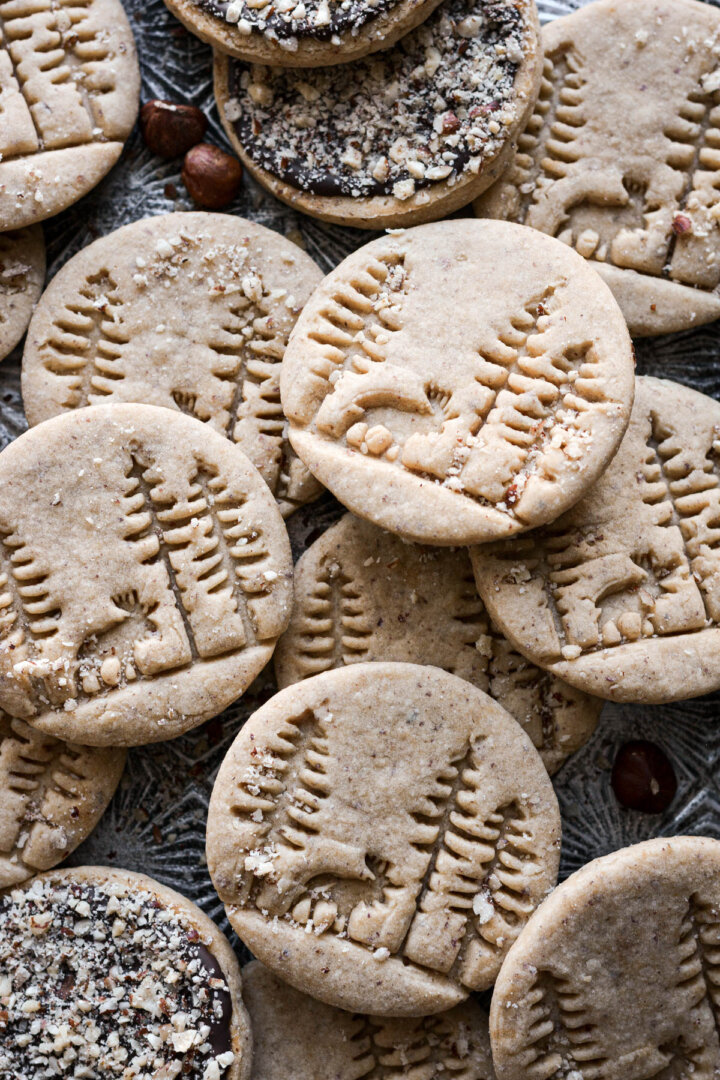
You might love these recipes for classic French vanilla crepes, chocolate hazelnut linzer cookies, and toasted hazelnut cookies.

This site contains affiliate links. As an Amazon associate, I earn from qualifying purchases. This means that I may make a small commission if you purchase a product using those links. This in no way affects my opinion of those products and services. All opinions expressed on this site are my own.
What are Crepes?
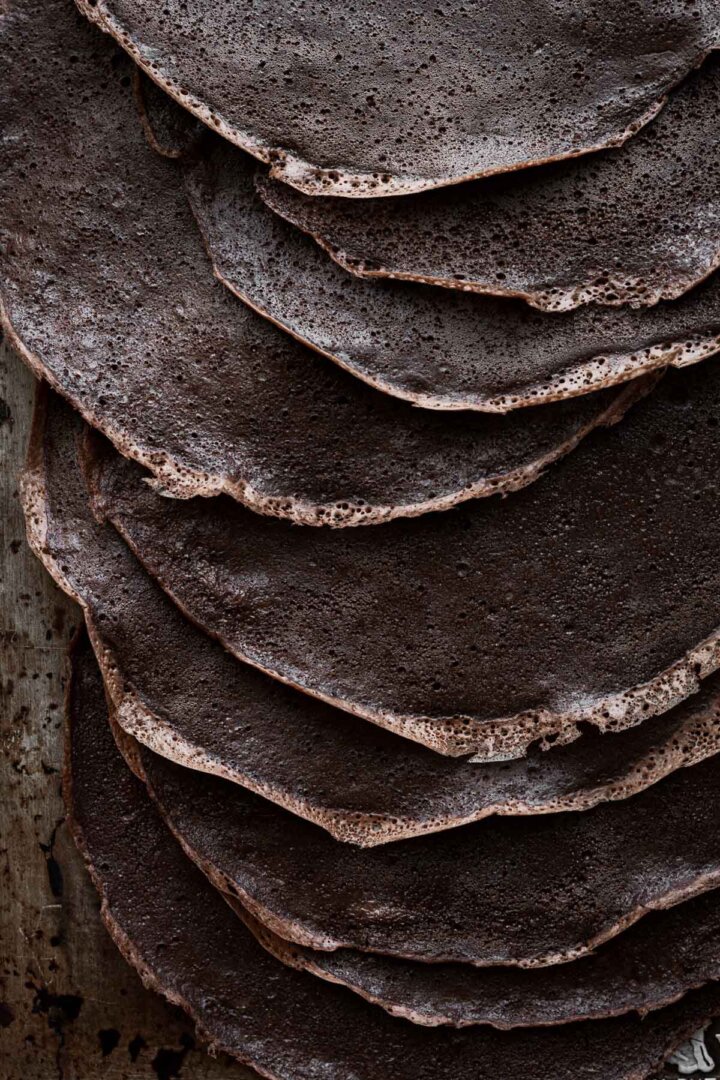
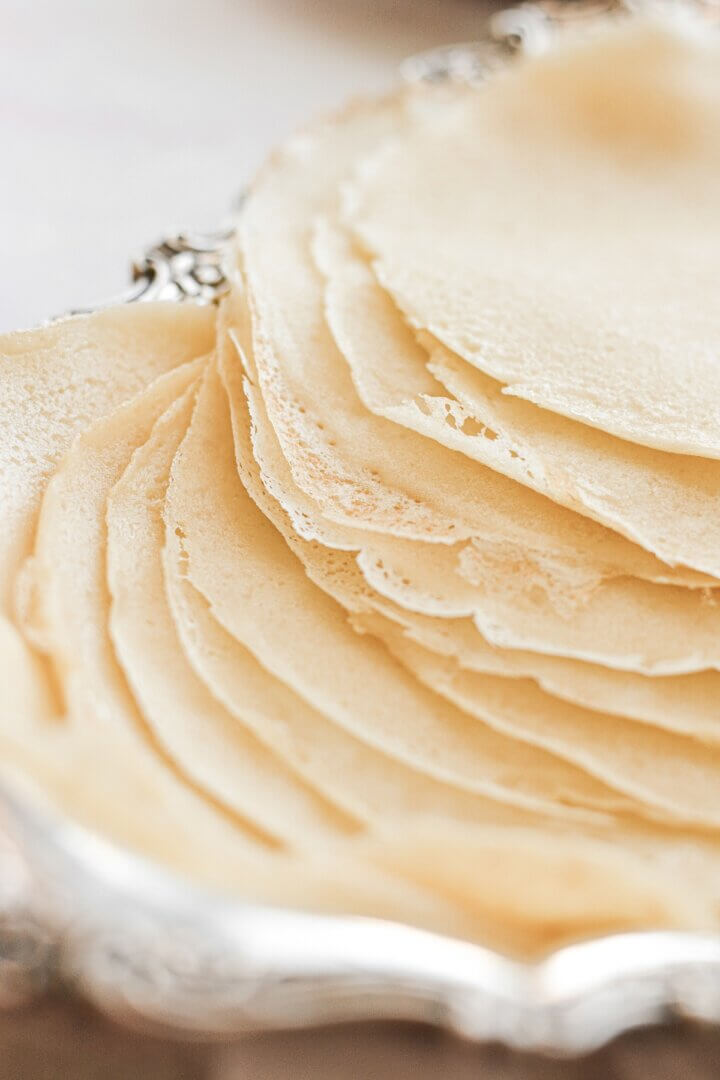
A crepe is a type of very thin pancake, originating in Brittany, France, and is considered a national dish of France. But unlike fluffy pancakes made with baking powder, crepes don’t contain leavening. Without leavening, crepes cook up very thin and flat, perfect for filling with any kind of sweet or savory filling. They’re light and delicate, and you can fold or roll them up with cream filling, jam or fruit for a delicious breakfast.
A crepe cake is simply a stack of crepes that have been layered with whipped cream or buttercream. The lacey edges of the crepes give the cake a beautiful and unique look that you wouldn’t want to cover up with frosting.
Why You’ll Love This Recipe
Easy to Make. Making homemade crepes is actually so easy! Simply whisk up the batter at night (or make it in a blender) and let it rest in the refrigerator overnight. In the morning, it only takes a few minutes to cook up a batch of soft, beautiful crepes. Make sure you have a good non-stick skillet, though, or you won’t be very successful at getting the crepes out of the skillet without tearing them.
Simple Pantry Ingredients. You don’t need any fancy ingredients to make French crepes. Just a few standard ingredients that every baker has on hand are all it takes.
Versatile. The versatility of crepes is all about the filling. I like to pair something creamy with something fruity, like vanilla custard with strawberries, whipped cream cheese with blueberries, or even chocolate hazelnut spread with caramelized pears and toasted hazelnuts. You get the idea.
High Altitude Tested. I develop all the recipes on my site for Denver’s altitude of 5,280 feet. If you’re at a lower or higher elevation, please see my FAQs for guidance on adjusting recipes for your altitude.
See the recipe card at the end of the post for the full ingredients list and instructions.
Ingredients and Equipment
- Non-stick Skillet. Probably the most important tool for making crepes is a non-stick skillet. Without this, you won’t be able to get your crepes out of the pan without tearing them. I recommend a 6-8 inch skillet (measured across the base of the pan), or even a crepe pan, if you’re really serious about your crepe making.
- Whole Milk + Heavy Whipping Cream.
- Eggs.
- Butter.
- Vanilla Extract.
- All Purpose Flour.
- Cocoa Powder. Use a good-quality Dutch processed cocoa powder for a rich color and flavor.
- Salt.
- Chocolate Hazelnut Spread.
- Hazelnuts.
Instructions
Crepe Batter
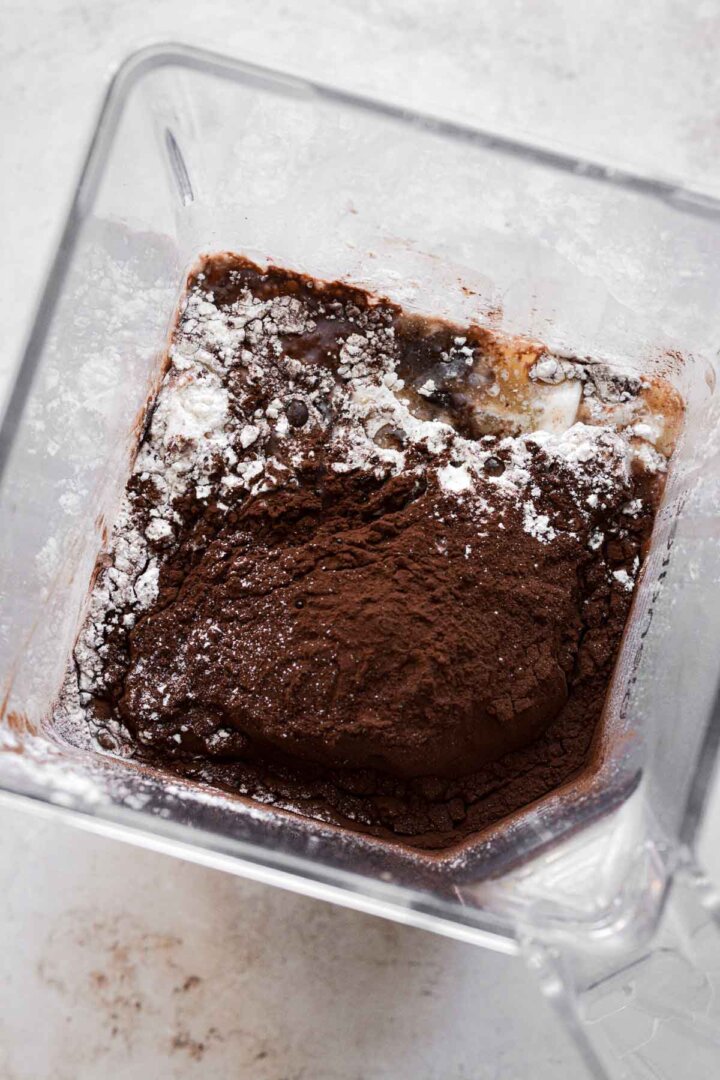
- In a liquid measuring cup, whisk together the milk, water, eggs, melted butter and vanilla.
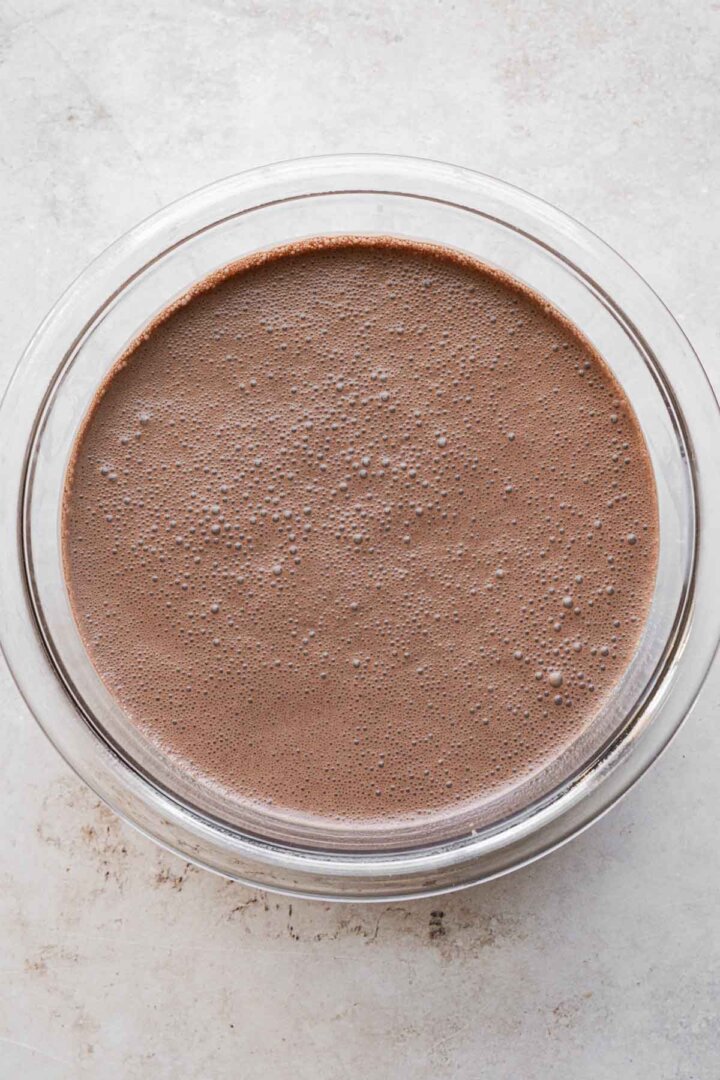
- In a bowl, sift together the flour, cocoa powder and salt. Pour in about half of the milk mixture, and whisk the batter into a smooth paste. Whisk in the rest of the milk mixture, whisking the batter until smooth.
- If you have a blender, you can also simply place all the ingredients into your blender, and blend for 30-60 seconds until smooth.
- Cover the bowl of batter with plastic wrap, place in the refrigerator, and let the batter rest overnight. This rest time allows the flour to fully absorb the liquid and lets the gluten relax, resulting in very tender, delicate crepes.
Whipped Cream
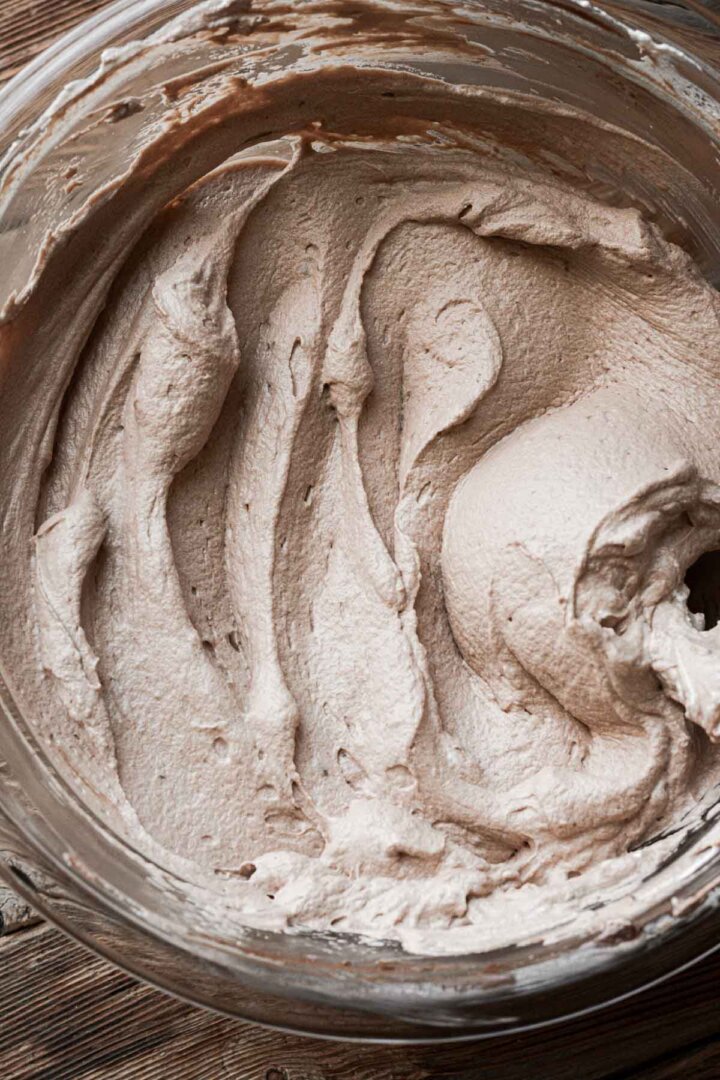
- Make the whipped cream just before assembling the crepes/crepe cake. In a bowl, use an electric mixer to whip the cream and vanilla until thick, fluffy peaks form that hold their shape.
- Measure the chocolate hazelnut spread into another bowl. Add 1/3 of the whipped cream to the chocolate hazelnut spread, folding it in to loosen up the spread. Fold in another 1/3 of the whipped cream, then fold in the last 1/3 of the whipped cream. Refrigerate until needed.
Cooking the Crepes
- After resting the crepe batter in the refrigerator overnight, the batter may look separated. Just whisk it up again until smooth. If there are lumps of flour or pieces of butter visible, blend the batter in your blender until smooth.
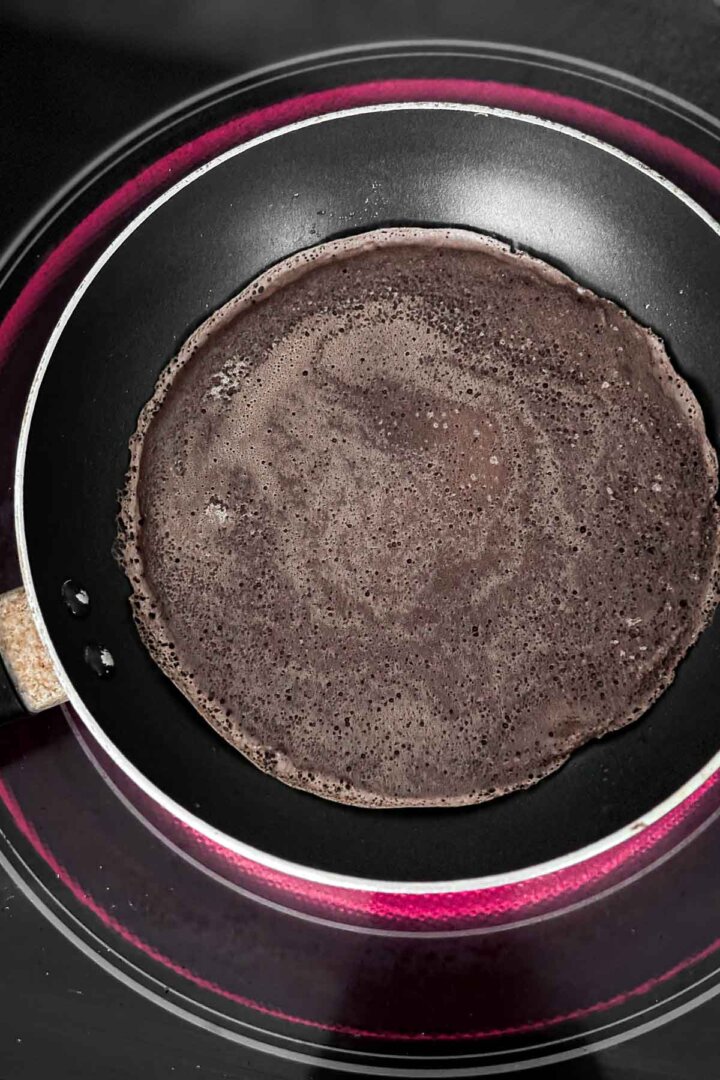
- Heat a 6-inch non-stick skillet over medium heat (or slightly lower) until hot. Lightly brush the pan with 1/4 teaspoon butter. The pan should be hot enough that the butter and batter sizzles when it hits the pan.
- Measure slightly less than 1/4 cup (about 3 tablespoons) of batter into the center of the pan, then swirl it around until the batter coats the bottom of the pan in a thin layer. Cook for about 1-2 minutes, until the edges of the crepe look “lacey”, and the center of the crepe is set with no uncooked batter. Don’t flip the crepe.
- Use a silicone spatula to loosen the edges (if the crepe is done, it should very easily scoot around the pan), then very gently slide the crepe off the skillet onto a plate.
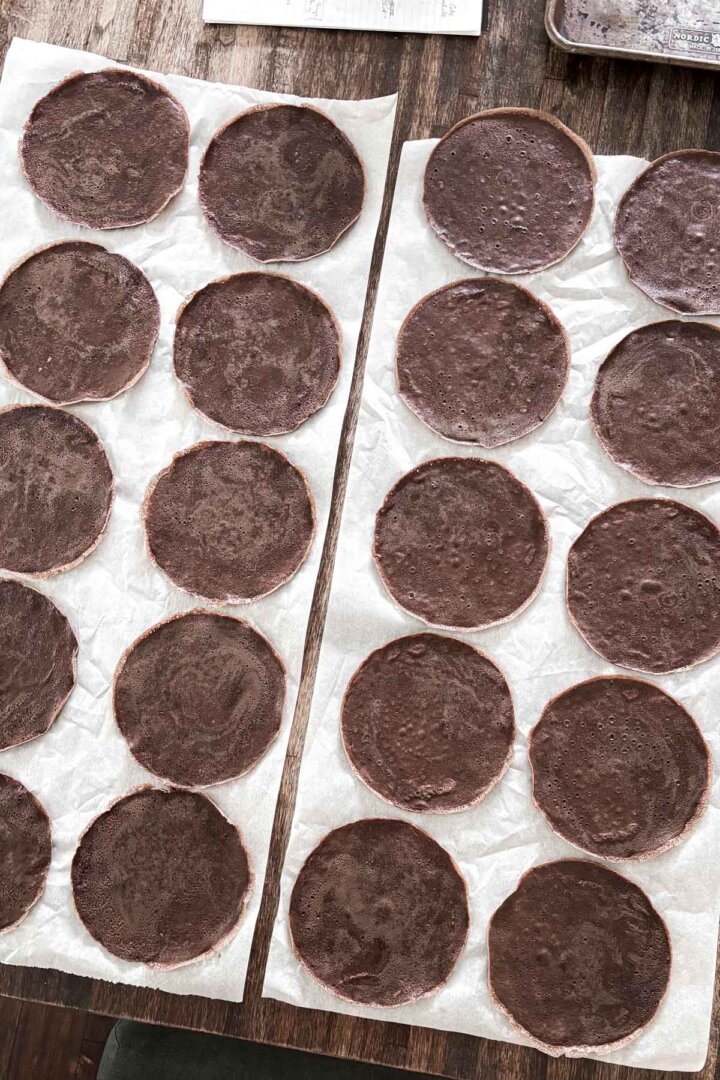
- Grease the pan with another 1/4 teaspoon of butter, and cook the next crepe. Continue cooking crepes until you’ve cooked all the batter. As you stack the cooked crepes, you can keep them warm by over-turning a large bowl on top of the plate. Then you can serve them warm with the fillings/toppings of your choice.
- Note that if you’re making a crepe cake, you should not stack the crepes, but rather, let them cool completely unstacked. I simply laid out several pieces of parchment paper on my counter to cool all the crepes separately.
Cake Assembly
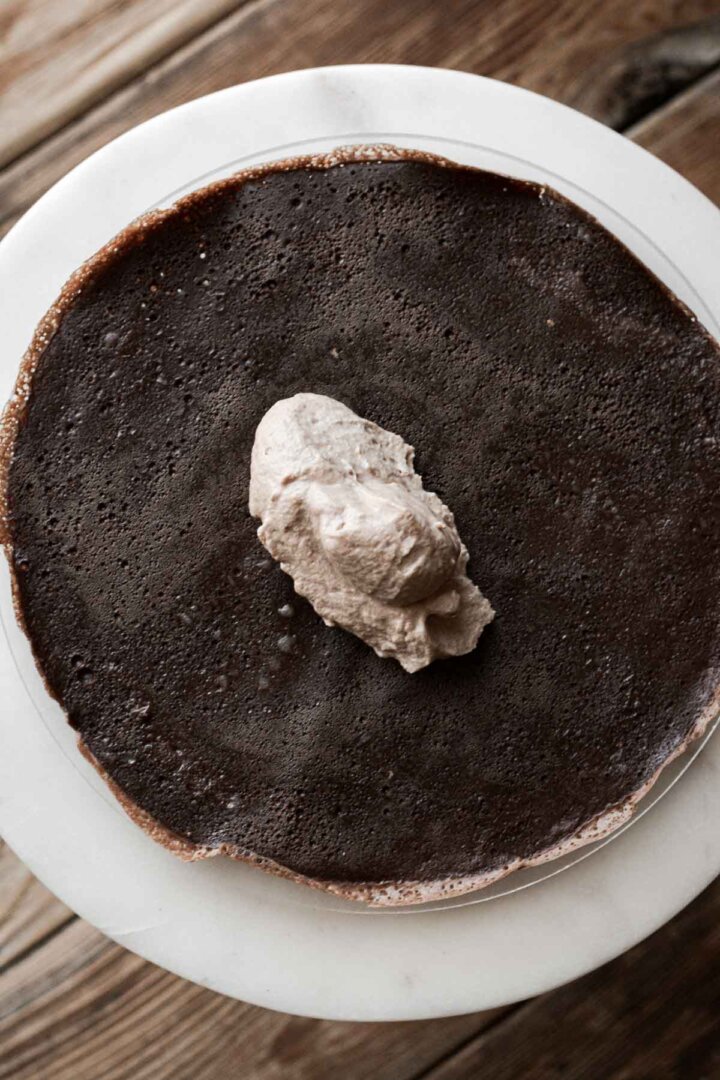
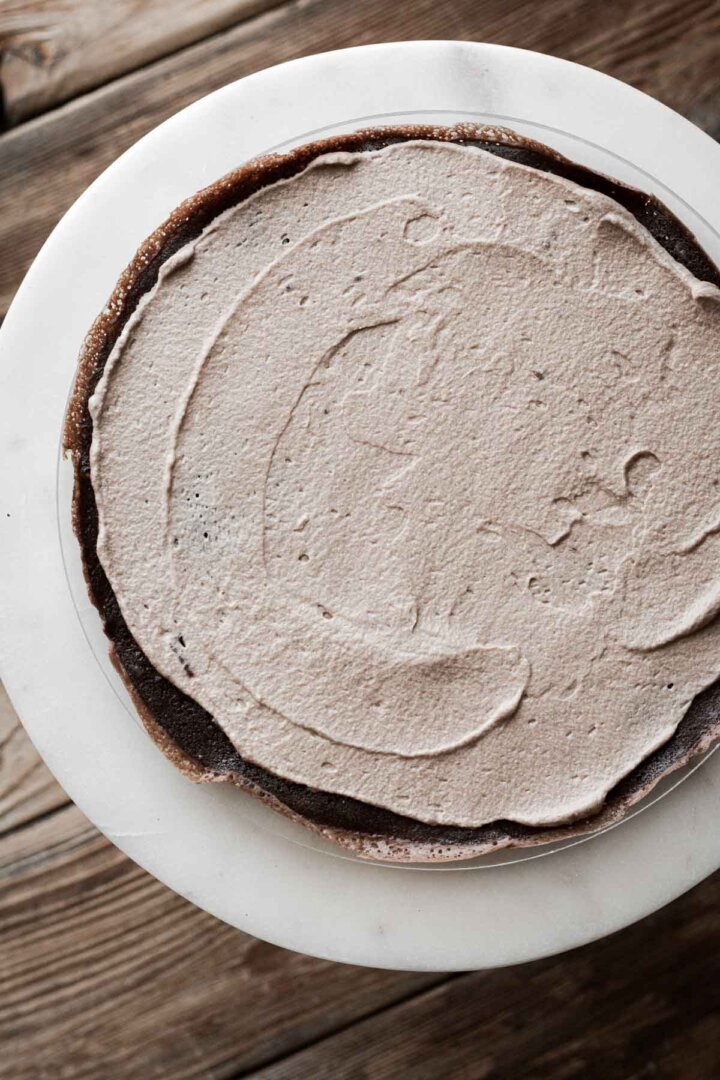
- Set one of the cooled crepes on a cake pedestal or serving plate. Use a small offset spatula to spread a thin layer of whipped cream (about 1 1/2 – 2 tbsp) over the crepe, stopping 1/4 inch from the edges. If you like, you can also sprinkle the whipped cream with a small amount of very finely chopped hazelnuts.
- Repeat stacking the crepes with layers of whipped cream in between each, until you’ve used up all the crepes and whipped cream. Decorate the top crepe with a few chopped hazelnuts.
- Refrigerate the cake for at least 1-2 hours, which will allow the crepes to absorb some of the whipped cream so that the layers don’t slip and slide too much when you slice the cake. You can also cover the cake and refrigerate it for up to one day in advance, before serving.
- Cut the cake into wedges, or, cut it straight across, then cut flat slices (in the same way that a wedding cake is often cut and served).
Be sure to read all of my BAKING FAQs where I discuss ingredients, substitutions and common baking questions, so that you can be successful in your own baking!
Frequently Asked Questions
If you layered the crepes with whipped cream, store the leftover cake in an airtight container in the refrigerator for up to 2-3 days. If you layered the crepes with buttercream, you can store the leftover cake in an airtight container at room temperature for up to 2-3 days.
The rest time allows the flour to fully absorb the liquid and lets the gluten relax, resulting in very tender, delicate crepes. You can let the batter rest for just a few hours, but overnight is best. And it also makes the morning so easy, since everything is prepped and ready to go.
I don’t flip my homemade crepes, although many recipes say to. They cook through completely just by cooking them on one side, and it’s just not really necessary to flip them.
You can store leftover crepes in an airtight container or freezer bag. Refrigerate them for up to 3 days. or freeze them for 3-6 months. When freezing them, I’d suggest layering each crepe with a piece of parchment paper, so they’re easy to get apart if you only want to use a few.
You can make a chocolate crepe cake with any flavor of buttercream you like, using my perfect American buttercream recipe. Or, just peruse my layer cakes for inspiration on buttercream flavors.

You Might Also Like


Please check out my Amazon Shop for a curated collection of some of my favorite cake pans from trusted brands, baking tools, ingredients, pretty things and fashion finds. I recommend products that I buy and use every day!
Did you love today’s recipe? Please rate the recipe and let me know in the comments what you thought! Also, be sure to follow Curly Girl Kitchen on Instagram, and tag me when you try one of my recipes so I can see all your delicious creations!
Chocolate Hazelnut Crepe Cake
All recipes on Curly Girl Kitchen are developed for high altitude at 5,280 feet. See FAQs for adjusting to higher or lower elevations.

Equipment
- 6-inch Non-Stick Skillet
- Electric Mixer (Stand or Hand-Held)
Ingredients
Crepes
- 1 ½ cups whole milk
- ½ cup water
- 3 large eggs
- 3 tbsp unsalted butter, melted (plus extra for greasing the skillet)
- 1 tsp vanilla extract
- 1 cup all-purpose flour, fluffed, spooned and leveled
- 6 tbsp unsweetened Dutch processed cocoa powder, sifted
- ¼ tsp coarse Kosher salt (if using table salt, use half the amount)
Whipped Cream
- 1 ¼ cups cold heavy whipping cream
- 1 ½ tsp vanilla extract
- ½ cup chocolate hazelnut spread
- ½ cup chopped hazelnuts, optional
Instructions
Crepe Batter
- In a liquid measuring cup, whisk together the milk, water, eggs, melted butter and vanilla.
- In a bowl, sift together the flour, cocoa powder and salt. Pour in about half of the milk mixture, and whisk the batter into a smooth paste. Whisk in the rest of the milk mixture, whisking the batter until smooth.
- If you have a blender, you can also simply place all the ingredients into your blender, and blend for 30-60 seconds until smooth.
- Cover the bowl of batter with plastic wrap, place in the refrigerator, and let the batter rest overnight. This rest time allows the flour to fully absorb the liquid and lets the gluten relax, resulting in very tender, delicate crepes.
Whipped Cream
- Make the whipped cream just before assembling the crepes/crepe cake. In a bowl, use an electric mixer to whip the cream and vanilla until thick, fluffy peaks form that hold their shape.
- Measure the chocolate hazelnut spread into another bowl. Add 1/3 of the whipped cream to the chocolate hazelnut spread, folding it in to loosen up the spread. Fold in another 1/3 of the whipped cream, then fold in the last 1/3 of the whipped cream. Refrigerate until needed.
Cooking the Crepes
- After resting the crepe batter in the refrigerator overnight, the batter may look separated. Just whisk it up again until smooth. If there are lumps of flour or pieces of butter visible, blend the batter in your blender until smooth.
- Heat a 6-inch non-stick skillet over medium heat (or slightly lower) until hot. Lightly brush the pan with 1/4 teaspoon butter. The pan should be hot enough that the butter and batter sizzles when it hits the pan.
- Measure slightly less than 1/4 cup (about 3 tablespoons) of batter into the center of the pan, then swirl it around until the batter coats the bottom of the pan in a thin layer. Cook for about 1-2 minutes, until the edges of the crepe look "lacey", and the center of the crepe is set with no uncooked batter. Don't flip the crepe.
- Use a silicone spatula to loosen the edges (if the crepe is done, it should very easily scoot around the pan), then very gently slide the crepe off the skillet onto a plate.
- Grease the pan with another 1/4 teaspoon of butter, and cook the next crepe. Continue cooking crepes until you've cooked all the batter. As you stack the cooked crepes, you can keep them warm by over-turning a large bowl on top of the plate. Then you can serve them warm with the fillings/toppings of your choice.
- Note that if you're making a crepe cake, you should not stack the crepes, but rather, let them cool completely unstacked. I simply laid out several pieces of parchment paper on my counter to cool all the crepes separately.
Cake Assembly
- Set one of the cooled crepes on a cake pedestal or serving plate. Use a small offset spatula to spread a thin layer of whipped cream (about 1 1/2 – 2 tbsp) over the crepe, stopping 1/4 inch from the edges. If you like, you can also sprinkle the whipped cream with a small amount of very finely chopped hazelnuts.
- Repeat stacking the crepes with layers of whipped cream in between each, until you've used up all the crepes and whipped cream. Decorate the top crepe with a few chopped hazelnuts.
- Refrigerate the cake for at least 1-2 hours, which will allow the crepes to absorb some of the whipped cream so that the layers don't slip and slide too much when you slice the cake. You can also cover the cake and refrigerate it for up to one day in advance, before serving.
- Cut the cake into wedges, or, cut it straight across, then cut flat slices (in the same way that a wedding cake is often cut and served).
Notes
 https://curlygirlkitchen.com/
Leave a Reply