
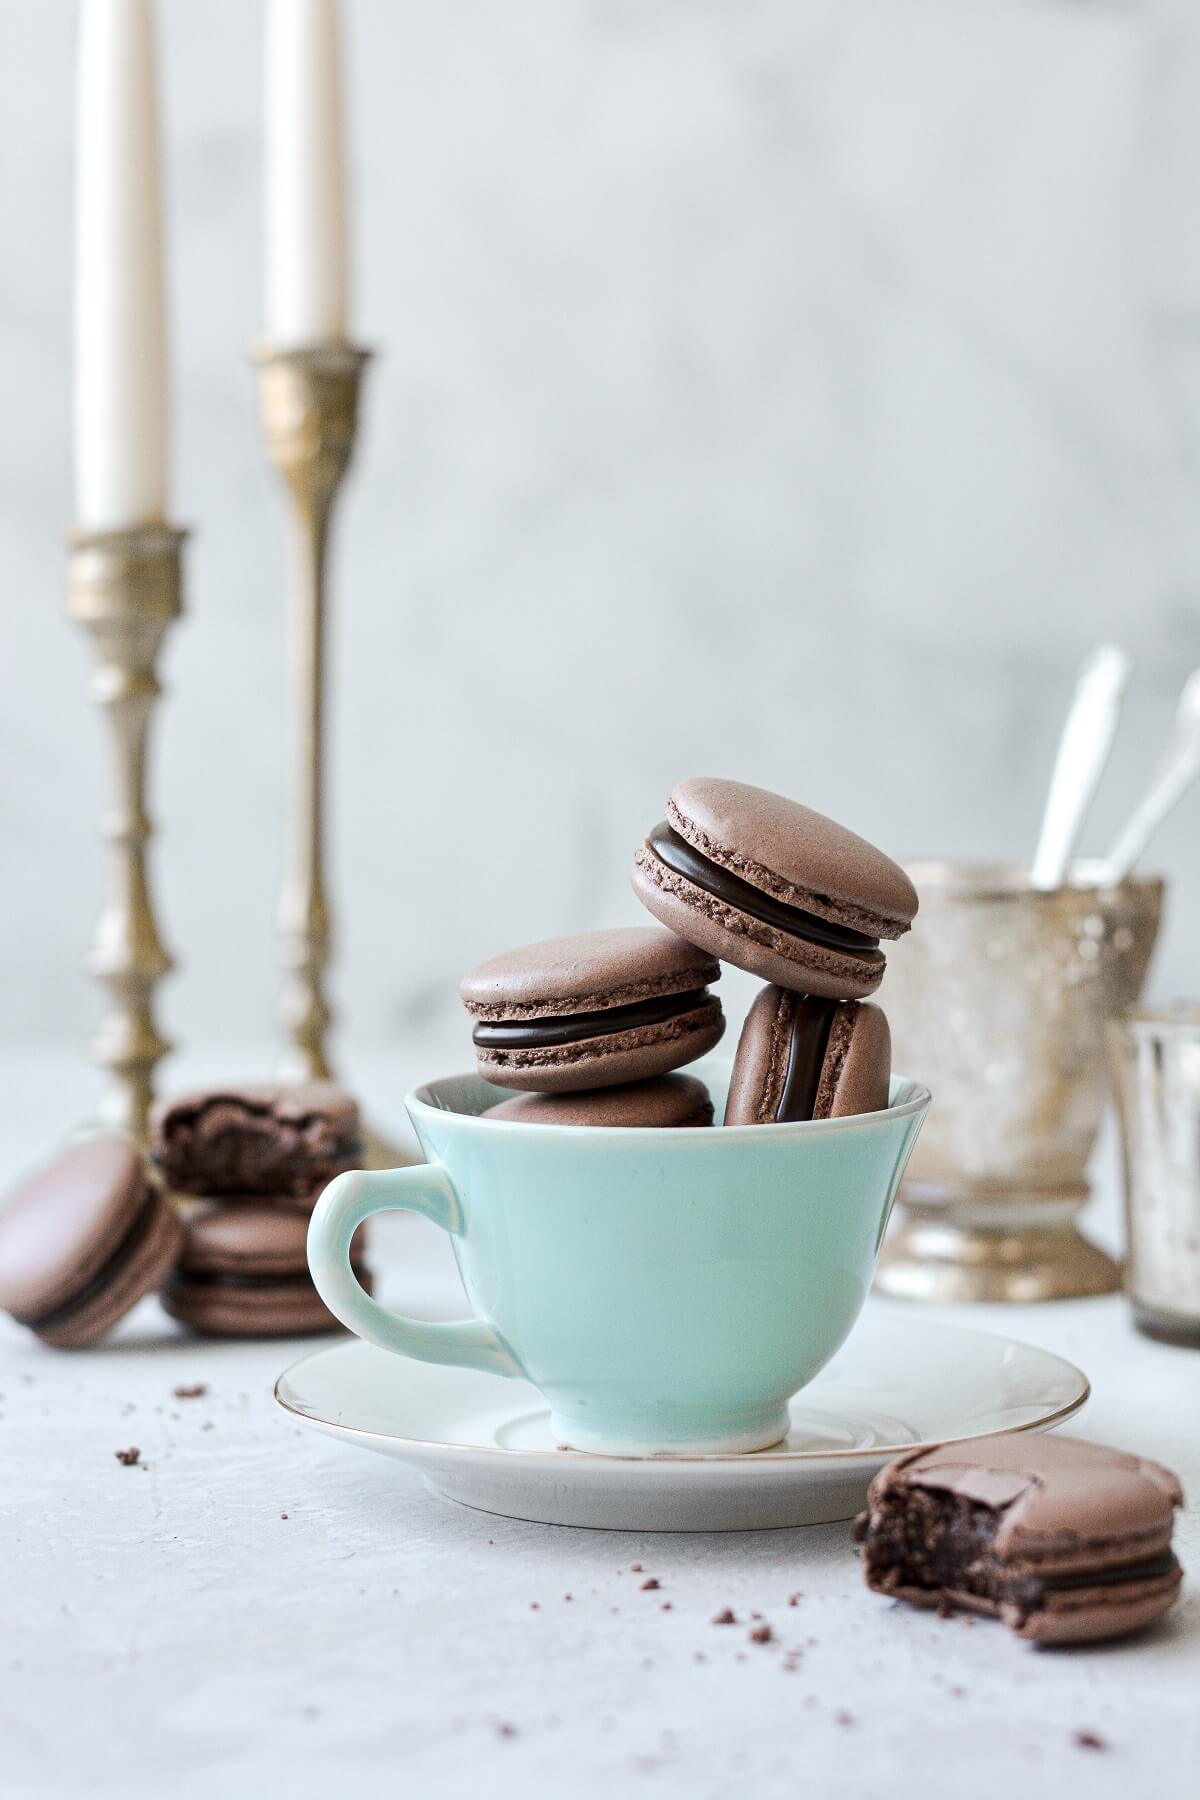
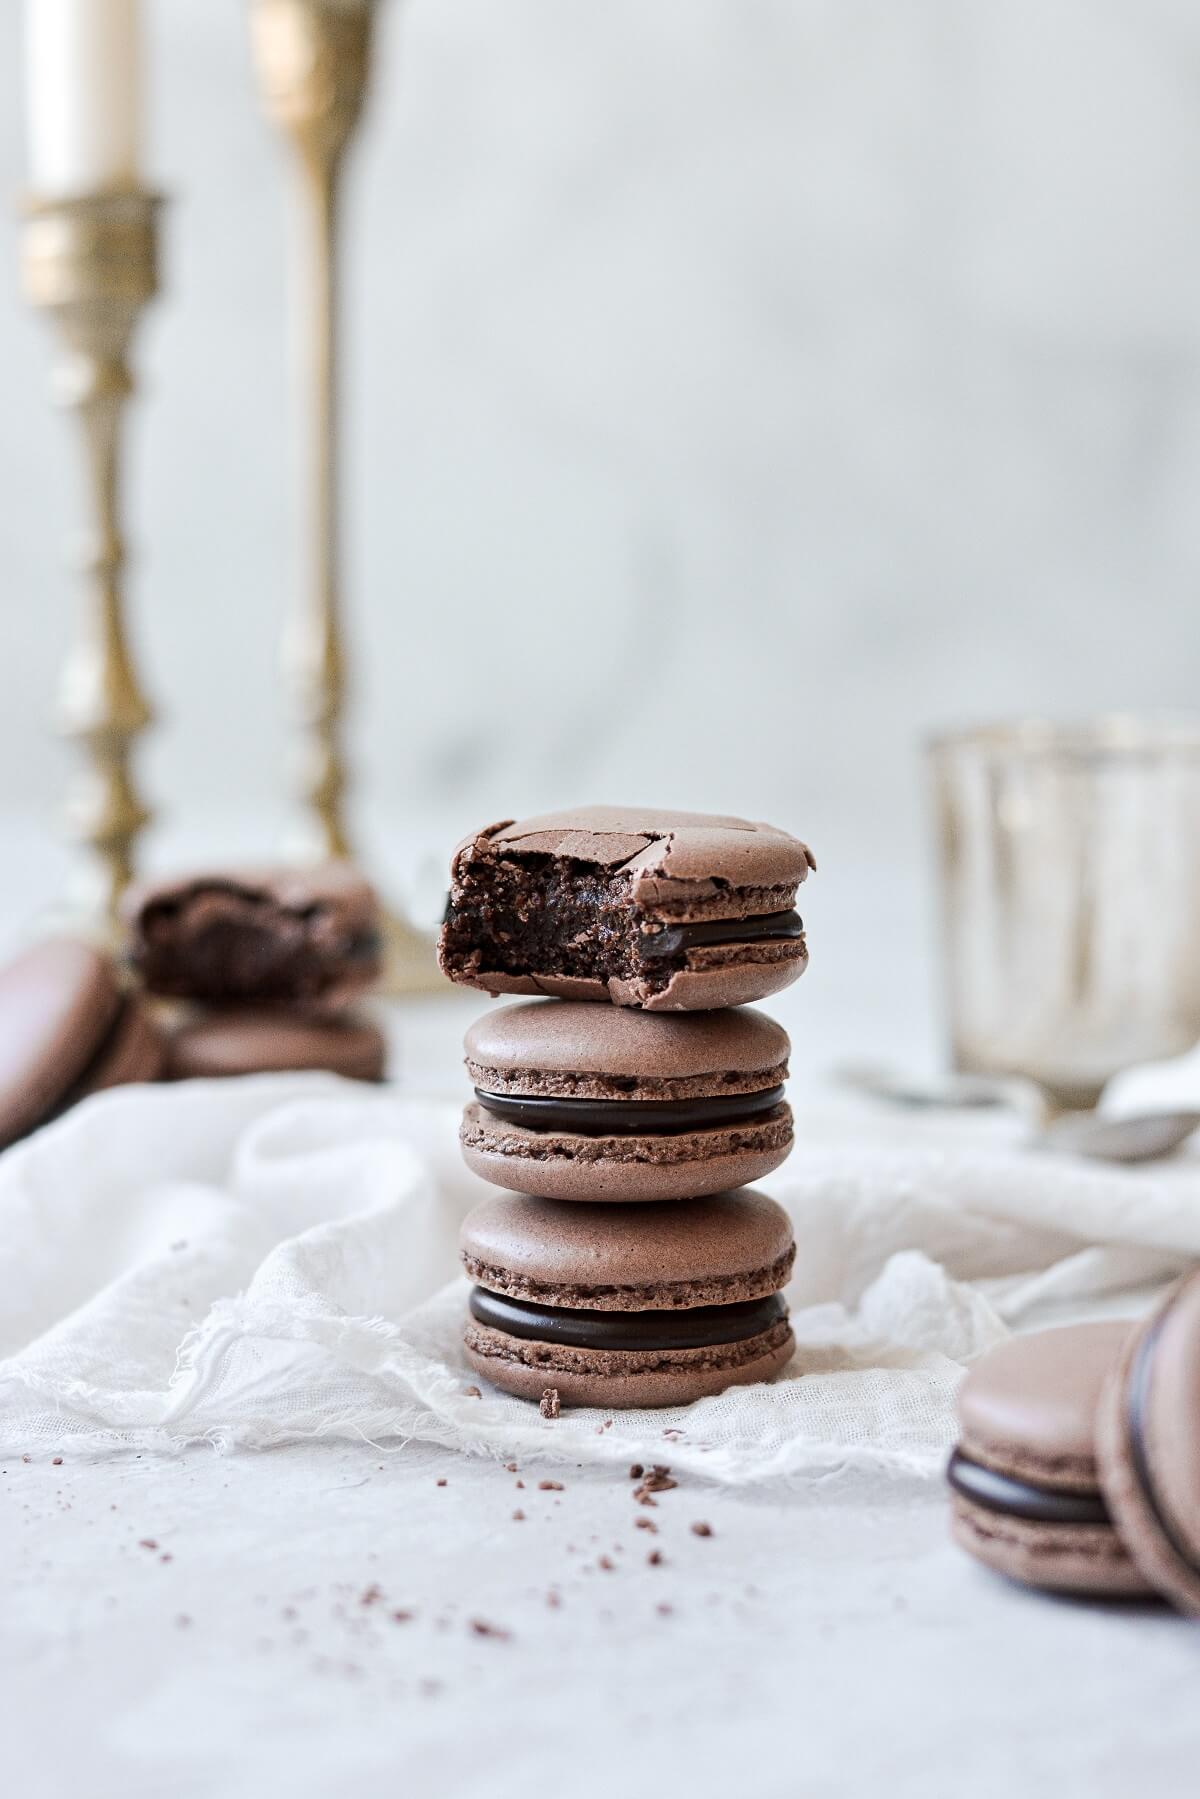
Chocolate macarons are a classic French cookie that have a crisp meringue shell with a chewy center. Dutch-processed cocoa powder gives these macarons a rich chocolate flavor, and I filled the delicate cookies with creamy dark chocolate ganache. French macarons are notoriously finicky cookies to master, and baking them at high altitude adds even more challenges. But with a few best practices and the proper technique of macaronage (mixing and folding the batter), you can make delicious high altitude chocolate macarons in your own kitchen.
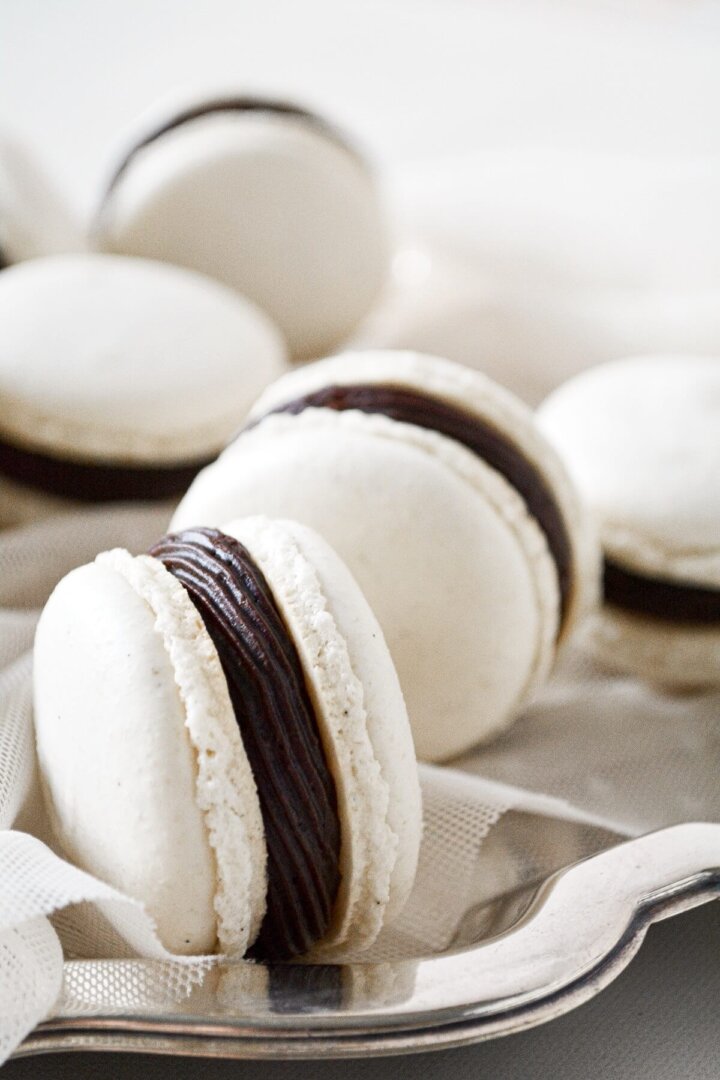
You might also love these vanilla bean French macarons filled with chocolate ganache, chocolate cream pie, and high altitude chocolate cake.
This site contains affiliate links. As an Amazon associate, I earn from qualifying purchases. This means that I may make a small commission if you purchase a product using those links. This in no way affects my opinion of those products and services. All opinions expressed on this site are my own.
Ingredients
Precision is key when it comes to making French macarons. And for that reason, I’ve only included the weights of the ingredients, since volume measurements can vary greatly.
Macarons
- Fine Almond Flour (100 grams)
- Powdered Sugar (100 grams)
- Egg Whites (100 grams / 3 large egg whites)
- Granulated Sugar (100 grams)
- Dutch-processed Cocoa Powder (2 tbsp.)
- Cream of Tartar (1/4 tsp.)
Filling
- Heavy Whipping Cream (3 oz. / 85 grams)
- Good-Quality Dark Chocolate (3 oz. / 85 grams)
See the recipe card at the end of the post for the full ingredients list and instructions.
Equipment
- Food Scale. For weighing the ingredients.
- Mesh Strainer. To sift the almond flour and other dry ingredients.
- Double Boiler (saucepan and metal heatproof bowl). For warming the egg whites and granulated sugar, to dissolve the sugar, before whipping the meringue.
- Stand Mixer with Whisk Attachment. For whipping the meringue.
- Piping Bag + #2A Piping Tip. To pipe the batter.
- Baking Sheet + Parchment Paper or Silicone Macaron Baking Mat Template. Unless you’re an expert at piping macaron batter, you need a template to guide you to pipe your macarons consistently. If you don’t have a silicone macaron baking mat, then simply use something round to trace 1 1/2 inch circles on a sheet of parchment paper. Turn the paper over, so that the markings are underneath, but show through the paper.
Instructions
Mise en Place
- The first task of making macarons is the mise en place, which means set everything up. Organize your tools, weigh your ingredients, and clean your equipment before you begin.
Clean Equipment
- Make sure that the bowl you’ll be using for the double boiler as well as the bowl and whisk attachment for your stand mixer is scrupulously clean. Traces of fat, grease, or even egg yolks in your whites, will prevent your meringue from whipping into stiff peaks. For extra insurance, soak a cotton ball in vinegar and wipe down the bowls and whisk.
Sift the Dry Ingredients
- Use the mesh strainer to sift the almond flour, powdered sugar and cocoa powder into a bowl. Discard any large bits of almond flour that don’t easily pass through the strainer.
Dissolve the Sugar in the Egg Whites over a Double Boiler
- Combine the egg whites and granulated sugar in the bowl you’ll be using for your double boiler.
- Bring a saucepan filled with a few inches of water to a simmer, then place the bowl over the hot water. Heat the mixture gently, whisking together the egg whites and sugar, just until the sugar is dissolved – feel it with your finger to check that it no longer feels gritty.
- This should only take about 2 minutes, and the egg whites shouldn’t get hot. Immediately remove from the heat when the sugar is dissolved. This step helps to create a more stable meringue.
Whip the Meringue to Stiff Peaks
- Pour the egg whites/sugar mixture into the bowl of your stand mixer fitted with the whisk attachment. Whip the egg whites on medium speed (#6 on a Kitchen Aid mixer) until frothy, then add the cream of tartar.
- Continue to whip the meringue, increasing the speed to high (#8) until your meringue forms stiff peaks. This could take 5-10 minutes.
Fold in the Dry Ingredients
- Now remove the bowl from the mixer. Add the vanilla, and 1/3 of your dry ingredients, folding everything together with a spatula until combined. Add the remaining dry ingredients.
- Fold the batter using the correct macaronage technique, making sure to also press the batter against the side of the bowl (to remove excess air and prevent hollow macarons), until the batter is ribbony, flows slowly like lava, and you can drizzle a figure 8. Count 30 seconds to see if the batter starts to disappear into itself after you drizzle the batter into the bowl.
- This video showing how to fold macaron batter in real time is the best demonstration for learning how to master this technique.
Pipe the Macarons
- Once your chocolate macaron batter is the correct consistency, immediately scoop it into your piping bag fitted with a #2A piping tip, or another medium-sized round piping tip.
- Holding the bag perpendicular to the baking sheet, pipe the batter onto your template until it doesn’t quite fill the template, releasing pressure and giving the bag a little swirl to release.
- Depending on how big you pipe your macarons will determine how many you get. I piped about 54 macaron shells, for 27 filled cookies.
Bang the Pan
- Once you’ve piped all the chocolate macarons, lift the pan about 12 inches above the counter, hold it level, and let it drop back onto the counter. Do this about 4-5 times to release any bubbles in the batter.
- If your batter is the correct consistency, any little swirls of batter on top of the macarons should disappear.
Rest and Dry the Macarons
- Set the pan out of the way and let the macarons rest for 30 minutes. You want the surface of the batter to dry a little and form a skin, so that when you gently touch it, it doesn’t stick to your finger.
- Avoid washing dishes in hot water (which creates a steamy, humid kitchen) while making macarons. Also, don’t use a fan to dry them, which can make them lopsided. If your kitchen is humid, turn on the range hood fan over your stove, or use a dehumidifier.
Bake and Cool
- Preheat the oven to 300. Bake the macarons on the center oven rack (1 pan at a time) for about 15 minutes, rotating the pan halfway through. The macarons are done when you touch one and the top of the shell doesn’t jiggle from the “feet”.
- Cool on the pan for 5 minutes, then transfer to a cooling rack to cool completely before filling.
Make the Chocolate Ganache
- Pour the cream into a saucepan and warm gently over medium heat, just until it begins to simmer around the edges. Remove from the heat and stir in the chopped chocolate until smooth, silky and shiny.
- Pour the ganache into a bowl, and let it sit at room temperature until cooled and thickened enough to fill your macarons.
- It might take about an hour to thicken. Stir the ganache to check the consistency. If it’s so thin that drizzles of ganache immediately disappear into the bowl, it’s too thin, and will run right off your macarons. If it’s thickened enough that it starts to hold its shape when you drizzle it into the bowl, then it’s ready.
Fill the Macarons
- Match up all your macarons into pairs by size, and turn one of each pair over.
- Use a spoon to spoon about 1 – 1 1/2 teaspoons of ganache onto the bottoms of half the macarons, letting it spread out almost to the edge. Don’t immediately place the top macaron on the ganache, or it might slide off. Spoon ganache onto all the bottoms first, and then go back and gently place the top macaron on the ganache, pressing down gently.
- Place the filled chocolate macarons into an airtight container and refrigerate to firm up the ganache.
- Keep refrigerated for up to 2 weeks, or freeze for 3-6 months.
Tips for Making Perfect Macarons
- Let your egg whites “age” a bit by separating the yolks from the whites and storing the whites in a sealed jar in the refrigerator for a day or two. This step will dehydrate the whites a little, allowing for a better stiff meringue.
- Unlike every other recipe on my site which uses American volume measurements, I’ve only included weights for the ingredients in this recipe. This is because precision is crucial to the success of macarons.
- Be sure to sift the almond flour and powdered sugar through a mesh sieve to ensure it’s lump-free. If you don’t, you could end up with lumps in your batter, which don’t make for a pretty macaron.
- Watch the consistency of your batter carefully after you mix the almond flour and powdered sugar into your meringue. Do not under-mix or over-mix; the consistency should be very viscous, like slowly-flowing lava.
- After piping your macarons, do not skip the step of banging your pan several times on the counter to pop the air bubbles. Not just a gentle tap; give it a hard bang. Then let them dry at room temperature for 30 minutes before baking.
- Once the cookies are baked, cooled and filled, they should be stored in the refrigerator. Cold from the fridge, they’re wonderfully soft and chewy. They can even be made in advance and frozen for later.
Be sure to read all of my BAKING FAQs where I discuss ingredients, substitutions and common baking questions, so that you can be successful in your own baking!
Frequently Asked Questions
What is macaronage?
- Macaronage is the French term for the proper method of mixing and folding macaron batter, to prepare it for piping. This video showing how to fold macaron batter in real time is the best demonstration for learning how to master this technique. I highly encourage you to watch this video. You will not be successful at making macarons without learning this technique.
What if my macarons are always a disaster?
- I’ll be honest, it’s highly unlikely that you’ll make perfect macarons on your first try. And probably not even your second or third try. There are so many factors that affect the outcome of these finicky cookies, and it takes practice to understand what the batter should look like before piping your macarons. Don’t be discouraged, though. Keep practicing, and you’ll get there!
Why is there only 2 tablespoons of cocoa powder in this recipe?
- The acidity and fat in cocoa powder affects the chemistry of the macaron batter, and too much cocoa powder will ruin the cookies.
What’s the best cocoa powder to use for making macarons?
- You should use a good-quality Dutch processed cocoa powder. I used Drost cocoa powder, which has a rich, deep chocolate flavor and a beautiful fine texture.
Should I grind the almond flour more finely in a food processor?
- If you’re using fine almond flour, there’s no reason to grind it further. And while some recipes recommend it, there is also discussion that doing so releases too much of the oil in the almond flour, affecting the outcome of the macarons. I love this almond flour.
Do I need to use the cream of tartar?
- Cream of tartar adds stability to meringue, making it easier to whip the meringue to stiff peaks. If your meringue isn’t stiff, or has a weak structure, it will affect the outcome of your macarons.
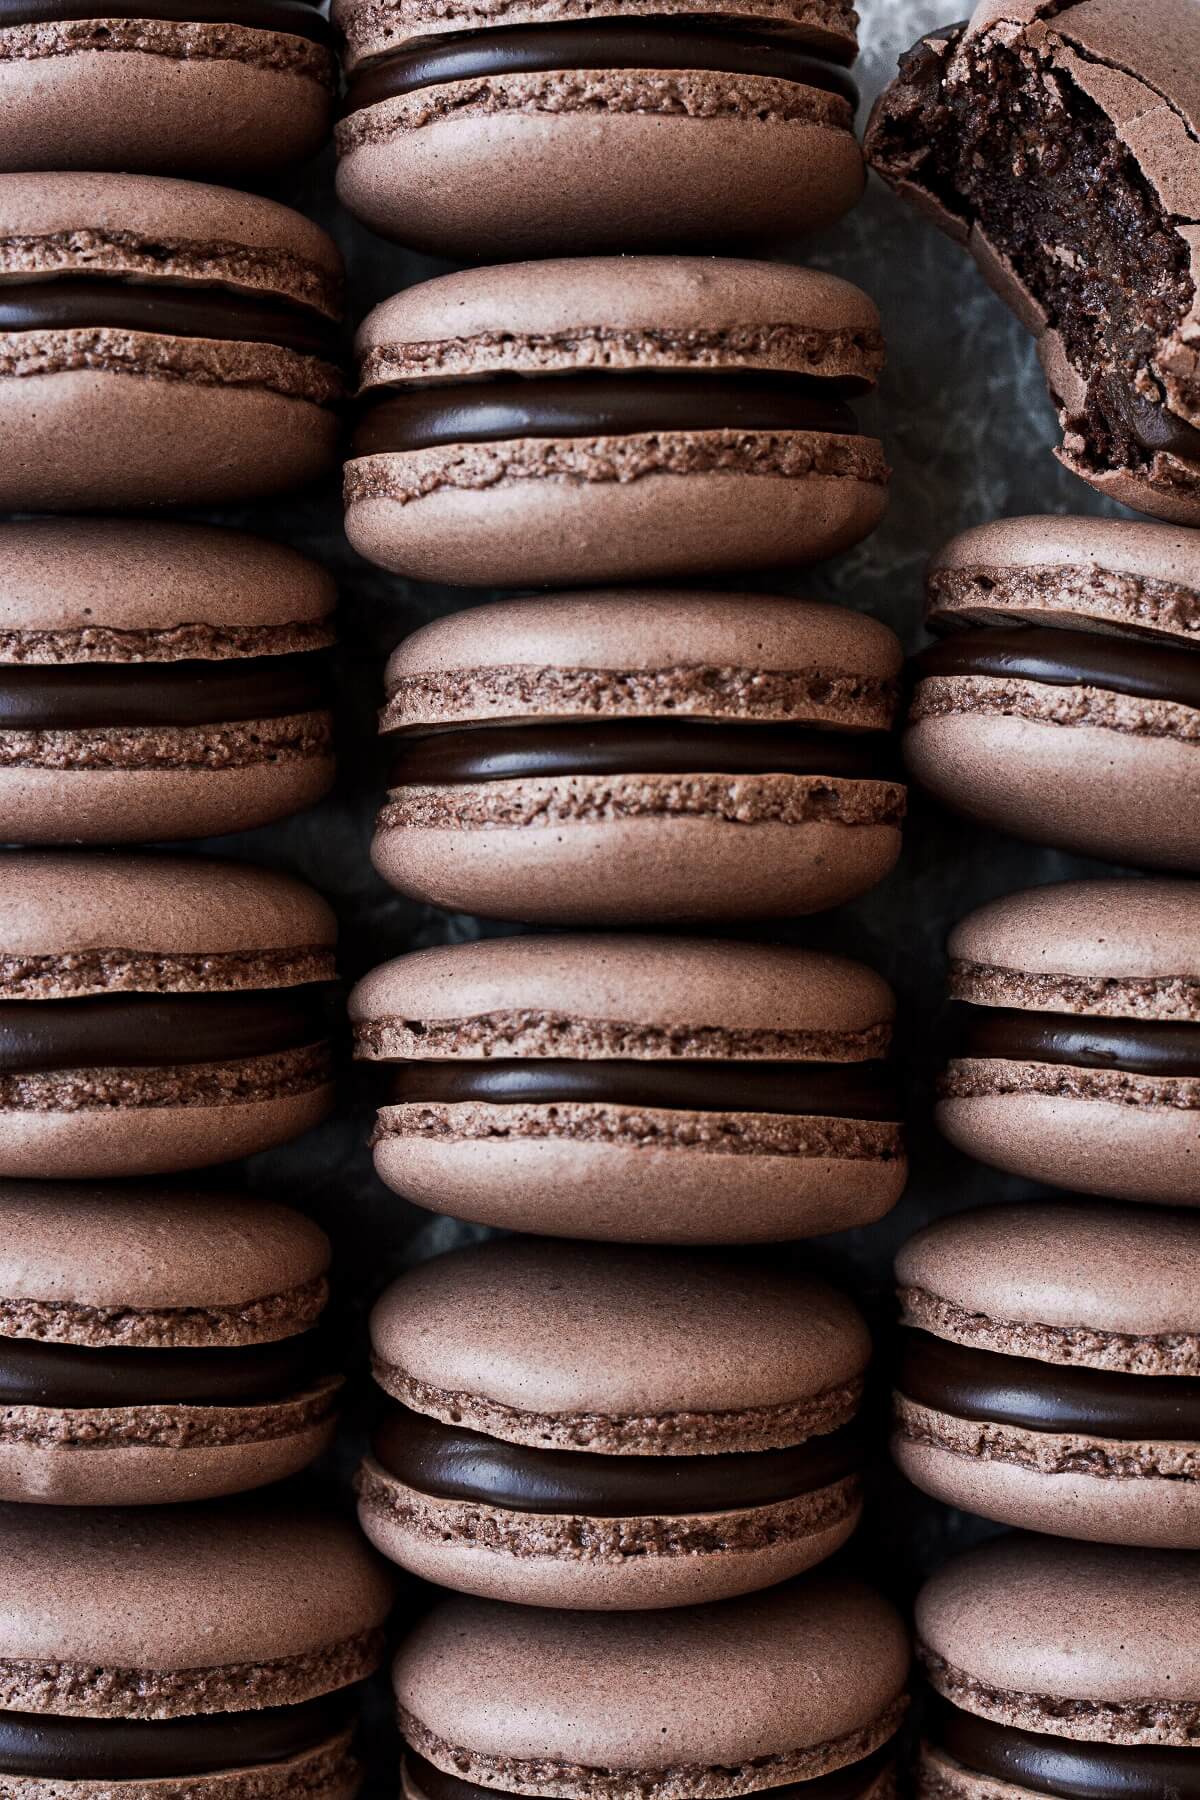
Should macarons be soft or crunchy?
- When baked correctly, the outer shell of a baked macaron will be crisp and smooth, but inside it should be moist and chewy. It should not be hollow. They should have ruffly “feet” around the bottom edge of the cookie.
- After the cookies “age” in the refrigerator for a day, they will be very soft and chewy as the shell absorbs moisture from the filling.
How should I store leftover macarons?
- French macarons can dry out and become stale quickly if stored at room temperature. You should keep the chocolate macarons in an airtight container in the refrigerator for up to 3 days, or freeze them for 3-6 months.
Do you have a vanilla macarons recipe?
- Yes, you can find my vanilla bean macaron recipe here.
You Might Also Like

Please check out my Amazon Shop for a curated collection of some of my favorite cake pans from trusted brands, baking tools, ingredients, pretty things and fashion finds. I recommend products that I buy and use every day!
Did you love today’s recipe? Please rate the recipe and let me know in the comments what you thought! Also, be sure to follow Curly Girl Kitchen on Instagram, and tag me when you try one of my recipes so I can see all your delicious creations!

High Altitude Chocolate Macarons
All recipes on Curly Girl Kitchen are developed for high altitude at 5,280 feet. See FAQs for adjusting to higher or lower elevations.

Equipment
- Stand Mixer with Whisk Attachment
- Food Scale
- Double Boiler (saucepan and metal heatproof bowl)
- Piping Bag + #2A Piping Tip
- Mesh Strainer
- Baking Sheet + Parchment Paper or Silicone Macaron Baking Mat Template
Ingredients
Chocolate Macarons
- 100 grams fine almond flour
- 100 grams powdered sugar
- 2 tbsp unsweetened, dark, Dutch-processed cocoa powder
- 100 grams egg whites (about 3 large egg whites), aged
- 100 grams granulated sugar
- ¼ tsp cream of tartar
- 1 ½ tsp vanilla extract
Chocolate Ganache
- 3 oz (85g) heavy whipping cream
- 3 oz (85g) good-quality dark chocolate, finely chopped
Instructions
Macarons
- Mise en PlaceThe first task of making macarons is the mise en place, which means set everything up. Organize your tools, weigh your ingredients, and clean your equipment before you begin.
- Clean EquipmentMake sure that the bowl you'll be using for the double boiler as well as the bowl and whisk attachment for your stand mixer is scrupulously clean. Traces of fat, grease, or even egg yolks in your whites, will prevent your meringue from whipping into stiff peaks. For extra insurance, soak a cotton ball in vinegar and wipe down the bowls and whisk.
- Sift the Dry IngredientsUse the mesh strainer to sift the almond flour, powdered sugar and cocoa powder into a bowl. Discard any large bits of almond flour that don't easily pass through the strainer.
- Dissolve the Sugar in the Egg Whites over a Double BoilerCombine the egg whites and granulated sugar in the bowl you'll be using for your double boiler. Bring a saucepan filled with a few inches of water to a simmer, then place the bowl over the hot water. Heat the mixture gently, whisking together the egg whites and sugar, just until the sugar is dissolved – feel it with your finger to check that it no longer feels gritty. This should only take about 2 minutes, and the egg whites shouldn't get hot. Immediately remove from the heat. This step helps to create a more stable meringue.
- Whip the Meringue to Stiff PeaksPour the egg whites/sugar mixture into the bowl of your stand mixer fitted with the whisk attachment. Whip the egg whites on medium speed (#6 on a Kitchen Aid mixer) until frothy, then add the cream of tartar. Continue to whip the meringue, increasing the speed to high (#8) until your meringue forms stiff peaks. This could take 5-10 minutes.
- Fold in the Dry IngredientsNow remove the bowl from the mixer. Add the vanilla, and 1/3 of your dry ingredients, folding everything together with a spatula until combined. Add the remaining dry ingredients.Continue to fold the batter using the correct macaronage technique, making sure to also press the batter against the side of the bowl (to remove excess air and prevent hollow macarons), until the batter is ribbony, flows slowly like lava, and you can drizzle a figure 8. Count 30 seconds to see if the batter starts to disappear into itself after you drizzle the batter into the bowl.This video showing how to fold macaron batter in real time is the best demonstration for learning how to master this technique.
- Pipe the MacaronsOnce your macaron batter is the correct consistency, immediately scoop it into your piping bag fitted with a #2A piping tip, or another medium-sized round piping tip.Holding the bag perpendicular to the baking sheet, pipe the batter onto your template until it doesn't quite fill the template, releasing pressure and giving the bag a little swirl to release.Depending on how big you pipe your macarons will determine how many you get. I piped about 54 macaron shells, for 27 filled cookies.
- Bang the PanOnce you've piped all the macarons, lift the pan about 12 inches above the counter, hold it level, and let it drop back onto the counter. Do this about 4-5 times to release any bubbles in the batter.If your batter is the correct consistency, any little swirls of batter on top of the macarons should disappear.
- Rest and Dry the MacaronsSet the pan out of the way and let the macarons rest for 30 minutes. You want the surface of the batter to dry a little and form a skin, so that when you gently touch it, it doesn't stick to your finger.Avoid washing dishes in hot water (which creates a steamy, humid kitchen) while making macarons. Also, don't use a fan to dry them, which can make them lopsided. If your kitchen is humid, turn on the range hood fan over your stove, or use a dehumidifier.
- Bake and CoolPreheat the oven to 300. Bake the macarons on the center oven rack (1 pan at a time) for about 15 minutes, rotating the pan halfway through. The macarons are done when you touch one and the top of the shell doesn't jiggle from the "feet".Cool on the pan for 5 minutes, then transfer to a cooling rack to cool completely before filling.
Ganache
- Pour the cream into a saucepan and warm gently over medium heat, just until it begins to simmer around the edges. Remove from the heat and stir in the chopped chocolate until smooth, silky and shiny.
- Pour the ganache into a bowl, and let it sit at room temperature until cooled and thickened enough to fill your macarons.It might take about an hour to thicken. Stir the ganache to check the consistency. If it's so thin that drizzles of ganache immediately disappear into the bowl, it's too thin, and will run right off your macarons. If it's thickened enough that it starts to hold its shape when you drizzle it into the bowl, then it's ready.
- Match up all your macarons into pairs by size, and turn one of each pair over.
- Use a spoon to spoon about 1 – 1 1/2 teaspoons of ganache onto the bottoms of half the macarons, letting it spread out almost to the edge. Don't immediately place the top macaron on the ganache, or it might slide off. Spoon ganache onto all the bottoms first, and then go back and gently place the top macaron on the ganache, pressing down gently.
- Place the filled macarons into an airtight container and refrigerate to firm up the ganache.
- Keep refrigerated for up to 2 weeks, or freeze for 3-6 months.
 https://curlygirlkitchen.com/
Fabulous recipe top to bottom – thank you a million times over for your thoughtful guide.
We did not have heavy cream for the ganache but I made some hazelnutbutter buttercream frosting to smash in the middle and ohhhhhh my gosh I’ve never felt more accomplished.
Just moved from sea level to high altitude and am so so happy to have found your site. From one curly girl to another~ much love!
Thanks so much for your nice comment, Ashley!
I see both your recipes for these–the vanilla (with paste) and the chocolate (with cocoa) . I was hoping to use the base of these for some other flavors–for instance, a “plain” one to make salted caramel buttercream. Do I have to replace the volume of the vanilla paste or the cocoa to do that? Or would the proportions work by just eliminating them?
Leaving out the vanilla bean paste, or just replacing it would vanilla extract or another flavor extract instead, should not affect the recipe at all.
Thank you so much for this recipe! It’s the first time that I’ve ever made macarons successfully, and they were amazing.
Hi Heather!
I tried your vanilla bean macaron recipe a few weeks ago, and the macarons were delicious! At the time, your site had a recipe for pistachio macarons, but I can’t find it. Could you please send the link? Also, you had a really helpful video with instructions for making three different macaron flavors. Could you send the link for this also?
Thanks SO much!
-Barb
Barb, you must be thinking of another site. I’ve never made pistachio macarons or the video you’re referencing.
Hi! So first, these are incredible! I made some after a failed batch of a different recipe the day before and these are better!
So I have a question, when I baked them the foot didn’t stay, it puffed up and then a few seconds later it spilled. Does that make sense? I was wondering if you have any ideas to help with that! Thanks! 😊
Did this happen after you took them out of the oven? If so, it sounds like they were a little under-baked.
It happened when they were still in the oven unfortunately, I’m going to try again in a few days! Overall I loved this recipe and I can’t wait to try your other recipes!
I I have tried so many macaron recipes and these are by far the most successful I have ever made! A friend who spent the summer in Paris said they were better than any they had there. Thank you! Have you ever made a red velvet one? I’m nervous to add food coloring to the batter if it will get too runny.