
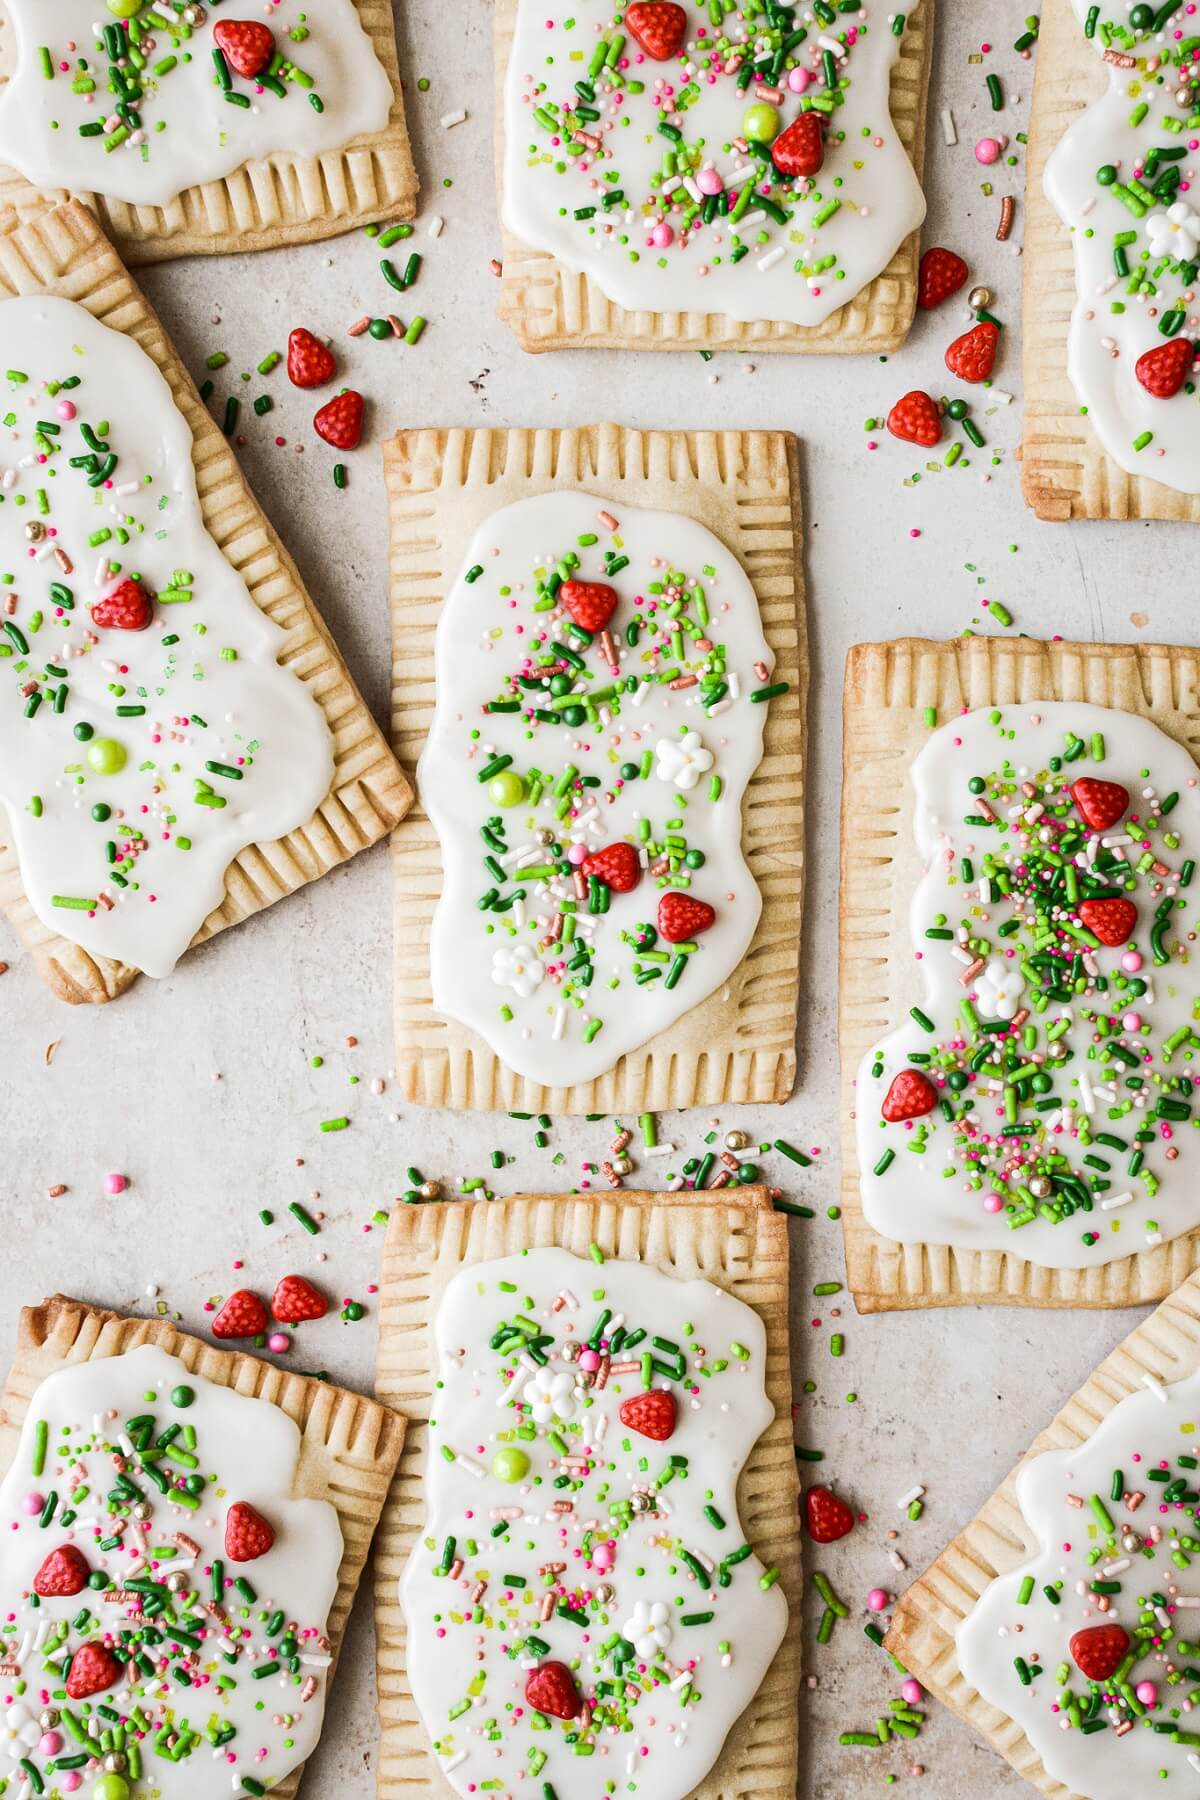
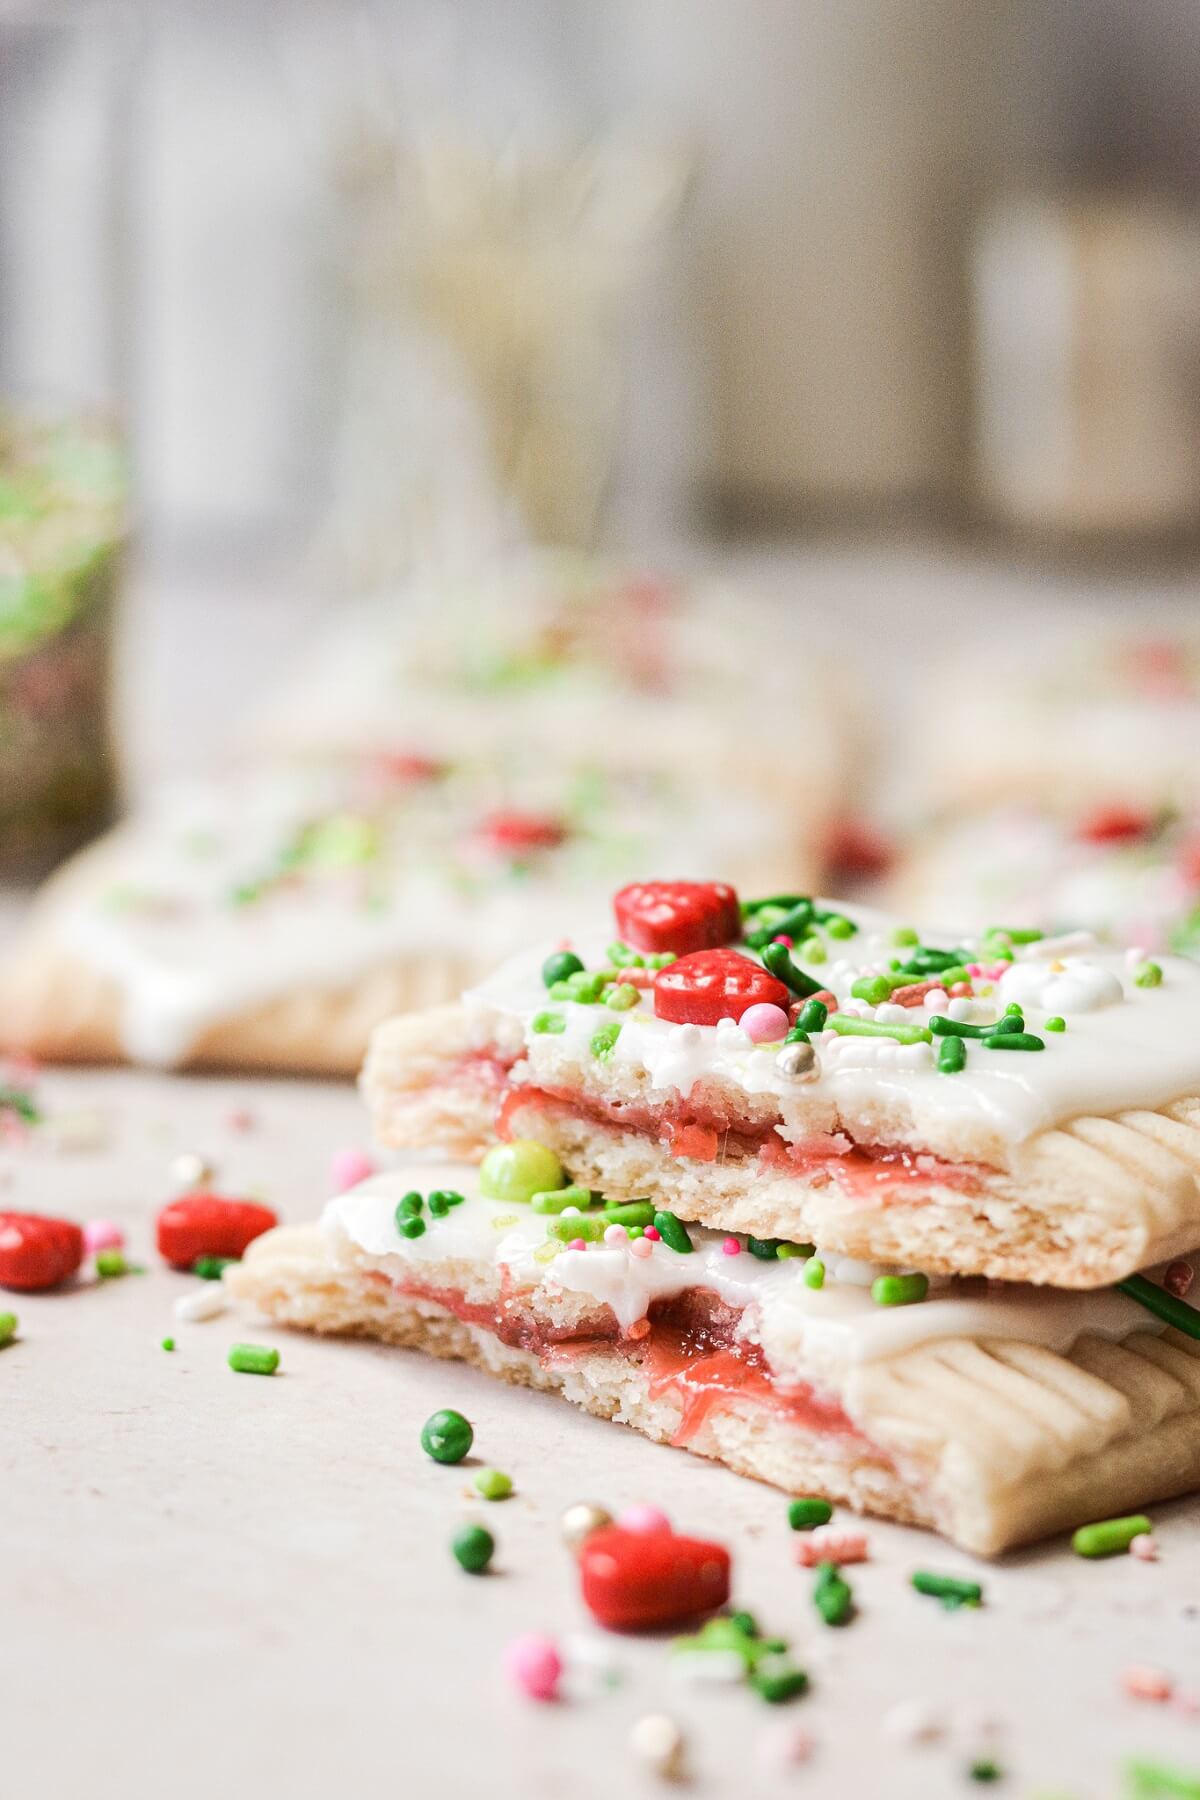
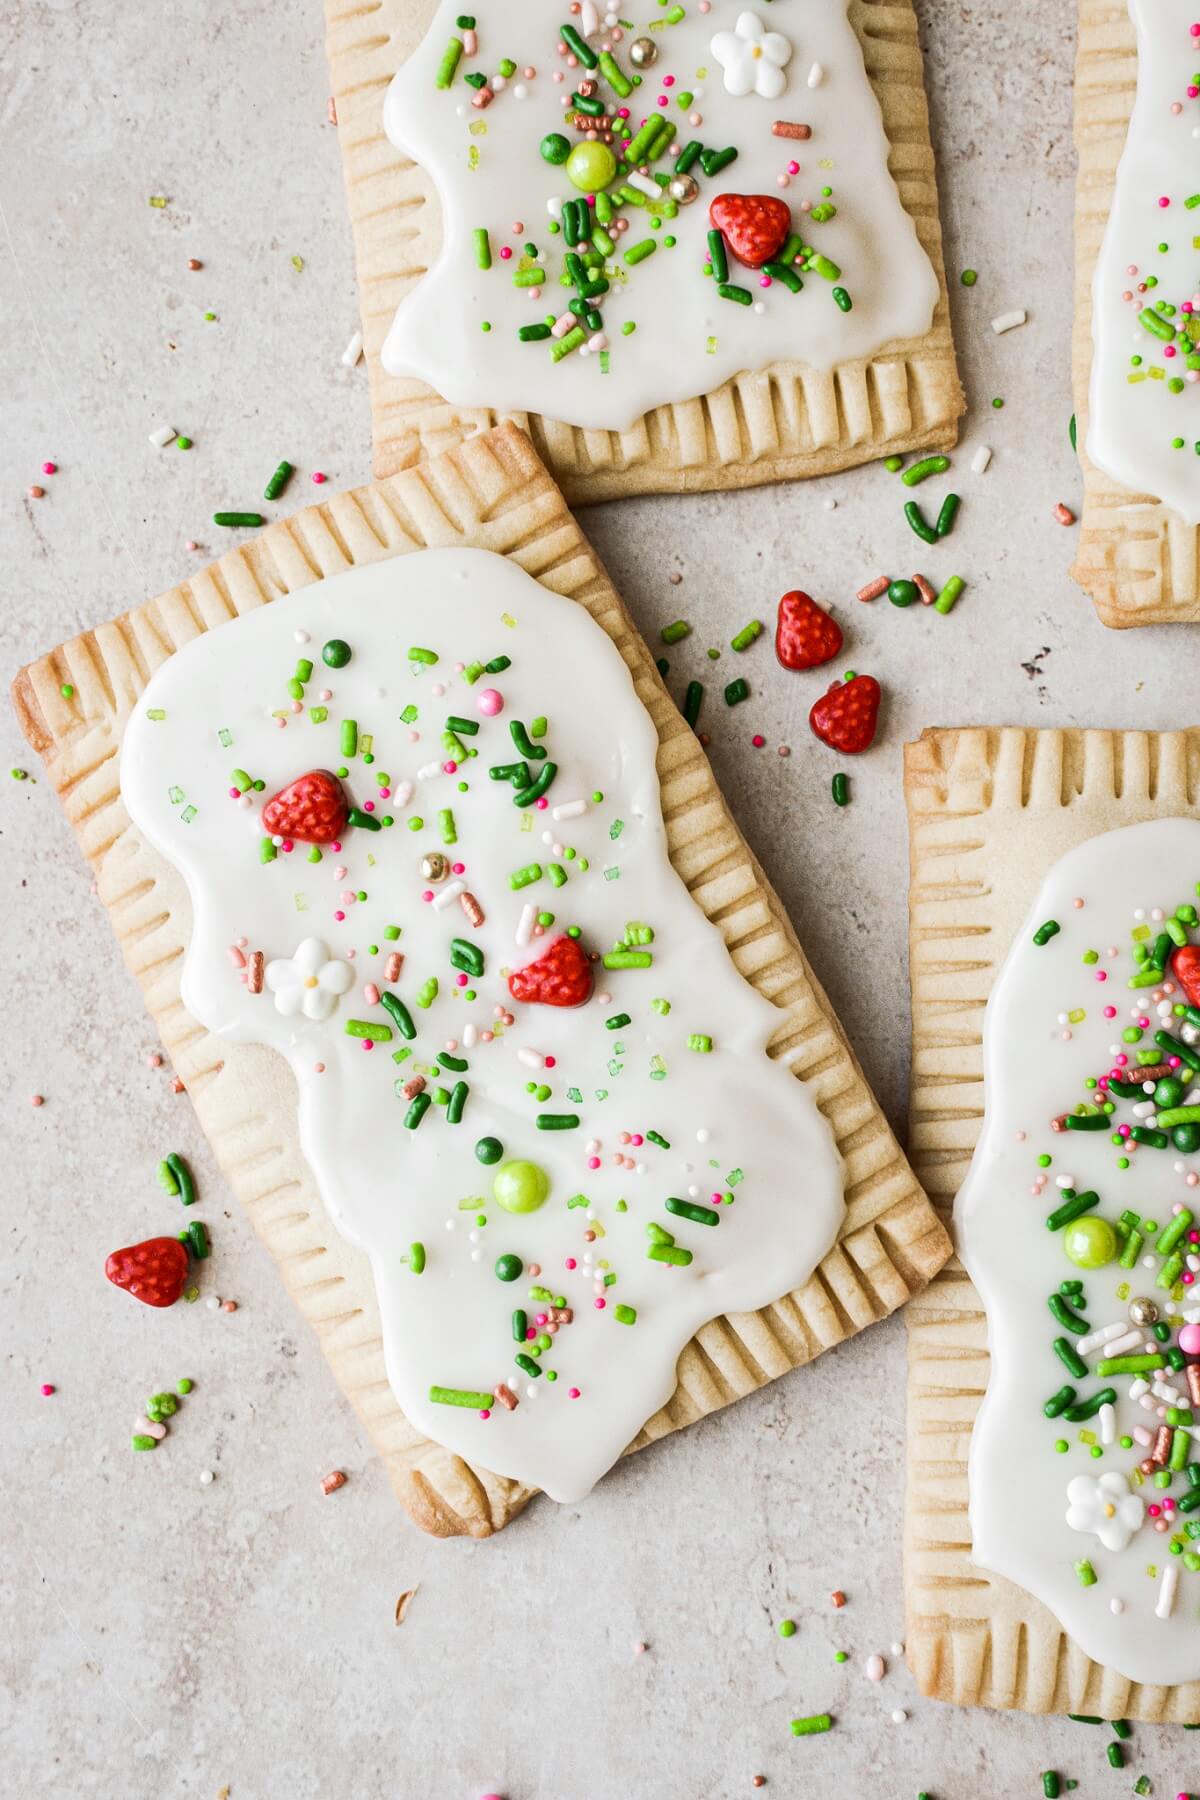
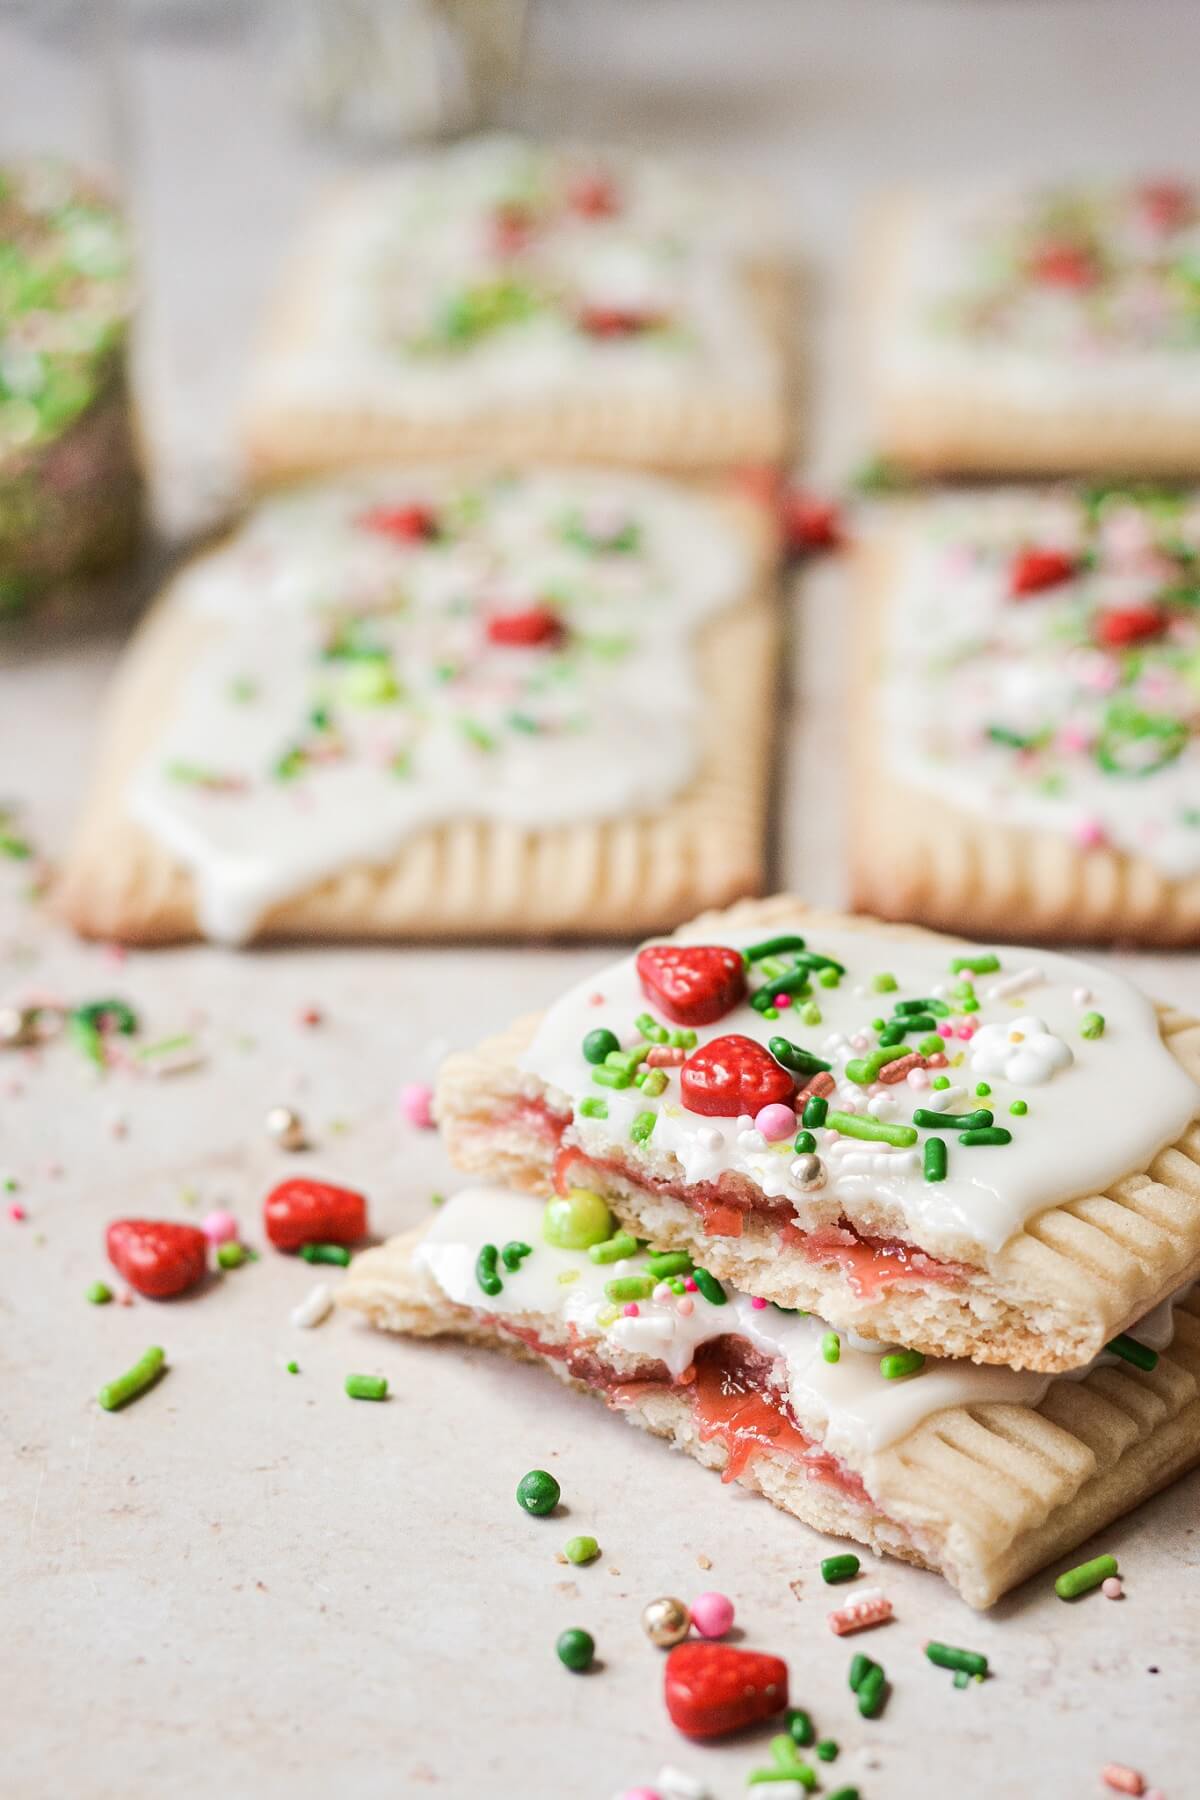
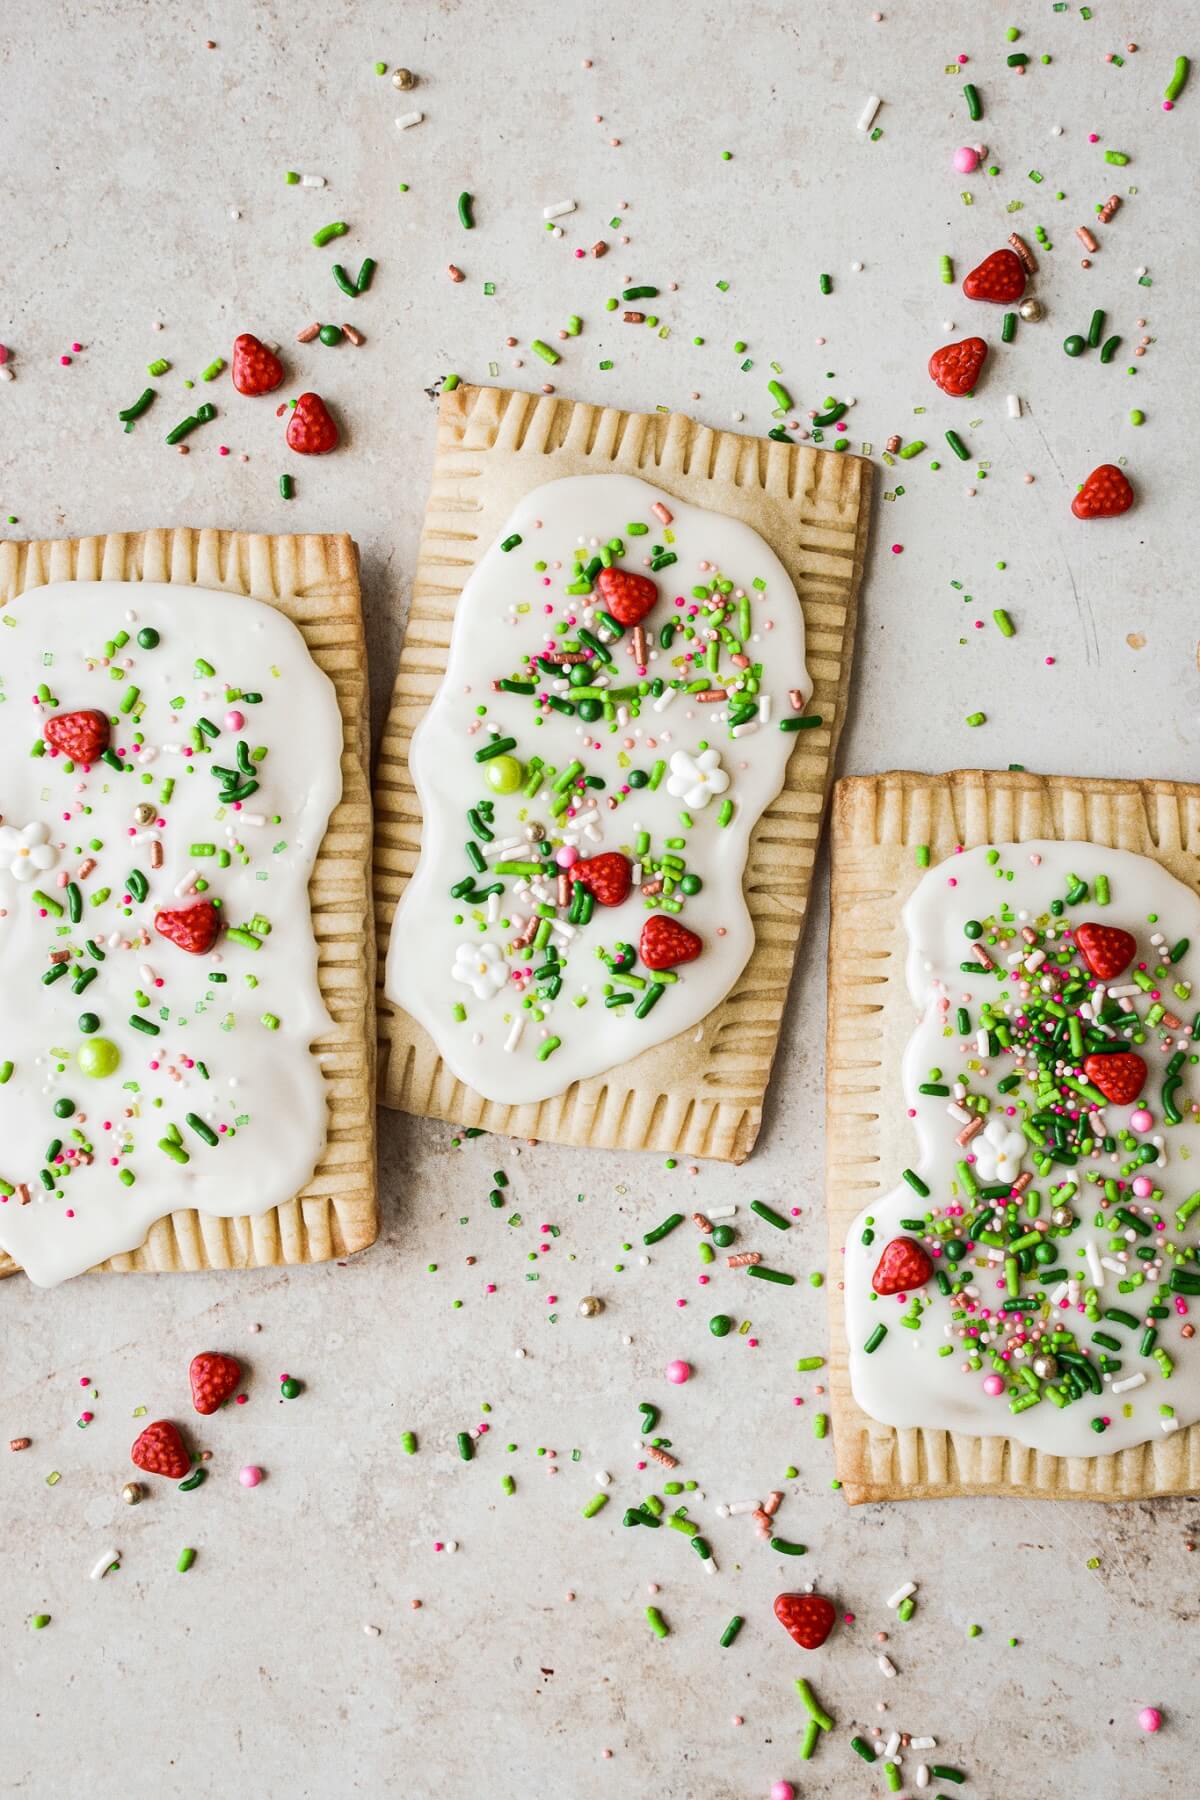
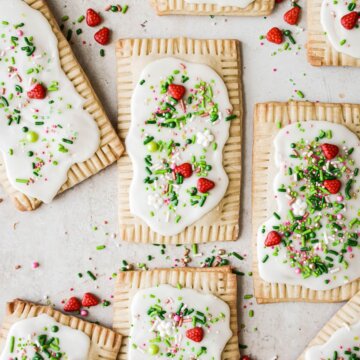
Homemade strawberry pop tarts with vanilla icing and sprinkles, that taste just like store bought pop tarts but better! The crust is a sugar cookie base that’s soft, buttery and crumbly, filled with strawberry jam. Then sweet vanilla icing is topped with the cutest strawberry sprinkle mix you’ve ever seen. If you want a copycat pop tarts recipe that’s even better than the original, you’ll love today’s strawberry pop tarts made from scratch.
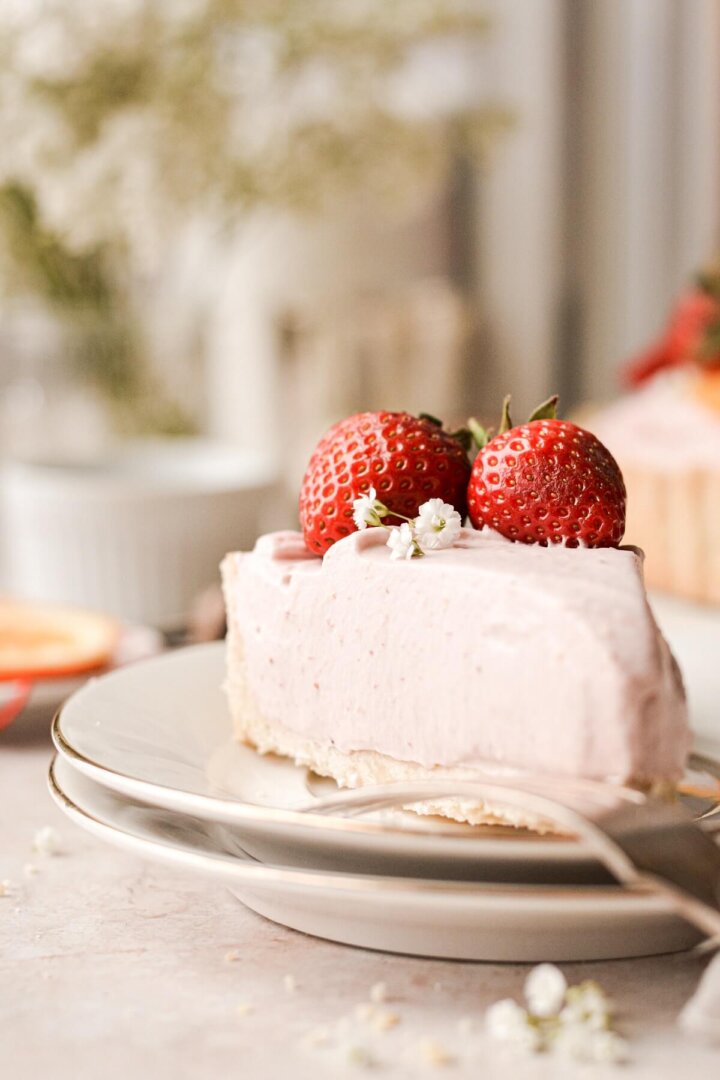
You might also love these strawberry rolls with cream cheese frosting, blueberry buckle coffee cake, and strawberry shortcake layer cake.
This site contains affiliate links. As an Amazon associate, I earn from qualifying purchases. This means that I may make a small commission if you purchase a product using those links. This in no way affects my opinion of those products and services. All opinions expressed on this site are my own.
Why You’ll Love This Recipe
Better Than Store Bought. If you grew up eating pop tarts most mornings for breakfast, then you’ll love my copycat version of strawberry pop tarts. Many pop tart recipes use pie dough for the crust, which makes a great breakfast pastry, but it’s more like a flaky toaster strudel or hand pie than a traditional pop tart. (And if that’s what you’re looking for, then please check out my flaky homemade cherry pop tarts recipe.) But by using my sugar cookie dough recipe, the crust is just like a store bought pop tart, but softer, more tender, more buttery, and just so much tastier.
Versatile for Any Flavor. Instead of strawberry jam for the filling, you can use absolutely any flavor of jam you like. Blueberry, peach, cherry or raspberry would all be great. You could even try lemon curd or Nutella.
Assemble at Night, Bake in the Morning. Although these are pretty easy to make, you will need a little time to make, chill and roll out the dough before assembling and baking your pop tarts. If you like, you can assemble them at night, then just bake them in the morning. Who wouldn’t love a freshly baked strawberry pop tart for a special breakfast!
High Altitude Tested. I develop all the recipes on my site for Denver’s altitude of 5,280 feet. If you’re at a lower or higher elevation, please see my FAQs for guidance on adjusting recipes for your altitude.
See the recipe card at the end of the post for the full ingredients list and instructions.
Ingredients
Crust
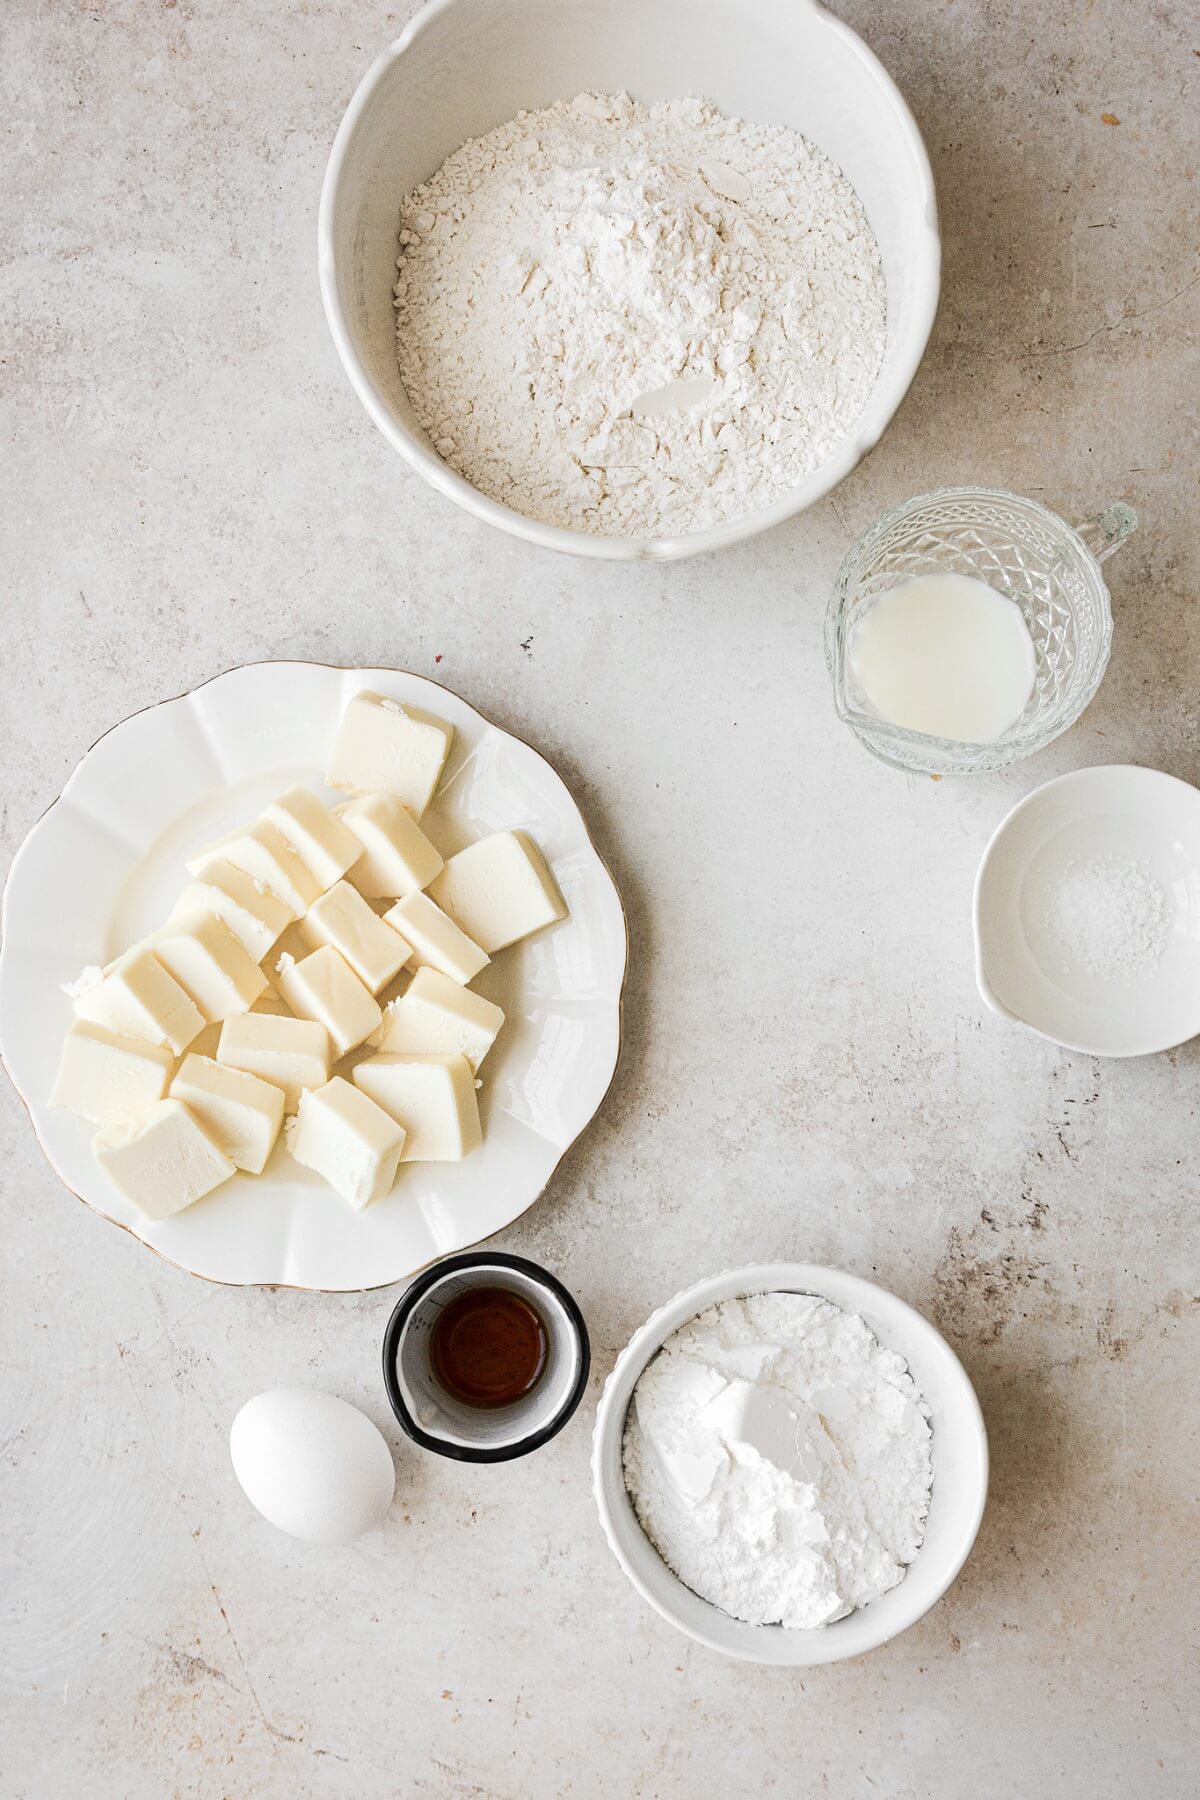
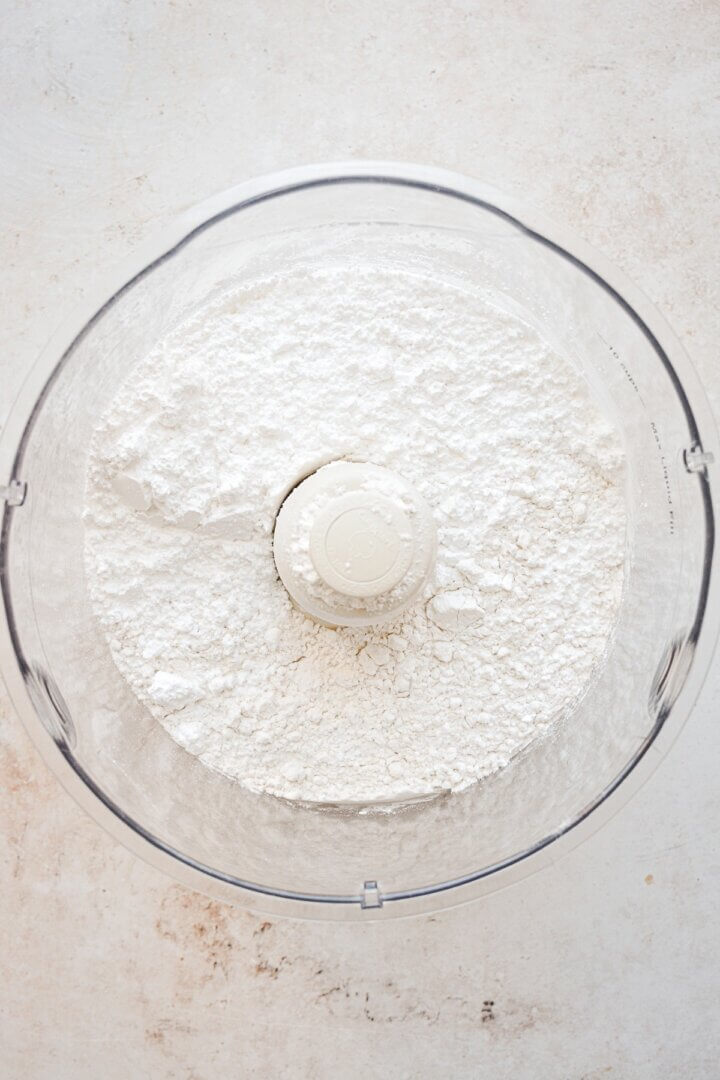
- All-Purpose Flour. Provides structure and strength to the cookie dough.
- Powdered Sugar. Sweetens the cookies, while the fine texture of the powdered sugar makes a softer crust than granulated sugar.
- Salt. Coarse Kosher salt balances the sweetness.
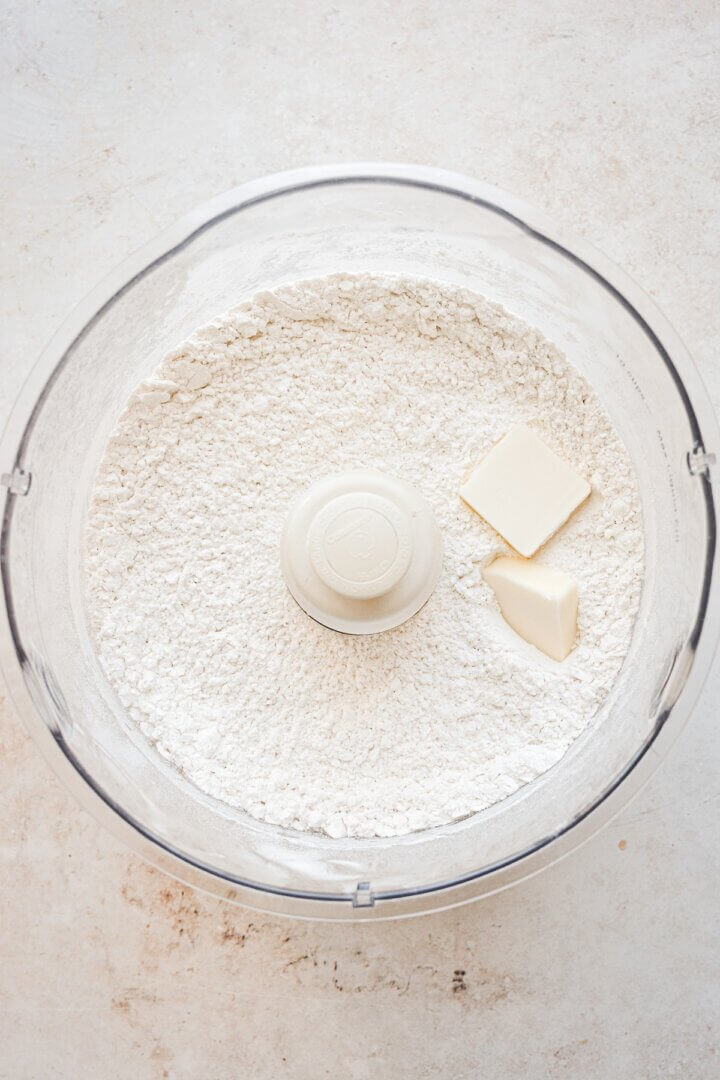
- Unsalted Butter. Adds flavor, moisture, richness and fat. As the water in the butter evaporates, the steam creates tiny flaky layers for a very tender cookie crust.
- Vanilla Extract. Flavor.
- Milk + Egg Yolk. Adds moisture and binds the dough together.
Filling & Icing
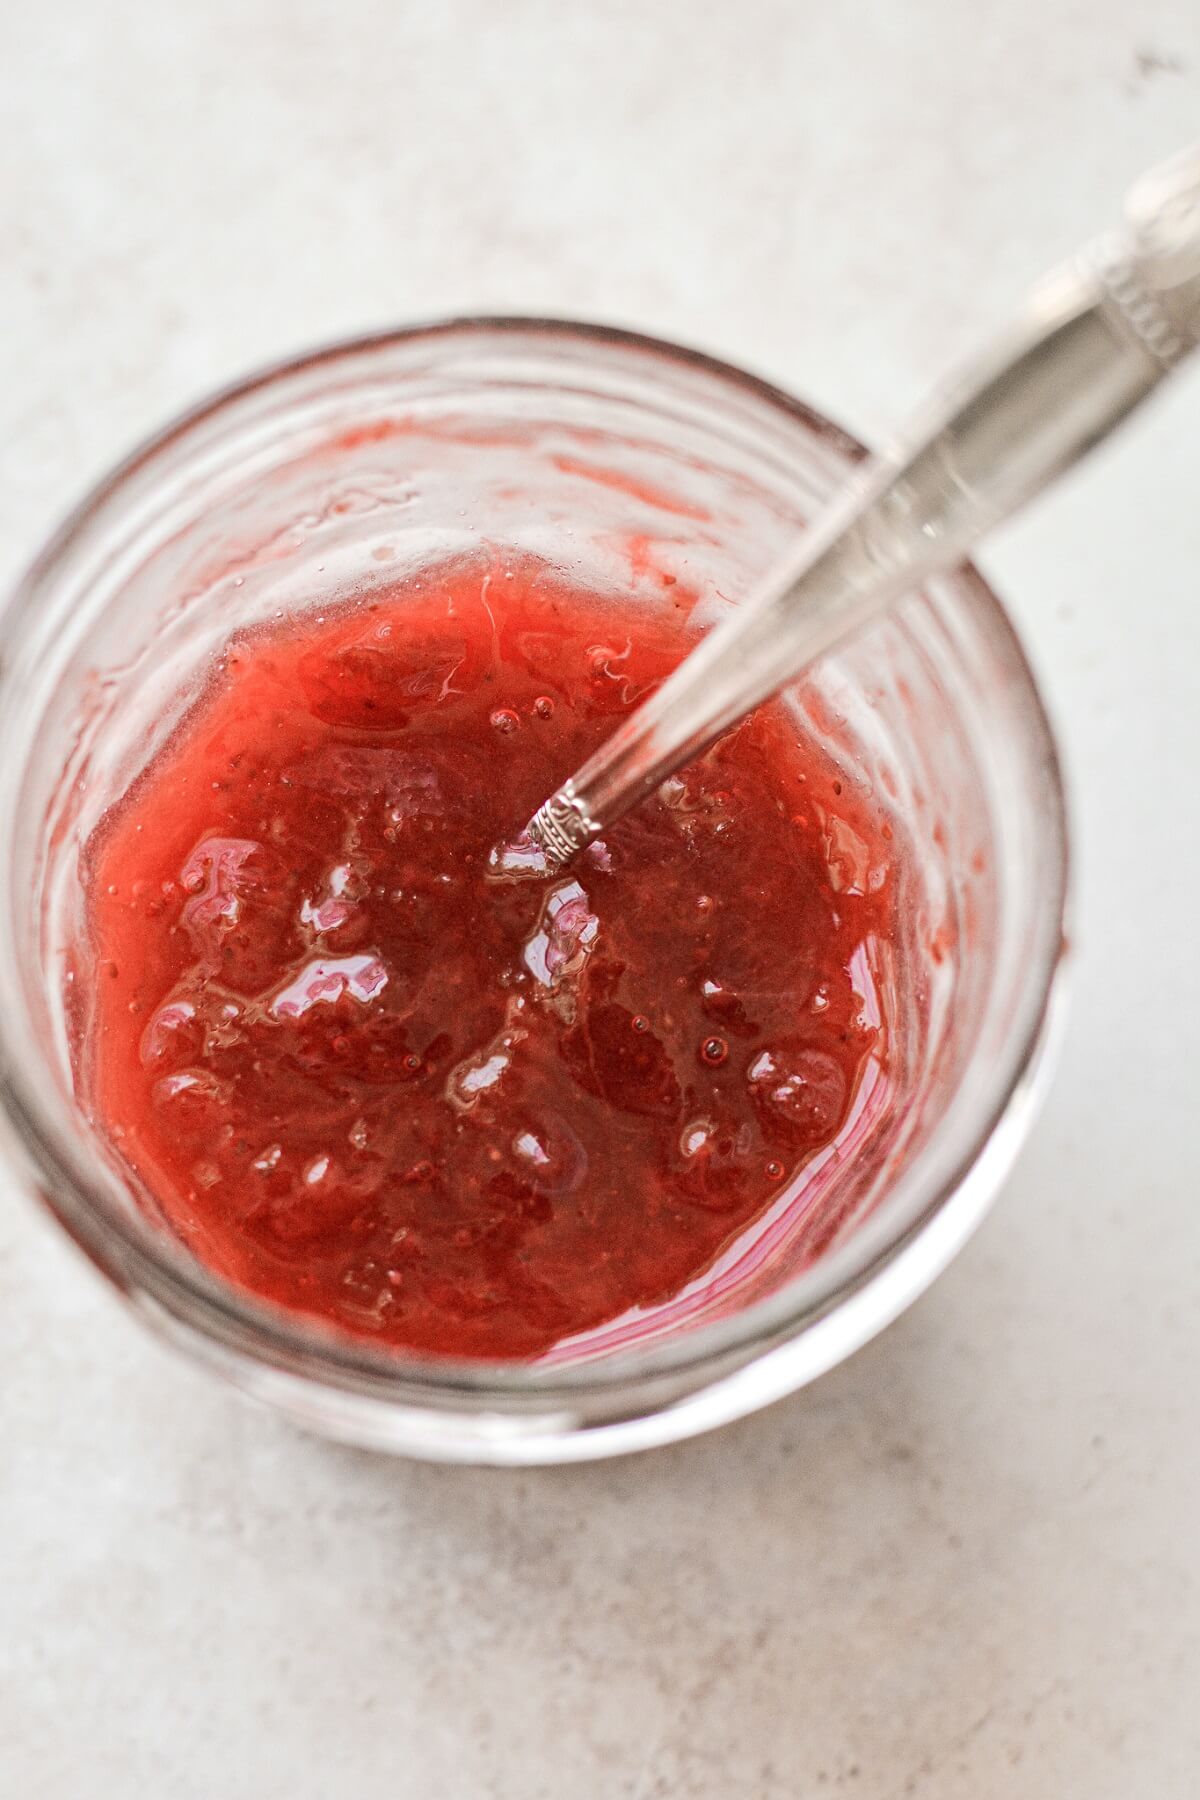
- Strawberry Jam. For the best flavor, use a good-quality strawberry jam made without high fructose corn syrup, or even something like this homemade strawberry rhubarb jam.
- Powdered Sugar. Sweetens and thickens the icing.
- Meringue Powder. Helps the icing to set quickly and stay set, rather than getting soft and sticky on the leftover pop tarts.
- Whole Milk. Thins the icing to a thick but spreadable consistency.
- Vanilla Extract. Flavor.
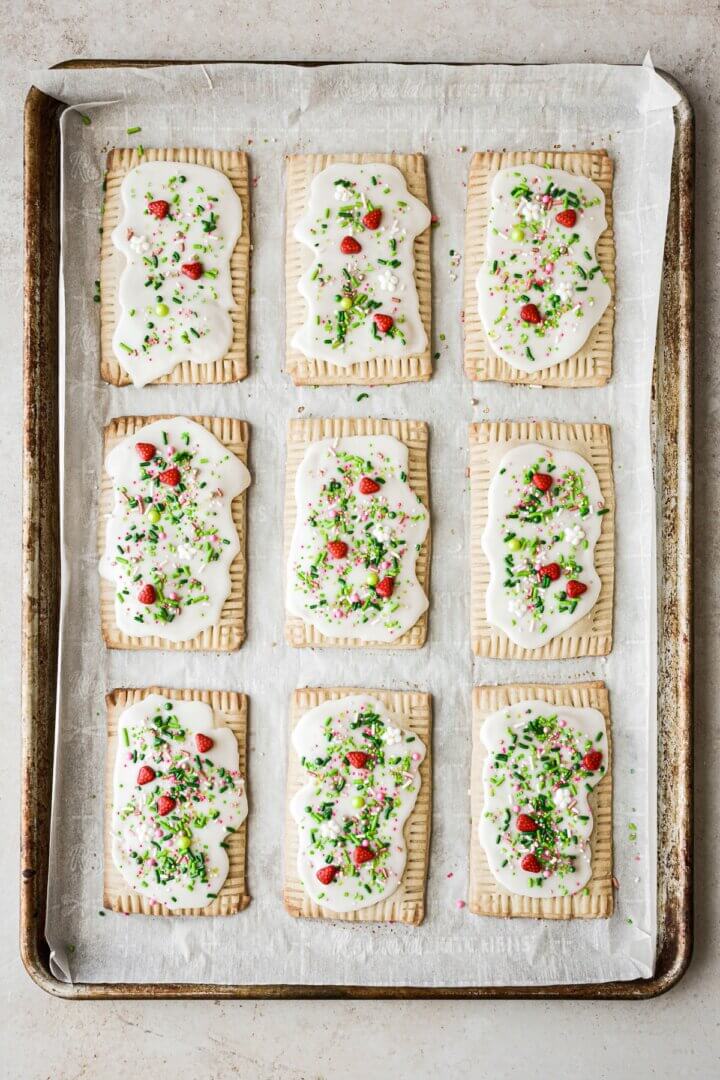
- Sprinkles. When I saw these cute sprinkles on Amazon, I knew I had to buy them, and use them either on strawberry pop tarts or a strawberry cake. Or both! I used this red and green strawberry sprinkle mix, and added a little of this vintage rose gold sprinkle mix to it to give it a touch more pink.
Instructions
Make the sugar cookie dough for the crust.
- In your food processor, pulse the flour, powdered sugar and salt until combined. With the processor running, drop in the pieces of butter, one at at time, pulsing a few times until the butter is evenly distributed, and the dough is moistened and crumbly.
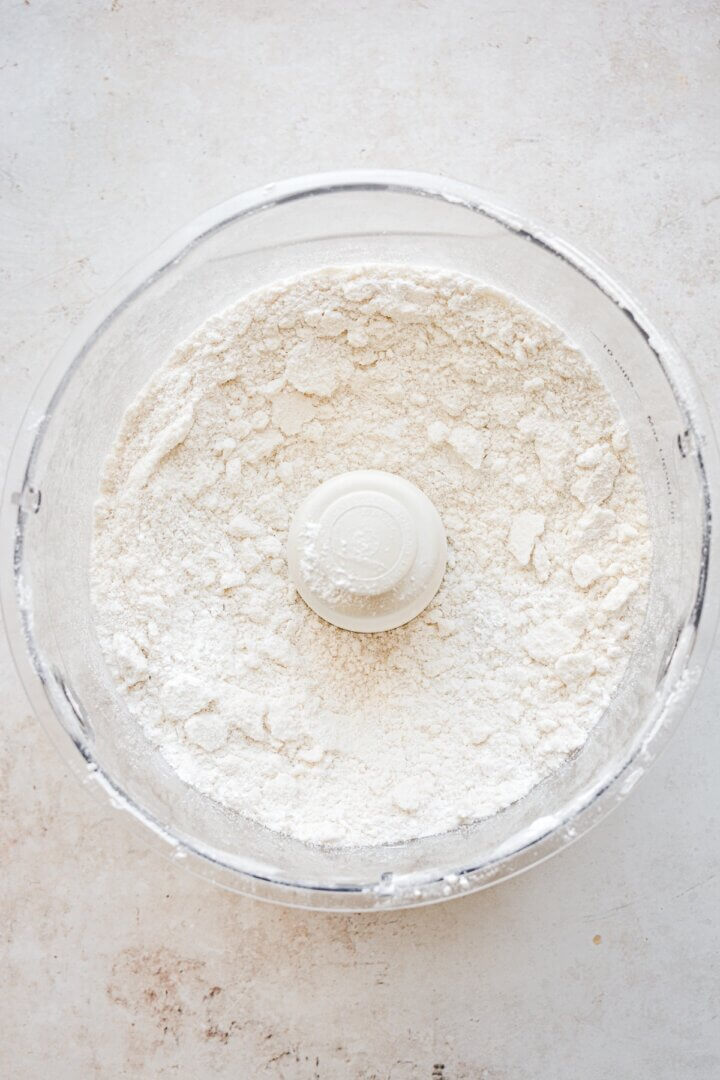
- Add the vanilla, milk and egg yolk (save the egg white for later), then process until the dough starts to stick together.
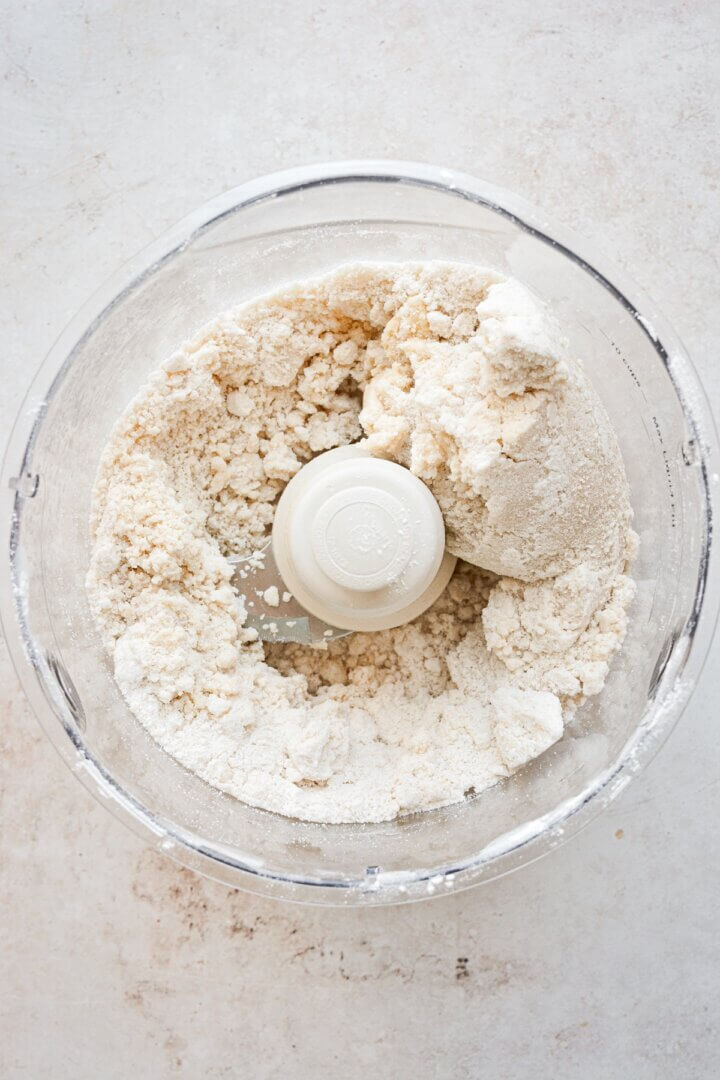
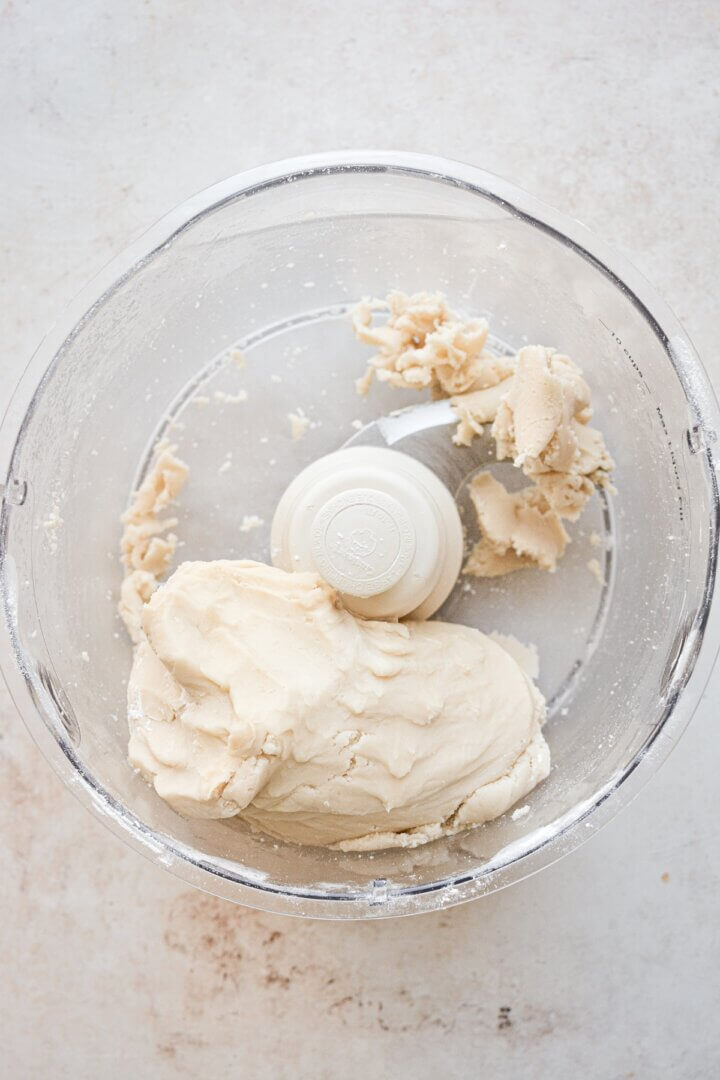
- Dump the dough out onto a clean counter and use your hands to finish bringing the dough together, kneading in any stray bits of flour. The dough should be soft, smooth and supple.
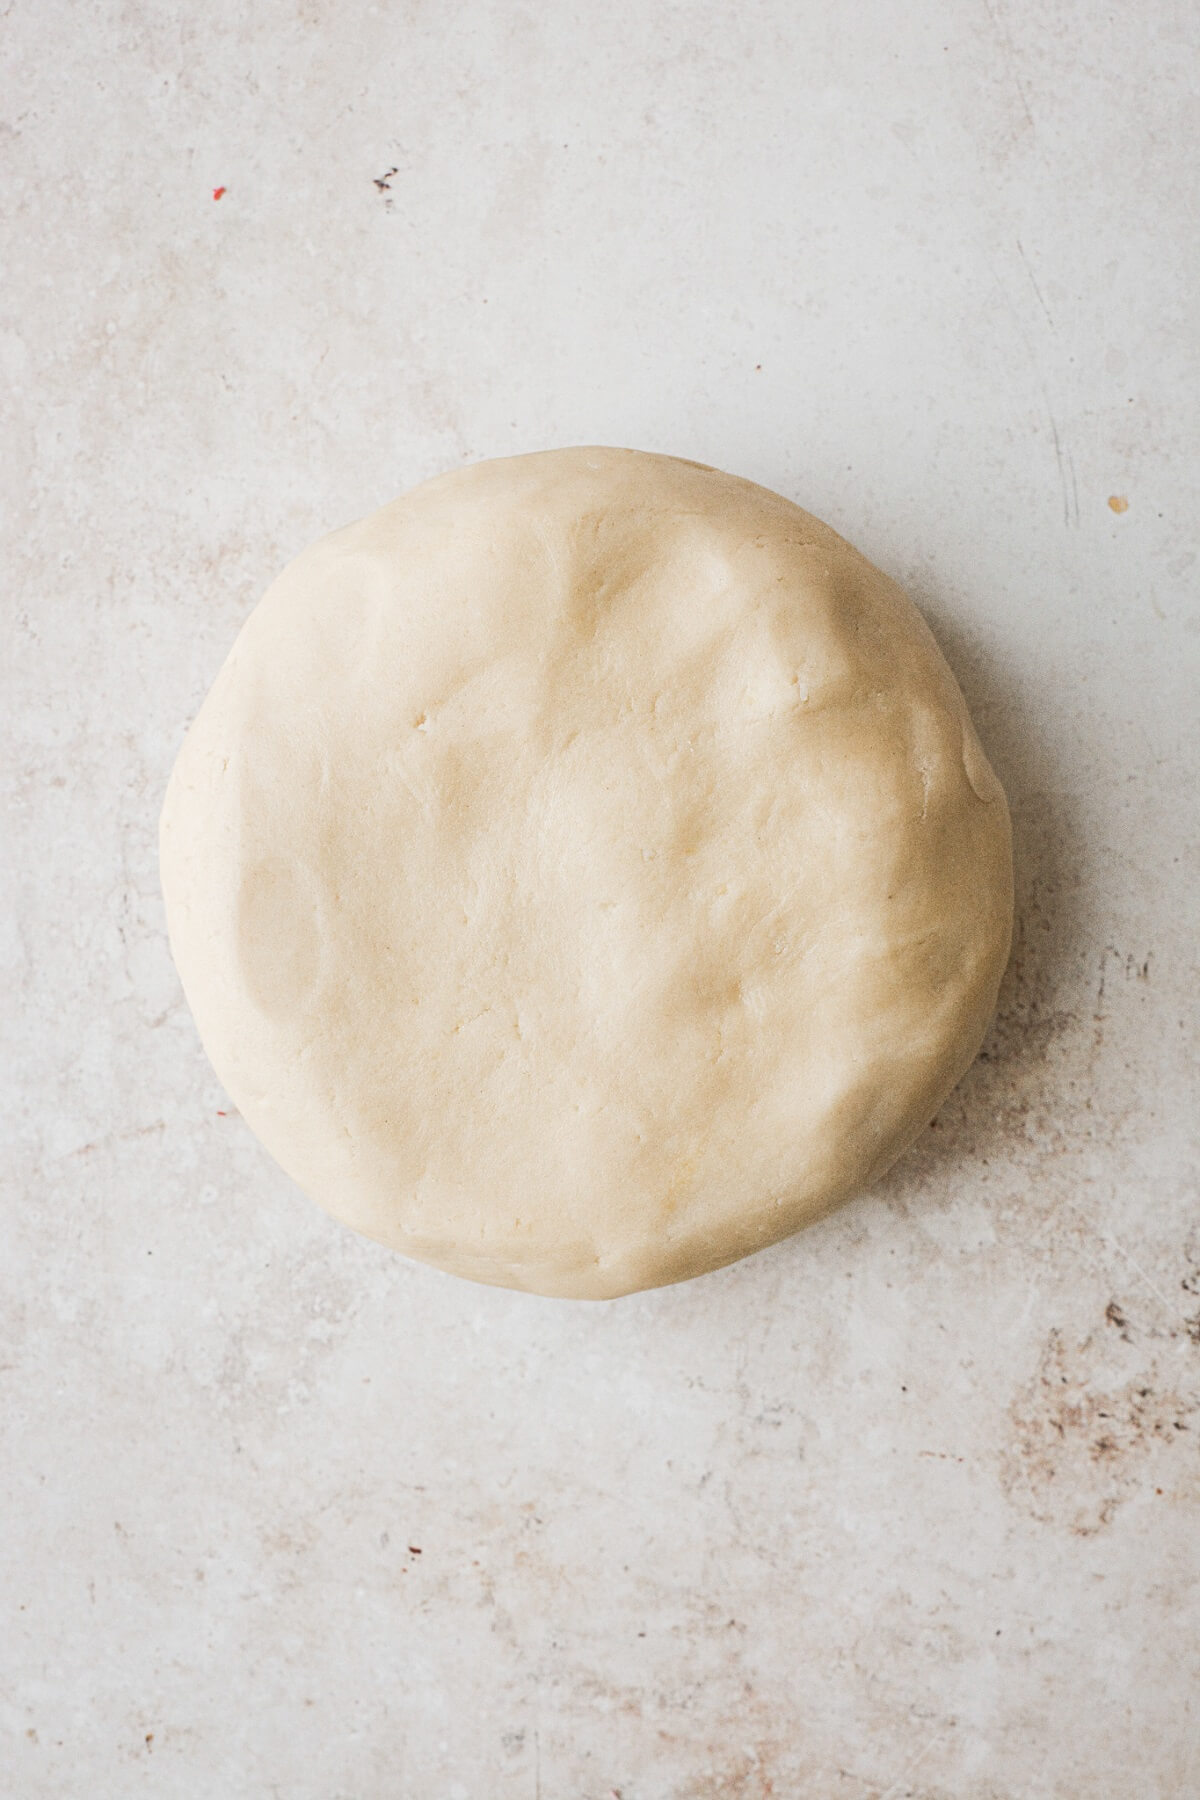
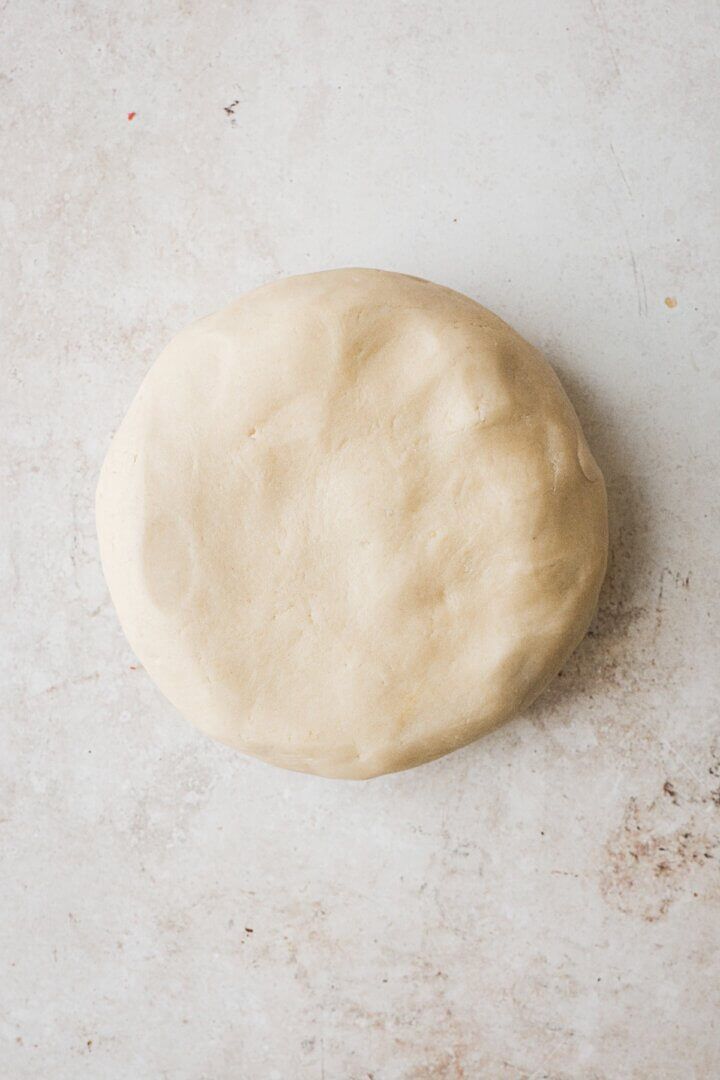
- Shape the dough into a flat disk, wrap in plastic wrap, and refrigerate for 20 minutes. Prepare two large baking sheets by lining them with sheets of parchment paper.
Note: This sugar cookie dough is a “short” dough, with a high ratio of fat to flour. This means it’s more delicate than something like pie dough or pizza dough, and can tear easily when rolled thin. Not to worry, though, you can easily patch up cracks or tears and your pop tarts will still be fantastic.
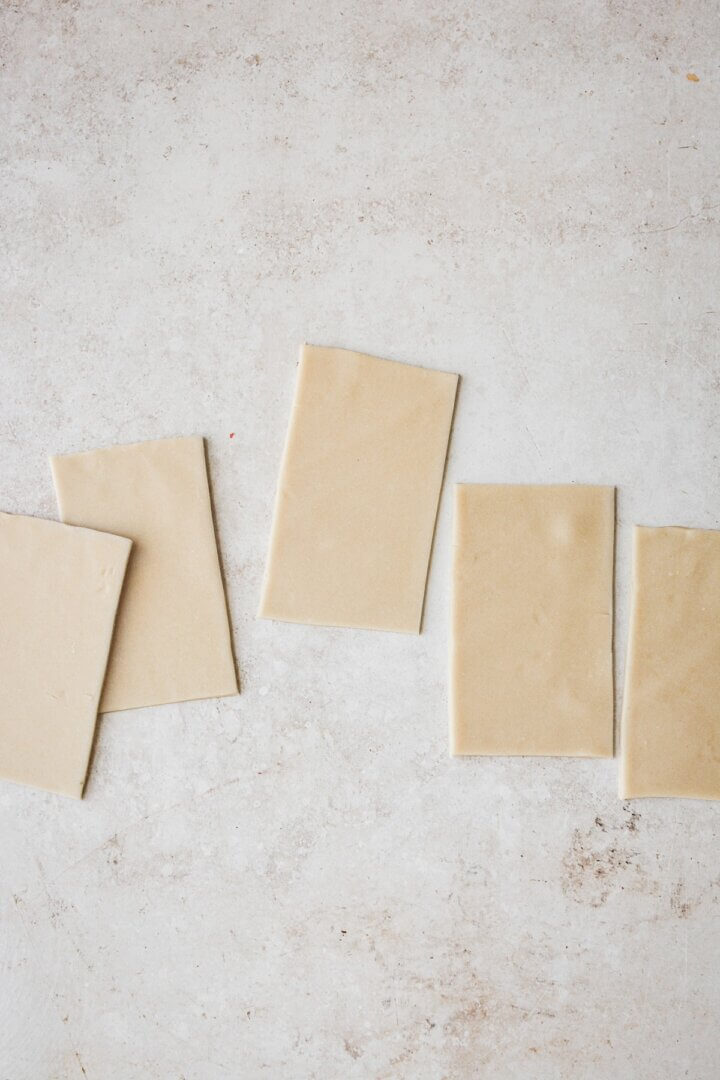
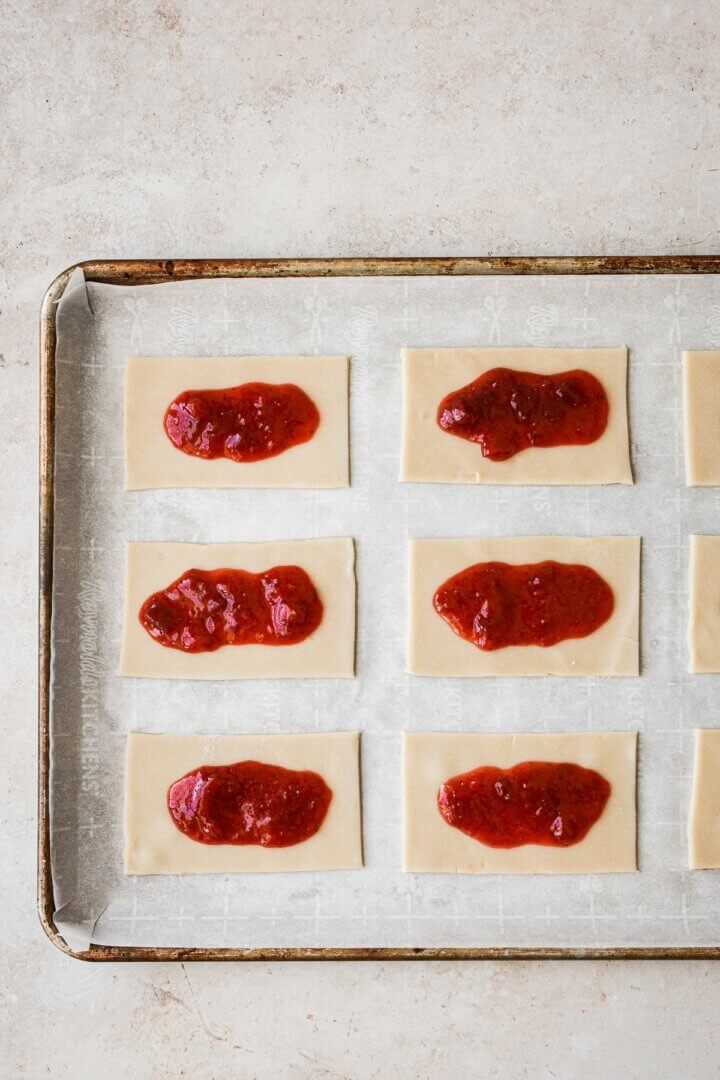
- Working with half the dough at a time, roll the dough out on a lightly floured surface to an even thickness of 1/8 inch thick, using enough flour so that it doesn’t stick to the counter or the rolling pin. Using a ruler for guidance, cut the dough into rectangles measuring 3×5 inches. Handling the dough carefully (it’s delicate when rolled thin), place the cut dough 2 inches apart on the baking sheets. TIP: I find it easiest to transfer the cut rectangles of dough by sliding a spatula or a bench scraper under them to move them to the baking sheet. This way, there’s less chance of tearing the dough than if you use your hands to pick them up.
- Gather up the scraps of dough, roll them out again, and continue cutting as many rectangles as you can. You should be able to cut 18 rectangles to make 9 pop tarts. Chill the cut dough in the refrigerator for 15 minutes.
Fill and assemble the pop tarts.
- Spoon the strawberry jam onto half of the rectangles of dough, using about 1 tablespoon of jam per pop tart.
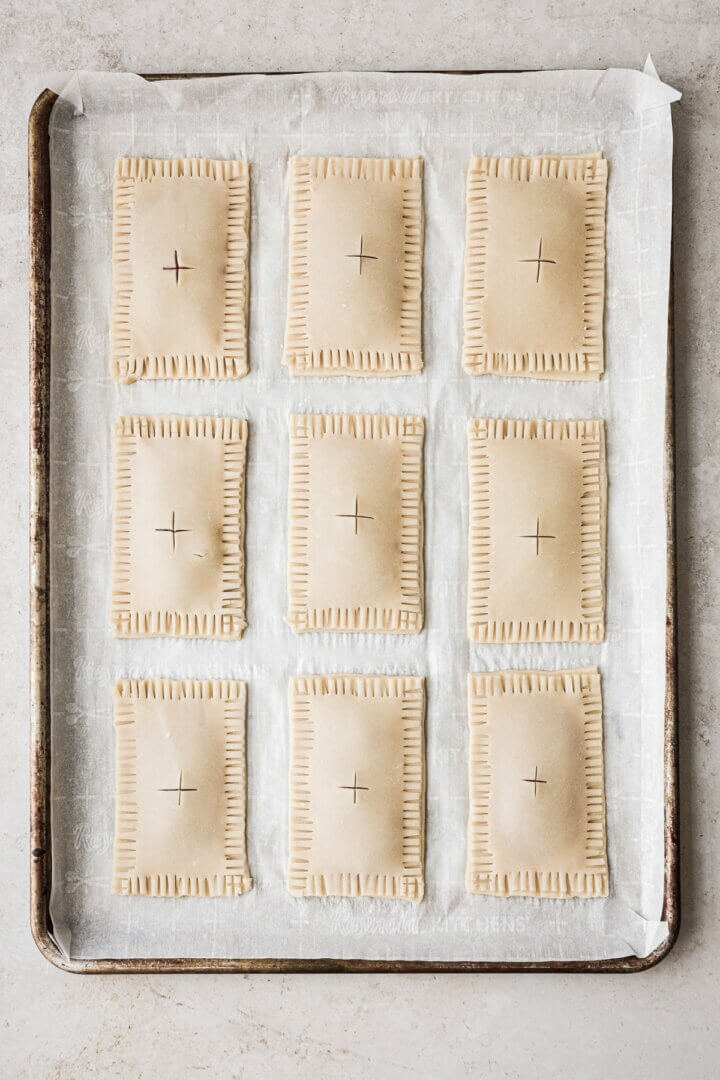
- Brush the edges of the dough with the reserved egg white.
- On the other half of the dough, use a knife to cut an “x” or several slits in the dough. This will help to vent the steam from the jam, so the sides don’t burst open in the oven.
- Place the top pieces of dough on the bottoms, and press the edges to seal. Use a fork to press the edges together all around each pop tart.
- Place the baking sheet back in the refrigerator to chill while the oven is preheating.
Bake.
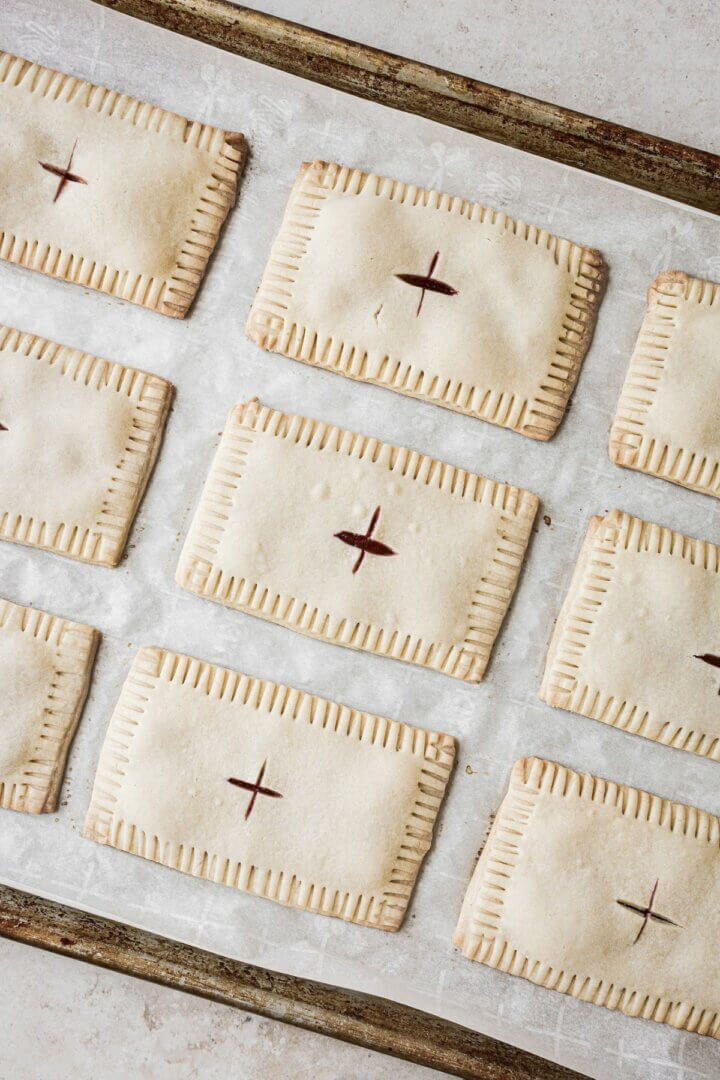
- Preheat the oven to 375 F, and position a rack in the center of the oven.
- Bake the pop tarts for about 25 minutes, until the bottoms and edges are golden brown, and the tops are baked through and starting to puff.
- Cool on the baking sheet for 15 minutes before icing.
Icing and sprinkles.
- In a bowl, stir together the powdered sugar and meringue powder. Add the milk and vanilla, and stir until smooth. The icing will be thick, but should slowly run off a spoon.
- Immediately spread the icing onto the warm pop tarts with a small icing spatula or the back of a spoon. Since the icing will set very quickly, you have to add the sprinkles right away to each pop tart as you ice it. So ice a pop tart, then add the sprinkles. Ice another pop tart, and add the sprinkles, and so on.
- Let the pop tarts cool completely before storing in an airtight container for up to 3 days.
Recipe Variations
- Strawberry Icing. For a pink, strawberry flavored icing, add a few teaspoons of freeze dried strawberry powder to the icing. You may need to also add an extra teaspoon of milk.
- Other Fillings. Use any jam you like for the filling, or even apple butter, lemon curd, Nutella or date paste to make a variety of pop tart flavors. Use freeze dried fruit powders (blueberry, strawberry or raspberry) to complement the same flavor of jam filling, or apple butter filling with maple icing, lemon curd with lemon icing, etc.
Be sure to read all of my BAKING FAQs where I discuss ingredients, substitutions and common baking questions, so that you can be successful in your own baking!
Frequently Asked Questions
Where did you get the strawberry sprinkles?
Aren’t the sprinkles the cutest? I used this red and green strawberry sprinkle mix, and added a little of this vintage rose gold sprinkle mix to it to give it a touch more pink.
Can I make the dough without a food processor?
If you don’t have a food processor, you’ll need a large bowl and a pastry cutter. In the bowl, combine the flour, sugar and salt. Scatter with the cold butter pieces and use the pastry cutter to cut the butter in until very finely cut and evenly distributed. Drizzle with the vanilla, milk and egg yolk, then use your hands to work the liquid into the dry ingredients until it forms into a soft dough.
Do I have to use the meringue powder in the icing, and where can I buy it?
You really need to use the meringue powder in your icing. It’s a common ingredient in royal icing, and it helps to set the icing quickly, and keeps it set, even days later. Without the meringue powder, the icing on your leftover pop tarts can become soft, sticky or runny, which would make them gross and soggy.
You can buy meringue powder at your local craft stores like Joanne’s, Michaels and Hobby Lobby, or find it on the baking or cake decorating aisles at Walmart. And you can buy meringue powder on Amazon, too. It has a long shelf life, and will keep in your pantry for years. I also use it in every single batch of American buttercream I make, for improved texture and stability, so it’s not just for icing cookies.
Can I make these in advance?
To make the dough in advance, wrap the disk of dough in plastic wrap, labeled, and refrigerate for up to 5 days, or freeze for 3-6 months. Frozen dough should be thawed overnight in the refrigerator. Then take the dough out of the fridge about 1 hour before you’re ready to roll out the dough. It should still be cool to the touch when you roll it out, but pliable enough to roll without too much difficulty.
You can also make the dough and assemble the strawberry pop tarts in the evening, and keep them refrigerated overnight. In the morning, simply bake the pop tarts and finish with the icing and sprinkles.
You Might Also Like

Please check out my Amazon Shop for a curated collection of some of my favorite cake pans from trusted brands, baking tools, ingredients, pretty things and fashion finds. I recommend products that I buy and use every day!
Did you love today’s recipe? Please rate the recipe and let me know in the comments what you thought! Also, be sure to follow Curly Girl Kitchen on Instagram, and tag me when you try one of my recipes so I can see all your delicious creations!
Homemade Strawberry Pop Tarts with Sprinkles
All recipes on Curly Girl Kitchen are developed for high altitude at 5,280 feet. See FAQs for adjusting to higher or lower elevations.

Equipment
- Food Processor or Pastry Cutter
Ingredients
Crust
- 3 cups all-purpose flour, spooned and leveled
- 1 cup powdered sugar
- ½ tsp coarse Kosher salt (if using table salt, use half the amount)
- 1 cup cold unsalted butter, cut into 16 pieces
- 2 tsp vanilla extract
- 3 tbsp whole milk
- 1 large egg, yolk and white separated
Filling & Icing
- ⅔ cup strawberry jam
- 1 ½ cups powdered sugar
- 1 tbsp meringue powder
- 3 tbsp whole milk
- ½ tsp vanilla extract
- sprinkles
Instructions
Crust
- In your food processor, pulse the flour, powdered sugar and salt until combined.With the processor running, drop in the pieces of butter, one at at time, pulsing a few times until the butter is evenly distributed, and the dough is moistened and crumbly.Add the vanilla, milk and egg yolk (save the egg white for later), then process until the dough starts to stick together.
- Dump the dough out onto a clean counter and use your hands to finish bringing the dough together, kneading in any stray bits of flour. The dough should be soft, smooth and supple.
- Shape the dough into a flat disk, wrap in plastic wrap, and refrigerate for 20 minutes.Prepare two large baking sheets by lining them with sheets of parchment paper.
- Working with half the dough at a time, roll the dough out on a lightly floured surface to an even thickness of 1/8 inch thick, using enough flour so that it doesn't stick to the counter or the rolling pin. Using a ruler for guidance, cut the dough into rectangles measuring 3×5 inches. Handling the dough carefully (it's delicate when rolled thin), place the cut dough 2 inches apart on the baking sheets. TIP: I find it easiest to transfer the cut rectangles of dough by sliding a spatula or a bench scraper under them to move them to the baking sheet. This way, there's less chance of tearing the dough than if you use your hands to pick them up.Gather up the scraps of dough, roll them out again, and continue cutting as many rectangles as you can. You should be able to cut 18 rectangles to make 9 pop tarts. Chill the cut dough in the refrigerator for 15 minutes.
Filling & Assembly
- Spoon the strawberry jam onto half of the rectangles of dough, using about 1 tablespoon of jam per pop tart.
- Brush the edges of the dough with the reserved egg white.
- On the other half of the dough, use a knife to cut an "x" or several slits in the dough. This will help to vent the steam from the jam, so the sides don't burst open in the oven.
- Place the top pieces of dough on the bottoms, and press the edges to seal. Use a fork to press the edges together all around each pop tart.
- Place the baking sheet back in the refrigerator to chill while the oven is preheating.
Bake
- Preheat the oven to 375 F, and position a rack in the center of the oven.
- Bake the pop tarts for about 25 minutes, until the bottoms and edges are golden brown, and the tops are baked through and starting to puff.
- Cool on the baking sheet for 15 minutes before icing.
Icing
- In a bowl, stir together the powdered sugar and meringue powder. Add the milk and vanilla, and stir until smooth. The icing will be thick, but should slowly run off a spoon.
- Immediately spread the icing onto the warm pop tarts with a small icing spatula or the back of a spoon. Since the icing will set very quickly, you have to add the sprinkles right away to each pop tart as you ice it. So ice a pop tart, then add the sprinkles. Ice another pop tart, and add the sprinkles, and so on.
- Let the pop tarts cool completely before storing in an airtight container for up to 3 days.
Video
Notes
- Making the Dough without a Food Processor: If you don’t have a food processor, you’ll need a large bowl and a pastry cutter. In the bowl, combine the flour, sugar and salt. Scatter with the cold butter pieces and use the pastry cutter to cut the butter in until very finely cut and evenly distributed. Drizzle with the vanilla, milk and egg yolk, then use your hands to work the liquid into the dry ingredients until it forms into a soft dough.
- Freezing the Dough: To make the dough in advance, wrap the disk of dough in plastic wrap, labeled, and refrigerate for up to 5 days, or freeze for 3-6 months. Frozen dough should be thawed overnight in the refrigerator. Then take the dough out of the fridge about 1 hour before you’re ready to roll out the dough. It should still be cool to the touch when you roll it out, but pliable enough to roll without too much difficulty.
 https://curlygirlkitchen.com/
Any tips for how to adjust this recipe for your sea-level friends? 🙂
Karen, this one will actually work at all altitudes without adjustments. 🙂
Thank you for this recipe – I’ve been wanting to make my own pop tarts but all the recipes I’ve seen have been with puff pastry or pie dough like you mentioned, so I was excited to try this version. I had a bit of difficulty with the dough staying together but they ended up turning out so well! They tasted just like pop tarts except better, with just the right amount of filling and icing. I shared them with my family and they all loved them – especially warmed up a bit in the toaster oven. My only change next time would be to bake them a bit less (or start checking on them earlier, around 20 mins) as I found the edges were a bit too well done.
I’m so glad you loved them! Yes, the dough is certainly delicate and can tear easily, especially since it’s rolled fairly thin, but it can also be easily patched, too. After rolling the dough and cutting the rectangles, I found it easiest to transfer them to the baking sheet by sliding a thin spatula or bench scraper underneath them instead of using my hands. Much less tearing that way!
Thanks for the tip! I was worried about the parts that had torn but I did my best to patch them up and none of them fell apart or exploded in the oven 🙂
Tried this because my daughter wanted iced pop tarts (we don’t eat gelatin for religious reasons and all iced pop tarts have gelatin), so she drew a really cute picture of what she wanted them to look like, and they came out so good! Thanks for another great recipe Heather!
I’m so happy I could help you and your daughter make something fun together 🙂
You don’t say to add the egg yolk in your instructions for those of us mixing the crust by hand rather than using a food processor. Is this an oversight or is there a reason it is omitted? Thanks.
You need the egg yolk no matter how you make the dough. I’ve updated that in the recipe notes.
I made the strawberry and cinnamon pop tarts for my husband. He said that they were amazing. They looked exactly as pictured. They were fun to make and worth a little extra effort.
Hi! Would you share where you got those adorable sprinkles?
Thanks!
I found them on Amazon, and I’ve shared the affiliate link in the FAQs section above the recipe card.