
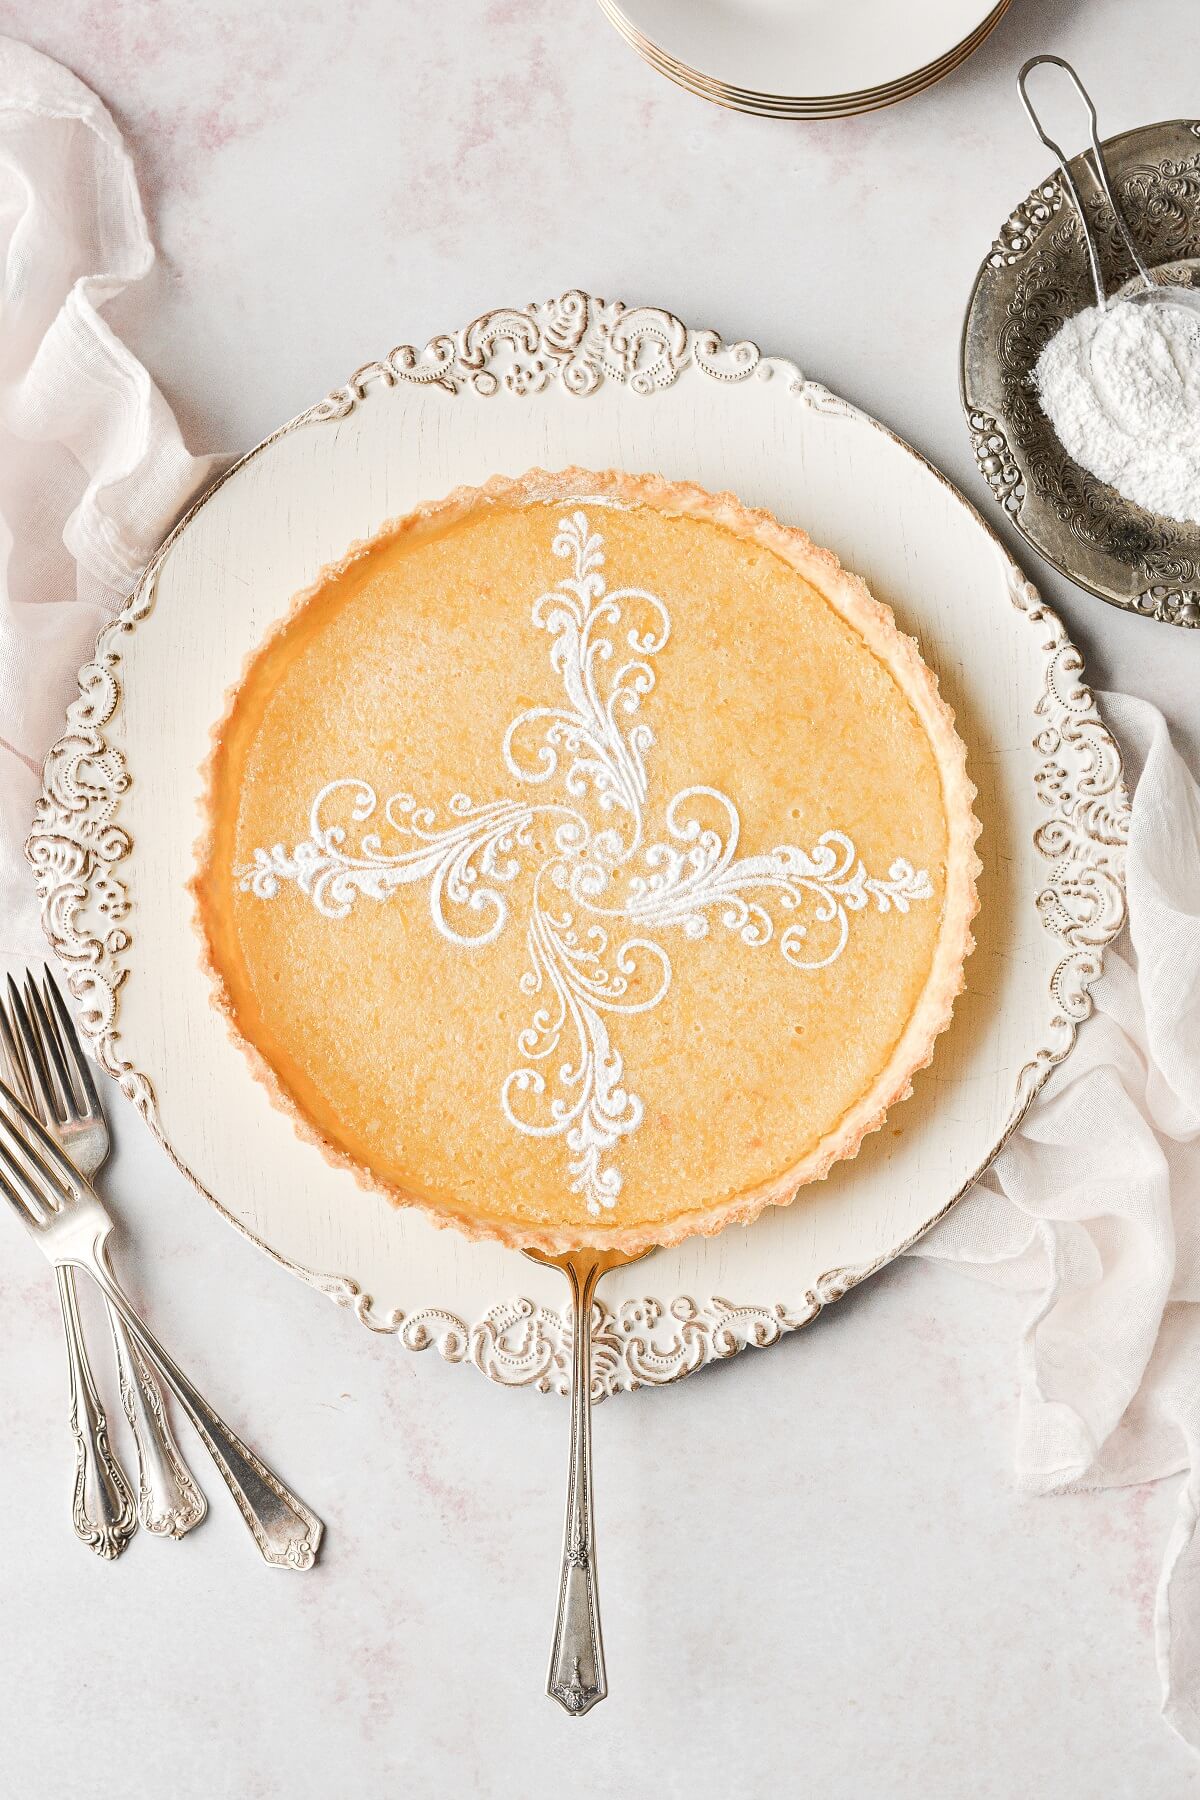
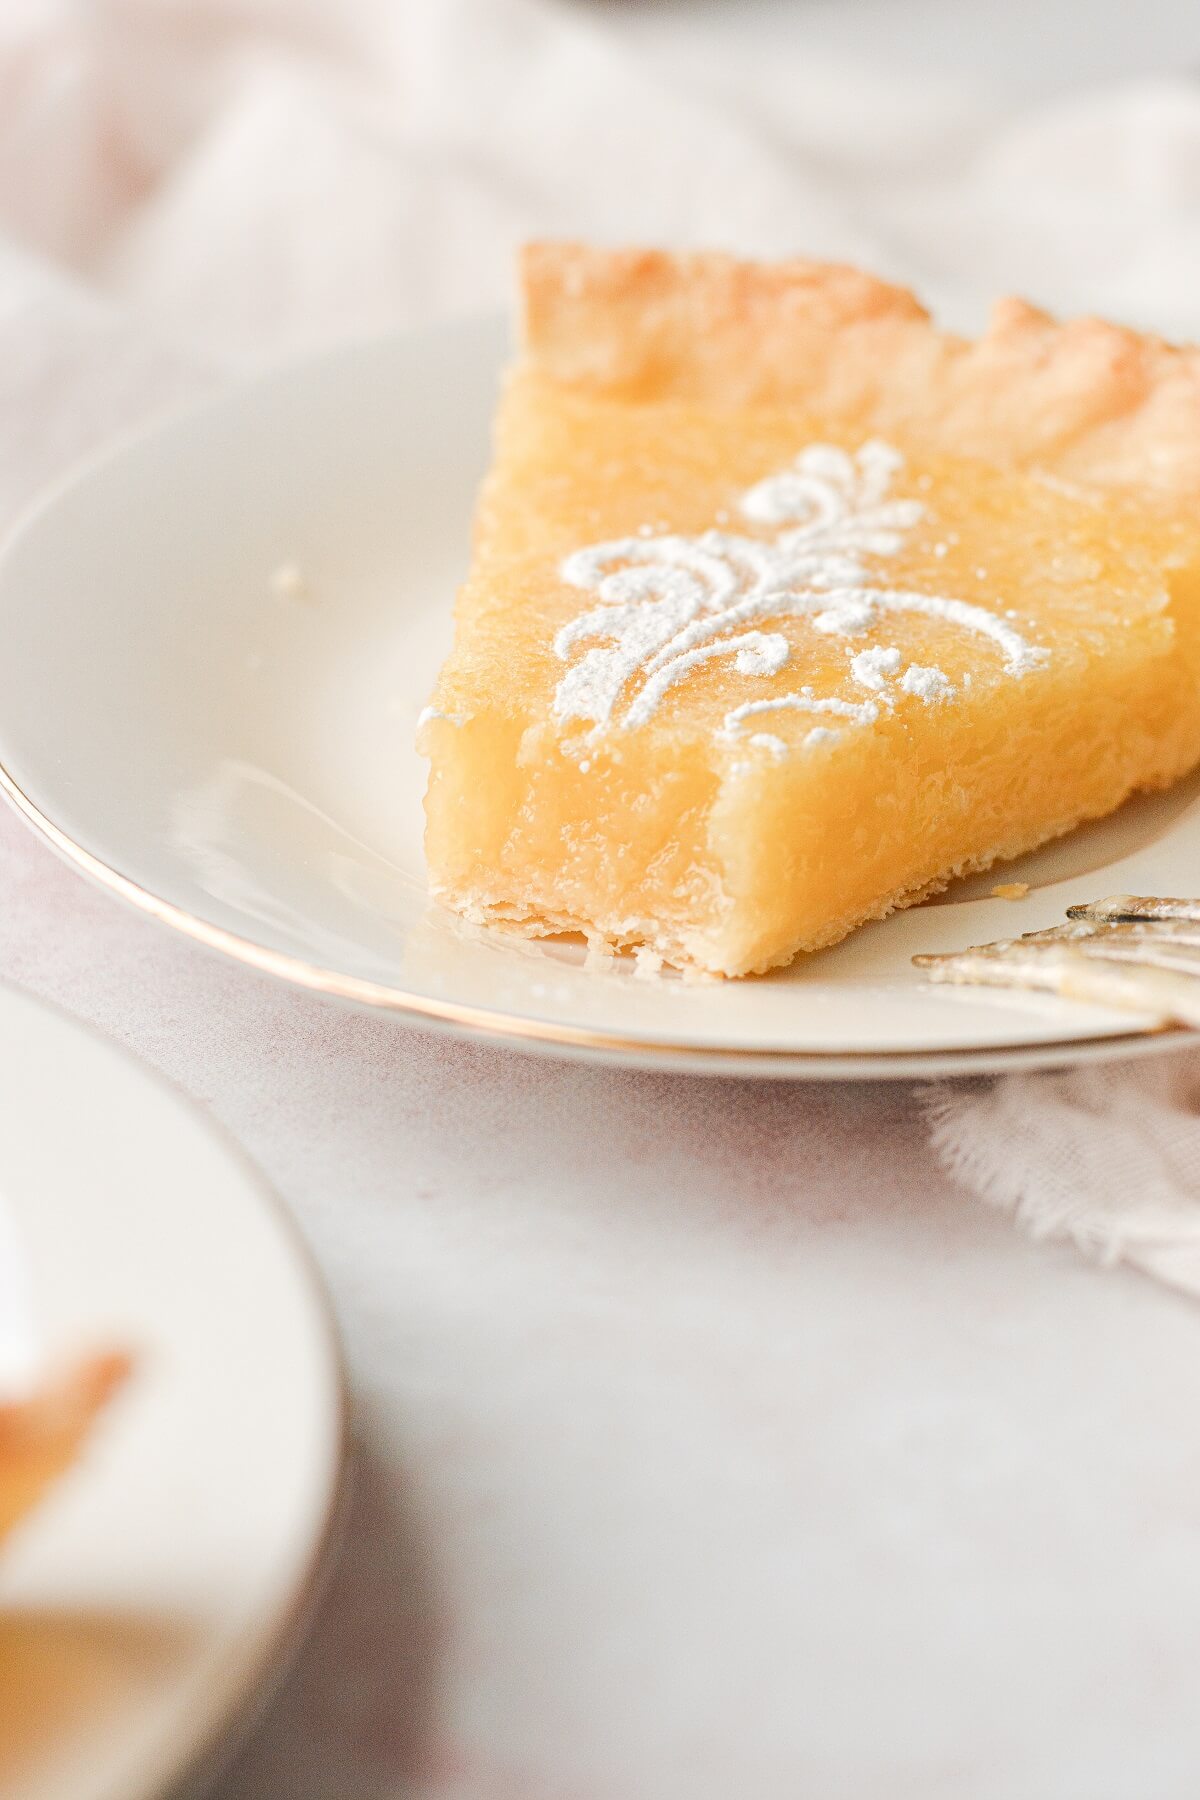
This classic lemon tart is made with a flaky, all-butter pastry crust filled with silky, tart lemon filling. I love serving a lemon tart with barely sweetened, fresh whipped cream, but it also looks just stunning with a powdered sugar stencil. While this tart looks fancy, it’s actually very easy to make, with only a few simple ingredients.
You might also love these iced lemon shortbread cookies, lavender lemon cake, and lemon poppy seed crumb muffins.
This site contains affiliate links. As an Amazon associate, I earn from qualifying purchases. This means that I may make a small commission if you purchase a product using those links. This in no way affects my opinion of those products and services. All opinions expressed on this site are my own.
Ingredients and Equipment
Flaky Pastry Crust
- 1/2 recipe All-Butter Perfect Pie Dough. This is a recipe for a flaky, buttery pastry crust, which stays crisp and delicious for days, and is the perfect base for a classic lemon tart. Alternatively, you could make a shortbread crust using this recipe. Both crusts are wonderful with the tart lemon filling.
- Egg White. Brushed over the crust during the bake, it helps to seal the crust to keep it crisp, even when filled with the lemon filling.
Lemon Filling
- Lemons. You’ll be using both fresh lemon zest and lemon juice for flavor and acidity, and you’ll need about 4 large lemons or 6-8 small lemons.
- Granulated Sugar. Sweetens the filling to balance the tartness of the lemon.
- All-Purpose Flour. Thickens the filling.
- Eggs. Adds richness and thickens the filling.
See the recipe card at the end of the post for the full ingredients list and instructions.
Tools and Equipment
- 9-inch Round Tart Pan with Removable Bottom. Using a tart pan gives the crust a beautiful, fluted edge that’s just lovely. If you don’t have a tart pan, you can also bake this tart in a 9-inch deep-dish pie pan.
- Pie Weights or Dried Beans. You’ll be “blind-baking” the crust first, which means to bake it empty, without any filling. To do this, you’ll need to fill the crust with pie weights so that the dough doesn’t puff up, or slump down the sides. I use dried beans.
- Pie Crust Shield. After blind-baking the crust, you’ll pour in the lemon filling, and bake it again to set the filling. During the second bake, you’ll need to cover the edge of the tart with a pie crust shield, so that it doesn’t get too browned.
- Other Stuff. You’ll also need the usual bowl, whisk, spatula and measuring cups. A pastry cutter to make the pie dough, a rolling pin and bench scraper. A piece of parchment paper, and a pastry brush to brush the dough with the egg white. And a lemon squeezer and microplane grater to zest the lemons.
Instructions
Make the pastry dough.
- Prepare 1/2 recipe All-Butter Perfect Pie Dough. This recipe will make a thin, flaky pastry crust.
- Alternatively, for a thicker, buttery, cookie-like shortbread crust, see this post on shortcrust pastry.
Roll out and chill the dough.
- Once your pie dough is ready to roll out, line a baking sheet with a piece of parchment paper. Set your tart pan with removable bottom on the baking sheet.
- On a floured surface, roll out the dough thinly, to almost 1/8 inch thick.
- Transfer the dough to the tart pan, and fit it against the bottom and up the sides of the pan, pressing gently against the sides. You don’t want to stretch or pull the dough, but allow enough slack in the dough so you can fit it snugly down into the edge of the pan.
- Use a sharp knife or scissors to trim the edge of the dough, allowing about 1/2 inch overhang. Keeping this overhang will allow for shrinkage as it bakes, and then you’ll finish trimming the dough even with the top of the pan after baking the crust.
- Preheat the oven to 400 F, and freeze the crust in the pan for 20 minutes while the oven is pre-heating.
Blind bake the tart crust.
- Spray a piece of aluminum foil lightly with non-stick spray, and fit the foil, greased side down, against the frozen crust. Fill the foil with dried beans or pie weights.
- Bake the crust, covered with the foil and dried beans, for 15 minutes.
- Remove the pan from the oven, scoop the beans out of the foil, then gently peel the foil off the crust.
- Brush the egg white over the bottom and sides of the crust. Return the pan to the oven, and bake, uncovered, for an additional 12-15 minutes, just until the crust is baked through and starting to turn a pale golden brown.
- Remove from the oven. Immediately use a sharp knife to trim the edge of the crust so it’s perfectly even with the top of the pan. Let cool for 10 minutes.
- Reduce the oven temperature to 325 F.
TIP: You’ll need 1 egg white to brush over the crust, but you won’t be using the whole white. Since the filling uses 4 eggs, start by whisking in 3 eggs + 1 egg yolk, saving the 4th white to brush over the crust. After brushing the crust with egg white, add the remainder of the white to the lemon filling.
Make the lemon filling.
- While the crust is baking, you can whisk up the filling.
- In a bowl, combine the sugar and lemon zest. Use your hands to rub the zest into the sugar for a minute or two, until it’s very fragrant and resembles damp sand.
- Whisk in the flour, then whisk in the eggs and lemon juice. Set aside until needed.
Bake the filling.
- After pre-baking the crust, and letting it cool for 10 minutes, make sure you’ve reduced the oven temperature to 325 F.
- Whisk up the filling again and gently pour it into the crust. Place a pie crust shield over the tart pan to cover just the edge of the crust so it doesn’t get overly brown. Very slowly, so you don’t slosh the filling, place the baking sheet with the tart pan on the center oven rack.
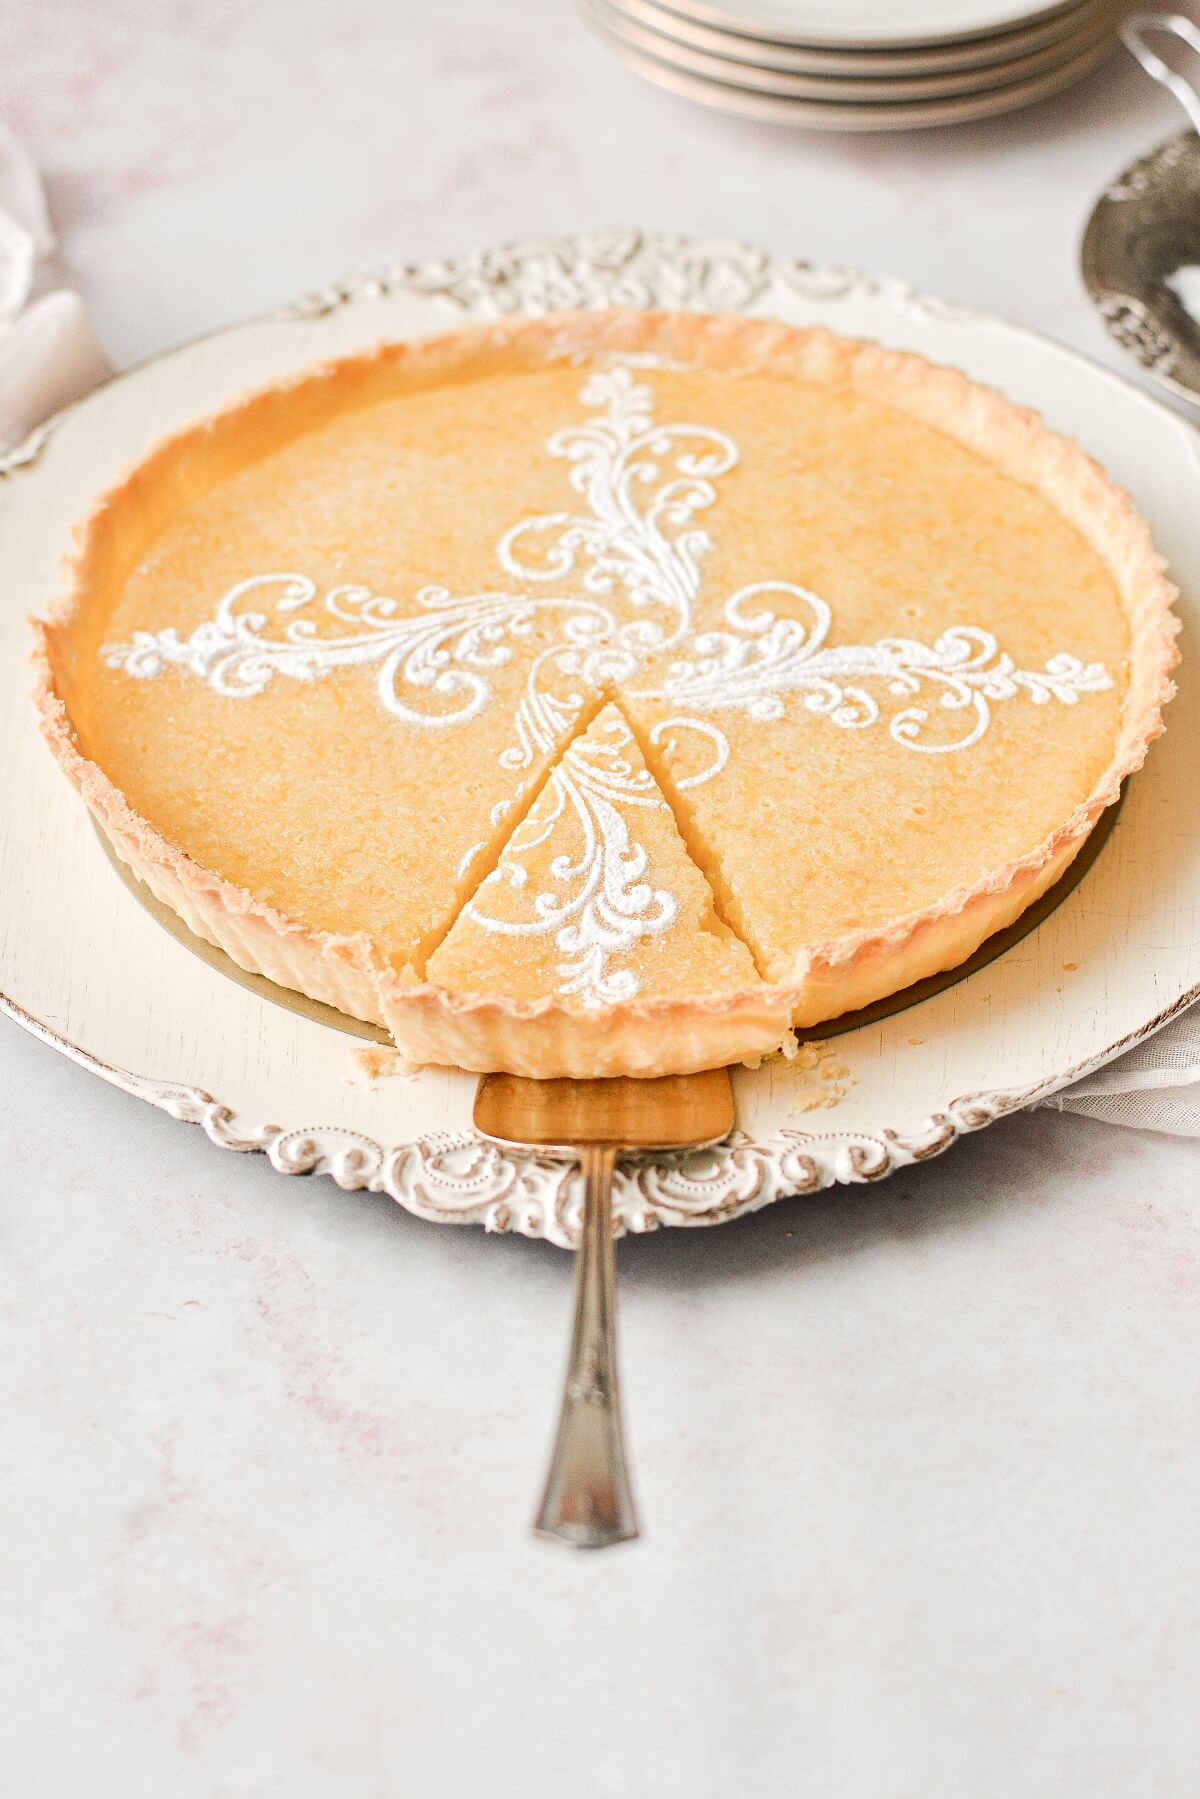
- Bake the tart for about 25-30 minutes. The filling should be just set, with a very slight wobble in the center, and no browning on top.
- Cool the lemon tart at room temperature for 1 hour, then refrigerate for 2-3 hours until chilled and set.
How to Make the Powdered Sugar Stencil
What You’ll Need.
- Non-Melting Powdered Sugar. Using non-melting powdered sugar is key. If you use regular powdered sugar or confectioner’s sugar from your grocery store, it will absorb the moisture from the lemon filling and become splotchy as it melts. The non-melting powdered sugar will stay put to perfectly preserve your design.
- Sifter or Strainer. You’ll need something small, like this sifter spoon or this sugar dusting wand.
- Stencil. There are so many lovely stencils to choose from, that you can make your lemon tart look as fancy or as simple as you like. I also love the look of the powdered sugar stripes on this lemon tart by Style Sweet Daily.
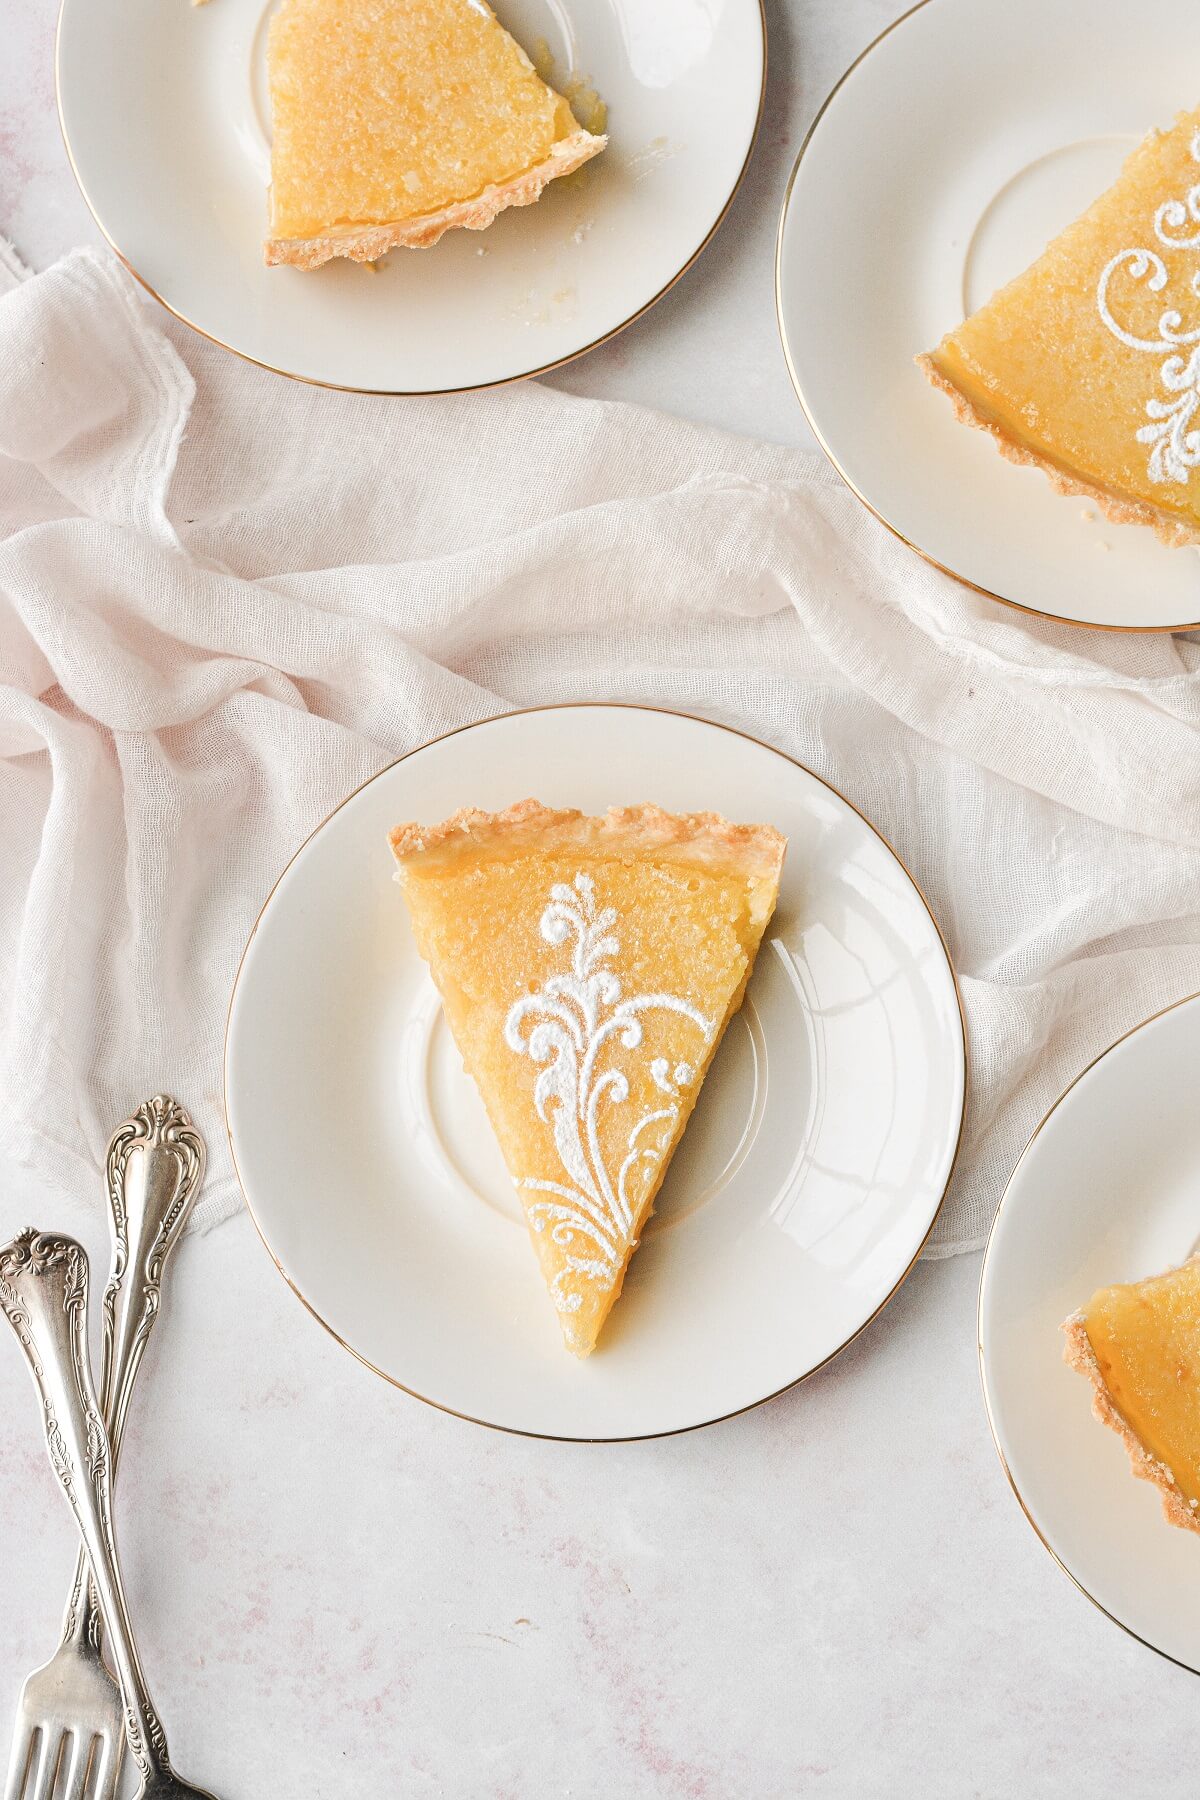
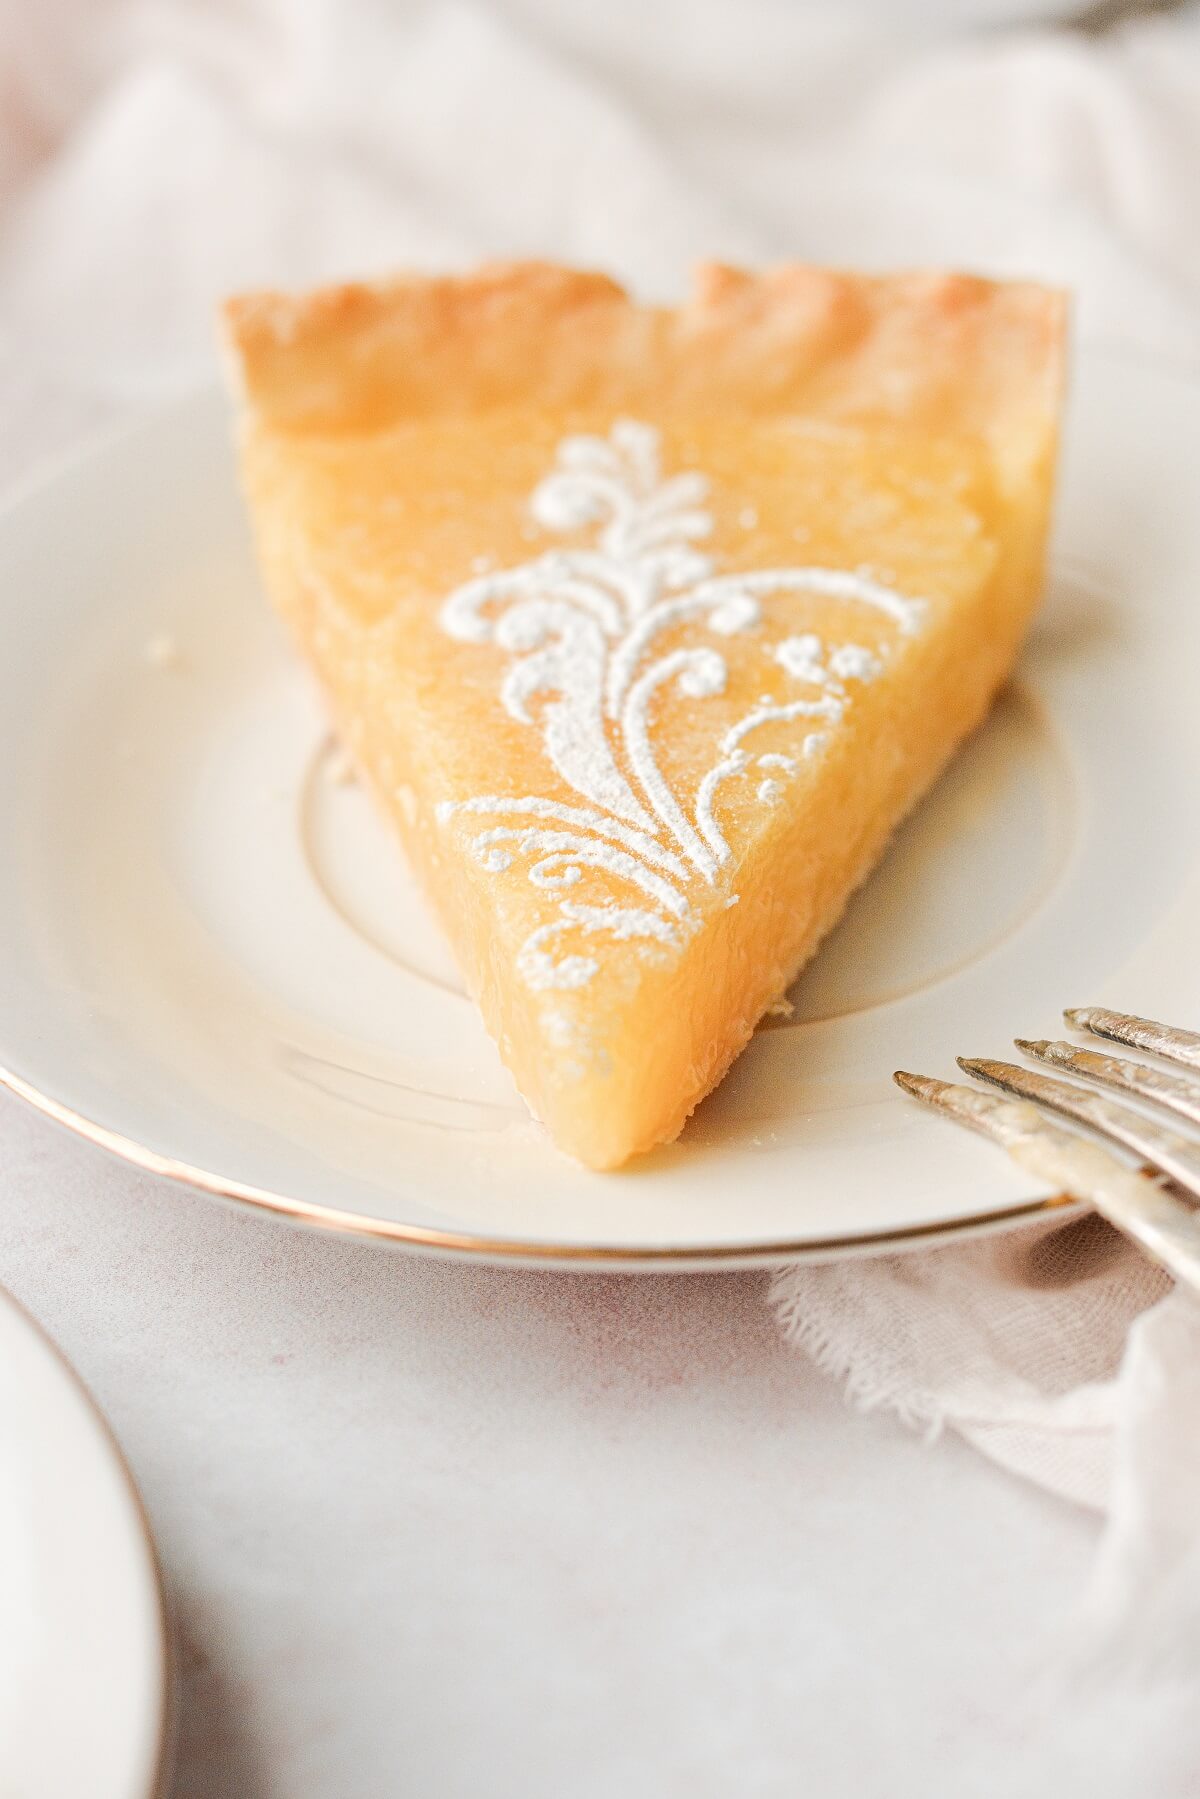
A powdered sugar stencil is an easy, but completely gorgeous way to decorate a lemon pie or tart. The contrast of the sunny yellow filling with the powdered sugar looks so beautiful.
Once your tart is completely cooled and set, position your stencil lightly on top of your tart. For my design, I actually re-positioned my stencil four times, moving it around the tart to create the look. If you need to, cover the rest of the tart loosely with a paper towel, so that the powdered sugar doesn’t fall where you don’t want it to.
Lightly dust the powdered sugar on top of the stencil. Carefully lift the stencil up, taking care not to disturb your design.
Be sure to read all of my BAKING FAQs where I discuss ingredients, substitutions and common baking questions, so that you can be successful in your own baking!
Frequently Asked Questions
What if I don’t have a tart pan?
You can easily use a 9-inch deep-dish pie pan to make this tart if you don’t have a tart pan.
Can I use bottled lemon juice instead of fresh lemon juice?
You can, but… you need fresh lemon zest anyway, so there’s no reason not to juice the lemons after using their zest.
How long does the tart stay fresh?
You should keep the tart refrigerated, loosely covered. The tart is best eaten within 3 days, but still tastes great after 5 days.
Why is my lemon filling cracked?
If your filling cracks as it cools, then either your oven was too hot, or you over-baked the filling. Be sure to take the tart out of the oven when the filling is barely set, but still has a slight wobble in the center.
Can I use Meyer lemons for this recipe?
Certainly, yes. They are a bit sweeter than regular lemons, so your filling won’t be quite as tart.
Can I make a lower sugar filling?
There is quite a bit of sugar in this recipe (1 1/2 cups in the filling), but there’s also a lot of sour lemon juice, so the two balance each other well. If you prefer to use less sugar for a more tart lemon filling, you can reduce it a bit, but I wouldn’t suggest using less than 1 cup of sugar.
You Might Also Like


Please check out my Amazon Shop for a curated collection of some of my favorite cake pans from trusted brands, baking tools, ingredients, pretty things and fashion finds. I recommend products that I buy and use every day!
Did you love today’s recipe? Please rate the recipe and let me know in the comments what you thought! Also, be sure to follow Curly Girl Kitchen on Instagram, and tag me when you try one of my recipes so I can see all your delicious creations!

Lemon Tart
All recipes on Curly Girl Kitchen are developed for high altitude at 5,280 feet. See FAQs for adjusting to higher or lower elevations.

Equipment
- 9-inch Round Tart Pan with Removable Bottom (or a deep-dish pie pan)
- Pie Weights or Dried Beans
- Pie Crust Shield
Ingredients
Crust
- ½ recipe All-Butter Perfect Pie Dough
- 1 egg white
Filling
- 1 ½ cups granulated sugar
- 2 tbsp fresh lemon zest, from 2 large lemons
- ¼ cup all-purpose flour, spooned and leveled
- 4 large eggs
- ¾ cup fresh lemon juice, from 4 large lemons (or 6-8 small lemons)
Topping (optional)
- non-melting powdered sugar, for stenciling, OR
- 1 cup heavy whipping cream, cold
- 2 tbsp powdered sugar
Instructions
Crust
- Prepare 1/2 recipe All-Butter Perfect Pie Dough. This recipe will make a thin, flaky pastry crust.Alternatively, for a thicker, buttery, cookie-like shortbread crust, prepare and pre-bake the shortbread crust as instructed in this Maple Tart recipe.
- Once your pie dough is ready to roll out, line a baking sheet with a piece of parchment paper. Set your tart pan with removable bottom on the baking sheet.
- On a floured surface, roll out the dough thinly, to almost 1/8 inch thick.
- Transfer the dough to the tart pan, and fit it against the bottom and up the sides of the pan, pressing gently against the sides. You don't want to stretch or pull the dough, but allow enough slack in the dough so you can fit it snugly down into the edge of the pan.
- Use a sharp knife or scissors to trim the edge of the dough, allowing about 1/2 inch overhang. Keeping this overhang will allow for shrinkage as it bakes, and then you'll finish trimming the dough even with the top of the pan after baking the crust.
- Preheat the oven to 400 F, and freeze the crust in the pan for 20 minutes while the oven is pre-heating.
- Spray a piece of aluminum foil lightly with non-stick spray, and fit the foil, greased side down, against the frozen crust. Fill the foil with dried beans or pie weights.
- Bake the crust, covered with the foil and dried beans, for 15 minutes.
- Remove the pan from the oven, scoop the beans out of the foil, then gently peel the foil off the crust.
- Brush the egg white over the bottom and sides of the crust. Return the pan to the oven, and bake, uncovered, for an additional 12-15 minutes, just until the crust is baked through and starting to turn a pale golden brown.
- Remove from the oven. Immediately use a sharp knife to trim the edge of the crust so it's perfectly even with the top of the pan. Let cool for 10 minutes.
- Reduce the oven temperature to 325 F.
Filling
- While the crust is baking, you can whisk up the filling.
- In a bowl, combine the sugar and lemon zest. Use your hands to rub the zest into the sugar for a minute or two, until it's very fragrant and resembles damp sand.
- Whisk in the flour, then whisk in the eggs and lemon juice. Set aside until needed.
- TIP: You'll need 1 egg white to brush over the crust, but you won't be using the whole white. Since the filling uses 4 eggs, whisk in 3 eggs + 1 egg yolk, saving the 4th white to brush over the crust. After brushing the crust with egg white, add the remainder of the white to the lemon filling.
- After prebaking the crust, and letting it cool for 10 minutes, make sure you've reduced the oven temperature to 325 F.
- Whisk up the filling again and gently pour it into the crust. Place a pie crust shield over the tart pan to cover just the edge of the crust so it doesn't get overly brown. Very slowly, so you don't slosh the filling, place the baking sheet with the tart pan on the center oven rack.
- Bake the tart for about 25-30 minutes. The filling should be just set, with a very slight wobble in the center, and no browning on top.
- Cool the tart at room temperature for 1 hour, then refrigerate for 2-3 hours until chilled and set.
Topping
- If you're making a powdered sugar stencil, be sure to use non-melting powdered sugar, since regular powdered sugar will melt and become splotchy.
- For a whipped cream topping, use an electric mixer to whip the cold heavy whipping cream and powdered sugar until soft peaks form.
- Remove the sides of the pan, and serve slices of the tart with the whipped cream.
Notes
 https://curlygirlkitchen.com/
Leave a Reply