
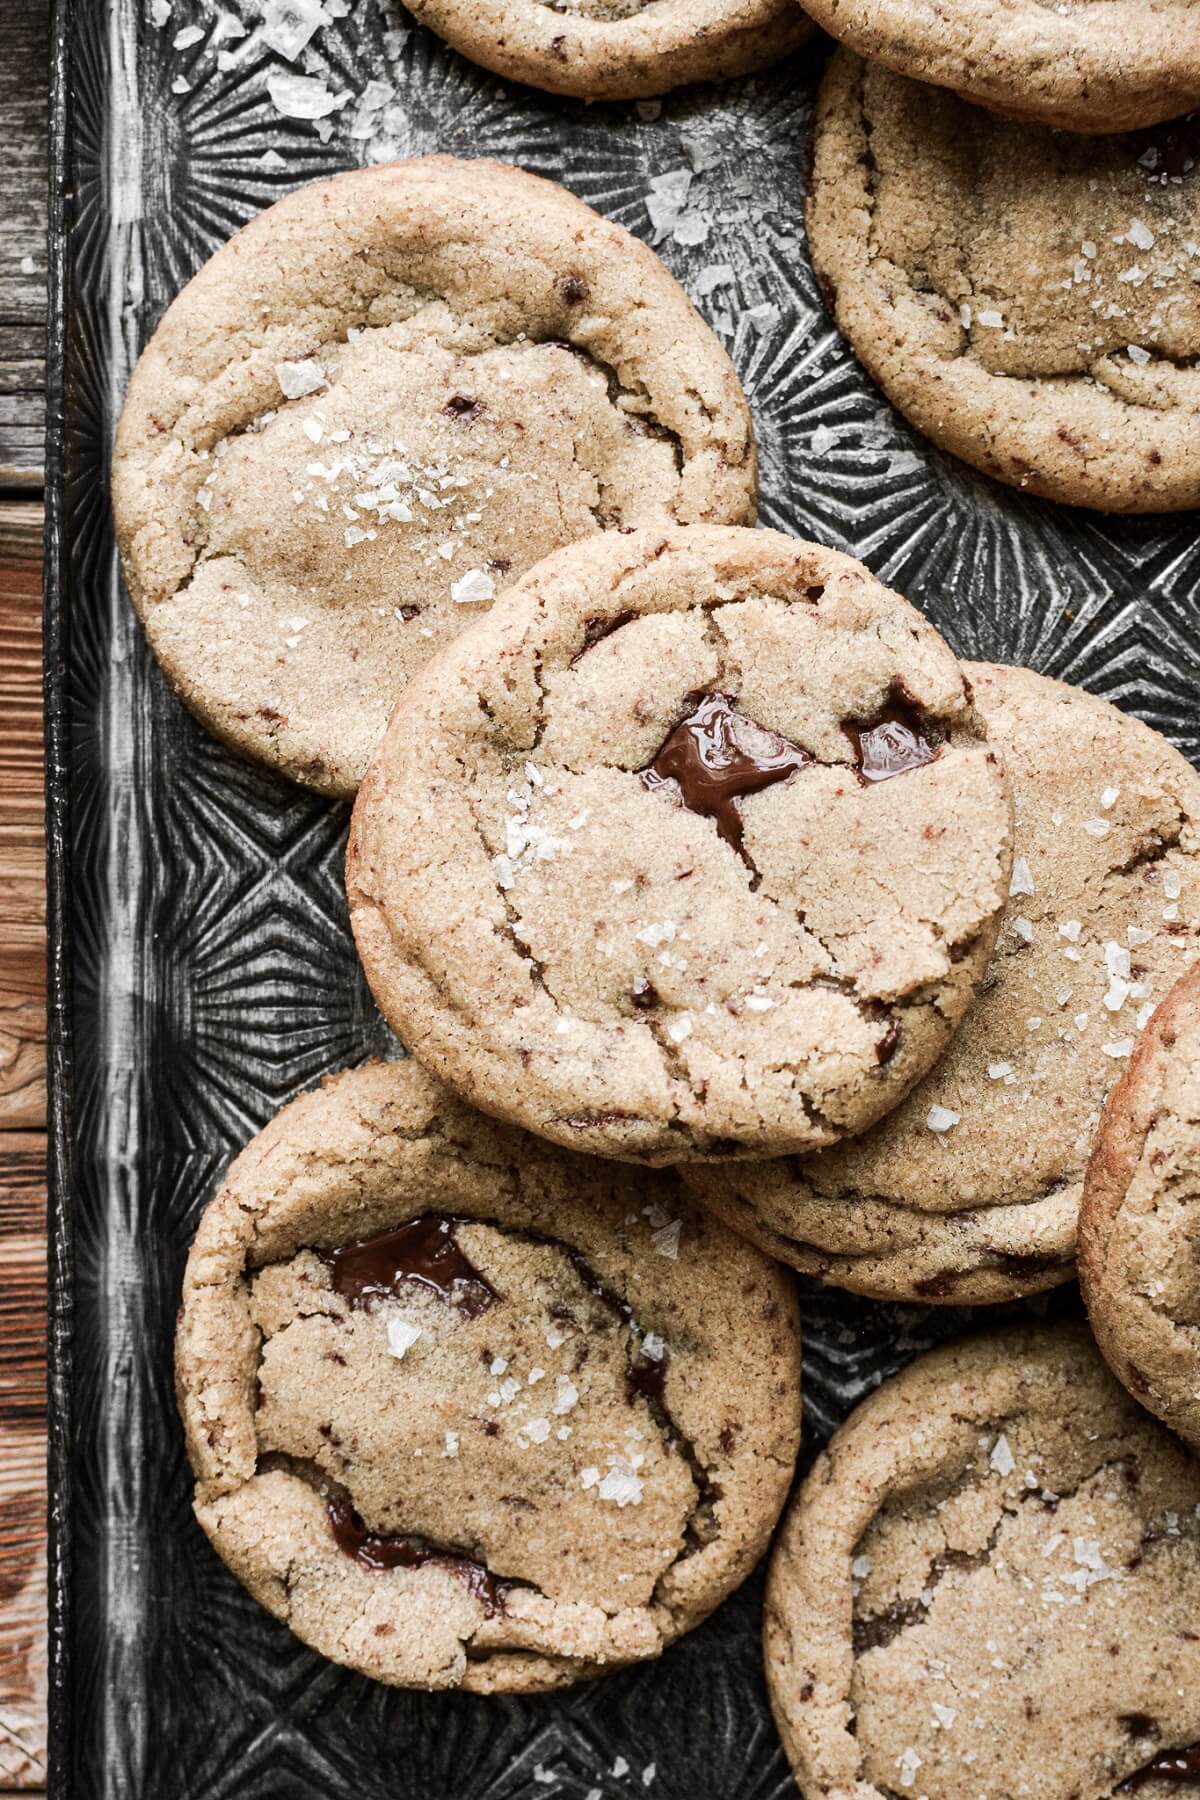
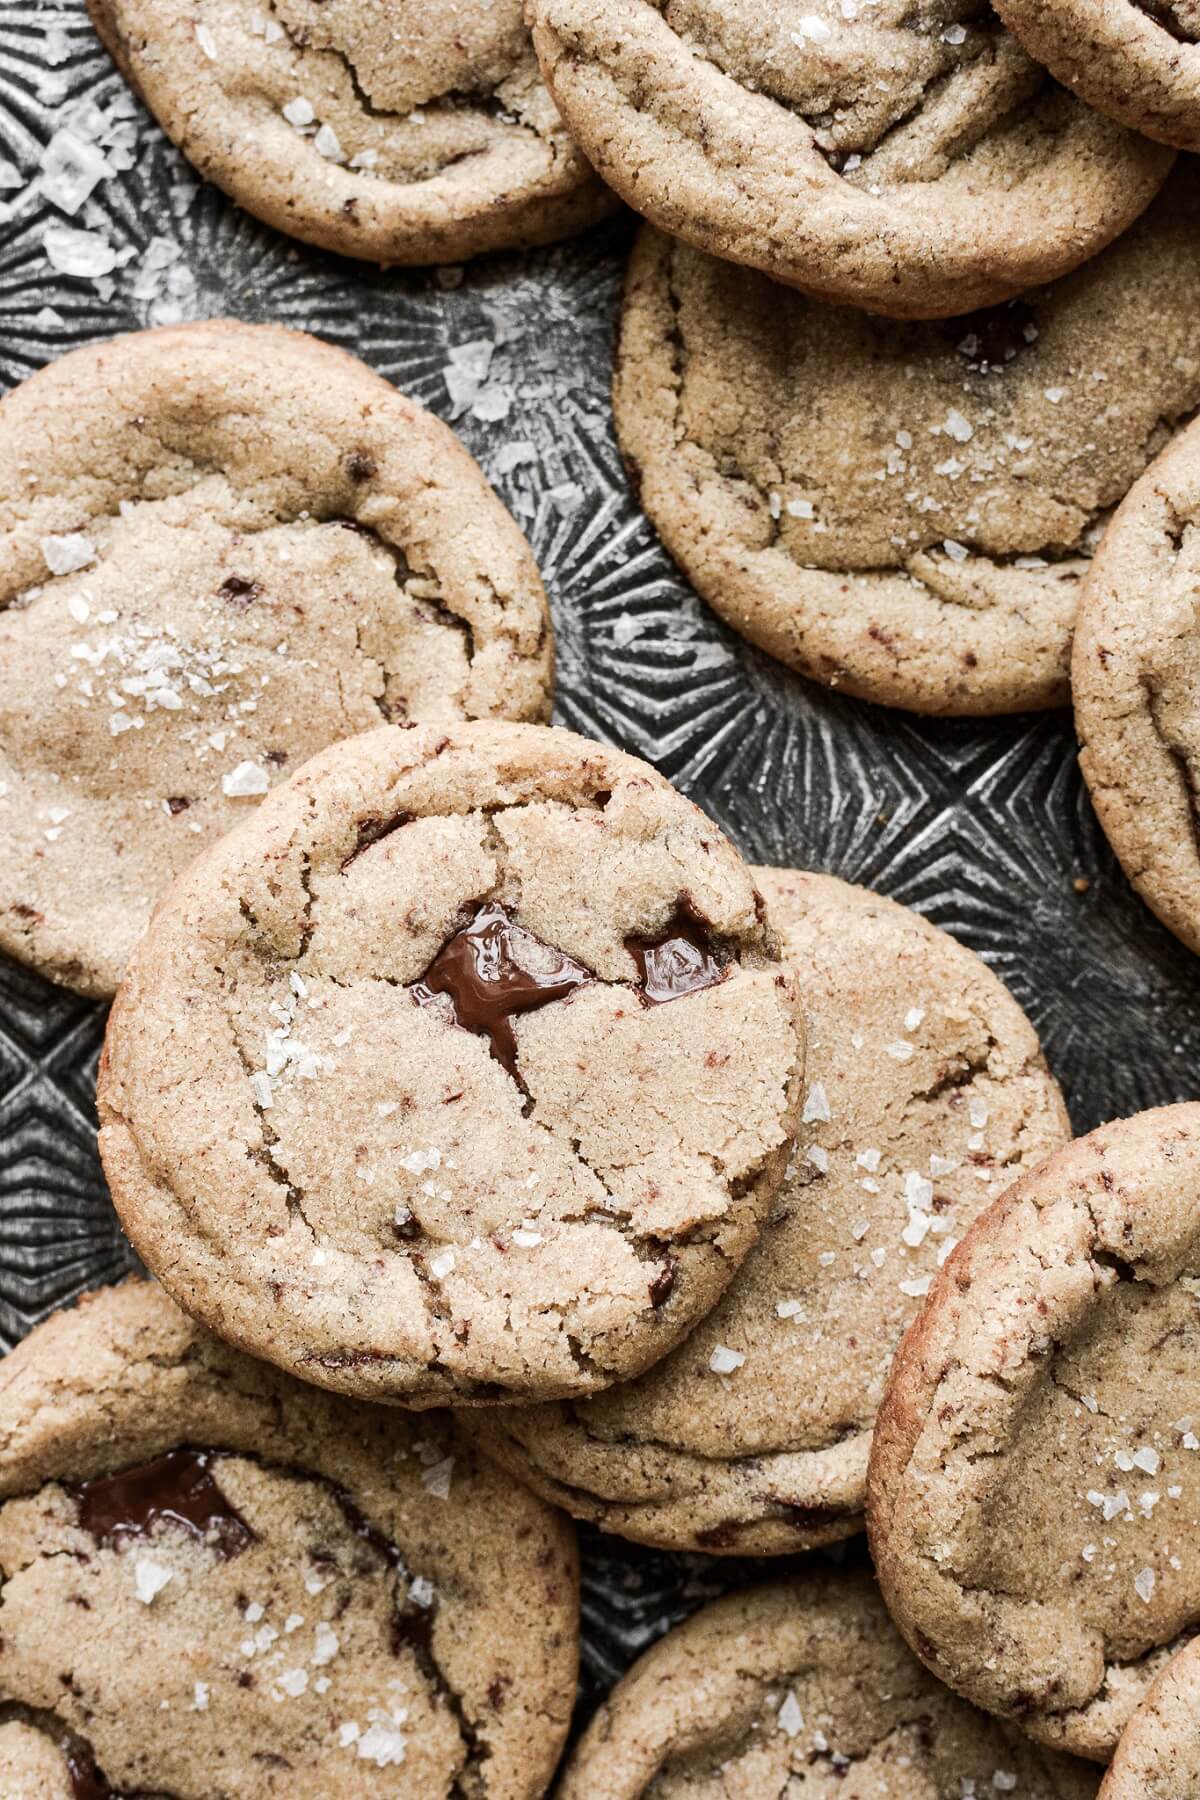
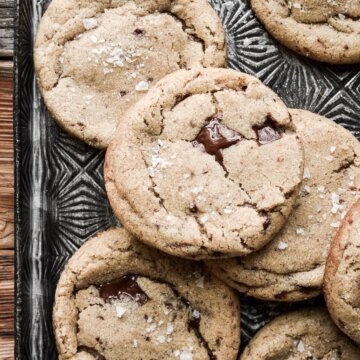
These high altitude brown butter chocolate chip cookies are thick with crisp golden edges and chewy centers. They’re perfectly salted with the rich flavor of nutty brown butter and lots of chopped dark chocolate. Our freezer is pretty much always stocked with these cookies, because they’re just so good! As a bonus, I’ve also tested this recipe without eggs, and have included a variation in today’s post for eggless chocolate chip cookies that are just as delicious.
And if you’re looking for a really soft chocolate chip cookie that’s perfected for high altitude, I’d recommend my best high altitude chocolate chip cookies recipe.
Looking for more high altitude cookie recipes? You’ll love these big chocolate chip cookies for two, oatmeal chocolate chip cookies, and chocolate white chocolate chip cookies.
This site contains affiliate links. As an Amazon associate, I earn from qualifying purchases. This means that I may make a small commission if you purchase a product using those links. This in no way affects my opinion of those products and services. All opinions expressed on this site are my own.
Why You’ll Love These Cookies
Rich Flavor of Browned Butter. The flavor of the brown butter is rich, nutty and so much more buttery than butter that hasn’t been browned. It perfectly complements the dark chocolate.
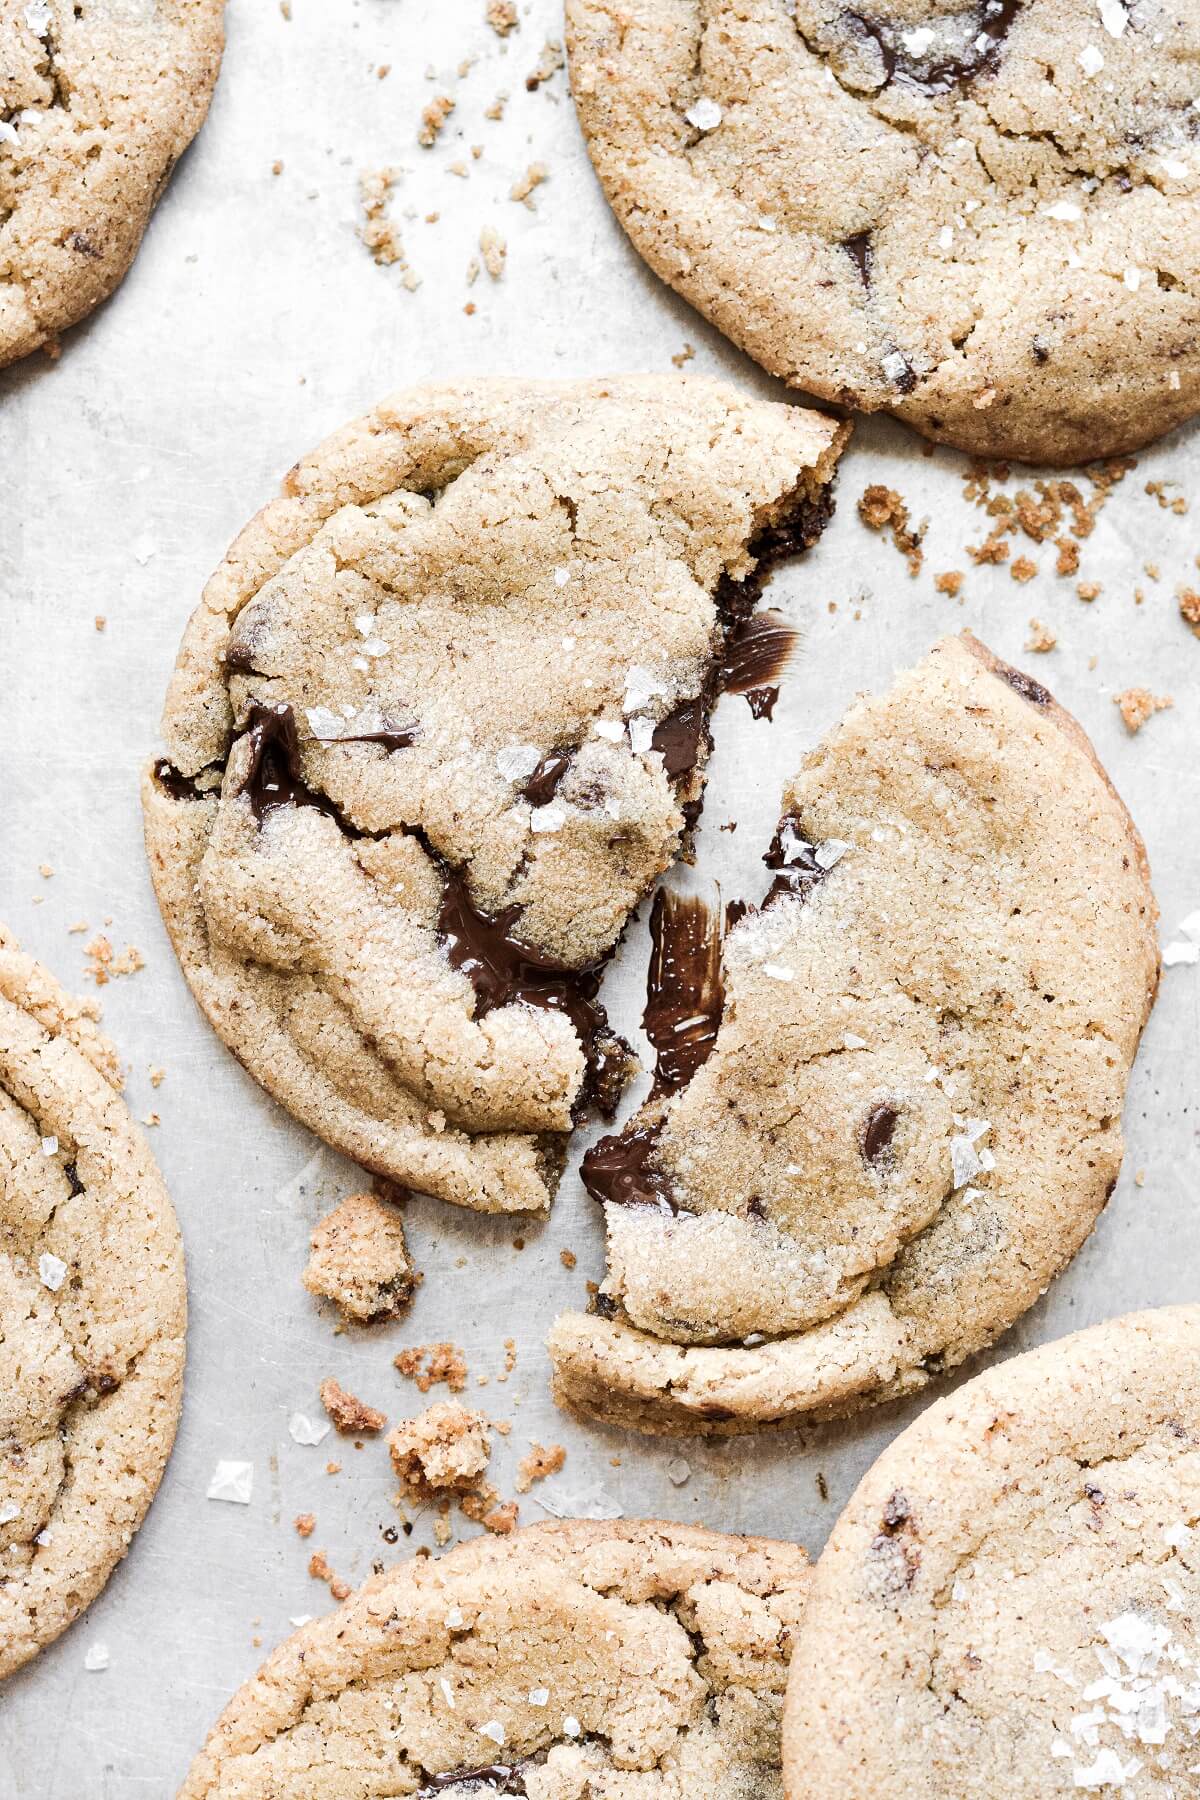
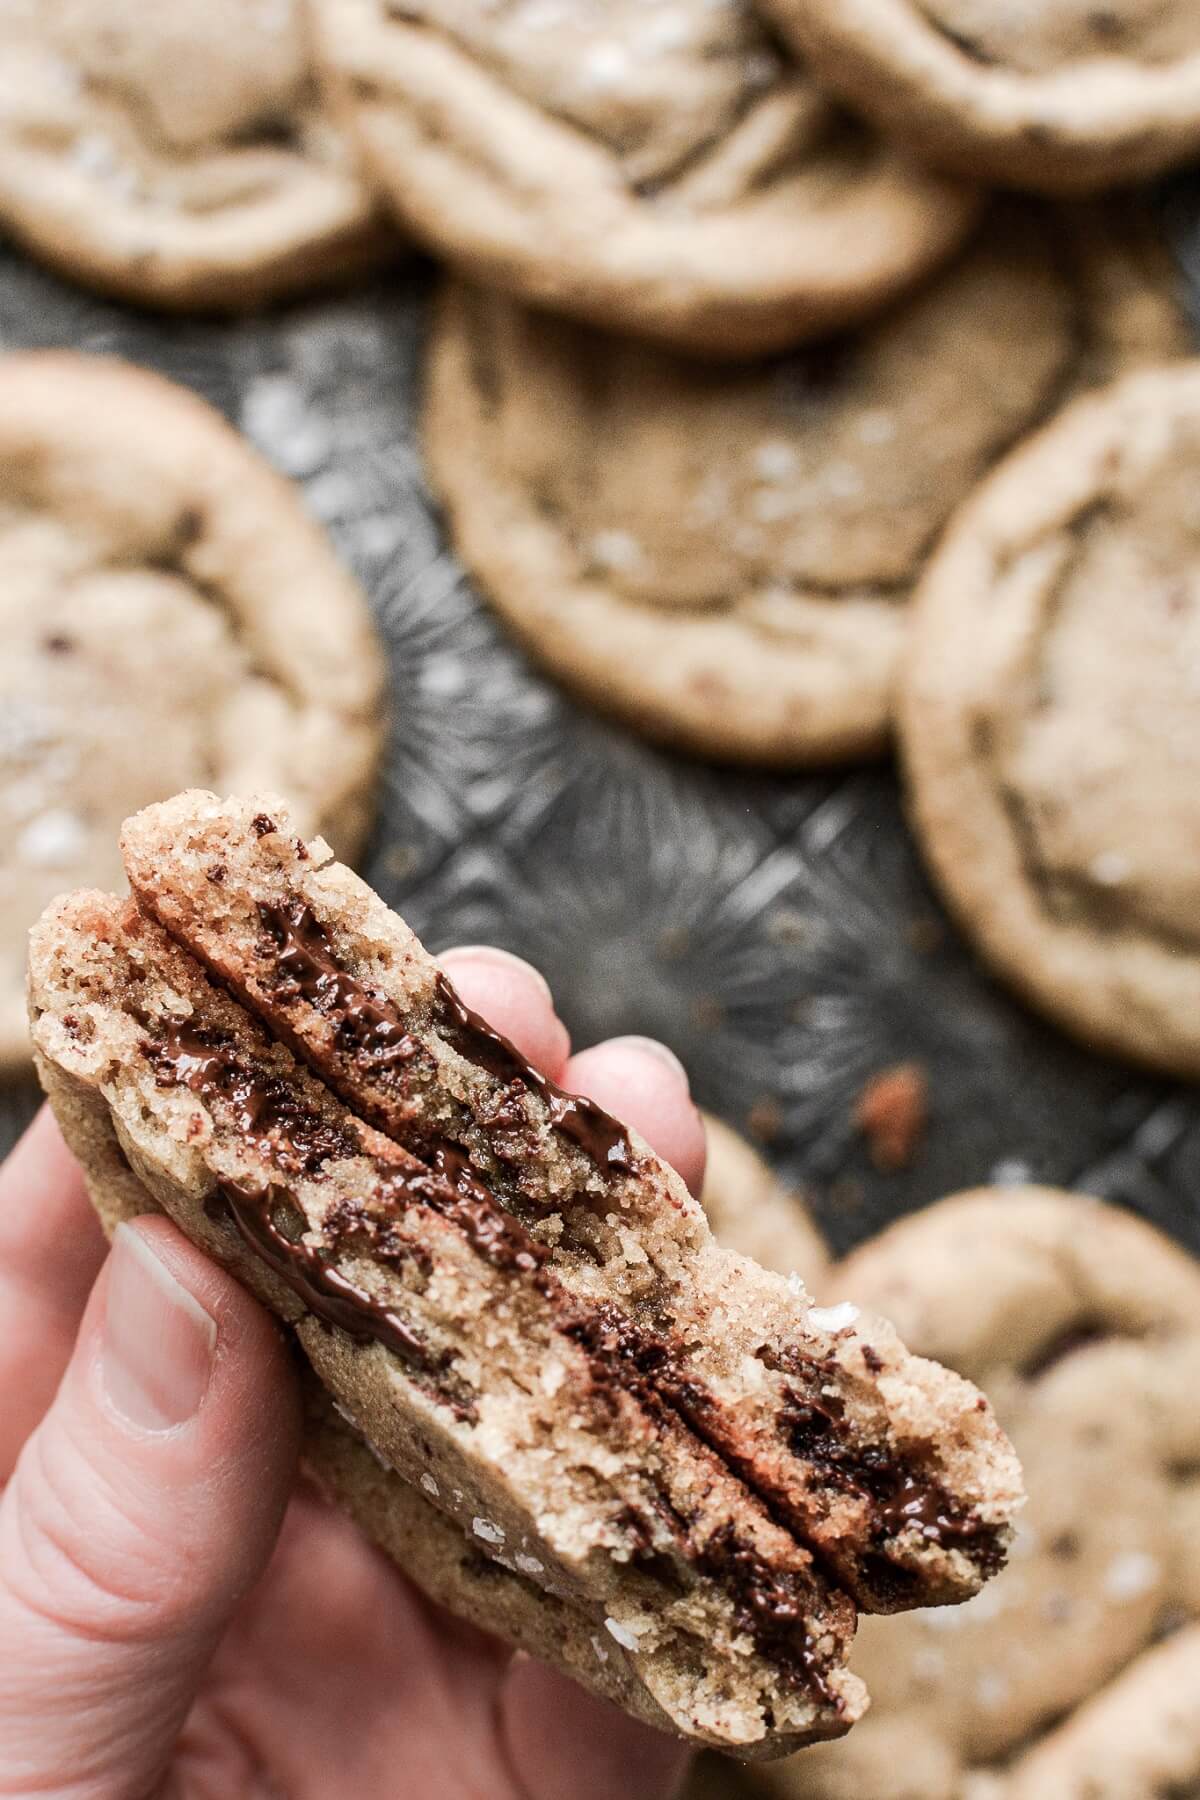
Crispy and Chewy. These brown butter chocolate chip cookies are completely different from my original high altitude chocolate chip cookie recipe. They aren’t necessarily soft, but rather thick chewy cookies with crisp, crumbly edges. I can’t stop eating them. Try adding an extra egg yolk to the dough for a cookie that’s a bit softer and chewier.
Salty and Sweet. The addition of some espresso powder, as well as the bitterness of the dark chocolate balances the sweetness, and is perfectly enhanced by some flaky finishing salt.
High Altitude Tested. I develop and test every recipe on my site for Denver’s altitude of 5,280 feet.
Eggless Variation. Whether you’re baking for someone who has an egg allergy or you’ve simply run out of eggs, I’ve tested these cookies with an easy substitution for the egg that makes a really wonderful batch of cookies.
See the recipe card at the end of the post for the full ingredients list and instructions.
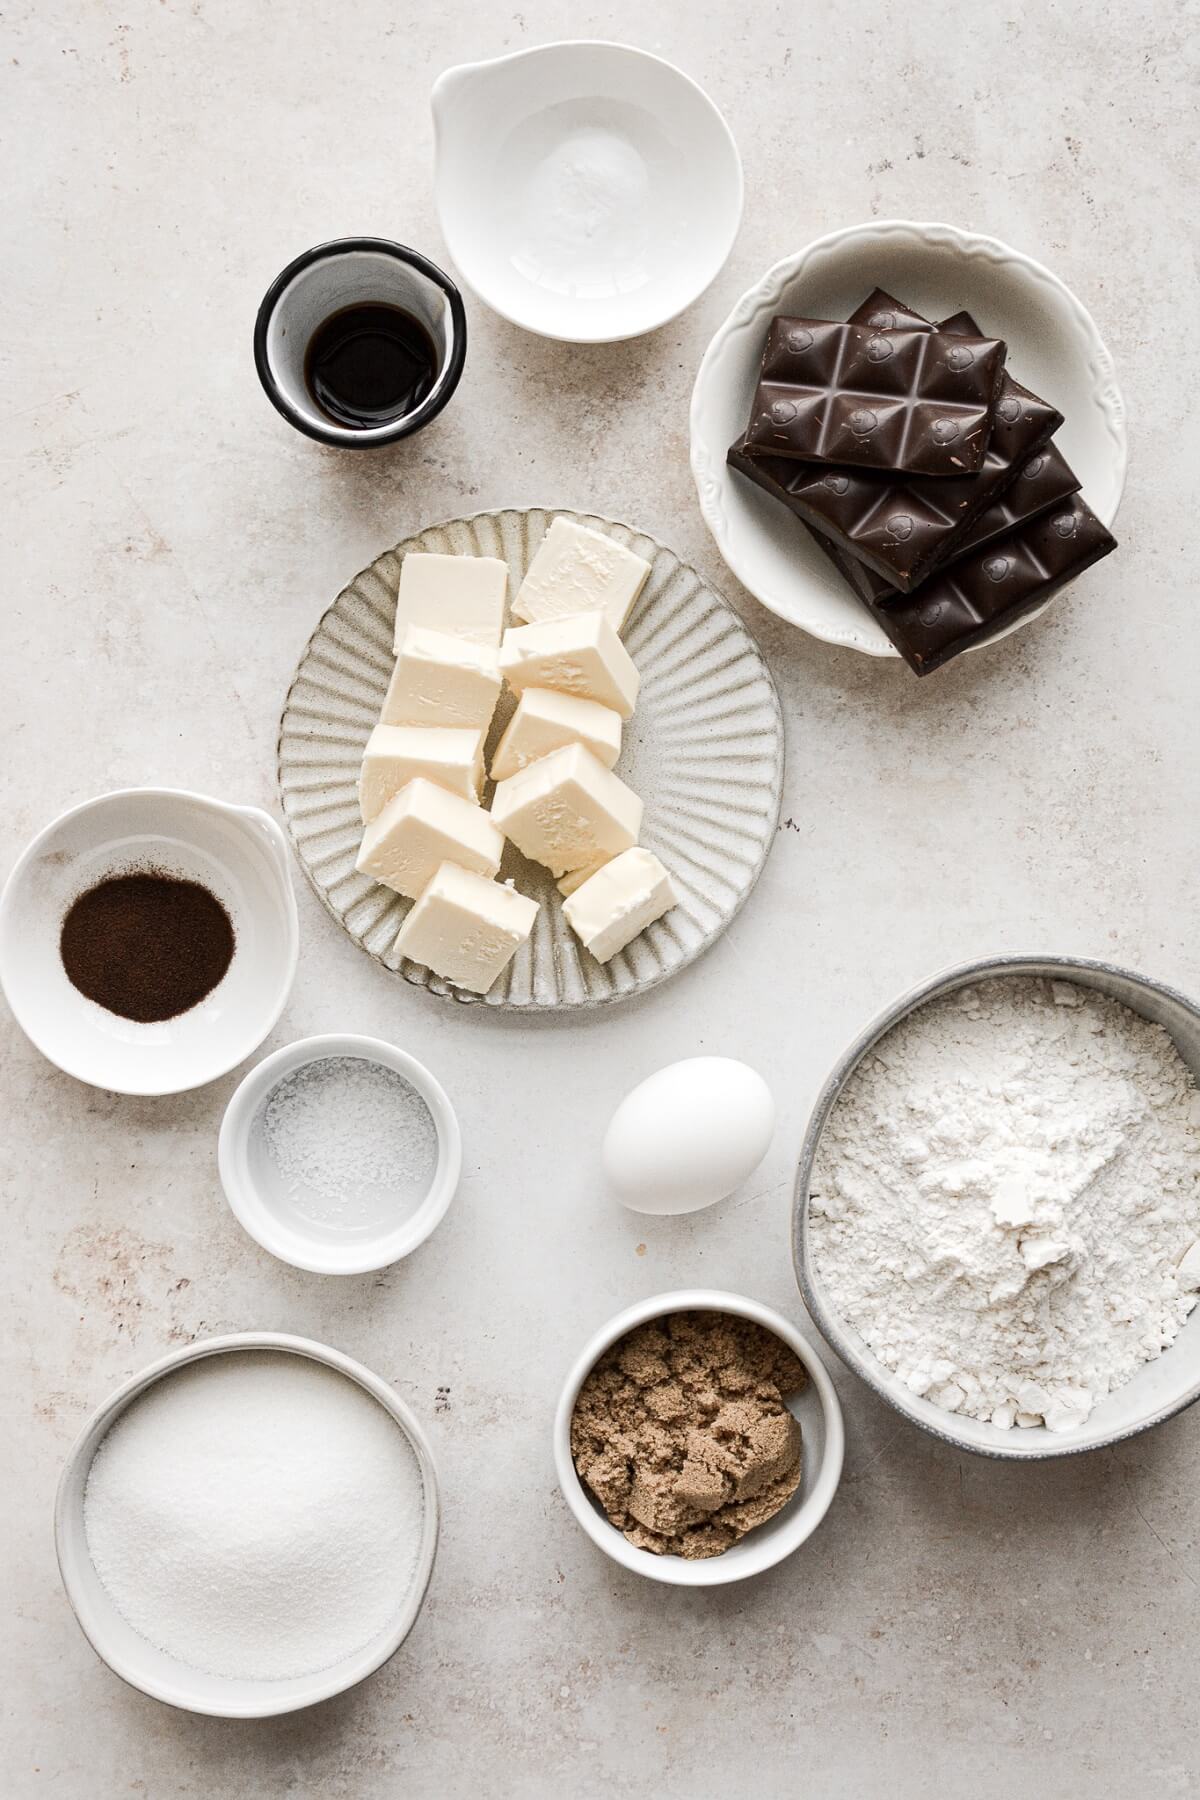
Ingredients
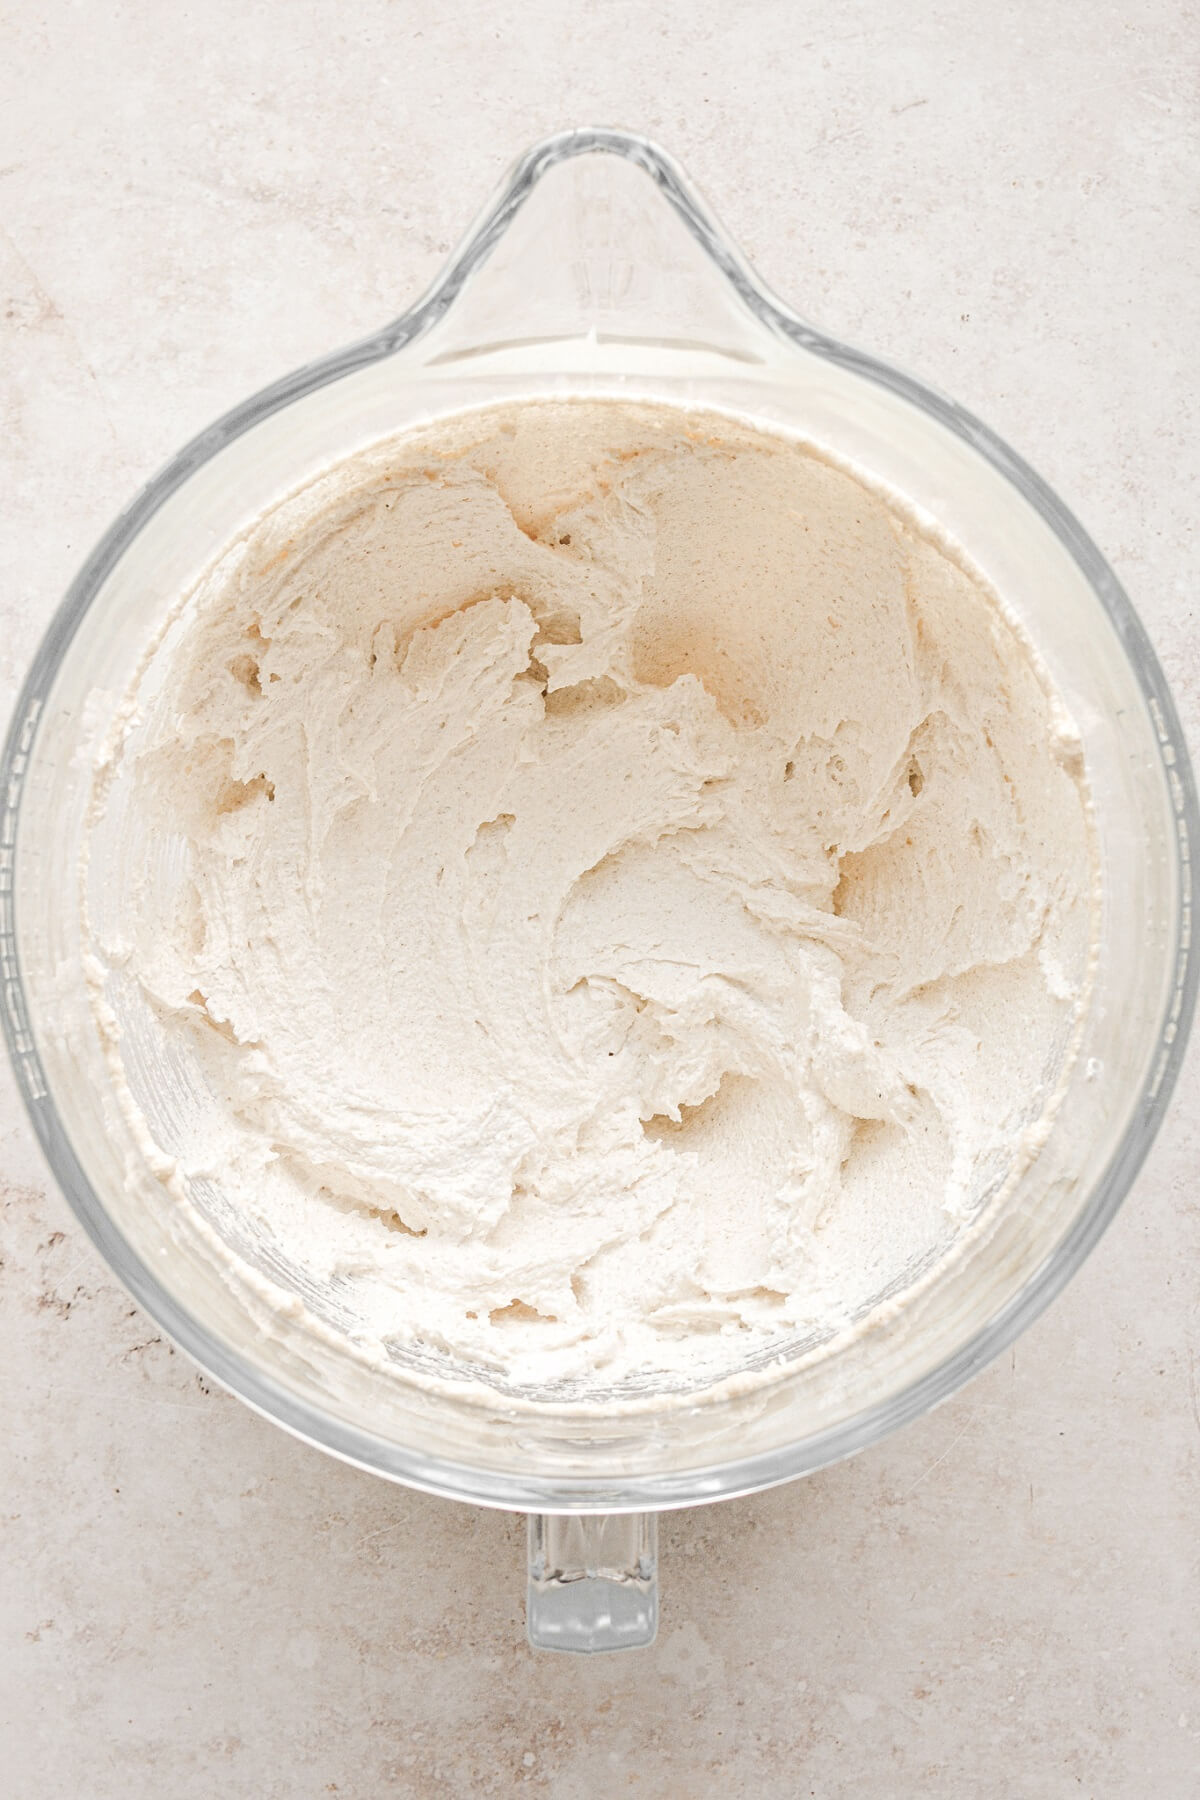
- Butter. I began developing this recipe with browned butter, because I absolutely love the nutty richness it adds to cookies. It’s so aromatic, light and fluffy when whipped with the sugar (and also makes fantastic buttercream).
- Sugar. Using both granulated sugar and a little brown sugar adds a richer, deeper flavor, than just the granulated sugar.
- Egg. Binds the dough together and gives it structure.
- Vanilla. Flavor.
- Flour. All-purpose flour gives the cookies structure and strength.
- Baking Soda. Leavening agent.
- Espresso Powder. The espresso powder nicely enhances the dark chocolate, but there’s a small enough amount added that the cookies don’t taste like coffee. This is completely optional, though.
- Salt. And the salt is an absolute must. I think that cookies should be noticeably salty, which is why I always sprinkle a little salt right on top of them, as well.
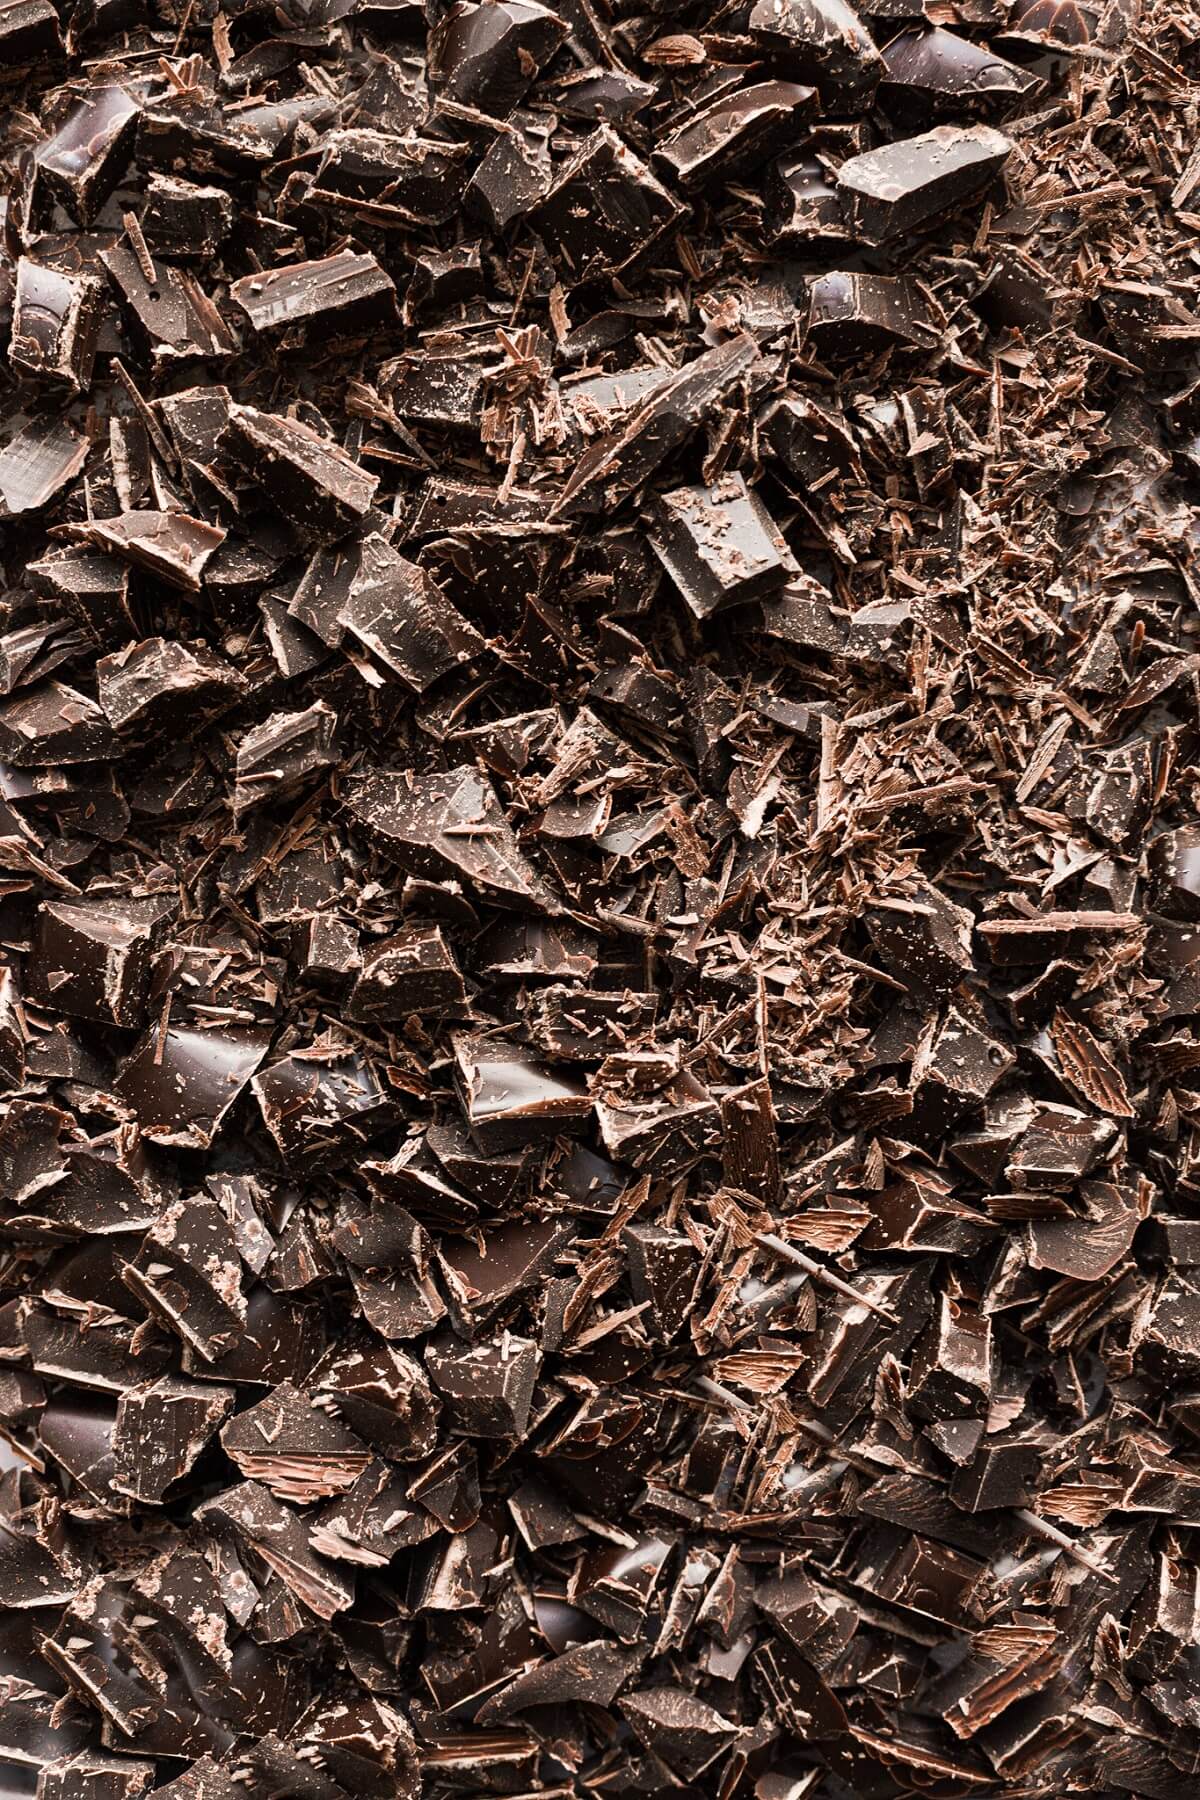
- Chocolate. For the chocolate, you can certainly use chocolate chips. I love the Kirkland (Costco) Semi-Sweet Chocolate Chips. They’re great quality, with minimal ingredients. But use dark, semi-sweet, milk – whatever your favorite is. With today’s recipe, though, I really love using good-quality chopped dark chocolate. I prefer Chocolove Dark Chocolate, which contains 55% cacao. The flavor is deep, rich and smooth, and it’s a chocolate that I love to use in baking. Chocolove also has such pretty wrappers on their chocolate bars, and I love pretty packaging. If you want more pools of dark chocolate on top of your cookies, save a few of the bigger pieces after chopping the chocolate and press those onto the tops of your cookie dough balls before chilling.
Be sure to read all of my BAKING FAQs where I discuss ingredients, substitutions and common baking questions, so that you can be successful in your own baking!
Instructions
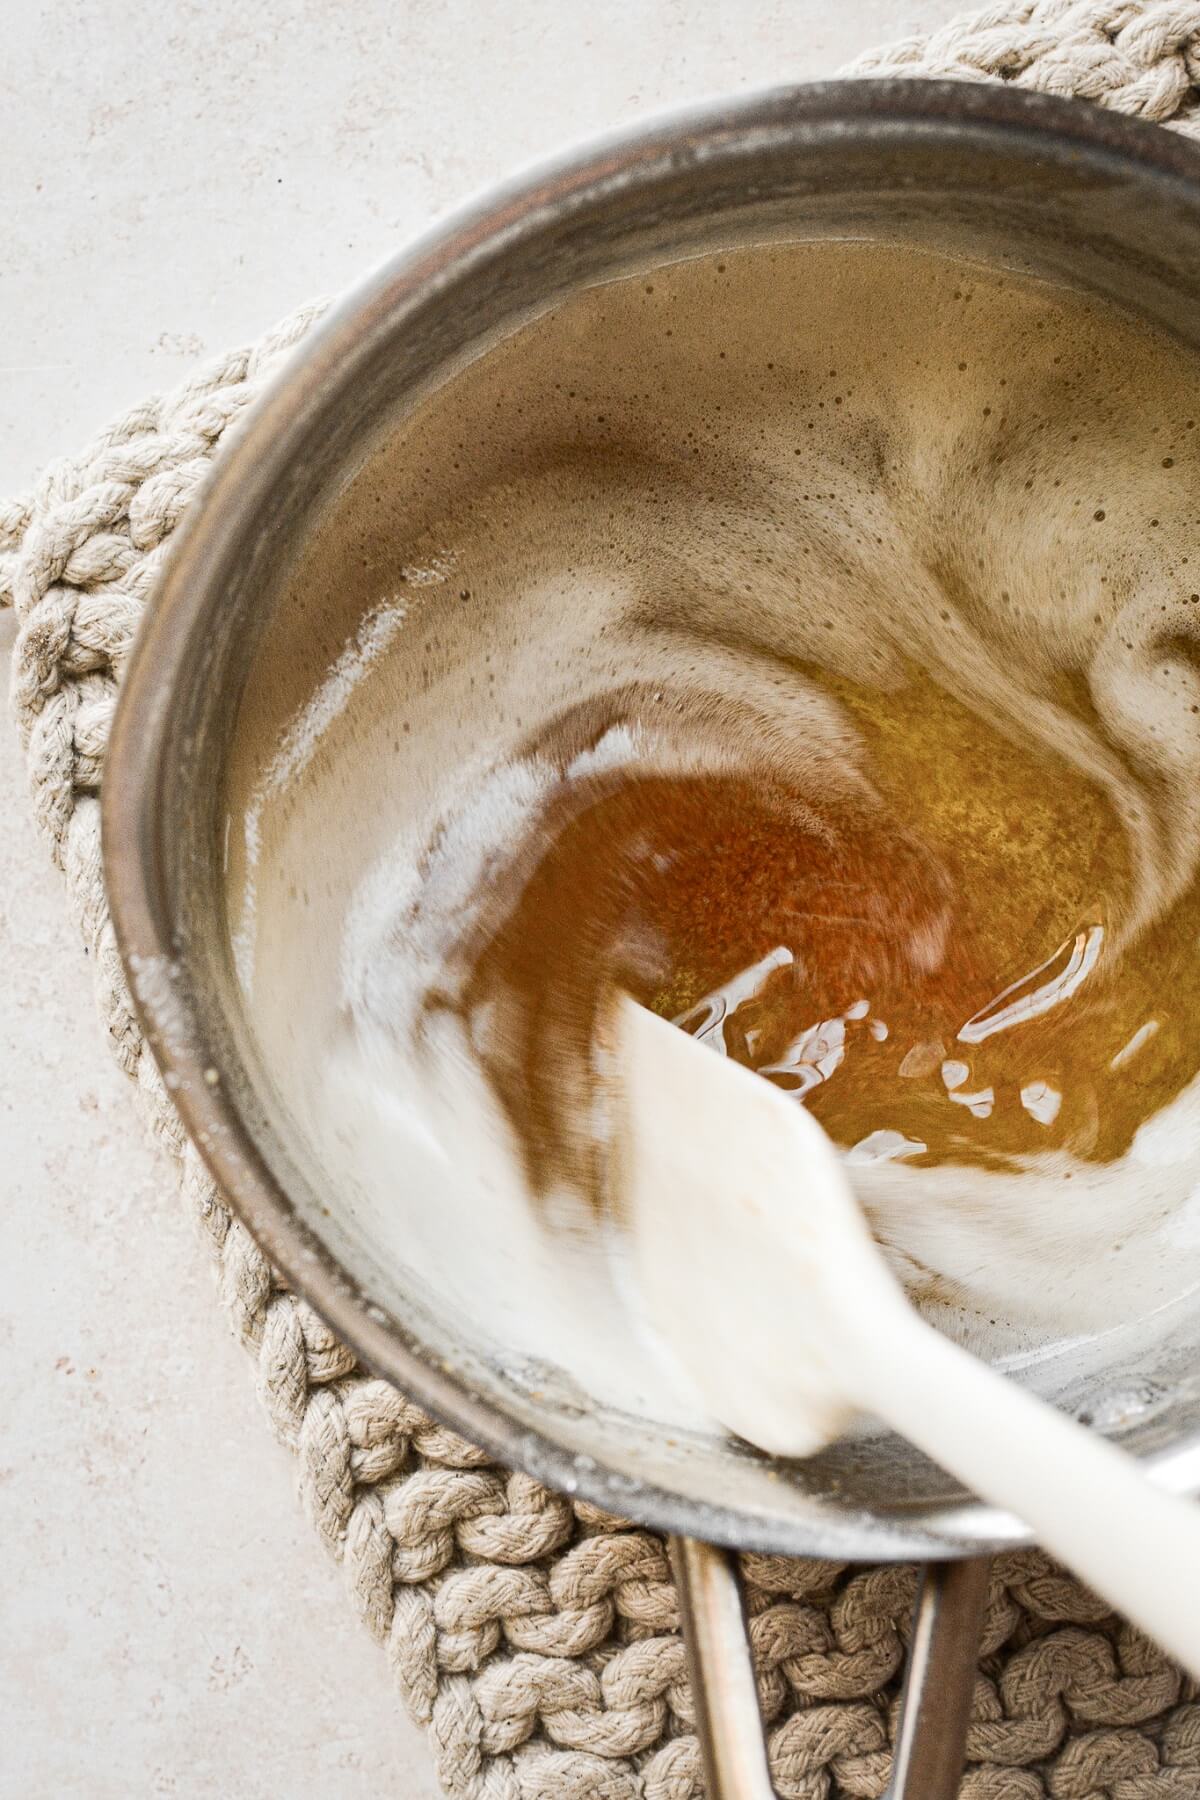
Make and cool the brown butter.
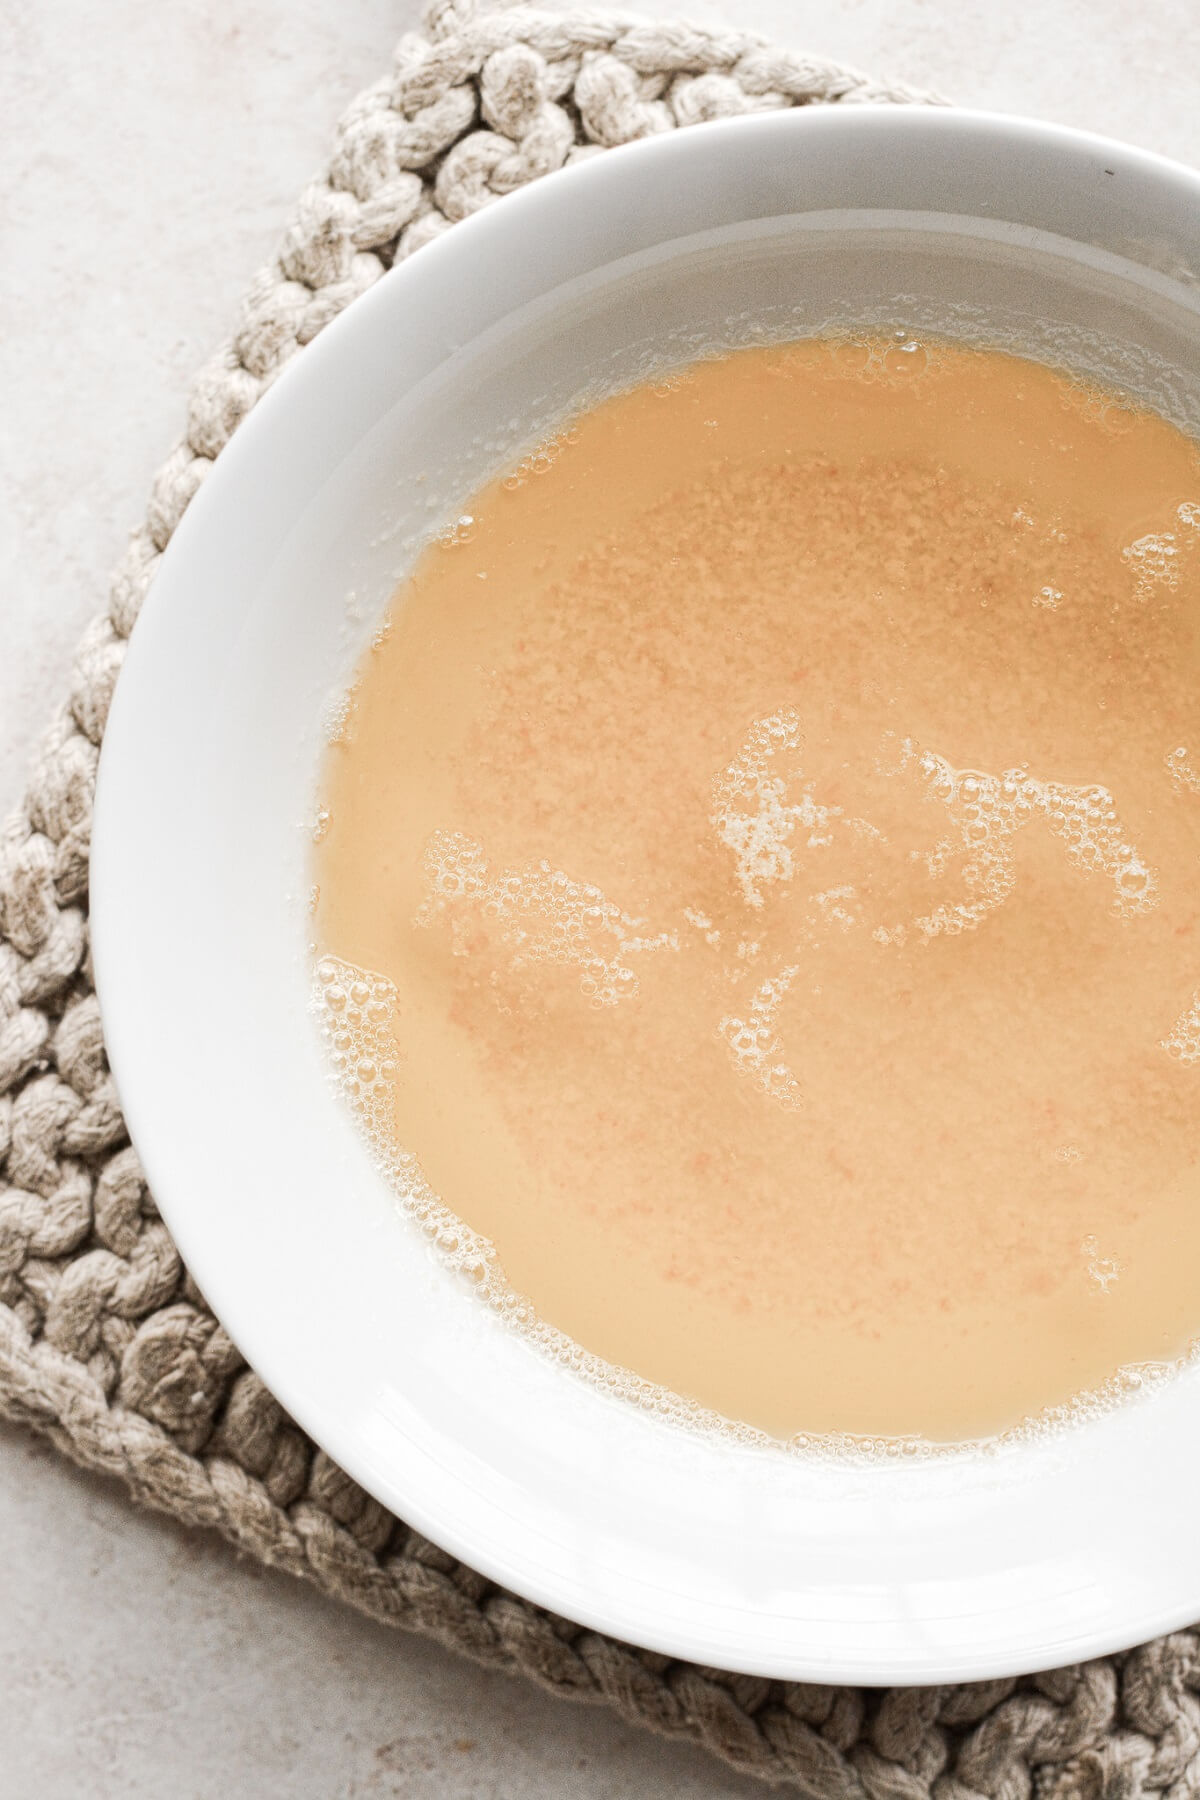
- In a saucepan, melt the butter over medium heat. Continue to cook the butter, swirling occasionally, until the water evaporates, and the butter forms fragrant, nutty brown solids at the bottom of the pan. Remove from the heat and immediately pour the hot butter into a bowl, scraping all the browned bits off the bottom of the saucepan with a spatula.
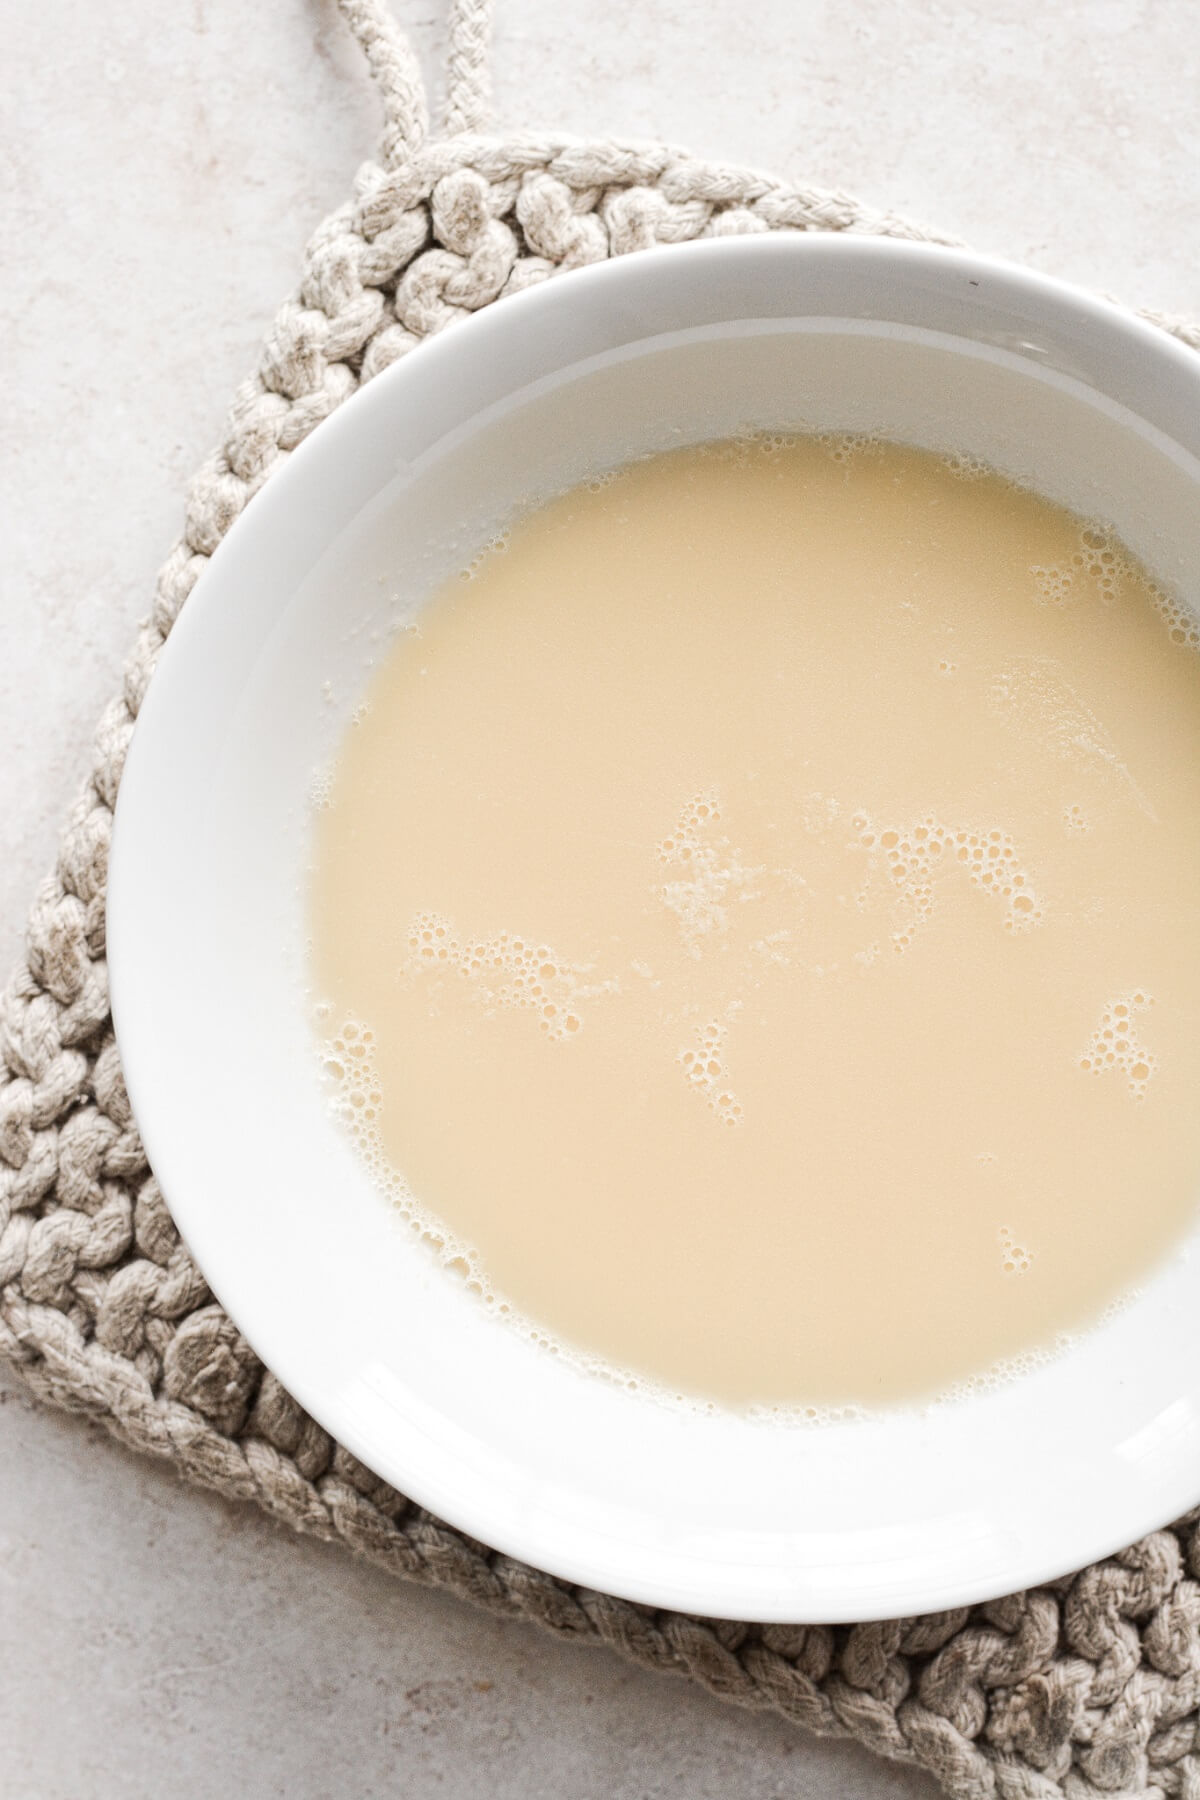
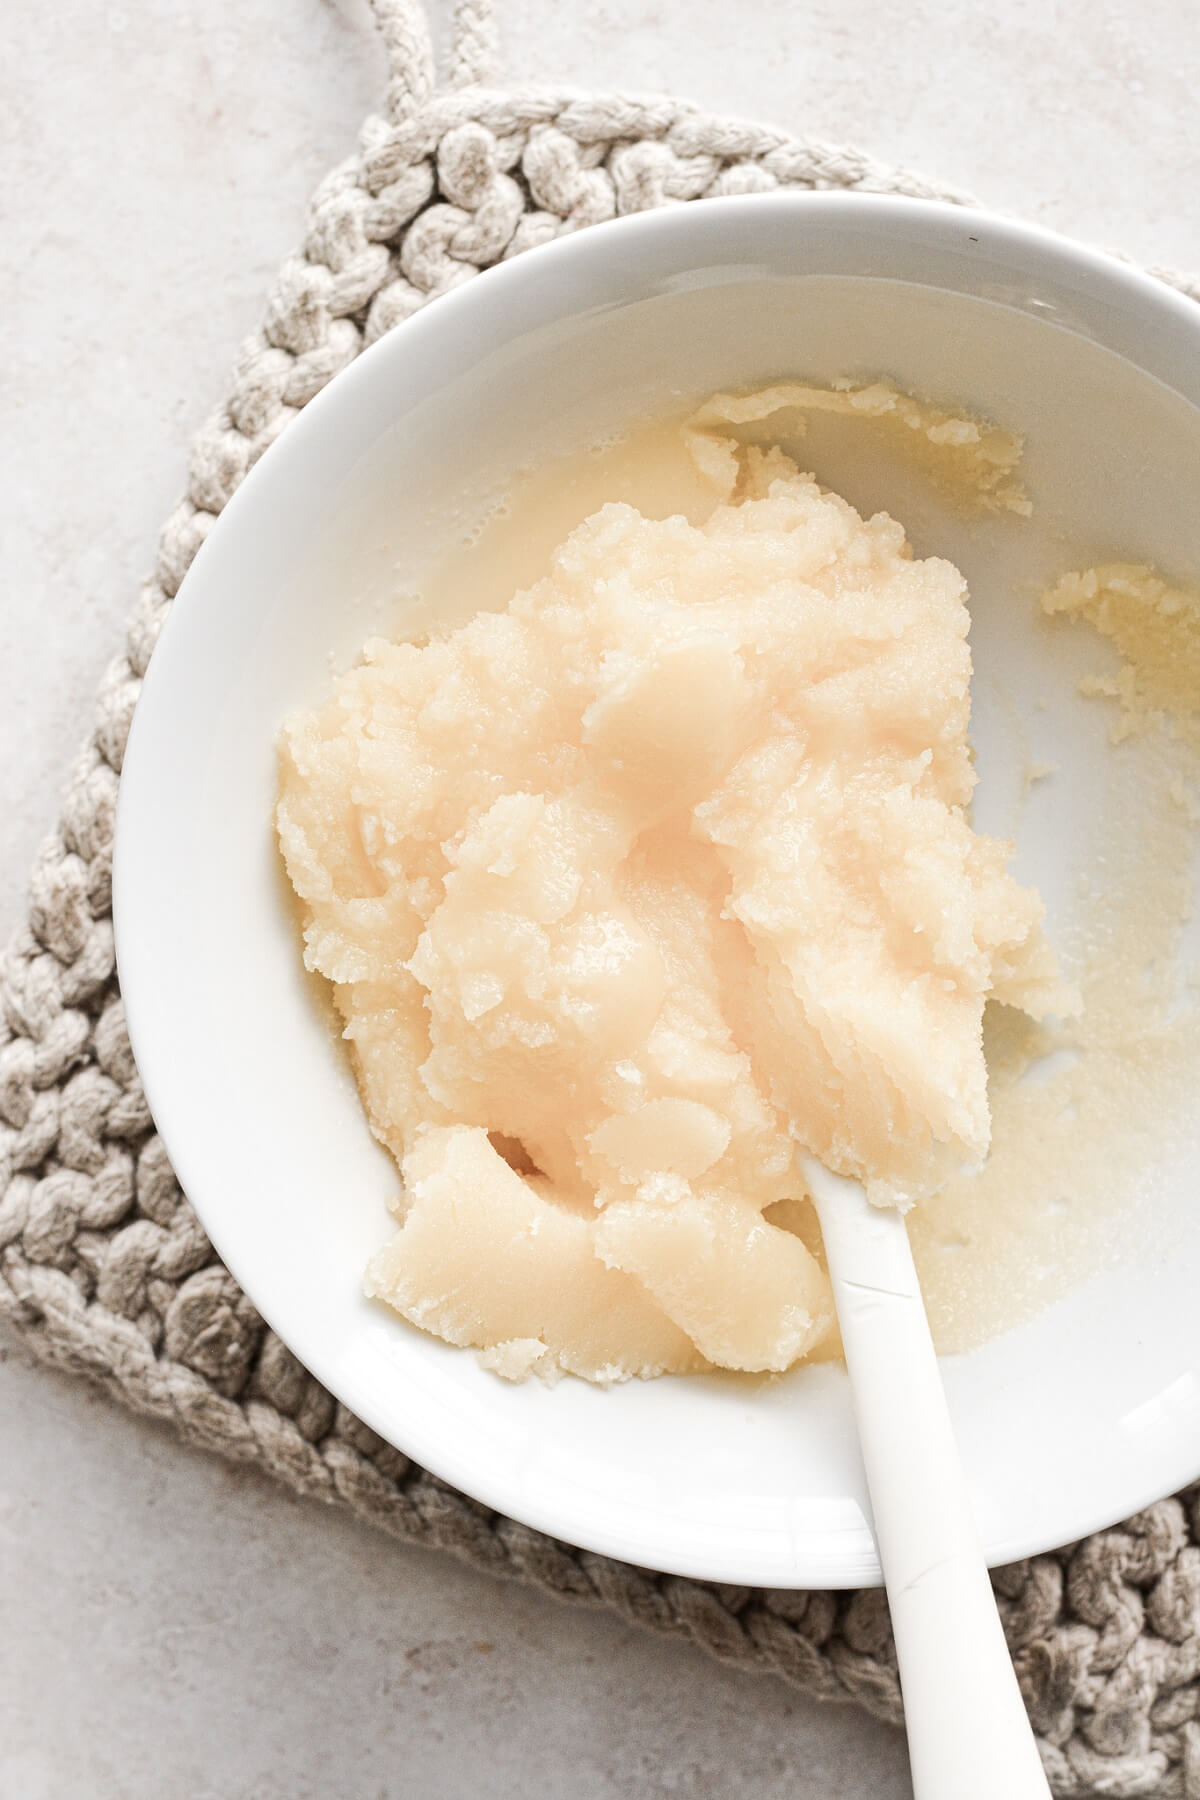
- Let the butter cool at room temperature for several hours, until it becomes somewhat solid again. As the butter cools, it may not become firm enough to hold its shape (depending on how warm your kitchen is), and may remain a little soft and spreadable, but allow it to cool until it is no longer a liquid.
Make the cookie dough.
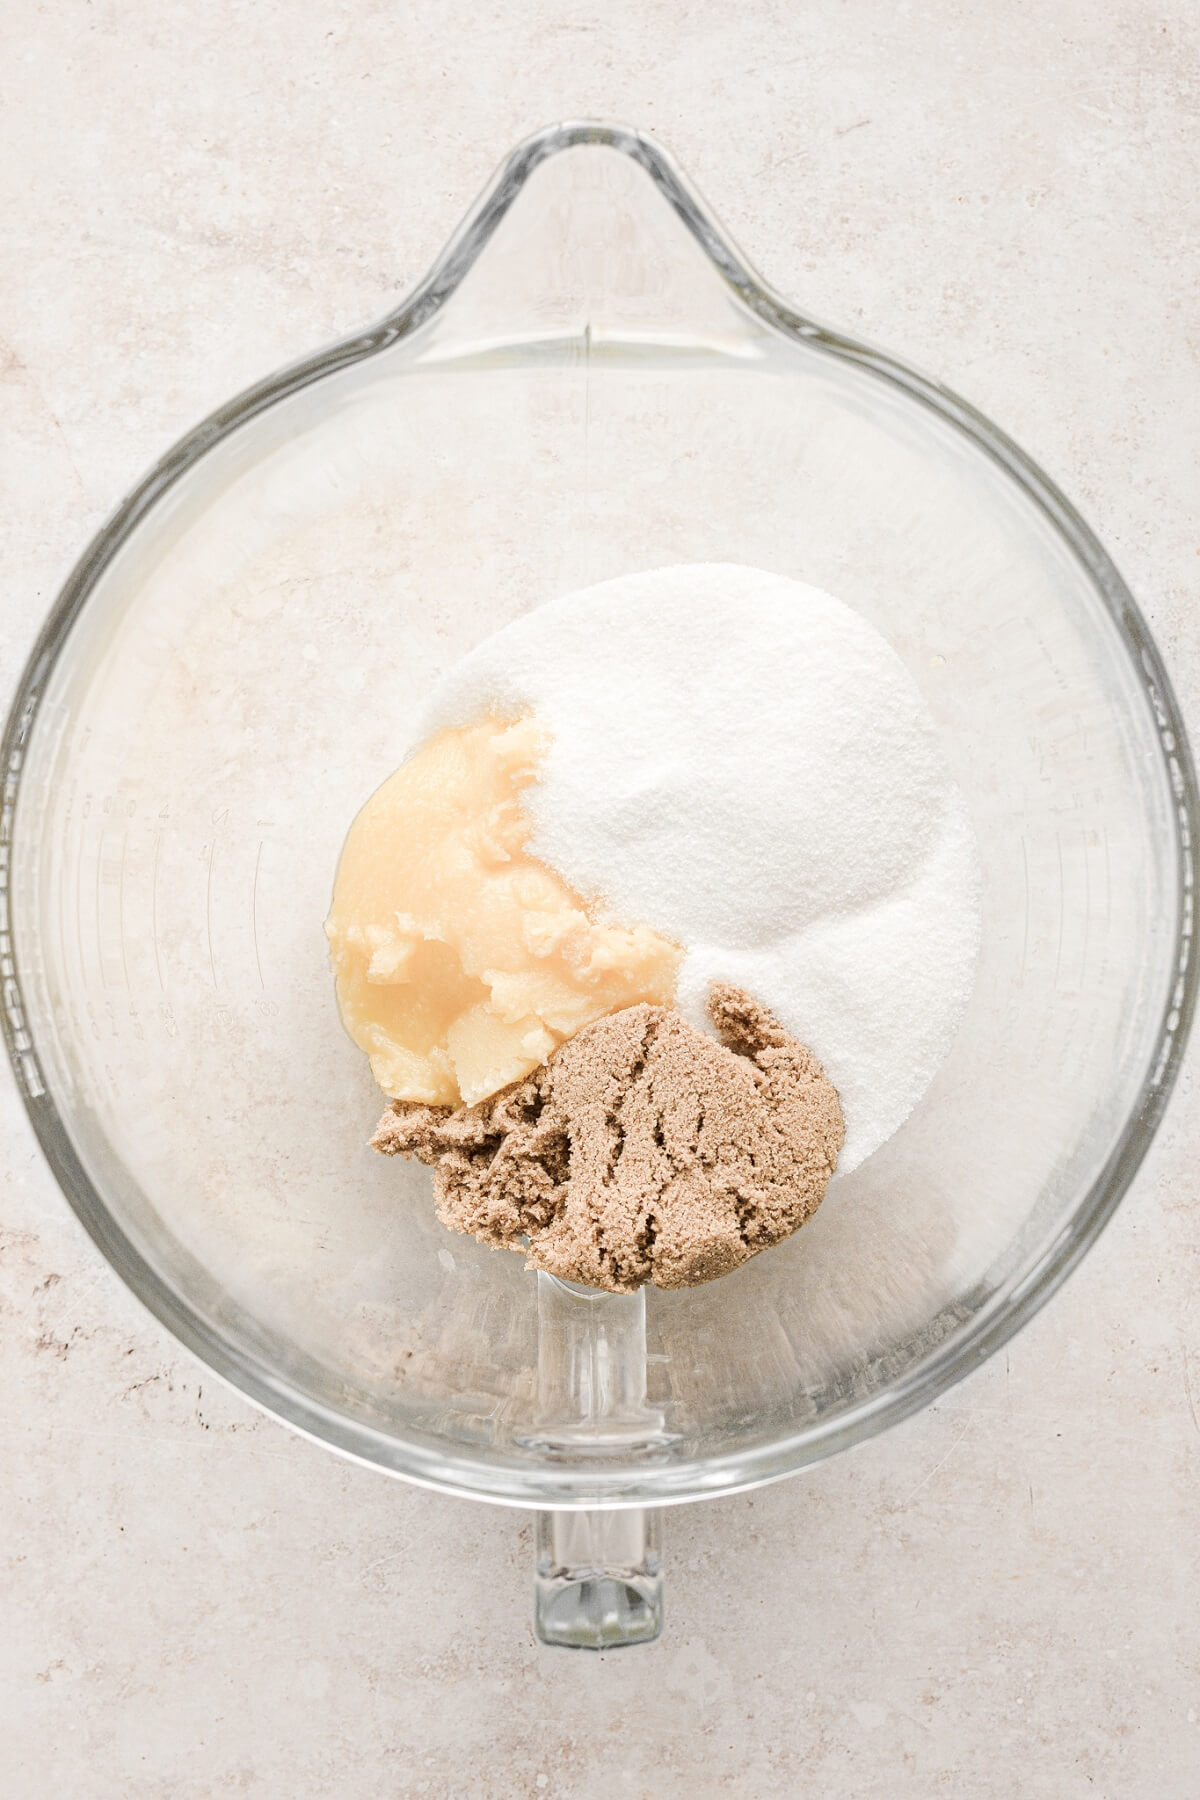
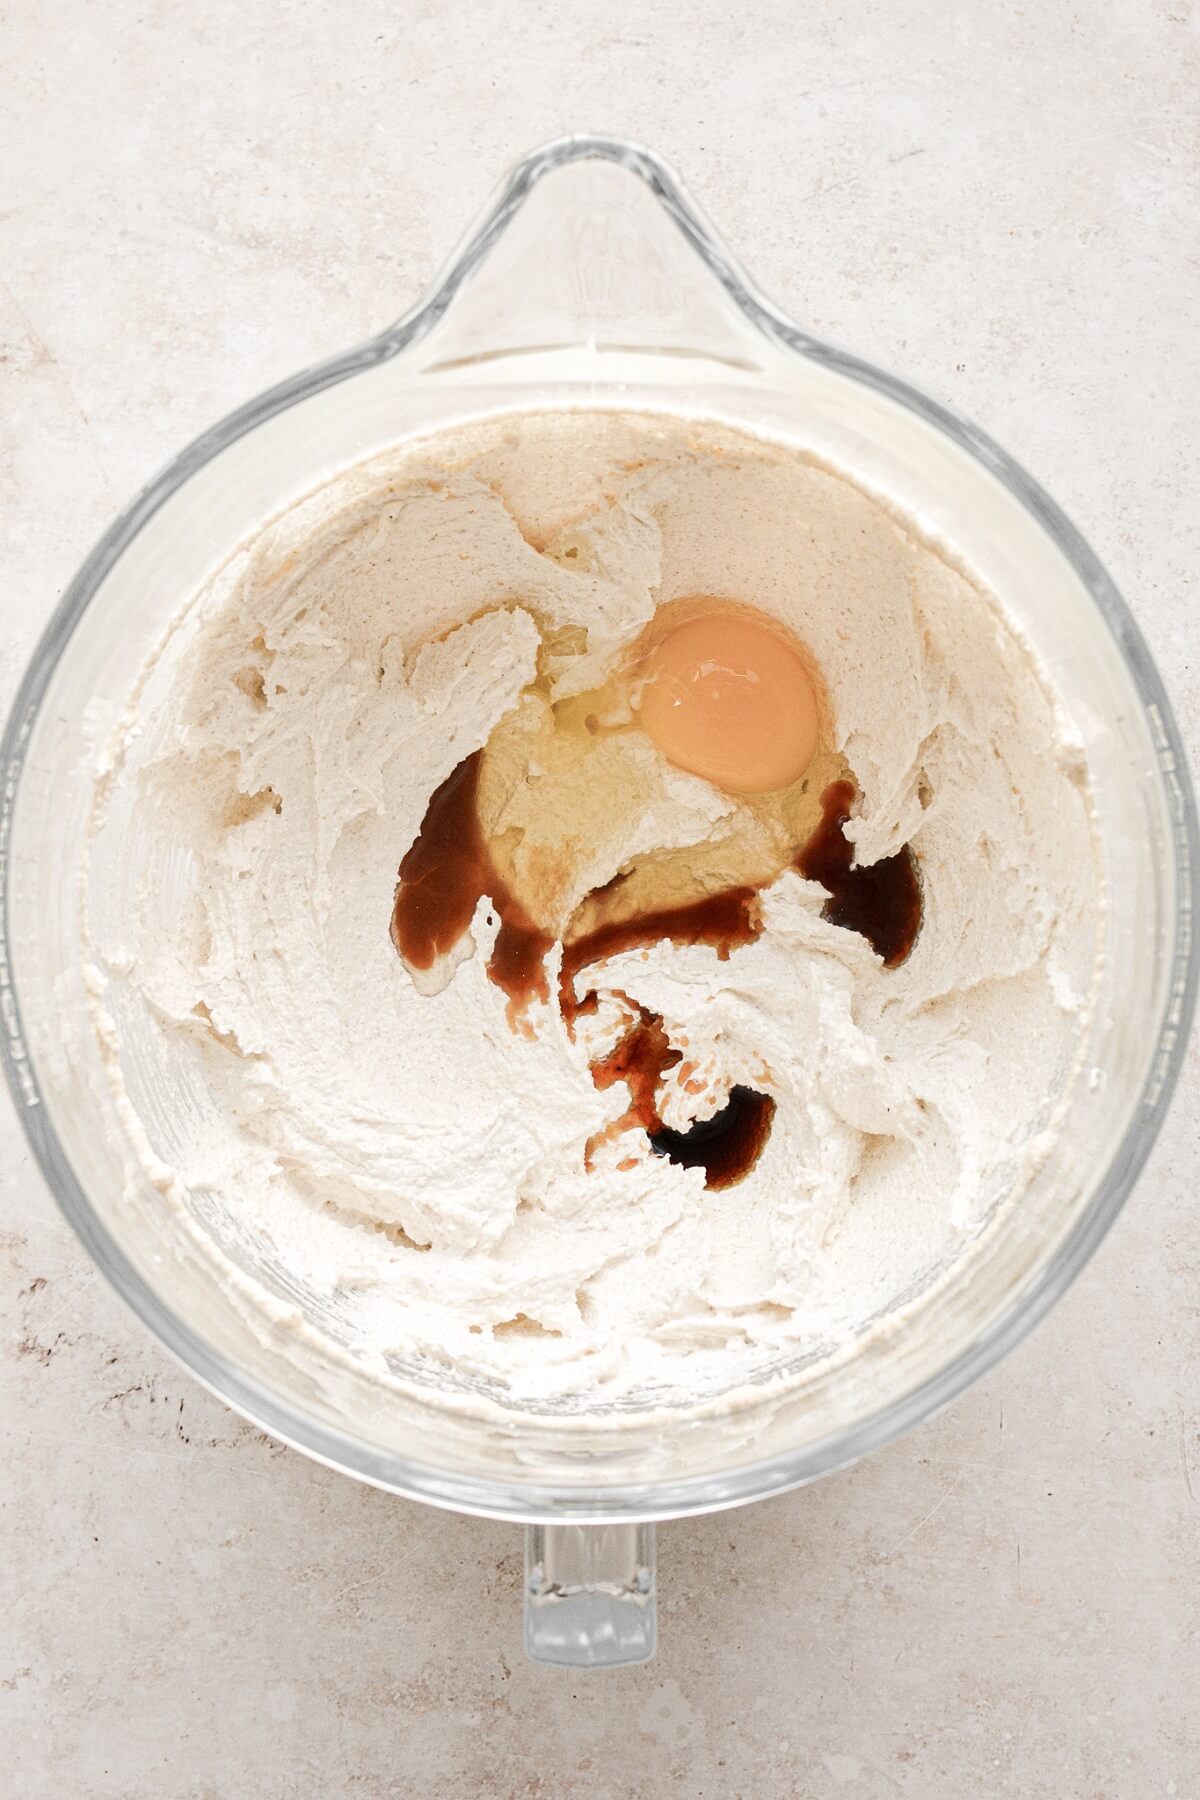
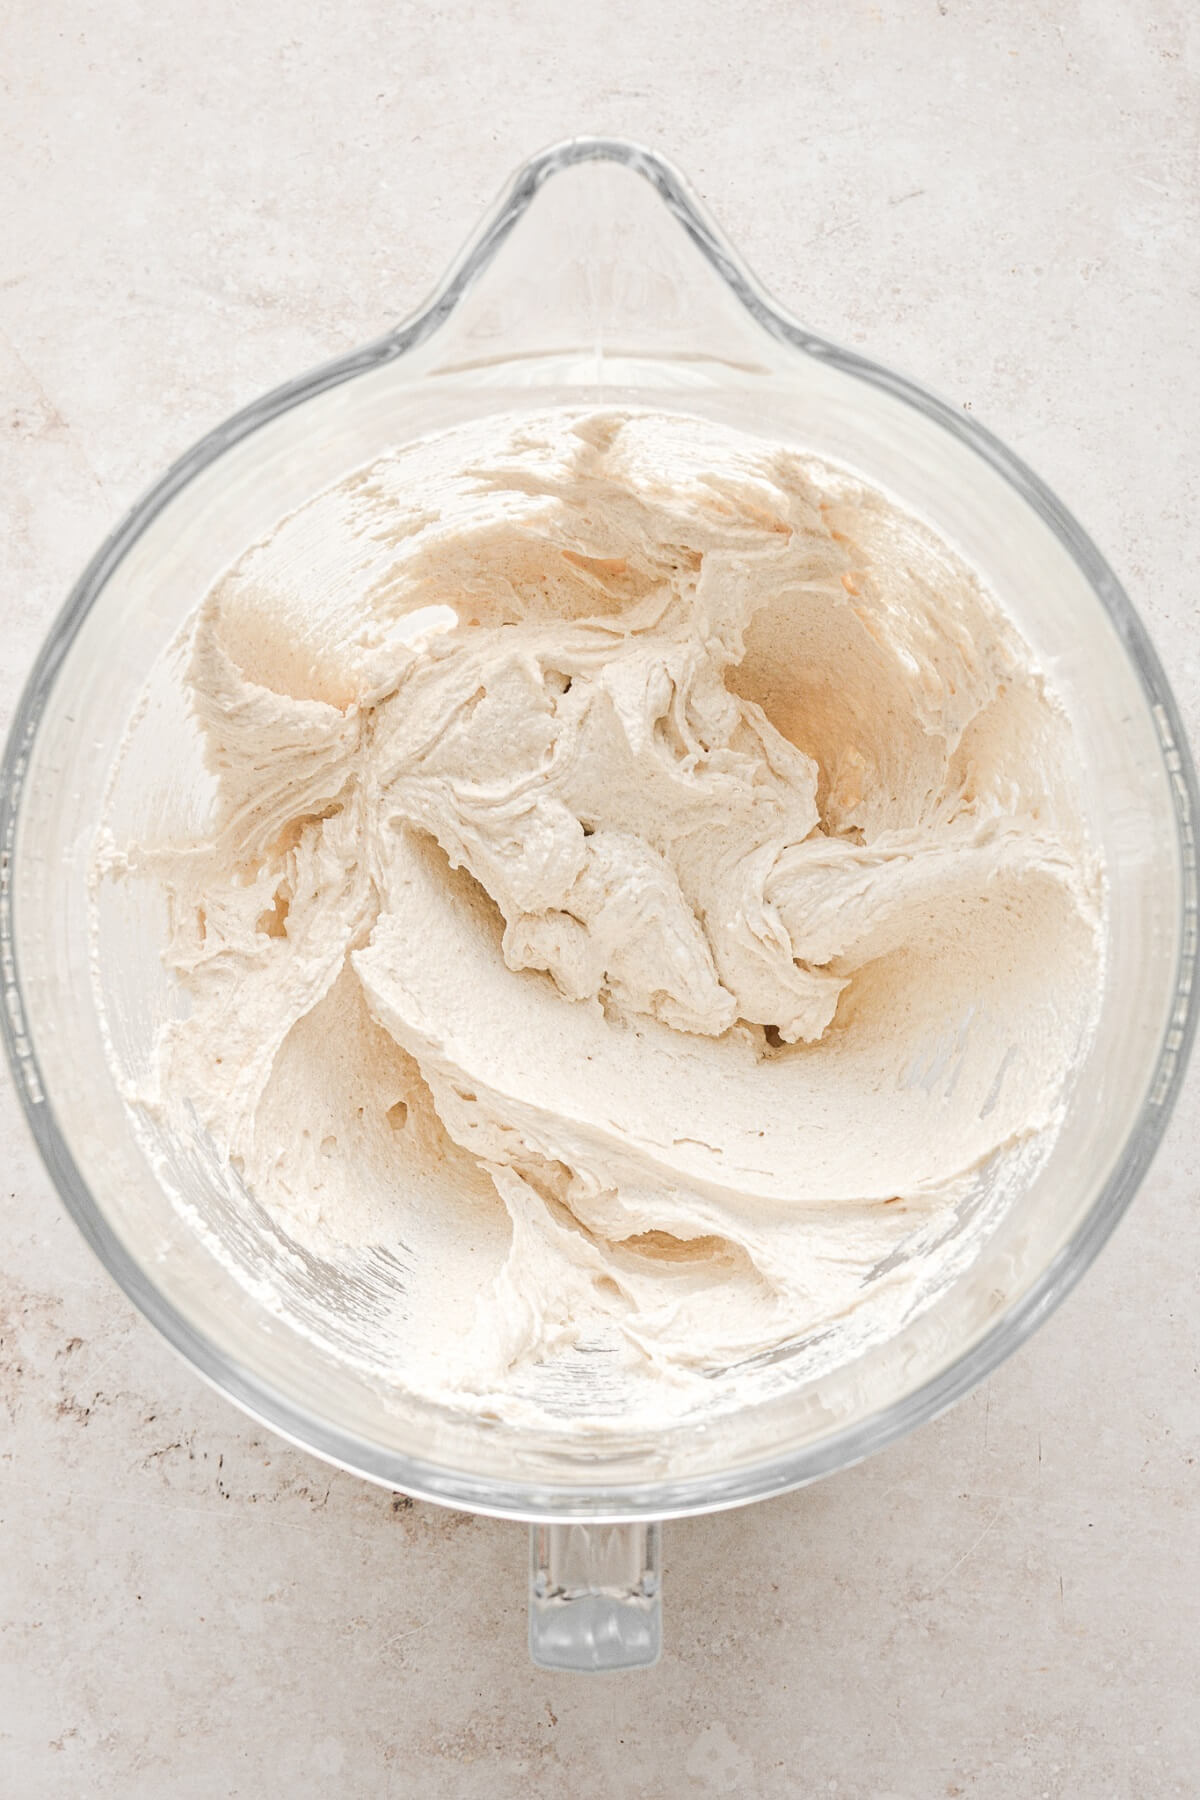
- In the bowl of your stand mixer fitted with the paddle attachment, beat the cooled browned butter, granulated sugar and brown sugar for 5 minutes on medium speed, scraping the bowl occasionally, until very light and fluffy. Gently mix in the egg and the vanilla.
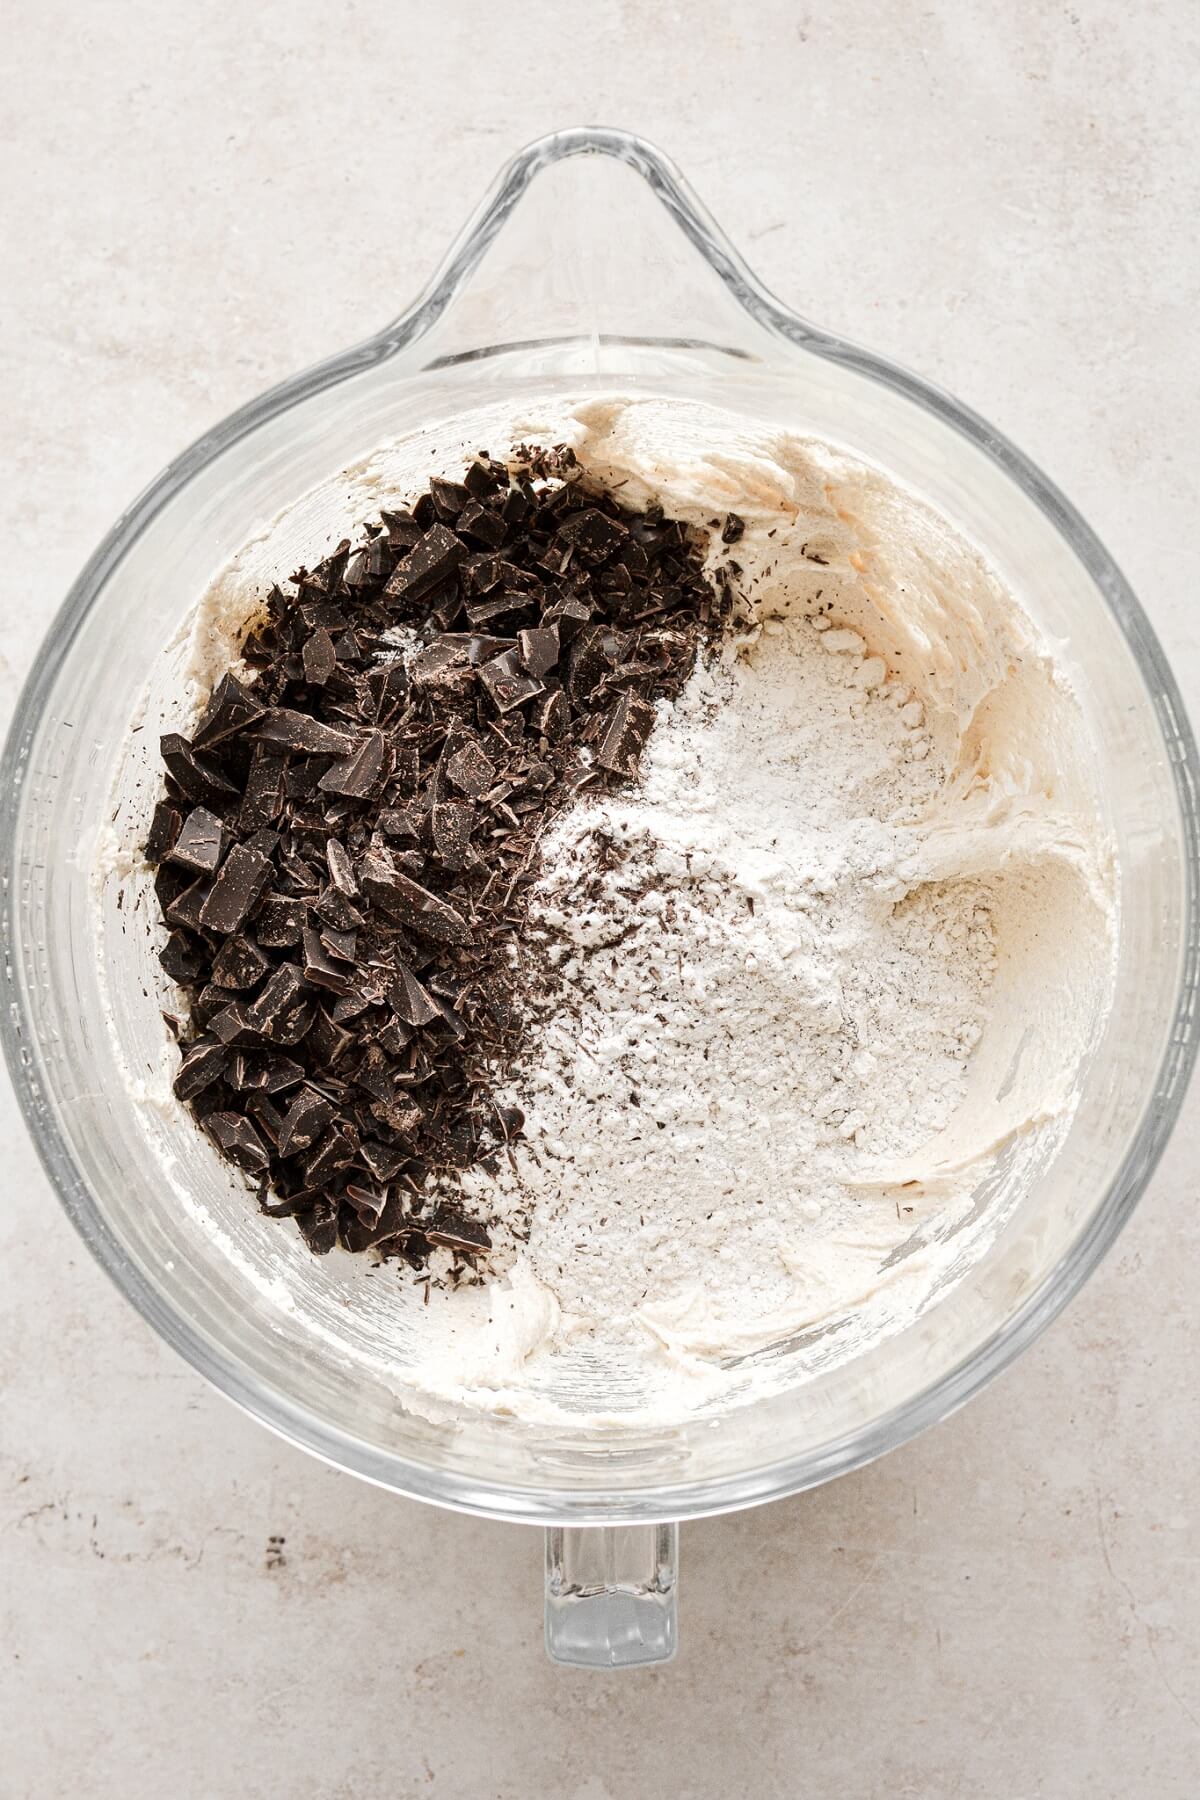
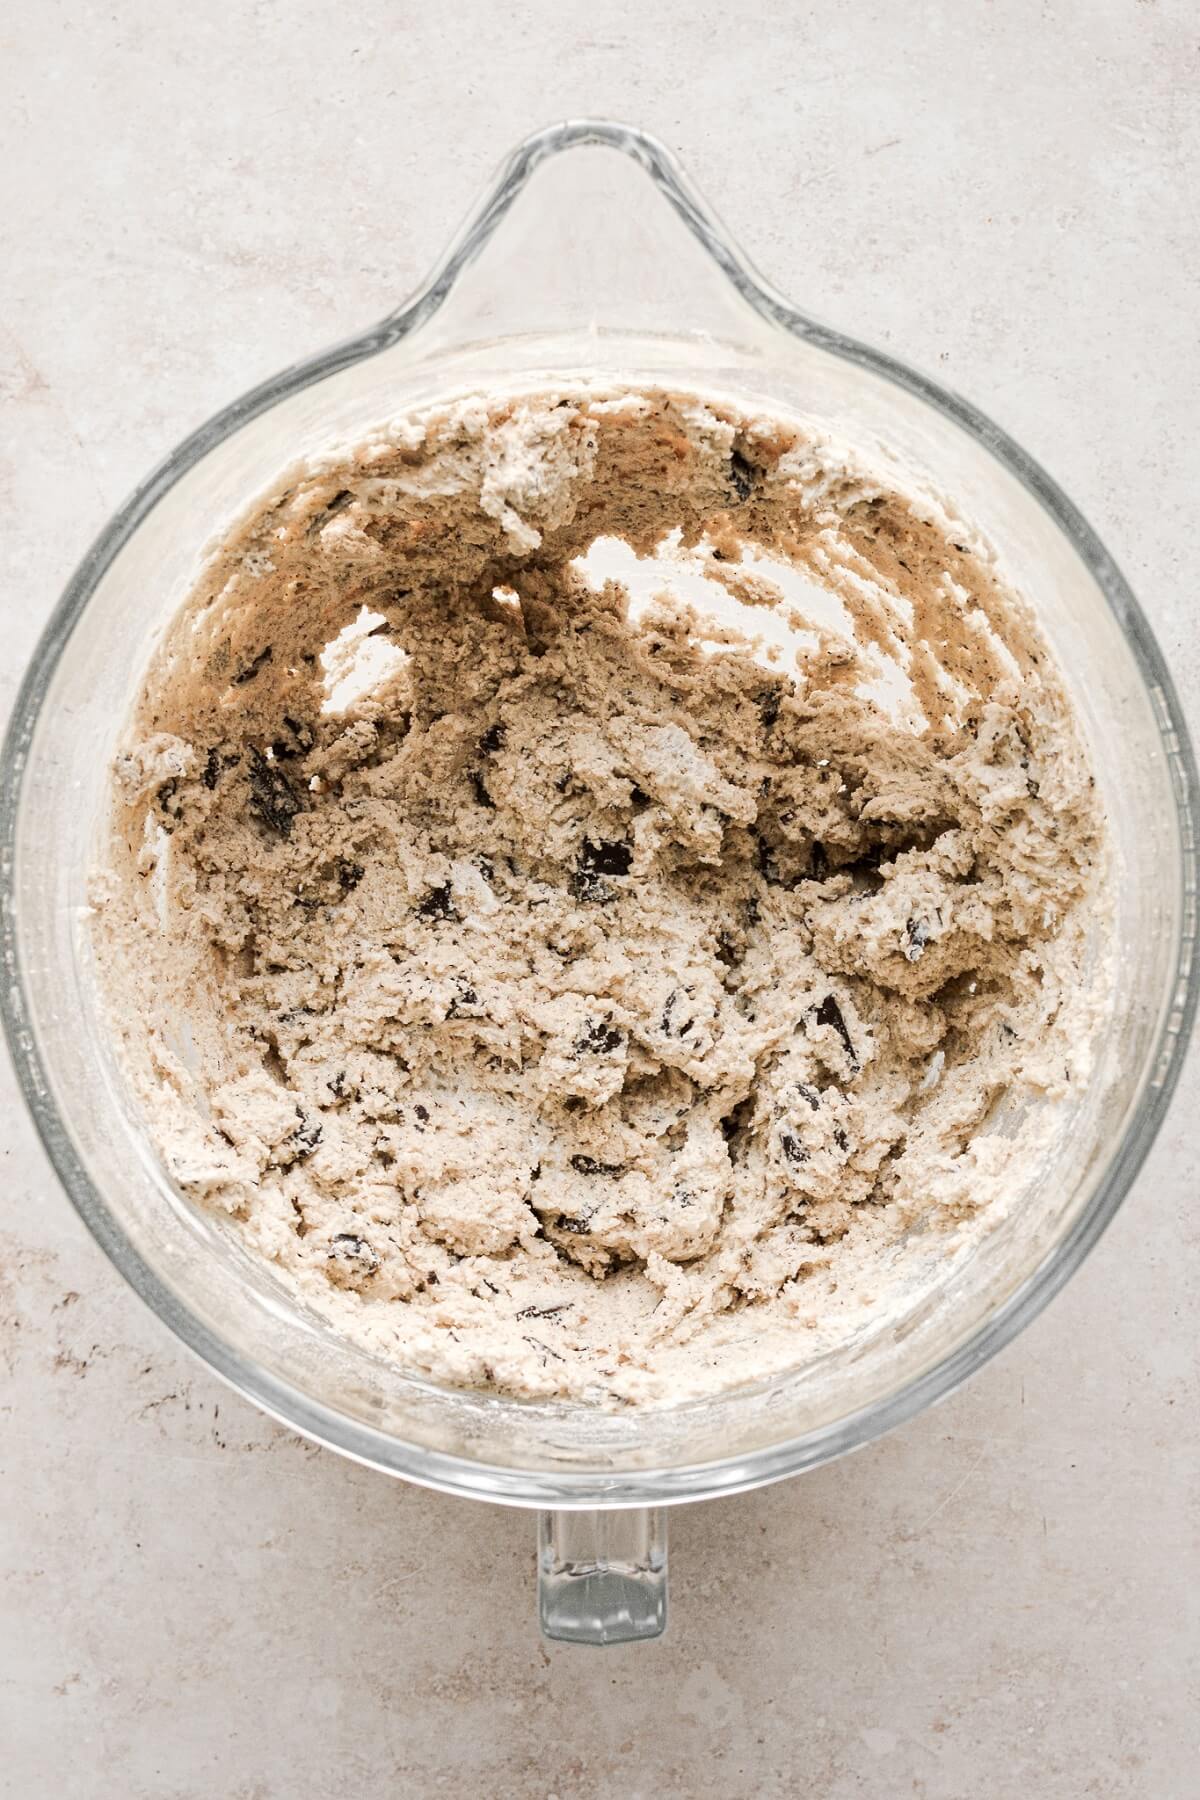
- In a separate bowl, combine the flour, baking soda, espresso powder, 3/4 teaspoon salt and the chopped chocolate. With the mixer on low, add the dry ingredients and mix just until combined, briefly increasing the speed to medium to incorporate all of the flour.
TIP: Before baking, the dough benefits from some time spent chilling first. The chill time does two things. It helps to prevent the cookies from spreading too much while baking, as well as to let the flavors mingle and intensify. And just before baking, the cookie dough balls are frozen for a few minutes, which allows the edges to brown while the centers cook more slowly, resulting in a delightfully chewy cookie that’s completely wonderful.
Chill the dough.
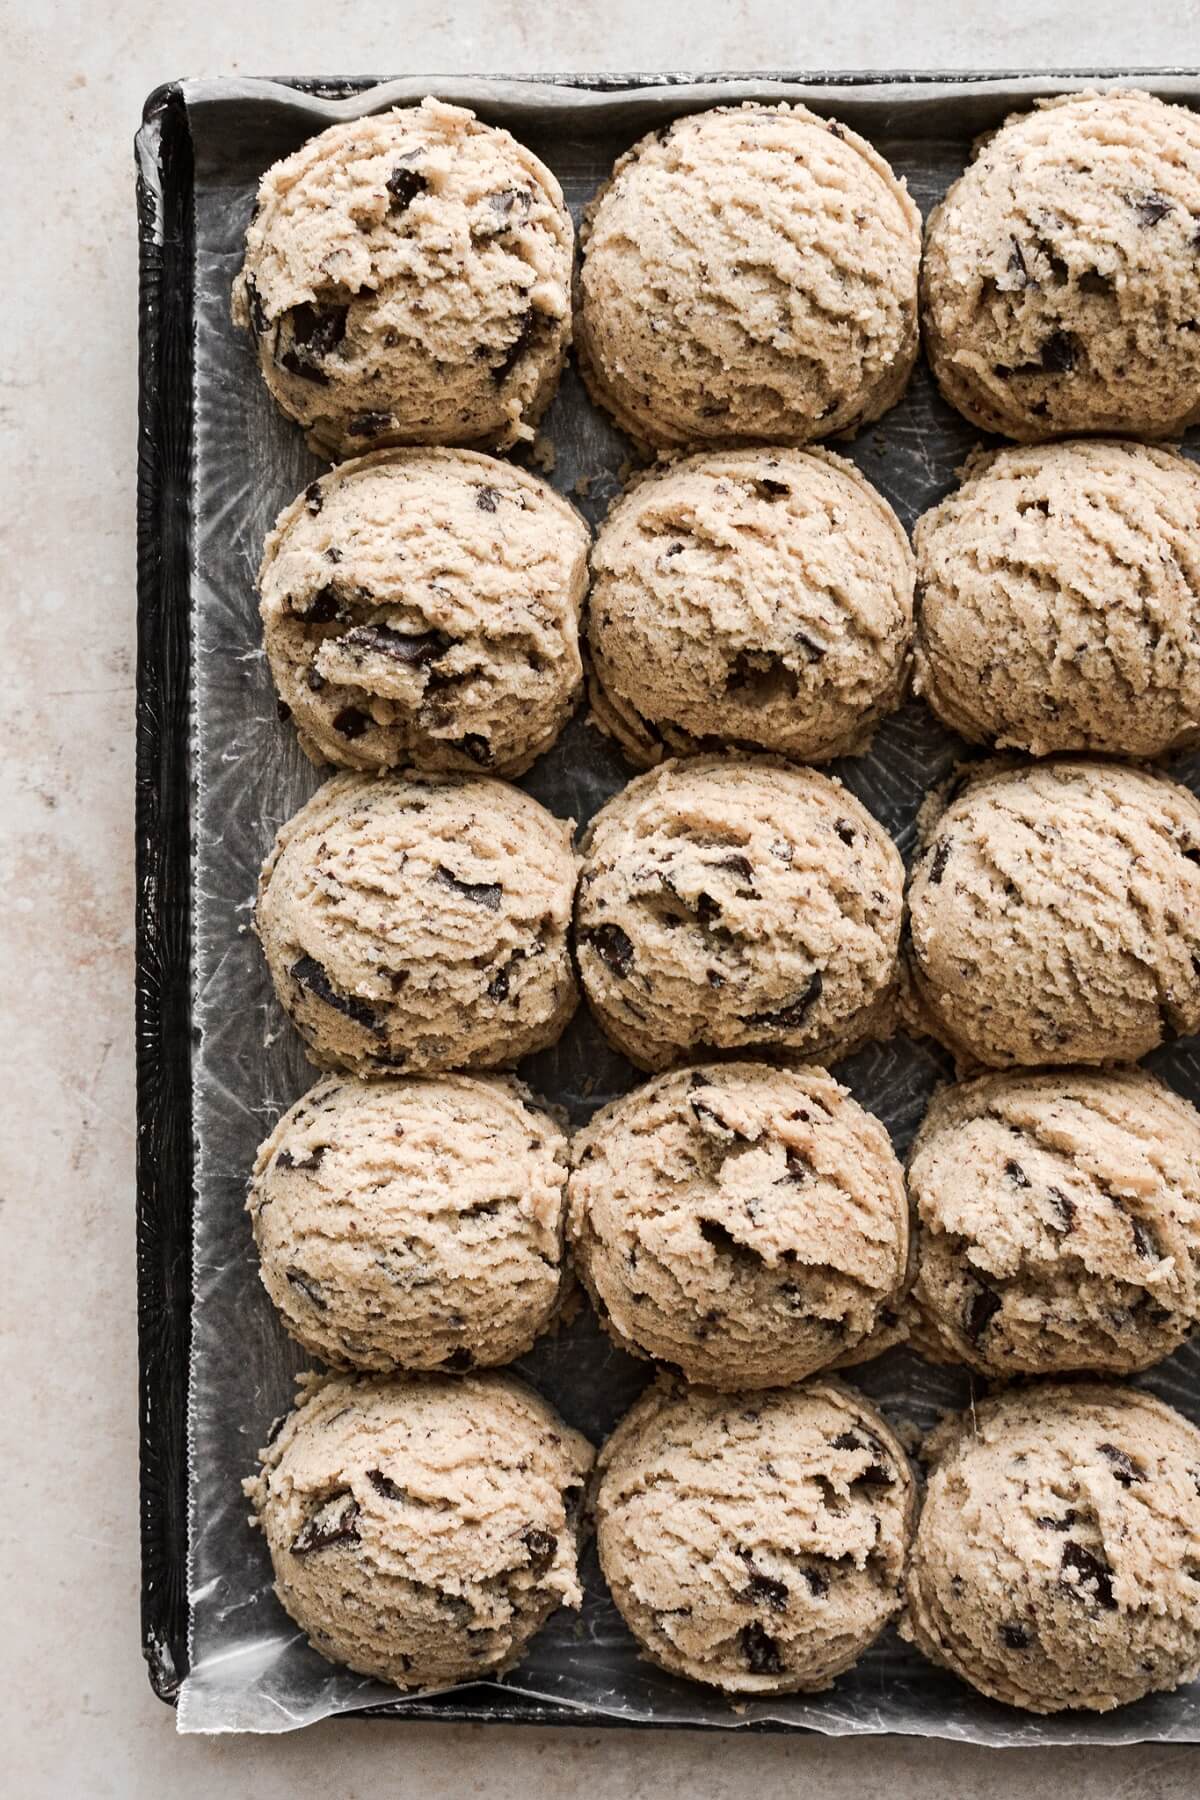
- Use a cupcake/ice cream scoop to divide the dough into 17 portions, about 2 ounces each. Shape the dough into balls, place in an airtight container, and refrigerate for at least 2 hours, or overnight.
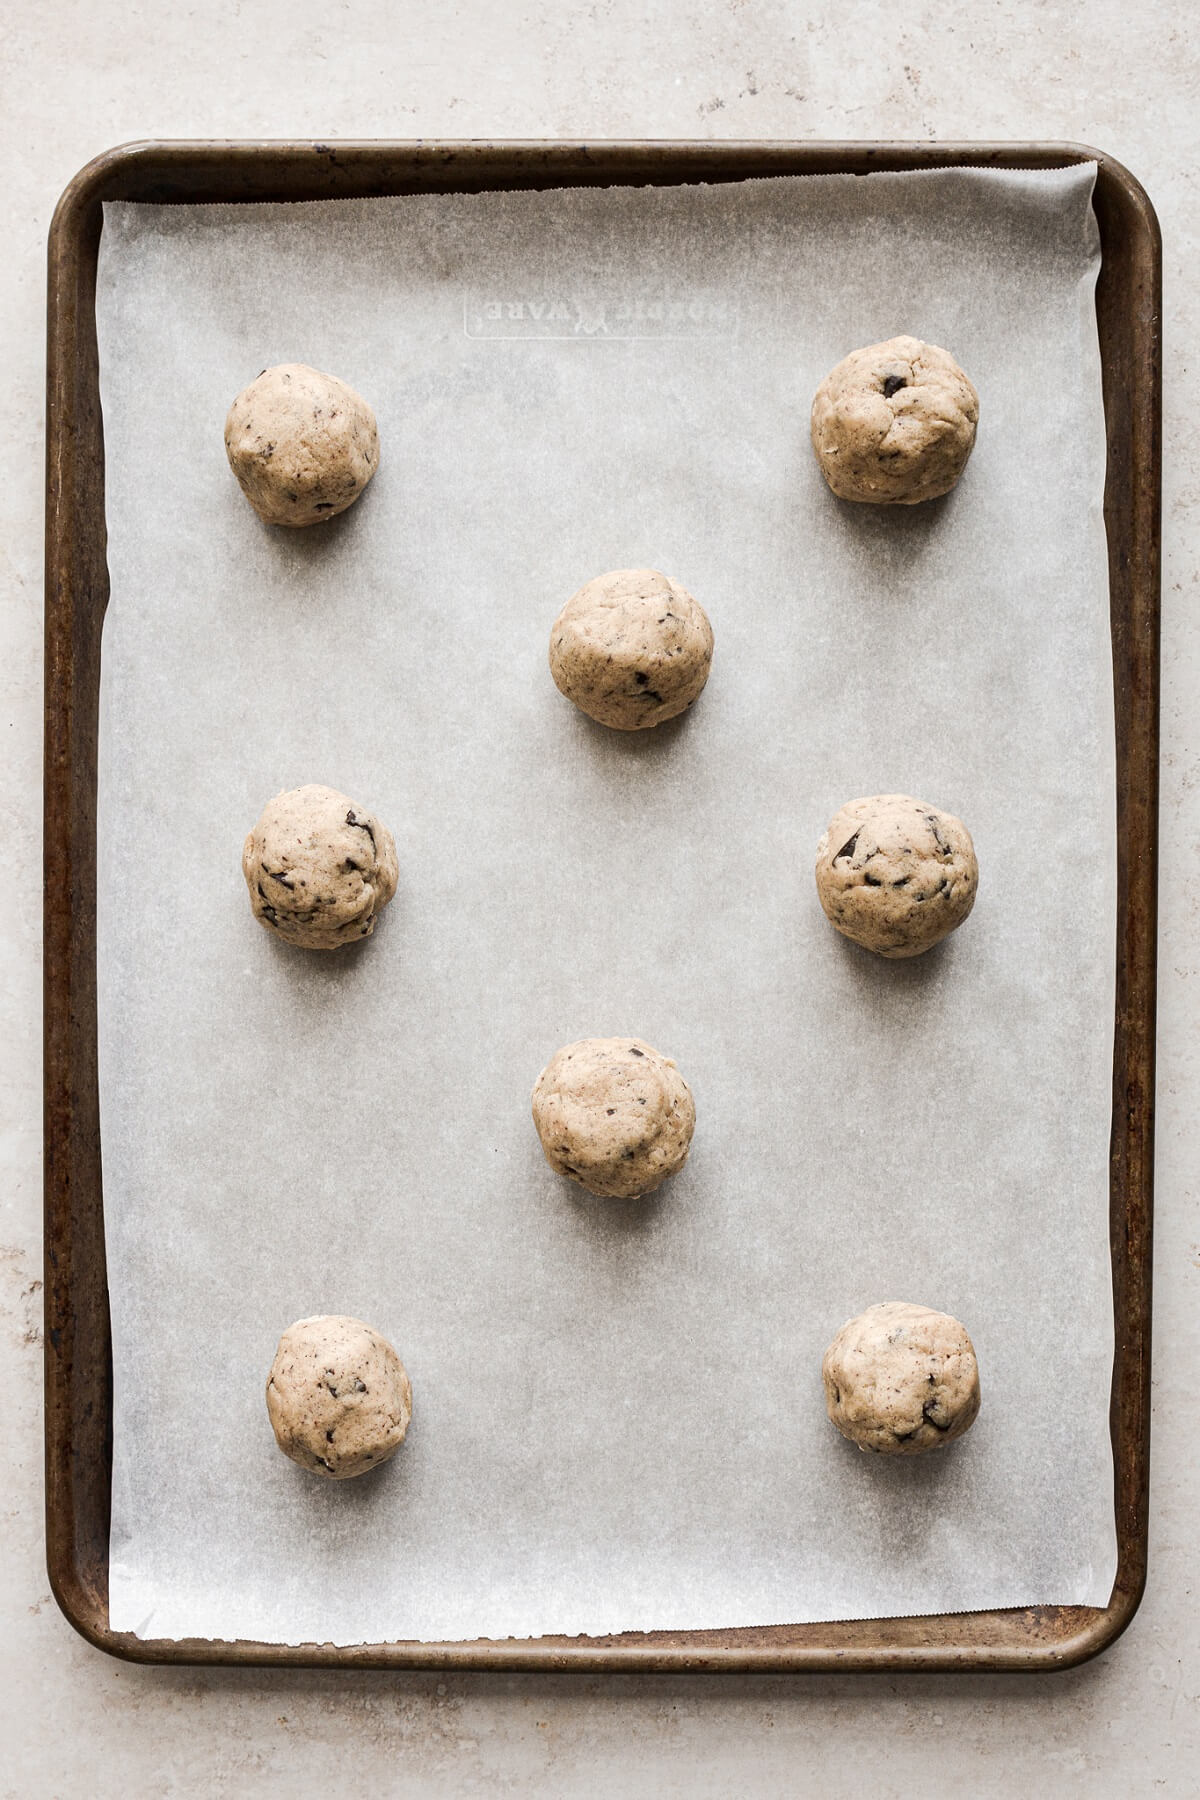
- Preheat the oven to 350 and line a large baking sheet with parchment paper. While the oven is preheating, place 8 balls of dough on a plate in the freezer for 10 minutes.
Bake.
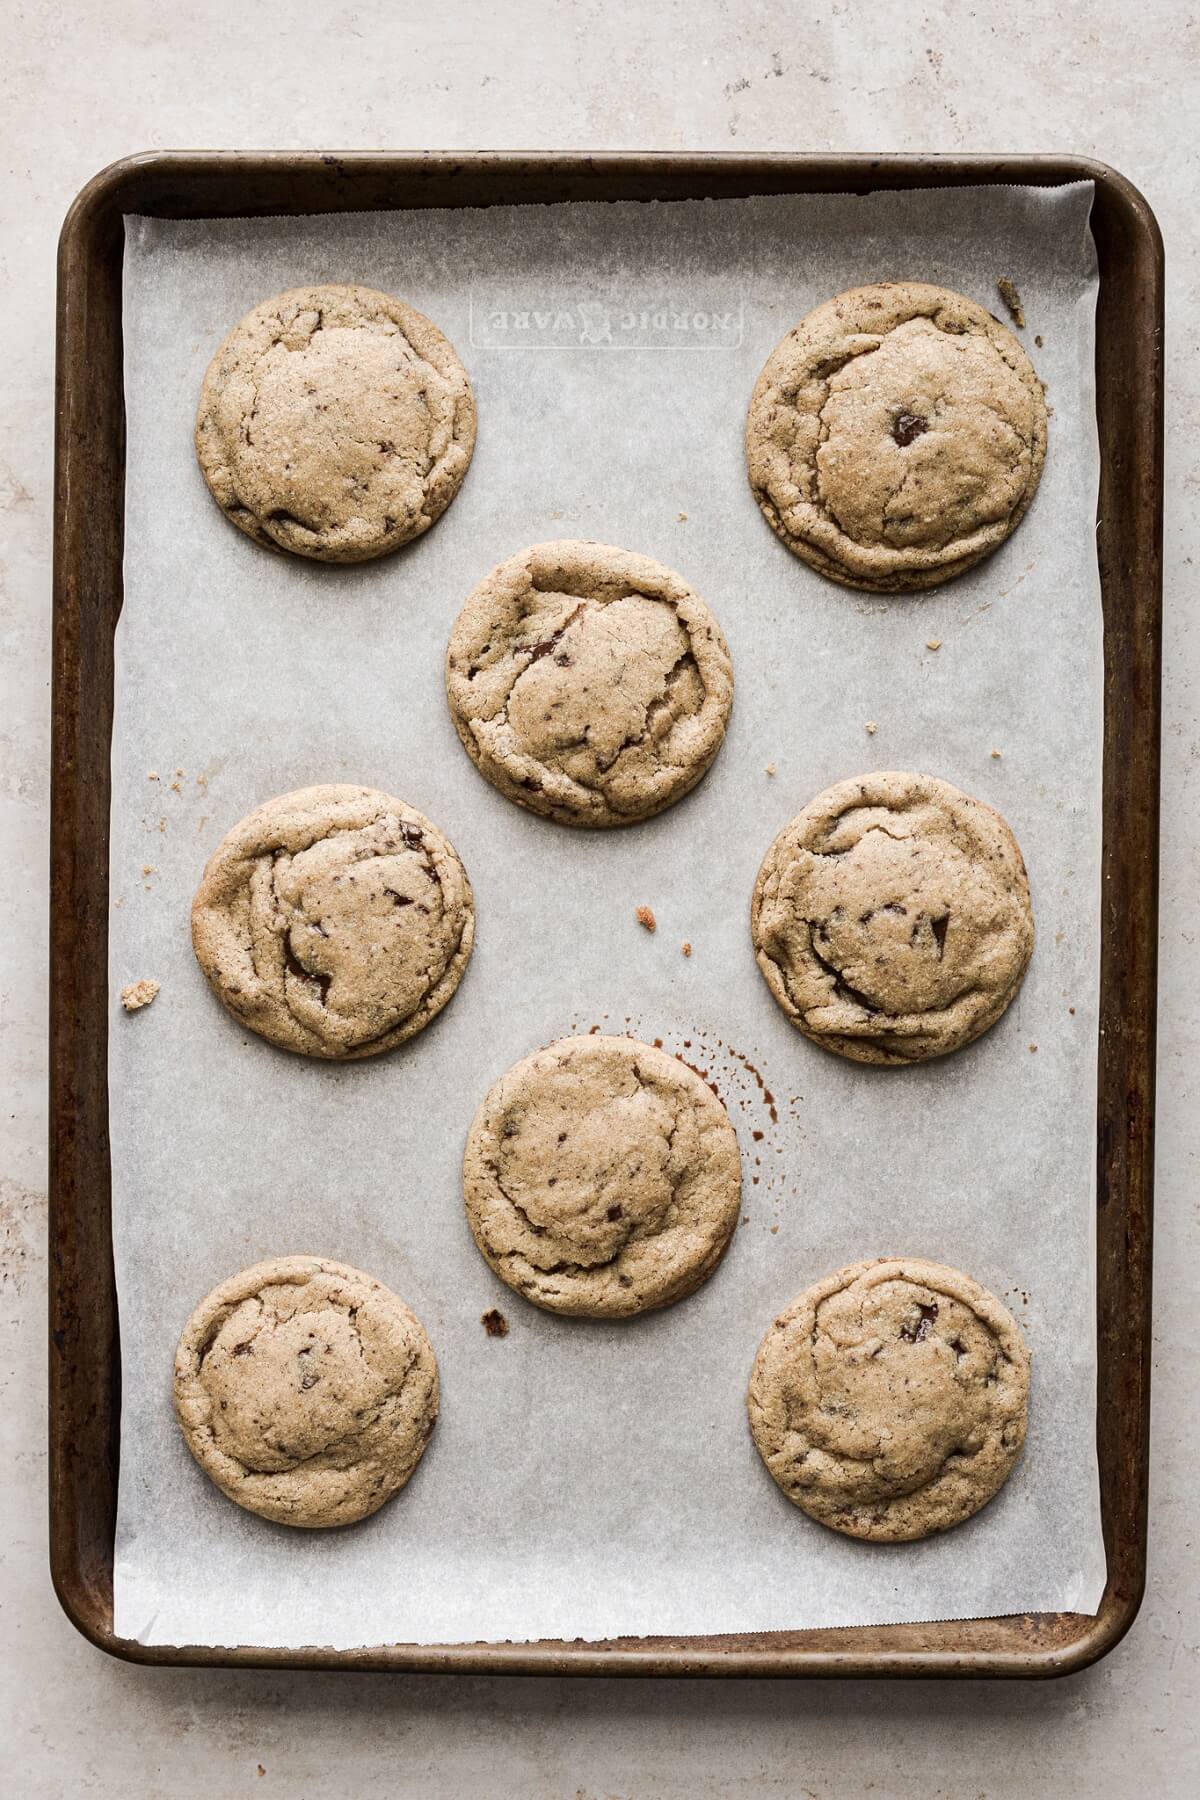
- Place the frozen balls of dough on the baking sheet, spaced three inches apart. Bake for about 13 minutes, until the edges are crisp and light golden brown, and the centers are gently puffed and look slightly underdone. If your cookies didn’t spread quite enough, you can bang the pan on the counter several times to help them flatten and settle.
- Sprinkle the cookies with the remaining 1/4 teaspoon salt. Let cool on the pan for 1 minute, then transfer to a wire rack to cool completely. As the cookies cool, the soft centers will settle down a bit, leaving a lightly crisp edge around the cookies with chewy centers.
TIP: For perfectly round cookies, immediately after taking the pan out of the oven, use a round cookie cutter that’s larger than the circumference of the baked cookies, and “scoot” it around the hot cookies. This pulls in the uneven edges and makes beautifully round cookies. You have to do this quickly, before the cookie sets.
- Repeat the above steps to freeze and bake the other 9 balls of dough.
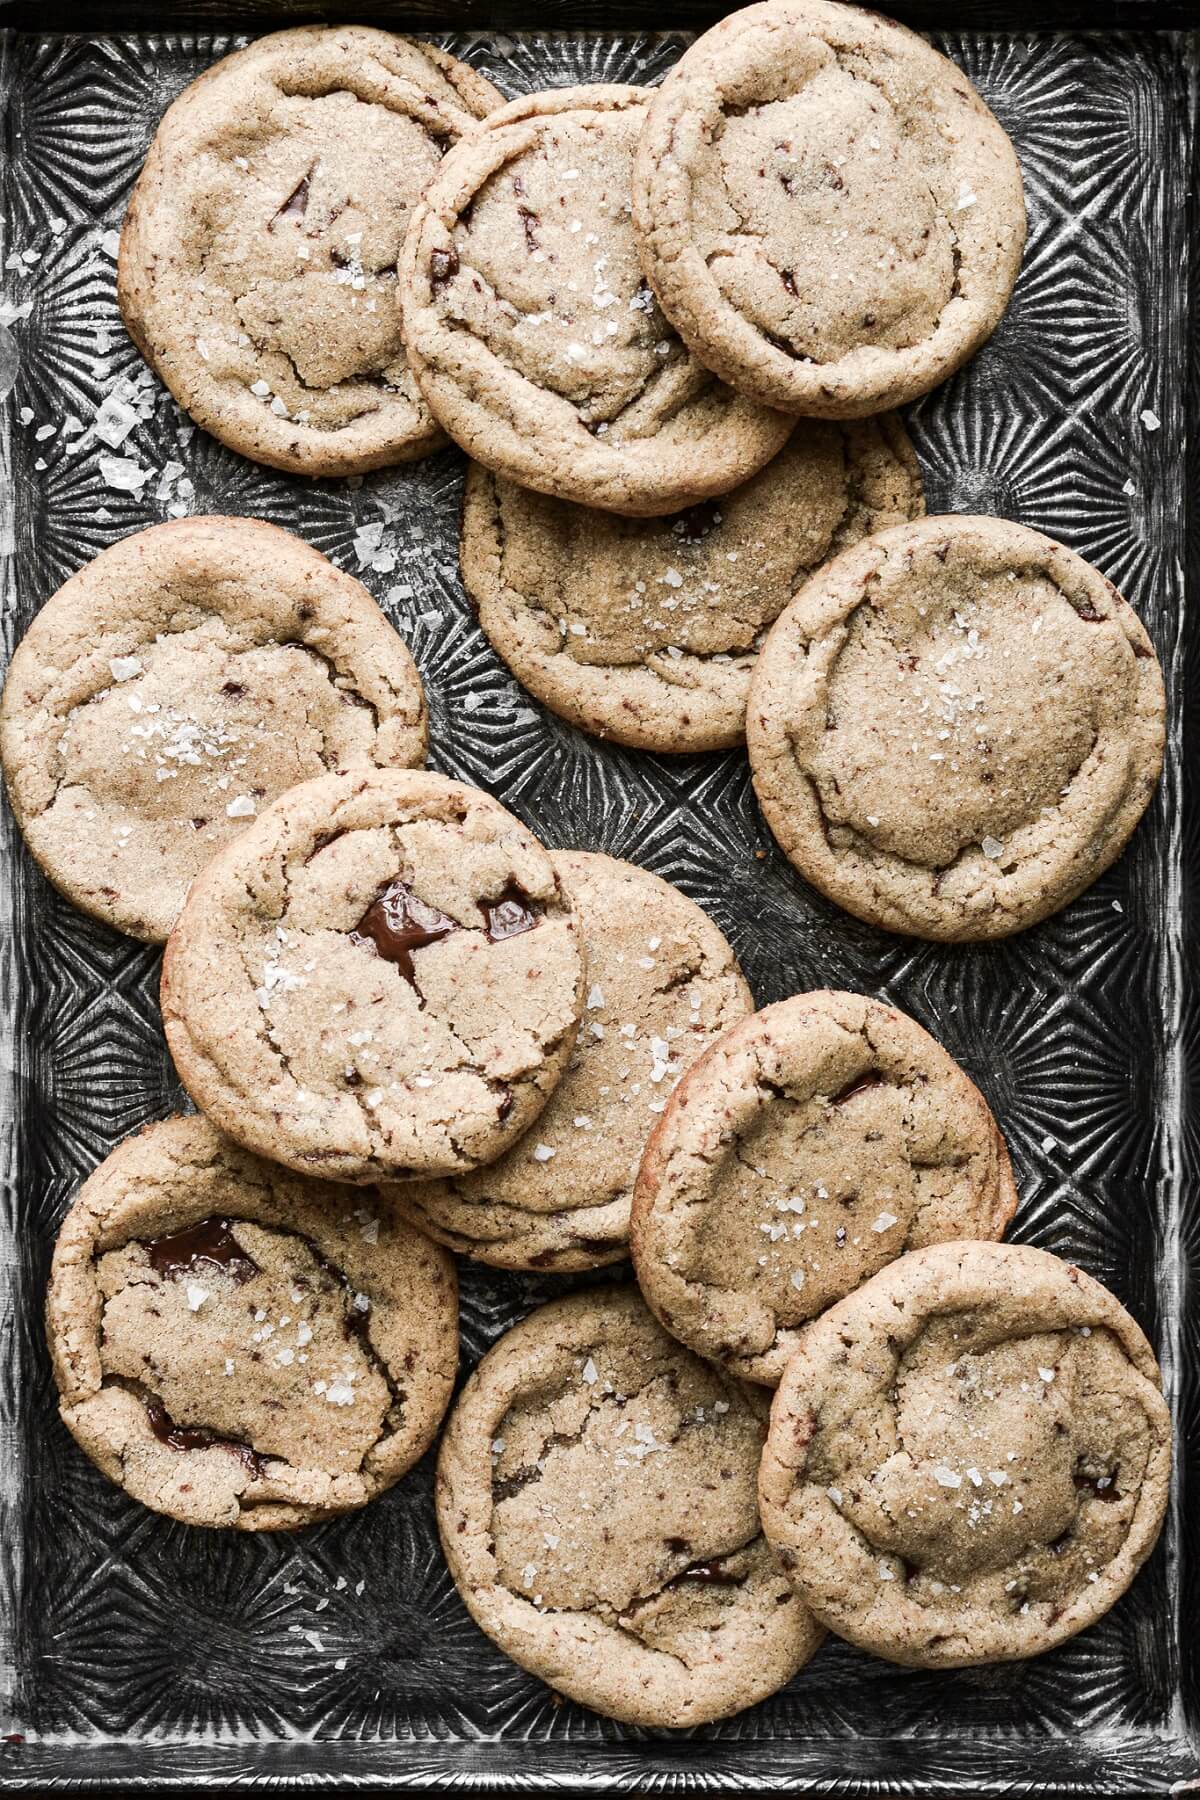
- When you take the cookies out of the oven, the edges are golden and crisp and the centers gently puffed. But as the cookies cool, the slightly under-baked centers settle a bit, leaving a soft chewy middle surrounded by faintly crisp edges. These brown butter chocolate chip cookies are thick, just sweet enough with a good pinch of salt, and full of rich dark chocolate.
Recipe Variations
Eggless Chocolate Chip Cookies
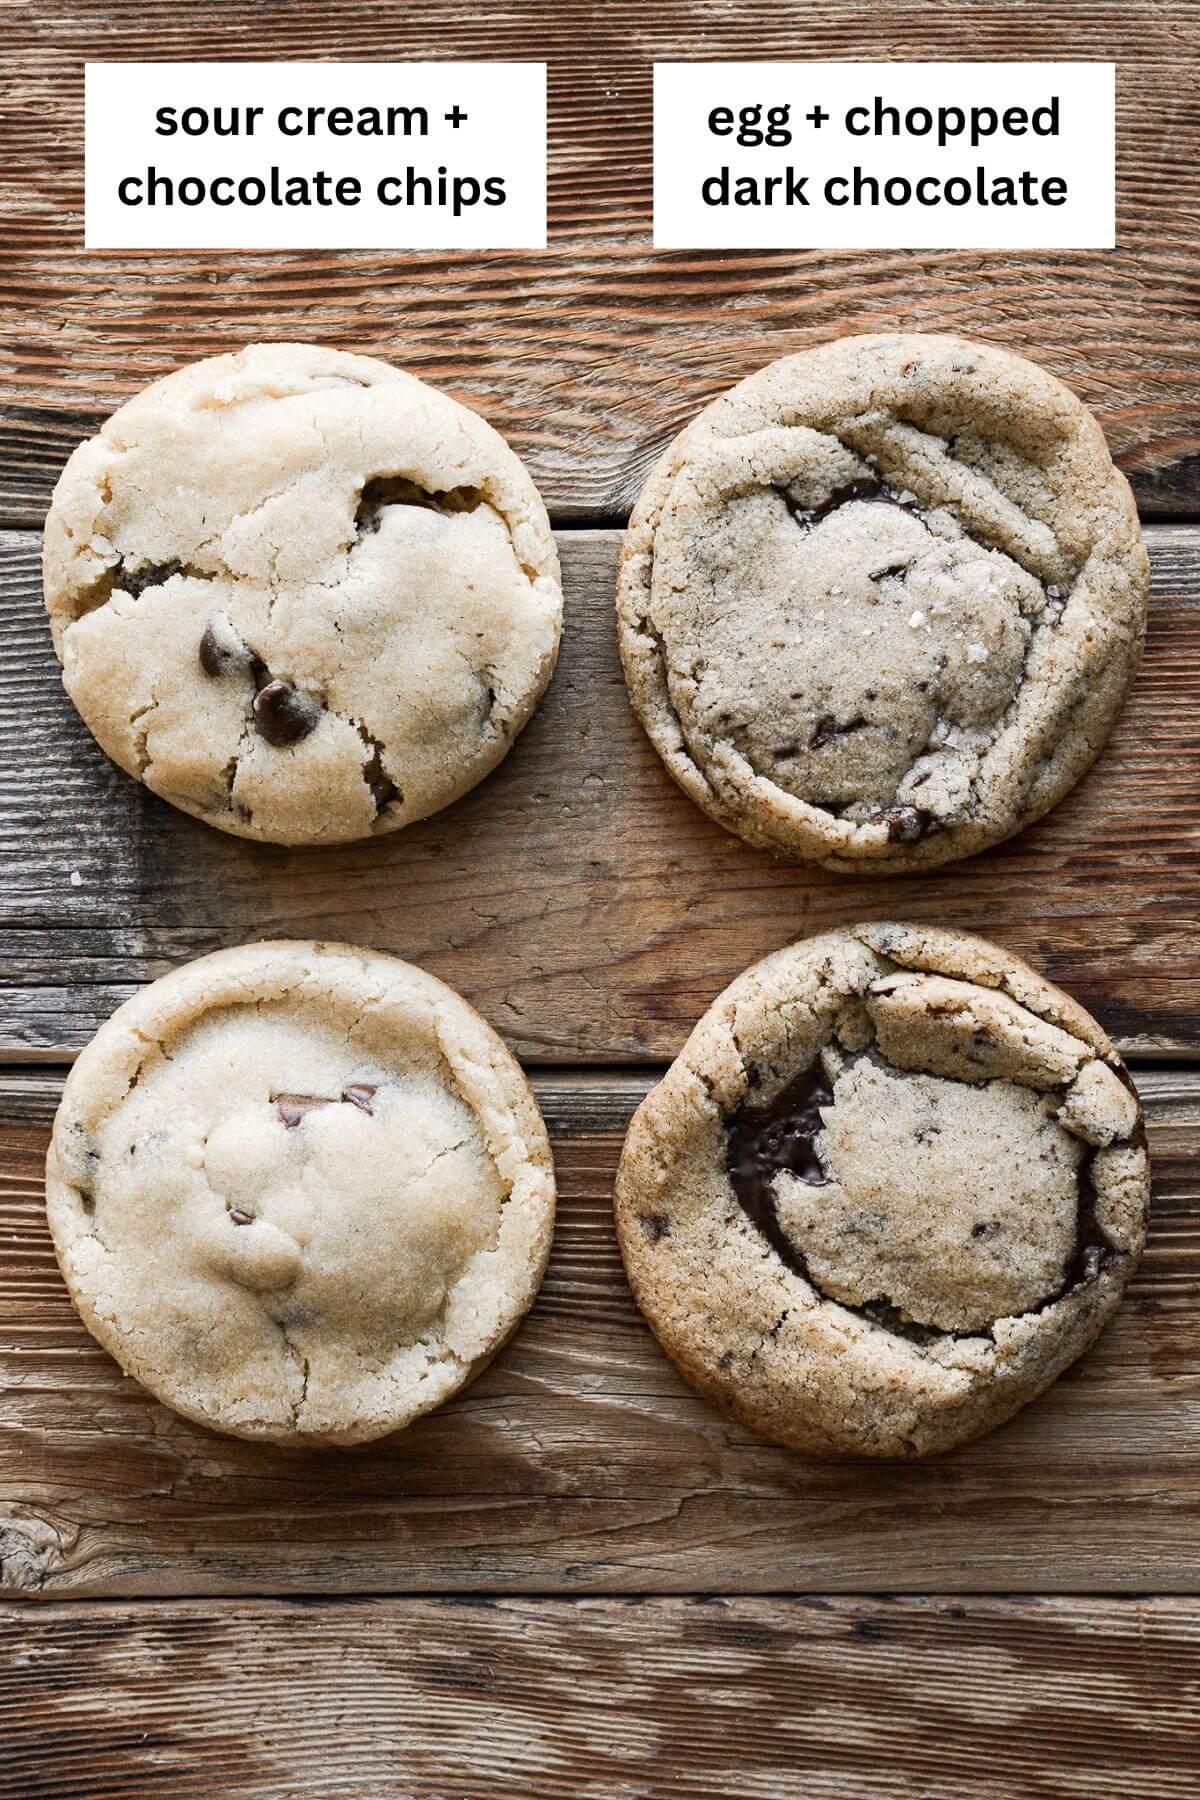
So can you make these brown butter chocolate chip cookies without eggs, and still get good results? Absolutely. The ingredient that I found works best to replace the egg is sour cream. Simply replace 1 large egg with 1/4 cup (2 ounces) of full fat sour cream, and follow the recipe as written.
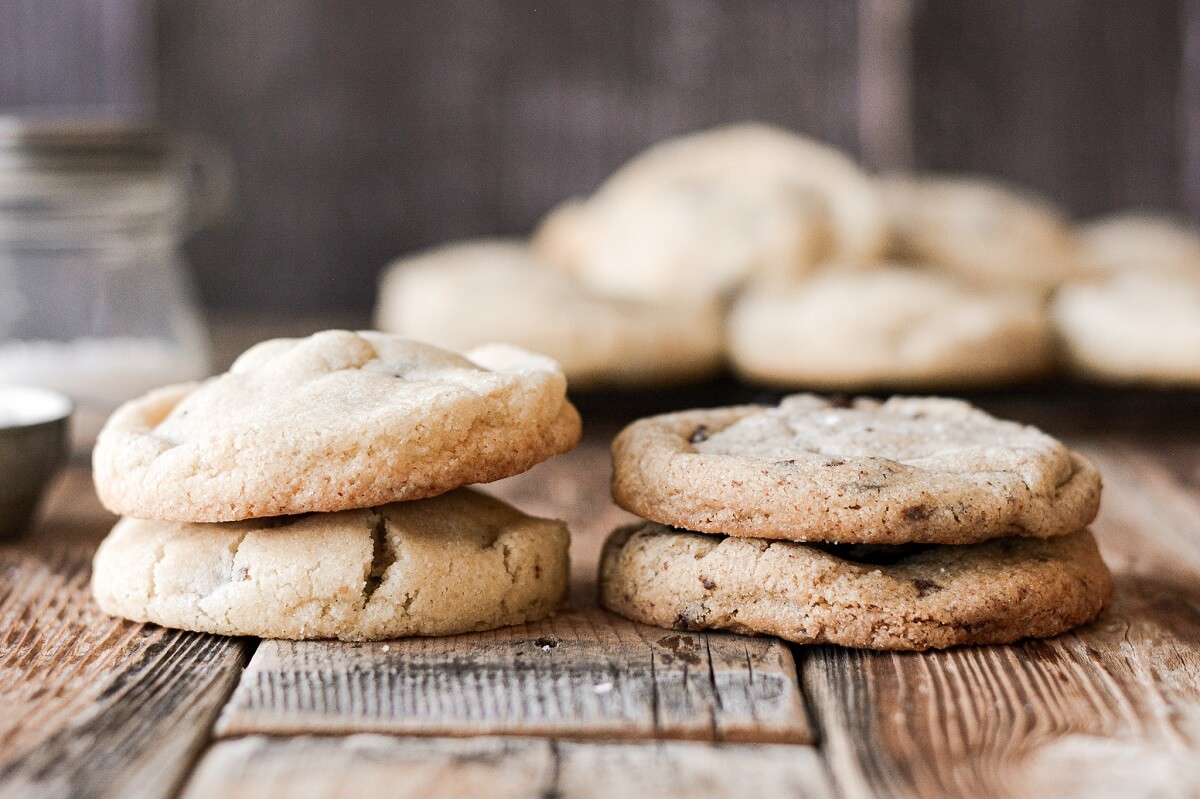
You’ll love the way your cookies look and taste with the sour cream, and it’s interesting to compare the difference. As you can see in the next photo, my high altitude eggless chocolate chip cookies are more pale, which shouldn’t be surprising, since we use eggs as an egg wash to help promote browning on baked goods like pie crust and bread. So without the egg, there’s less browning and caramelization, but the structure of the cookie is just as sound. When they’re warm from the oven, the eggless cookies are also much softer than the ones made with an egg, although they may be a bit more crumbly a day or two later, since the egg helps keep the centers of the cookies chewy.
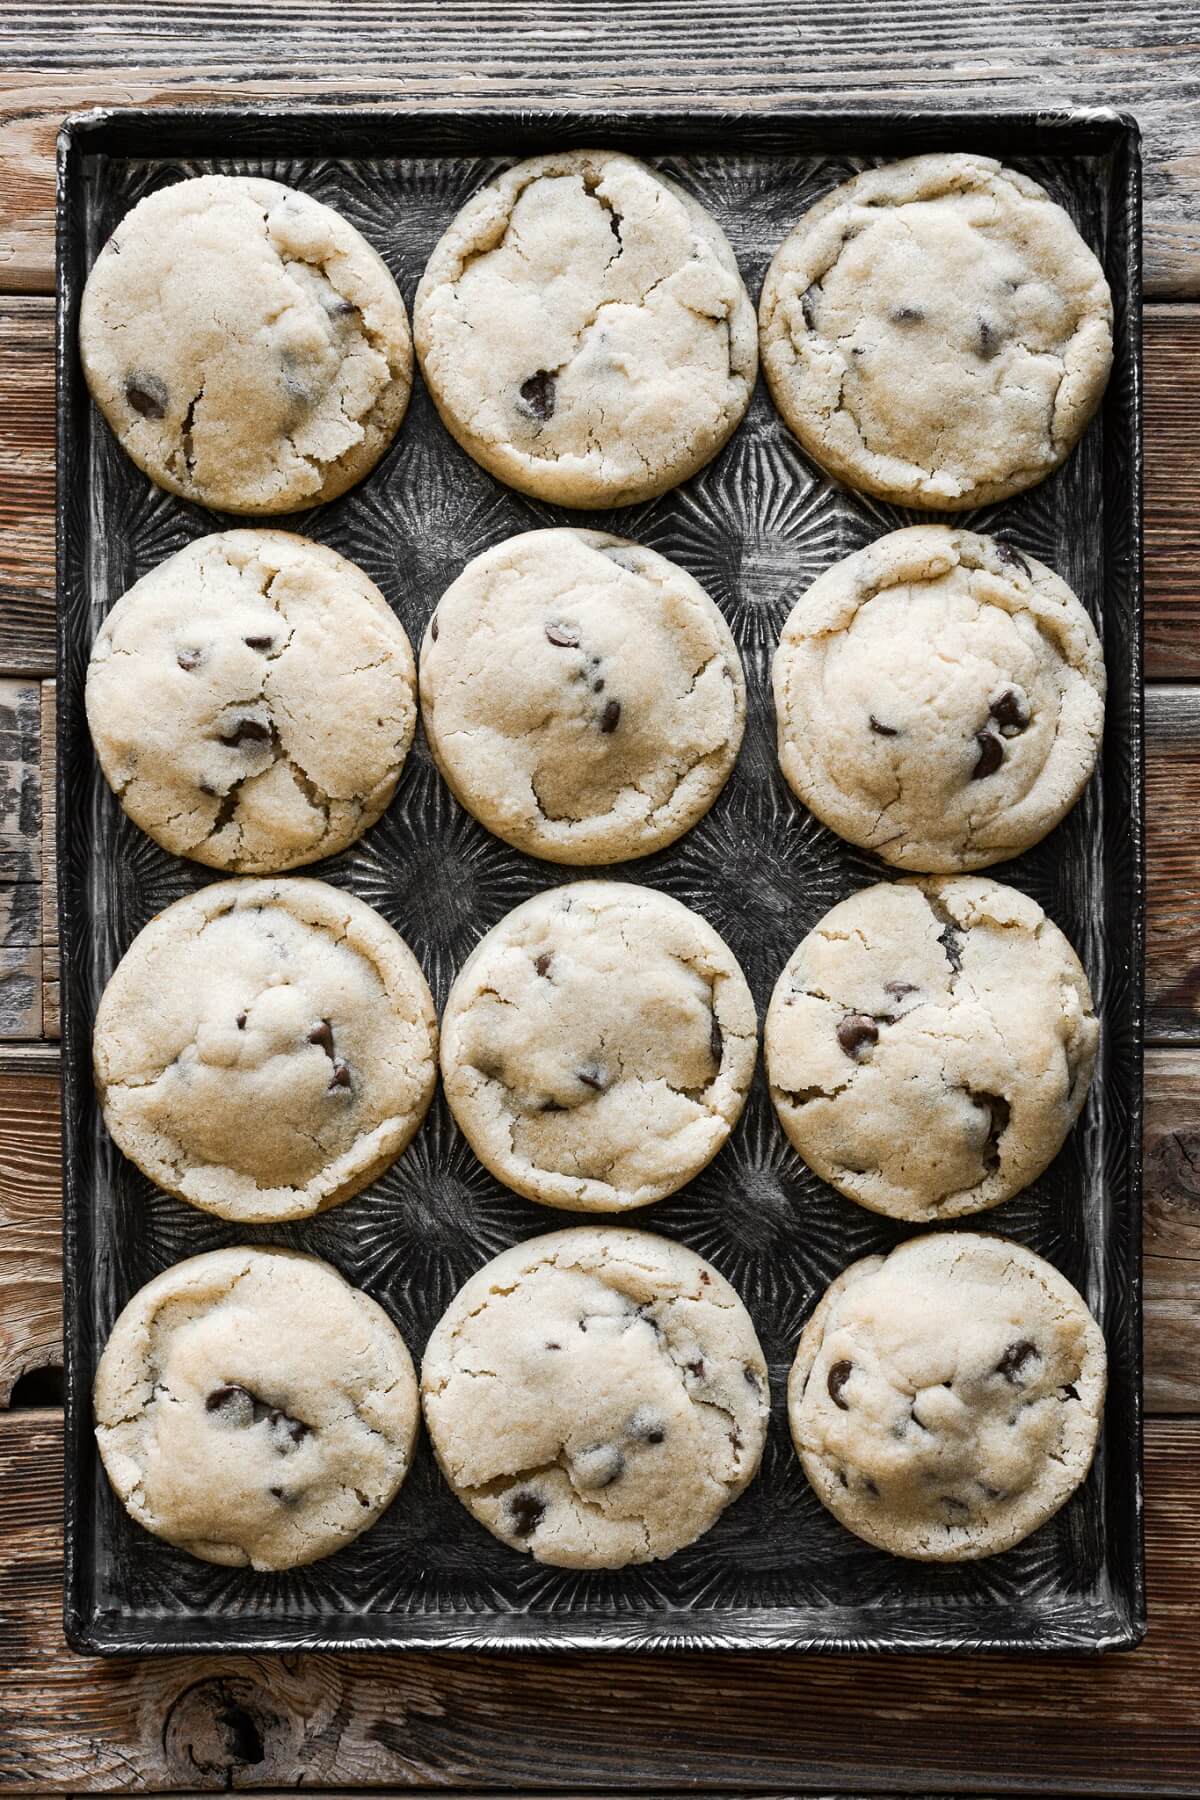
As the cookies cool, they also stay a little puffier, although that may not only be due to the use of sour cream instead of an egg, but could also possibly be attributed to my using chocolate chips instead of chopped chocolate in the test batch. As you know, chocolate chips hold their shape better than a bar of chocolate that’s been chopped. These brown butter chocolate chip cookies are fantastic either way!
Strawberry Chocolate Chip Cookies
Just add 1 ounce freeze dried strawberries (roughly chopped) to the cookie dough when you add the chocolate chips/chopped chocolate. The freeze dried strawberries add pretty pink and red specks throughout the cookies, and a delicious tart and fruity flavor to complement the chocolate. Decorate the tops of the cookies with more freeze dried strawberries and chocolate chips for a lovely Valentine’s Day cookie.
Spicy Ginger Chocolate Chip Cookies
Add a subtle spicy heat to your cookies for the holidays by adding 1/2 teaspoon ground ginger, 1/4 teaspoon ground cinnamon, and 2 1/2 tablespoons finely chopped candied/crystallized ginger. I love making this version at Christmas, to add to my Christmas cookie boxes.
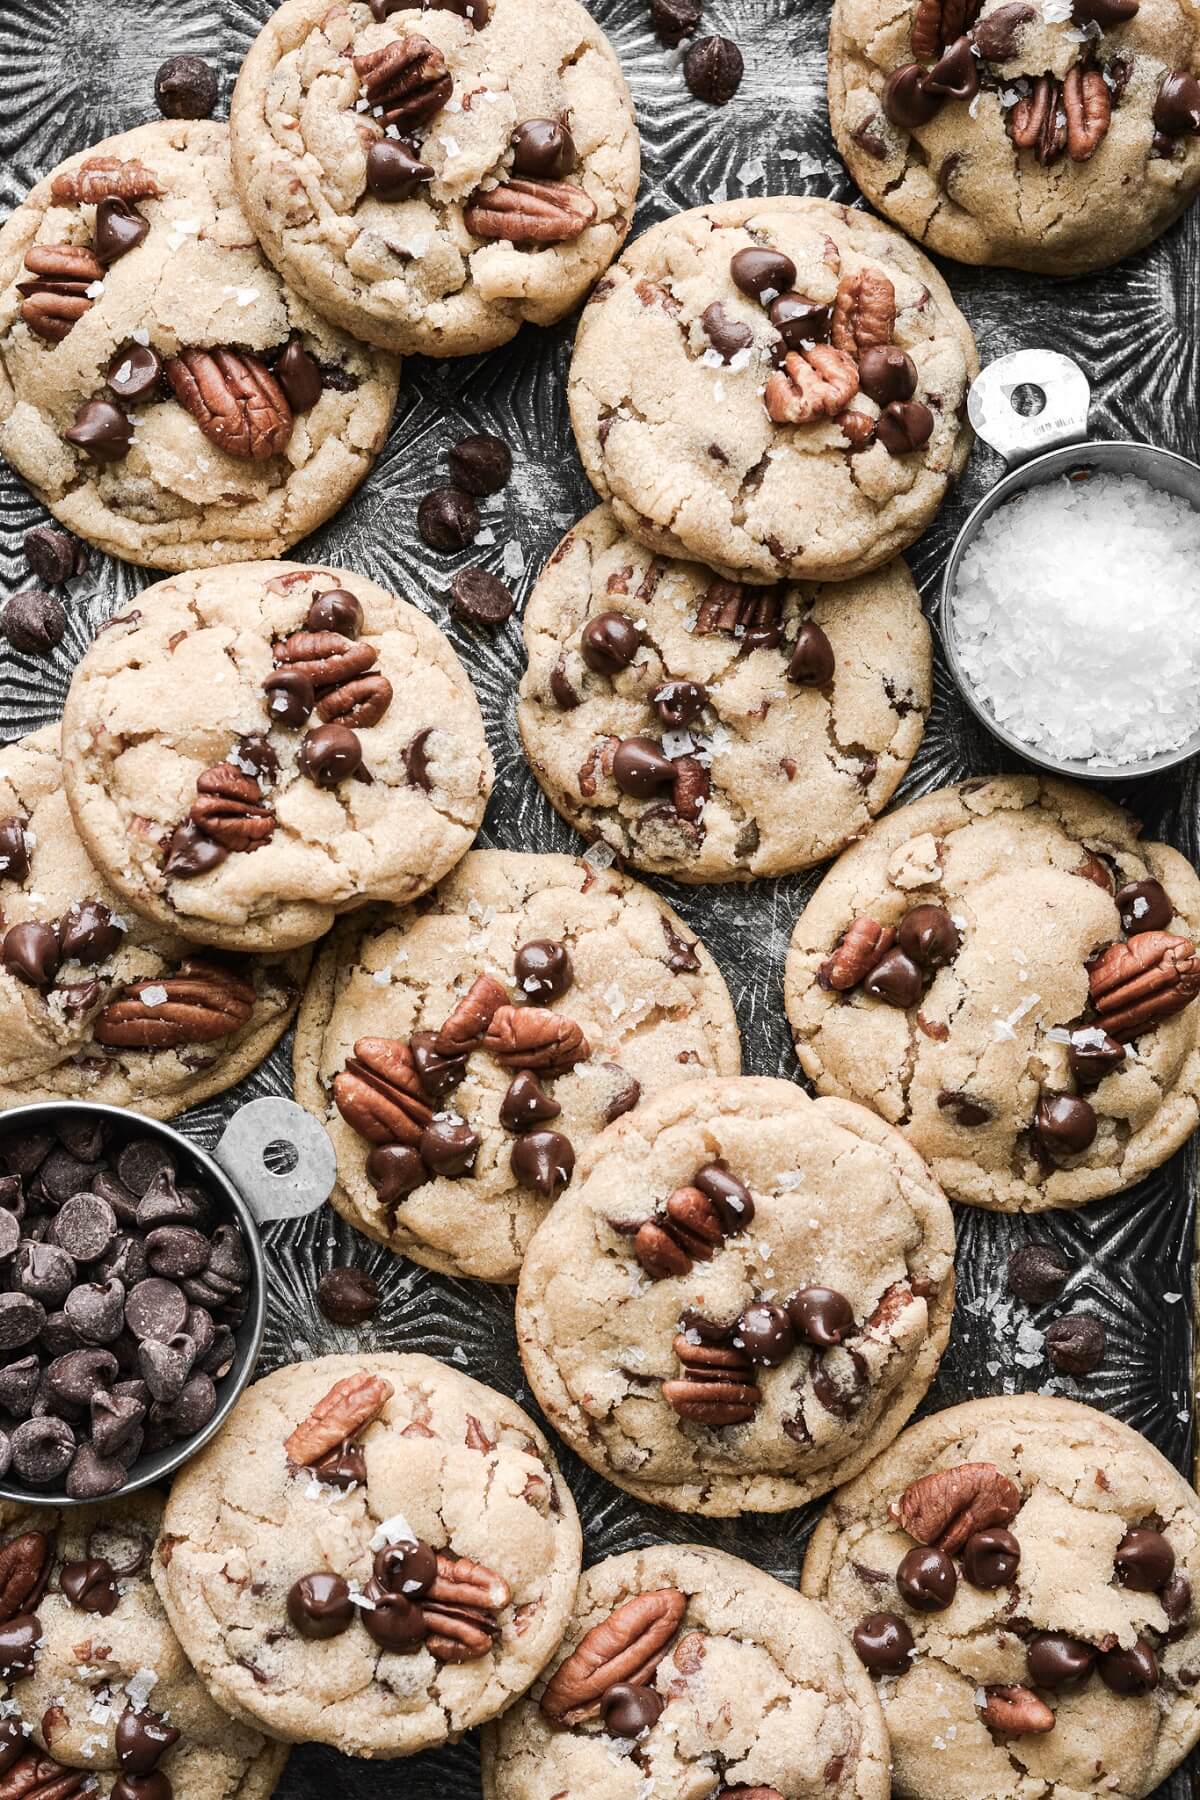
Brown Butter Pecan Chocolate Chip Cookies
I absolutely love chocolate chip cookies with pecans. The brown butter, the chocolate, the flaky salt – it all works beautifully with the nuttiness of the pecans. I mean, hello, brown butter pecan cookies! They’re simply delicious. For extra flavor, lightly toast the pecans first, before adding them to the cookie dough.
Just add 3/4 – 1 cup pecans (roughly chopped) to your cookie dough when you add the chocolate chips or chopped chocolate. You could also use walnuts instead of the pecans. And for a pretty finish, be sure to “decorate” your cookies while they’re hot from the oven by pressing a few more chocolate chips and pecan pieces into the cookies.
Be sure to read all of my BAKING FAQs where I discuss ingredients, substitutions and common baking questions, so that you can be successful in your own baking!
Frequently Asked Questions
Can I make these cookies if I don’t live at high altitude?
I develop all of my recipes for Denver’s altitude of 5,280 feet. If you live at a lower altitude, you’ll likely need to make a few minor adjustments, such as reducing the flour a little. This article can provide guidance on specific adjustments.
Can I make this recipe without browning the butter first?
I suppose you can, but the browned butter adds the most incredible flavor. It also reduces the water content, which in turn, affects the structure of the cookies. If you skip the step of browning the butter, you may need to reduce the butter by 1-2 tablespoons.
What’s a good finishing salt to sprinkle on top of the cookies?
I love Maldon’s flaky sea salt.
Will this recipe work with chocolate chips instead of chopped chocolate?
This recipe works well with either chocolate chips or chopped chocolate.
Can I use yogurt instead of sour cream in the eggless cookies?
While I have only tested the eggless batch with sour cream, you can likely use unsweetened Greek yogurt instead of sour cream and achieve similar results.
How do you make your cookies so perfectly round?
Cookies are very rarely nice and round when they come out of the oven. They tend to spread a little unevenly and lopsided, especially when baking at high altitude. So for perfectly round cookies, immediately after taking the pan out of the oven, use a round cookie cutter that’s larger than the circumference of the baked cookies, and “scoot” it around the hot cookies. This pulls in the uneven edges and makes beautifully round cookies. You have to do this quickly and rather aggressively, before the cookie sets. Cookie scooting is very popular with baking bloggers and photographers, as the finished cookies look so much nicer than cookies that haven’t been scooted.
You Might Also Like
Please check out my Amazon Shop for a curated collection of some of my favorite cake pans from trusted brands, baking tools, ingredients, pretty things and fashion finds. I recommend products that I buy and use every day!
Did you love today’s recipe? Please rate the recipe and let me know in the comments what you thought! Also, be sure to follow Curly Girl Kitchen on Instagram, and tag me when you try one of my recipes so I can see all your delicious creations!
High Altitude Brown Butter Chocolate Chip Cookies
All recipes on Curly Girl Kitchen are developed for high altitude at 5,280 feet. See FAQs for adjusting to higher or lower elevations.

Equipment
- Stand Mixer with Paddle Attachment
Ingredients
- 1 cup unsalted butter
- 1 cup granulated sugar
- ¼ cup light brown sugar, lightly packed
- 1 large egg
- 2 tsp vanilla extract
- 2 cups all-purpose flour, fluffed, spooned and leveled
- ½ tsp baking soda
- 1 ½ tsp espresso powder, optional
- 1 tsp coarse Kosher salt, divided (if using table salt, use half the amount)
- 6 oz good-quality dark chocolate, roughly chopped (see note) (or 1 cup chocolate chips)
Instructions
- In a saucepan, melt the butter over medium heat. Continue to cook the butter, swirling occasionally, until the water evaporates, and the butter forms fragrant, nutty, golden brown solids at the bottom of the pan. Remove from the heat and immediately pour the hot butter into a bowl, scraping all the browned bits off the bottom of the saucepan with a spatula.
- Let the butter cool at room temperature for several hours, until it becomes somewhat solid again. As the butter cools, it may not become firm enough to hold its shape (depending on how warm your kitchen is), and may remain a little soft and spreadable, but allow it to cool until it is no longer a liquid.
- In the bowl of your stand mixer fitted with the paddle attachment, beat the cooled browned butter, granulated sugar and brown sugar for 5 minutes on medium speed, scraping the bowl occasionally, until very light and fluffy. Gently mix in the egg and the vanilla.
- In a separate bowl, combine the flour, baking soda, espresso powder, 3/4 teaspoon salt and the chopped chocolate. With the mixer on low, add the dry ingredients and mix just until combined, briefly increasing the speed to medium to incorporate all of the flour.
- Use a cupcake/ice cream scoop with a release lever to divide the dough into 17 portions, about 2 ounces each. Shape the dough into balls, place in an airtight container, and refrigerate for at least 2 hours, or overnight.
- Preheat the oven to 350 F, and position a rack in the center of the oven. Line a large baking sheet with parchment paper. While the oven is preheating, place 8 balls of dough on a plate in the freezer for 10 minutes.
- Place the frozen balls of dough on the baking sheet, spaced three inches apart. Bake for about 13 minutes, until the edges are crisp and light golden brown, and the centers are gently puffed and look slightly underdone. If your cookies didn't spread quite enough, you can bang the pan on the counter several times to help them flatten and settle.Sprinkle the cookies with the remaining 1/4 teaspoon salt. Let cool on the pan for 1 minute, then transfer to a wire rack to cool completely. As the cookies cool, the soft centers will settle down a bit, leaving a lightly crisp edge around the cookies with chewy centers.TIP: For perfectly round cookies, immediately after taking the pan out of the oven, use a round cookie cutter that's larger than the circumference of the baked cookies, and "scoot" it around the hot cookies. This pulls in the uneven edges and makes beautifully round cookies. You have to do this quickly, before the cookie sets.
- Repeat the above steps to freeze and bake the other 9 balls of dough. Store cooled cookies in an airtight container at room temperature for several days, or in the freezer for up to 3-6 months.
Notes
 https://curlygirlkitchen.com/
This is hands down the best cookie recipe I’ve been tried. I’ve made thousands of cookies and nothing even touches this one. Bravo! And thank you.
I’m so glad you love them, Emily! Thank you for taking the time to comment.
The flavor of these cookies is amazing! I’m at 6,200 ft and they turned out crumbly instead of chewy. I am new to baking at high altitude. Do you have recommendations for adjustments to try? Thank you!
So glad you like them! These cookies do have crisp edges that are a little crumbly, while the centers are softer and chewier. If you scoop too much flour, it could make the dough too dry, resulting in a more crumbly cookie. Be sure you’re measuring your flour using the “spoon and sweep” method, and not scooping directly from the bag of flour with your measuring cups.
For other adjustments, I’d recommend you take a look at my FAQs – I have some helpful guidelines for adjusting recipes for various altitudes. https://curlygirlkitchen.com/baking-faqs/
Hello, These cookies were simple to make and absolutely delicious! I am a Colorado baker as well and I am very impressed by your website. The only difference for my cookies was cooking them for 6-7 minutes. My oven must be hotter than the one you use but otherwise I love the flavor and chewy-ness of the brown butter cookies. I will definitely be making these again.
These are wonderful! And they turned out perfect the first time. I was getting frustrated trying to adapt my favorite CC cookie recipe then I found this one, which was very close to mine (using browned butter).You saved my determination to keep trying high altitude baking. After spending my whole life in the Texas Gulf Coast it’s been quite a shock to see all my baking fails here in our summer home (Durango, CO) but I have faith again! I hope it’s okay that I posted a link to your site and this recipe on my high altitude baking group on FB. They need to know about your site!! Thanks again.
Another winning recipe, Heather! I substituted flaxseed “egg” for the real egg. Mine didn’t flatten out much, but my husband said they were the best cookies I’ve ever made (and I’ve been making cookies a long time!). Thank you!
I’m so glad! This recipe is my own personal favorite. 🙂
Denver suburb. Made these cookies several months ago and they were a total failure – however, I suspect my food scale was dying a slow death at the time, throwing off my measurements. Gave them another go today with a new food scale to much more success! I followed the recipe exactly, using chopped Ghirardelli bittersweet chocolate and the suggestion to include an additional egg yolk. They were pleasantly chewy and not too flat, but I want even more chewy thickness! I also felt they were a little pale – but they definitely weren’t undercooked.
Changes I will potentially make in future batches: 1) play with the white/brown sugar ratio – maybe 1:1 instead of 4:1?, 2) consider using dark brown sugar instead of light, 3) add the flakey salt topping after making my dough balls but before chilling so it sticks better, and 4) add toasted walnuts with the chocolate – I love the nuttiness and crunch, but I wanted to try the recipe “straight up” first!
Hi Heather, I already have some browned butter on hand. Would I reduce the amount to use for the recipe, and by how much? I figure since my butter already is made and the moisture is out of it, I would need less than the recipe calls for. Thanks!
1 cup of butter may lose between 1-2 tablespoons of water during the browning process, but I haven’t measured it to see exactly how much is lost. I hope that helps!
Update: I made some last night, and 1 cup of butter lost 2 tablespoons.
Thank you!!!
Is there any reason you can’t put the brown butter in a bowl to cool in the fridge? So you don’t have to wait so long?
You can do that, but you need to keep an eye on it, stirring it every 20 minutes or so, so it doesn’t get too hard.
Easily one of the absolute best cookies I’ve ever made! So delicious and full of flavor—I kept staring at the cookie as I ate it in awe. They came out perfectly chewy with an amazingly crispy bottom. I used 60% Ghirardelli chocolate chips and chopped it. Cant wait to make them again with toasted pecans. Love it, thank you!
The browned butter flavor is awesome, the dough is to die for also.
These are amazing! And I just love that little “scoot” method – it gives such a nice finished edge!! Thank you for sharing your expertise here on your blog!
Thank you so much for the brown butter chocolate chip cookie recipe. They were absolutely delicious. I lived in Florida for thirty years where I was an avid baker. I loved baking for friends and family. A few years ago I moved to Arvada, Colorado and I could not understand why my tried and true recipes for cakes and cupcakes were now dry or even hard. I thought it was the oven. I was talking to a gym buddy and told her that I guess I am going to give up baking. She asked if I was changing the recipe for the altitude. Uh no. So I started doing research on recipes for high altitudes. Your site has beautifully photographed and curated recipes. I have already picked out several to bake. Thank you so very much. I am baking again!!
I’m so happy to help! And so glad that someone told you that you didn’t have to give up, and a few simple changes make all the difference. 🙂
Hi,
I was wondering if the butter has to cool until no longer a liquid? Can it just be cool to the touch instead? Thank you.
It needs to return to a solid, as stated in the recipe. I usually just make it the night before I plan to bake the cookies, so it can just sit on the counter overnight to solidify.
This is the only cookie recipe I’m using from now on. I live at 6,000ft and when I tried making a different cookie recipe, they turned out super flat. However. This recipe made the most perfect cookies! I didn’t have espresso powder, but still turned out amazing! Next time I’ll add chopped pecans with the chocolate.
🤌🏼 Amazzzzzzing!