
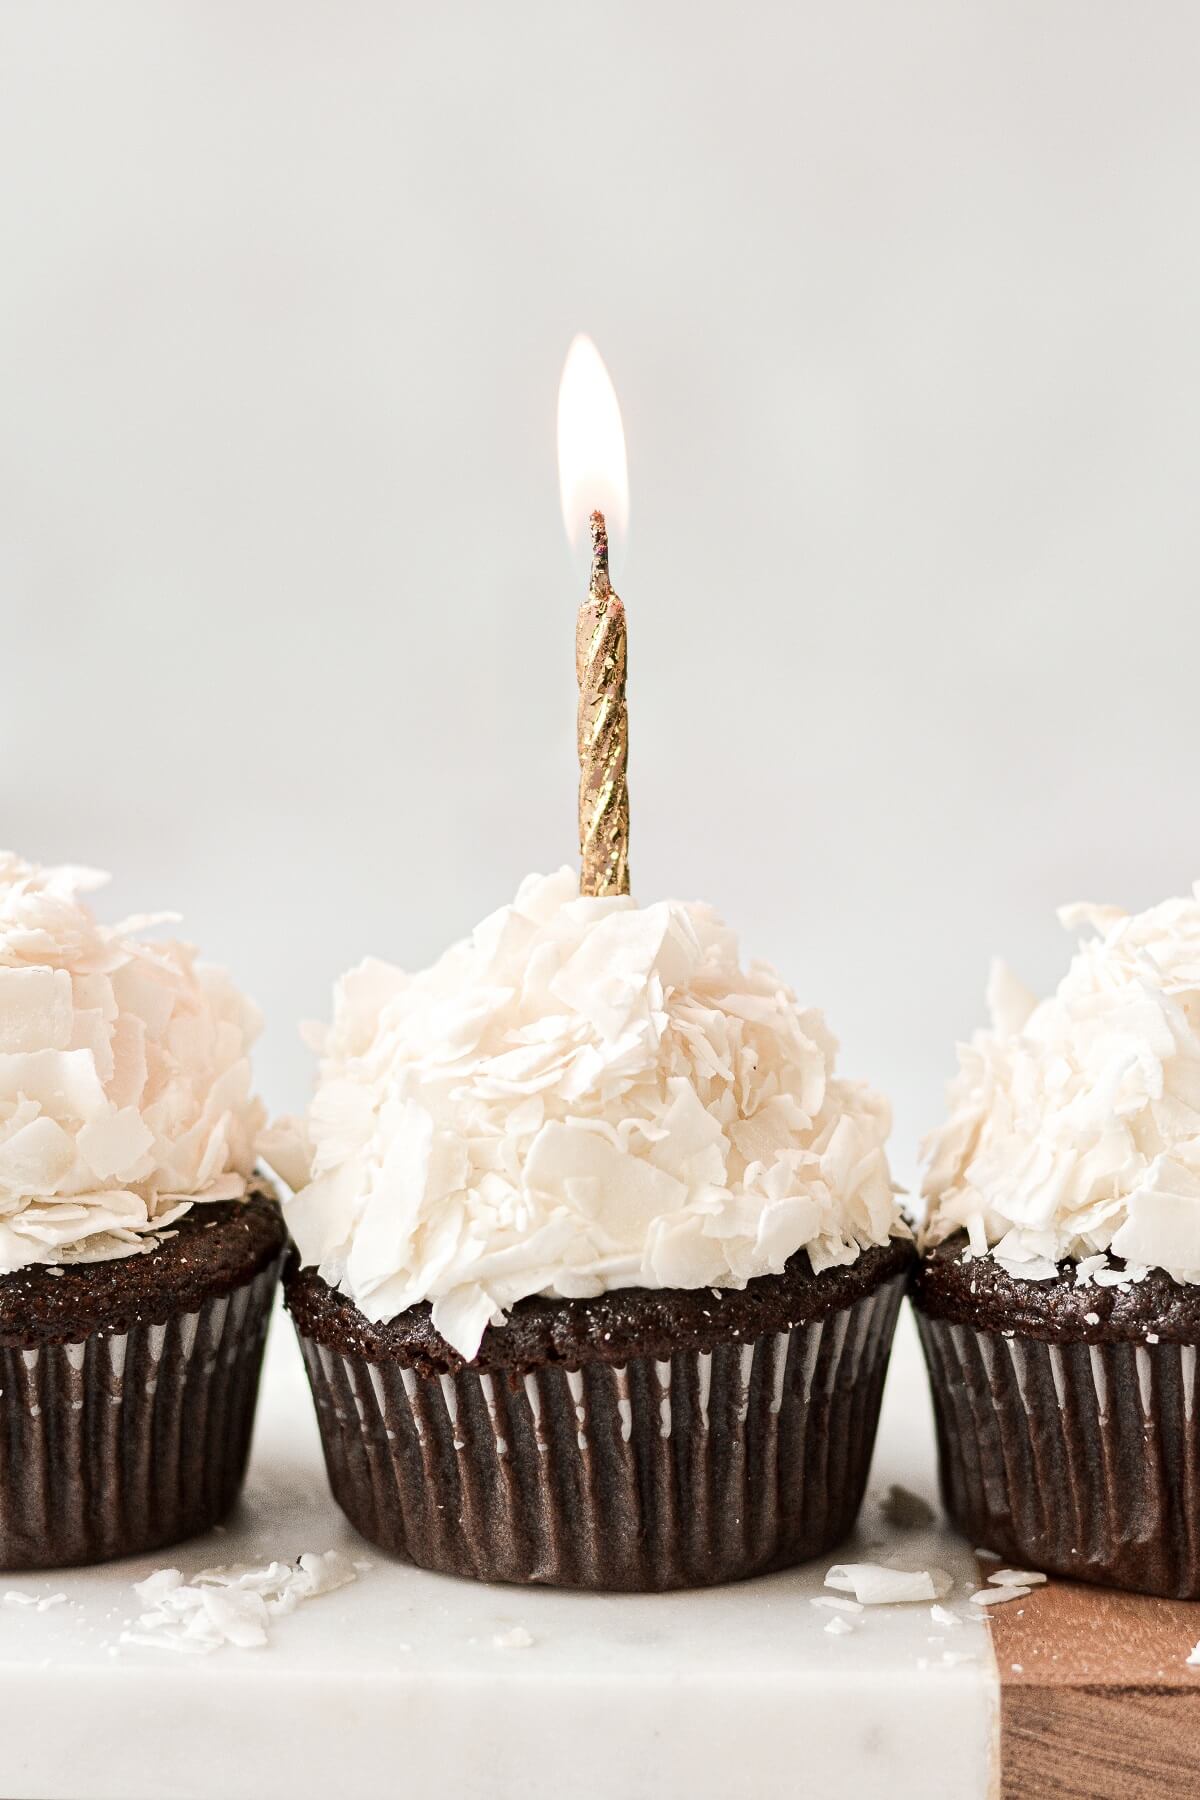
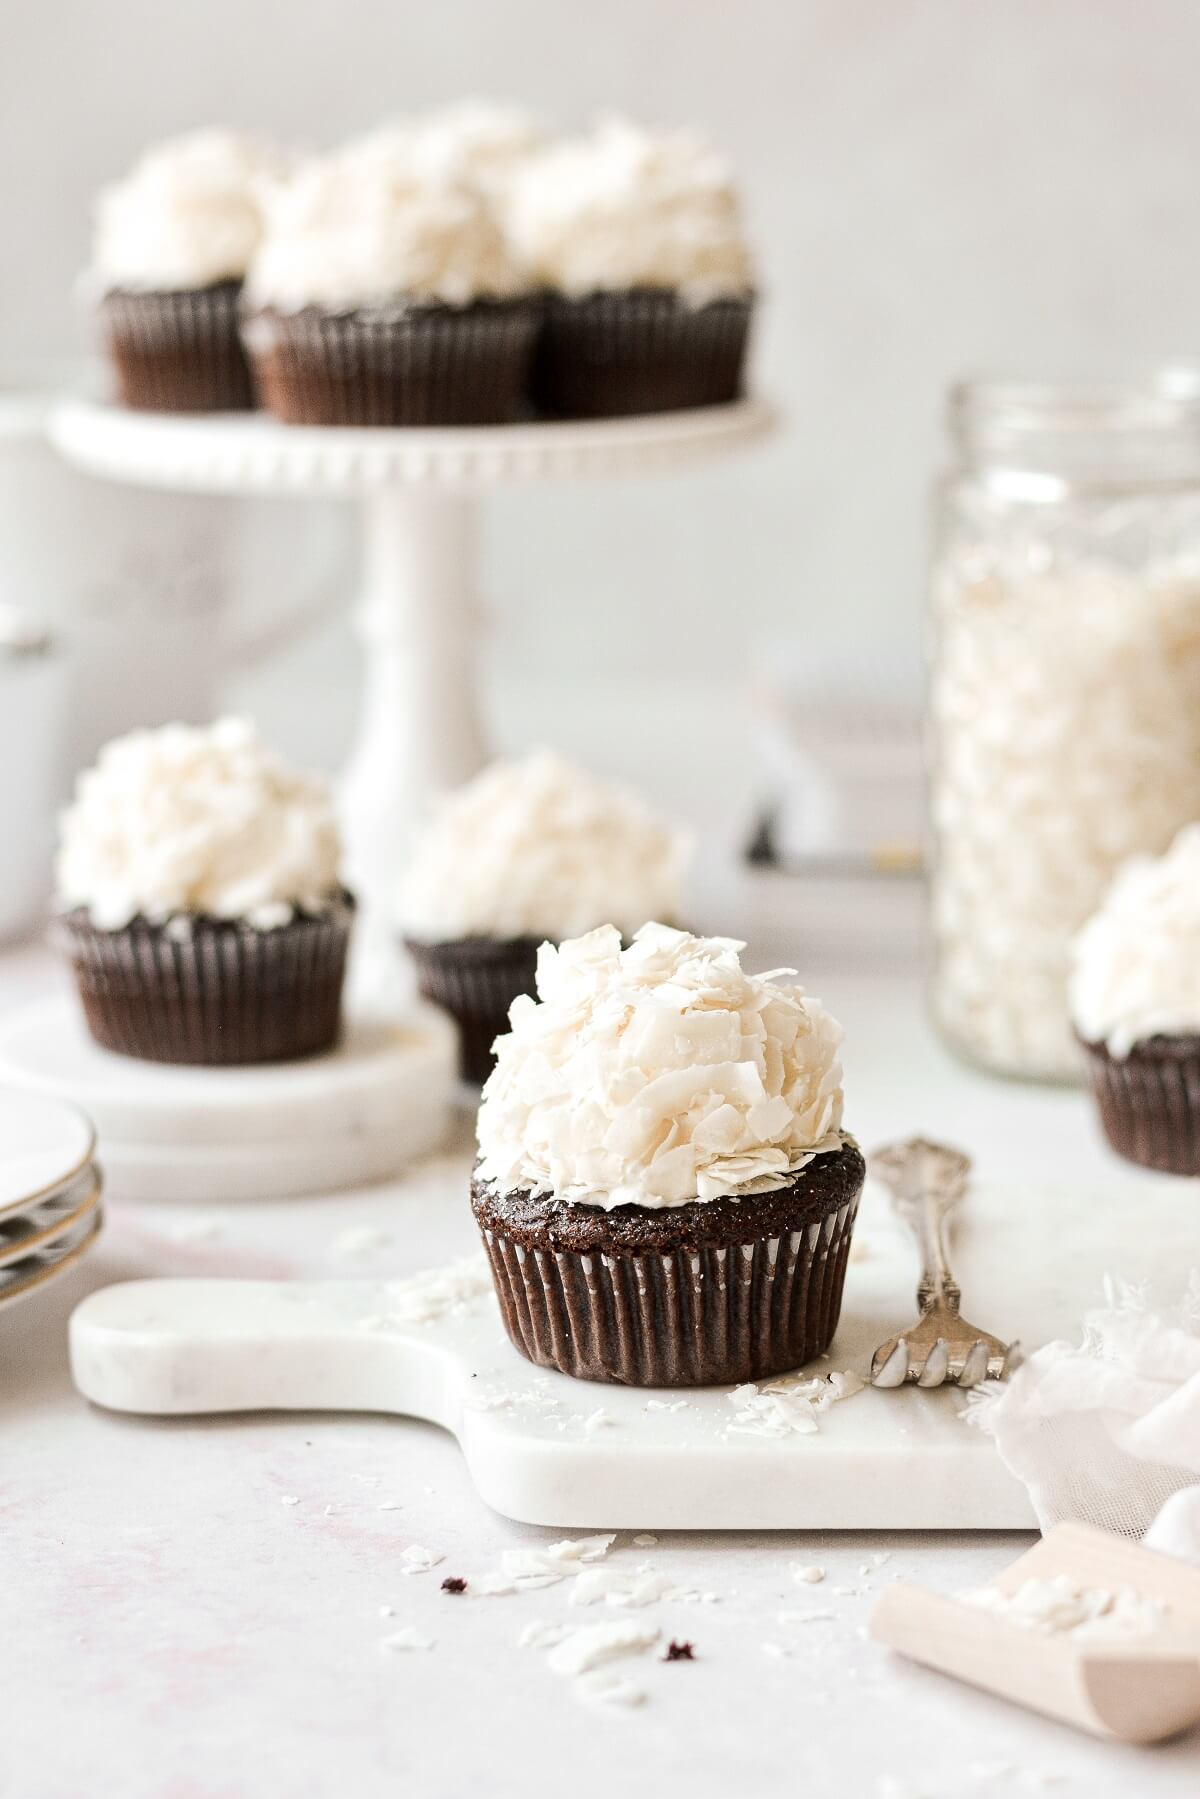
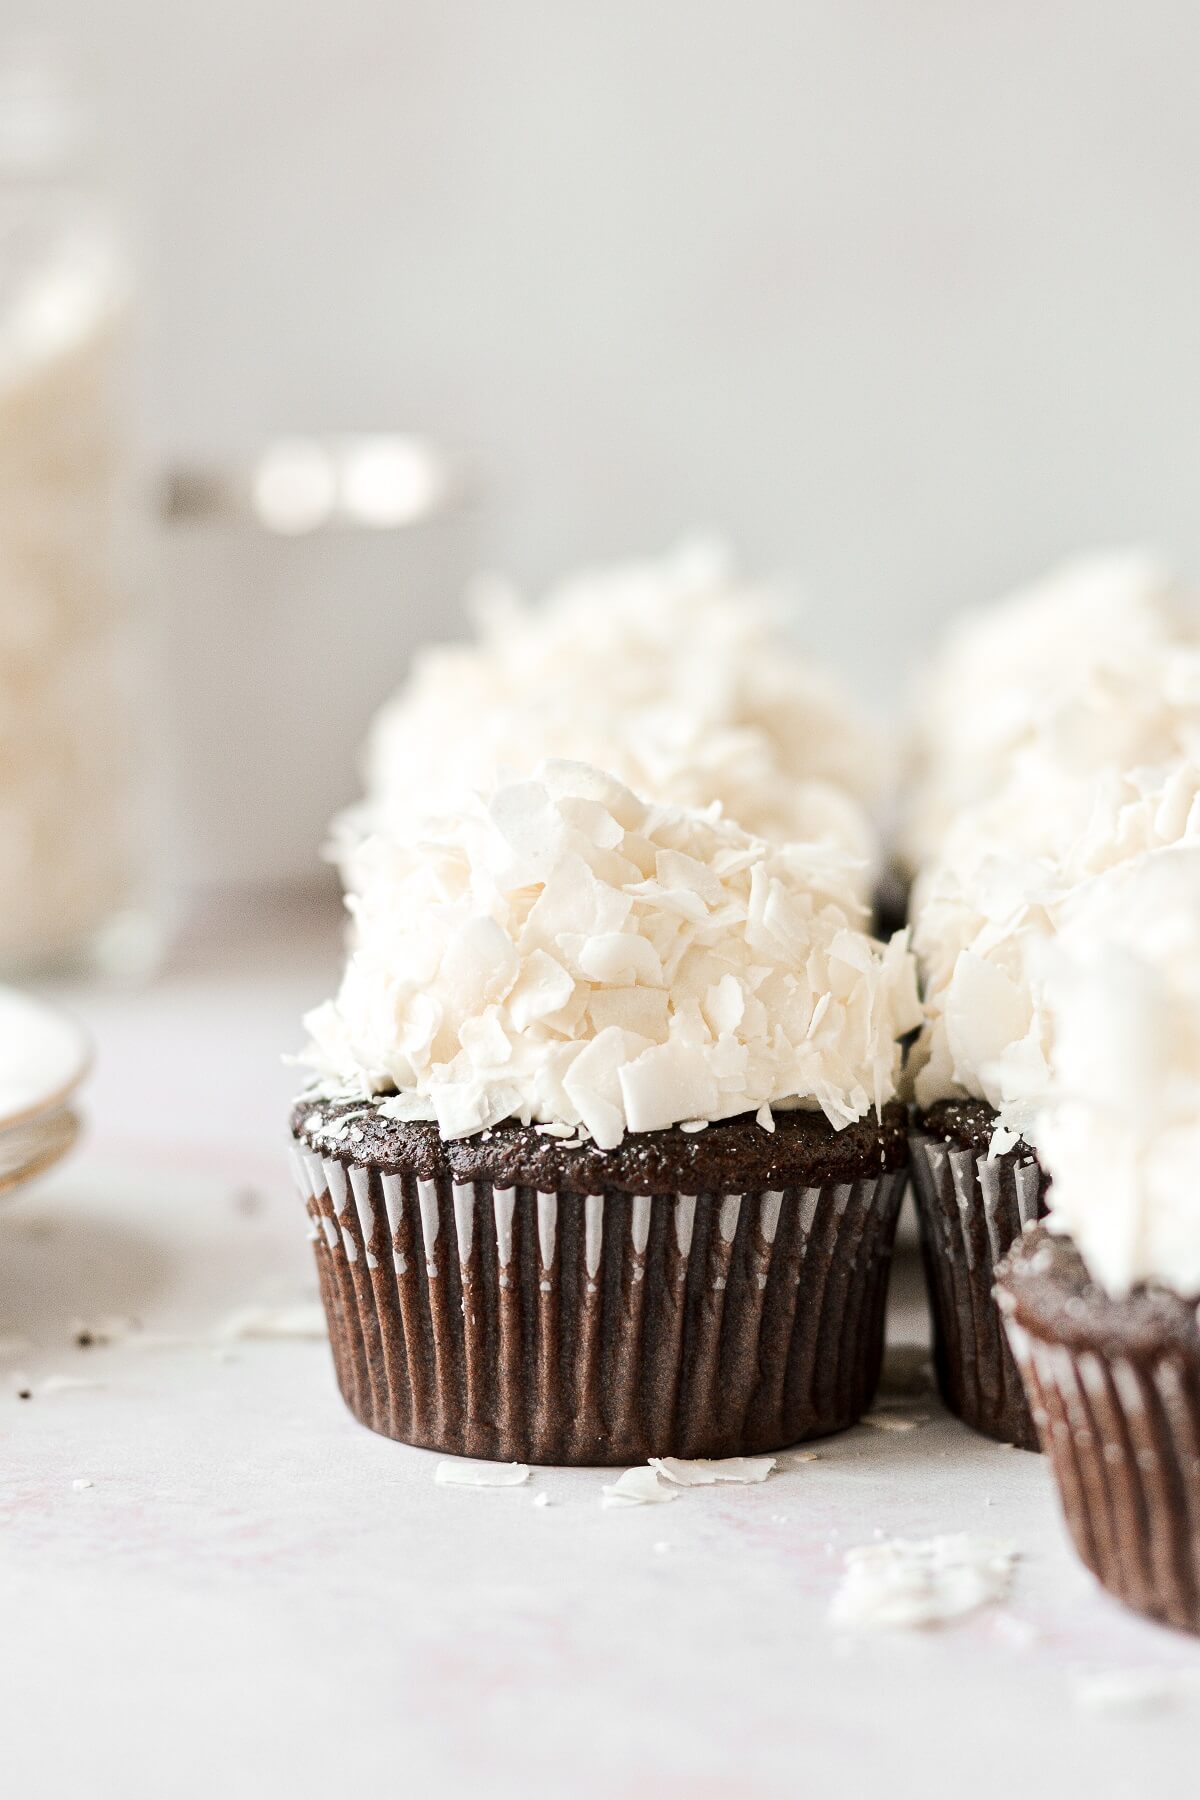
Soft and moist chocolate coconut cupcakes, filled with homemade coconut milk custard, and frosted with fluffy coconut buttercream. This is a high altitude tested cupcake recipe, completely made from scratch with no boxed cake mix!
Looking for more cupcake recipes? You’ll love these key lime pie cupcakes, chocolate cherry cupcakes, and strawberry cupcakes.
This site contains affiliate links. As an Amazon associate, I earn from qualifying purchases. This means that I may make a small commission if you purchase a product using those links. This in no way affects my opinion of those products and services. All opinions expressed on this site are my own.
Why You’ll Love These Cupcakes
A Perfect Flavor Pairing. I love a pure white coconut cake, but there’s no denying that rich dark chocolate and sweet coconut is just fantastic together.
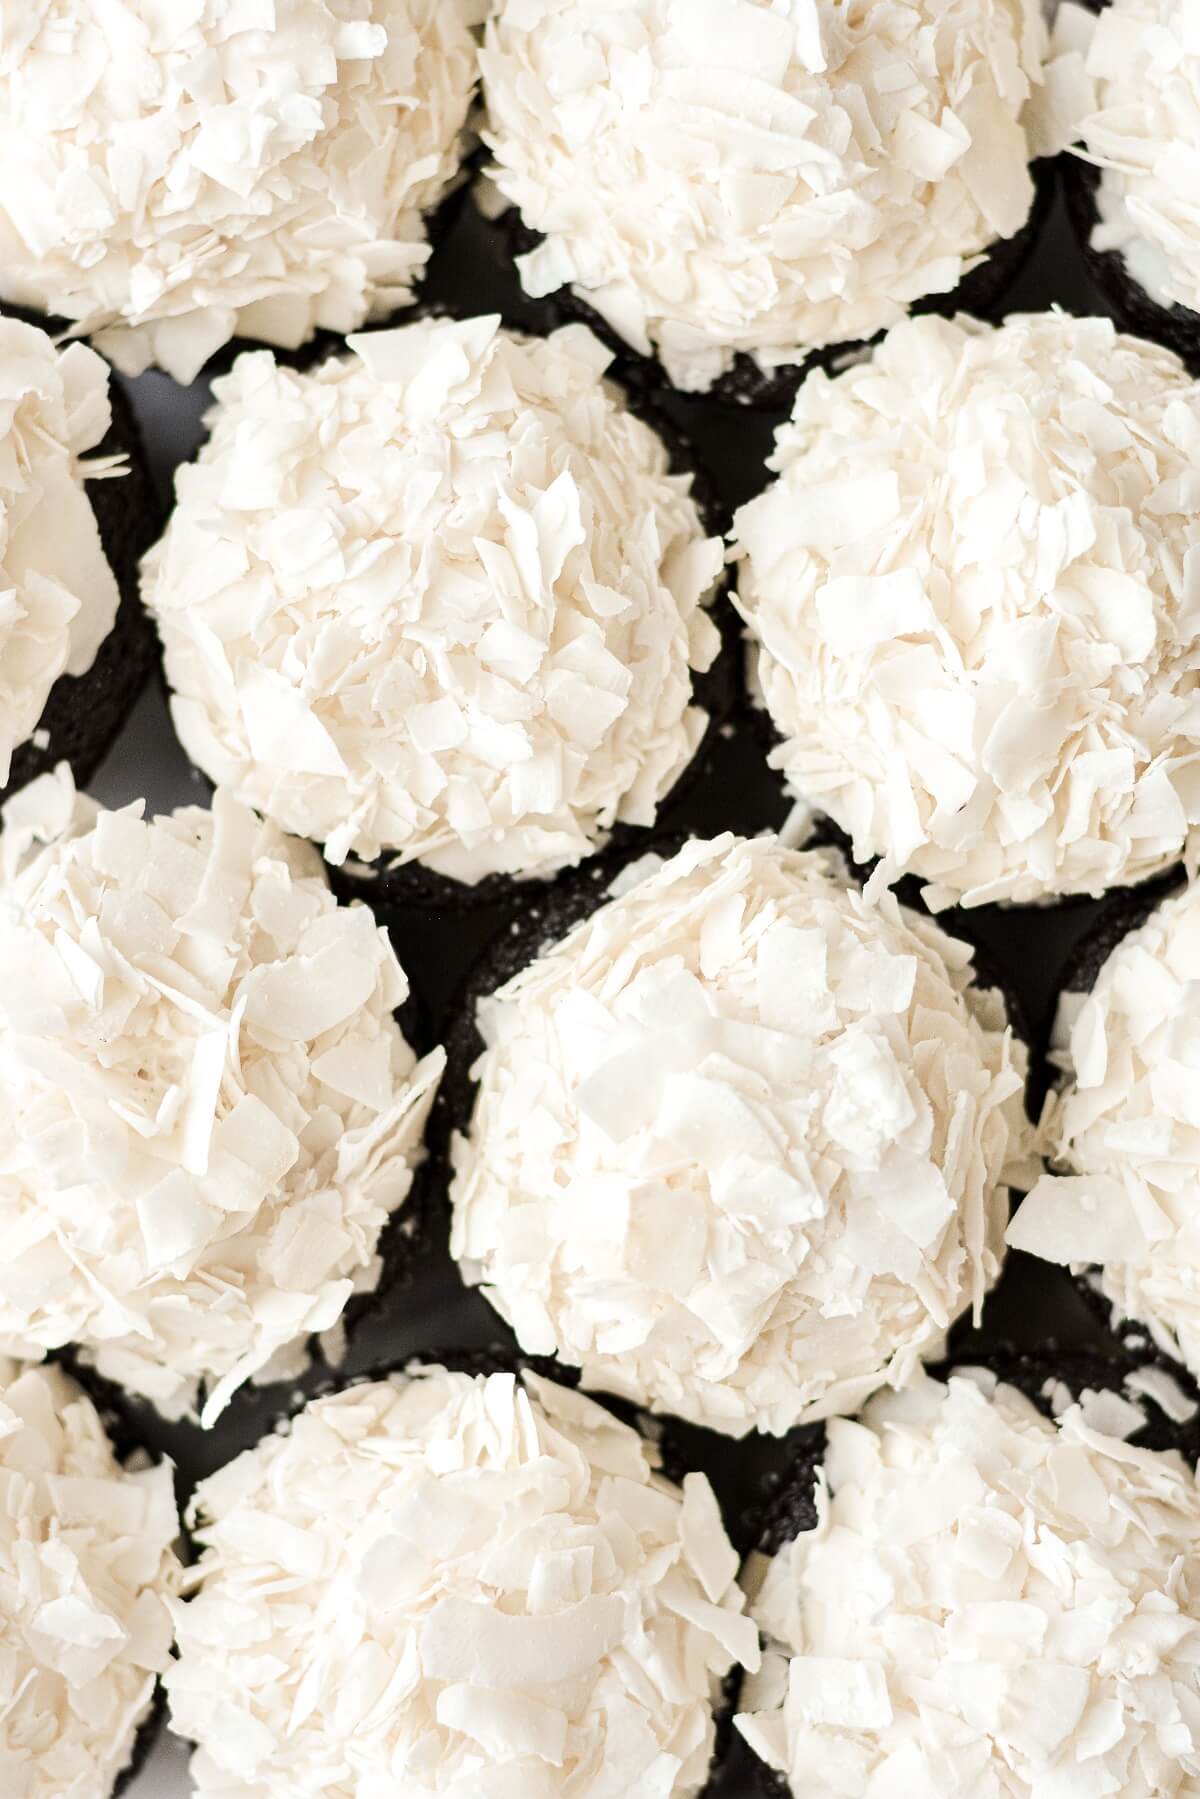
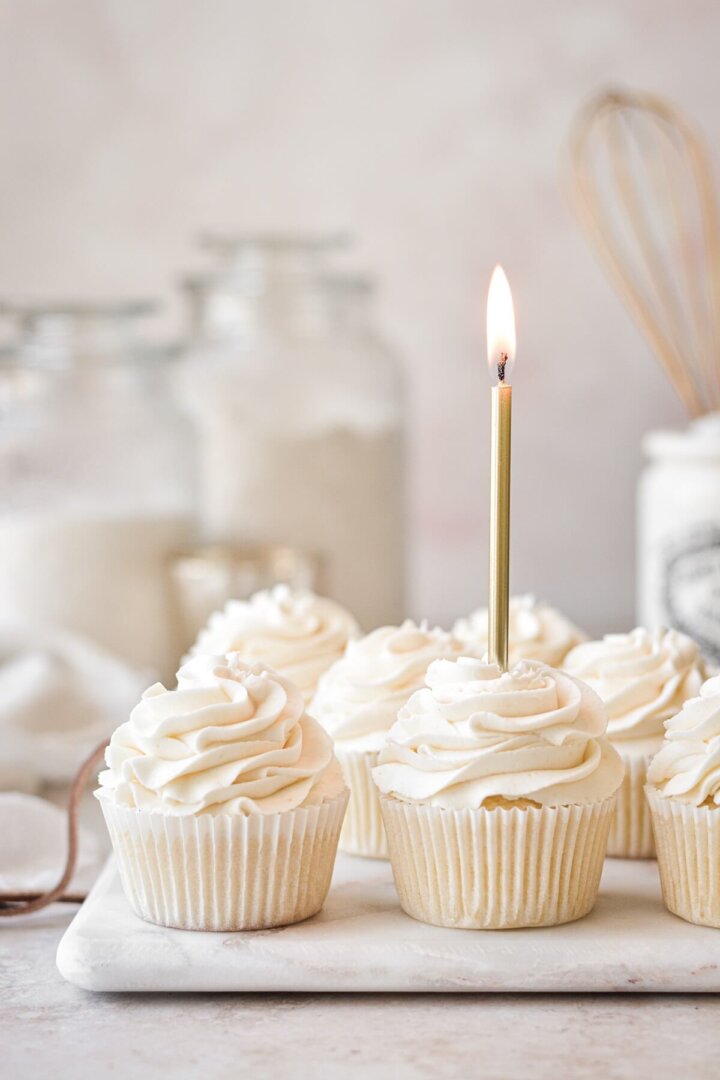
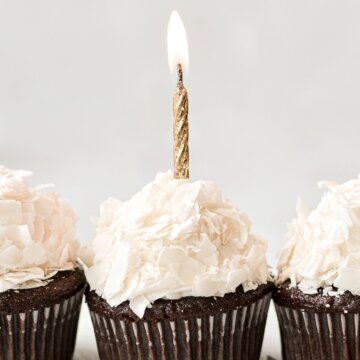
Simple to Decorate. You don’t need any piping skills to make these cupcakes pretty. Just mound some frosting on top and sprinkle it with coconut to look like a beautiful snowball-topped cupcake.
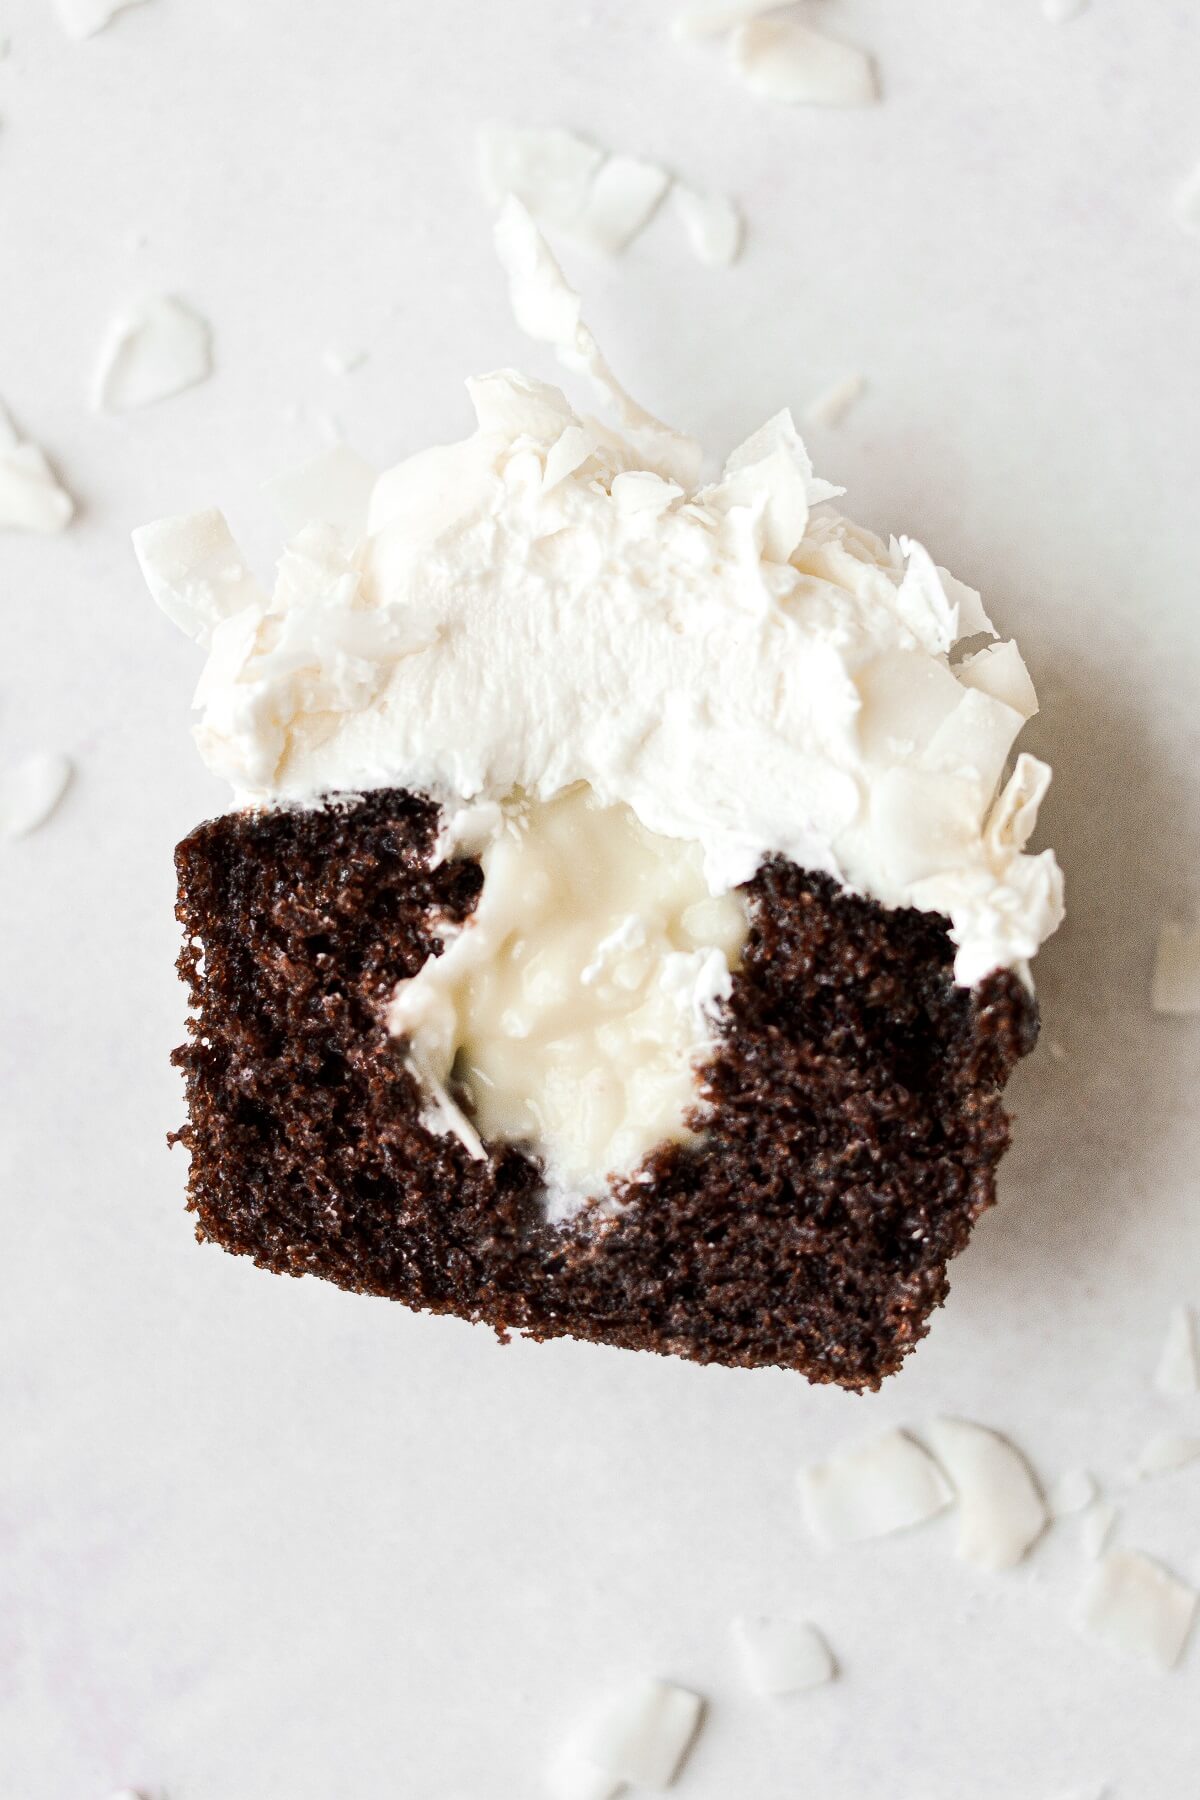
Stays Soft For Days. The chocolate cupcakes are already so moist, but with the creamy coconut milk custard inside, they stay incredibly soft and moist for days.
High Altitude Tested. I develop all the recipes on my site for Denver’s altitude of 5,280 feet. If you’re at a lower or higher elevation, please see my FAQs for guidance on adjusting recipes for your altitude.
See the recipe card at the end of the post for the full ingredients list and instructions.
Ingredients
Coconut Custard
- Coconut Milk. To make the custard, use full-fat, unsweetened canned coconut milk, not the refrigerated coconut milk that you find on the dairy aisle.
- Sugar. Granulated sugar adds sweetness.
- Corn Starch. Thickens the custard.
- Egg Yolk. Adds a rich flavor.
- Butter. Unsalted butter adds richness and flavor.
- Vanilla + Coconut Extracts. Flavor.
- Coconut. You can use either natural or sweetened shredded coconut.
Chocolate Cupcakes
- Flour. I prefer cake flour for white cakes, but all-purpose flour works great in chocolate cakes and cupcakes, and gives the batter structure.
- Sugar. Granulated sugar sweetens and moistens the cake.
- Cocoa Powder. A good chocolate cupcake needs good cocoa powder, and I made these with Rodelle Dutched Cocoa Powder. Be sure to use Dutch-process, not natural cocoa powder.
- Baking Powder + Baking Soda. Leavens the cupcakes so they rise.
- Salt. Balances the sweetness and enhances the flavors. I use coarse Kosher salt, so if you use table salt, which has a finer grain, you should use half the amount.
- Eggs. Add structure and richness.
- Milk + Sour Cream. A combination of milk and sour cream gives this cake flavor and moisture. Sour cream is just fantastic in cakes.
- Vegetable Oil. Most cake recipes contain either butter or oil. Butter, of course, has a superior flavor, but oil is known for making an incredibly moist and light cake.
- Vanilla Extract. Flavor.
Coconut Buttercream
- Butter. I always make my buttercream with unsalted butter so I can control the saltiness. In hot weather, substitute half shortening for a more stable buttercream.
- Powdered Sugar. Sweetens and thickens the buttercream.
- Meringue Powder. Adds stability and improves the texture.
- Salt. Balances the sweetness.
- Vanilla + Coconut Extracts. Flavor.
- Coconut. You can use either natural or sweetened shredded coconut, but natural coconut looks prettier, and doesn’t add a cloying sweetness.
Instructions
Custard
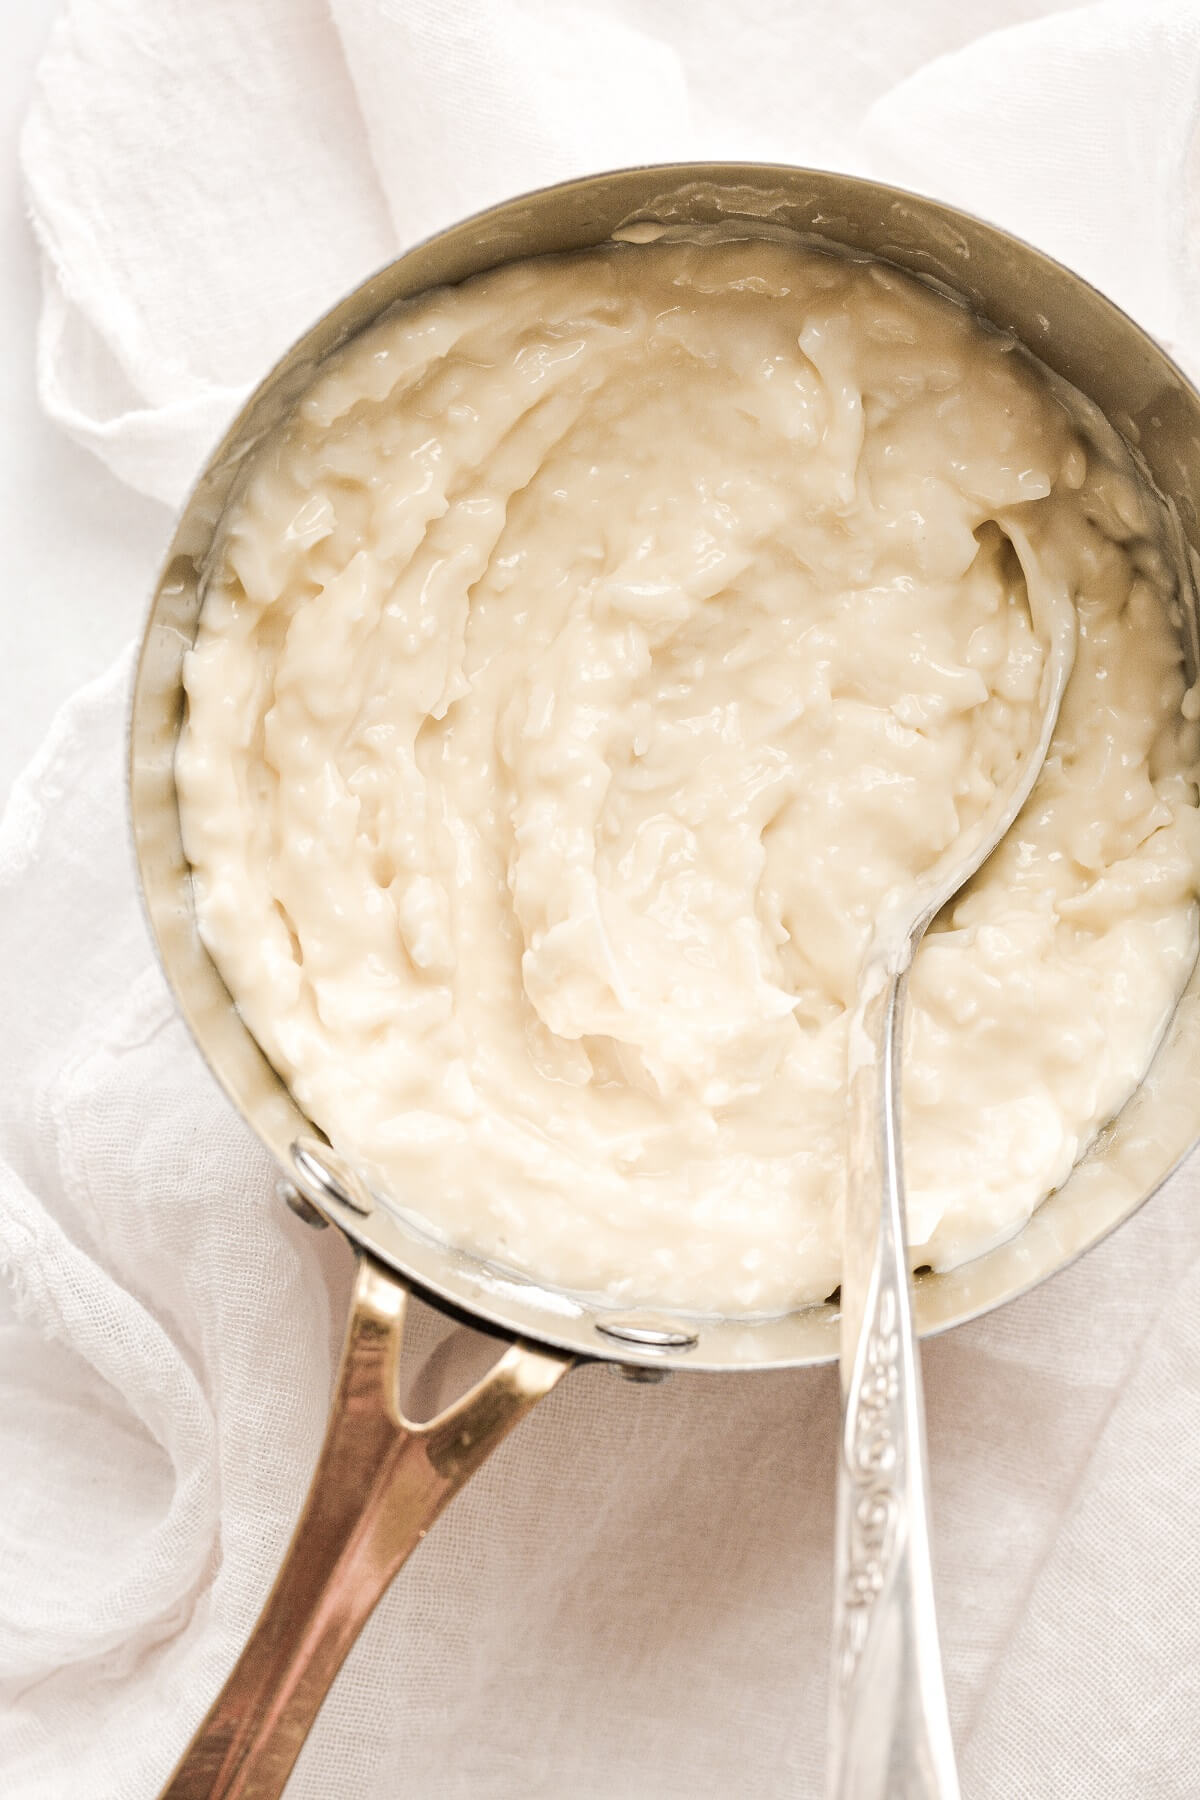
- In a small saucepan, whisk together the sugar, corn starch and egg yolk until you have a smooth paste. Whisk in the coconut milk.
- Over medium heat, cook the custard, while whisking constantly. Once it starts to boil and thicken, continue to cook for 1 full minute.
- Remove from the heat and stir in the butter, extracts and coconut.
- Transfer to a container, cover and refrigerate until well chilled. You can make the custard up to 2 days in advance.
Cupcakes
- Preheat the oven to 350 F, and line a muffin/cupcake pan with 16 paper liners. Position a rack in the center of the oven.
- In a bowl, sift together the flour, sugar, cocoa powder, baking powder, baking soda and salt.
- Separately, whisk together the eggs, milk, oil, sour cream and vanilla. Add the wet ingredients to the dry and whisk until smooth.
- Use a scant 1/4 cup measuring cup to fill the paper liners about 2/3 full.
- Bake the cupcakes until the tops spring back when gently touched, about 15-20 minutes. Check for doneness at 15 minutes.
- Cool the cupcakes in the pan for several minutes, then gently transfer to a cooling rack. Cool completely before filling and frosting.
TIP: If you only have a 12-cup pan, you can let the remaining batter rest while you bake the first batch of cupcakes. Without stirring the batter again, spoon the remaining batter into the pan and bake the second batch of cupcakes.
Buttercream
- In the bowl of your stand mixer fitted with the whisk attachment, beat the butter for 1 minute until smooth.
- With the mixer on low, add the powdered sugar by spoonfuls, the meringue powder and salt, mixing until combined, but clumpy. Add the extracts.
- Increase speed to medium (#6 on a Kitchen Aid), and beat for 4-5 minutes, scraping the bowl occasionally, until light and fluffy. If you need to, add 1-2 tablespoons of milk for desired consistency – this is usually not needed in the summer, but you may need to add milk in the winter when your kitchen is colder.
Assembly
- Use a cupcake corer (or a small paring knife) to remove the centers of the cupcakes.
- Spoon some of the custard into the centers, keeping it level with the top of the cupcakes.
- Pipe or spread a mound of buttercream on top of the cupcake, then gather handfuls of coconut and lightly sprinkle/press it onto the buttercream.
Be sure to read all of my BAKING FAQs where I discuss ingredients, substitutions and common questions with cake making, so that you can be successful in your own baking! I also suggest reading these comprehensive posts on making Perfect American Buttercream, How to Stack, Fill, Crumb Coat and Frost Layer Cakes and How to Use Piping Bags.
Frequently Asked Questions
Should I use sweetened or unsweetened shredded coconut?
You can use either, but natural (unsweetened) coconut is so much better, in my opinion. It has a nicer flavor since it isn’t excessively sweet, and the texture is nice and crunchy. Sweetened coconut is less expensive, but is very sweet, and has a chewy texture. You can make sweetened coconut crunchier by lightly toasting it in the oven. In these chocolate coconut cupcakes, I used sweetened shredded coconut in the custard, and natural flaked coconut to sprinkle over the buttercream.
Do these cupcakes need to be refrigerated?
Yes, with the custard filling, they do need to be refrigerated in an airtight container. Let them come to room temperature about an hour before serving.
What kind of coconut milk should I use?
In the custard, you should use canned, unsweetened, full-fat coconut milk, like Thai Kitchen. The coconut milk found in the dairy aisle isn’t a good substitute.
Will the coconut custard work as a pie filling, too?
This coconut custard recipe isn’t quite thick enough for a pie. I have a wonderful coconut cream pie recipe you don’t want to miss!
Can I make the cupcakes in advance?
Buttercream freezes well, and you can make it ahead of time, stored in an airtight container or freezer bag, and freeze it for up to 3-6 months. Thaw at room temperature.
The custard can be made 2 days in advance and refrigerated.
The cupcakes can be filled, frosted and stored in an airtight container 1 day in advance.
What should I use the leftover custard for?
If you have leftover custard, you can make little trifle cups with the custard and the cupcake centers that you removed. Or just enjoy the custard with some fruit and whipped cream.
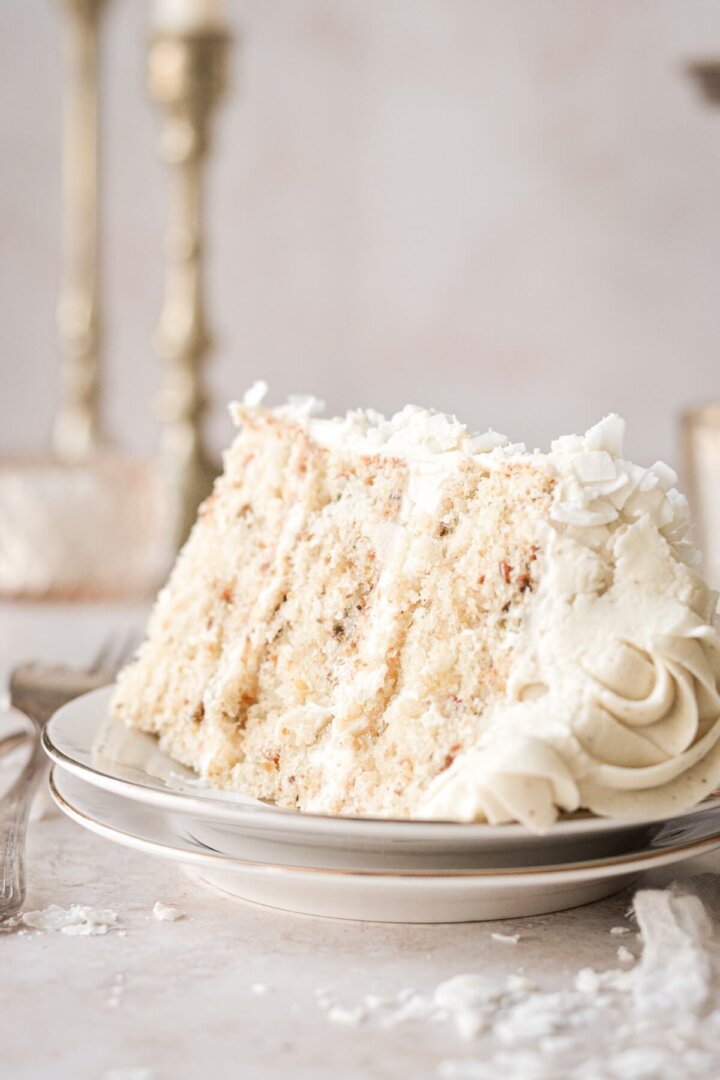
Will this recipe work as a layer cake?
Yes, you can make a three-layer 6-inch cake, or double the recipe for a three-layer 8-inch cake.
Do you have a vanilla coconut cupcake recipe?
For a vanilla version of these chocolate coconut cupcakes, try this vanilla cupcake recipe and add coconut extract to the batter. It would be fantastic with the coconut custard and buttercream.
You Might Also Like

Please check out my Amazon Shop for a curated collection of some of my favorite cake pans from trusted brands, baking tools, ingredients, pretty things and fashion finds. I recommend products that I buy and use every day!
Did you love today’s recipe? Please rate the recipe and let me know in the comments what you thought! Also, be sure to follow Curly Girl Kitchen on Instagram, and tag me when you try one of my recipes so I can see all your delicious creations!
High Altitude Chocolate Coconut Cupcakes
All recipes on Curly Girl Kitchen are developed for high altitude at 5,280 feet. See FAQs for adjusting to higher or lower elevations.

Equipment
- Muffin Pans + Paper Liners
- Stand Mixer with Whisk Attachment
Ingredients
Coconut Custard
- 1 ½ tbsp granulated sugar
- 2 ½ tsp corn starch
- 1 egg yolk
- 7 oz (1/2 can) full-fat unsweetened canned coconut milk
- 2 tsp unsalted butter
- ¼ – ½ tsp coconut extract
- ½ tsp vanilla extract
- ½ cup shredded coconut (either natural or sweetened)
Chocolate Cupcakes
- 1 cup all-purpose flour, spooned and leveled
- ¾ cup + 2 tbsp granulated sugar
- 6 tbsp unsweetened, Dutch-processed cocoa powder
- ¼ tsp baking powder
- ½ tsp baking soda
- ½ tsp coarse Kosher salt (if using table salt, use half the amount)
- 2 large eggs
- ½ cup whole milk
- ½ cup vegetable oil
- ½ cup sour cream
- 1 tsp vanilla extract
Coconut Buttercream
- 1 cup unsalted butter, softened to room temperature
- 2 cups powdered sugar
- 2 tsp meringue powder
- ⅛ tsp coarse Kosher salt (if using table salt, use half the amount)
- ¾ tsp coconut extract
- 1 tsp vanilla extract
- 2 cups shredded coconut (either natural or sweetened)
Instructions
Custard
- In a small saucepan, whisk together the sugar, corn starch and egg yolk until you have a smooth paste. Whisk in the coconut milk.
- Over medium heat, cook the custard, while whisking constantly. Once it starts to boil and thicken, continue to cook for 1 full minute.
- Remove from the heat and stir in the butter, extracts and coconut.
- Transfer to a container, cover and refrigerate until well chilled. You can make the custard up to 2 days in advance.
Cupcakes
- Preheat the oven to 350 F, and line a muffin/cupcake pan with 16 paper liners. Position a rack in the center of the oven.
- In a bowl, sift together the flour, sugar, cocoa powder, baking powder, baking soda and salt.
- Separately, whisk together the eggs, milk, oil, sour cream and vanilla. Add the wet ingredients to the dry and whisk until smooth.
- Use a scant 1/4 cup measuring cup to fill the paper liners about 2/3 full. (If you only have a 12 cup pan, you can let the remaining batter rest while you bake the first batch of cupcakes. Without stirring the batter again, spoon the remaining batter into the pan and bake the second batch.
- Bake the cupcakes until the tops spring back when gently touched, about 15-20 minutes. Check for doneness at 15 minutes.
- Cool the cupcakes in the pan for several minutes, then gently transfer to a cooling rack. Cool completely before filling and frosting.
Buttercream
- In the bowl of your stand mixer fitted with the whisk attachment, beat the butter for 1 minute until smooth.
- With the mixer on low, add the powdered sugar by spoonfuls, the meringue powder and salt, mixing until combined, but clumpy. Add the extracts.
- Increase speed to medium (#6 on a Kitchen Aid), and beat for 4-5 minutes, scraping the bowl occasionally, until light and fluffy. If you need to, add 1-2 tablespoons of milk for desired consistency – this is usually not needed in the summer, but you may need to add milk in the winter when your kitchen is colder.
Assembly
- Use a cupcake corer (or a small paring knife) to remove the centers of the cupcakes.
- Spoon some of the custard into the centers, keeping it level with the top of the cupcakes.
- Pipe or spread a mound of buttercream on top of the cupcake, then gather handfuls of coconut and lightly sprinkle/press it onto the buttercream.
Notes
- Keep cupcakes refrigerated in an airtight container until ready to serve, then let them come to room temperature for about an hour before serving.
- If you have leftover custard, you can make little trifle cups with the custard and the cupcake centers that you removed.
 https://curlygirlkitchen.com/
Can I convert this to a cake?
Please see these recipes:
https://curlygirlkitchen.com/high-altitude-chocolate-coconut-cake/
https://curlygirlkitchen.com/classic-coconut-cake/
I just made it and it’s super moist and soft. The custard it’s delicious . Easy to make