
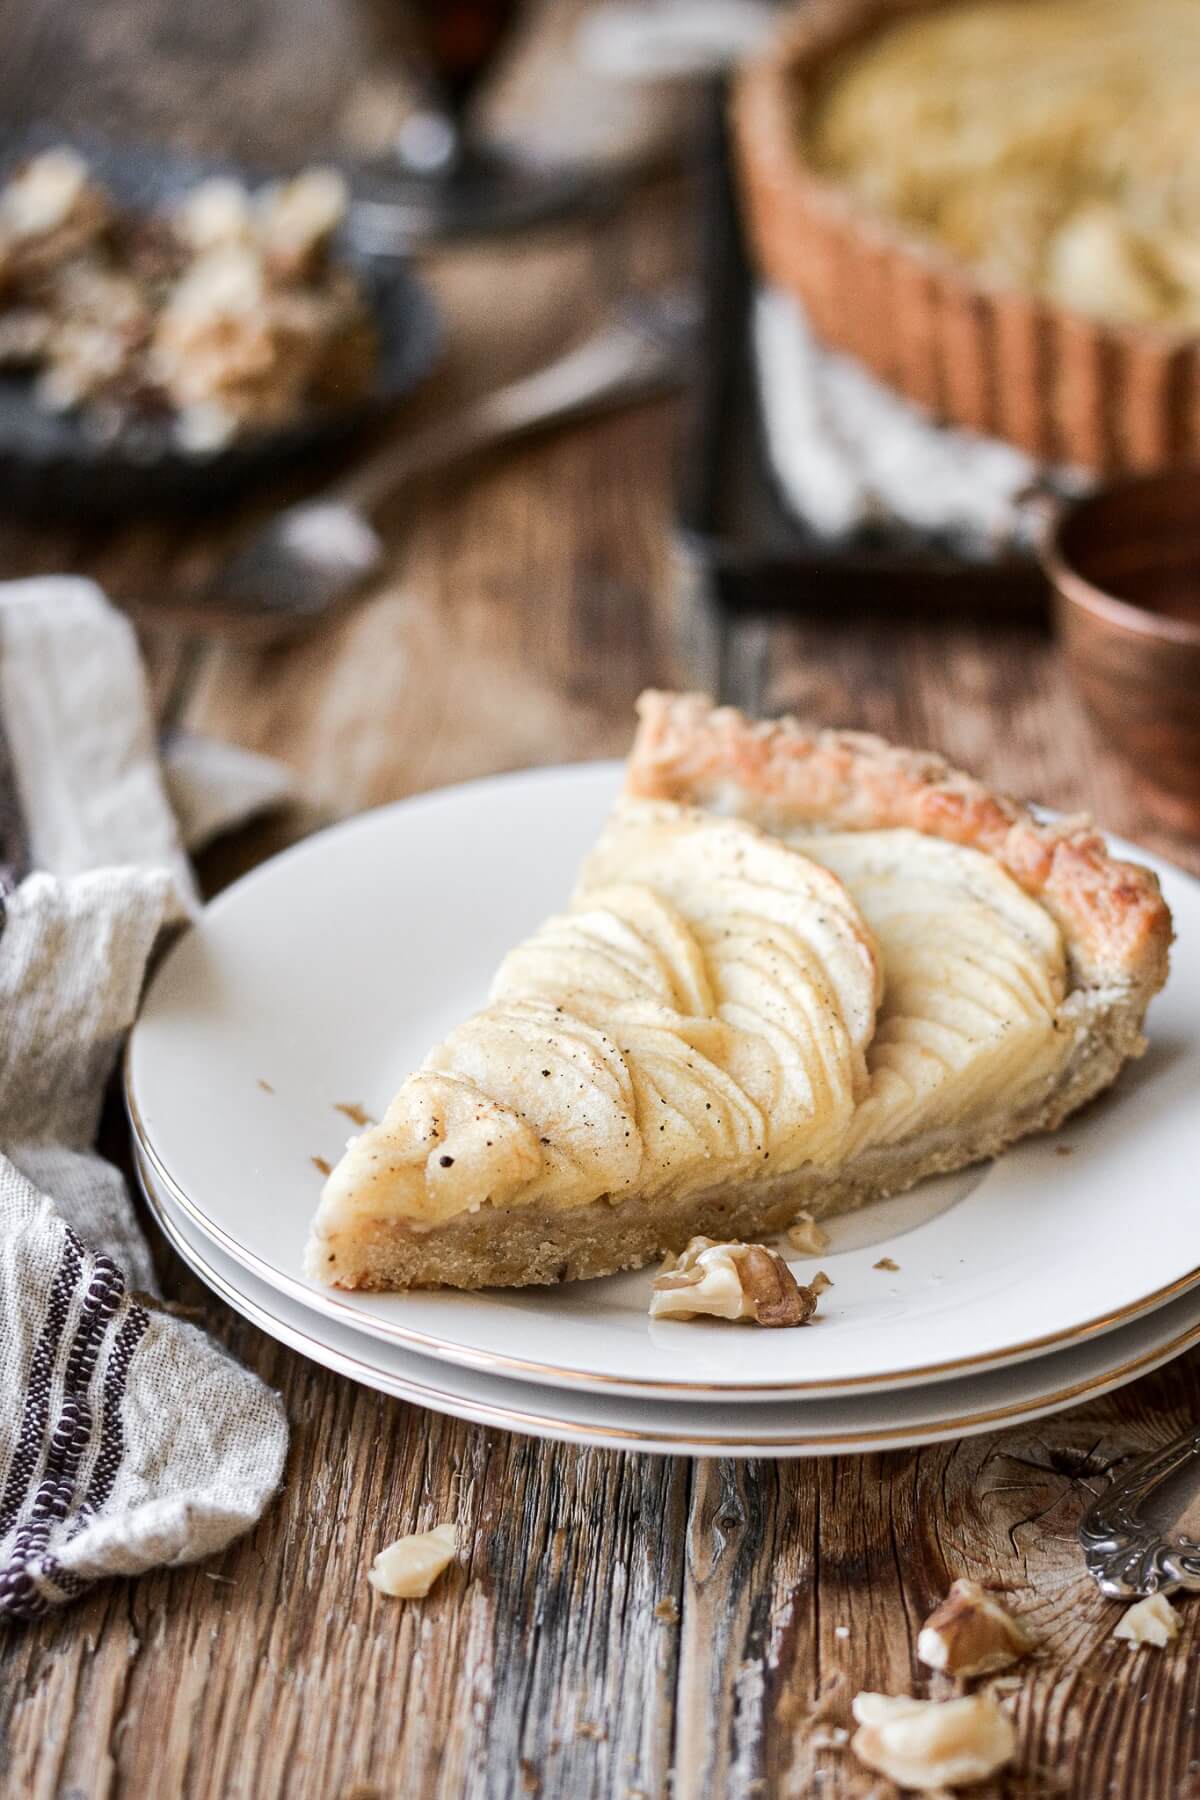
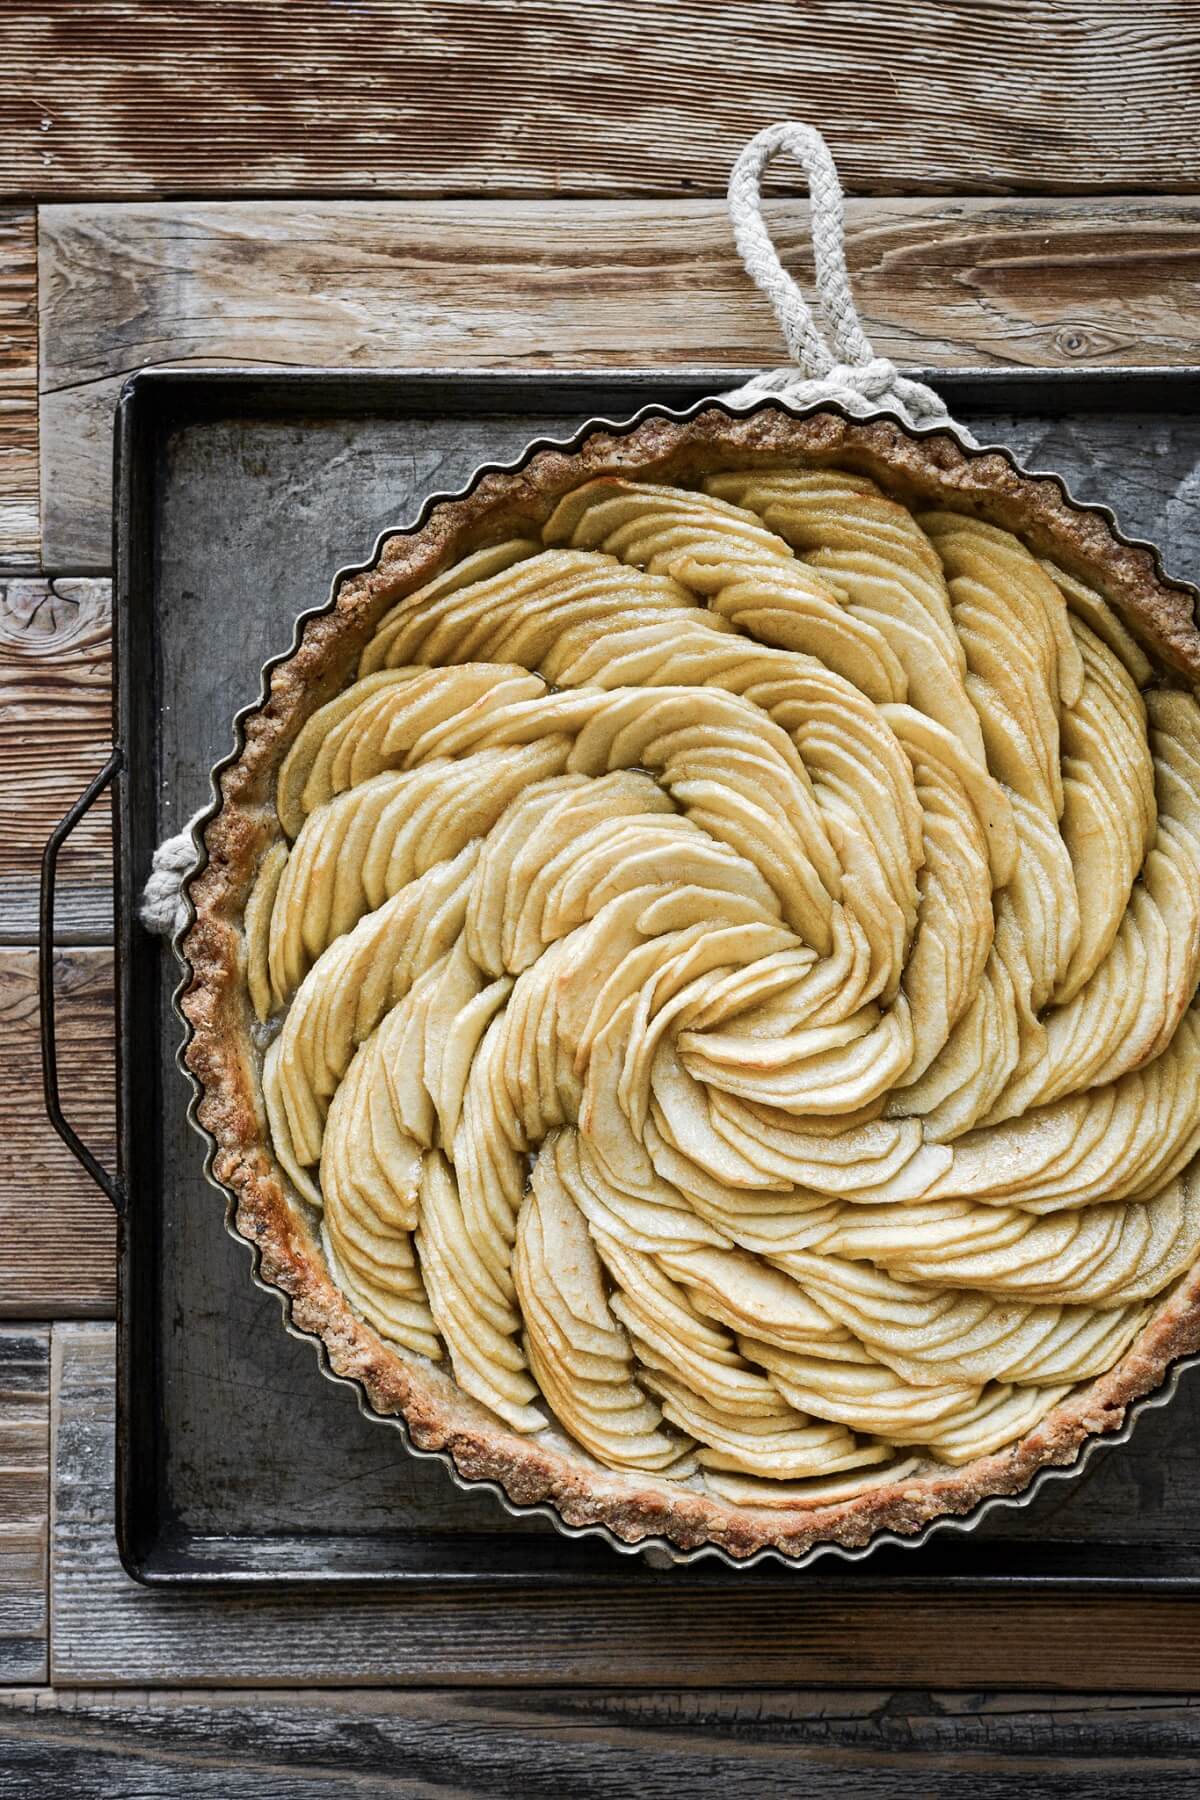
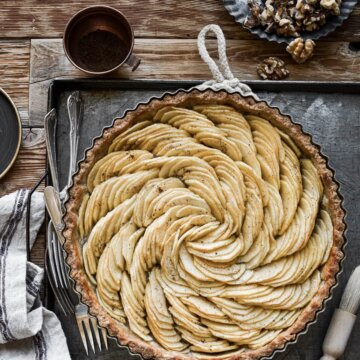
A stunning French apple tart that looks impressive, but is surprisingly simple to make. Thinly sliced apples are brushed with pure maple syrup and baked in a buttery walnut shortbread crust. The crust is crisp and nutty, and the apple filling is perfectly sweetened. If you’re looking for an alternative to apple pie this Thanksgiving, this apple walnut tart will make a beautiful dessert on your holiday table.
You might also love these maple walnut shortbread cookies, cardamom almond star bread, and cranberry Christmas cake.

This site contains affiliate links. As an Amazon associate, I earn from qualifying purchases. This means that I may make a small commission if you purchase a product using those links. This in no way affects my opinion of those products and services. All opinions expressed on this site are my own.
Why You’ll Love This Recipe
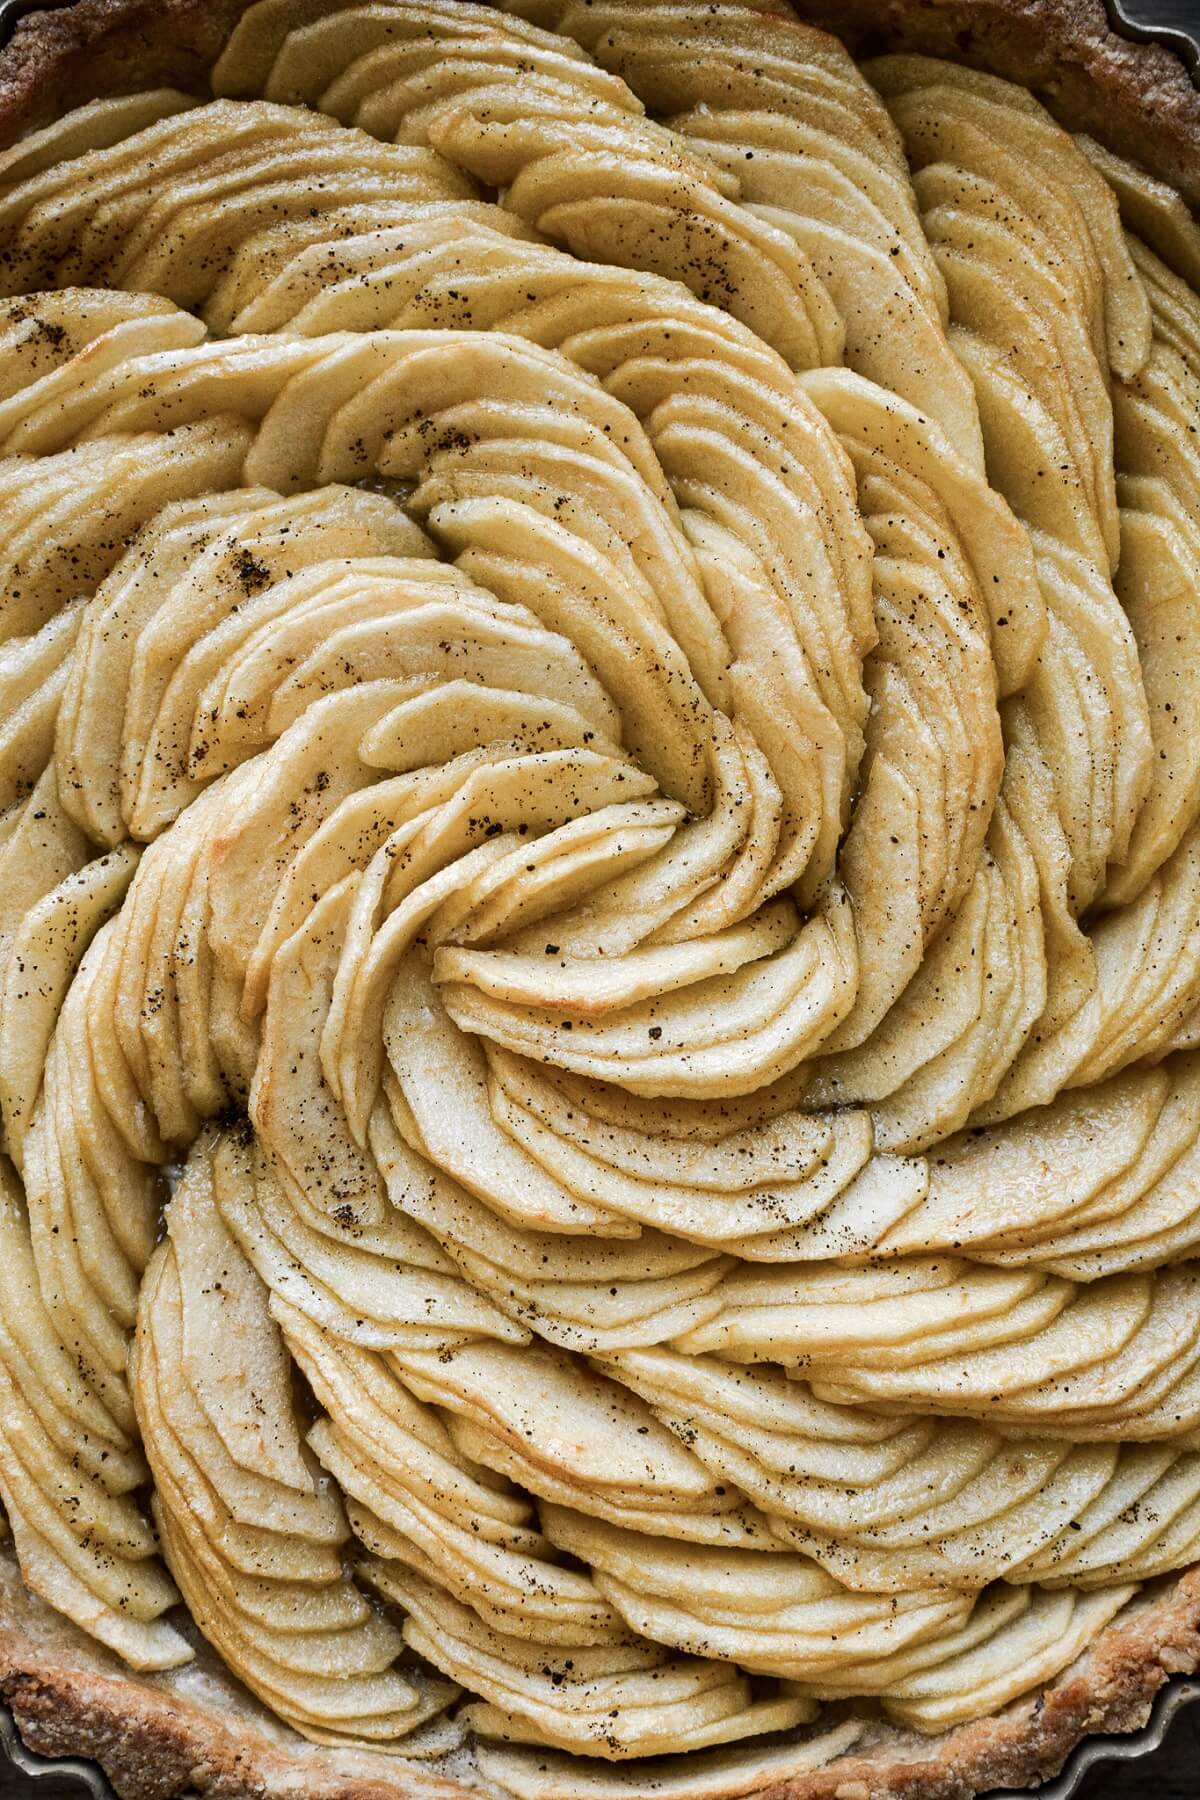
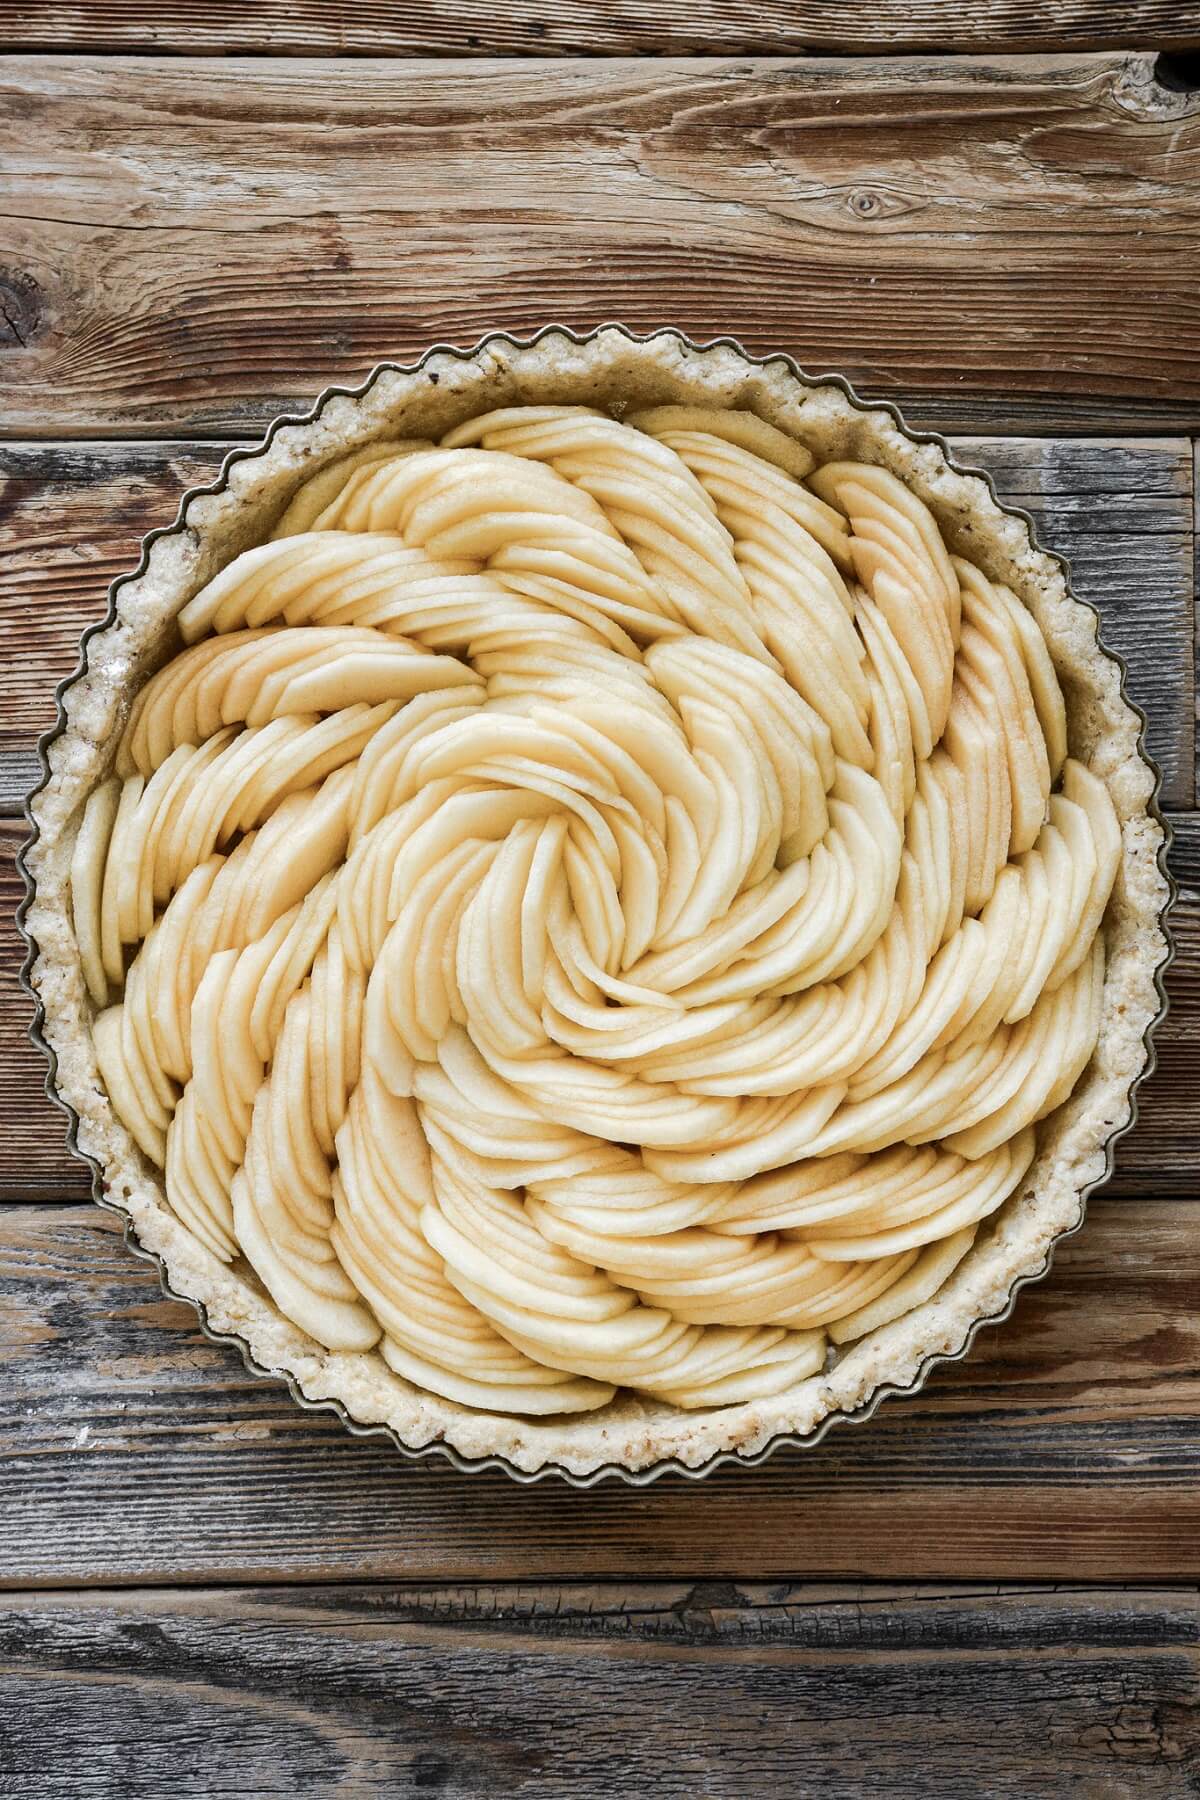
Beautiful Presentation. What I love about a French apple tart is the many ways you can arrange the apple slices. The spiral pattern in my apple walnut tart is easy to do, as you’ll see in the step by step photos I’ve included in today’s post, to help guide you in making your own apple tart.
Not Too Sweet. This is not an overly sweet apple dessert, with the apples just lightly sweetened and perfectly complemented by the nutty walnut shortbread crust.
Perfect for the Holidays. It’s the season of pie after all!
High Altitude Tested. I develop all the recipes on my site for Denver’s altitude of 5,280 feet. If you’re at a lower or higher elevation, please see my FAQs for guidance on adjusting recipes for your altitude.
See the recipe card at the end of the post for the full ingredients list and instructions.
Ingredients
Walnut Crust
- Flour. All-purpose flour gives the crust strength and structure.
- Sugar. I typically use powdered sugar in my shortcrust pastry, as well as my favorite shortbread cookies, as the fine texture keeps the dough soft and tender. You can use granulated sugar in today’s recipe, though, if it’s all you have on hand.
- Salt. A pinch of salt enhances the flavors and balances the sweetness of the fillings that you fill your tart with.
- Butter. Gives the crust a rich, buttery flavor and crisp cookie texture.
- Walnuts. Adds nuttiness and texture. You can use pecans instead of walnuts, if preferred.
- Egg. You’ll be separating the egg, using the yolk in the dough to bind it together, and brushing the white on the crust to help seal it against moisture.
- Vanilla Extract. Flavor.
Today’s walnut shortbread crust is a variation of my shortcrust pastry recipe. It comes together easily, and you can simply press the crumbs into the pan, rather than rolling out the dough.
Apple Filling
- Apples. I used Honey Crisp apples, but Granny Smith apples work well, too.
- Lemon Juice. Adds tartness, and keeps the apples from browning as you arrange them in the crust.
- Sugar. A little granulated sugar adds sweetness and draws some of the moisture out of the apples.
- Flour. Keeps the bottom crust from getting soggy.
- Butter. Adds richness.
- Maple Syrup. Brushed over the apples after baking, the maple syrup adds sweetness and shine.
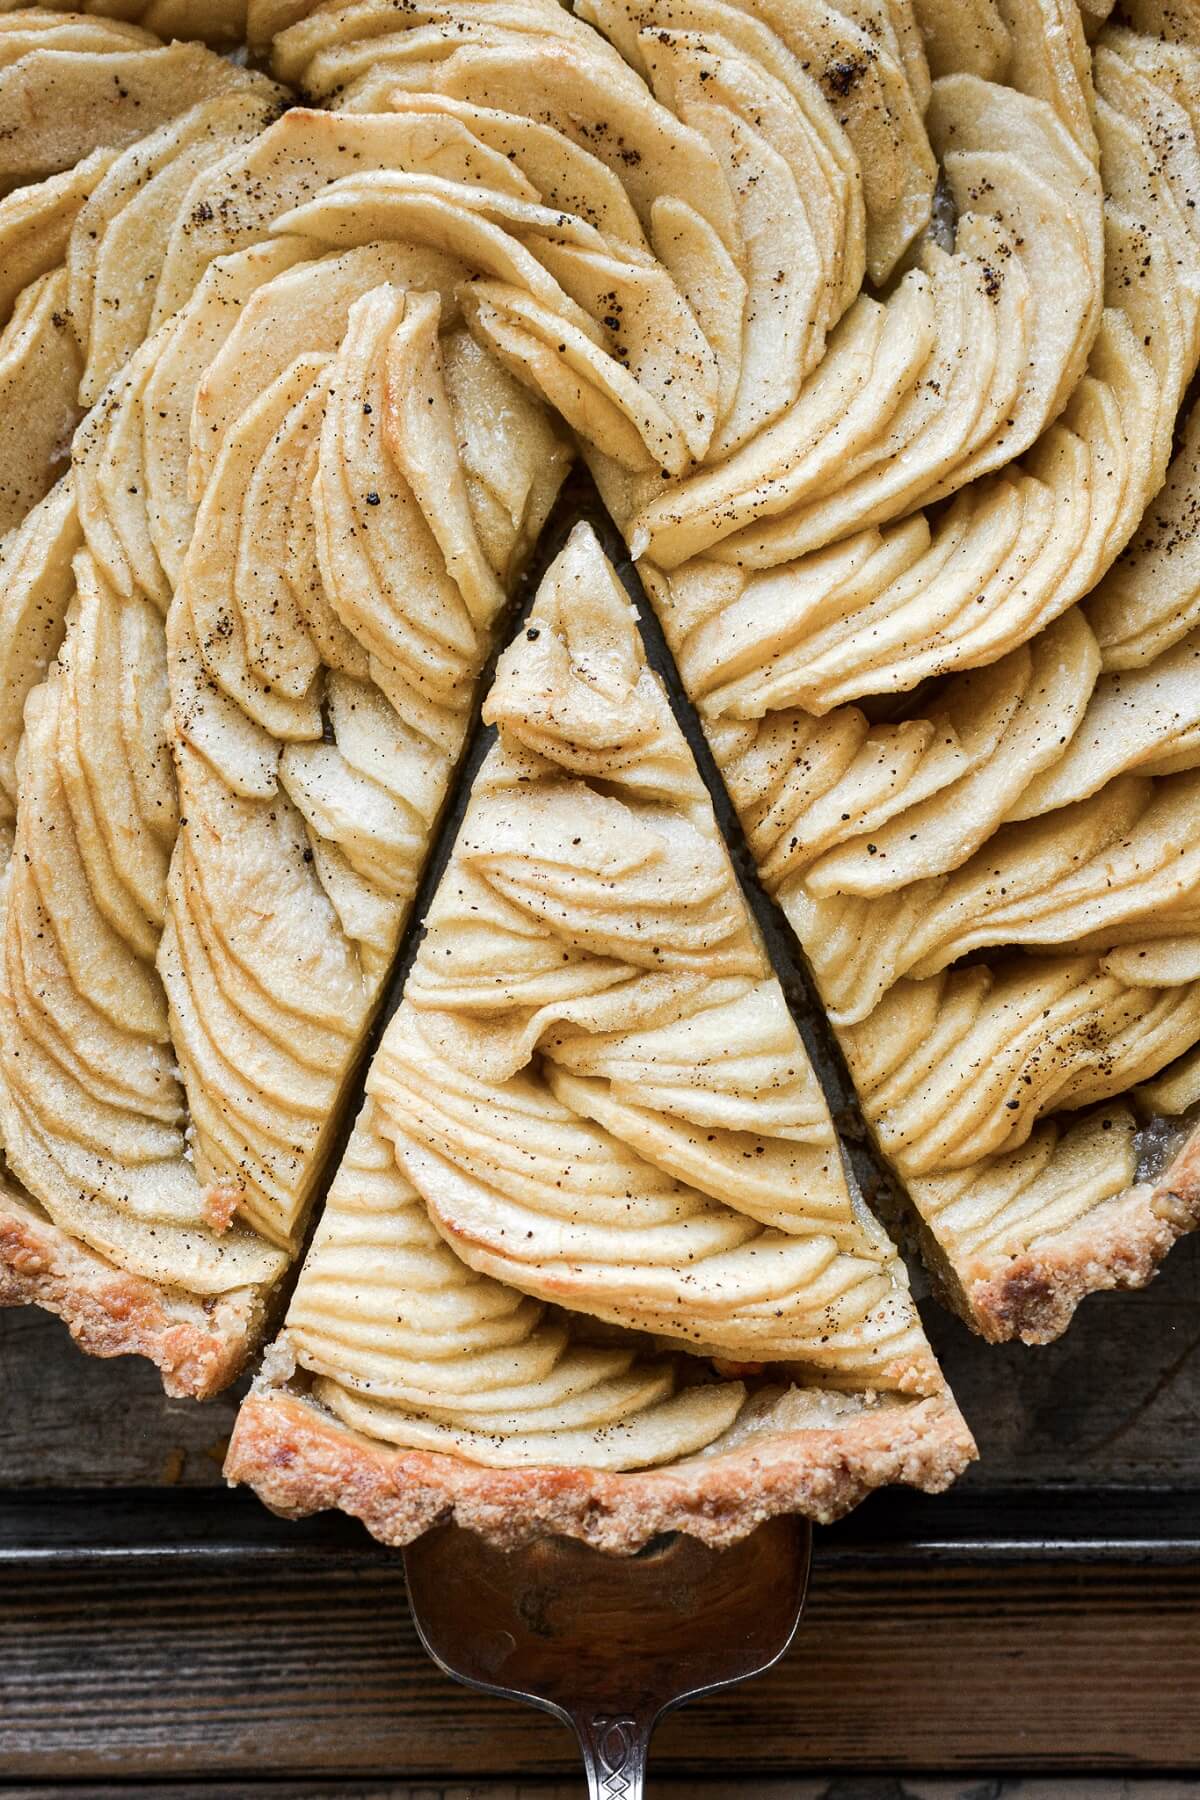
- Vanilla Powder. While you could certainly add some spices to the apples, I didn’t. Instead, I just sprinkled a little ground vanilla bean powder over the tart after baking.
Instructions
Walnut Crust
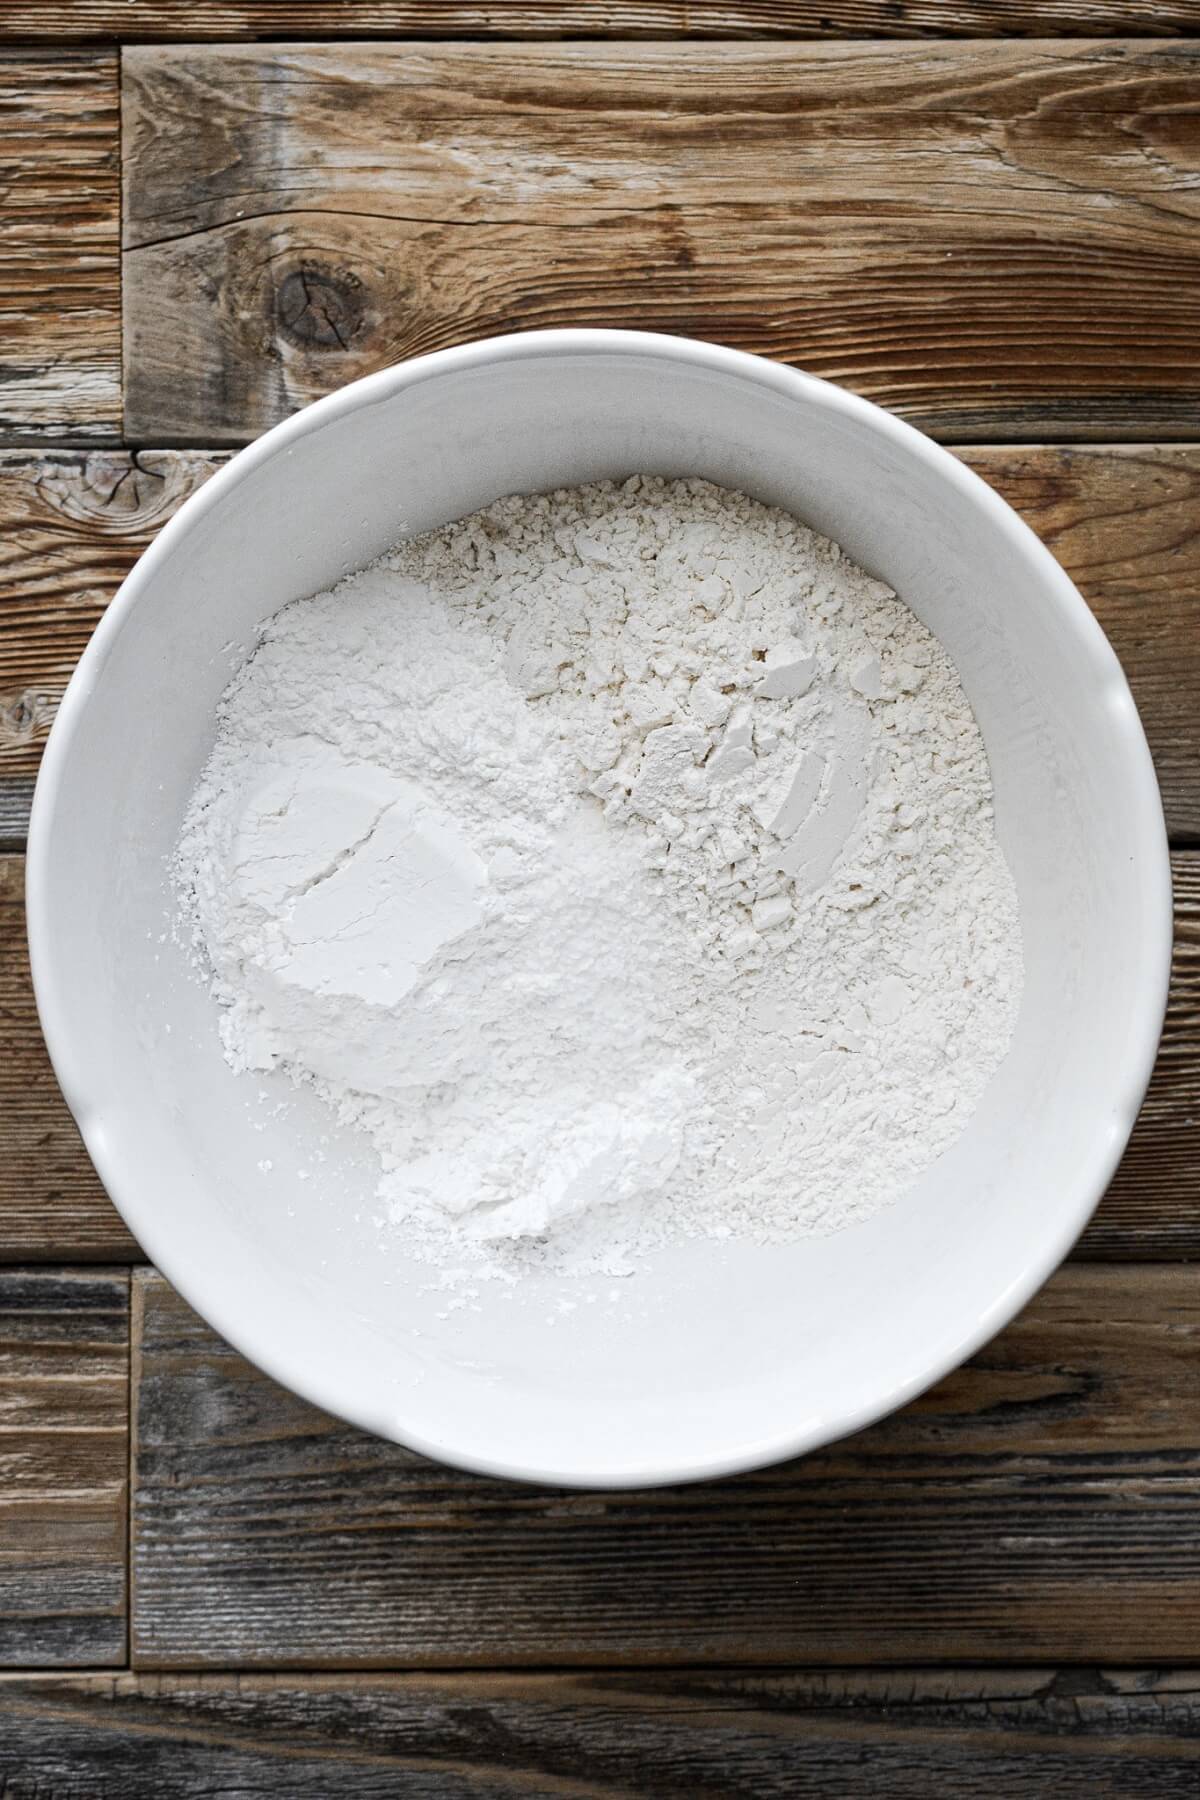
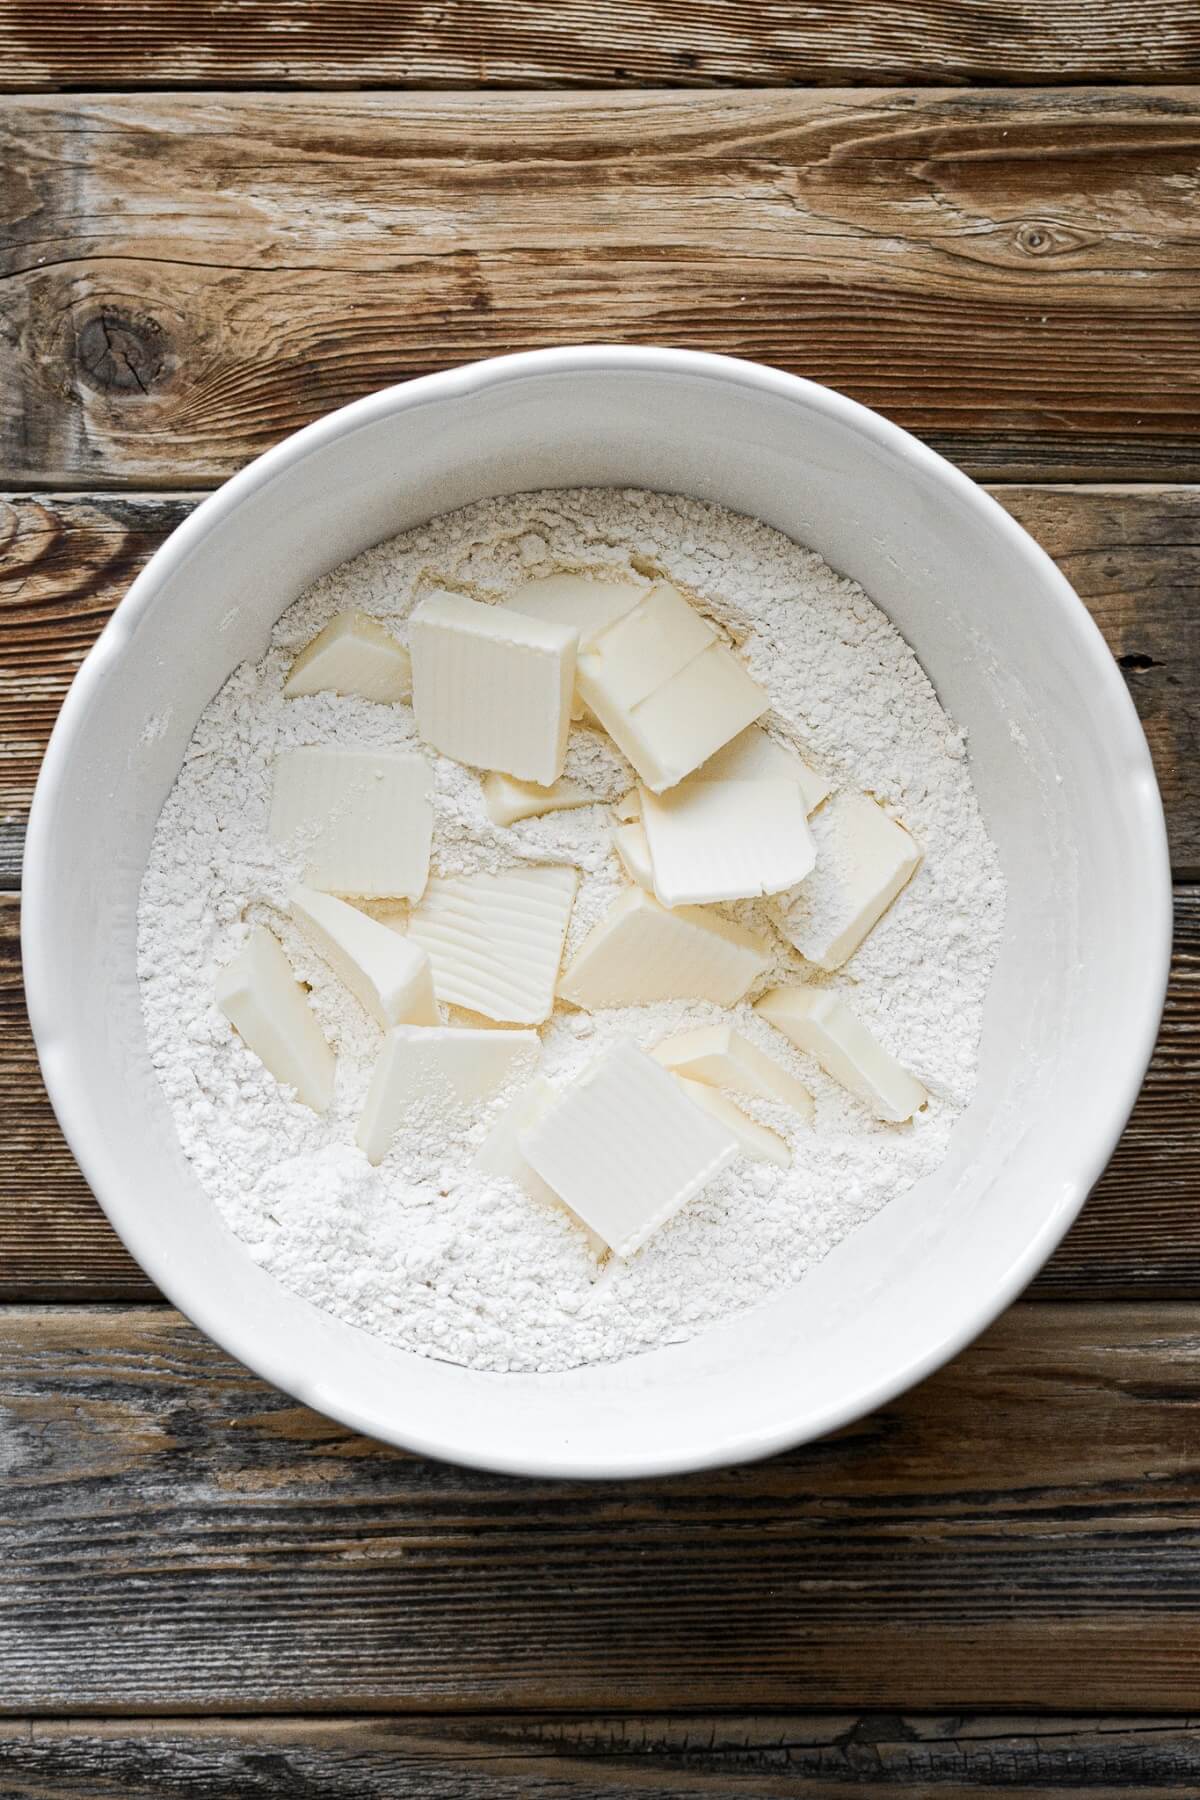
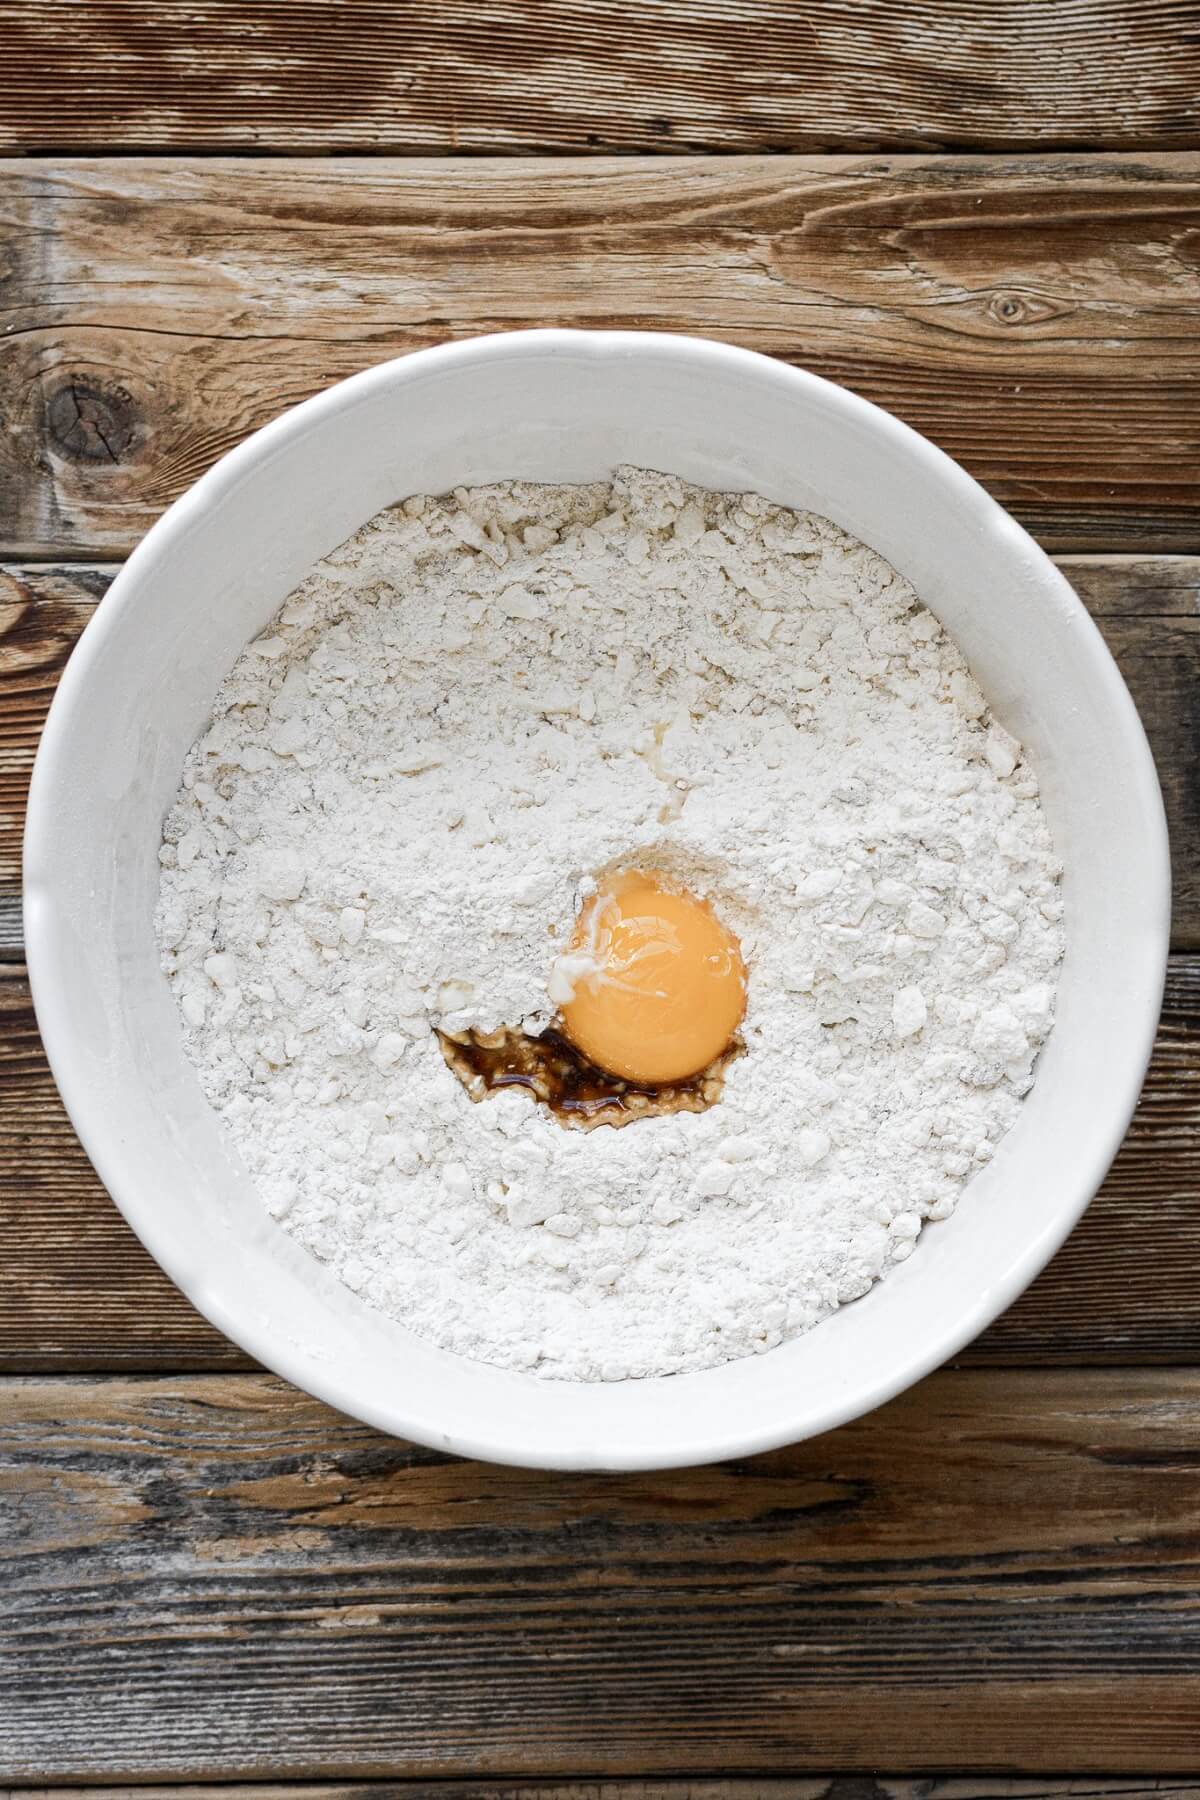
- In a bowl, combine the flour, powdered sugar and salt.
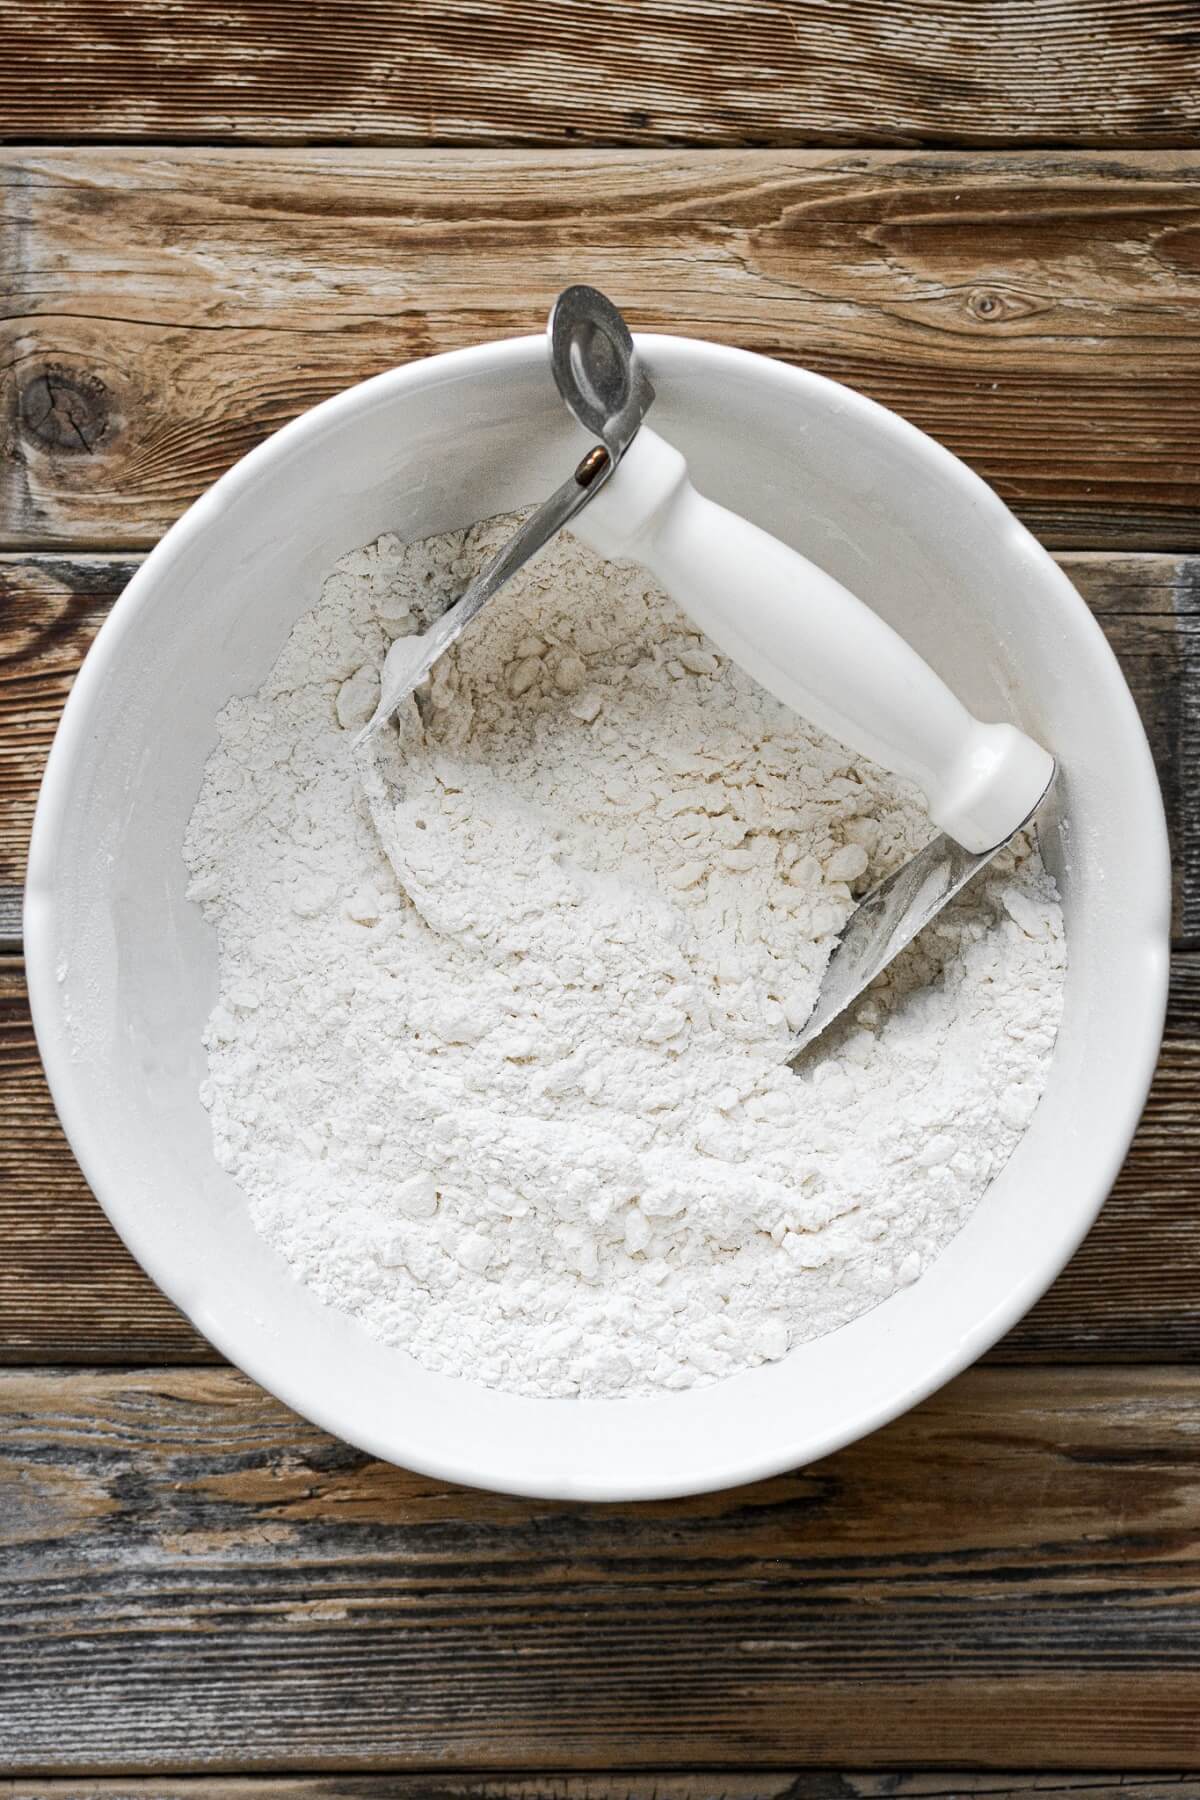
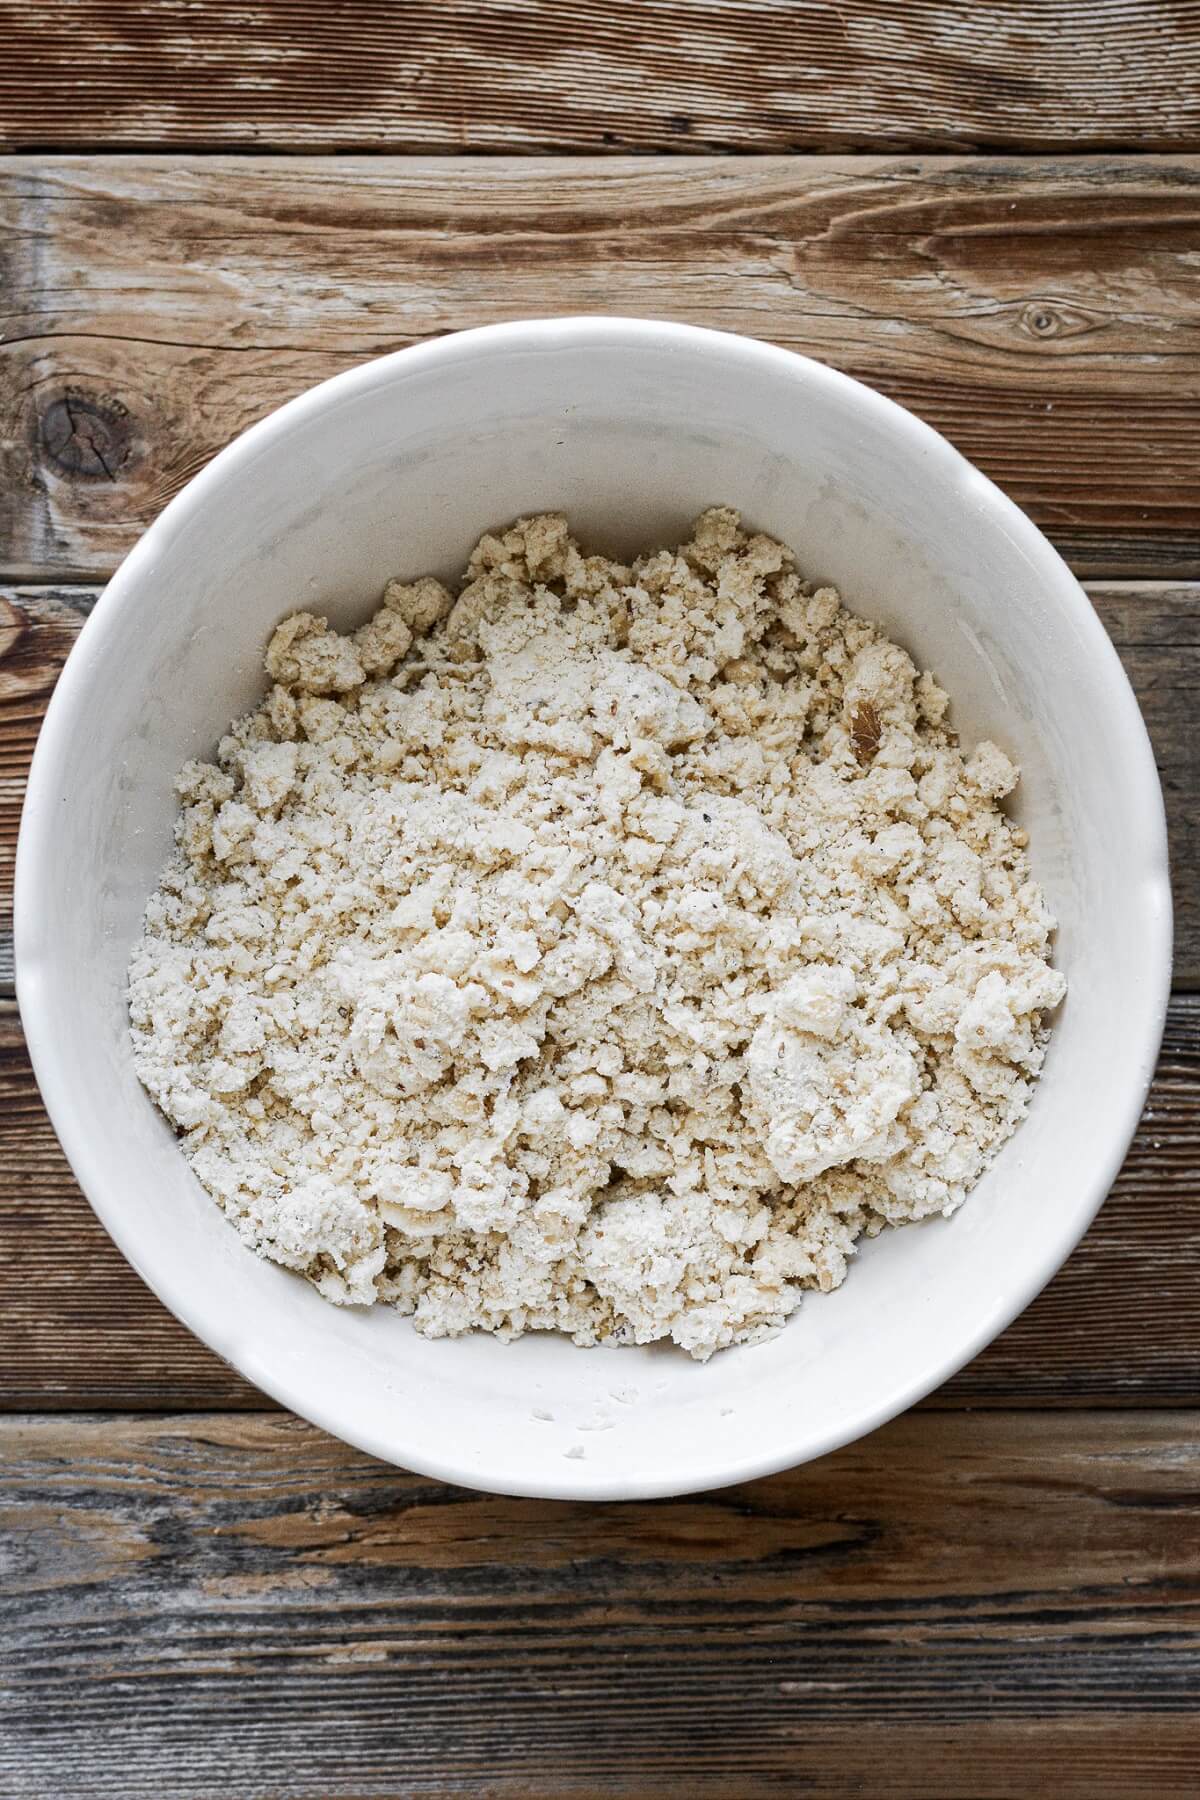
- Add the butter, and use a pastry cutter to cut the butter in until the butter is evenly distributed with pieces no bigger than peas, and the flour is moist and crumbly.
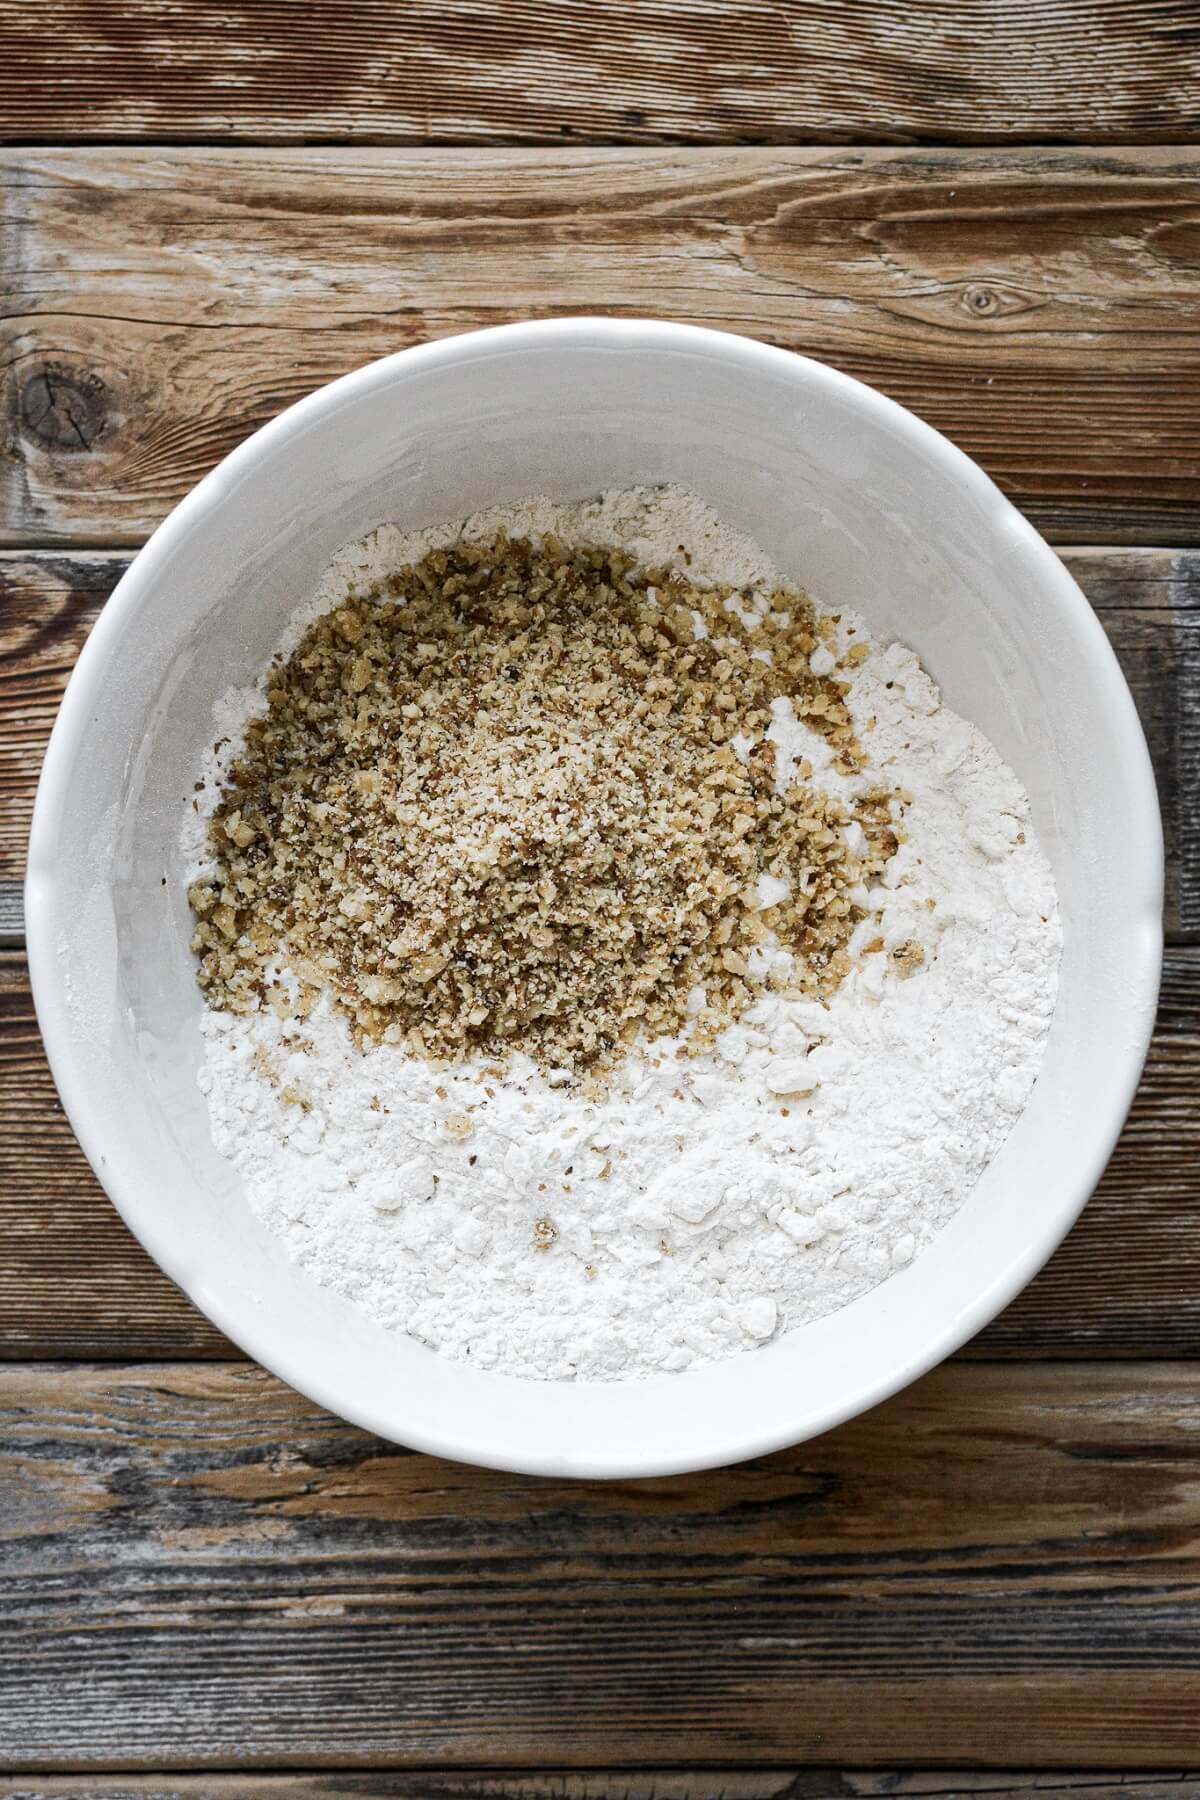
- Stir in the chopped walnuts.
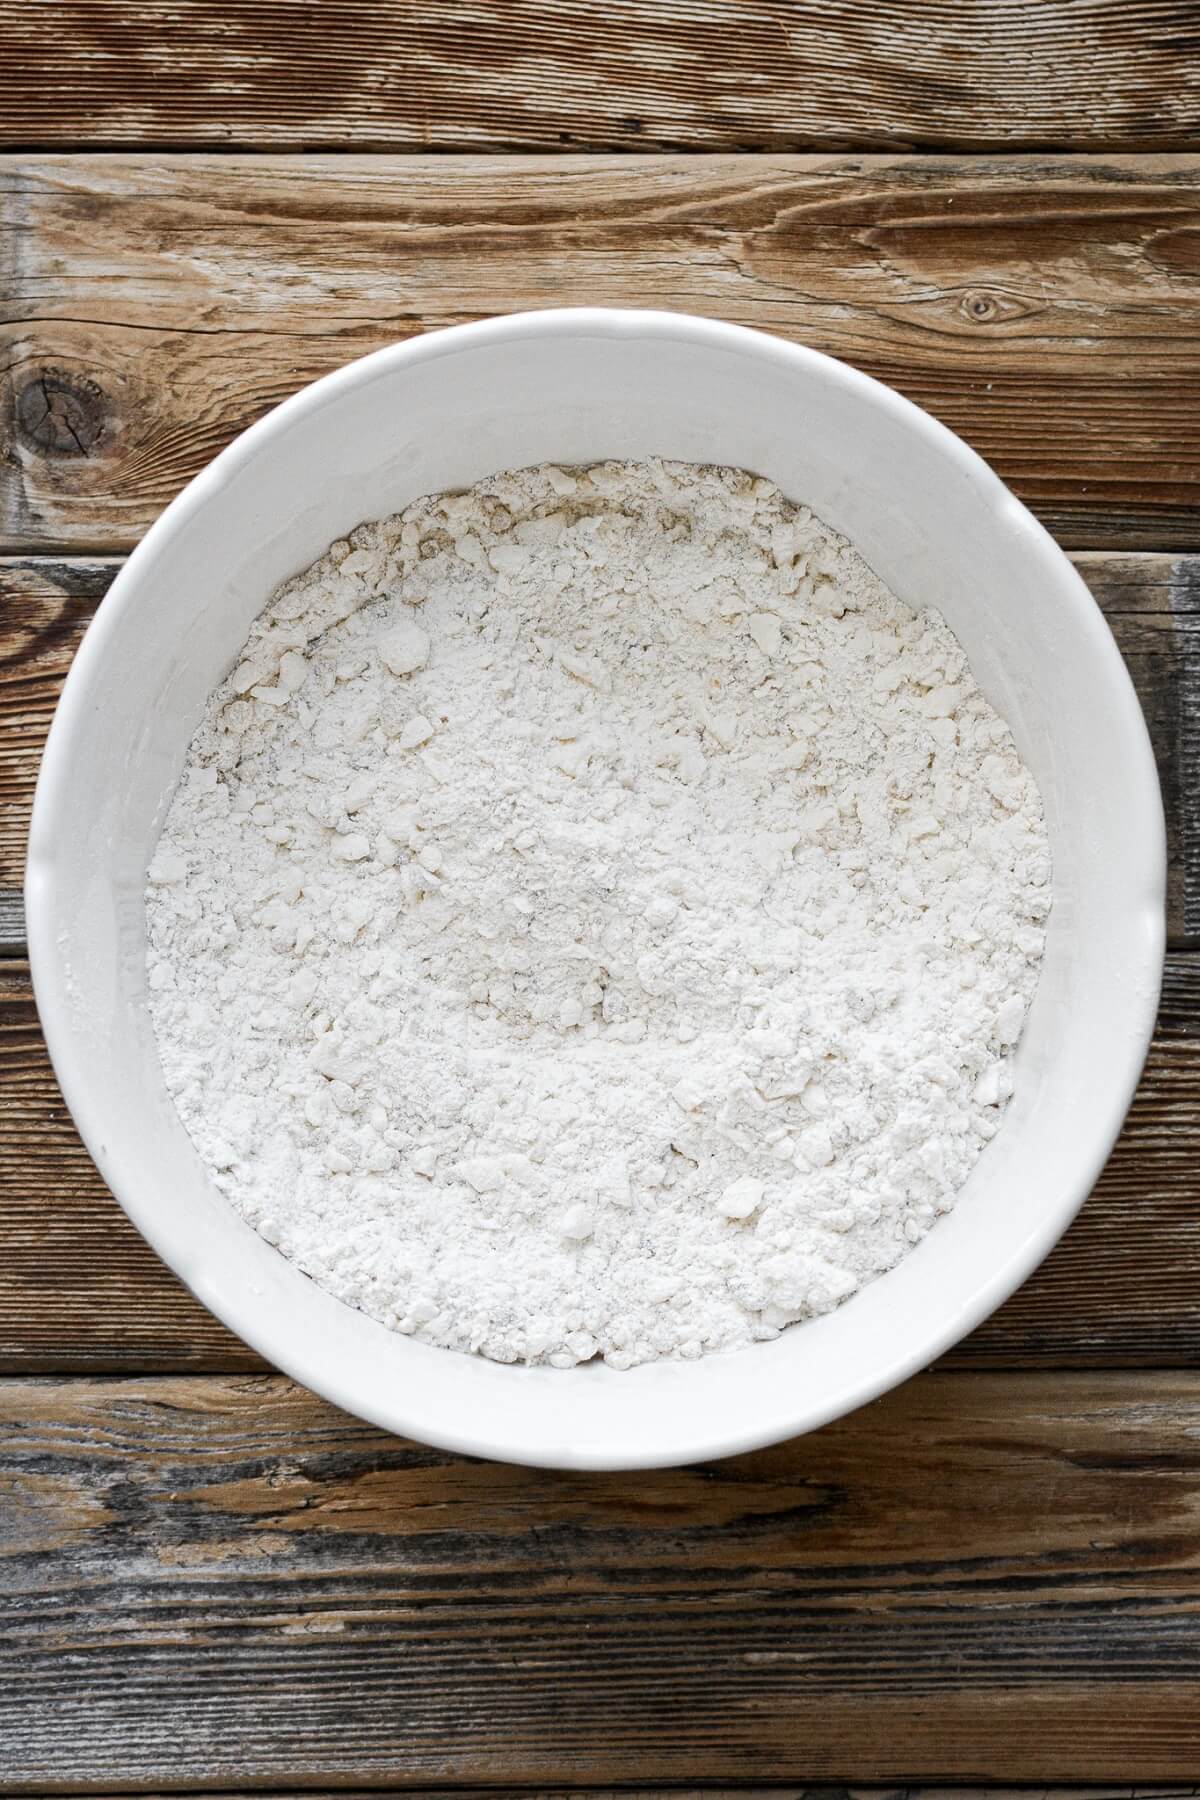
- Add the egg yolk (reserving the egg white for later) and the vanilla. Use your hands to work the moisture into the dough crumbs, until evenly distributed and moist enough that the crumbs will stick together if you squeeze them in your hand.
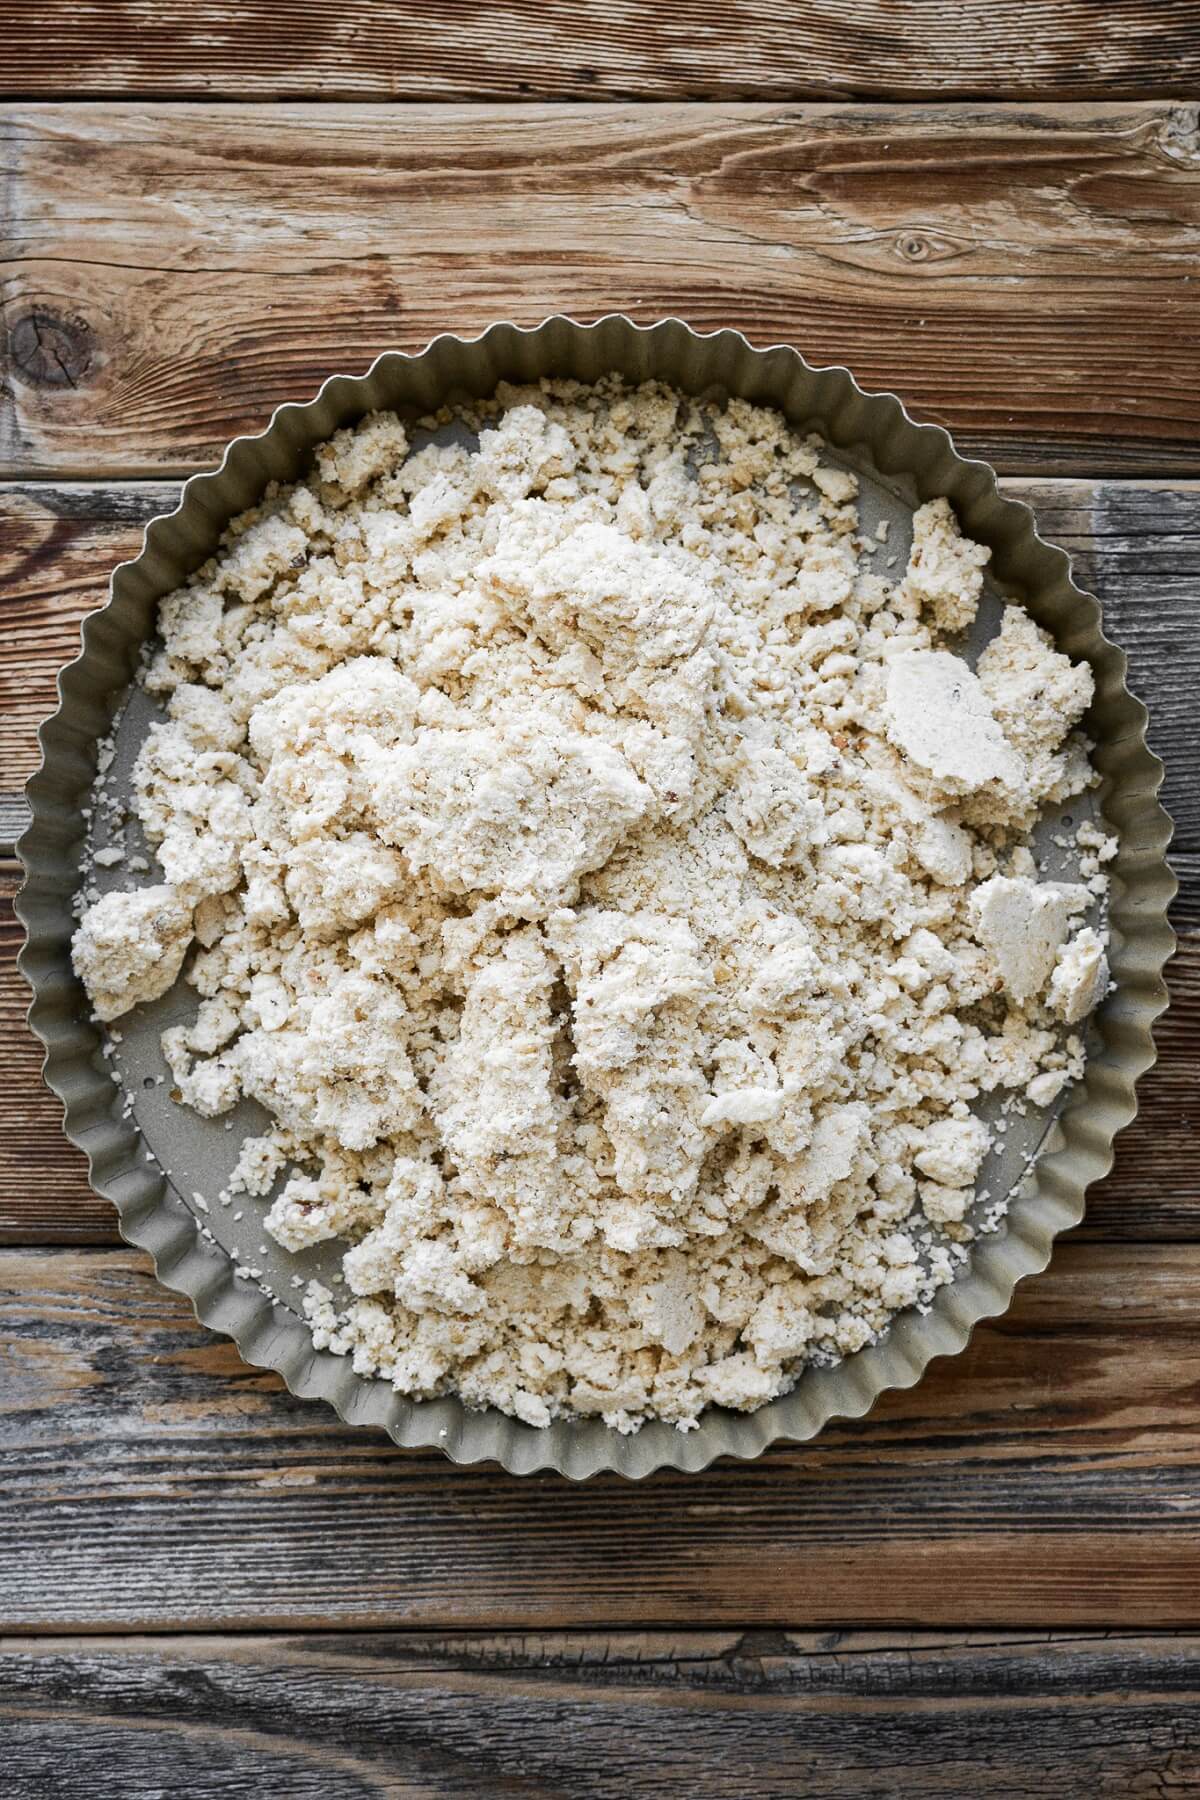
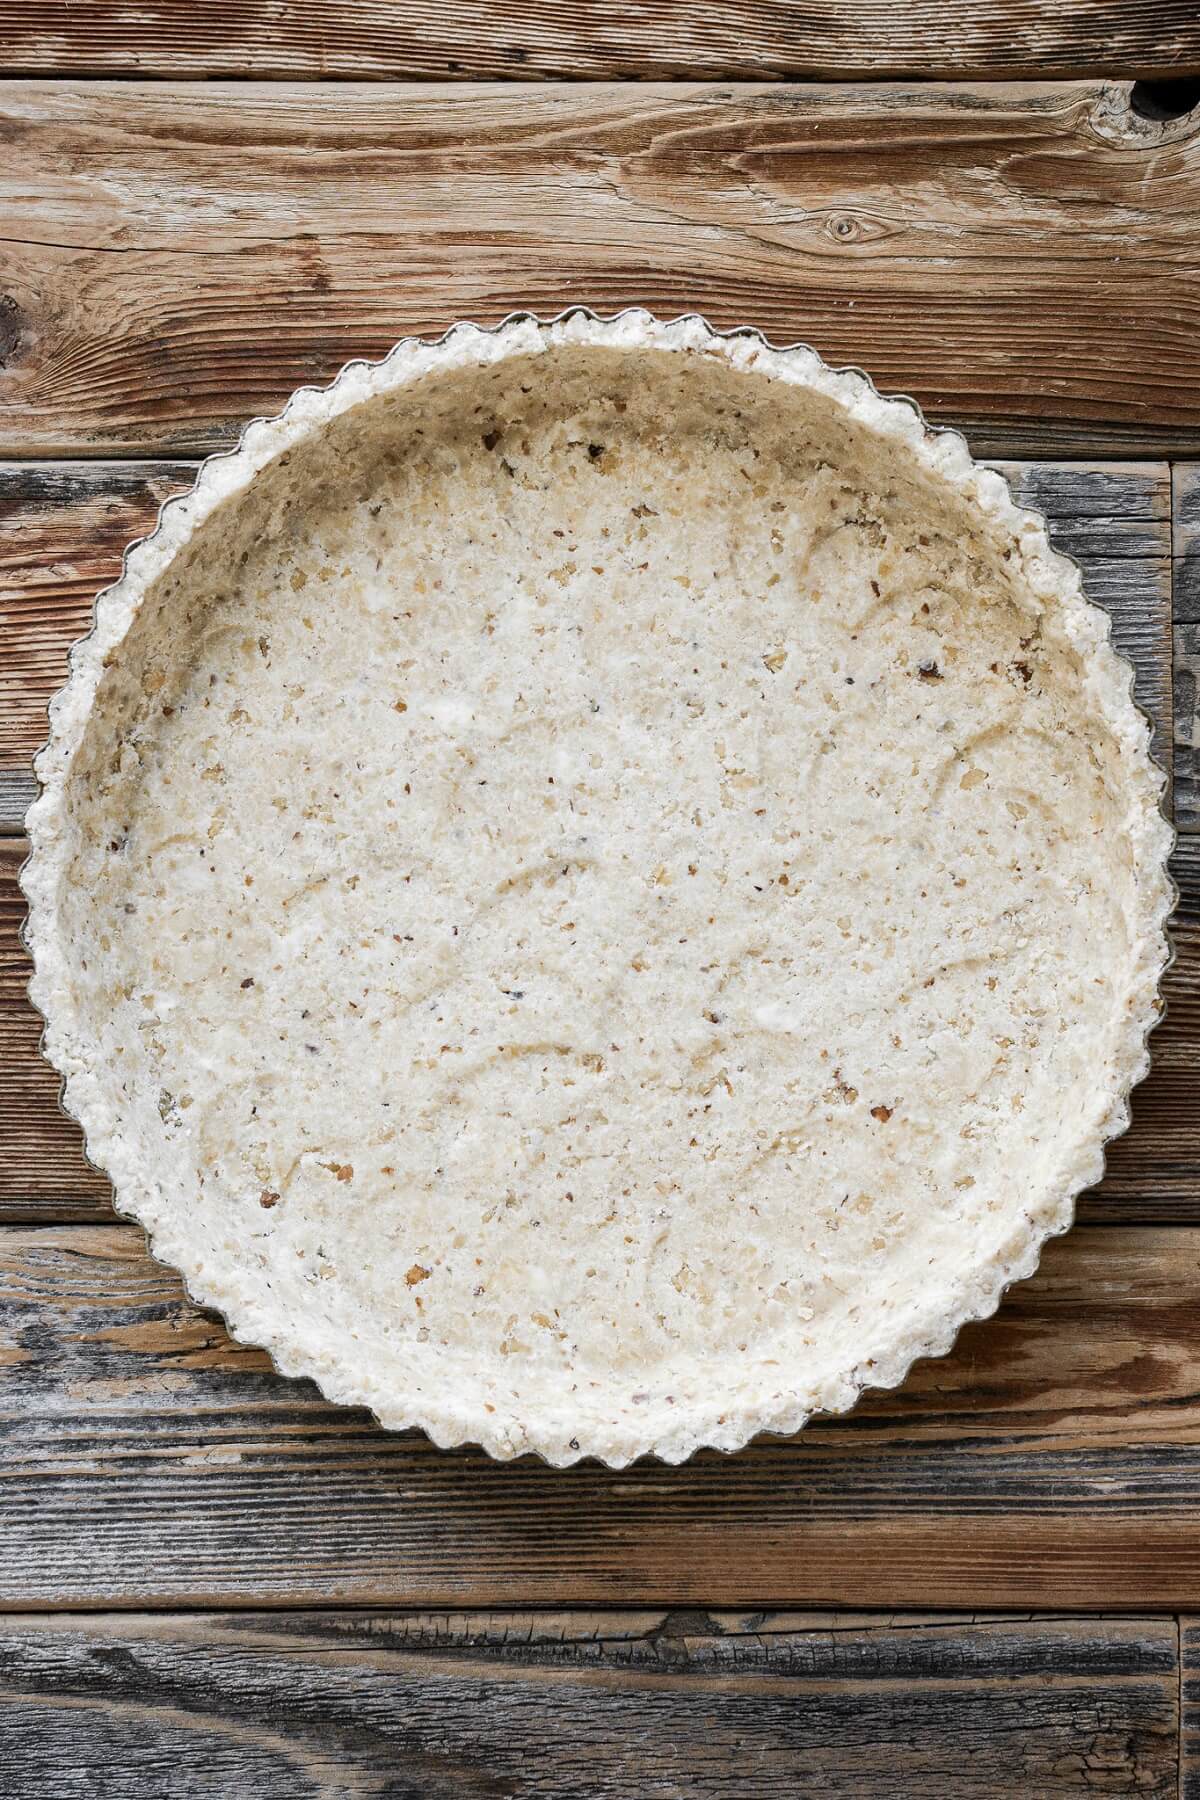
- Line your tart pan with a circle of parchment paper on the bottom. Dump the crumbs into the pan, spread them out, then press them evenly and firmly against the bottom and up the sides of the pan.
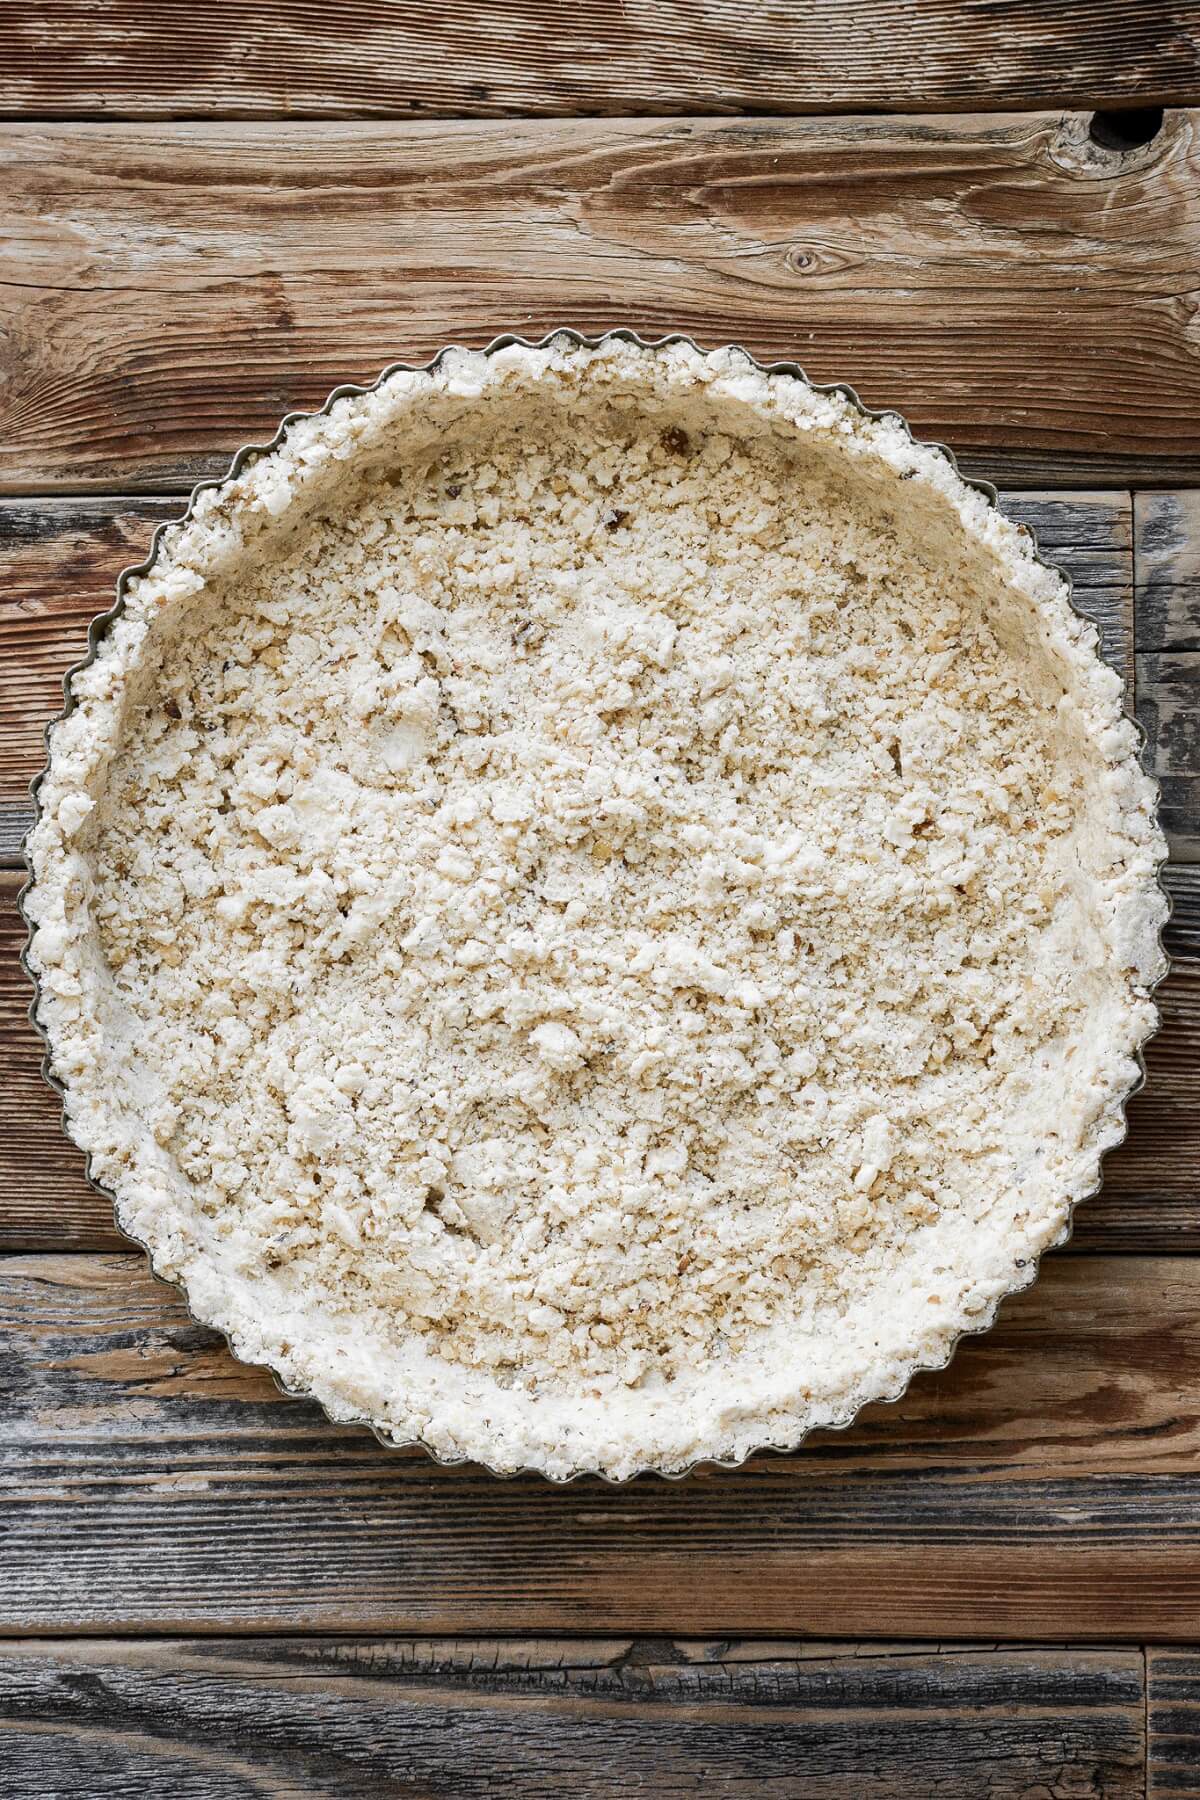
- Freeze the crust for 30 minutes.
- Preheat the oven to 375 F, and position a rack in the center of the oven.
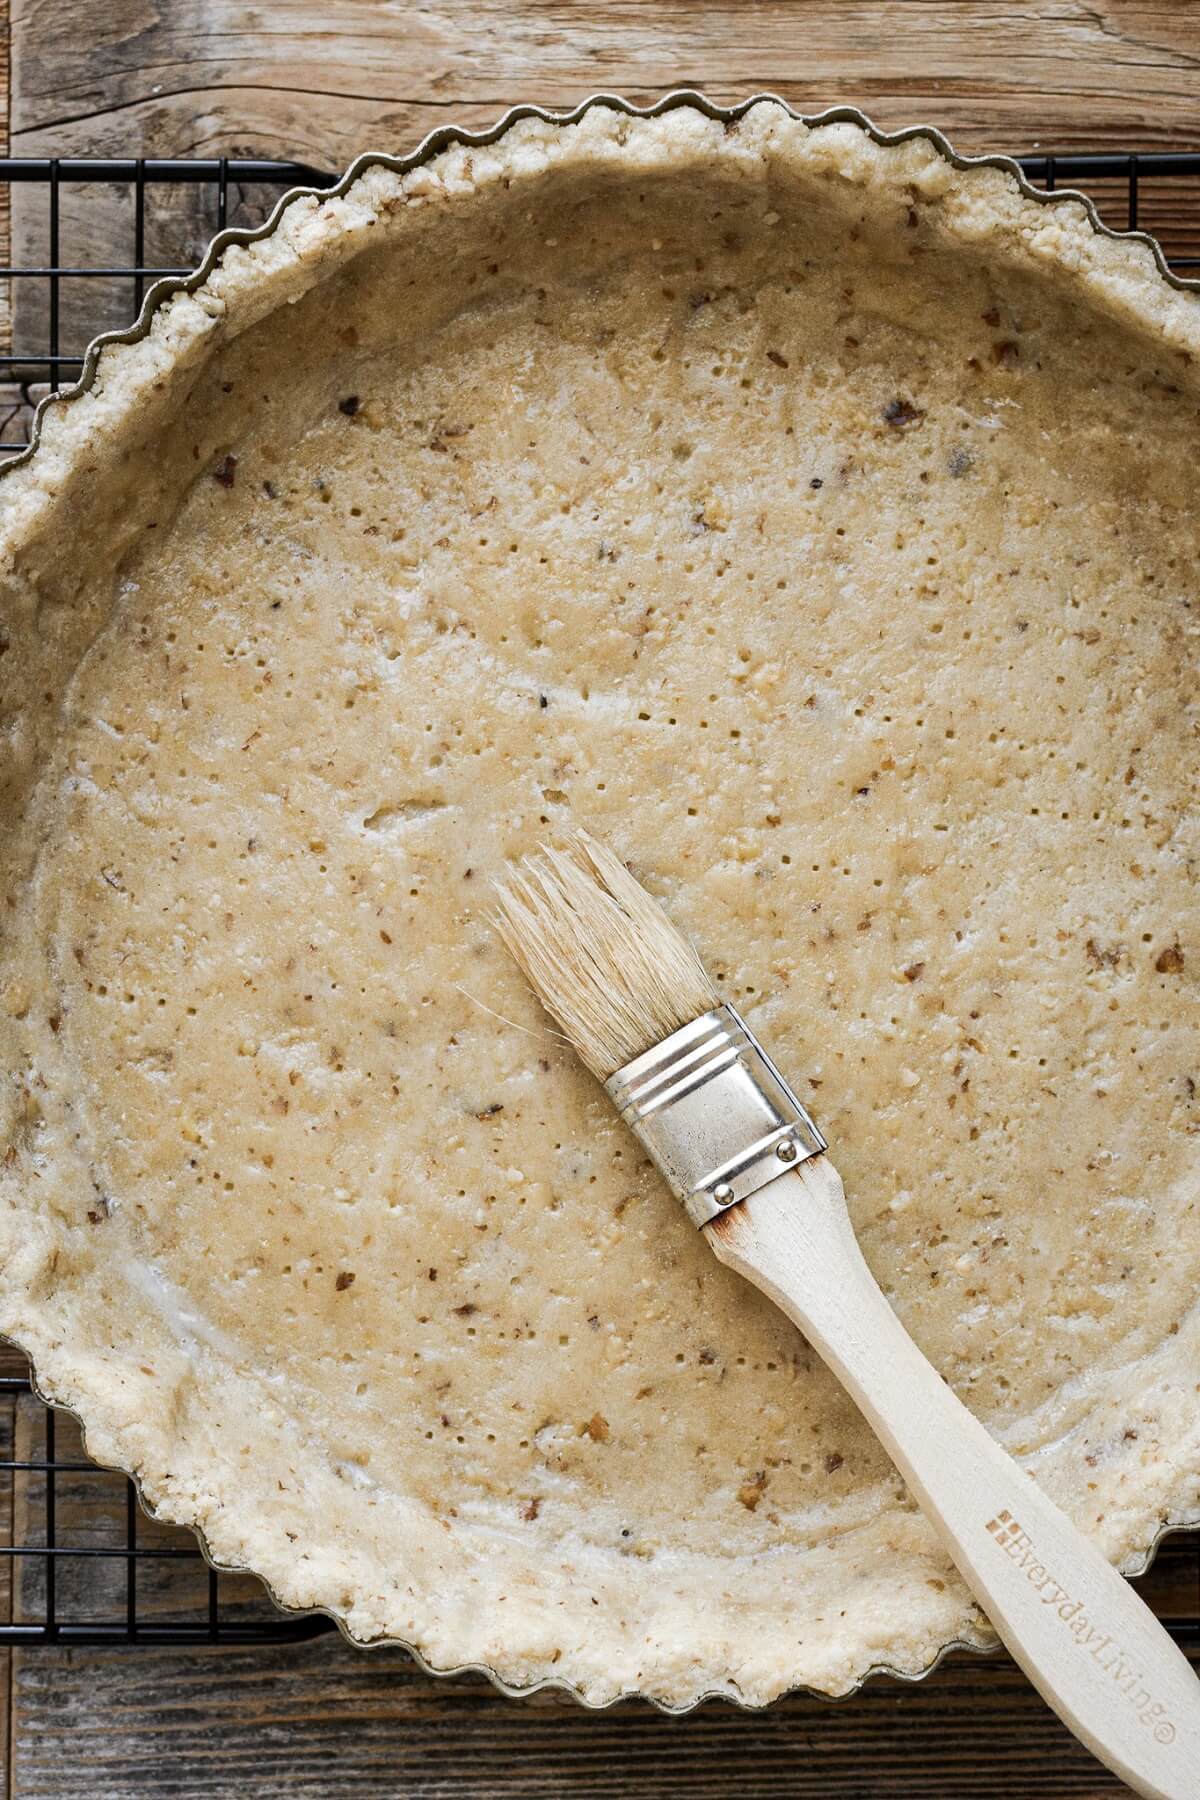
- Use a fork to prick the frozen crust all over – this is called “docking” the dough, and helps prevent it from puffing up.
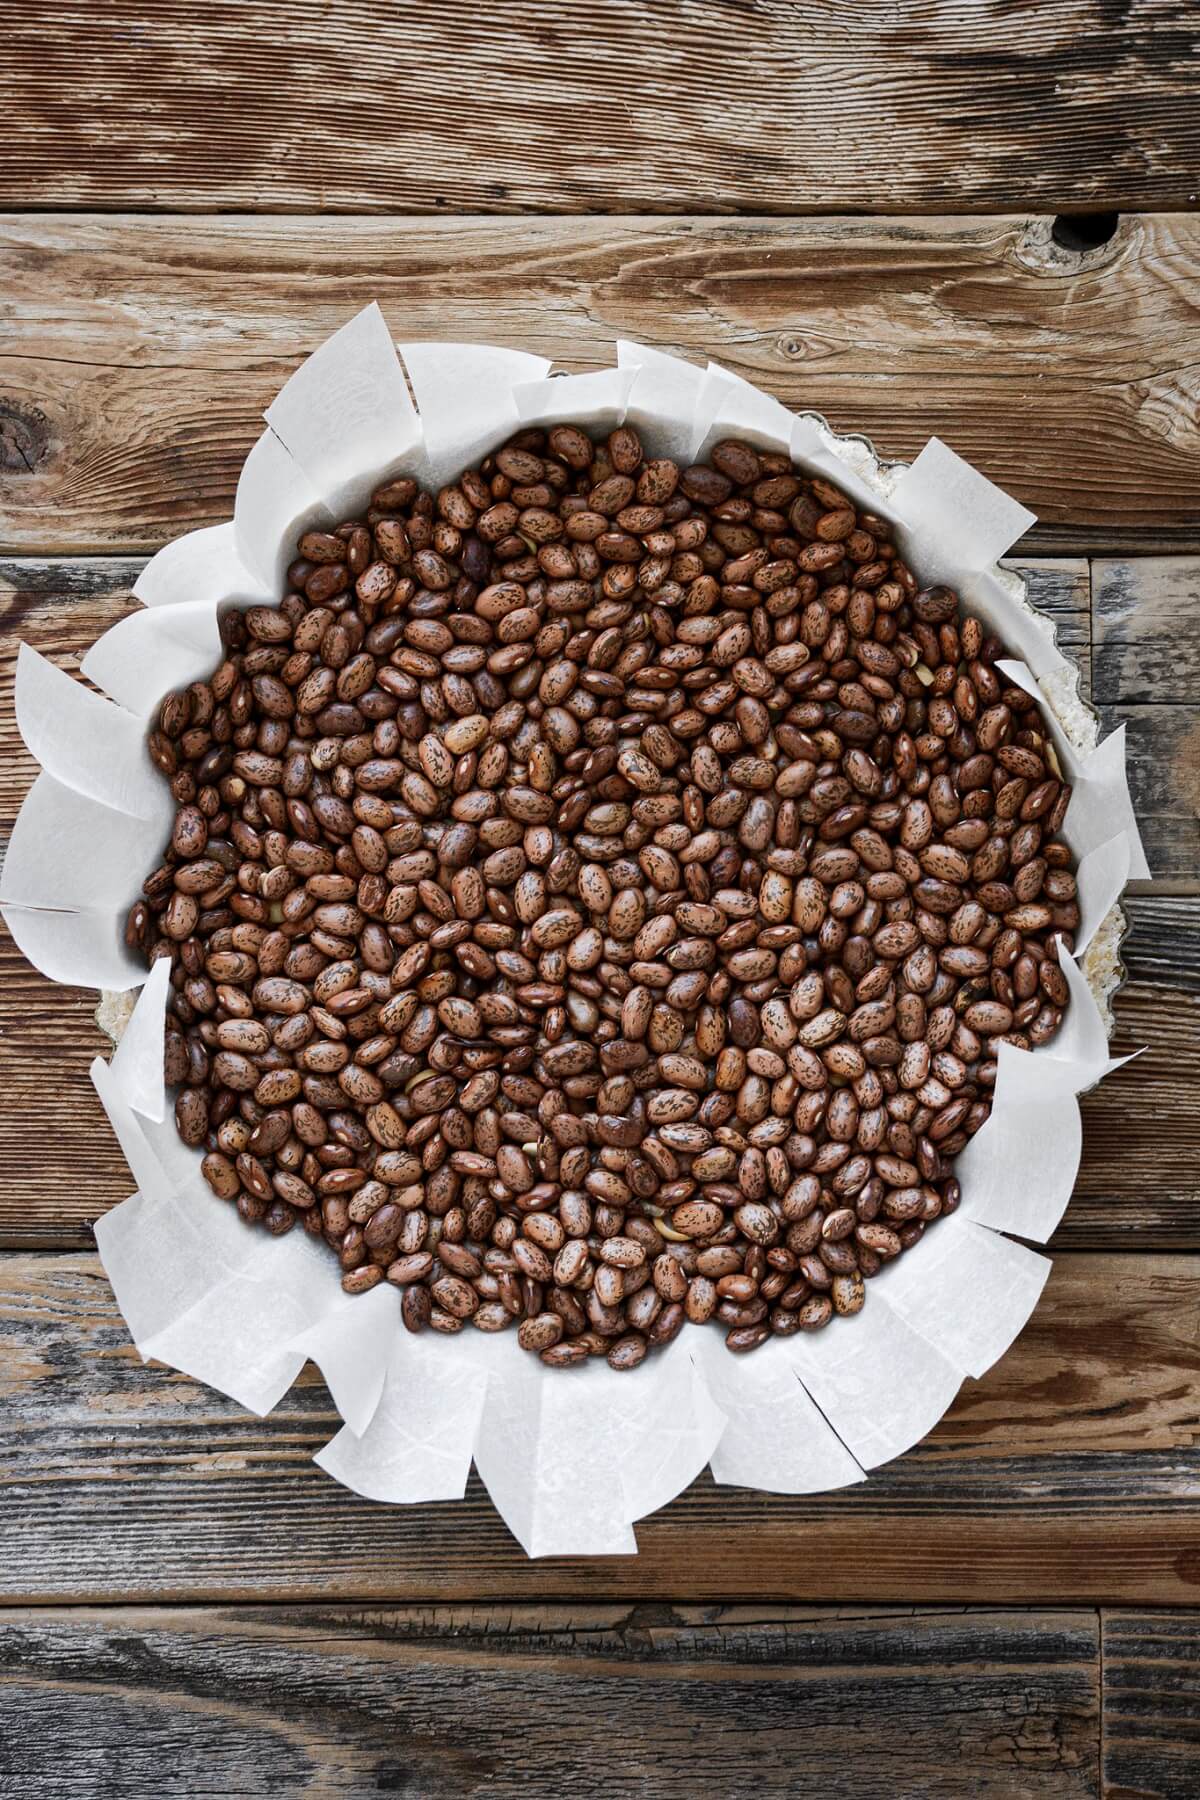
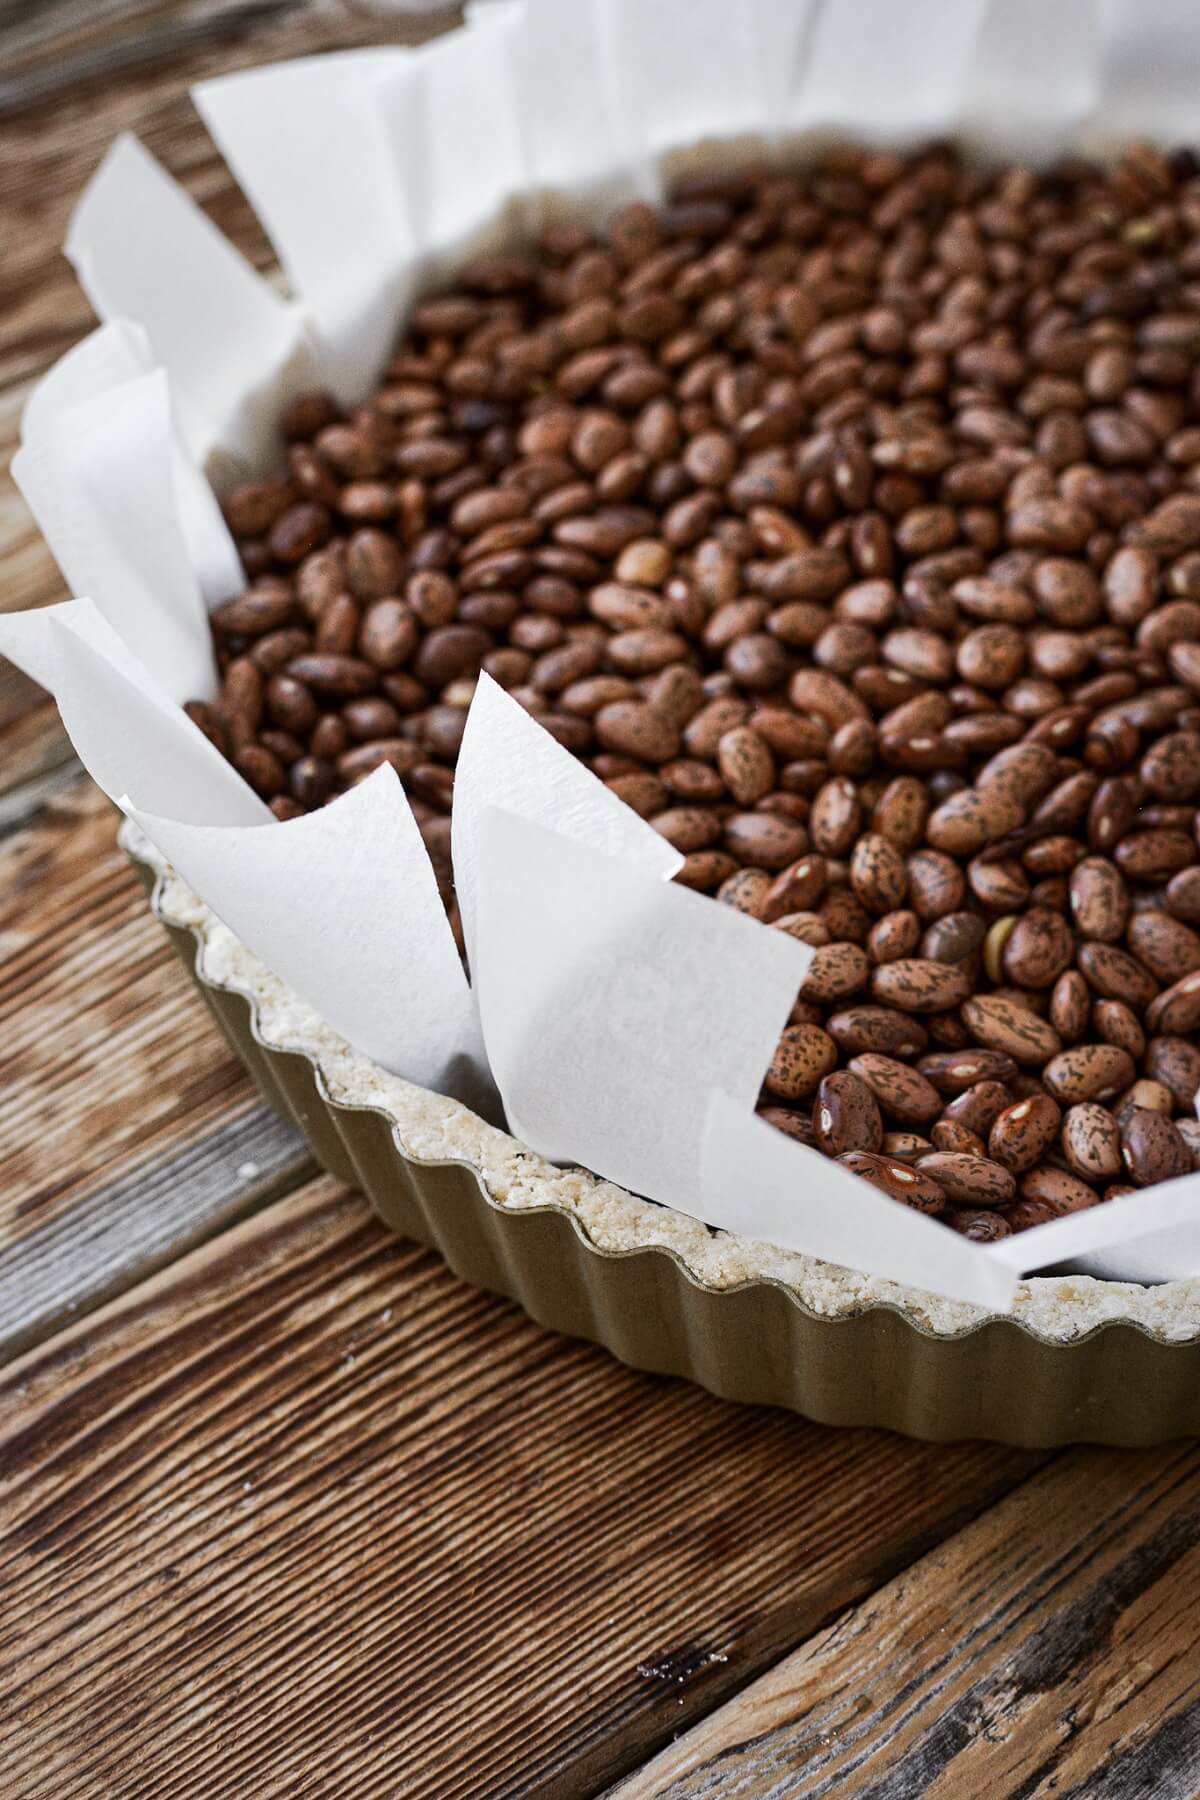
- Now place a piece of parchment paper inside the crust, and fill the paper with dried beans or pie weights. This is called “blind baking”, and also prevents the crust from puffing up. By baking the crust like this, you’ll only be partially baking it, and it will finish baking later with the apple filling. Bake the crust for 20 minutes.
- Take the pan out of the oven, and reduce the oven temperature to 350 F. Remove the dried beans and the paper.
- In a small bowl, lightly beat the leftover egg white with a fork, then brush it over the hot crust. This will help to seal the crust, and prevent it from getting soft from the apple filling. Set the crust aside until you’re ready to fill with the apples.
Apple Filling
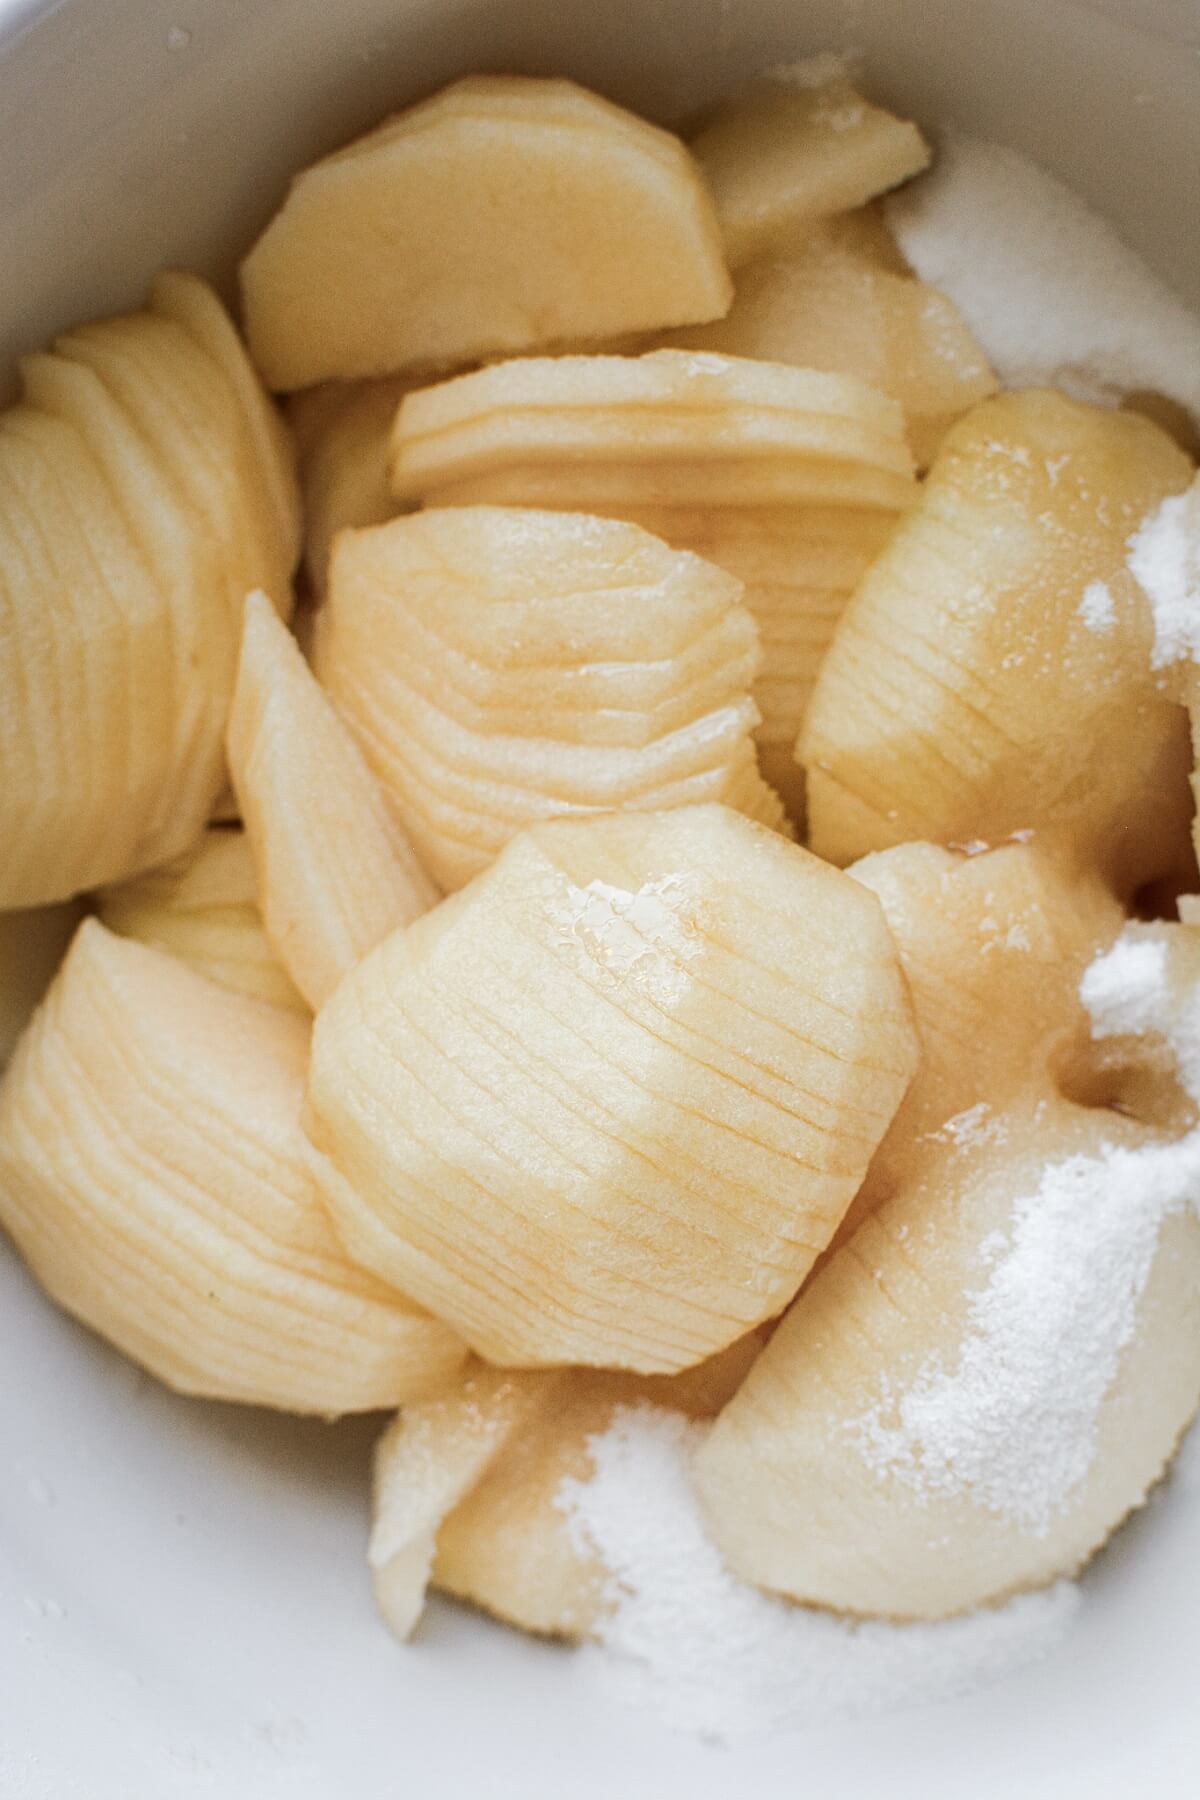
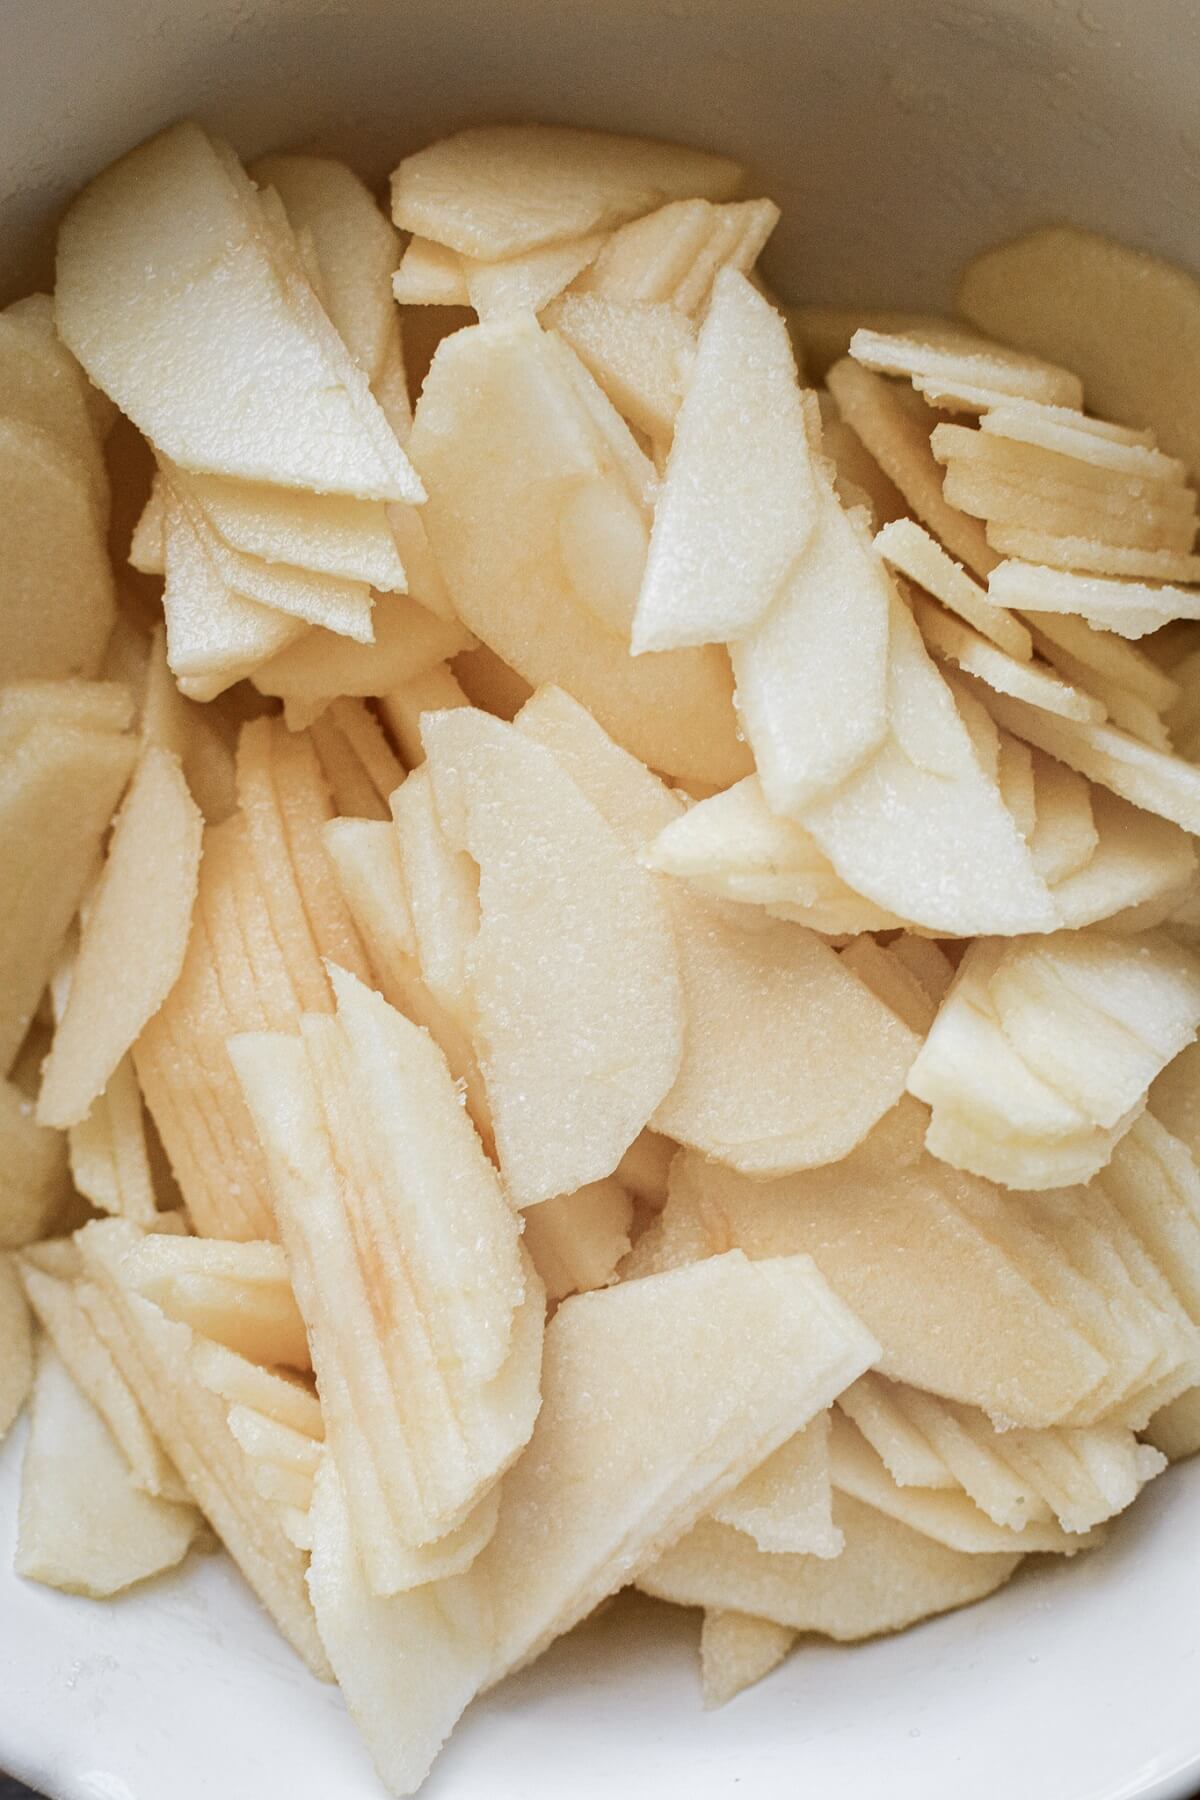
- Peel and core the apples, then slice them very thinly, about 1/16 inch thick. Place the apple slices in a bowl, drizzle with the lemon juice and sprinkle with the sugar. Very gently, toss the apples with your hands to coat them in the lemon juice and sugar, taking care not to break the apple slices. Set aside until you’re ready to fill your crust.
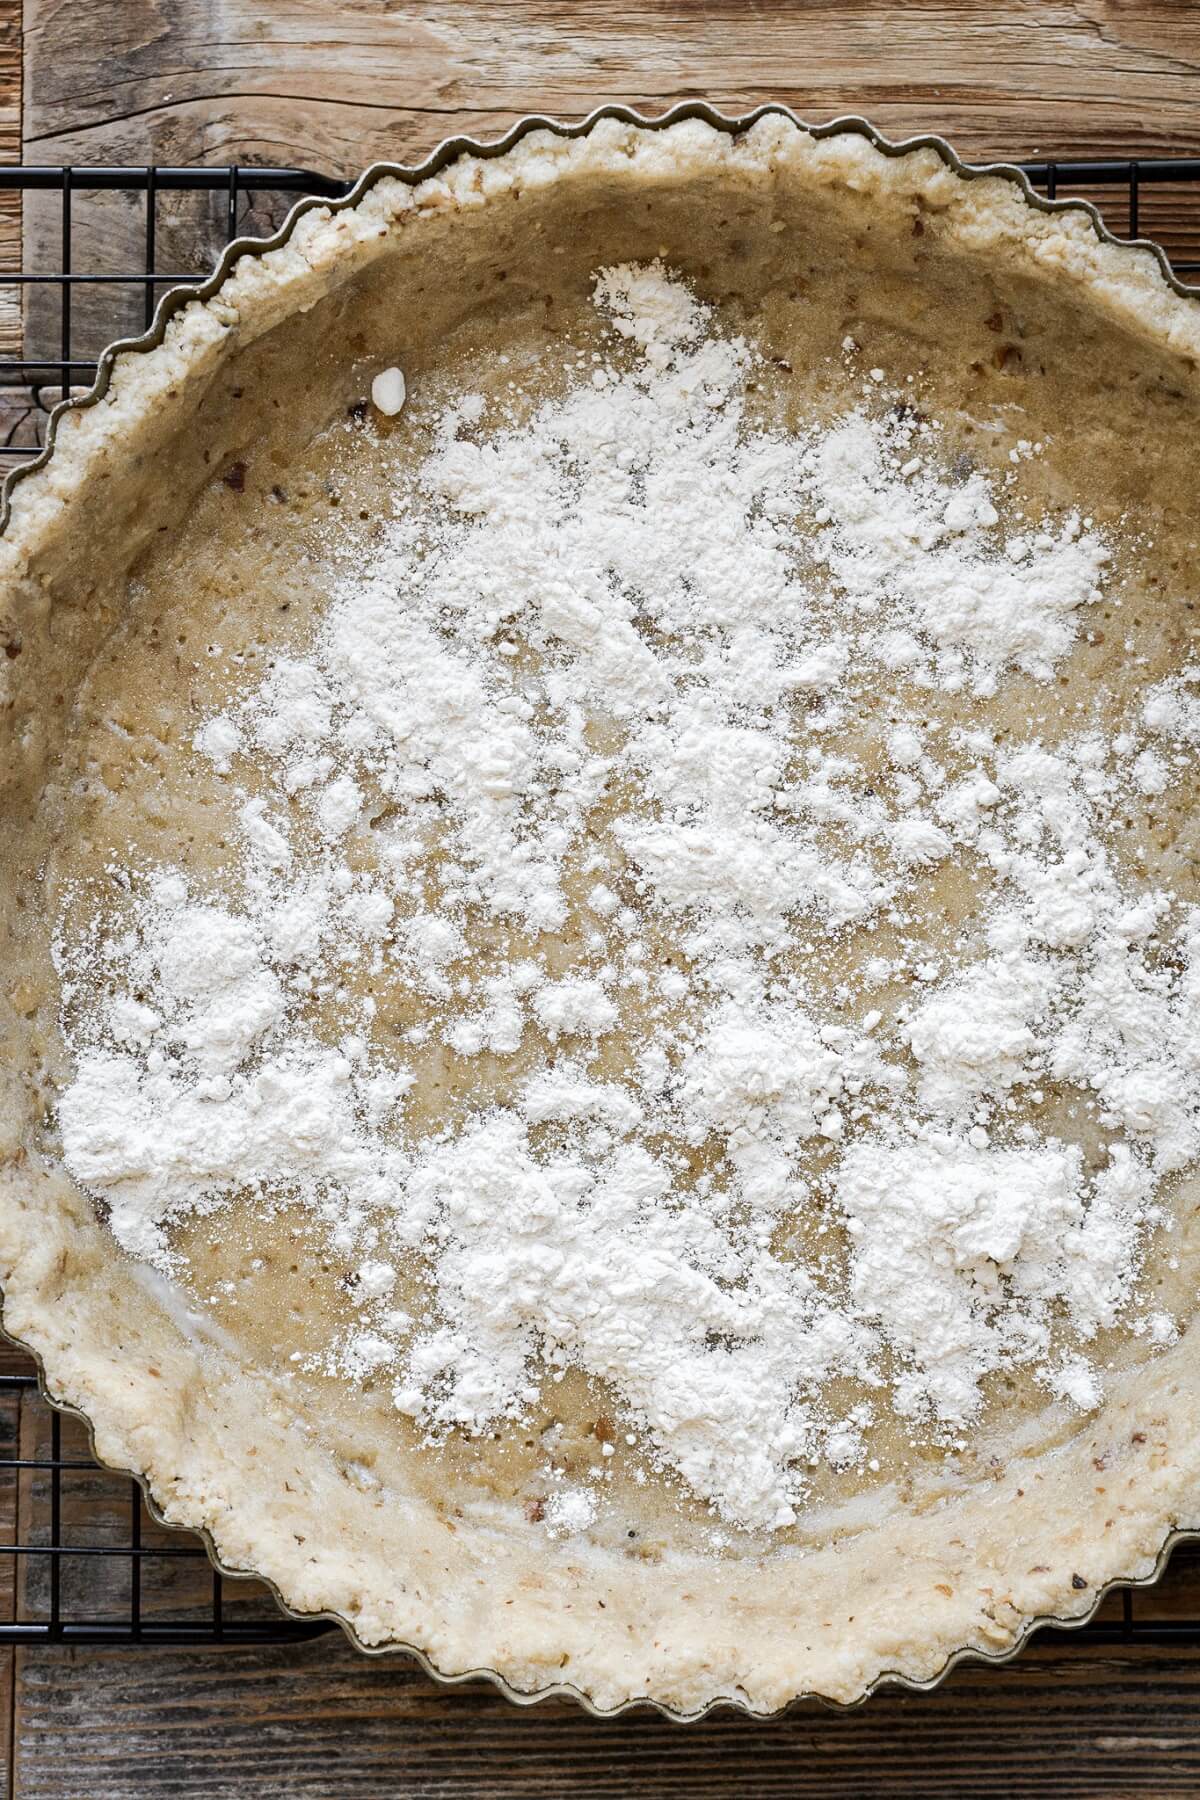
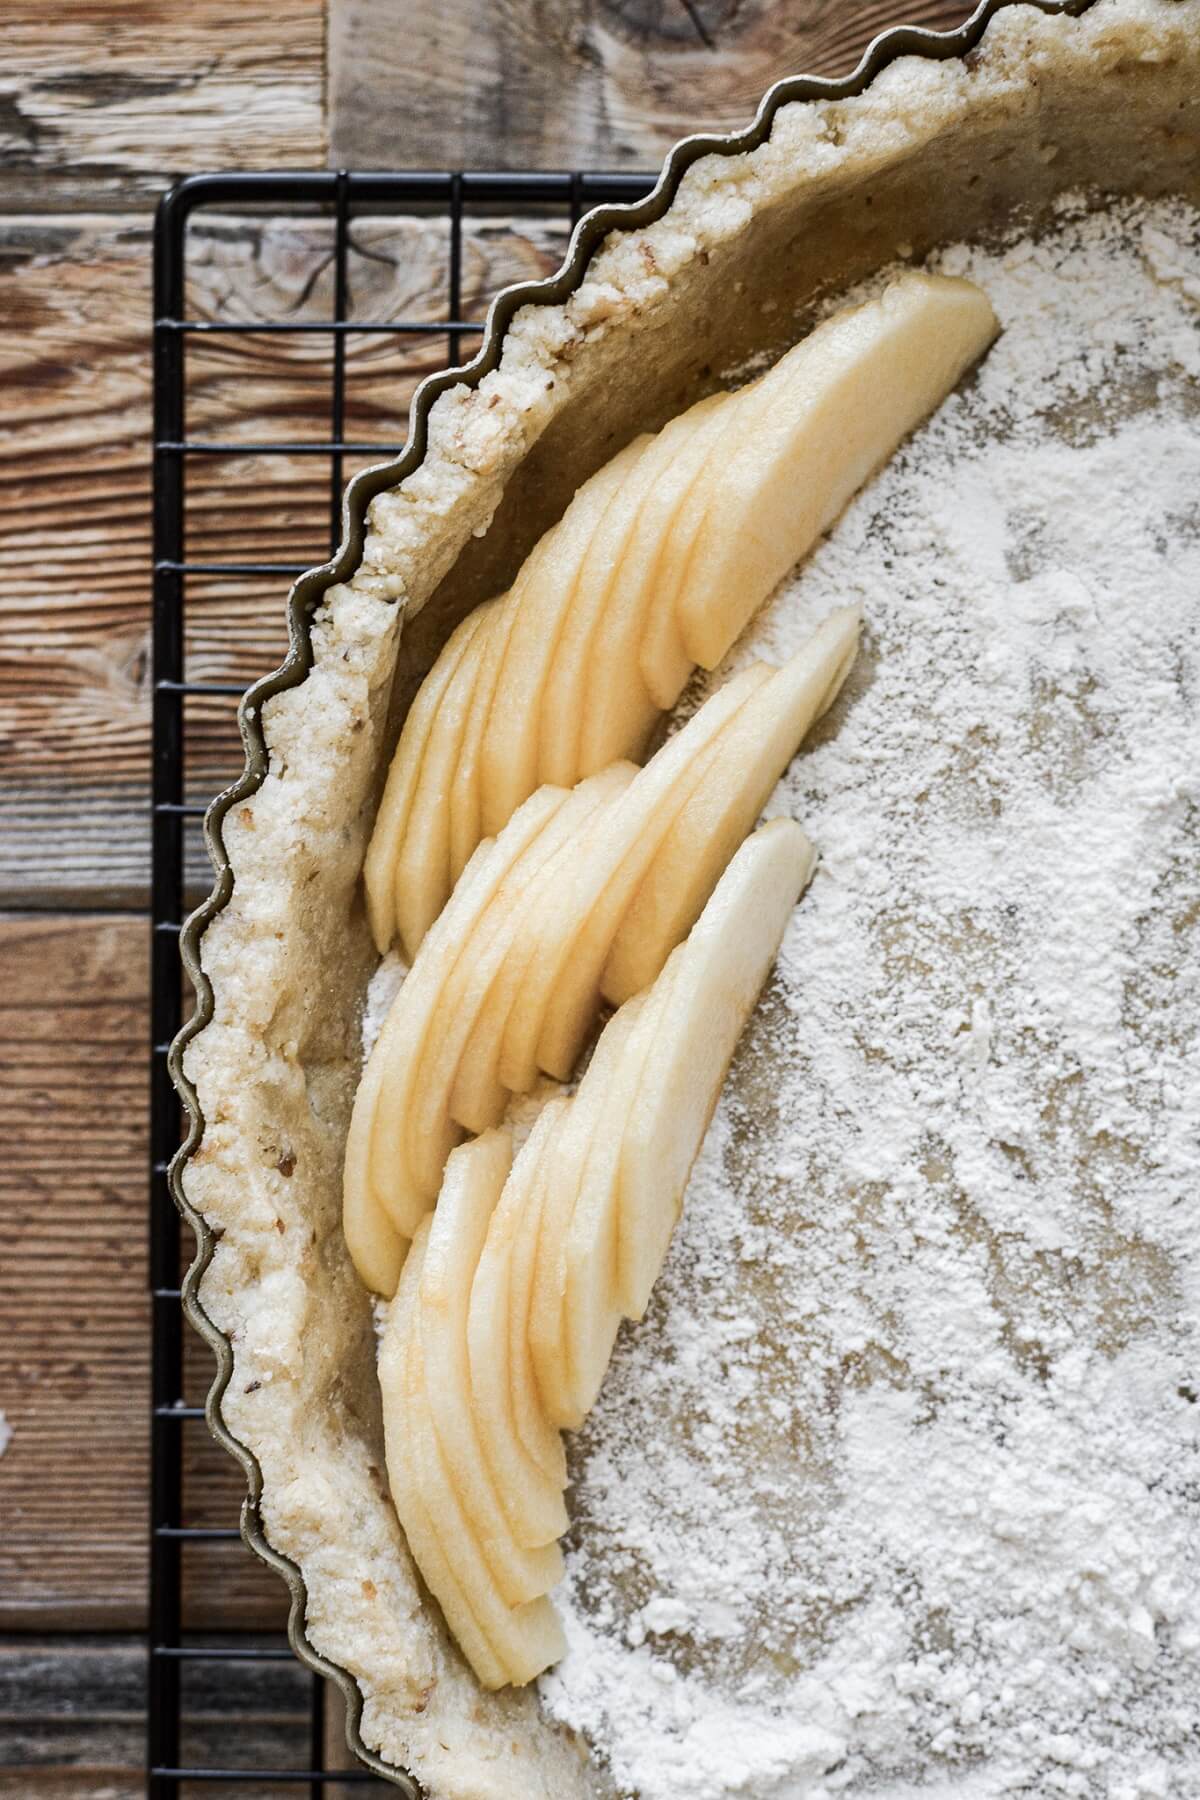
- Sprinkle the 1 tablespoon flour over the bottom of the crust.
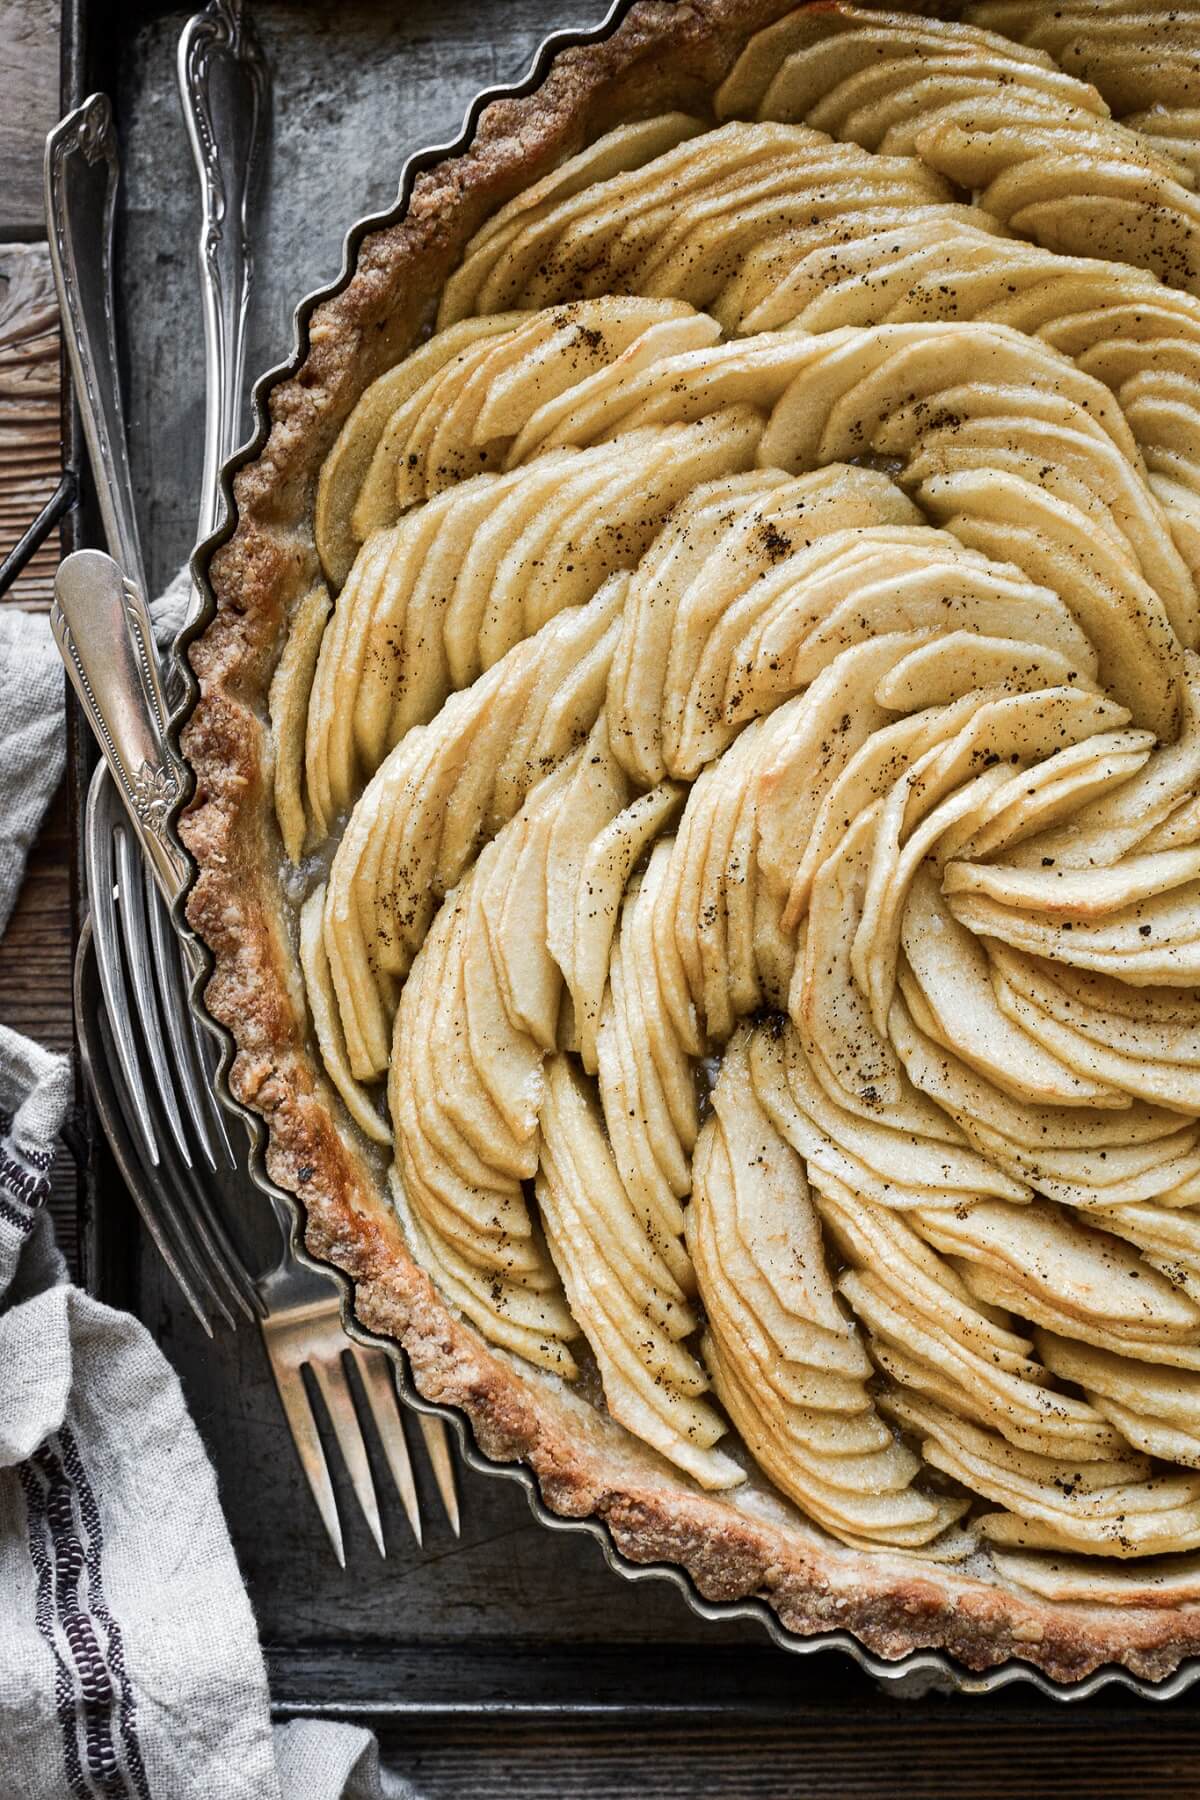
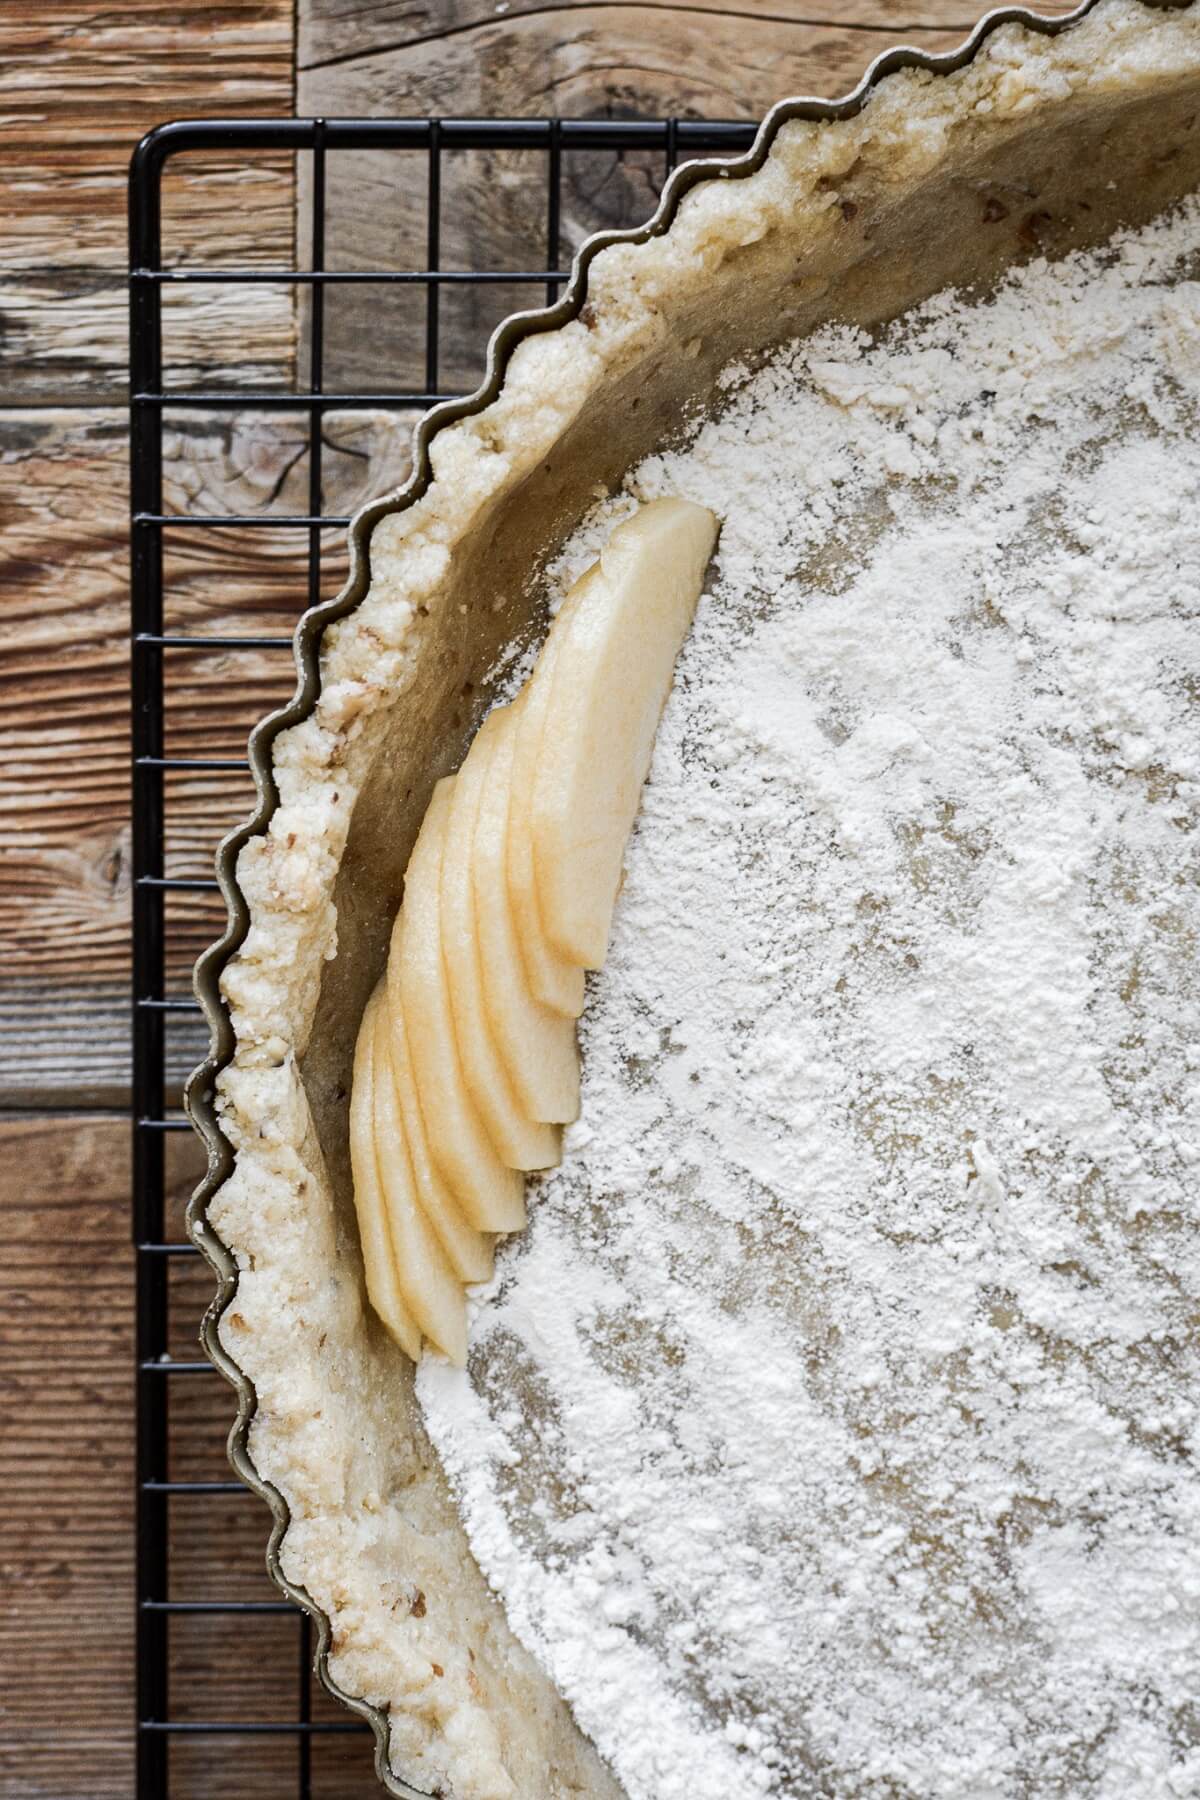
- Take 7-8 apple slices at a time, fan them out slightly, and arrange them in the crust, as shown in the photos. Keep the apple slices mostly upright as you arrange them, not lying down on their side. Arrange overlapping groups of apple slices all the way around the edge of the crust.
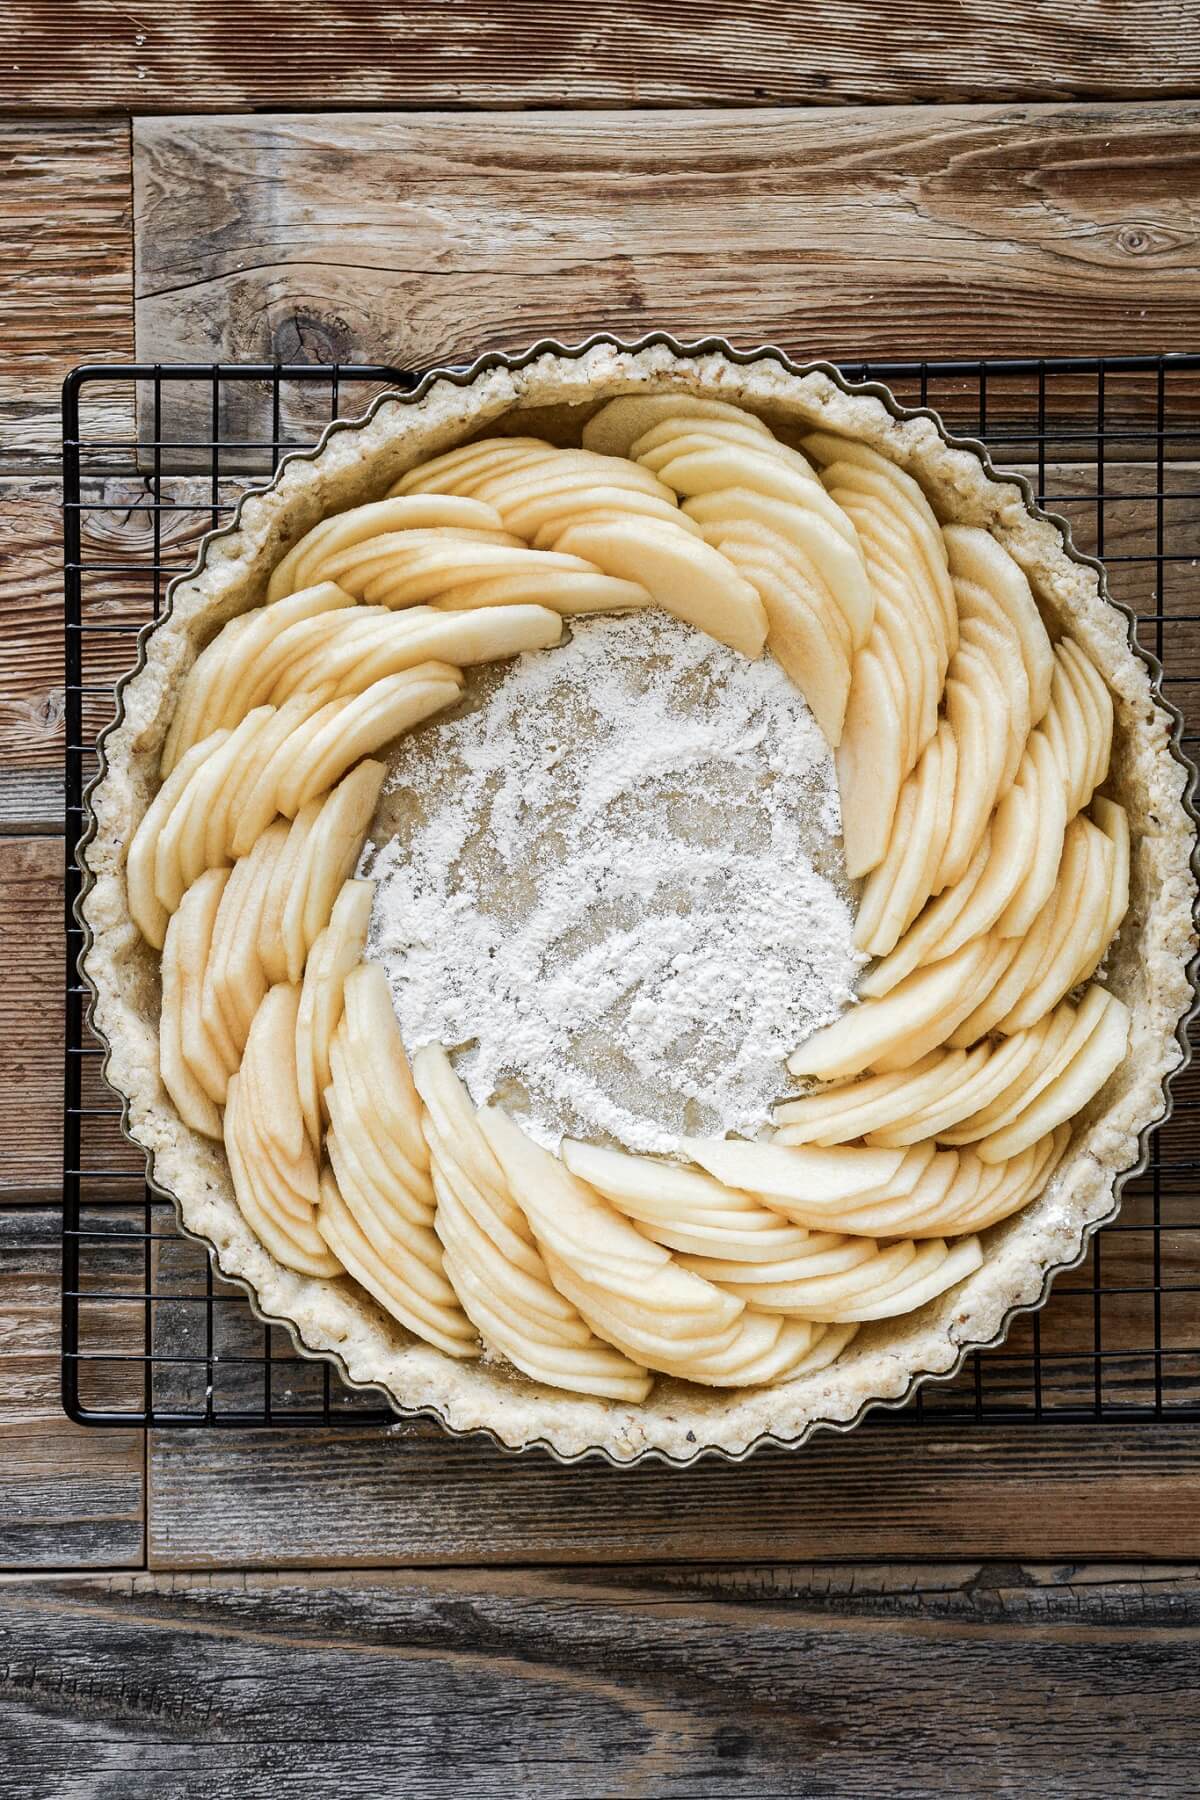
- Now do the same in the middle, working with fewer apple slices at a time, as needed. As you get closer to the middle, it gets a bit trickier, and you may need to arrange 1 apple slice at a time to finish the middle. If you have leftover apples, you can tuck them in here and there in the tart, wherever you see a gap in your design. Discard the liquid at the bottom of the bowl of apples.
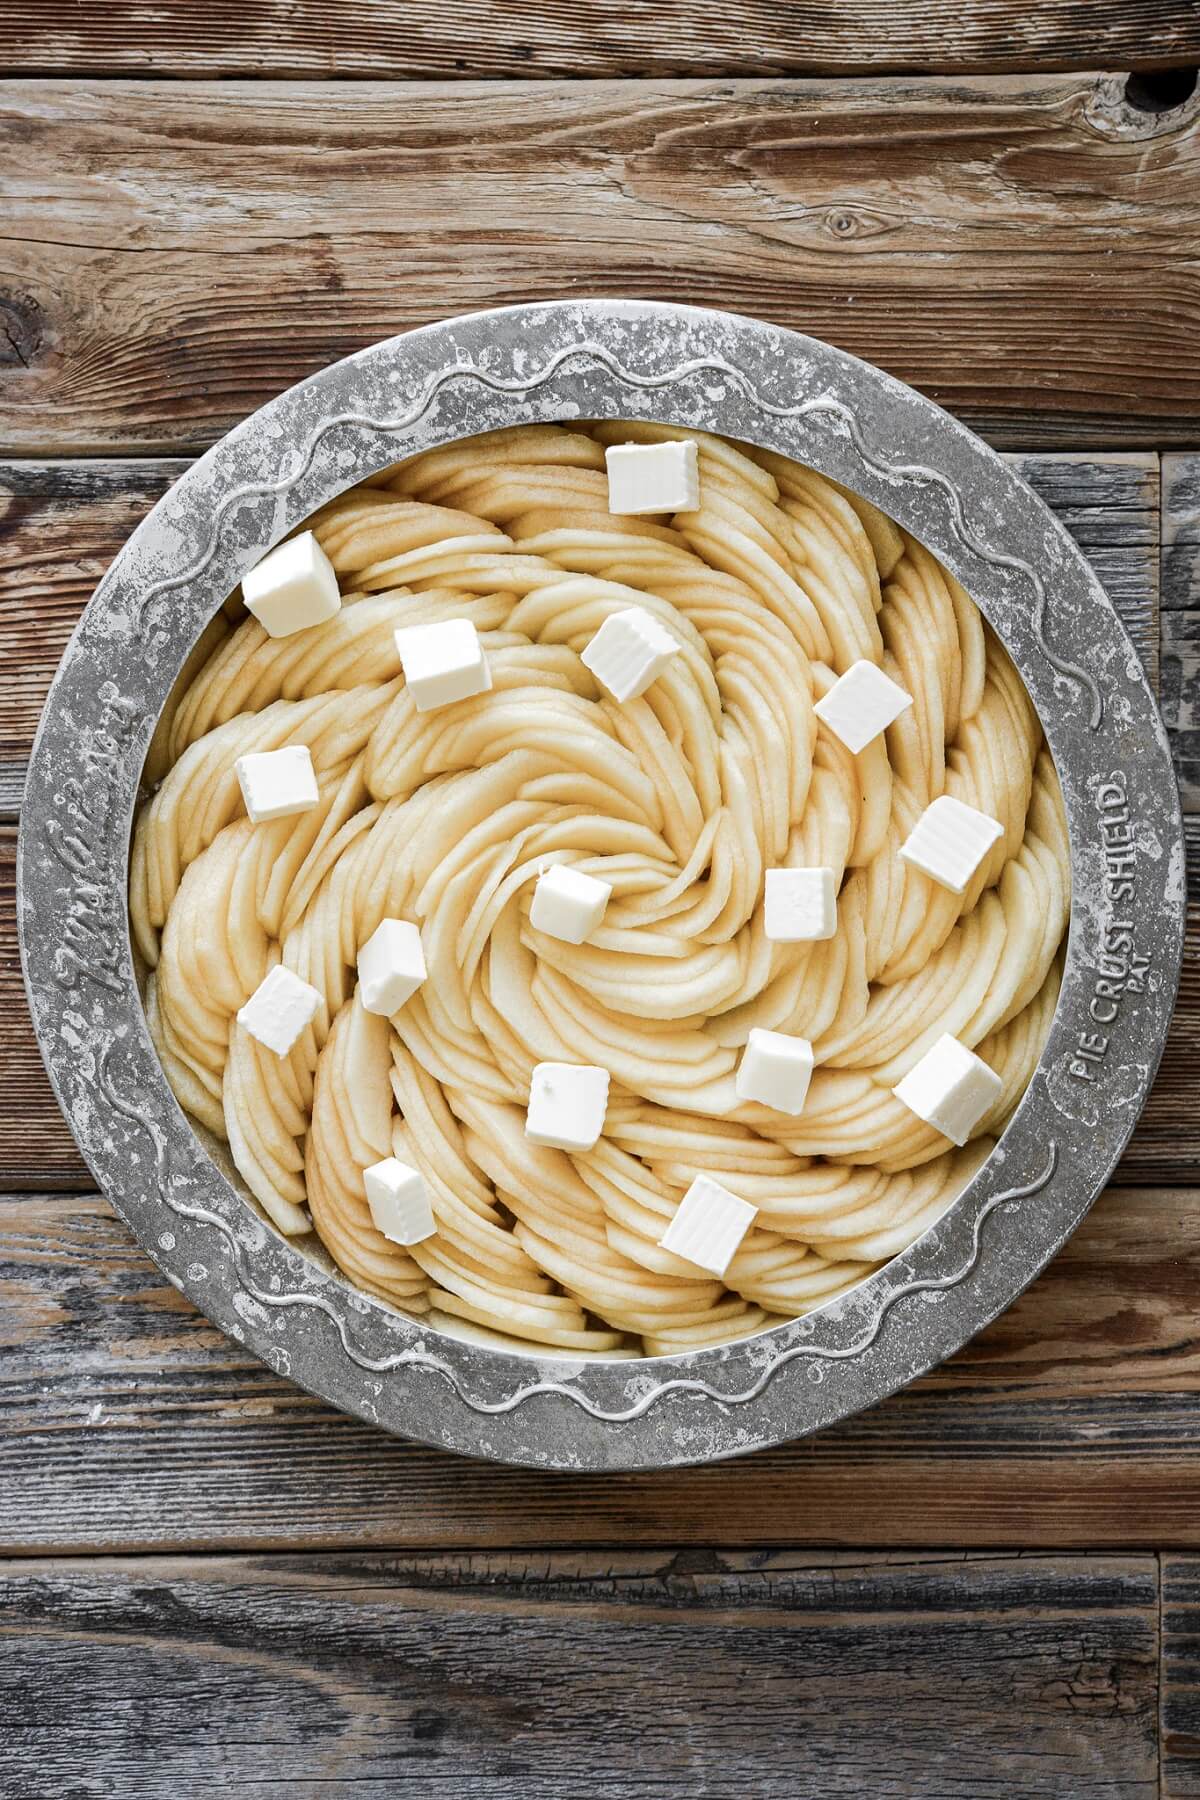
- Dot the apples with the cubed butter, and place a pie crust shield on top of the pan (or use strips of foil) to protect the edge of the crust from burning.
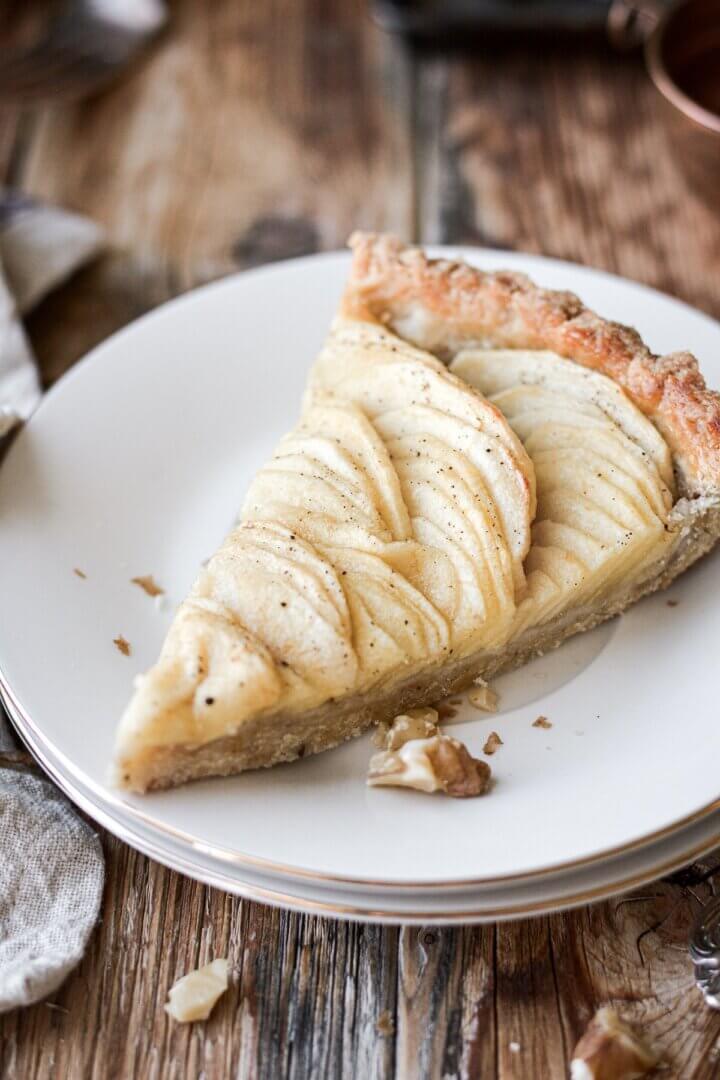
- Bake the tart at 350 F for about 1 hour, until the apples are tender. Take the tart out of the oven and set on a cooling rack. Brush the hot apples with the maple syrup. Let cool for about an hour and serve your French apple tart warm, or at room temperature.
Be sure to read all of my BAKING FAQs where I discuss ingredients, substitutions and common baking questions, so that you can be successful in your own baking!
Frequently Asked Questions
Do French apple tarts usually have custard in them?
Many recipes for French apple tarts call for a layer of vanilla custard or pastry cream underneath the apples. But you don’t have to add the custard, and I chose not to. Without the custard, the tart will stay fresh longer, and has a texture more like a pie, with the crisp crust and tender apple filling.
How should I store the leftover apple tart?
A French apple tart is best eaten the day it’s made, but is still delicious the next day. Store leftover tart in an airtight container at room temperature for up to 2 days.
Can I add spices to the apples?
Of course, feel free to add any spices that you love with apples. I decided not to use any spices, and just sprinkled the apples with ground vanilla bean powder after baking my tart.
What are the best apples for baking?
I’ve always preferred Honey Crisp and Granny Smith, and I usually use a combination of these two varieties. They’re crisp, tart, and hold up well when baked. You don’t want to use a soft apple that turns mushy and loses its shape when baked.
Can I leave the walnuts out of the crust?
Yes, for a nut free option, simply leave out the walnuts with no other adjustments needed.
You Might Also Like
Please check out my Amazon Shop for a curated collection of some of my favorite cake pans from trusted brands, baking tools, ingredients, pretty things and fashion finds. I recommend products that I buy and use every day!
Did you love today’s recipe? Please rate the recipe and let me know in the comments what you thought! Also, be sure to follow Curly Girl Kitchen on Instagram, and tag me when you try one of my recipes so I can see all your delicious creations!
French Apple Tart with Walnut Shortbread Crust
All recipes on Curly Girl Kitchen are developed for high altitude at 5,280 feet. See FAQs for adjusting to higher or lower elevations.

Equipment
- Food Processor or Pastry Cutter
Ingredients
Walnut Crust
- 1 ¾ cups all-purpose flour, fluffed, spooned and leveled
- ½ cup powdered sugar
- 1 tsp coarse Kosher salt (if using table salt, use half the amount)
- 10 tbsp cold, unsalted butter, cut into chunks
- ½ cup walnuts or pecans, finely chopped
- 1 large egg, yolk and white separated
- ½ tsp vanilla extract
Apple Filling
- 2 lbs Honey Crisp apples (about 4-5 apples)
- 1 tbsp lemon juice
- ¼ cup granulated sugar
- 1 tbsp all-purpose flour
- 2 tbsp unsalted butter, cubed
- ¼ cup pure maple syrup
Instructions
Walnut Crust
- In a bowl, combine the flour, powdered sugar and salt. Add the butter, and use a pastry cutter to cut the butter in until the butter is evenly distributed with pieces no bigger than peas, and the flour is moist and crumbly. Stir in the chopped walnuts.
- Add the egg yolk (reserving the egg white for later) and the vanilla. Use your hands to work the moisture into the dough crumbs, until evenly distributed and moist enough that the crumbs will stick together if you squeeze them in your hand.
- Line your tart pan with a circle of parchment paper on the bottom. Dump the crumbs into the pan, spread them out, then press them evenly and firmly against the bottom and up the sides of the pan.
- Freeze the crust for 30 minutes.
- Preheat the oven to 375 F, and position a rack in the center of the oven.
- Use a fork to prick the frozen crust all over – this is called "docking" the dough, and helps prevent it from puffing up.
- Now place a piece of parchment paper inside the crust, and fill the paper with dried beans or pie weights. This is called "blind baking", and also prevents the crust from puffing up. By baking the crust like this, you'll only be partially baking it, and it will finish baking later with the apple filling.Bake the crust for 20 minutes.
- Take the pan out of the oven, and reduce the oven temperature to 350 F. Remove the dried beans and the paper.
- In a small bowl, lightly beat the leftover egg white with a fork, then brush it over the hot crust. This will help to seal the crust, and prevent it from getting soft from the apple filling. Set the crust aside until you're ready to fill with the apples.
Apple Filling
- Peel and core the apples, then slice them very thinly, about 1/16 inch thick. Place the apple slices in a bowl, drizzle with the lemon juice and sprinkle with the sugar. Very gently, toss the apples with your hands to coat them in the lemon juice and sugar, taking care not to break the apple slices. Set aside until you're ready to fill your crust.
- Sprinkle the 1 tablespoon flour over the bottom of the crust.
- Take 7-8 apple slices at a time, fan them out slightly, and arrange them in the crust, as shown in the photos. Keep the apple slices mostly upright as you arrange them, not lying down on their side. Arrange overlapping groups of apple slices all the way around the edge of the crust.Now do the same in the middle, working with fewer apple slices at a time, as needed. As you get closer to the middle, it gets a bit trickier, and you may need to arrange 1 apple slice at a time to finish the middle. If you have leftover apples, you can tuck them in here and there in the tart, wherever you see a gap in your design.Discard the liquid at the bottom of the bowl of apples.
- Dot the apples with the cubed butter, and place a pie crust shield on top of the pan (or use strips of foil) to protect the edge of the crust from burning.
- Bake the tart at 350 F for about 1 hour, until the apples are tender. Take the tart out of the oven and set on a cooling rack. Brush the hot apples with the maple syrup. Let cool for about an hour and serve warm, or at room temperature.
Notes
 https://curlygirlkitchen.com/
Can I parbake this the night before and then bake it in the morning?
I ended up leaving it in the freezer overnight, and took it out to thaw a little bit while the oven preheated. Turned out great!
Thanks for all your great recipes – as a Denverite, you’re my first stop when it comes to baking recipes!
I’m so glad you loved it!