
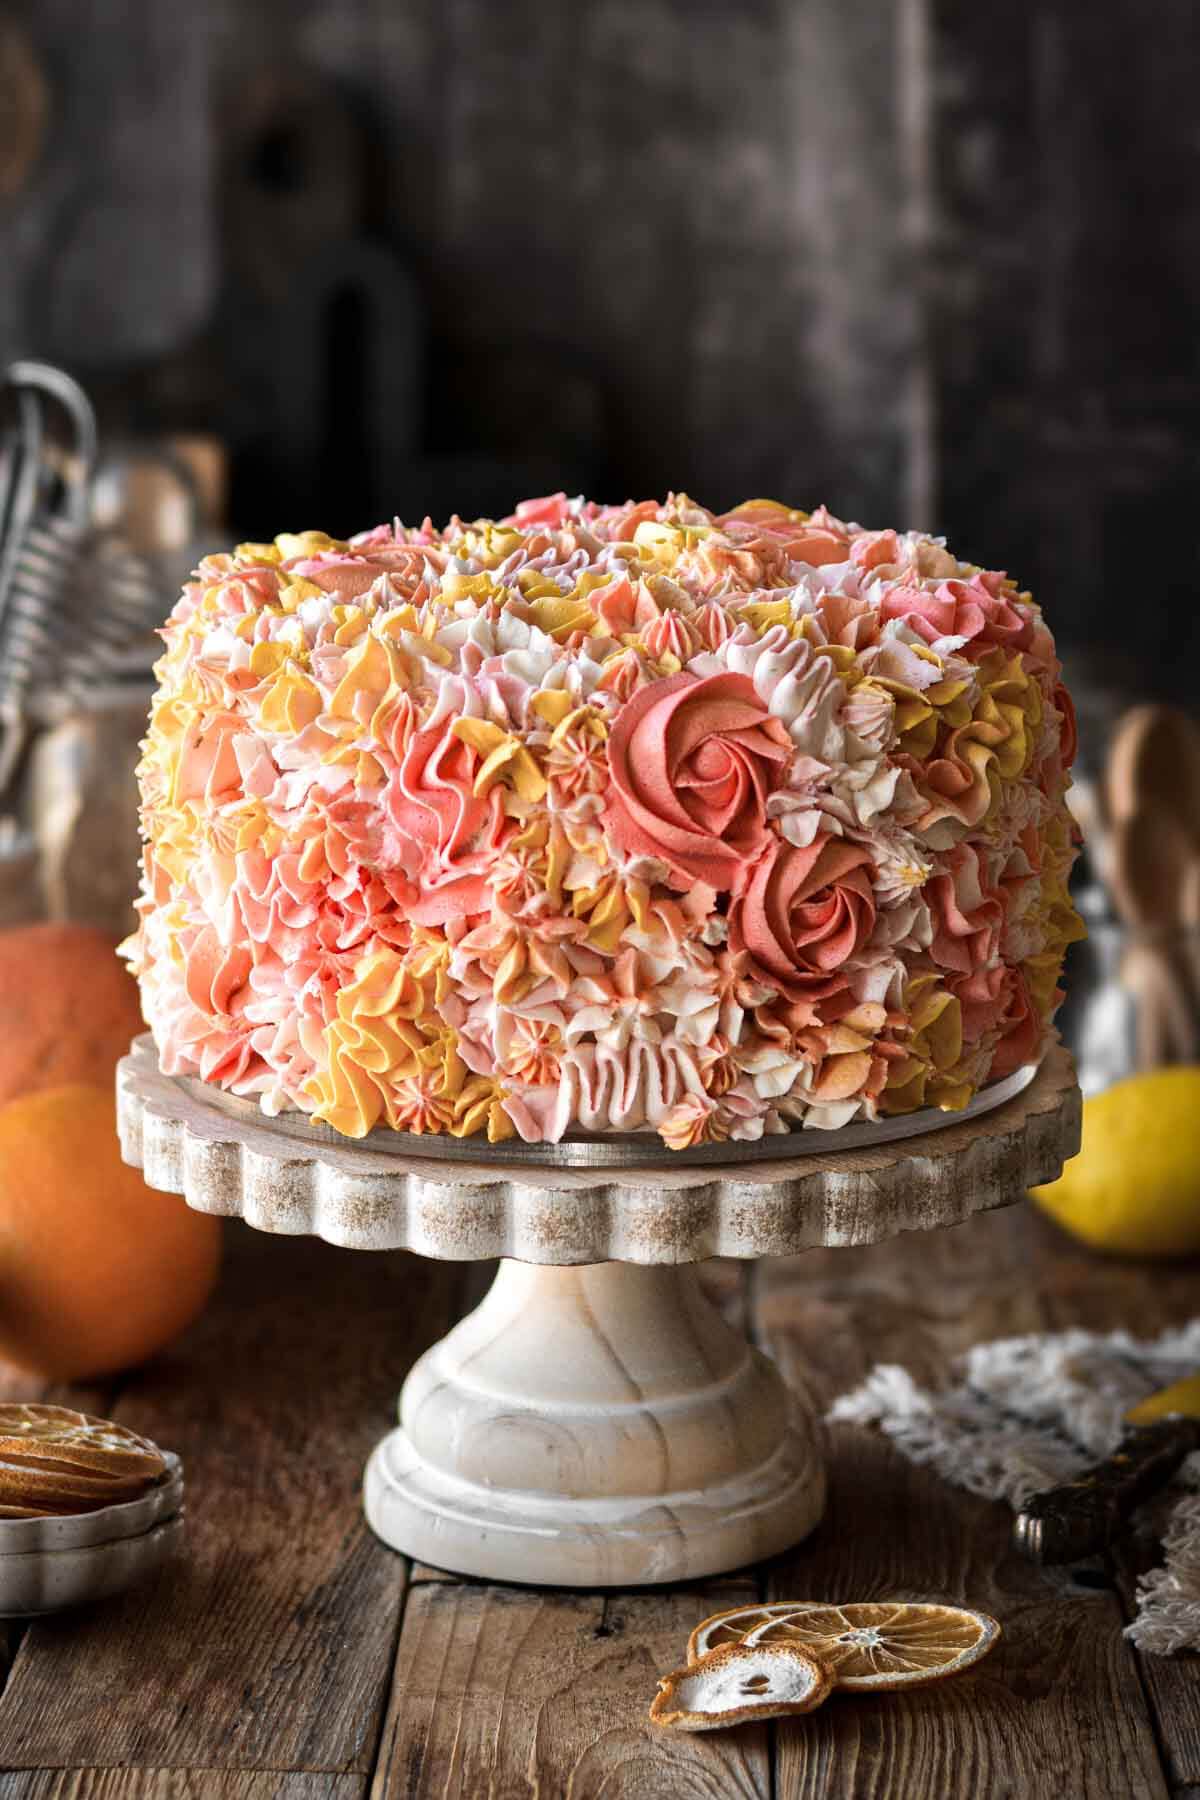
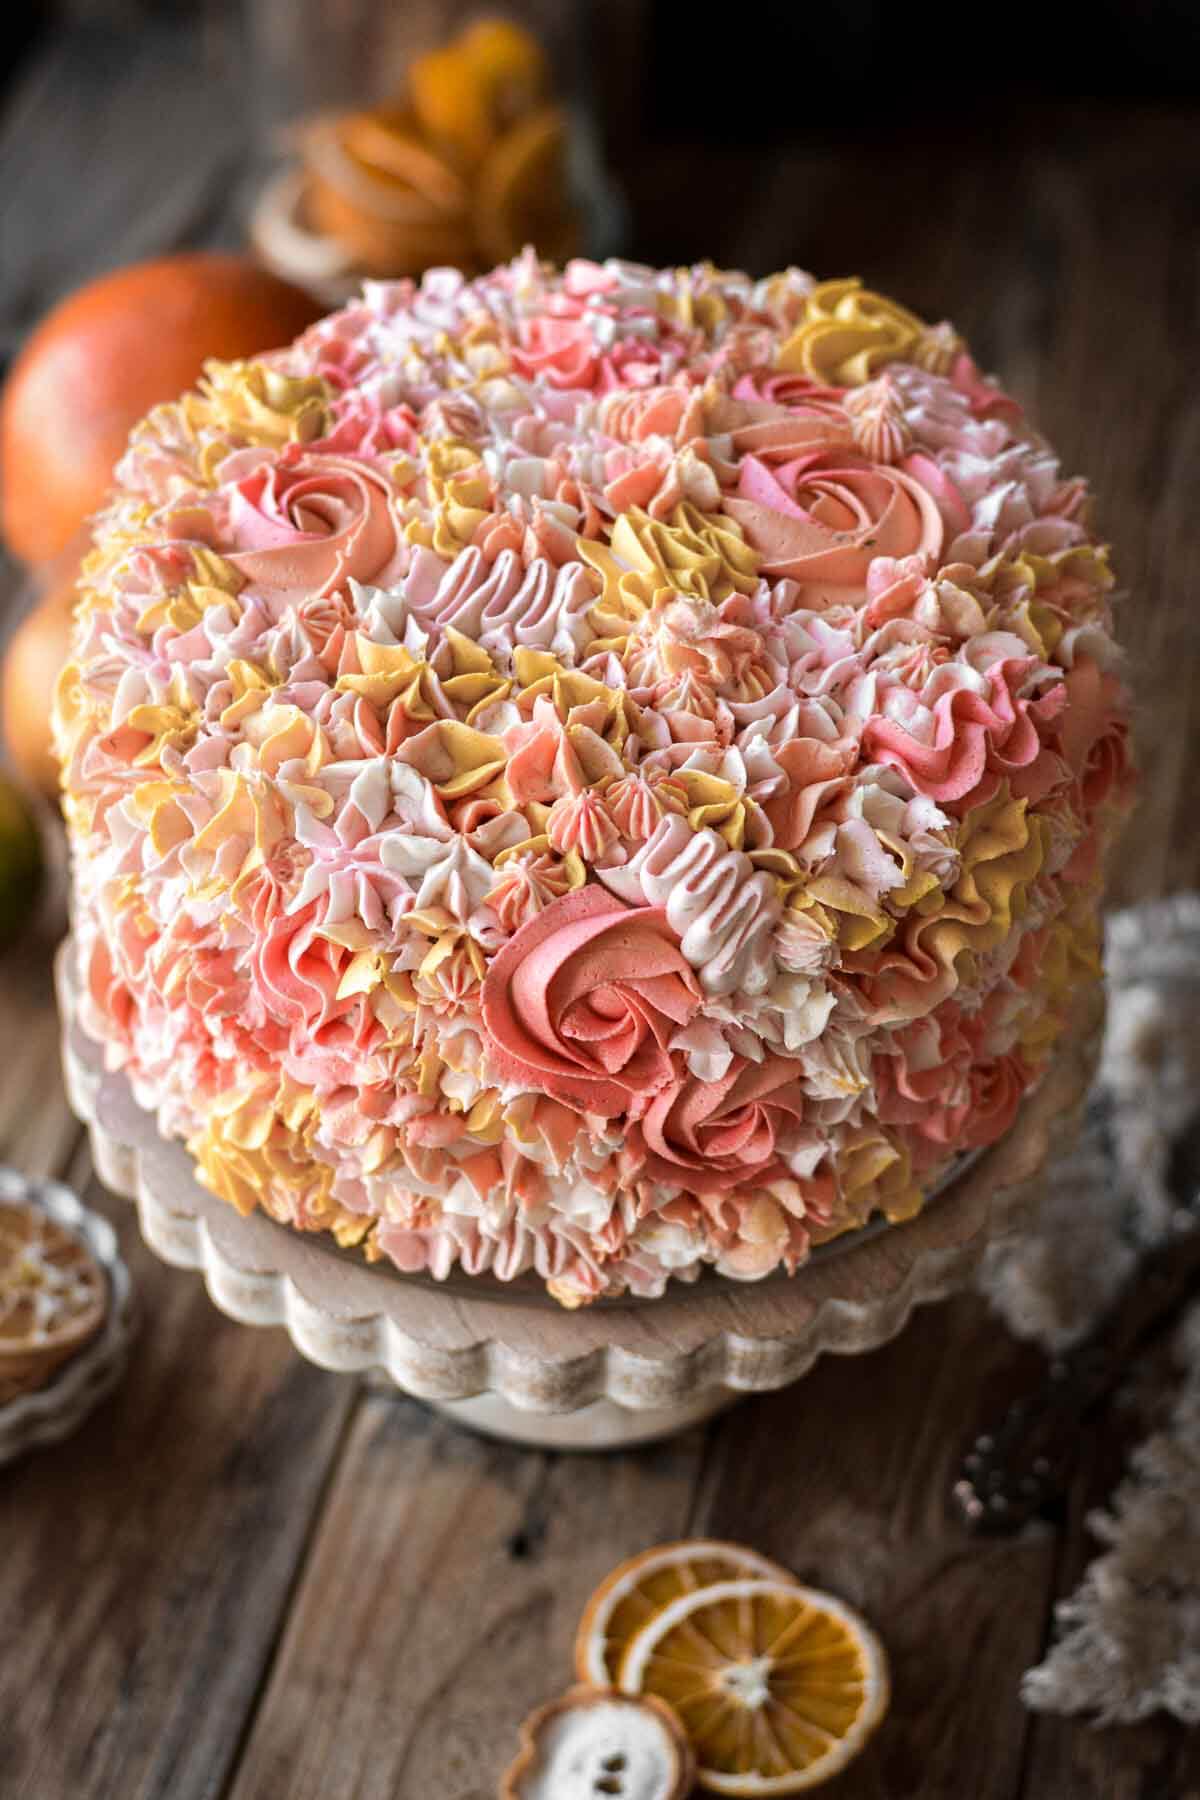
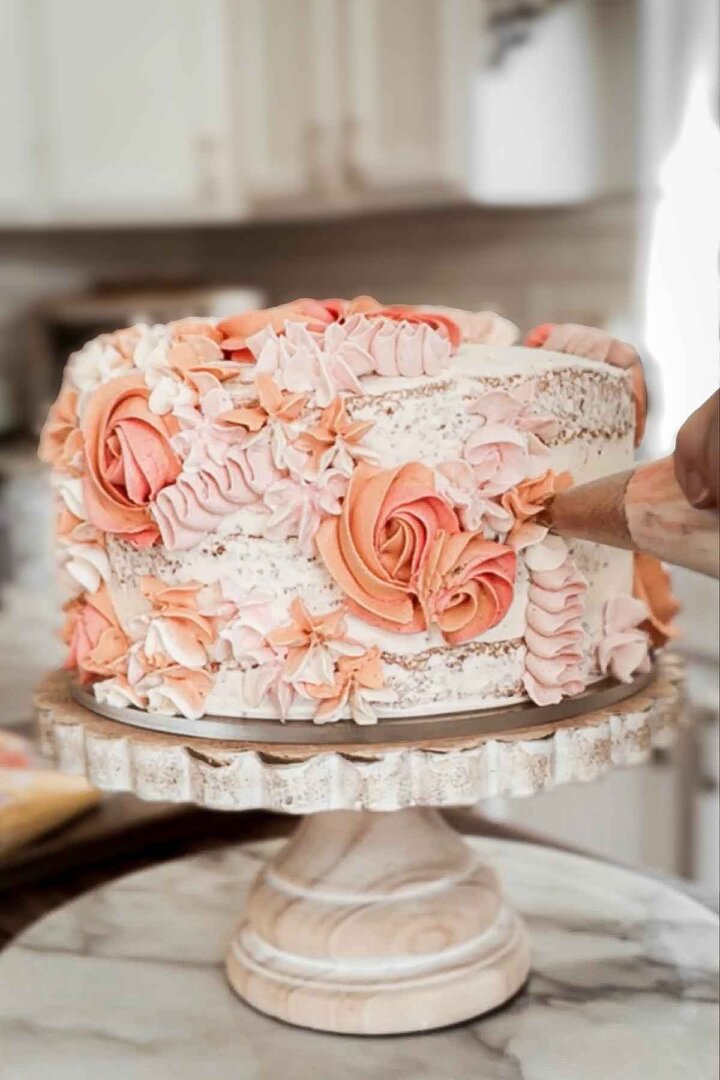
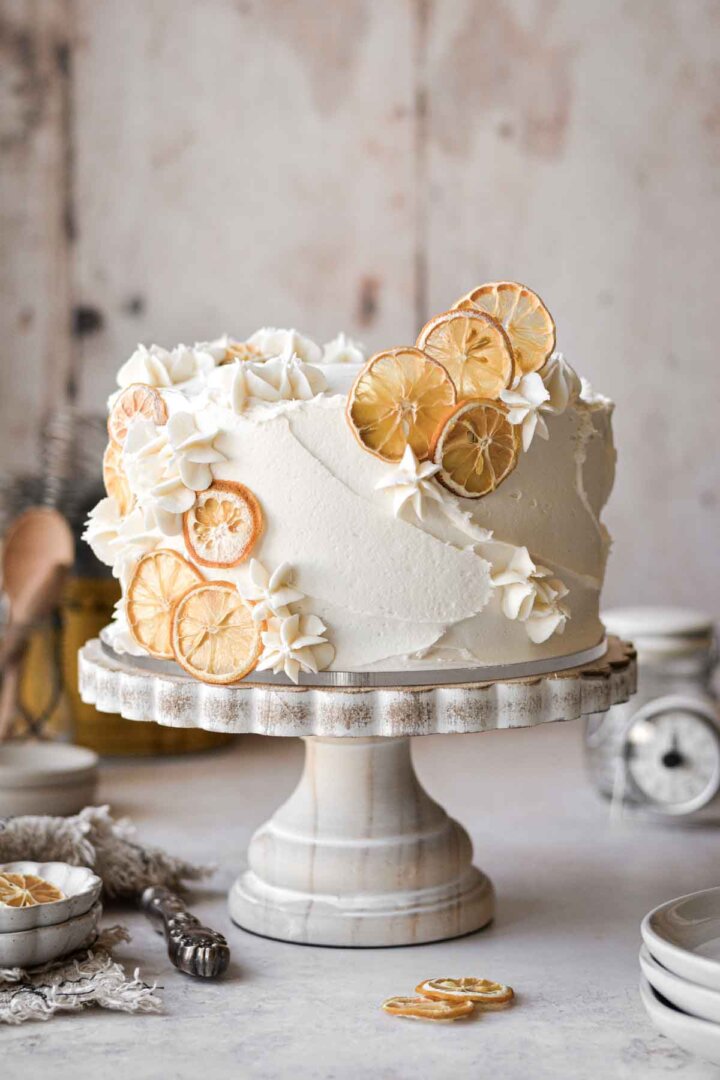
This high altitude citrus cake with floral buttercream is the most beautiful cake for spring or the Easter holiday. Three layers of moist and tender orange cake, flavored with fresh orange zest and orange juice, are filled with lemon curd. Then I flavored the buttercream with fresh citrus zest from lemons, limes, oranges and grapefruit. You can frost the cake simply and decorate it with dried citrus slices, or see today’s video tutorial, as well as the details in the post below, for the piped floral design.
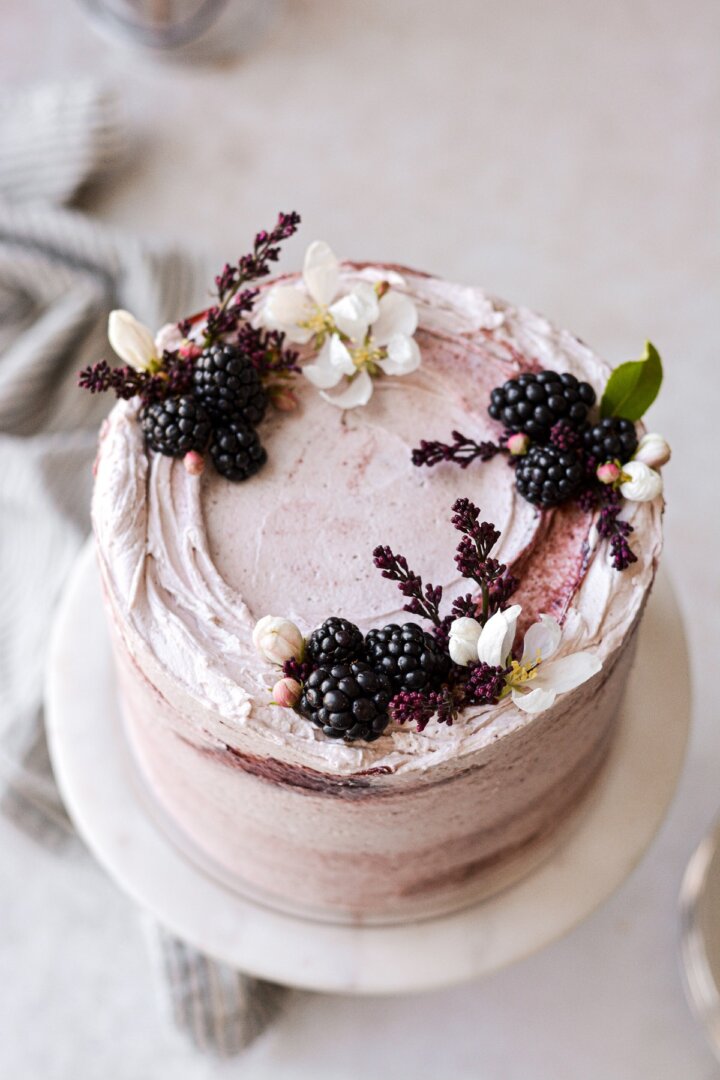
You might also love these recipes for blackberry cake, lemon coconut hydrangea cake, and hummingbird cake.
This site contains affiliate links. As an Amazon associate, I earn from qualifying purchases. This means that I may make a small commission if you purchase a product using those links. This in no way affects my opinion of those products and services. All opinions expressed on this site are my own.
Why You’ll Love This Recipe
Perfectly Fluffy and Moist. This orange cake is so light, fluffy and moist, full of wonderful fresh citrus flavors in the buttercream.
The Most Beautiful Cake for Spring. For the colors in my cake, I chose vibrant shades of citrus in pinks, yellow and orange. But for Easter or any other special occasion, you can choose your own color palette when designing your cake.
High Altitude Tested. I develop all the recipes on my site for Denver’s altitude of 5,280 feet. If you’re at a lower or higher elevation, please see my FAQs for guidance on adjusting recipes for your altitude.

Floral Buttercream Cake Decorating Tips
- Start with a Chilled Crumb-Coated Cake. Your layer cake needs to have a thin, well-chilled crumb coat before you begin piping on the flowers. See this post for a video tutorial on frosting layer cakes.
- Use the Right Buttercream. Your buttercream should be fluffy and perfectly pipeable, not runny and soft, or it will never hold its shape when you pipe it onto your cake. And be sure you make enough buttercream! Piped designs use far more buttercream than just a simple frosted cake. See this post for all the details on my Perfect American Buttercream.
- Choose Your Colors. After assembling my cake and frosting it with a crumb coat, I divided the remaining buttercream into six bowls, and colored it as following: white (no food coloring), pale pink (1 drop “electric pink”), medium pink (2-3 drops “electric pink”), dark pink (2-3 drops “super red”), yellow (2-3 drops “lemon yellow” + 1 drop “warm brown”), and orange (2-3 drops “orange” + 1 drop “warm brown”).
- Use the Double Bag Method. My method for today’s cake was to use a “double bag” method. This means that I divided the buttercream between six 12-inch disposable piping bags, which were not fitted with couplers or piping tips. Simply snip off the tips of the bags. Then, I had two 16-inch piping bags, one fitted with just tip 1M (and no coupler), and the other fitted with a standard coupler that I could use to switch out other piping tips. This method allows you to drop the smaller bags of buttercream into the larger bags fitted with the tips, so you can easily swap out colors and tips as you’re decorating your cake. See this post for how to use couplers, piping tips and piping bags.
- Blend the Colors in the Piping Bags. For a blended effect, I combined two colors in each of my six 12-inch piping bags.


- Practice with Piping Tips. If you’re not sure what a piping tip can do, you can always practice first, and then reuse the buttercream. I mostly used tip 1M (for rosettes, drop flowers and ruffles), as well as tip 104 (ribbons) and tip 32 (to fill in small gaps with stars).
- Start with the Biggest Elements. For today’s cake, you’ll want to start with the biggest design elements, and work towards the smallest. I began with tip 1M, and piped a few rosettes randomly around the sides and top of my cake. Then I added ribbons with tip 104. Then I started adding ruffles and drop flowers with tip 1M.
- Fill in with the Smallest Elements. As you get close to the end, you’ll simply fill in any gaps with drop flowers (tip 1M), or small stars (tip 32).
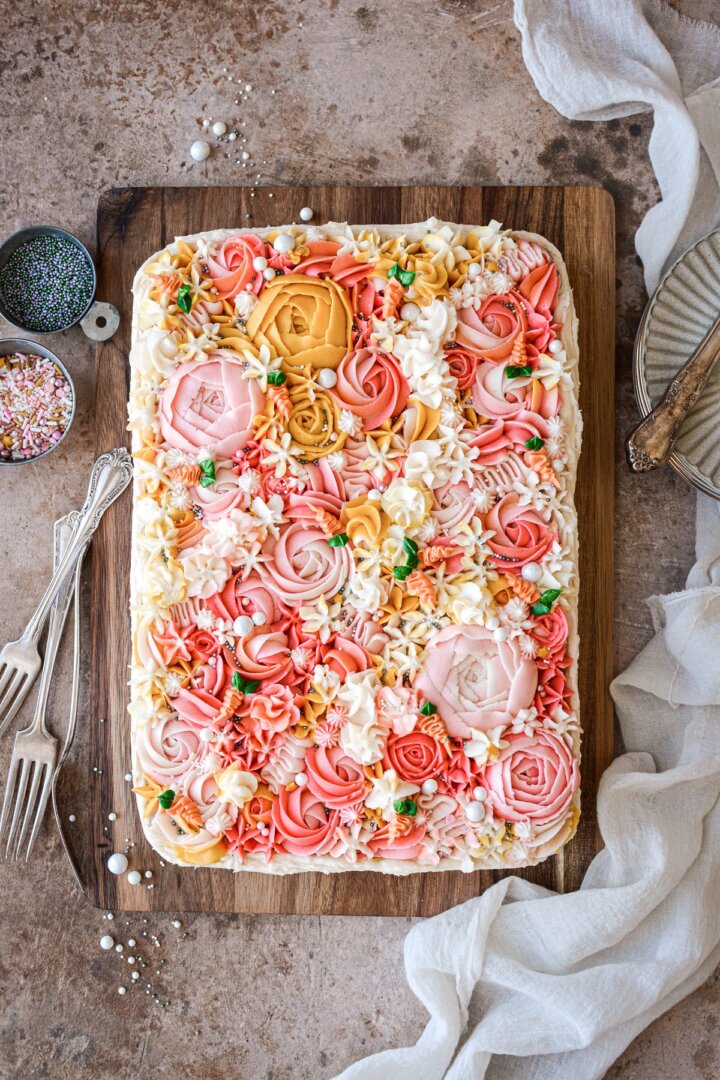
- Video Tutorial. Be sure to watch the video in today’s recipe card to see a demonstration of me decorating this cake. And for more inspiration, see my carrot cake sheet cake, which you’ll see is very similar to today’s design with both the colors and the piping.


Be sure to read all of my BAKING FAQs where I discuss ingredients, substitutions and common questions with cake making, so that you can be successful in your own baking! I also suggest reading these comprehensive posts on making Perfect American Buttercream, How to Stack, Fill, Crumb Coat and Frost Layer Cakes and How to Use Piping Bags.
Frequently Asked Questions
The cake should be stored in an airtight container or cake carrier for up to three days.
The buttercream recipe makes a large amount of buttercream, which is enough for the piped floral design. If you plan on frosting your cake more simply without any piping, you can cut the buttercream recipe in half.
I don’t recommend straying from today’s recipe. I have extensively tested both my orange cake and lemon cake recipes, and you cannot simply substitute one type of citrus juice for another. The reason is that orange juice, lemon juice, lime juice and grapefruit juice all have very different levels of sugar and acidity, both of which greatly affect the texture and rise of a cake. As far as adding any juice to buttercream, the acidity in citrus juice has the tendency to curdle the butter (which will ruin your buttercream), and is the reason I only used the zest.
You can learn how to dry citrus slices in my orange cake recipe post.

You Might Also Like
Please check out my Amazon Shop for a curated collection of some of my favorite cake pans from trusted brands, baking tools, ingredients, pretty things and fashion finds. I recommend products that I buy and use every day!
Did you love today’s recipe? Please rate the recipe and let me know in the comments what you thought! Also, be sure to follow Curly Girl Kitchen on Instagram, and tag me when you try one of my recipes so I can see all your delicious creations!

High Altitude Citrus Cake with Floral Buttercream
All recipes on Curly Girl Kitchen are developed for high altitude at 5,280 feet. See FAQs for adjusting to higher or lower elevations.

Equipment
- Stand Mixer with Paddle Attachment
- 8-inch cake pans (x3)
- 2 16-inch Disposable Piping Bags
- 6 12-Inch Disposable Piping Bags
- Coupler and Piping Tips (1M, 104, 32)
Ingredients
Cake
- 1 ½ cups granulated sugar
- 2 tsp freshly grated orange zest (from 1 navel orange)
- 3 cups cake flour (preferred), or all-purpose flour, fluffed, spooned and leveled
- 2 ½ tsp baking powder
- ½ tsp coarse Kosher salt (if using table salt, use half the amount)
- 3 large eggs
- ½ cup whole milk
- 1 cup orange juice
- ½ cup vegetable oil
- ½ cup unsalted butter, melted
- 1 tsp vanilla extract
Filling
- ⅔ cup lemon curd
Buttercream
- 3 cups unsalted butter, softened to room temperature
- 6 cups powdered sugar
- 2 tbsp meringue powder (optional)
- ½ tsp coarse Kosher salt (if using table salt, use half the amount)
- 2 tsp vanilla extract
- 1 tsp freshly grated orange zest
- 1 tsp freshly grated lemon zest
- 1 tsp freshly grated lime zest
- 1 tsp freshly grated grapefruit zest
- gel food coloring ("super red", "electric/neon pink", "lemon yellow", "orange", "warm brown")
Instructions
Cake
- Preheat the oven to 350F, and position a rack in the center of the oven. Spray three 8-inch cake pans with non-stick baking spray, line the bottoms of the pans with circles of parchment paper, and lightly spray the paper, too.
- In a large bowl, use your fingers to rub the orange zest into the sugar until moist and fragrant.
- Sift in the flour, baking powder and salt, then whisk until evenly combined.
- Separately, whisk together the eggs, milk, orange juice, oil, melted butter and vanilla extract. Add the wet ingredients to the dry and whisk for about 15-30 seconds, until smooth.
- Divide the batter between the pans. Bake on the center oven rack for about 25-30 minutes, until a cake tester comes out clean and the centers of the cakes spring back when lightly touched.
- Set the pans on a cooling rack, cover loosely with a clean kitchen towel and cool completely before frosting.
Buttercream
- In the bowl of your stand mixer fitted with the paddle attachment, beat the butter for 1 minute until smooth.
- With the mixer on low, gradually add the powdered sugar, meringue powder, salt and vanilla, mixing to combine. Add the citrus zest.
- Increase speed to medium and whip for 4-5 minutes, scraping the bowl occasionally, until very light and fluffy. If the buttercream is too thick, beat in a little milk, one tablespoon at a time.
Assembly and Decorating
- Remove the cooled cakes from the pans and peel the paper off the cakes. Place one of the cake layers on a cake plate or pedestal. Frost the top of the cake with a very thin layer of buttercream, leaving a "dam" around the edge. Fill the center with half the lemon curd. Place the second layer of cake on top, and repeat with more buttercream and the rest of the lemon curd. Place the third layer of cake on top.
- Frost the cake all over with a thin crumb coat of buttercream. Chill 30 minutes.
- Frost with a final coat of buttercream and decorate with dried orange slices, or see today's video tutorial, as well as the information above in today's post, for the piped buttercream floral design.
Video
Notes
 https://curlygirlkitchen.com/
Leave a Reply