
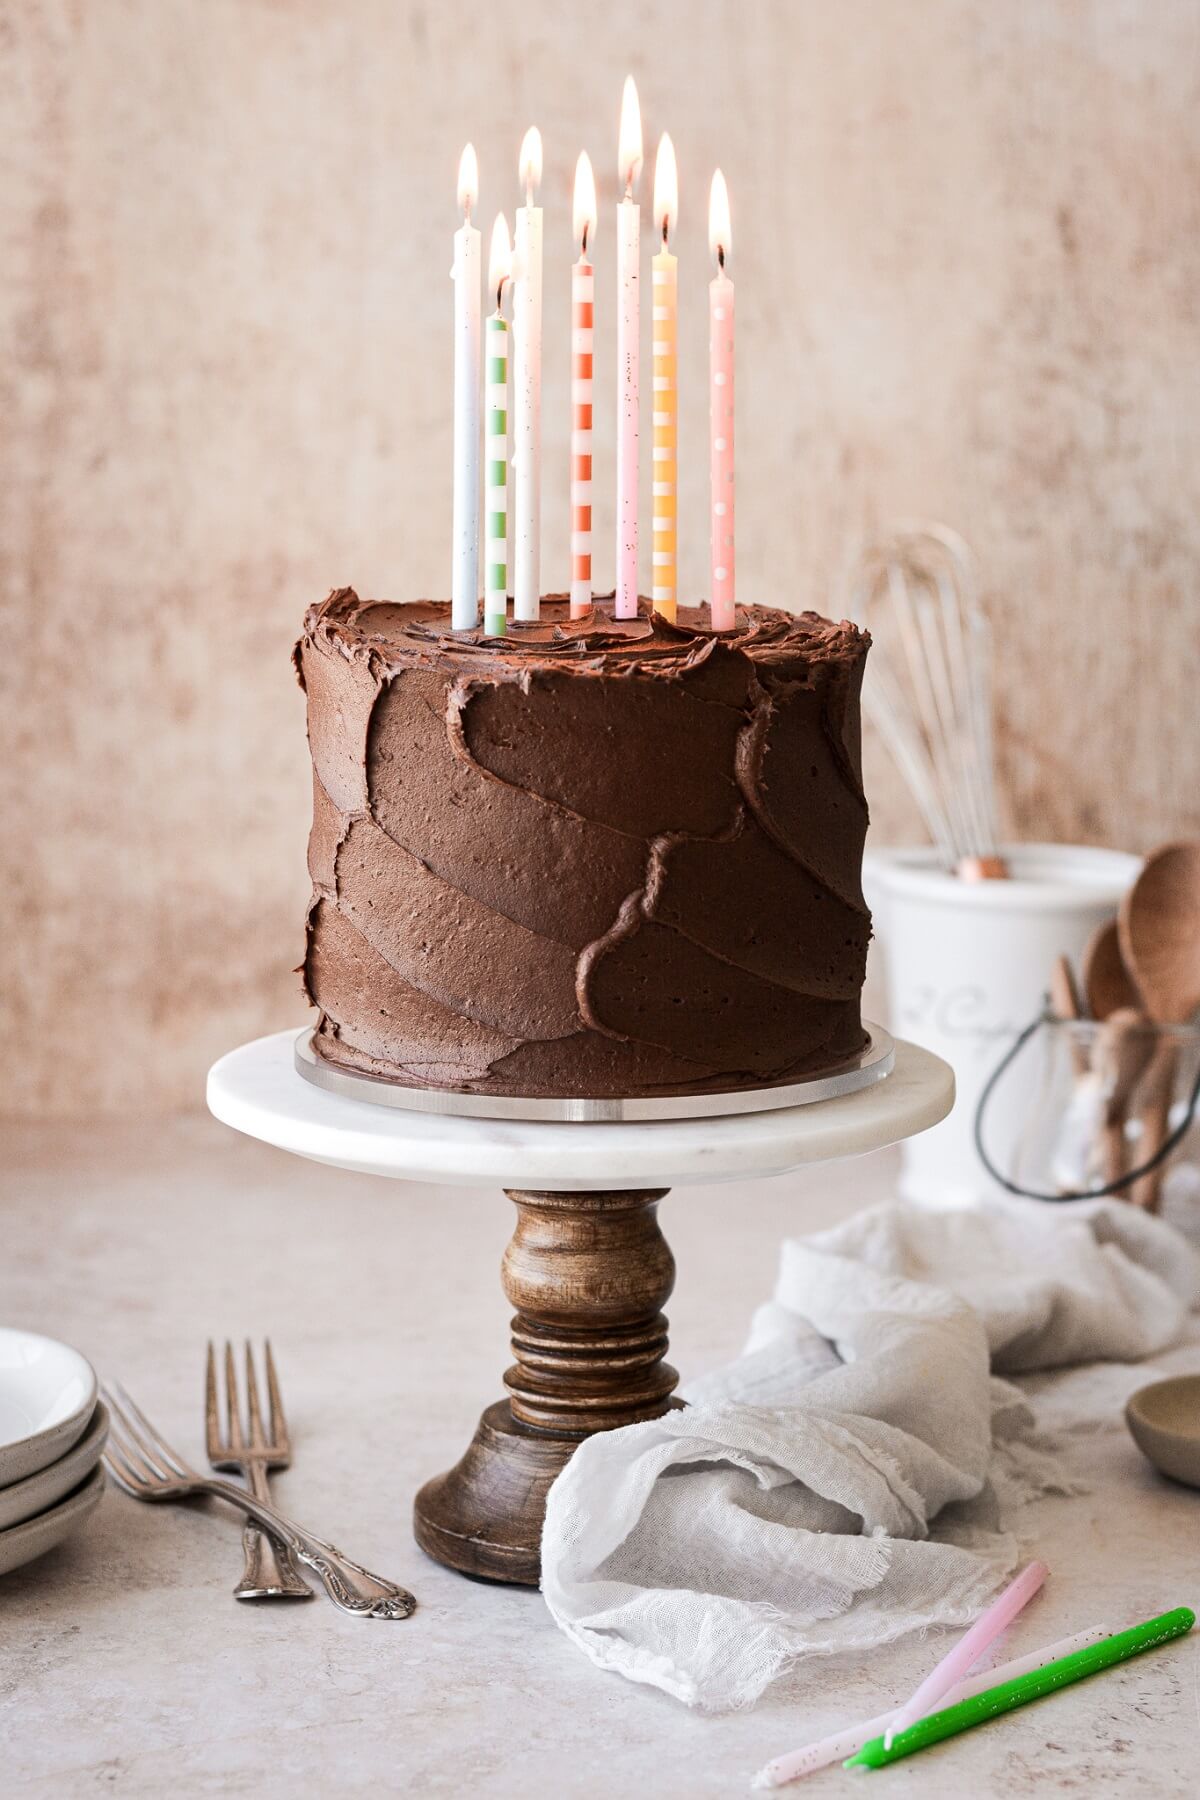
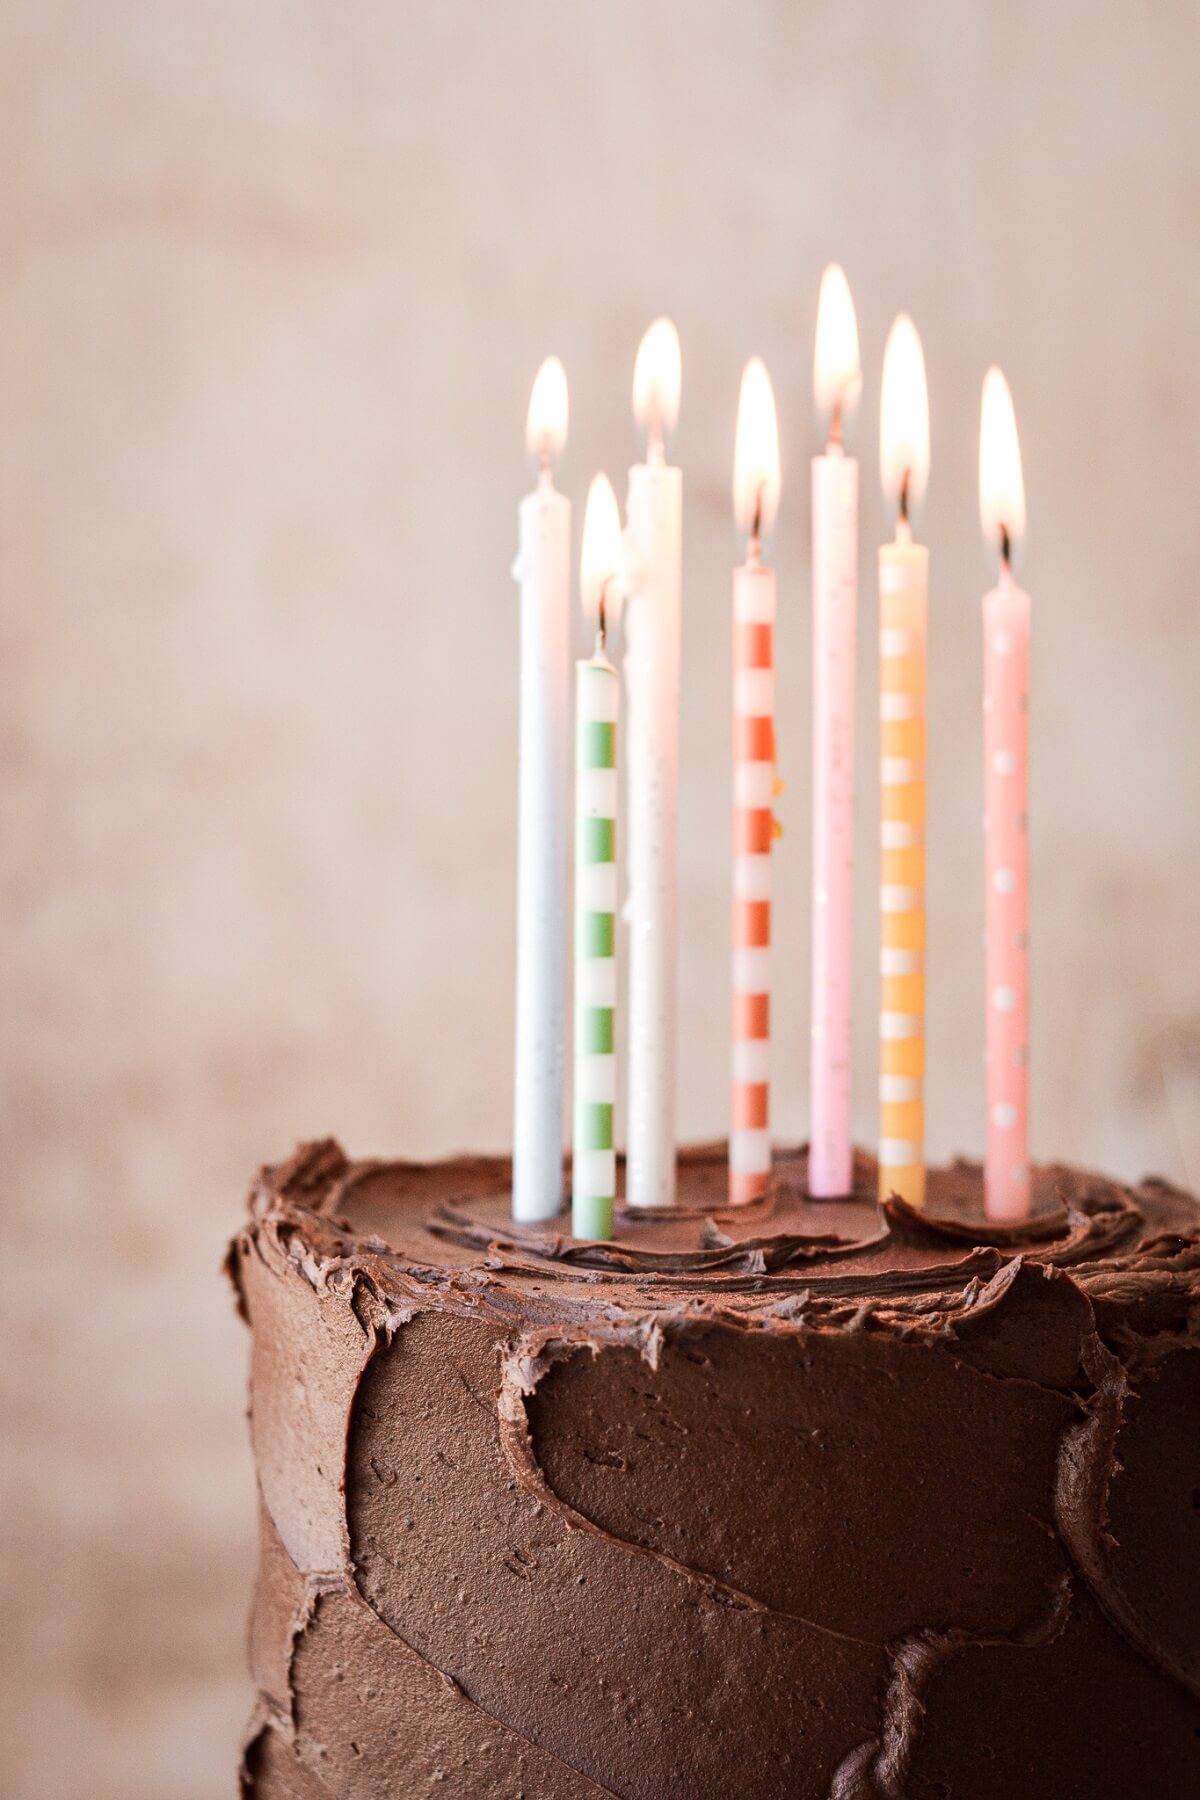
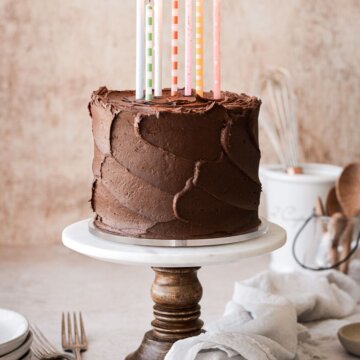
I believe in celebrating special occasions with cakes. And I believe in making beautiful cakes just for ordinary days, too. Layer cakes are my absolute favorite dessert to bake and photograph, and one of my goals I’ve been working through this year is to complete my series of high altitude tested classic cake recipes. Today I’ve made for you this stunning high altitude yellow butter birthday cake with the dreamiest chocolate buttercream. Talk about a classic cake flavor!
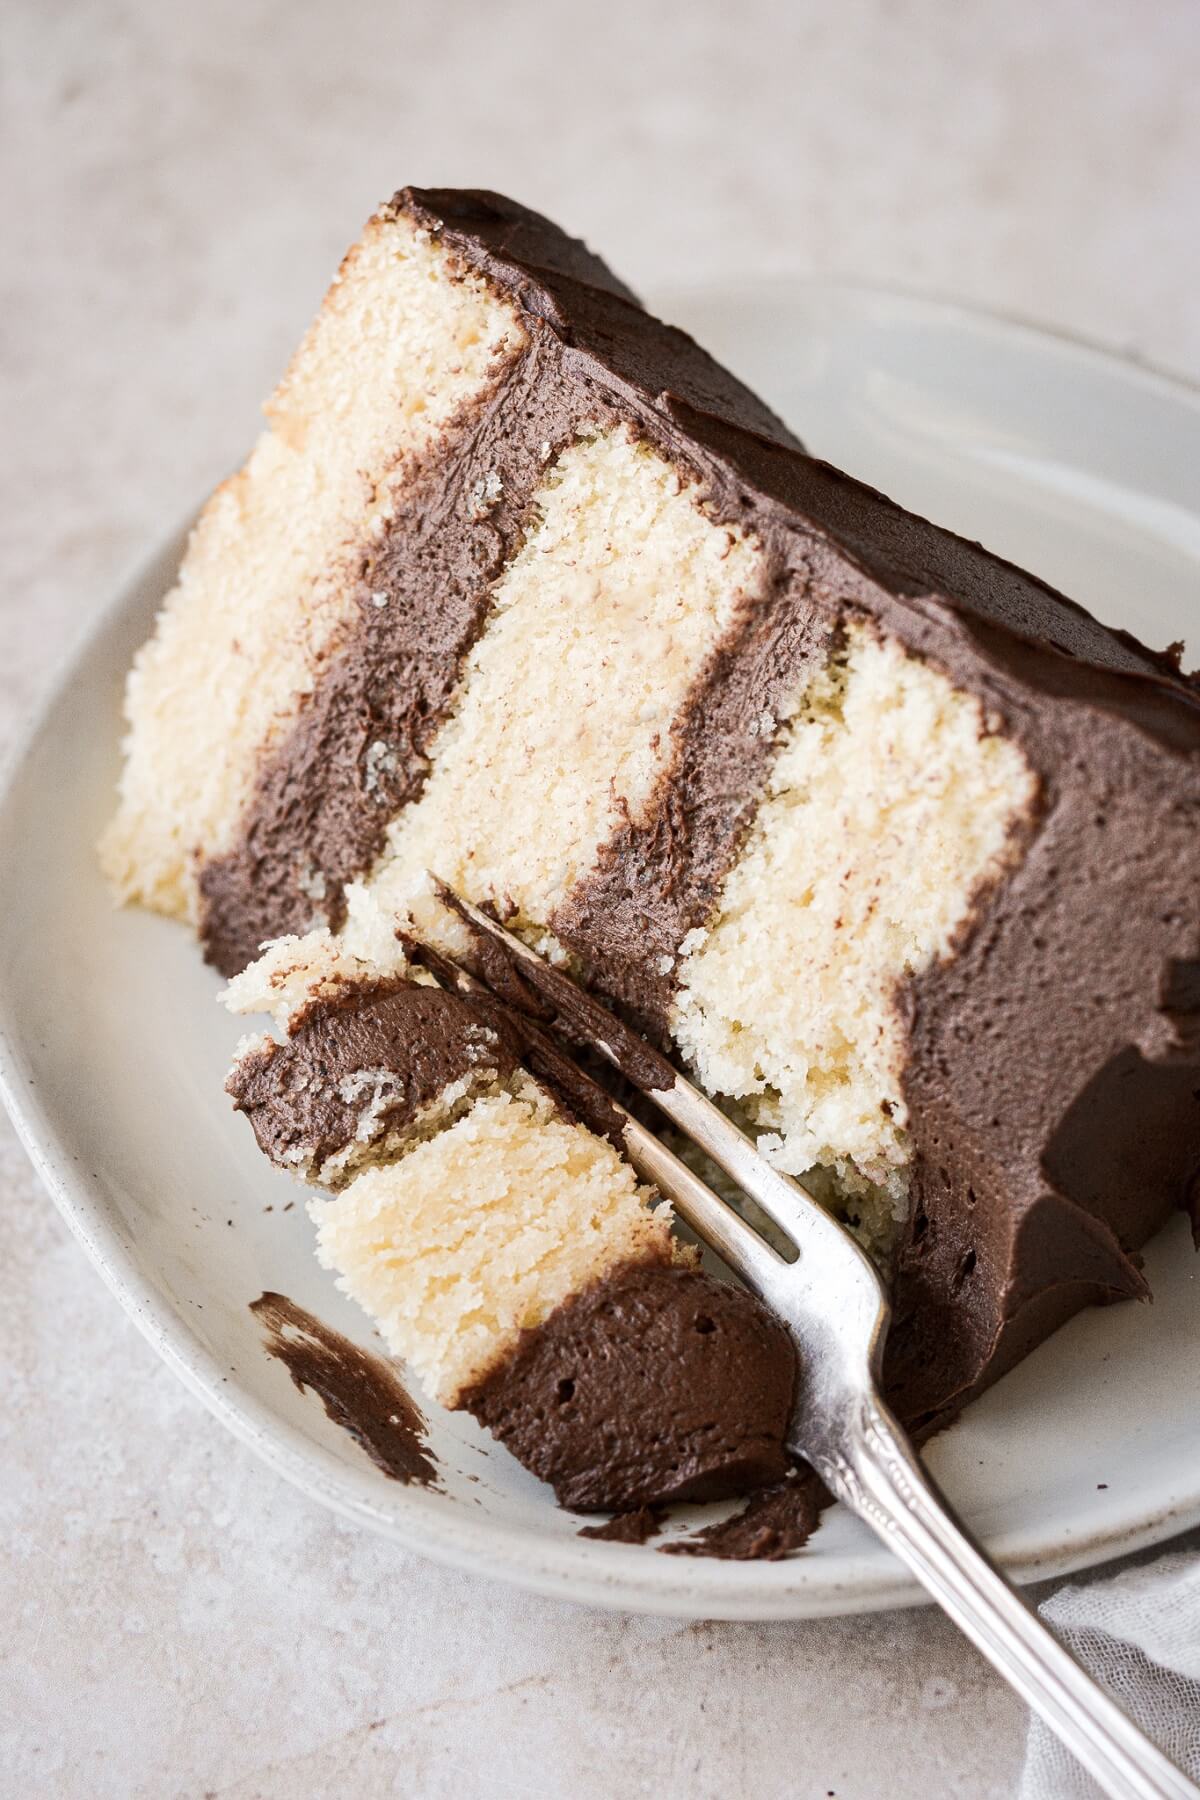
A yellow butter birthday cake is known for being soft, tender and moist, and full of butter and vanilla flavor. A classic retro cake and frosting combination is yellow cake with chocolate buttercream, and it’s the cake that reminds me of childhood birthday parties. For my high altitude yellow cake, I make it using the traditional creaming method. This involves first creaming the butter and sugar together until light and fluffy, and then beating in the eggs. Lastly, I add the dry ingredients, alternating with the liquid, for a velvety batter that bakes up into the most beautiful, tender cake you can imagine.
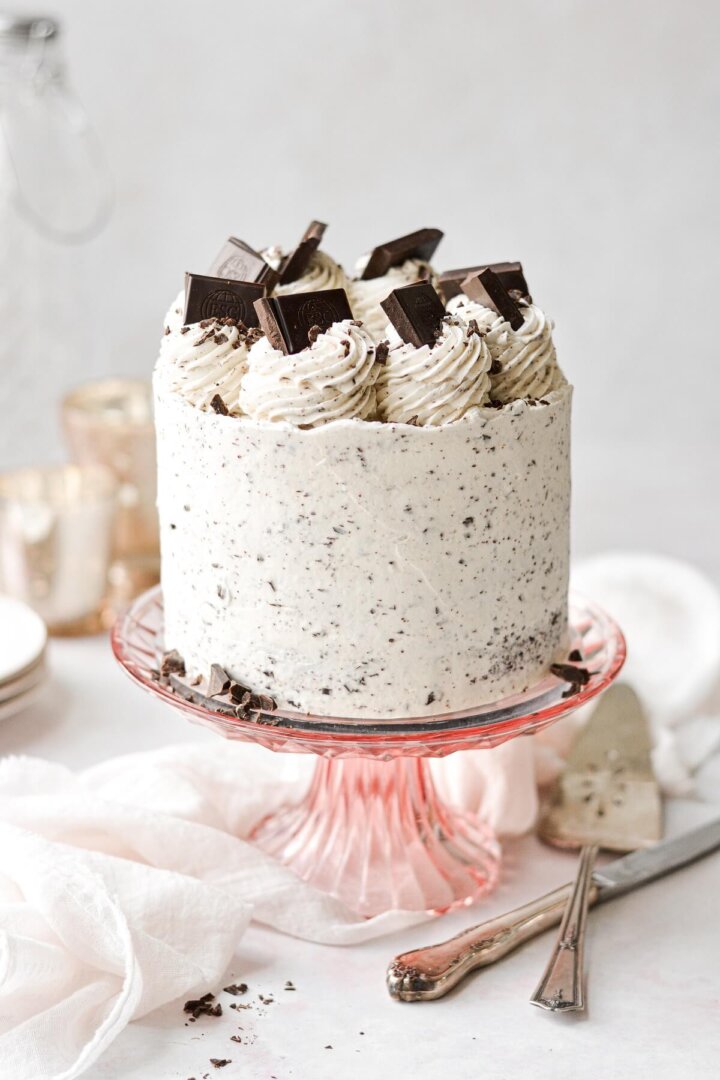
Looking for more classic birthday cake recipes? Don’t miss my cookies and cream cake, Funfetti cake, best chocolate cake, and vanilla cake.
This site contains affiliate links. As an Amazon associate, I earn from qualifying purchases. This means that I may make a small commission if you purchase a product using those links. This in no way affects my opinion of those products and services. All opinions expressed on this site are my own.
High Altitude Cake Baking
The Challenges
Cake making can be particularly problematic for high altitude bakers. We face all kinds of challenges due to the low air pressure that sea level bakers simply don’t have to worry about. As elevation rises, air pressure falls, which has two main effects on baked goods: they will rise more quickly, and lose moisture faster. As a result, cakes can end up too dry, dense and crumbly, they can collapse and fall, or become gummy from the concentrated sugars.
The Solutions
A few simple adjustments to the recipe solves these problems. We need to increase the flour to strengthen the structure of the batter. Sugar is reduced to avoid a gummy, sticky cake crumb. Lowering the amount of leavening agent will relieve pressure on the cell walls of the cake, allowing it to rise more gradually and evenly, rather than rising quickly and collapsing. And to allow for moisture loss, we need to add a bit more liquid.
Adjustment Guides
There are many helpful guides online for how to make specific adjustments for your exact altitude, with varying adjustments needed for every 1,000 or so feet of elevation. I really like this guide by King Arthur Baking. And I also encourage you to read my Baking FAQs for a comprehensive list of baking tips and answers to common questions. For reference, all of my recipes are baked and tested for Denver’s elevation of 5,000 feet.
See the recipe card at the end of the post for the full ingredients list and instructions.
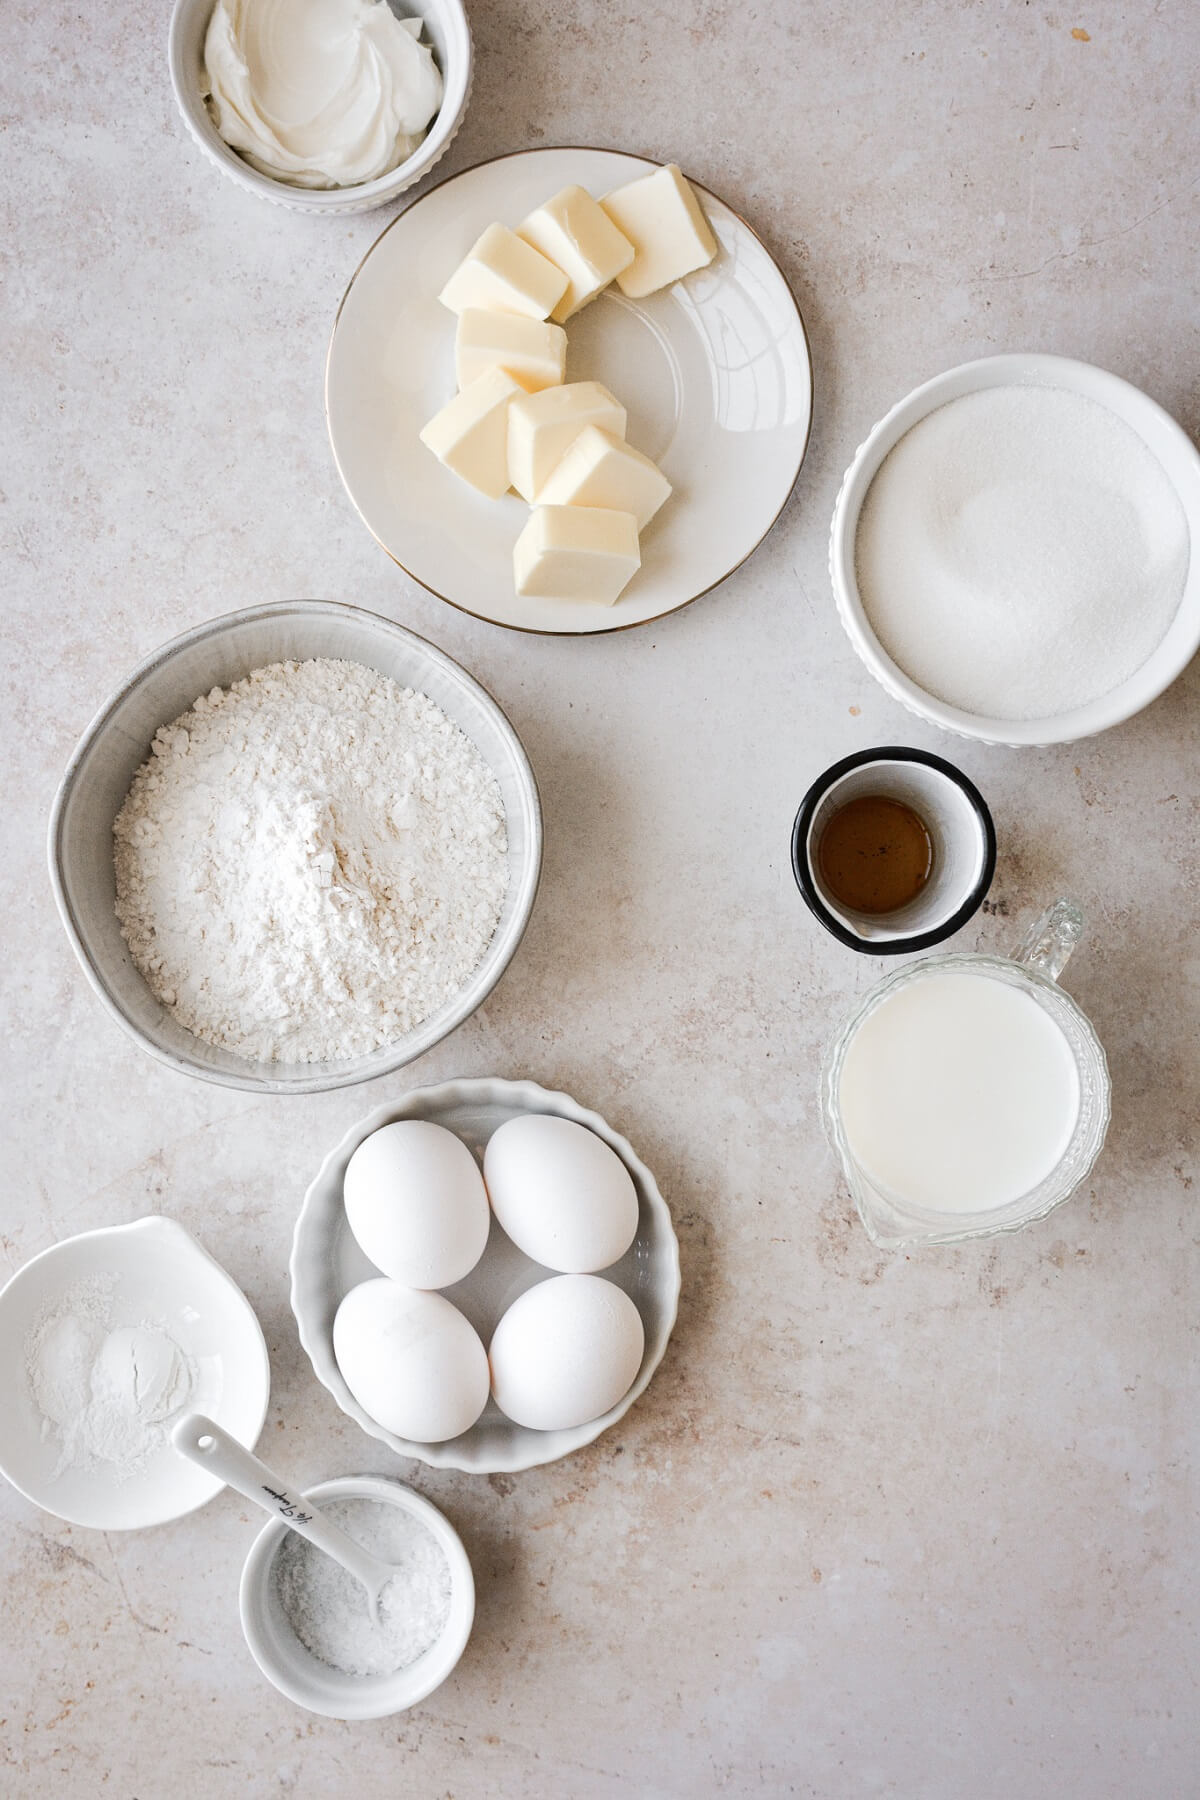
Ingredients
Yellow Cake
- Butter. Use unsalted butter, so that you can control the saltiness of your cake. Maker sure your butter is softened to room temperature, or it will not cream properly with the sugar.
- Sugar. Granulated sugar makes the cake sweet, of course, but also moist. The reason for creaming the butter and sugar together first is to evenly disperse the sugar throughout the batter, as well as to beat in air and incorporate volume for a lighter, fluffier cake.
- Eggs. The eggs contain protein and fat, and they add structure to your cake.
- Vanilla. Vanilla extract flavors the cake, complementing the flavor of the butter.
- Cake Flour. I prefer to use cake flour in white cakes, vanilla cakes and yellow cakes, and all-purpose flour for chocolate cakes, carrot cakes, spice cakes, etc. Cake flour contains a lower percentage of protein than all-purpose flour and makes a very soft, tender cake.
- Baking Powder. Leavens the cake so it rises.
- Salt. I use coarse Kosher salt in all of my baking. A little salt balances the sweetness and enhances the flavor of the butter and vanilla.
- Buttermilk. Whole buttermilk is my liquid of choice for cakes. It adds a subtle tang, which balances the sugar, and creates a really lovely cake crumb.
- Sour Cream. Full-fat sour cream is also a fantastic ingredient in cakes, making them soft, flavorful and moist. A spoonful of sour cream just makes everything better.
Chocolate Buttercream
- Unsalted Butter. Adds richness, fat and flavor.
- Powdered Sugar. Sweetens and thickens the buttercream.
- Cocoa Powder. Gives the buttercream its chocolate flavor. You can use either natural or Dutch-processed. Dutch-processed cocoa powder will have a richer, deeper flavor and color.
- Meringue Powder. Improves the texture and stabilizes the buttercream.
- Coarse Kosher Salt. Balances the sweetness.
- Vanilla Extract. Complements the flavor of the chocolate.
- Milk. Thins the buttercream for desired consistency.
Instructions
Bake and cool the cake.
- Preheat the oven to 350 F. Prepare three 8-inch cake pans by spraying the bottoms of the pans with non-stick baking spray, lining them with a circle of parchment paper, and then lightly spraying the paper as well.
- In the bowl of your stand mixer fitted with the paddle attachment, beat the butter and sugar for 5 minutes on medium speed, scraping the bowl several times, until light and fluffy.
- Beat in the eggs, one at a time, beating each for 15 seconds before adding the next.
- Scrape the bowl down and beat in the vanilla.
- In a separate bowl, sift together the flour, baking powder and salt. In another bowl, combine the buttermilk and sour cream.
- With the mixer on low, add the flour mixture in three additions, alternating with the buttermilk/sour cream, starting and ending with the flour. Use a spatula to finish bringing the batter together so that you don’t over-mix.
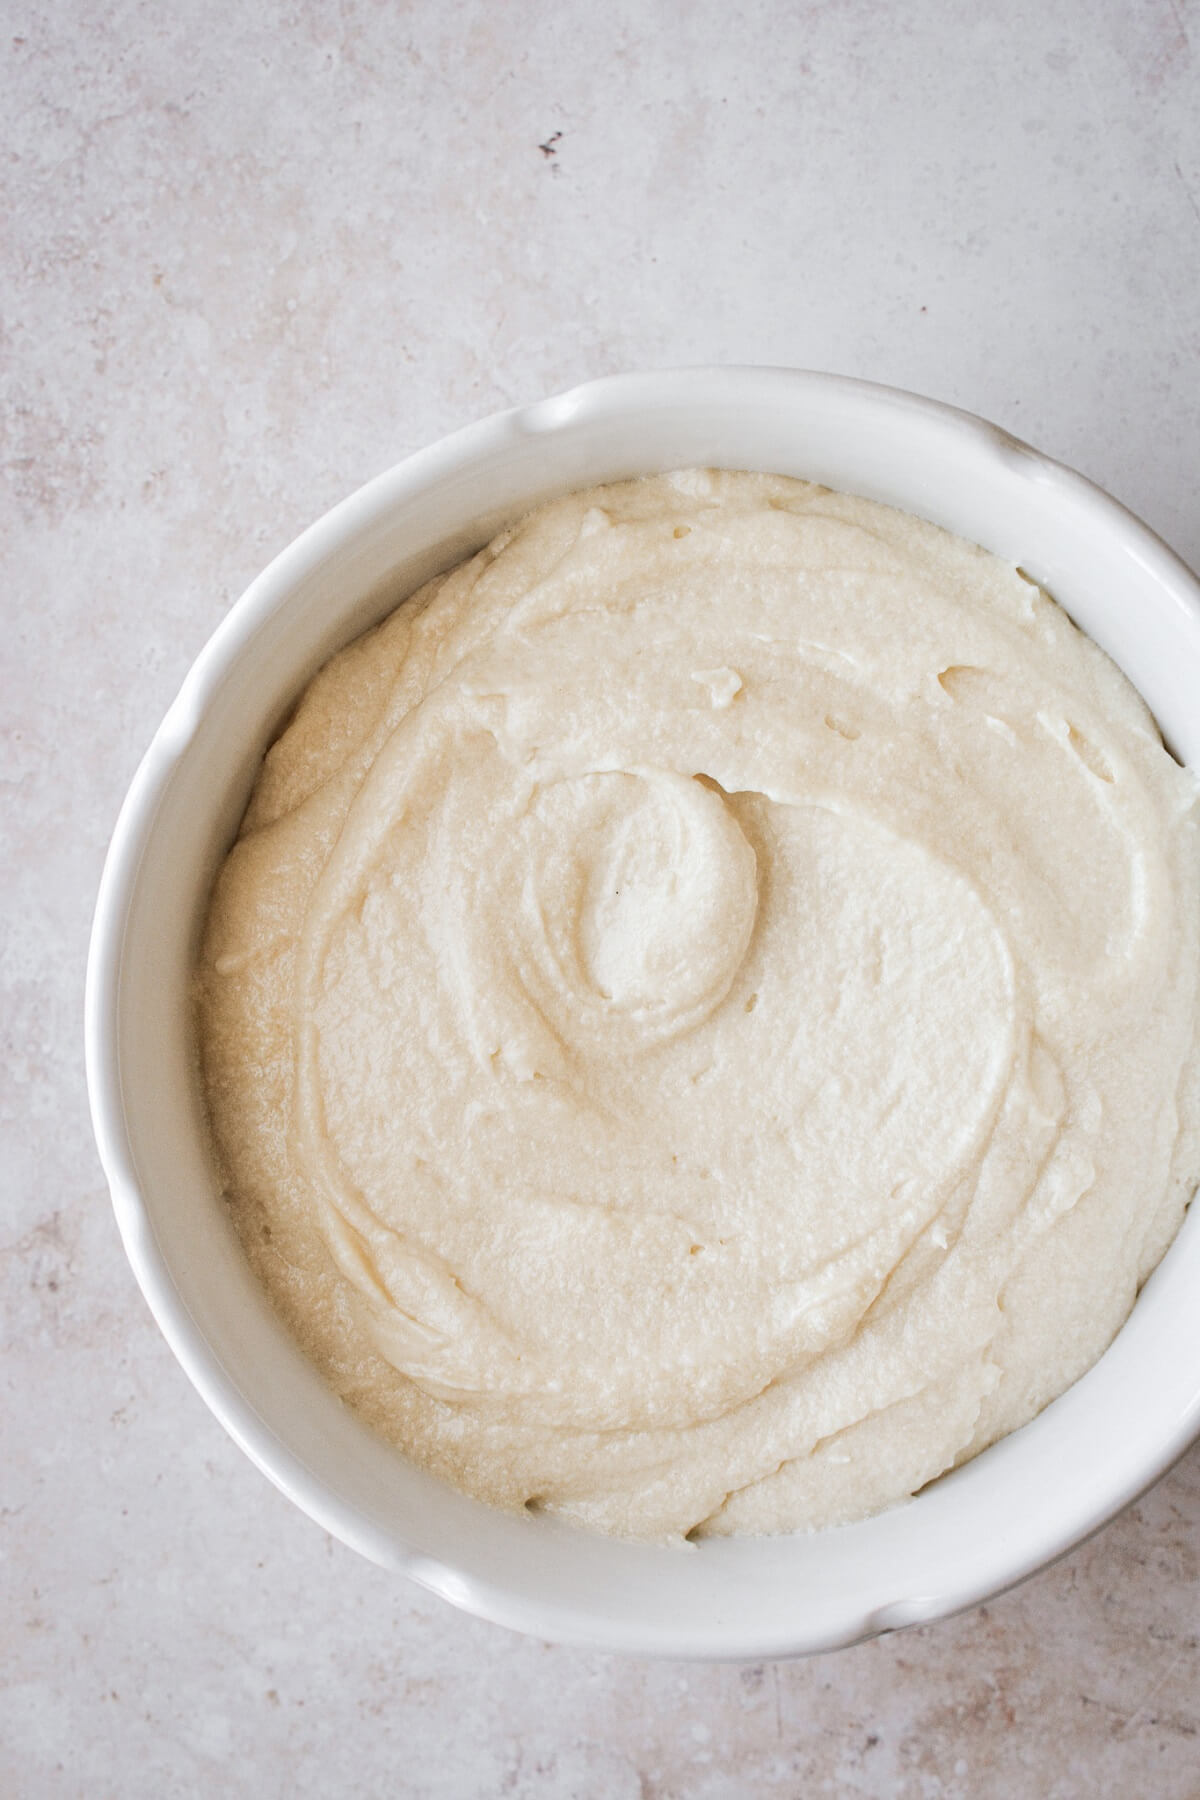
- Divide the batter between the pans, smooth out the top of the batter and tap the pans a few times on the counter to release any bubbles.
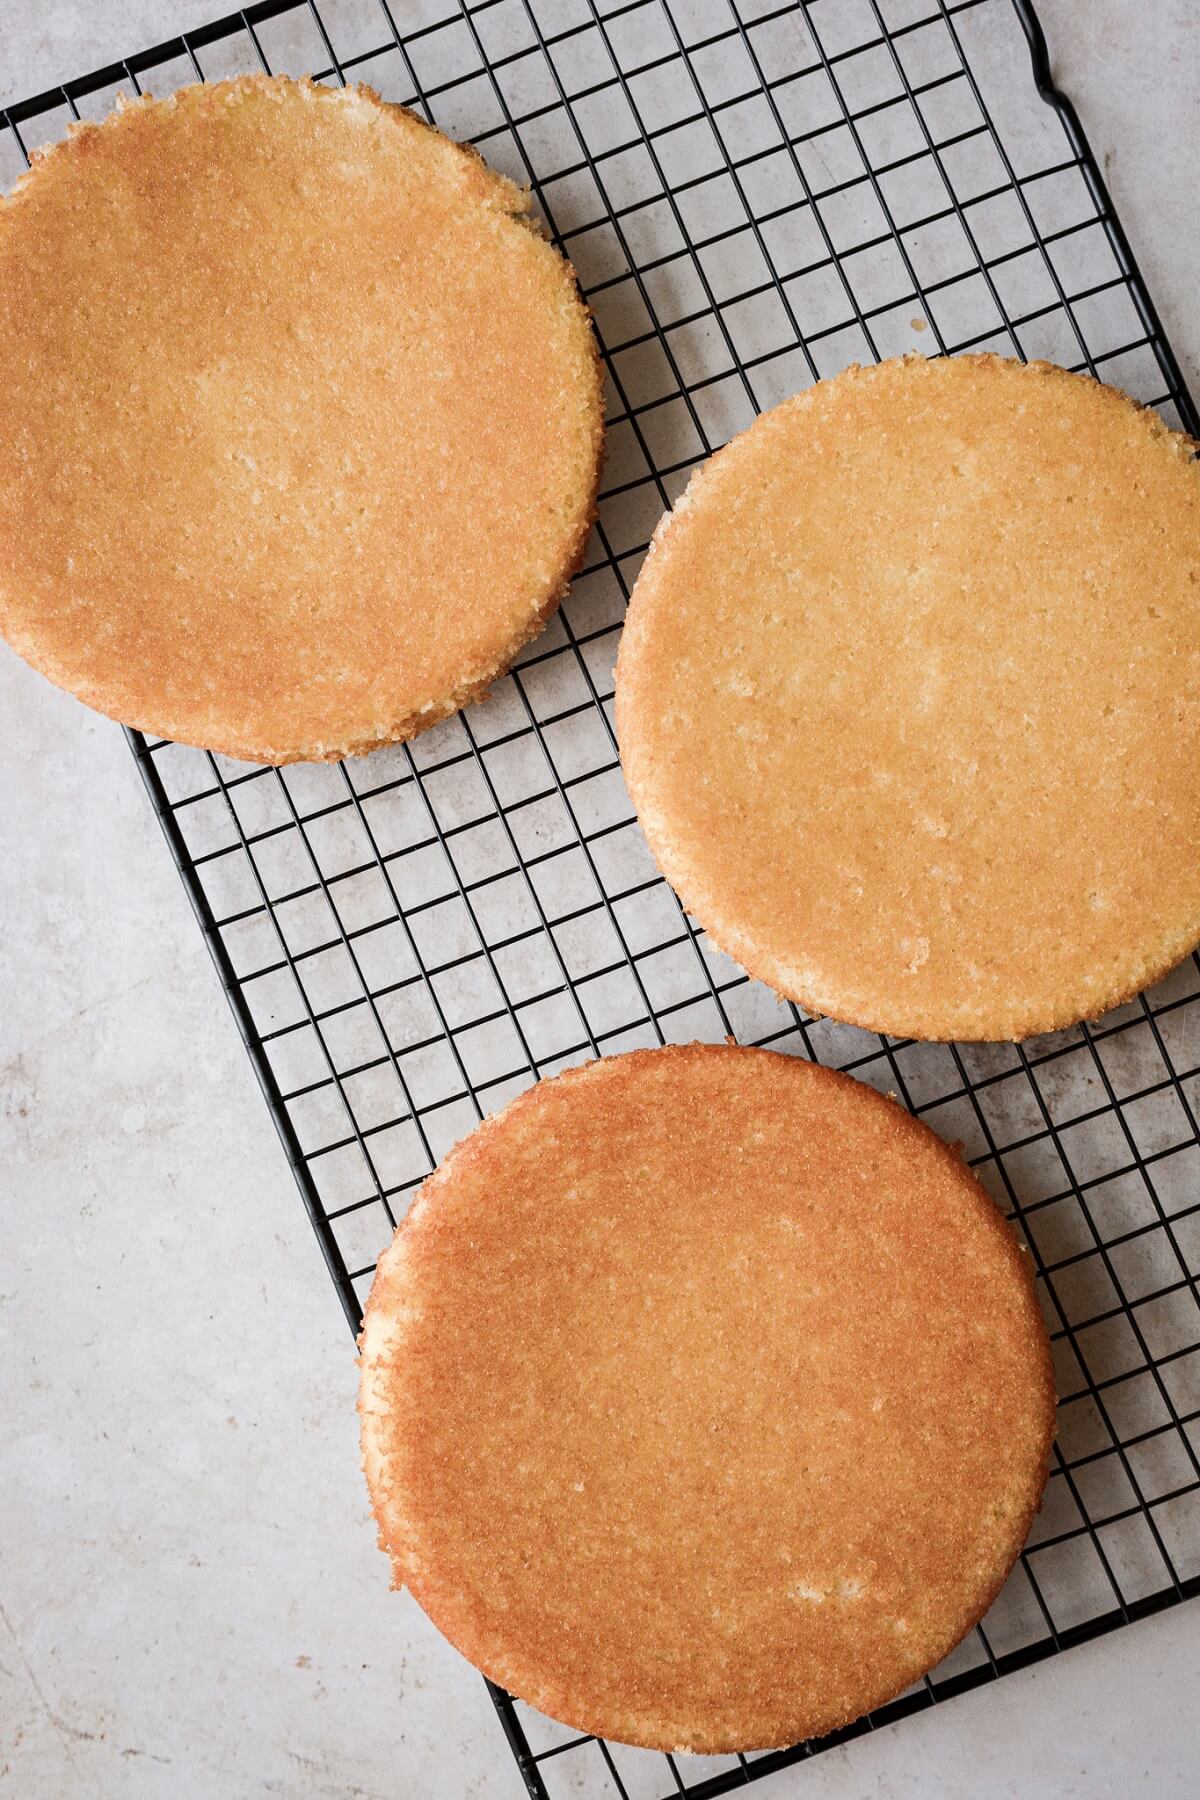
- Bake the cakes on the center oven rack for about 30 minutes, until a cake tester comes out clean.
- Set the pans on a wire cooling rack, cover loosely with a clean kitchen towel, and cool completely in the pans before removing and frosting.
My method for making buttercream is one I’ve honed for years, and if you struggle with your buttercream, then I encourage you to read my comprehensive guide on Perfect American Buttercream. It’s a recipe that never fails me, and you’ll find so many tips and flavor variations for making your buttercream simply perfect.
Chocolate Buttercream
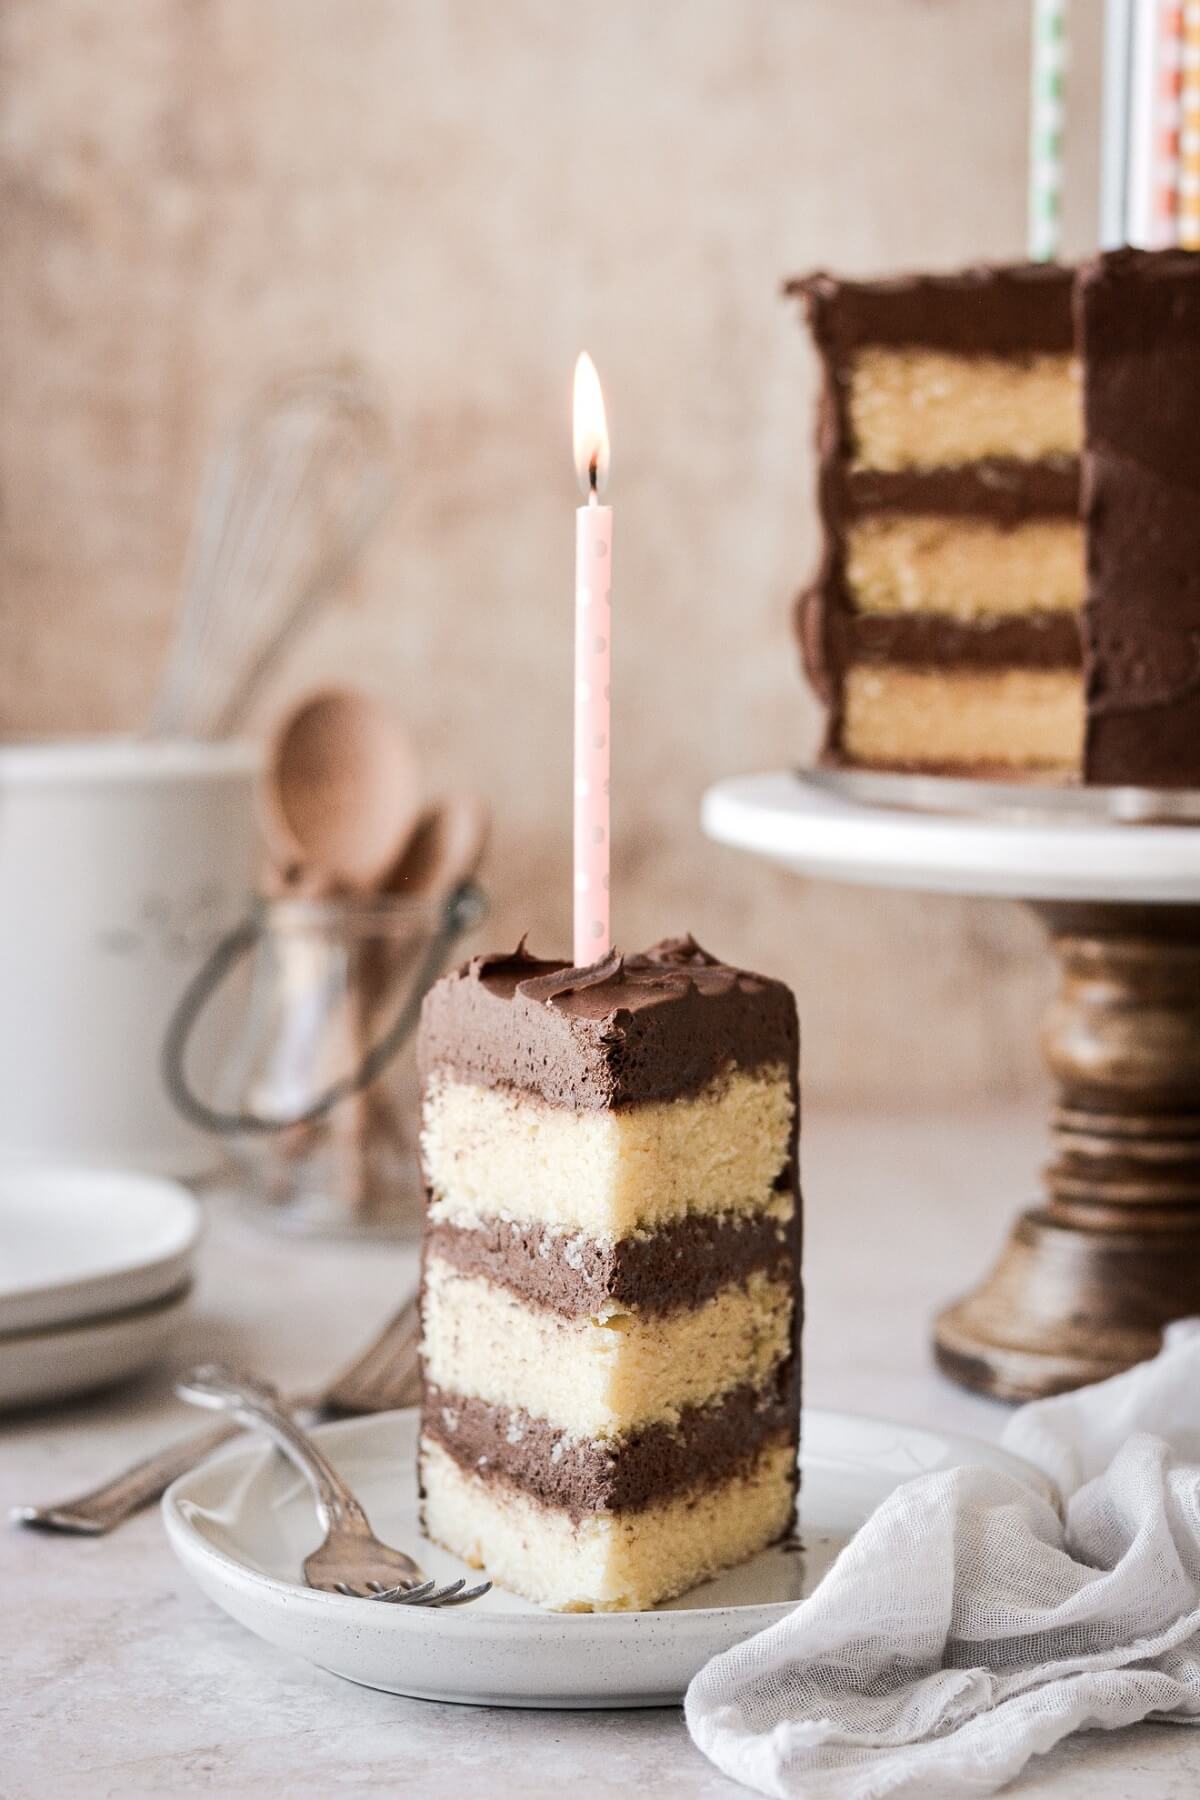
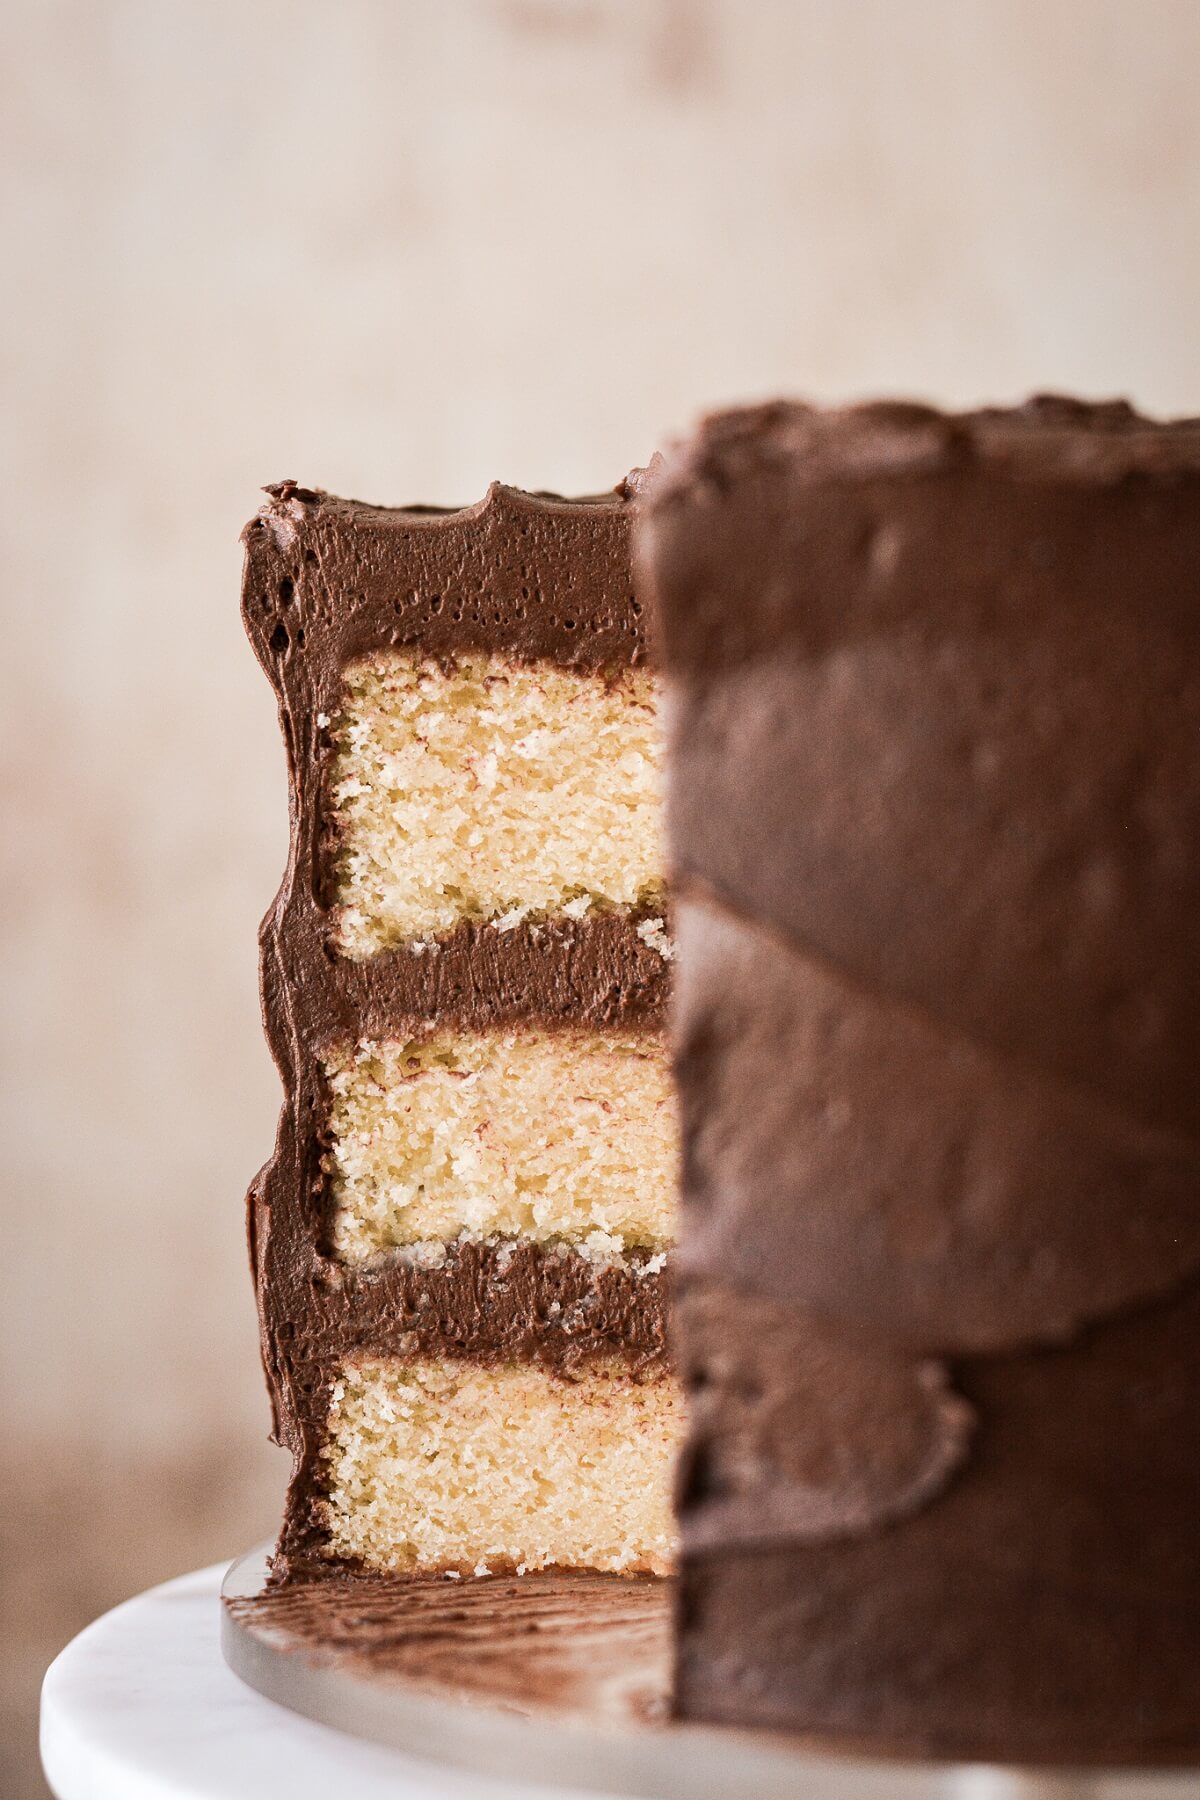
A retro yellow butter birthday cake with chocolate frosting is the quintessential classic birthday cake flavor. And it’s not hard to see why. The soft, buttery cake with thick layers of fluffy, not-too-sweet chocolate frosting is simply irresistible. There’s no such thing as too much chocolate buttercream!
- In the bowl of your stand mixer fitted with the paddle attachment, beat the butter for 1 minute until smooth.
- In a separate bowl, whisk together the powdered sugar, cocoa powder, meringue powder and salt. With the mixer running on low, add the dry ingredients by spoonfuls, mixing until combined but clumpy. Add the vanilla.
- Turn the mixer up to medium and whip for 5 minutes, scraping the bowl occasionally, until very light and fluffy. Add the milk only if needed for desired spreading/piping consistency. Turn the mixer back to low and mix for 1 minute to reduce any large pockets of air.
Assembly
- The cakes are sticky, so it will help to place a small piece of wax paper on top the cake before you turn it out of the pan, so that it doesn’t stick and pull apart from your fingers. Remember to remove all the parchment and wax paper from the cake layers as you assemble the cake.
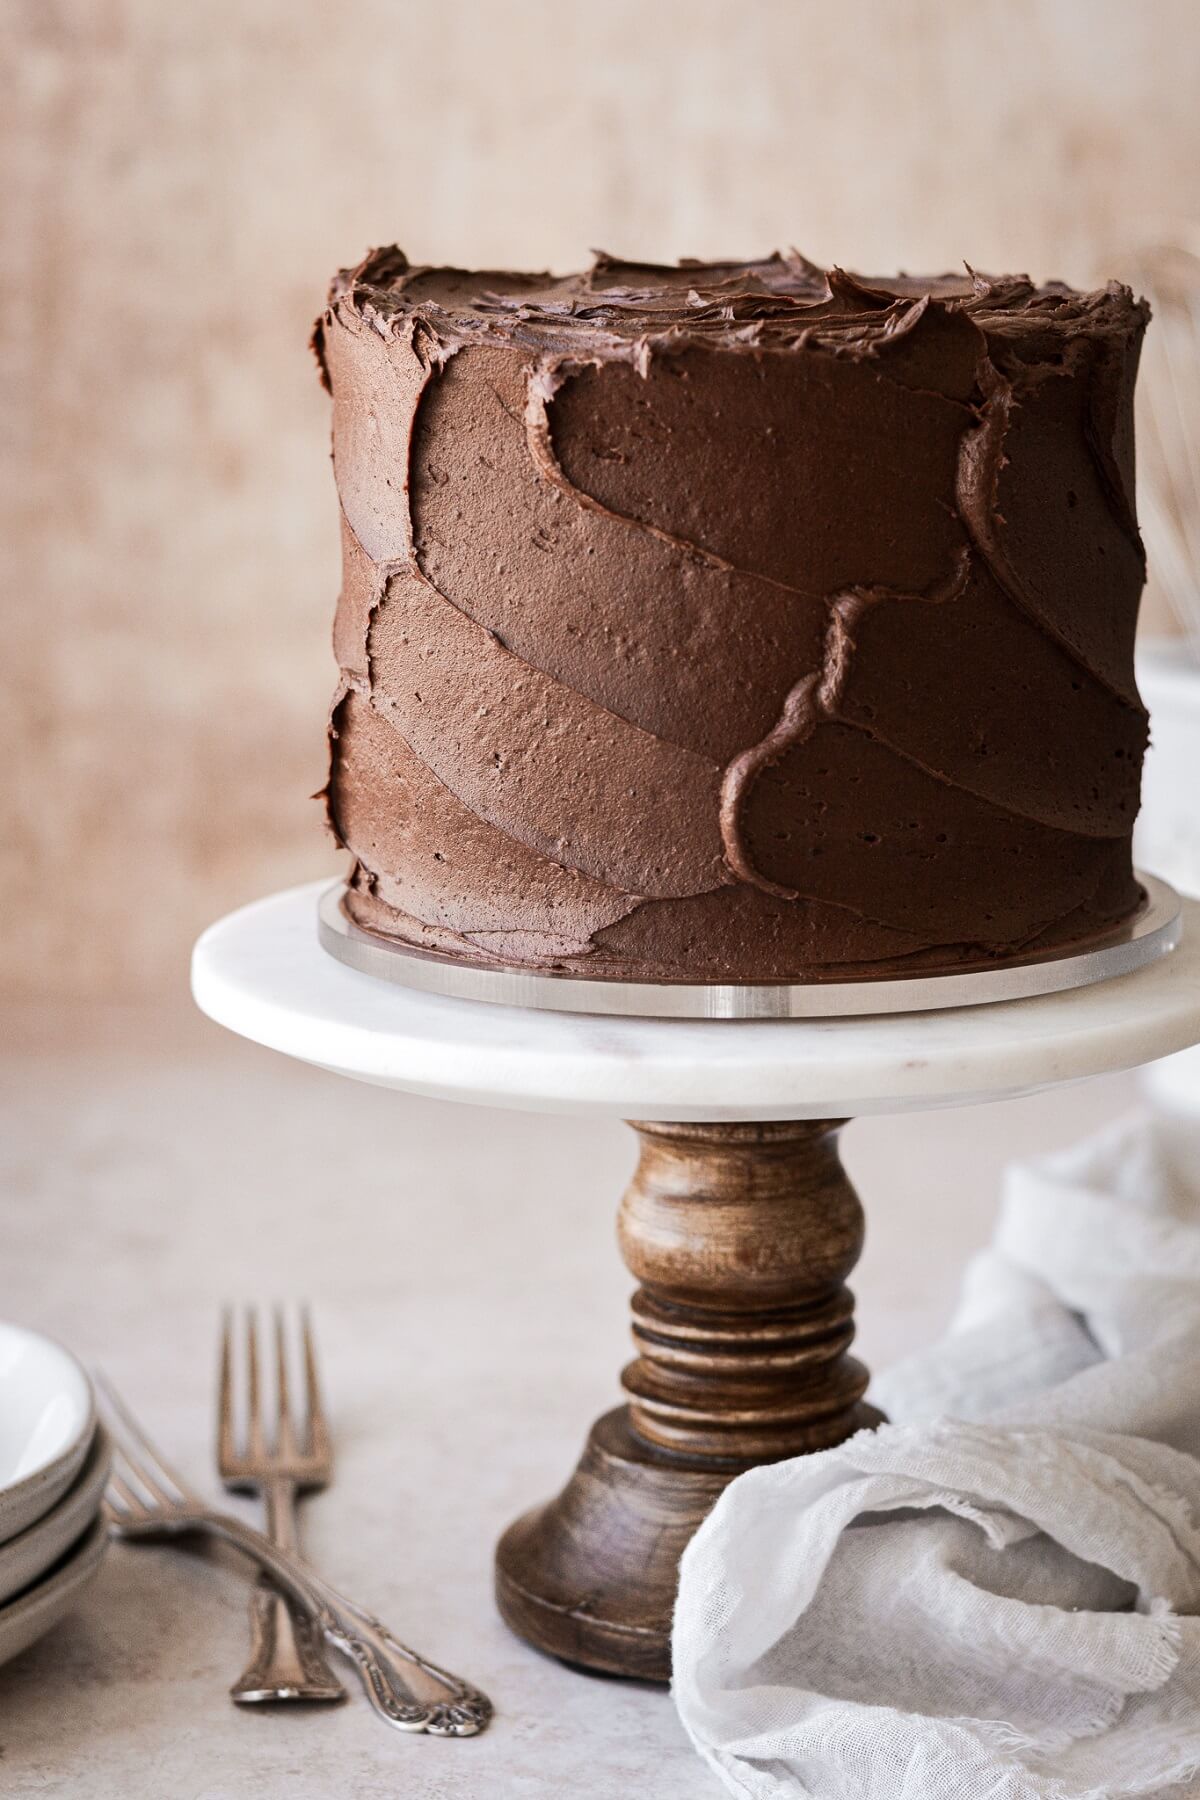
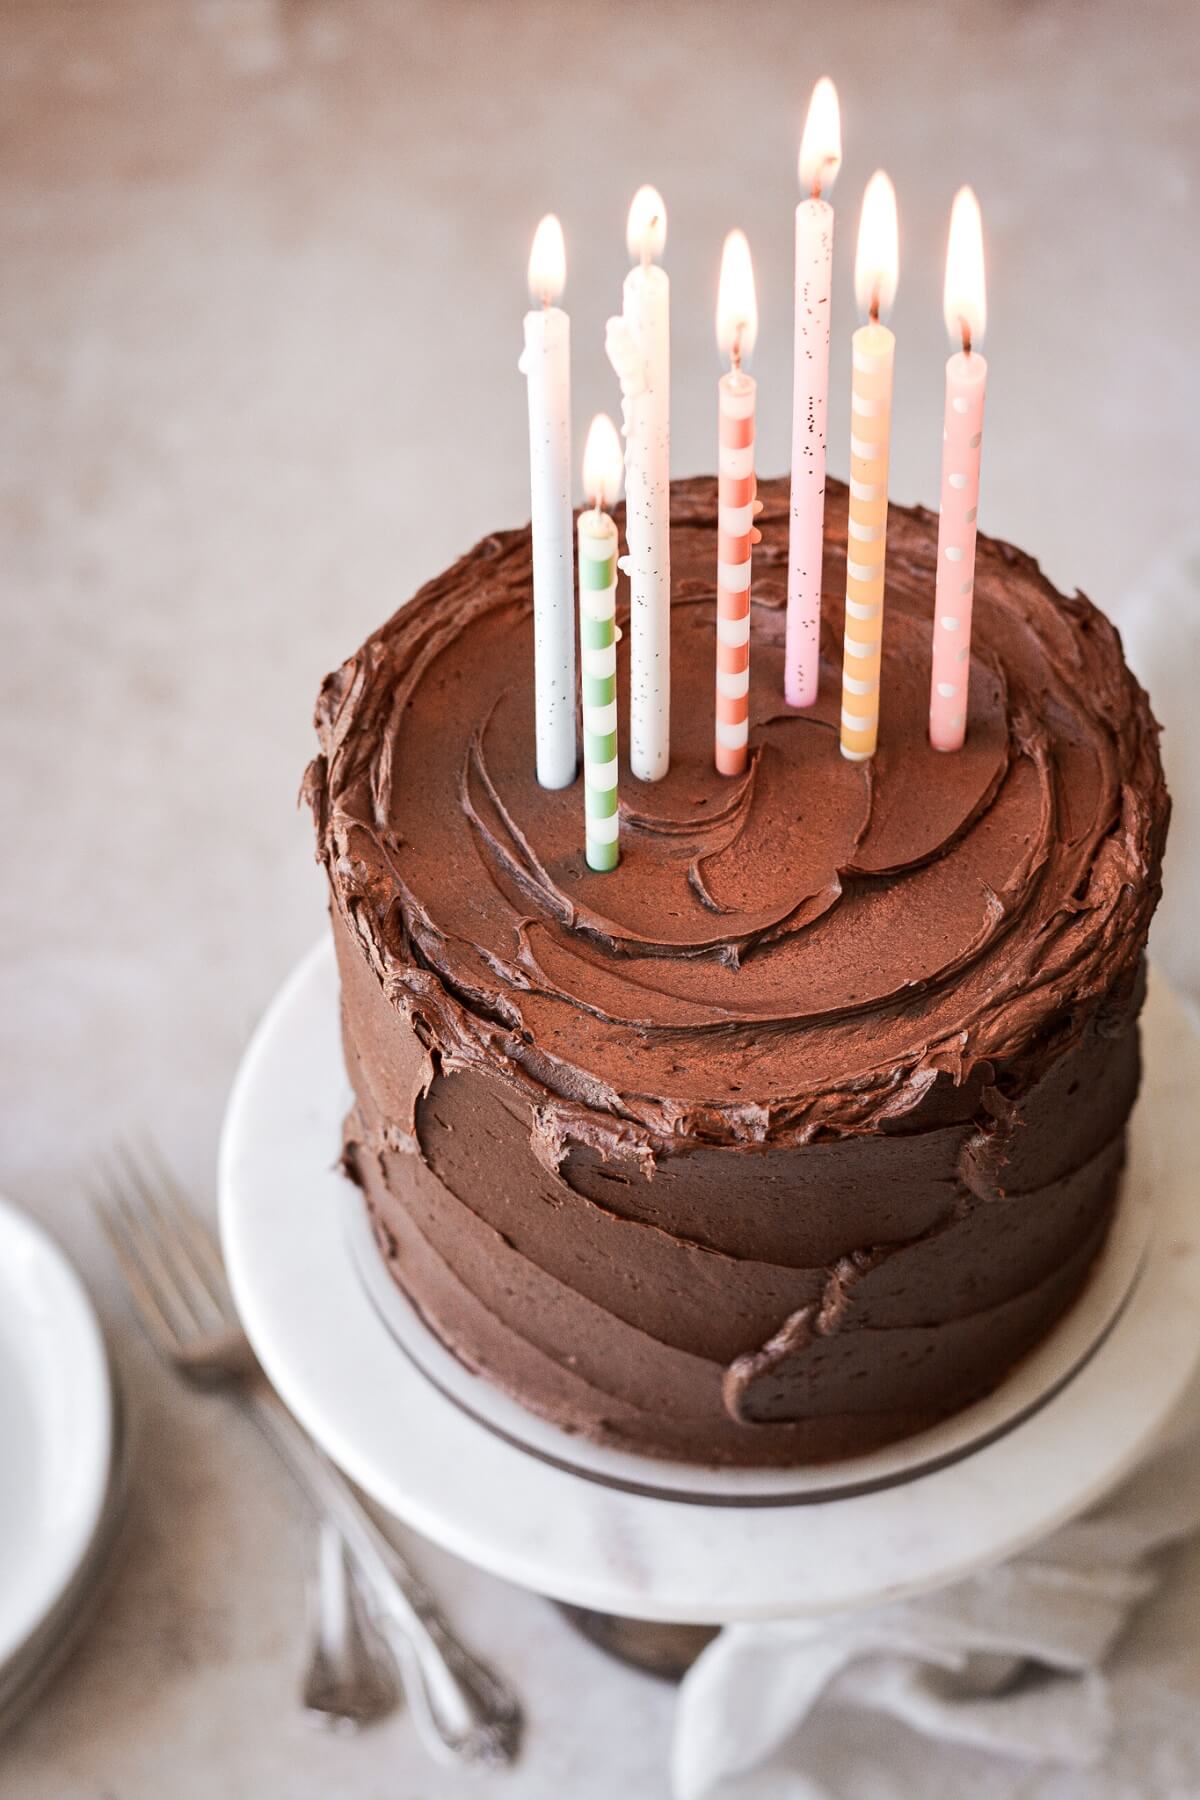
- Stack and fill the cakes with the chocolate buttercream, then frost all over with a thin crumb coat of buttercream. Chill the crumb-coated cake in the refrigerator for 20 minutes.
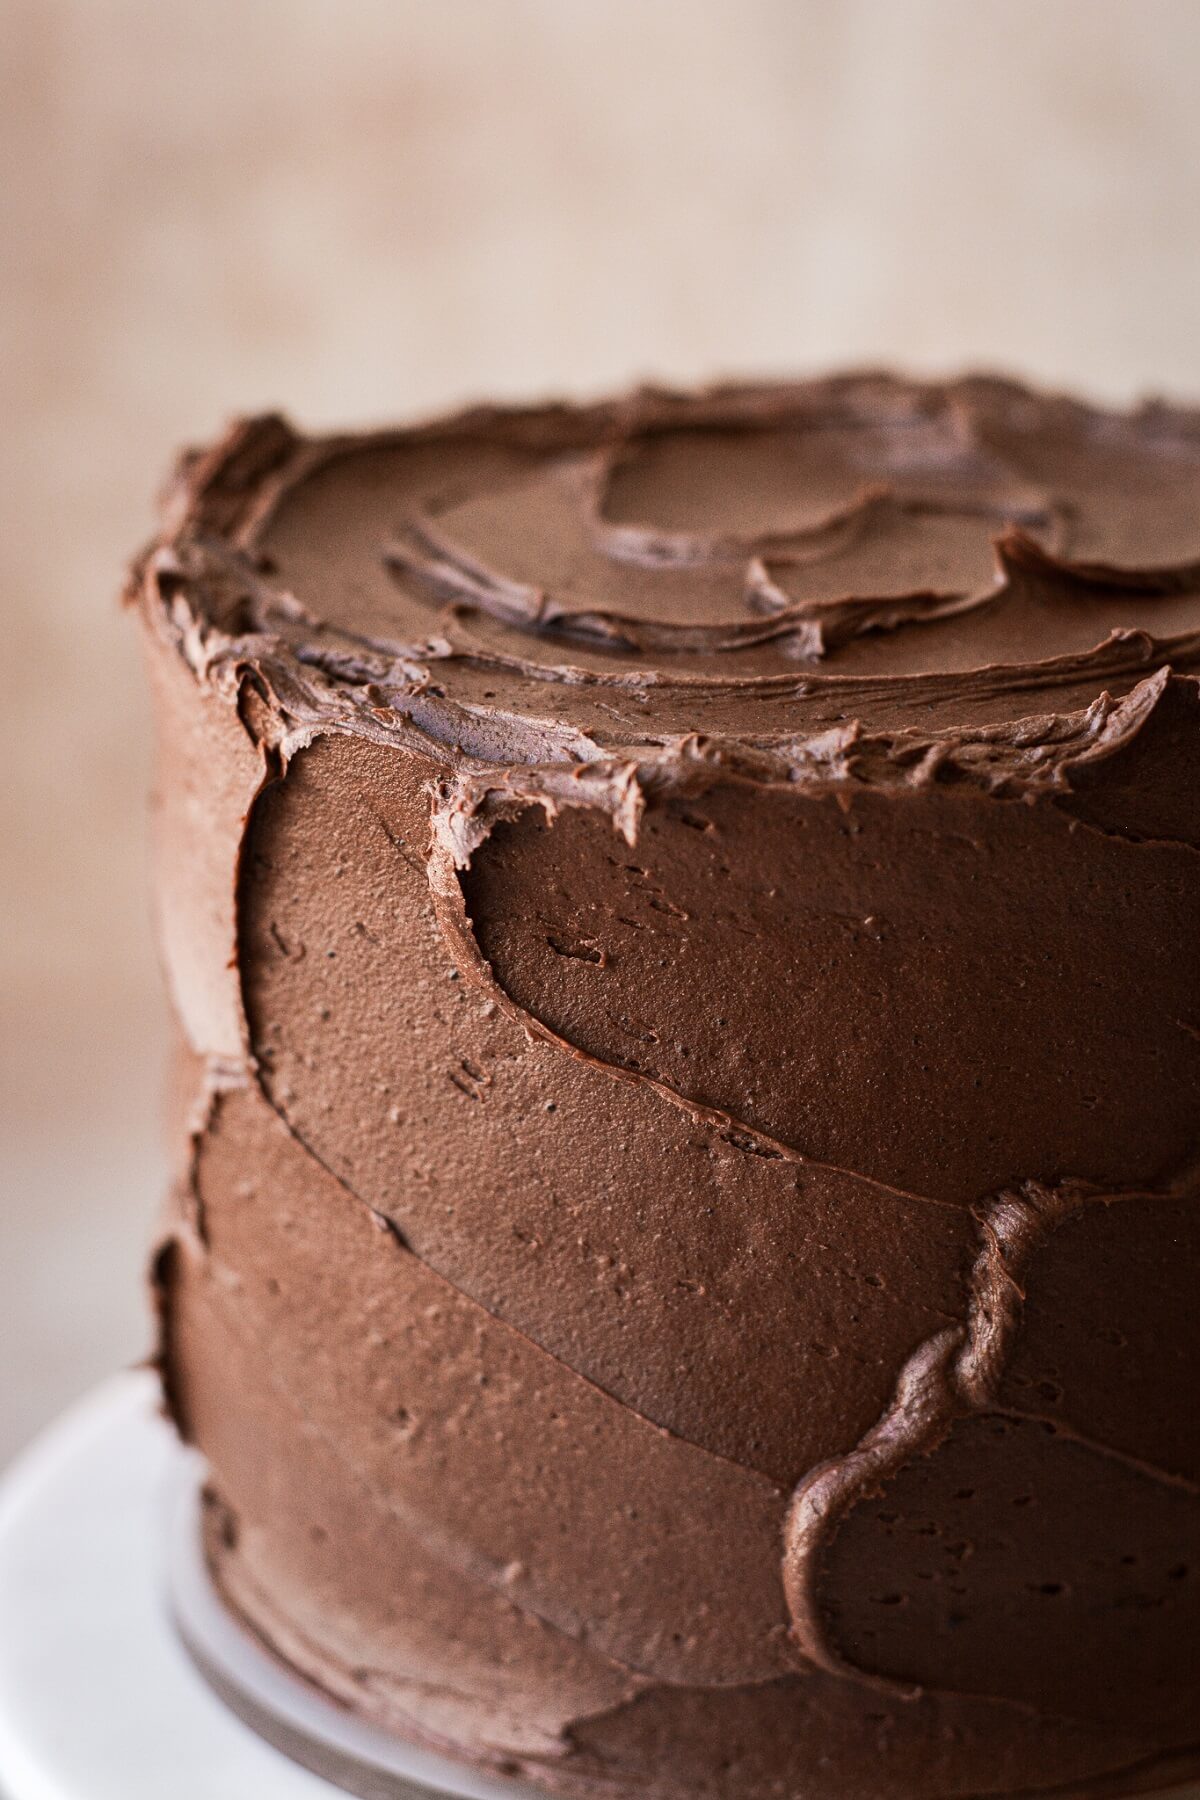
- Finish frosting the cake with a final swirly layer of buttercream.
Be sure to read all of my BAKING FAQs where I discuss ingredients, substitutions and common questions with cake making, so that you can be successful in your own baking! I also suggest reading these comprehensive posts on making Perfect American Buttercream, How to Stack, Fill, Crumb Coat and Frost Layer Cakes and How to Use Piping Bags.
Frequently Asked Questions
Does this recipe work as a sheet cake?
Yes, you can bake this cake in a 9×13 pan. It will need to bake longer, so be sure to test the cake for doneness. Here is my 1/2 sized yellow sheet cake recipe post.
Can I use all purpose flour instead of cake flour?
No, all purpose flour will make this cake too dense and dry, and you may not be happy with the results. Please use the cake flour, unless you’re willing to experiment with using a little less all purpose flour.
If I don’t have 8-inch pans, can I use 9-inch pans?
Yes, you can, although your cake won’t be quite as tall.
Can I make a smaller cake?
You can cut the cake recipe in half and bake it in three 6-inch pans for about 25 minutes. Reduce the buttercream by 25% for a 6-inch cake. This post’s photographed yellow butter birthday cake is a 6-inch cake.
How should I store leftover cake?
The leftover cake will stay soft, moist and fresh for days, if kept in an airtight container or cake carrier. No need to refrigerate leftover cake. Any extra buttercream can be frozen in a zip bag for another use.
You Might Also Like

Please check out my Amazon Shop for a curated collection of some of my favorite cake pans from trusted brands, baking tools, ingredients, pretty things and fashion finds. I recommend products that I buy and use every day!
Did you love today’s recipe? Please rate the recipe and let me know in the comments what you thought! Also, be sure to follow Curly Girl Kitchen on Instagram, and tag me when you try one of my recipes so I can see all your delicious creations!
High Altitude Yellow Butter Birthday Cake with Chocolate Buttercream
All recipes on Curly Girl Kitchen are developed for high altitude at 5,280 feet. See FAQs for adjusting to higher or lower elevations.

Equipment
- Stand Mixer with Paddle Attachment
Ingredients
Cake
- 1 cup (226g) unsalted butter, softened to room temperature
- 2 ¼ cups (486g) granulated sugar
- 4 (220g) large eggs
- 2 tsp (8g) vanilla extract
- 3 cups (360g) cake flour, spooned and leveled
- 3 ½ tsp (14g) baking powder
- 1 tsp coarse Kosher salt (if using table salt, use half the amount)
- 1 ⅓ cups (359ml) whole buttermilk
- ⅔ cup (160g) full-fat sour cream
Buttercream
- 2 cups (452g) unsalted butter, softened to room temperature
- 3 ¼ cups (455g) powdered sugar
- ¾ cup (62g) unsweetened cocoa powder
- 1 tbsp (9g) meringue powder
- ¼ tsp coarse Kosher salt (if using table salt, use half the amount)
- 2 tsp (8g) vanilla extract
- 2-4 tbsp (33-66ml) milk or cream, if needed
Instructions
Cake
- Preheat the oven to 350 F. Prepare three 8-inch cake pans by spraying the bottoms of the pans with non-stick baking spray, lining them with a circle of parchment paper, and then lightly spraying the paper as well.
- In the bowl of your stand mixer fitted with the paddle attachment, beat the butter and sugar for 5 minutes on medium speed, scraping the bowl several times, until light and fluffy.
- Beat in the eggs, one at a time, beating each for 15 seconds before adding the next.
- Scrape the bowl down and beat in the vanilla.
- In a separate bowl, sift together the flour, baking powder and salt. In another bowl, combine the buttermilk and sour cream.
- With the mixer on low, add the flour mixture in three additions, alternating with the buttermilk/sour cream, starting and ending with the flour. Use a spatula to finish bringing the batter together so that you don't over-mix.
- Divide the batter between the pans, smooth out the top of the batter and tap the pans a few times on the counter to release any bubbles.
- Bake the cakes on the center oven rack for about 30 minutes, until a cake tester comes out clean.
- Set the pans on a wire cooling rack, cover loosely with a clean kitchen towel, and cool completely in the pans before removing and frosting. It's normal for the cake to settle and shrink a bit as soon as you take it out of the oven.
Buttercream
- In the bowl of your stand mixer fitted with the paddle attachment, beat the butter for 1 minute until smooth.
- In a separate bowl, whisk together the powdered sugar, cocoa powder, meringue powder and salt. With the mixer running on low, add the dry ingredients by spoonfuls, mixing until combined but clumpy. Add the vanilla.
- Turn the mixer up to medium and whip for 5 minutes, scraping the bowl occasionally, until very light and fluffy. Add the milk only if needed for desired spreading/piping consistency. Turn the mixer back to low and mix for 1 minute to reduce any large pockets of air.
Assembly
- The cakes are sticky, so it will help to place a small piece of wax paper on top the cake before you turn it out of the pan, so that it doesn't stick and pull apart from your fingers. Remember to remove all the parchment and wax paper from the cake layers as you assemble the cake.
- Stack and fill the cakes with the chocolate buttercream, then frost all over with a thin crumb coat of buttercream. Chill the crumb-coated cake in the refrigerator for 20 minutes.
- Finish frosting the cake with a final swirly layer of buttercream.
Notes
 https://curlygirlkitchen.com/
I dabbled into cake decorating when my son's 3rd birthday cake was a fail. I determined it would never happen again. However, to simply work on the art of decorating cakes was not enough for my husband & his family. They are cake FREAKS! So…I tried a recipe. And then another. And then another. None were quite good enough…until I stumbled upon your white cake on Pinterest. My husband smiled and said, "THIS is the one." Whew! Well, you can imagine my panic when my MIL asked for a YELLOW cake on her birthday. My husband goes, "Why don't you see if that same 'white cake lady' has a yellow cake?" Good point. This cake was hands down the biggest crowd pleaser for some of the biggest cake critics around. The LOVED it!! Since then, I have tried your plain vanilla cake (with orange cream buttercream) & chocolate blueberry cake which were both amazing as well. To recap, all your cakes are phenomenal – I'm a big fan! But there's something about this cake that just makes you feel as though you're eating your great-grandma's. Love it!!
Sarah, I think this is the nicest comment I've ever gotten! Thank you so much for your feedback. I'm curious where you live – since I'm at high-altitude and all my recipes are tested at high altitude, I always wonder if they work equally well for people who don't live in the mountains. Would love to know!
I live in Florida…at 3 feet above sea level. LOL It has depended on the cake, to be honest. This cake (and your chocolate) were right around 30 minutes at 325 degrees convection. Your plain vanilla cake took about 8 extra minutes on convection. I'm not really sure why that would be! If they aren't done by the time stated in your recipe, I add about 2-3 minutes and check each time. But I assure you that your cakes are equally loved on the beach as well as the mountains! LOL
I plan to make a two layer cake. I would like to put in a flavored filling like orange or almond. The recipients are allergic to chocolate. I'm using buttercream frosting. What would you suggest? Thank-you.
If you don’t have kosher salt, can you use regular salt? How much? Thanks 😊
Yes, that’s fine! Table salt is finer than coarse Kosher salt, so you should use less, probably 1/2 as much.
My fav vanilla cake. So moist. it works perfectly at our low altitude and is so moist and flavourful. Thank you!
I’m so happy to hear that! And incredibly helpful for others to know, who are also baking at a lower altitude than me.
Oh my God I have lived at almost 9,000 ft for 23 years, finally found the perfect cake! Thank you so much period my sister always wants a yellow cake with chocolate frosting at Christmas, I have tried so many over the years and they have always failed and we just dig in and eat it with our fingers. this one came out perfect actually I had to make her a second one and send it home with her after Thanksgiving and she ate the whole thing herself! anyway thank you so much now I’m looking for any Christmas sugar cookies from your website as my niece is coming over and I want to make the perfect Christmas cookies for her to decorate. Thank you this a recipe was awesome and so fabulous to find after 23 years living in Winter Park Colorado!
Cheryl, you don’t know how happy this makes me to hear! High altitude baking is such a struggle, and I’m thrilled to be a helpful resource to other bakers.
You’ll love this sugar cookie recipe – they hold their shape without spreading while baking, so they’re perfect for cutout cookies that you’ll be decorating.
https://curlygirlkitchen.com/pumpkin-sugar-cookies-maple-icing/
Can you use 3 nine (9)inch pans instead of 4 8 inch pans. Thanks
Yes, that will work just fine.
What can I use if I don’t have meringue powder?
Kaitlin, although the meringue powder helps with stability and texture, you can make the buttercream without it.
This cake was amazing!! My daughter wanted a “vanilla cake” for her 4th birthday, but I didn’t have all the ingredients for your vanilla cake recipe. So I searched for a yellow cake recipe and found this! We live at 6000 feet, and I wasn’t sure how it would do with sour cream (I’ve had a recipe fail before with baking with sour cream at this altitude), but the cake turned out perfectly, and we all loved it! I plan to make it again. ❤️ Thank you so much for sharing high altitude recipes that work and are delicious!
How can I make this cake with only two layers? Is that possible? I don’t have three round pans. Thank you!
If your 8-inch pans have 3 inch high sides, then you can divide the batter between two pans, and the cake layers will be a bit thicker, needing to be baked a little longer. If the sides are only 2 inches high, you can bake 2/3 of the batter, then let the remaining batter rest, until you have a free pan to bake the rest of the batter. Try not to disturb the leftover cake batter too much when you pour it into the pan to bake the third layer.
If you have two 9-inch pans, just divide the batter between those, and your finished cake will be a little wider and not quite as tall. Good luck!
Hi Heather, I am trying my hand at homemade cake baking in CO for the first time in a long time. I am currently waiting for my cakes to cool as I write this. I had to use two 9 in pans bc that is what I had, so I hope that will work. I did notice that one of the cakes completely sank in before it was done baking, while the other one looks fine. I tried as best I could to make sure there was equal batter in each pan. I did notice there was some grainy looking batter (sugar not mixed in all the way I guess?) at the tops after pouring but more so on one pan, after I put the batter int the pans. Do you think I didn’t mix the batter enough? You mentioned not over mixing so I was afraid to really get under there in the mixing bowl. Any other suggestions? Wish I could show you a picture 🙂
Fingers crossed I can get them out of the pans, as I don’t have wax paper!
Also wondering, what is the purpose of putting a towel over the cakes after baking? Have not heard of this.
If one cake sank but the other didn’t, then it does sound like the batter was mixed unevenly.
I cool cakes with a towel over the pans just to let them cool more slowly, letting the steam keep the cakes moist.
I searched for a high altitude yellow cake recipe because I visiting my sister in Albuquerque for her birthday. The cake was so delicious that I wanted to make it at home, at sea level. I found all the reverse-conversions overwhelming, so I just added 1/4 tsp of baking soda to the dry ingredients, and threw it in the oven. It came out perfectly! Thank you, Heather, for developing this great recipe. I have one more question: Did you measure in ounces and convert to grams for the recipe, or did you measure in grams and convert to ounces? I ask because when I measured the cake flour in a regular measuring cup I wound up with almost a cup more flour than when I weighed it. Is the recipe designed to be weighed or measured?
I measure my flour using the “spoon and sweep” method with measuring cups, not by grams or ounces. It works well for me, so measuring is just the method that I personally prefer, even though many people prefer the preciseness of weighing all ingredients. The only time I tend to weigh ingredients are for things like chopped fresh fruit.
I did include the weights on a few of my recipes, by measuring it first with measuring cups then recording the weight. If you’re getting far more flour by measuring than weighing then it sounds like you’re packing the flour into the measuring cup. Be sure to fluff it up in the canister/bag first, lightly spoon it into the measuring cup, then level off the top.
Hi! Would it be possible to do this with three 6 inch pans? Would you recommend changing any quantities the temp or length of baking? Thank you so much!
Yes, I often make half the recipe and bake it in three 6-inch pans. The baking temp will be the same, and the time is usually about the same, too, or a few minutes less.
I followed this recipe precisely. The only thing that I did not do was use cake flour as I forgot to grab it from the store. I live at around 5400 ft above sea level.
The cake did stick to the pan so regret not using parchment paper. But it had the consistency of corn bread. Was dry and crumbly.
Admittedly I did not use cake flour but my version did not turn out at all.
I made the chocolate version of this recipe w all purpose flour and oil and it was great.
I might try again.. will have to see..
All purpose flour does not work well in this recipe, which is why I specify to use cake flour.
Newbie here. How many cups of frosting does this make? How much frosting do you put on each layer and how much do you save for the final frosting?
I’d suggest reading these posts for lots of helpful tips:
https://curlygirlkitchen.com/perfect-american-buttercream-frosting/
https://curlygirlkitchen.com/how-to-stack-fill-crumb-coat-frost-layer-cake/
Can I make cupcakes out of this recipe or do adjustments need to be made?
I made this for my husband’s birthday, and his exact words were, “This is the best cake I have ever had.”
It was absolutely delicious and I can’t wait to make another one of your cakes soon!
Truly the most delicious yellow cake I’ve made in my 55+ years of baking! My stand mixer was out for repairs; however, I did manage to make it with my hand mixer…it took a bit longer, but well worth the effort. Your recipes have saved me after moving from sea level to high altitude over five years ago. Thank you!
Look, I have been the family cook and baker for many years. I have made countless meals, desserts, and cakes. I have so many recipes it’s a chore to keep them straight. I almost never make them the same way twice and I’m savagely critical. So, when I needed to make 48 cupcakes for my Papa’s 80th birthday, I just quick printed an online recipe. “It’s just cupcakes,” I said. “Easy peasy, the recipe won’t matter,” I said. I didn’t pay attention to the high altitude or that it was a layer cake recipe. I just threw it all together. I did think it was a little weird that the frosting called for meringue powder, but I had it, so I used it. The icing piped on perfectly even in an 80 degree kitchen. And it stayed that way. There was no room in the fridge, so the leftovers sat on the counter in my non-air conditioned kitchen in an Atlanta summer for a week. And then I ate one.
O. M. G. It was like biting into a little fluffy cloud. The yellow cupcake was so pale as to be nearly white, it was still moist, and full of flavor. But the buttercream. Oh man. A cloud I tell you. So light. So soft. Perfectly sweet and chocolatey without being gritty or cloying. No wonder I got so many new requests to make more! I can’t wait to make them again. I will never make buttercream another way. This one is going in the special collection of all-time family favorites I’ve handwritten for my daughter. So, from generations of my family, even those yet to come, a very heartfelt THANK YOU.
Such a nice comment, thank you, Kari! I’m thrilled you loved this recipe.
This cake is WONDERFUL.
I live in Calgary AB with an elevation of 3,428 feet above sea level. I have experimented with so many yellow cakes and have often dealt with coarser & drier textures, and sunken centres. This cake is SUPER moist, flavourful, and can hold its shape without sinking. The frosting is also delightful, and I appreciate the ease of using cocoa powder instead of melted chocolate.
I had pretty much given up on making cakes here in CO after being disappointed by dry cake too many times. I decided to give this a shot for Father’s Day though and TOTALLY NAILED IT. My family said it’s the best yellow cake they’ve ever had. I really appreciated the separate article you wrote on crumb coat/filling/frosting too. So yummy and gives me hope that good cakes CAN be made in my high altitude kitchen. Thank you 🙂
I’m so glad to hear this! I hope you find many more recipes here that you love.