
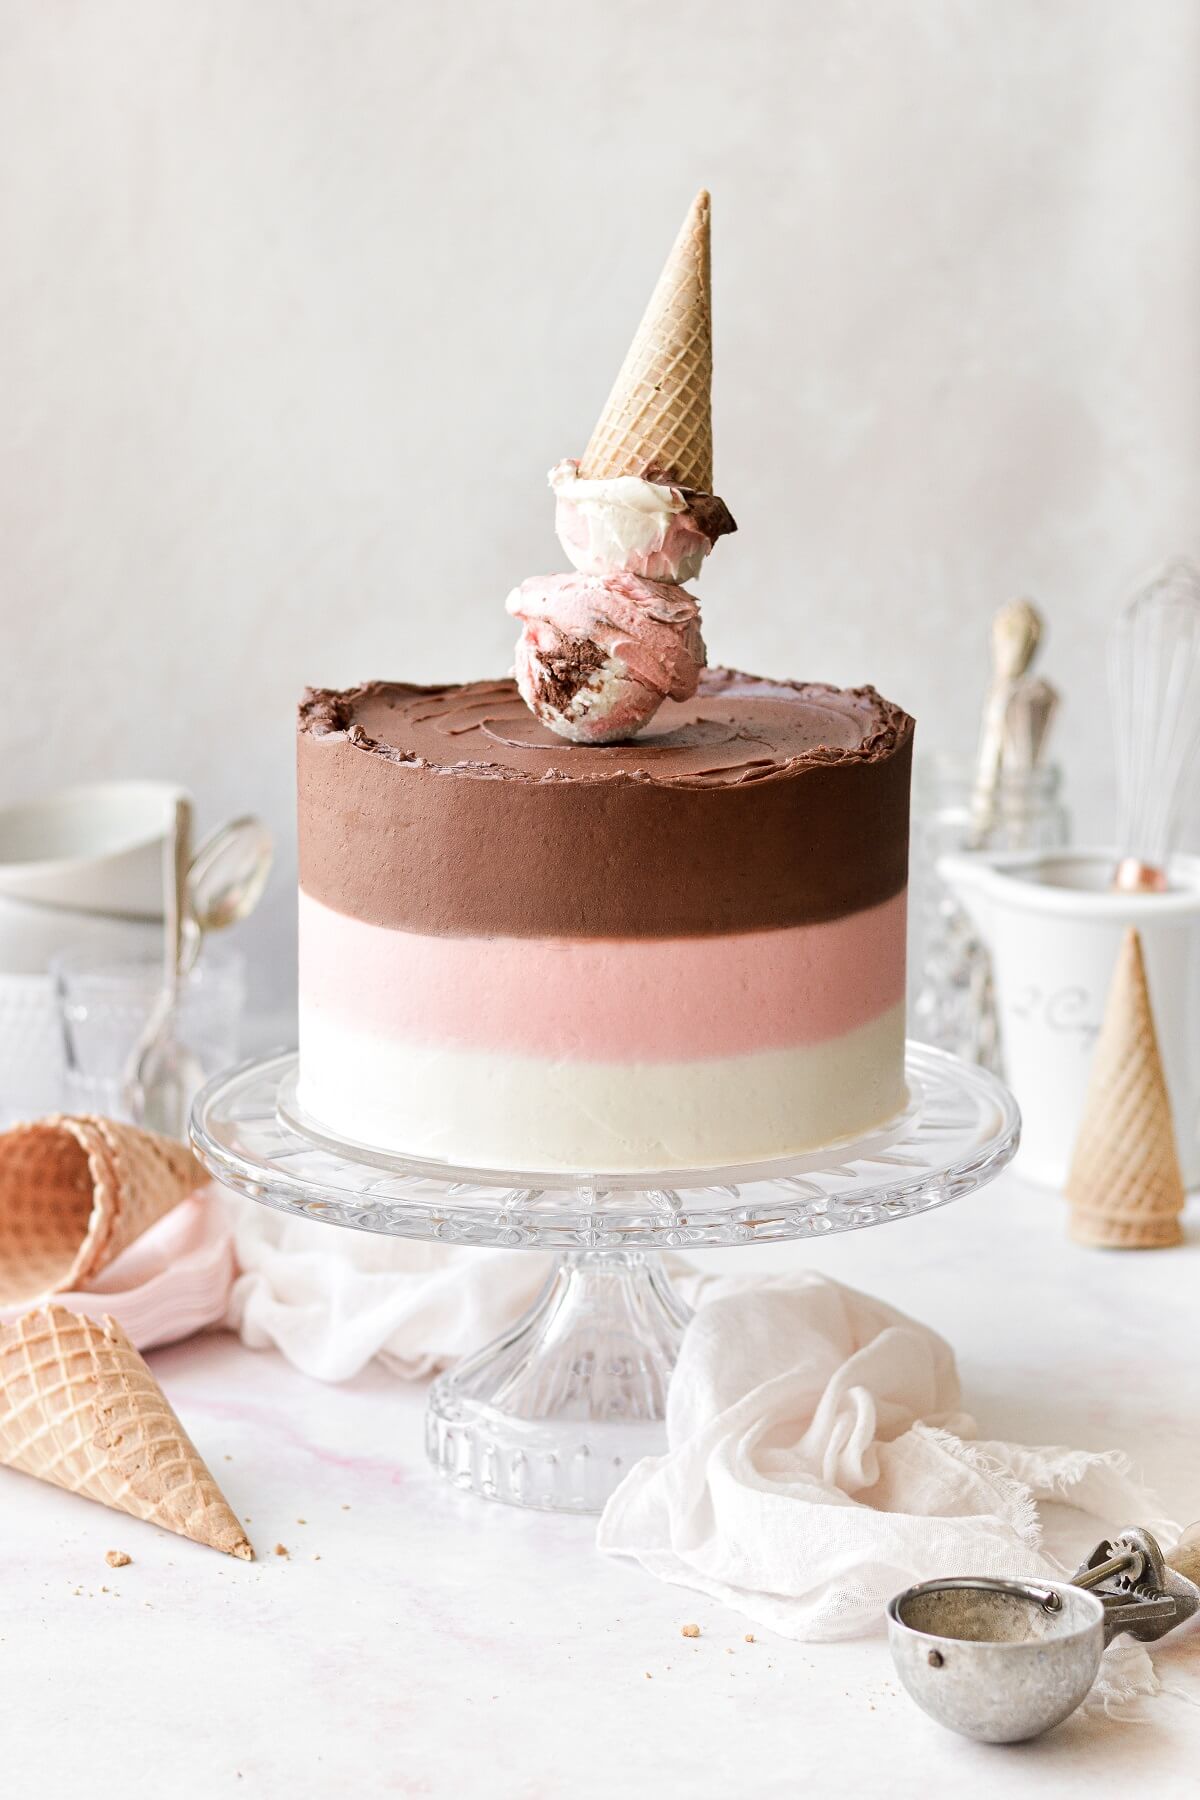
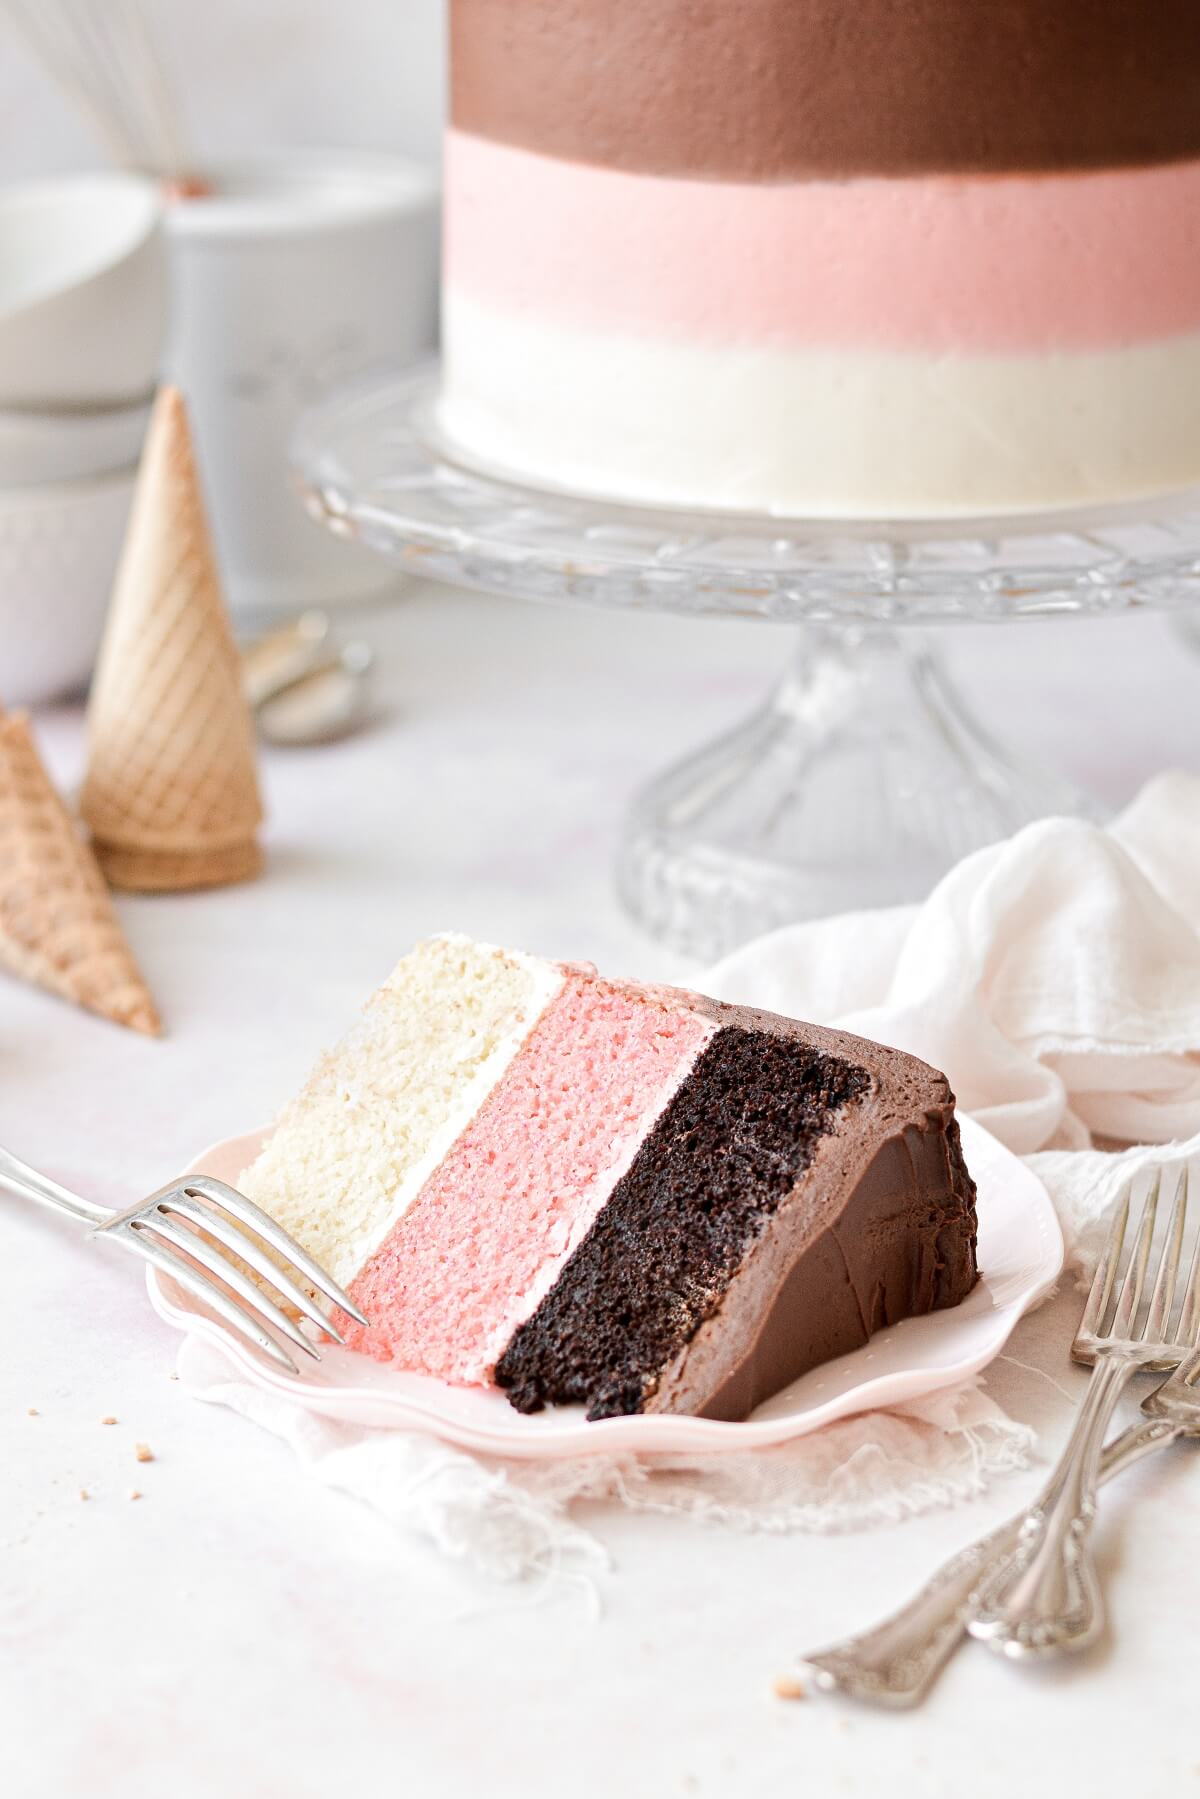
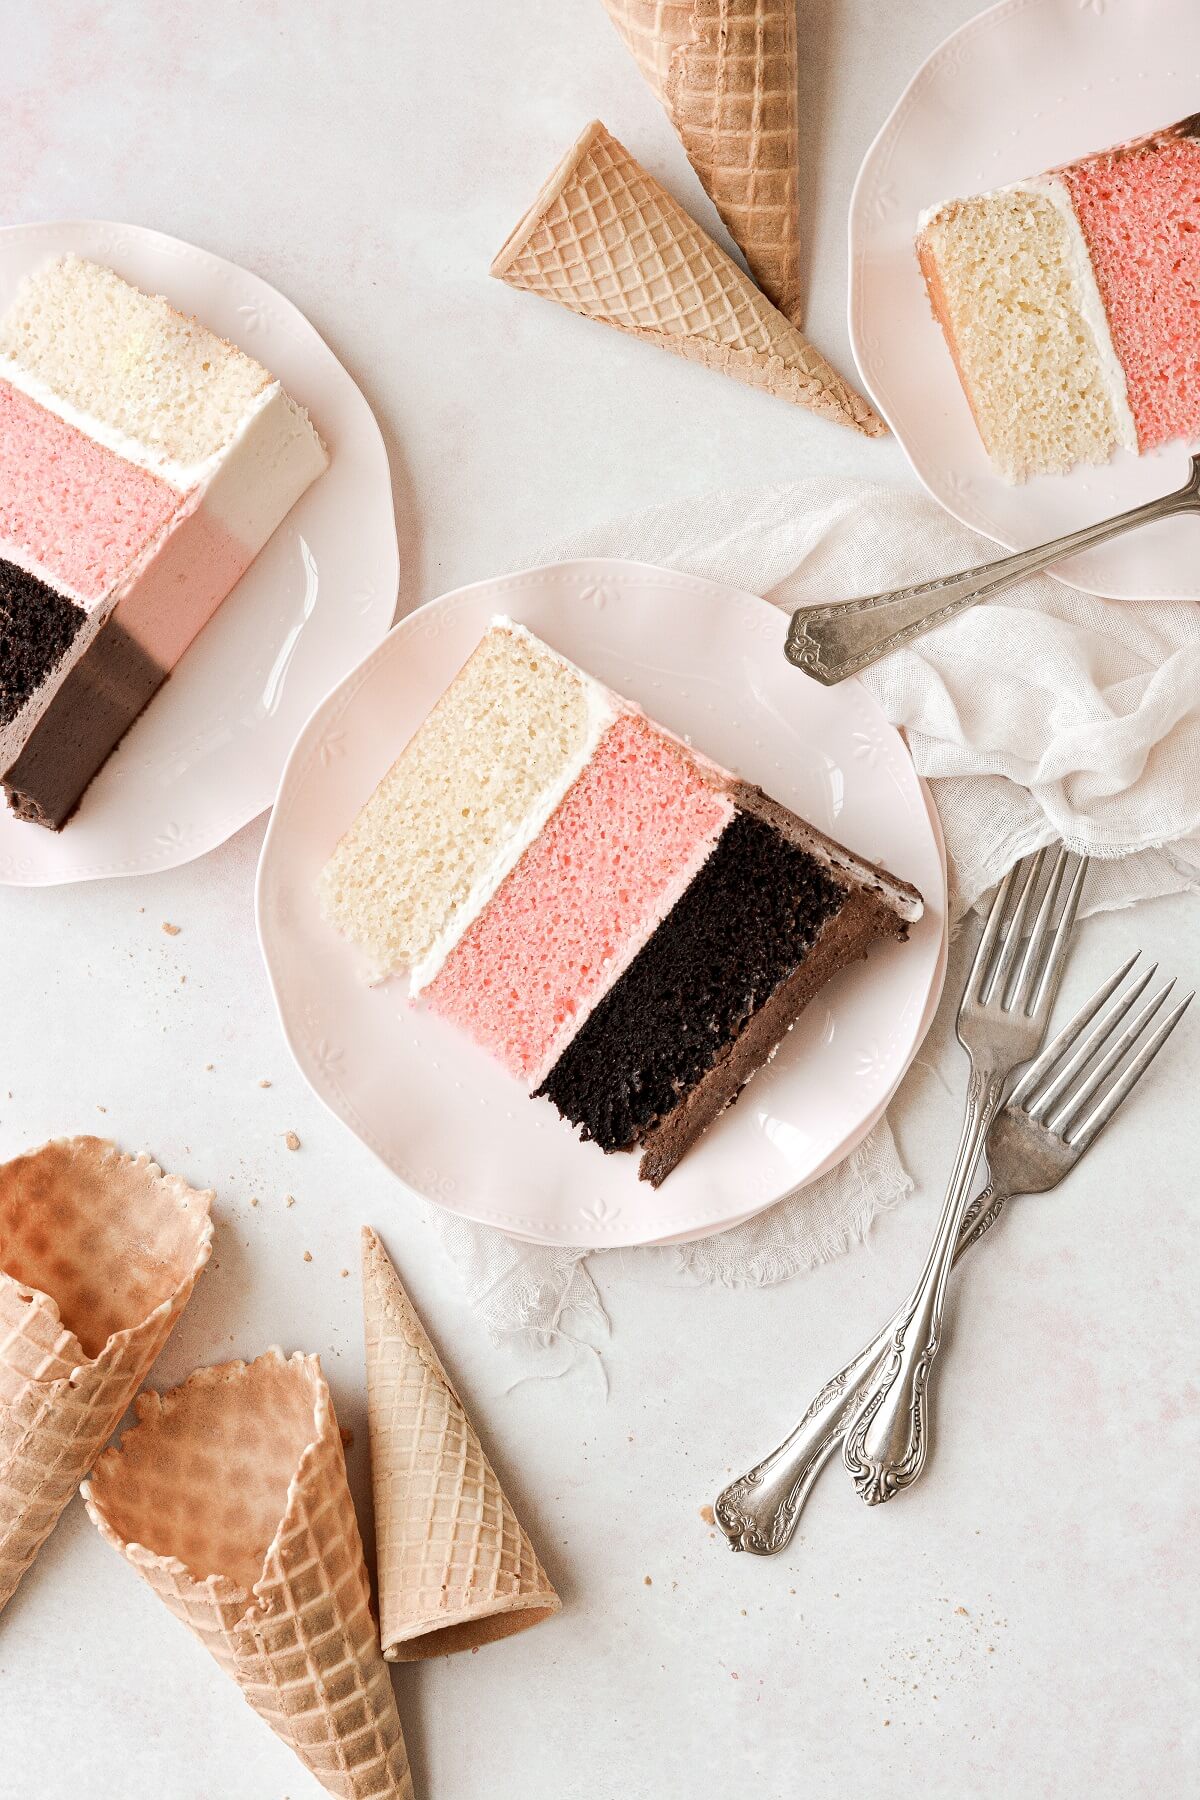
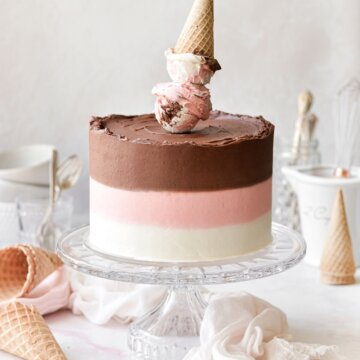
A whimsical Neapolitan cake, with from scratch layers of vanilla, chocolate and strawberry cake, pretty striped buttercream, and an ice cream cone cake topper. This delicious high altitude cake combines all the flavors of Neapolitan ice cream, a childhood favorite, into a showstopper dessert for a special occasion.
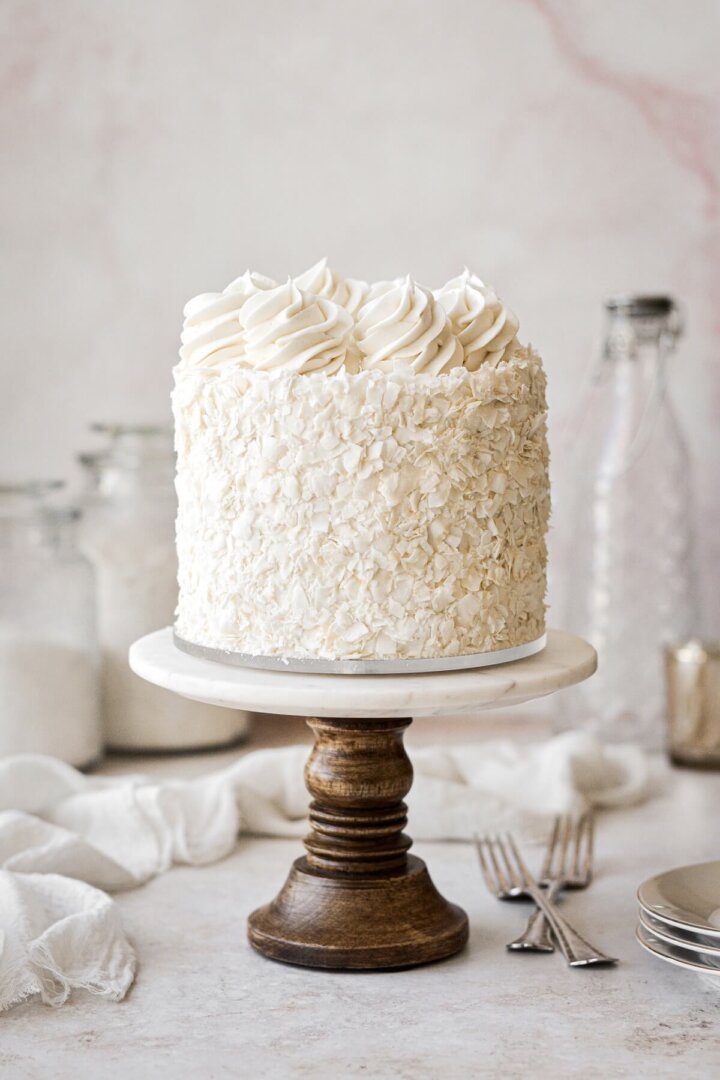
Interested in more cake decorating ideas? Be sure to check out my buttercream flowers cake, rainbow sprinkle cake, and a hummingbird cake with painted floral buttercream.
This site contains affiliate links. As an Amazon associate, I earn from qualifying purchases. This means that I may make a small commission if you purchase a product using those links. This in no way affects my opinion of those products and services. All opinions expressed on this site are my own.
Why You’ll Love This Cake
Three Flavors in One. Just like its ice cream namesake, you don’t have to choose your favorite cake flavor, since you get a little of everything.
Special Enough for a Celebration. Anyone looking at this cake will know you put a LOT of effort into creating it. Make it for your next birthday celebration for a cake that everyone will love!
High Altitude Tested. I develop all the recipes on my site for Denver’s altitude of 5,280 feet. If you’re at a lower or higher elevation, please see my FAQs for guidance on adjusting recipes for your altitude.
TIP: If making three cakes from scratch seems daunting, you can use boxed mixes, but PLEASE don’t use canned frosting. That stuff is just gross.
Ingredients
Vanilla Cake & Buttercream
For the vanilla layer, my perfect high altitude vanilla cake with vanilla buttercream is moist, fluffy and so easy to whisk up with a bowl and spoon.
Strawberry Cake & Buttercream
For the strawberry layer, my strawberry cake recipe with strawberry buttercream uses strawberry puree for the best natural strawberry flavor. Add a few drops of red or pink gel food coloring to get a vivid pink color.
Chocolate Cake & Buttercream
And lastly, my dark chocolate cake with chocolate buttercream is rich, chocolatey and moist, with a hint of espresso.
TIP: Make the cakes one day in advance, and assemble and decorate your cake the next day. This cake is a bit labor-intensive, considering you are making three cake batters and three buttercreams – all from scratch – so it does take some time to prep everything.
Baking Instructions
- Preheat the oven to 350 F, and spray the bottoms of three 8-inch (or 9-inch) cake pans with non-stick spray.
- Prepare 1/2 recipe Vanilla Cake.
- Prepare 1/2 recipe Strawberry Cake. Add red or pink gel food coloring for desired shade of pink.
- Prepare 1/2 recipe Chocolate Cake.
- Bake the cakes for about 28-30 minutes on the center oven rack, until a cake tester comes out clean. Set the pans on a cooling rack, covered loosely with a clean kitchen towel, and cool completely.
- If making the cakes in advance, cool until slightly warm, then turn the cakes out and wrap well in plastic wrap. Keep at room temperature for up to 1 day, or freeze for up to 3-6 months.
TIP: To avoid washing too many dishes and measuring cups, mix up the vanilla cake batter first. Then, the strawberry batter, and lastly the chocolate. There’s no need to wash the bowl in between batters if you make them in that order. You can get the vanilla cake in the oven first, if you like, while you make the strawberry and chocolate, or wait and bake them all at the same time.
Assembly
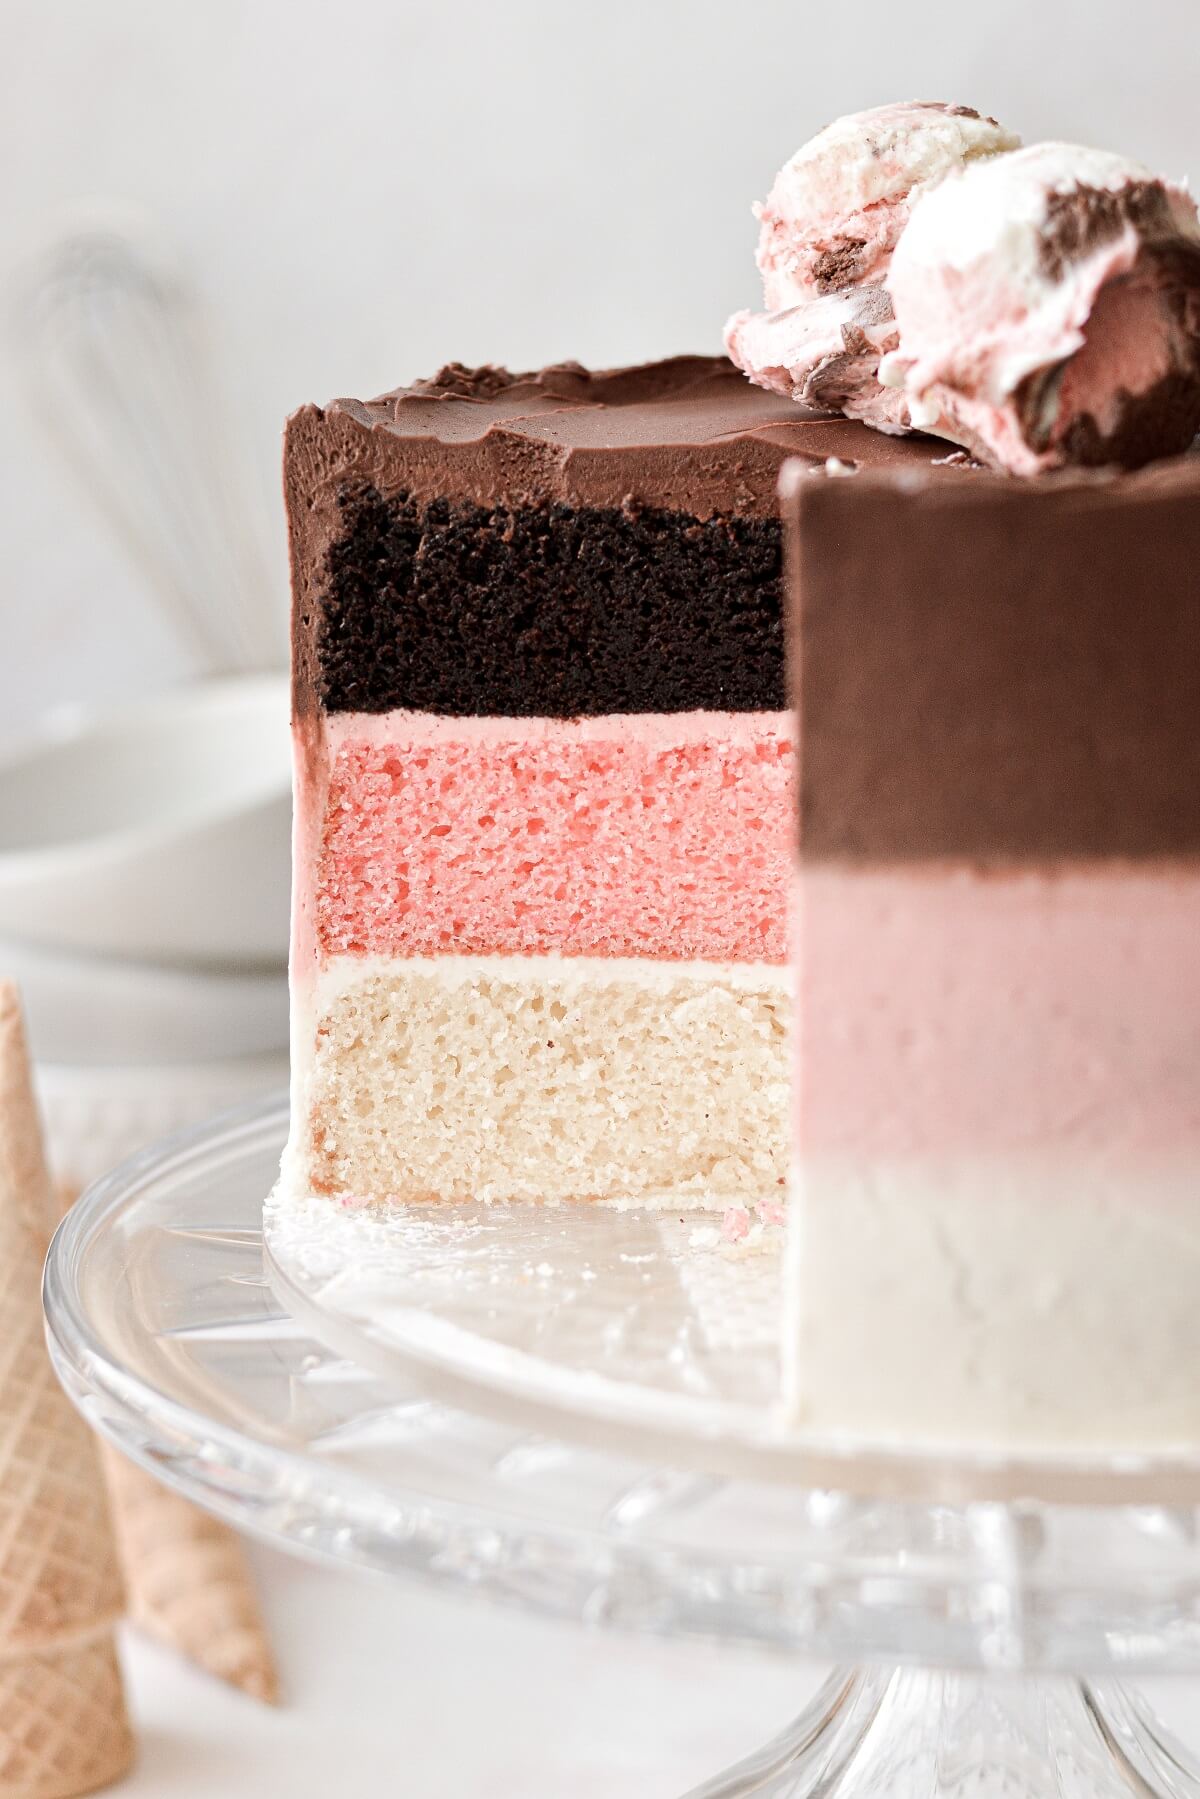
Stack, fill and crumb coat the cakes.
- If the tops of the cakes are domed or uneven, carefully trim off the domed portion for a flat surface.
- Place the vanilla cake on a cake board. Frost the top of the vanilla cake with a layer of vanilla buttercream, between 1//8-1/4 inch thick. Frost the sides of the cake with a thin coat of vanilla buttercream.
- Place the strawberry cake on the vanilla cake. Frost the top of the strawberry cake with a layer of strawberry buttercream, between 1//8-1/4 inch thick. Frost the sides of the cake with a thin coat of strawberry buttercream.
- Place the chocolate cake on the strawberry cake. Frost the top of the chocolate cake with a layer of chocolate buttercream, between 1//8-1/4 inch thick. Frost the sides of the cake with a thin coat of chocolate buttercream.
- Take a bench scraper and drag it around the sides of the cake, to smooth the sides out and scrape off any excess frosting. Place the cake in the refrigerator for 30 minutes to chill and set the crumb coat.
TIP: If you need a visual guide, The Cake Blog has a good, simple tutorial on the striped buttercream technique. Piping the buttercream on with a piping bag will give you cleaner looking stripes, but I did today’s cake with just an icing spatula.
Add the final coat of buttercream and blend the stripes together.
- For the final, “pretty” coat of buttercream, you can either use an icing spatula (which I did), or use separate piping bags for each color. Piping bags will give you cleaner, sharper lines between each color, but as you can see, if you’re careful with an icing spatula, you can also keep it nice and neat.
- Use your icing spatula to spread vanilla buttercream along the bottom edge, trying to keep it neat, filling in the bottom third of the cake all the way around. Repeat with the strawberry buttercream, and then chocolate, frosting the sides and top with chocolate. If you see any gaps, go ahead and dab on some more frosting to fill in the gaps.
- Now, take your bench scraper again, hold it at about a 45-degree angle to the cake and lightly sweep it around the sides of the cake on a continuous motion – this is where it is extremely beneficial to decorate your cake on a turntable so that you can turn it with one hand while you smooth the buttercream with the other. Without a turntable, this step will be difficult for you. You are not trying to remove much frosting, so use a light hand – you are simply smoothing out any air bubbles and blending the colors together. Sweep around the cake several times, scraping the excess frosting off the bench scraper and into a bowl. Wipe the bench scraper clean with a paper towel each time around, and keep smoothing until you’re satisfied with the result. Smooth out the top. If you don’t have perfectly smooth lines, don’t worry. This technique takes some practice.
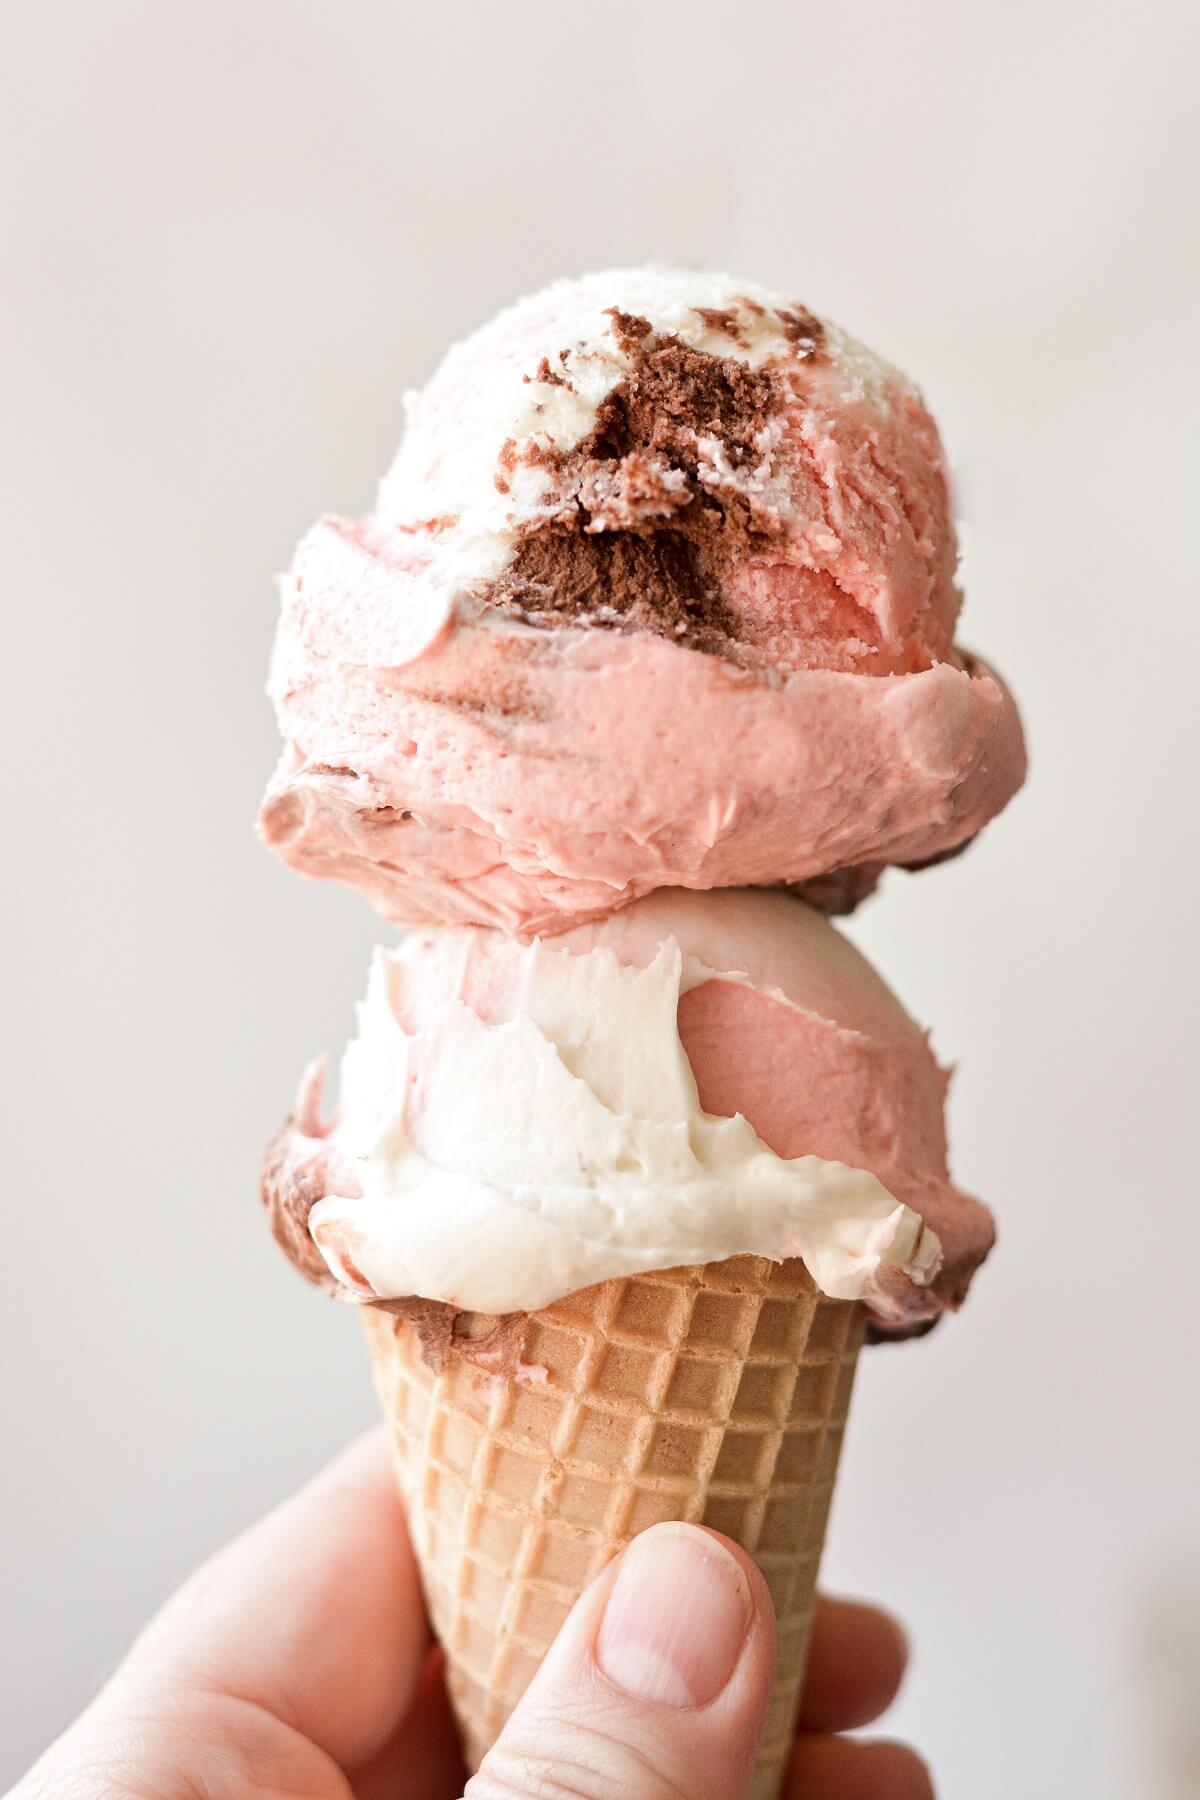
TIP: Save the extra frosting you scrape off the cake for making the “ice cream” scoops for the cake topper. This recipe makes plenty of buttercream with enough leftover for more ice cream cones, or some elaborate piping on top.
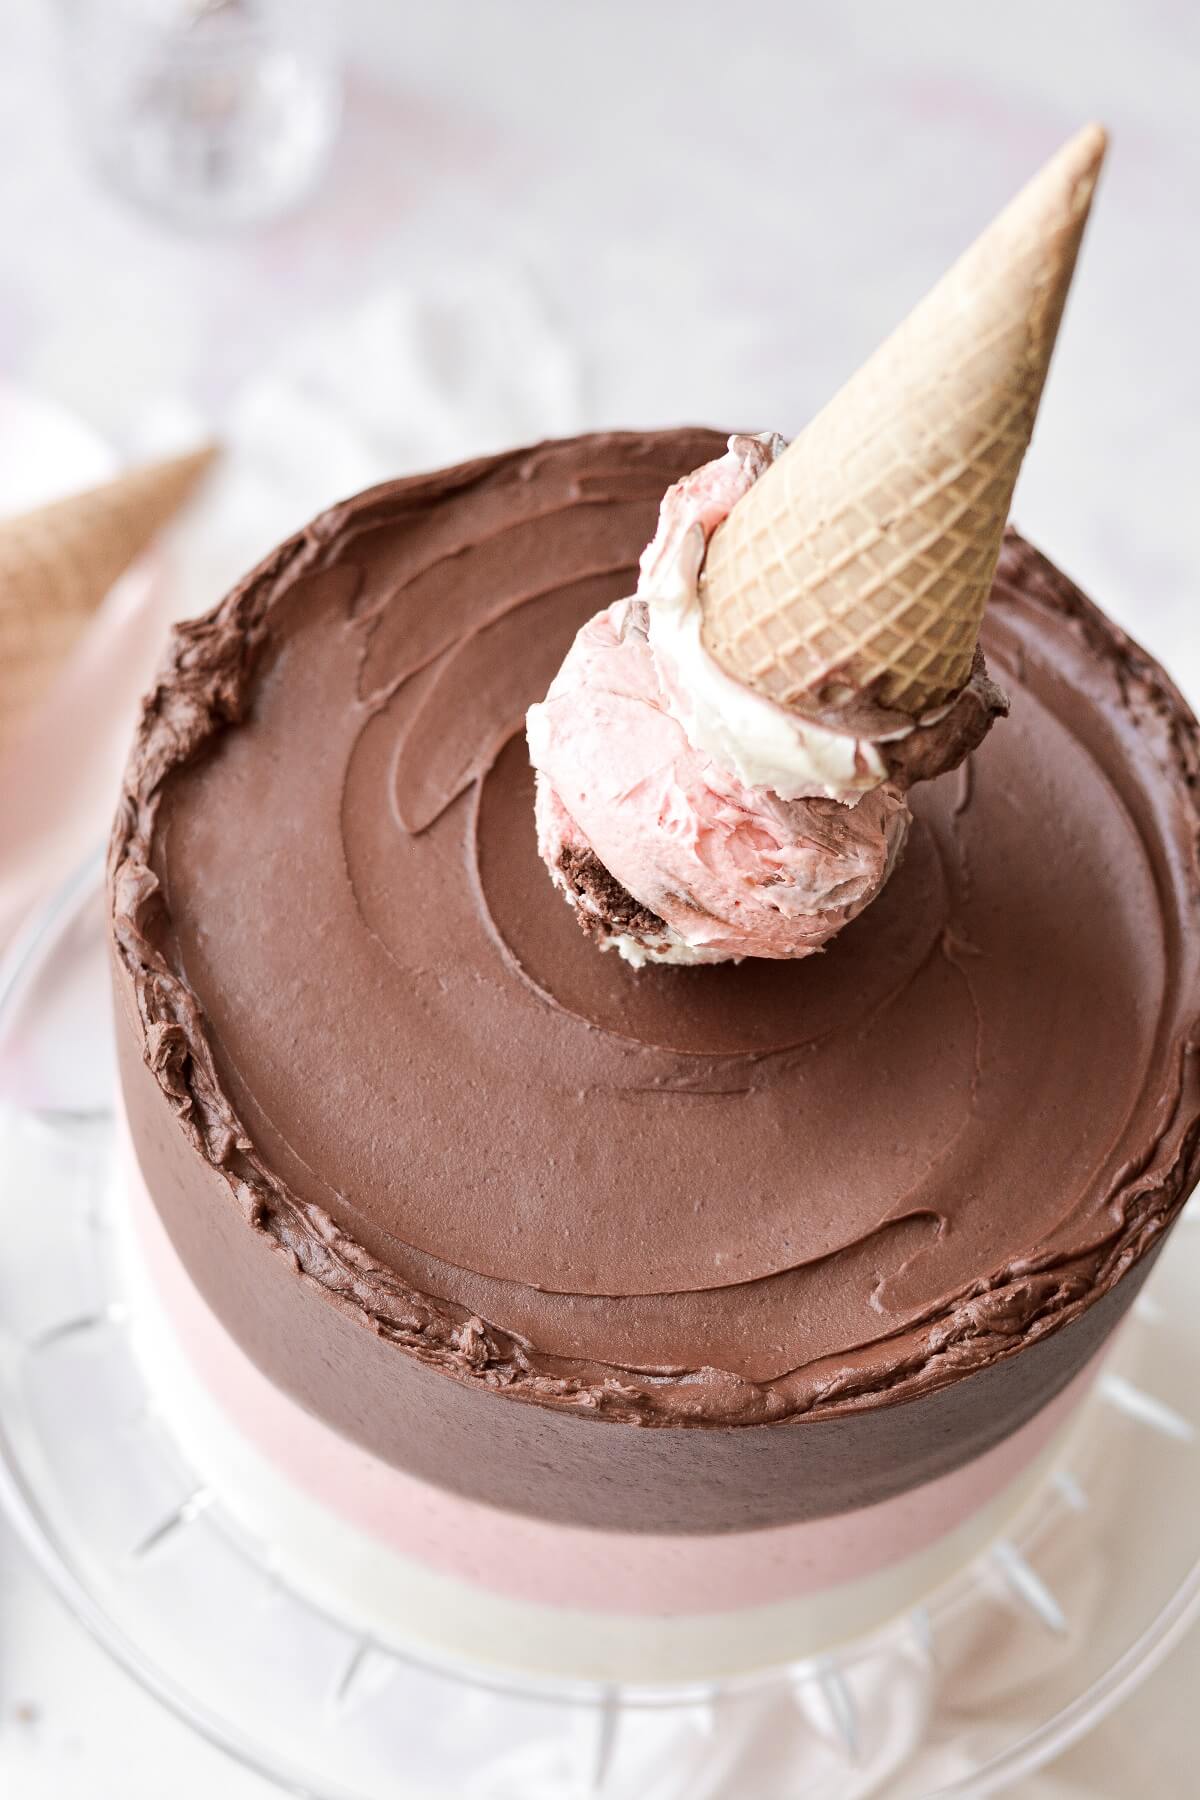
Ice Cream Cone Cake Topper
- To make the ice cream cone topper, you’ll need a sugar cone and the excess frosting that you scraped into a bowl.
- Position the ice cream cone in something, like a small jar, so that it’s held upright. Chill the bowl of extra buttercream for a few minutes in the refrigerator, then use an ice cream scoop with a release lever to scoop the frosting, just like you would scoop ice cream. Release the scoop of buttercream onto the ice cream cone. Repeat with a second scoop.
- Set the ice cream cone in the refrigerator to completely chill and firm up.
- To place the topper on your cake, insert a wooden skewer into the chilled ice cream scoops, until it reaches the bottom of the sugar cone. Turn it upside down, poke the skewer into the cake, and push it down to center it on top of the cake.
Other Decorating Ideas
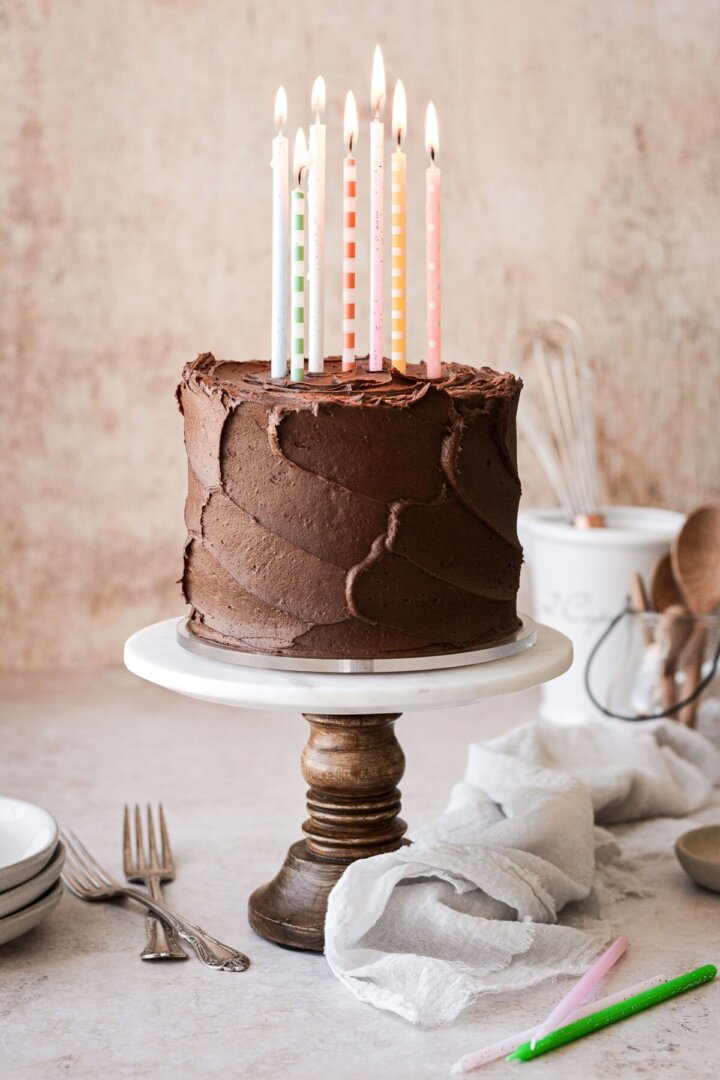
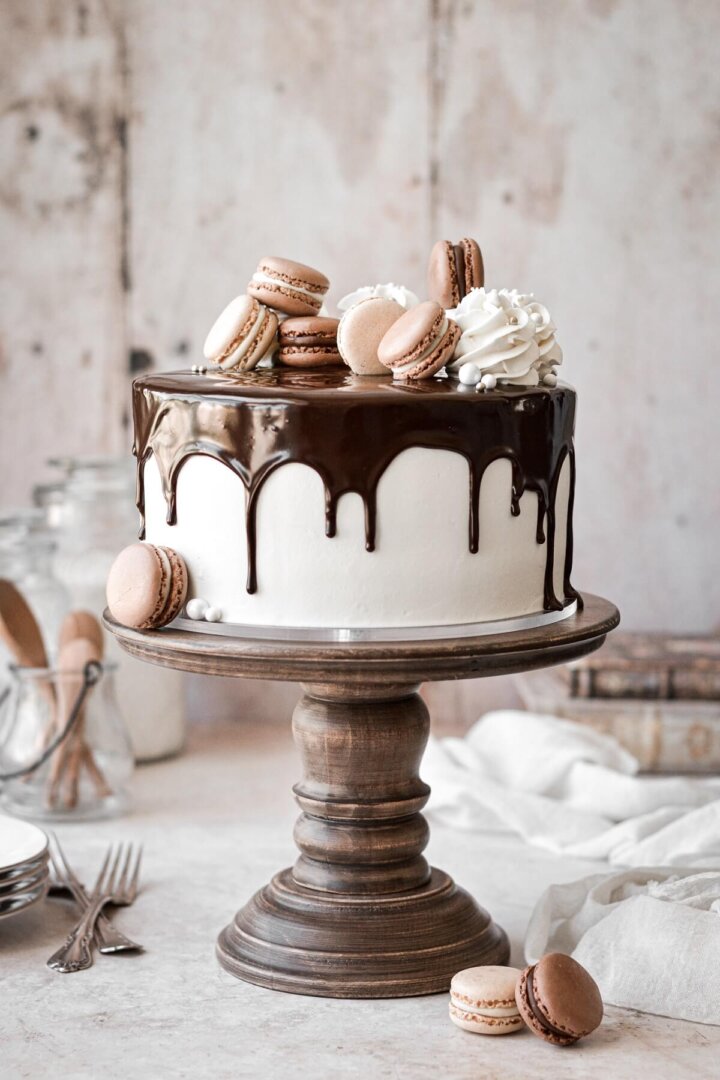
I think the striped buttercream technique is so beautiful on this Neapolitan cake, but there are so many other pretty ways to decorate your cake. I especially love the rosettes by I Am Baker, and the naked look by Sweetapolita. Or keep the outside plain, with surprise stripes inside, like I did with my rainbow cake. I also love the idea of a chocolate ganache drip on top, or adding up to three upside down ice cream cone toppers.
Be sure to read all of my BAKING FAQs where I discuss ingredients, substitutions and common questions with cake making, so that you can be successful in your own baking! I also suggest reading these comprehensive posts on making Perfect American Buttercream, How to Stack, Fill, Crumb Coat and Frost Layer Cakes and How to Use Piping Bags.
Frequently Asked Questions
Can I use 9-inch cake pans instead of 8-inch?
Yes, 9-inch pans will work just fine, although the cake layers will be slightly thinner.
How can I make a smaller version of this cake?
Since this Neapolitan cake is made from three thick cake layers (each layer being 1/2 of a full cake recipe), the finished cake will feed about 20 people. To make a smaller cake, you can make 1/4 of each cake recipe (which could be tricky to scale some of the ingredients down that much), and bake the batter in three 6-inch cake pans. Another option is to make extra cake layers, wrap them well in plastic wrap and freeze them for another day.
How do you keep the ice cream cone from falling over?
Set the ice cream cone in something that can hold it upright, and place the scoops of buttercream on top. Chill it well, until cold and firm. Insert a wooden skewer into the scoops, down to the bottom of the cone. Flip it over, and insert the other end of the skewer into the cake.
You Might Also Like

Please check out my Amazon Shop for a curated collection of some of my favorite cake pans from trusted brands, baking tools, ingredients, pretty things and fashion finds. I recommend products that I buy and use every day!
Did you love today’s recipe? Please rate the recipe and let me know in the comments what you thought! Also, be sure to follow Curly Girl Kitchen on Instagram, and tag me when you try one of my recipes so I can see all your delicious creations!
High Altitude Neapolitan Cake
All recipes on Curly Girl Kitchen are developed for high altitude at 5,280 feet. See FAQs for adjusting to higher or lower elevations.

Equipment
- Stand Mixer with Paddle Attachment
- 8-inch cake pans (x3)
Ingredients
Vanilla Cake and Buttercream
- ½ recipe Vanilla Cake
- ½ recipe Vanilla Buttercream
Strawberry Cake and Buttercream
- ½ recipe Strawberry Cake
- ½ recipe Strawberry Buttercream
- 3-4 drops red or pink gel food coloring
Chocolate Cake and Buttercream
- ½ recipe Chocolate Cake
- ½ recipe Chocolate Buttercream
Instructions
Cake
- Preheat the oven to 350 F, and spray the bottoms of three 8-inch cake pans with non-stick spray.
- Prepare 1/2 recipe Vanilla Cake.
- Prepare 1/2 recipe Strawberry Cake. Add red or pink gel food coloring for desired shade of pink.
- Prepare 1/2 recipe Chocolate Cake.
- Bake the cakes for about 28-30 minutes on the center oven rack, until a cake tester comes out clean. Set the pans on a cooling rack, covered loosely with a clean kitchen towel, and cool completely.
- If making the cakes in advance, cool until slightly warm, then turn the cakes out and wrap well in plastic wrap. Keep at room temperature for up to 1 day, or freeze for up to 3-6 months.
Buttercream
- Prepare 1/2 recipe Vanilla Buttercream.
- Prepare 1/2 recipe Strawberry Buttercream.
- Prepare 1/2 recipe Chocolate Buttercream.
- Cover each bowl of buttercream with plastic wrap, until needed.
Assembly
- If the tops of the cakes are domed or uneven, carefully trim off the domed portion for a flat surface.
- Place the vanilla cake on a cake board. Frost the top of the vanilla cake with a layer of vanilla buttercream, between 1//8-1/4 inch thick. Frost the sides of the cake with a thin coat of vanilla buttercream.
- Place the strawberry cake on the vanilla cake. Frost the top of the strawberry cake with a layer of strawberry buttercream, between 1//8-1/4 inch thick. Frost the sides of the cake with a thin coat of strawberry buttercream.
- Place the chocolate cake on the strawberry cake. Frost the top of the chocolate cake with a layer of chocolate buttercream, between 1//8-1/4 inch thick. Frost the sides of the cake with a thin coat of chocolate buttercream.
- Take a bench scraper and drag it around the sides of the cake, to smooth the sides out and scrape off any excess frosting. Place the cake in the refrigerator for 30 minutes to chill and set the crumb coat.
- For the final, "pretty" coat of buttercream, you can either use an icing spatula (which I did), or use separate piping bags for each color. Piping bags will give you cleaner, sharper lines between each color, but as you can see, if you're careful with an icing spatula, you can also keep it nice and neat.
- Use your icing spatula to spread vanilla buttercream along the bottom edge, trying to keep it neat, filling in the bottom third of the cake all the way around. Repeat with the strawberry buttercream, and then chocolate, frosting the sides and top with chocolate. If you see any gaps, go ahead and dab on some more frosting to fill in the gaps.
- Now, take your bench scraper again, hold it at about a 45-degree angle to the cake and lightly sweep it around the sides of the cake on a continuous motion – this is where it is extremely beneficial to decorate your cake on a turntable so that you can turn it with one hand while you smooth the buttercream with the other. Without a turntable, this step will be difficult for you. You are not trying to remove much frosting, so use a light hand – you are simply smoothing out any air bubbles and blending the colors together. Sweep around the cake several times, scraping the excess frosting off the bench scraper and into a bowl. Wipe the bench scraper clean with a paper towel each time around, and keep smoothing until you’re satisfied with the result. Smooth out the top. If you don't have perfectly smooth lines, don't worry. This technique takes some practice.
Ice Cream Cone Topper
- To make the ice cream cone topper, you'll need a sugar cone and the excess frosting that you scraped into a bowl.
- Position the ice cream cone in something, like a small jar, so that it's held upright. Chill the bowl of extra buttercream for a few minutes in the refrigerator, then use an ice cream scoop with a release lever to scoop the frosting, just like you would scoop ice cream. Release the scoop of buttercream onto the ice cream cone. Repeat with a second scoop.
- Set the ice cream cone in the refrigerator to completely chill and firm up.
- To place the topper on your cake, insert a wooden skewer into the chilled ice cream scoops, until it reaches the bottom of the sugar cone. Turn it upside down, poke the skewer into the cake, and push it down to center it on top of the cake.
 https://curlygirlkitchen.com/
This is my second year making this cake for my son’s birthday and I get compliments every time. It is so good and beautiful and it fed 15 adults and 12 kids. Thank you so much for this recipe—it’s so special to be able to make a homemade cake for him and your instructions are great! Cheers.