
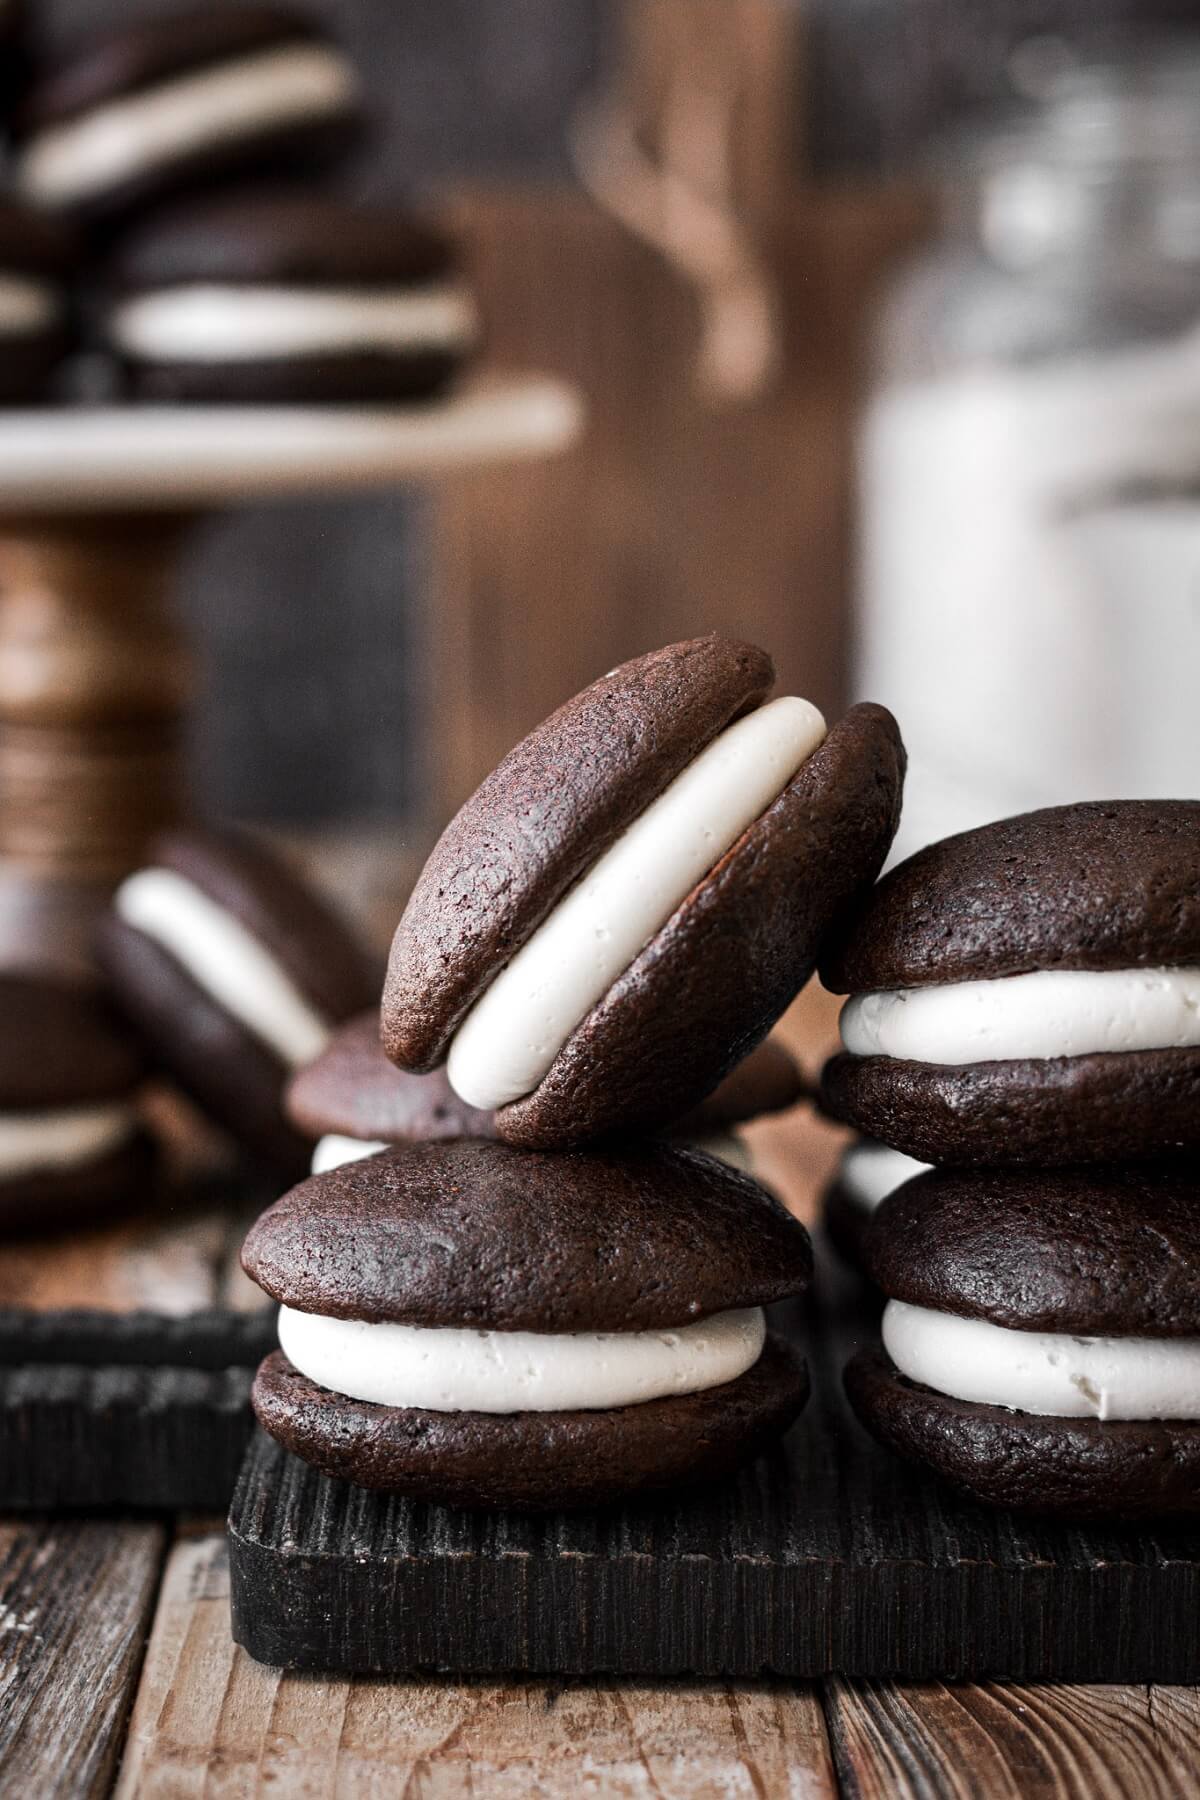
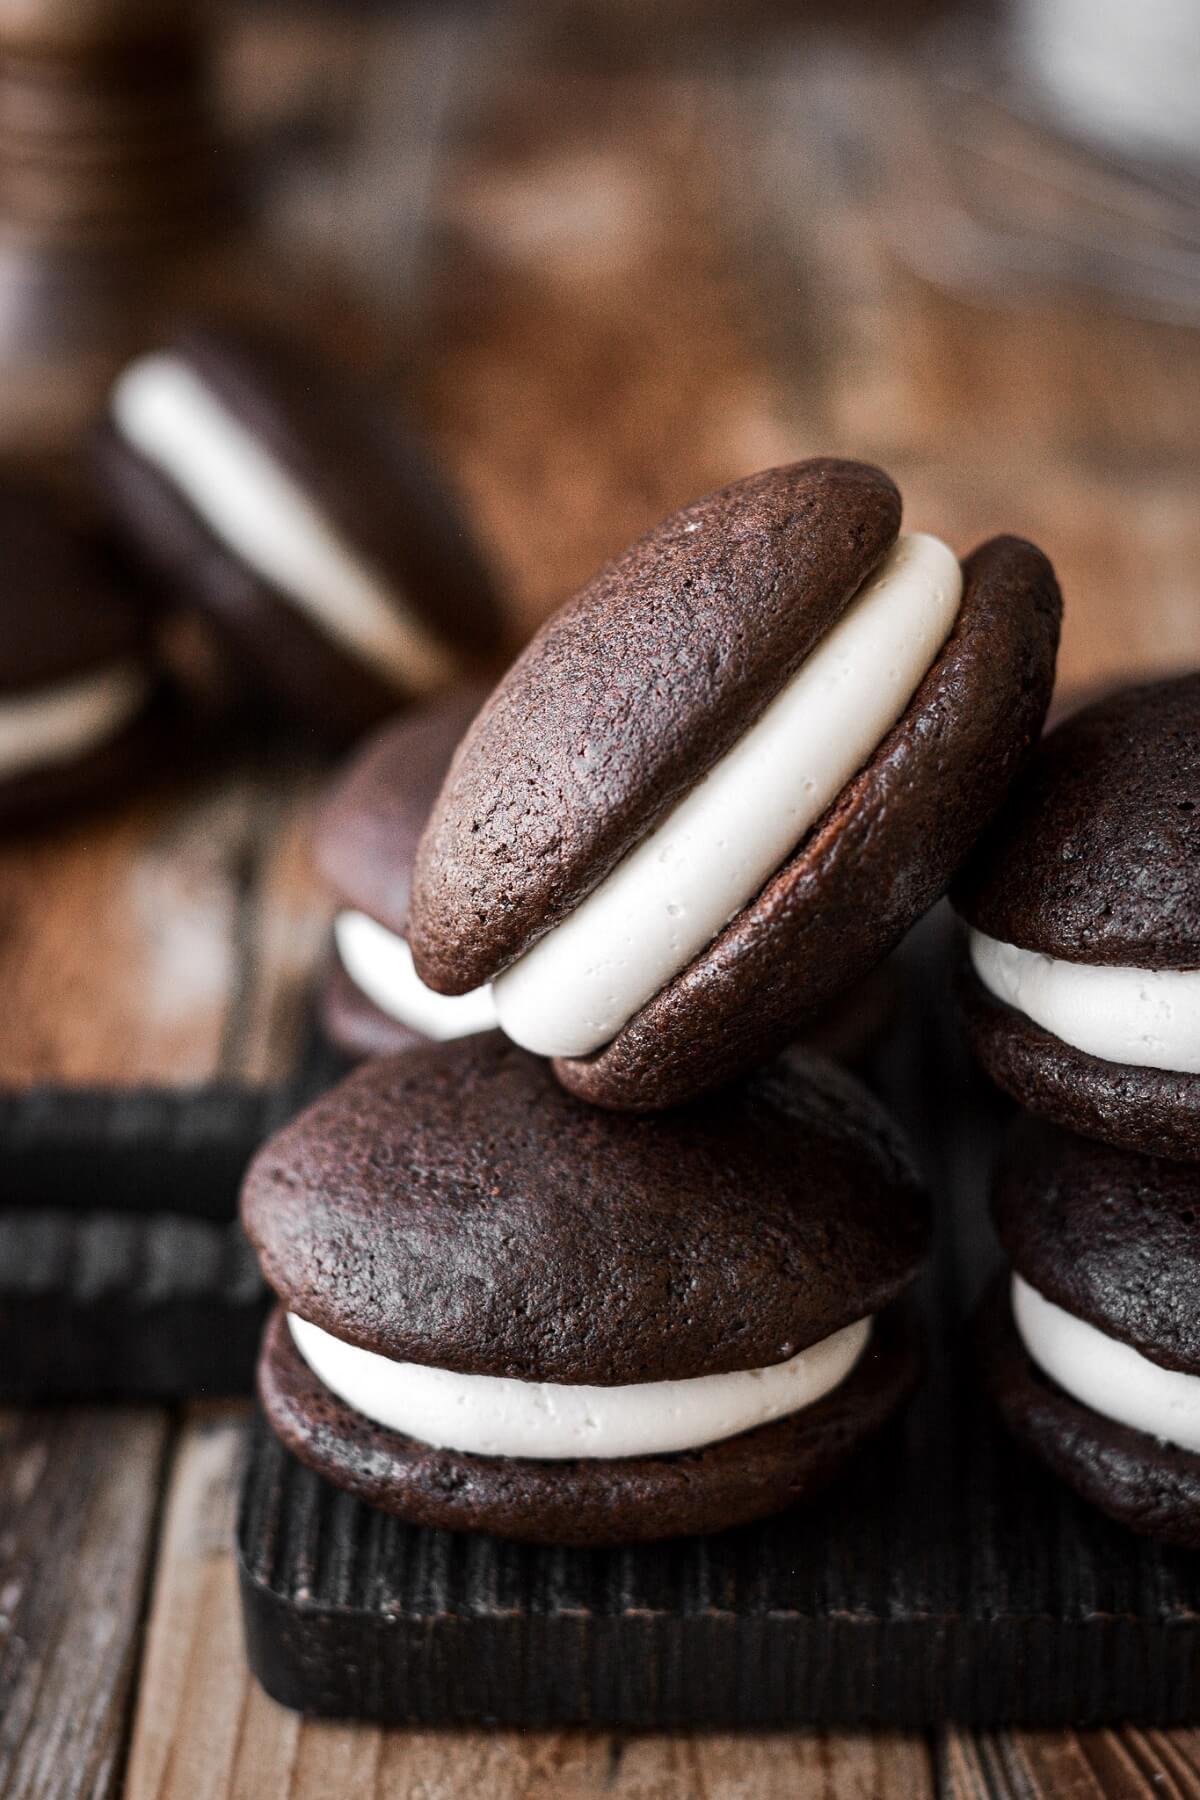
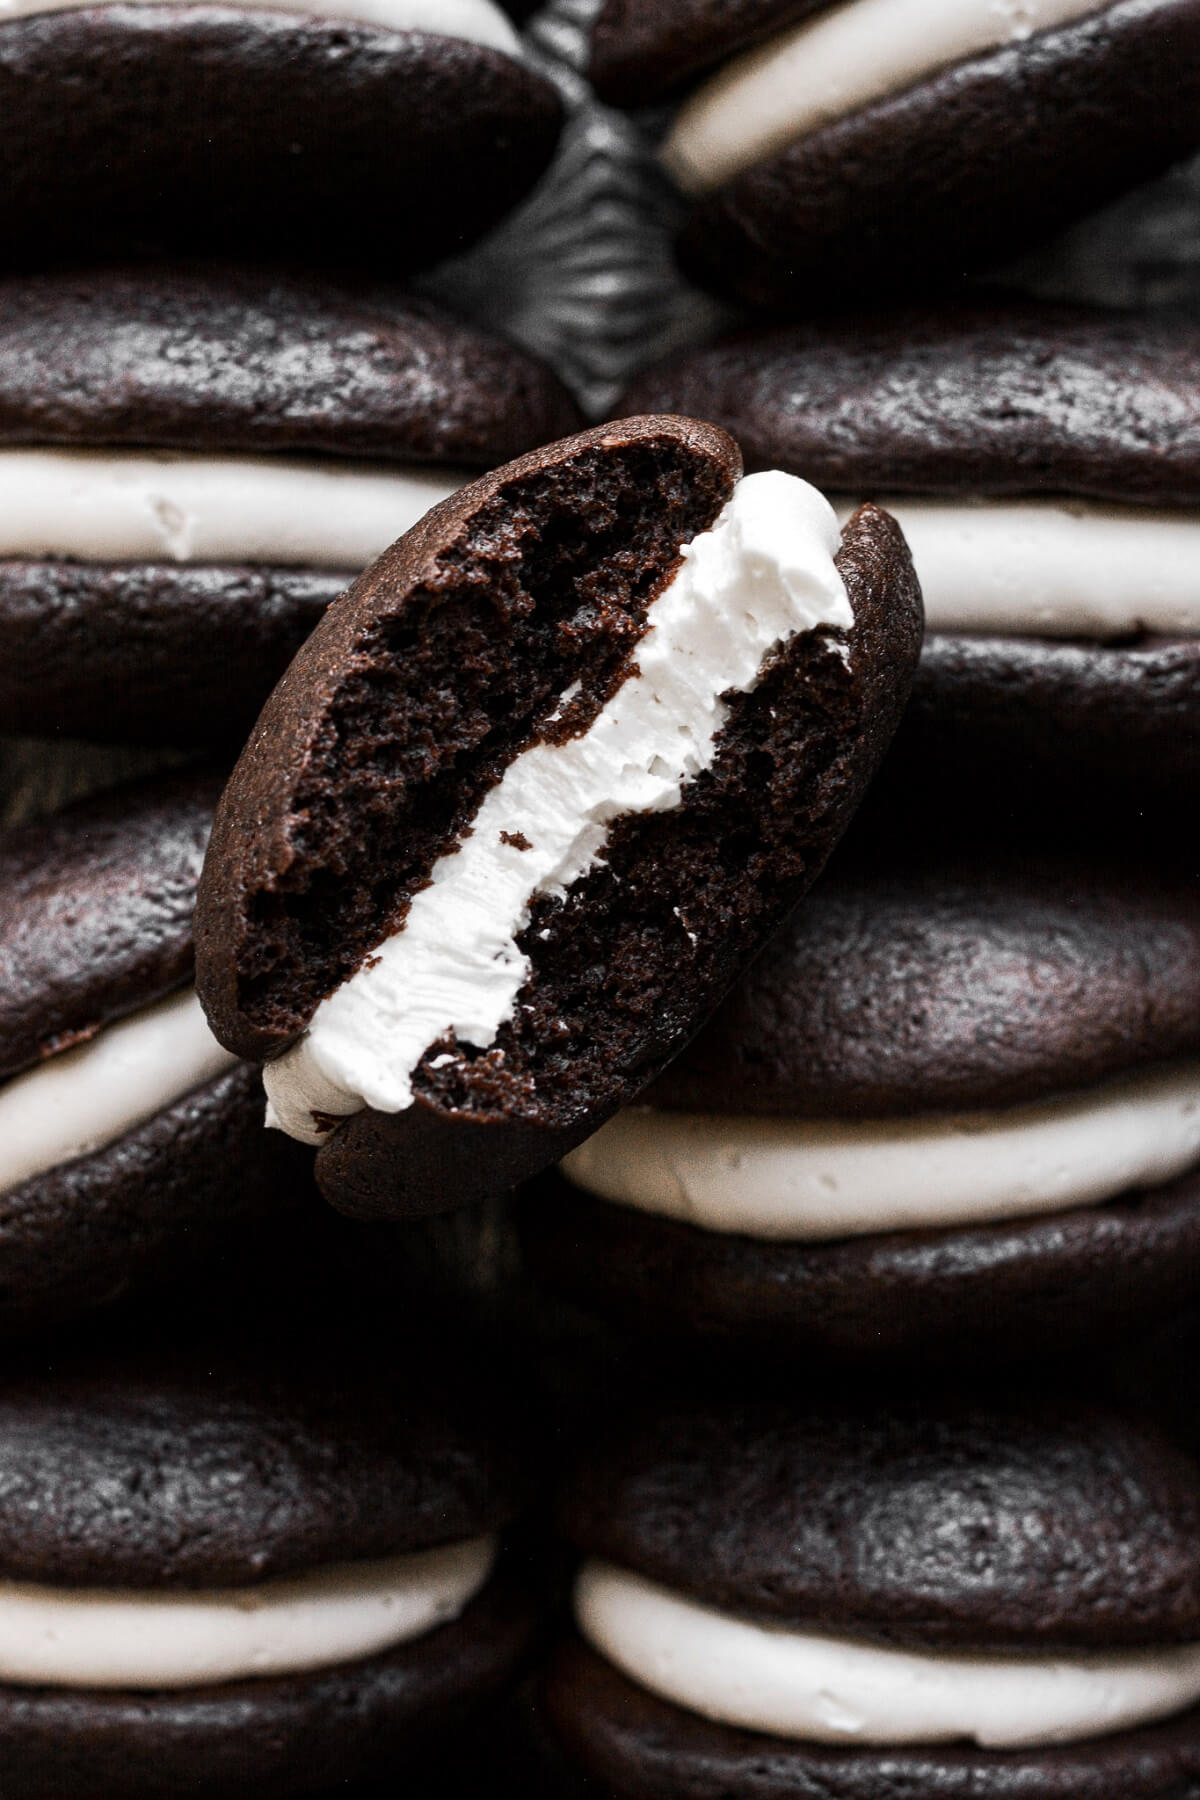
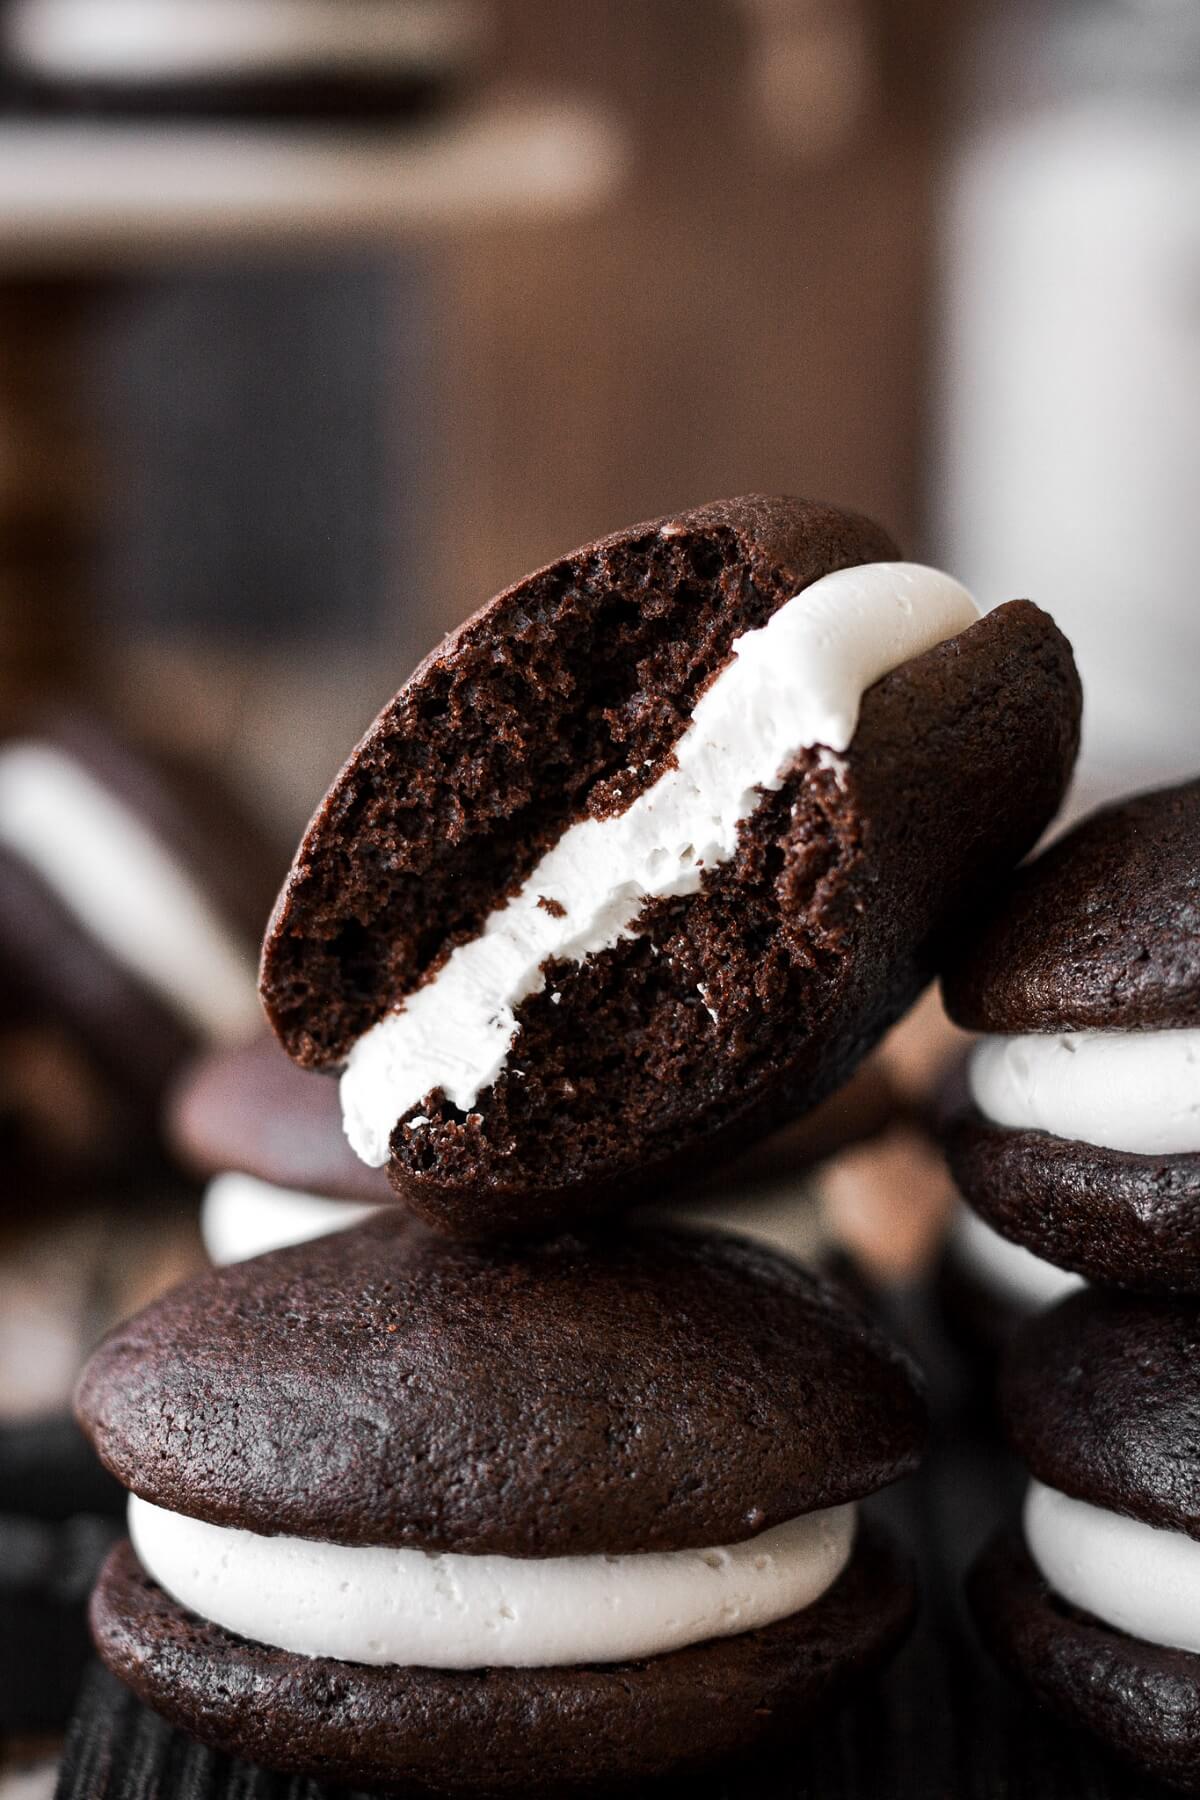
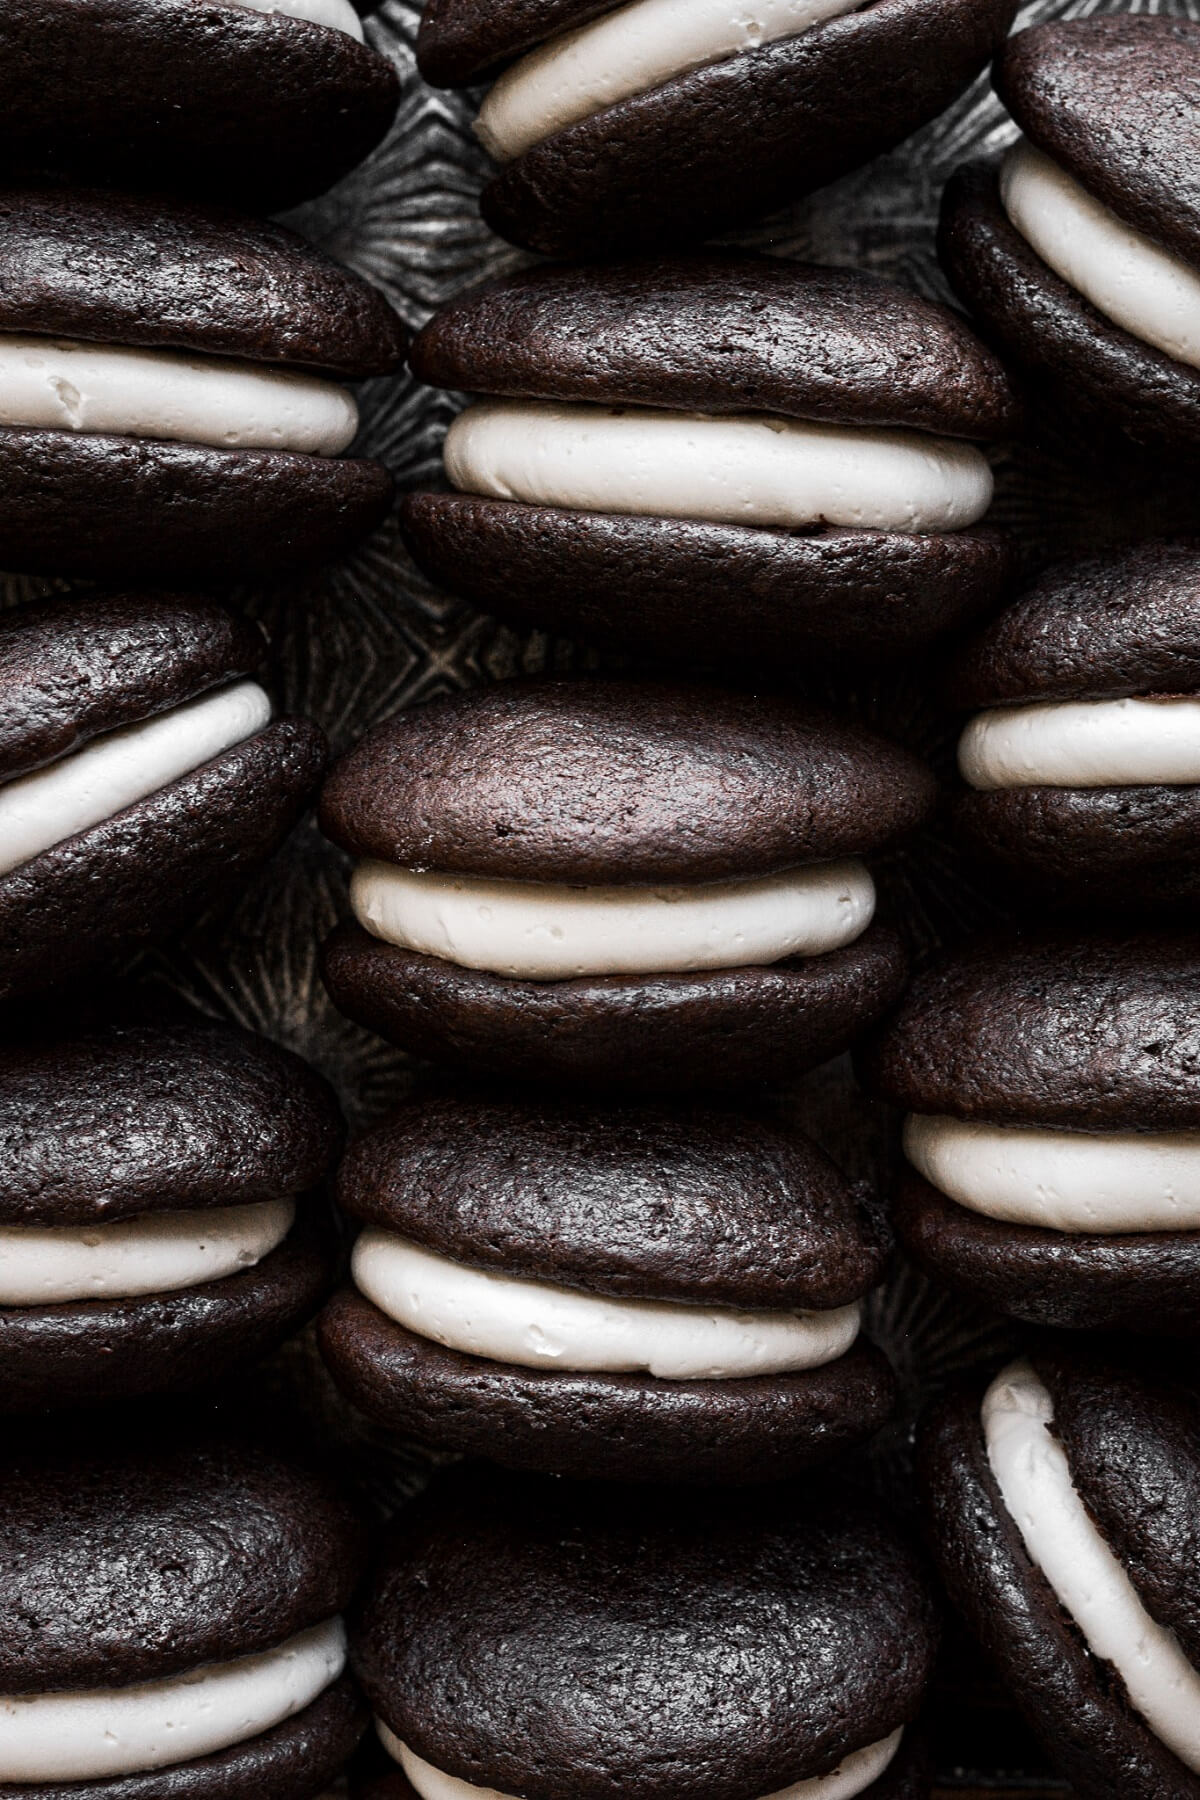
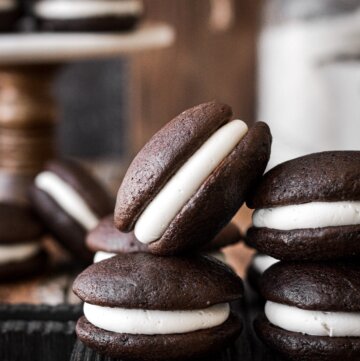
High altitude chocolate whoopie pies are a delicious hybrid of cake and cookies with cream filling. The chocolate cookies are soft, moist and cakey, sandwiched together with fluffy vanilla buttercream for an irresistible treat. You can also use today’s recipe to make the most irresistible chocolate coconut whoopie pies.
You might also love these high altitude recipes for red velvet whoopie pies with cream cheese filling and spiced gingerbread whoopie pies.
This site contains affiliate links. As an Amazon associate, I earn from qualifying purchases. This means that I may make a small commission if you purchase a product using those links. This in no way affects my opinion of those products and services. All opinions expressed on this site are my own.
What are Whoopie Pies?
A whoopie pie is basically a soft cookie sandwich that’s made of two small cakes that are baked like cookies and assembled with cream filling between them. They’re not as light and fluffy as a cake or cupcake, but not as dense or chewy as a cookie either. Chocolate whoopie pies are also sometimes called a black moon, black and white, big fat Oreo (or BFO), or a gob (which is a term specific to Pittsburgh and surrounding areas). Gobs are the name that I grew up knowing them by (since my dad was from Pennsylvania), and my mom often made chocolate and vanilla whoopie pies when I was a kid.
Besides chocolate whoopie pies, other popular flavors include vanilla, carrot cake, pumpkin, red velvet, gingerbread or snickerdoodle. They’re often filled with some type of marshmallow cream filling, but I prefer buttercream. If you like soft Oreo Cakesters, you’ll love today’s recipe.
Why You’ll Love This Recipe
Cakey and Creamy. The combination of soft chocolate cake with creamy filling is just so good. These are basically like chocolate vanilla cupcakes, but in the form of a chocolate sandwich cookie.
Soft and Moist. If you’ve made my popular high altitude chocolate cake recipe, then you might notice that today’s recipe seems a bit familiar. That’s because it is the same cake recipe, but with a higher ratio of dry ingredients (flour and cocoa powder) to liquid ingredients, so that the cookies don’t spread too much as they bake. The flavor is rich and chocolatey, not too sweet, with a soft moist texture.
High Altitude Tested. I develop all the recipes on my site for Denver’s altitude of 5,280 feet. If you’re at a lower or higher elevation, please see my FAQs for guidance on adjusting recipes for your altitude.
See the recipe card at the end of the post for the full ingredients list and instructions.
Ingredients
Cookies
- Flour. All purpose flour gives the cookies structure and strength.
- Granulated Sugar. Sweetness and moisture.
- Cocoa Powder. Just like with my chocolate cake recipe, use unsweetened, Dutch-processed cocoa powder for a rich chocolate flavor and deep color.
- Baking Powder + Baking Soda. Leavening agents.
- Salt. Balances the sweetness and enhances the flavor of the chocolate.
- Instant Espresso Powder. Optional, but it adds a subtle coffee flavor to bring out the chocolate flavor even more.
- Eggs. Structure and moisture.
- Milk + Sour Cream. Use whole milk and full fat sour cream to make the cookies tender and moist.
- Vegetable Oil. Moisture.
- Vanilla Extract. Flavor.
Filling
- Butter. I use unsalted butter, but if you use salted, just omit the extra salt in the recipe. For a white buttercream filling, like the one pictured, substitute vegetable shortening for half the butter.
- Powdered Sugar. Sweetens and thickens the buttercream.
- Meringue Powder. Adds stability.
- Salt. Balances the sweetness.
- Vanilla Extract. Flavor.
Instructions
Cookies
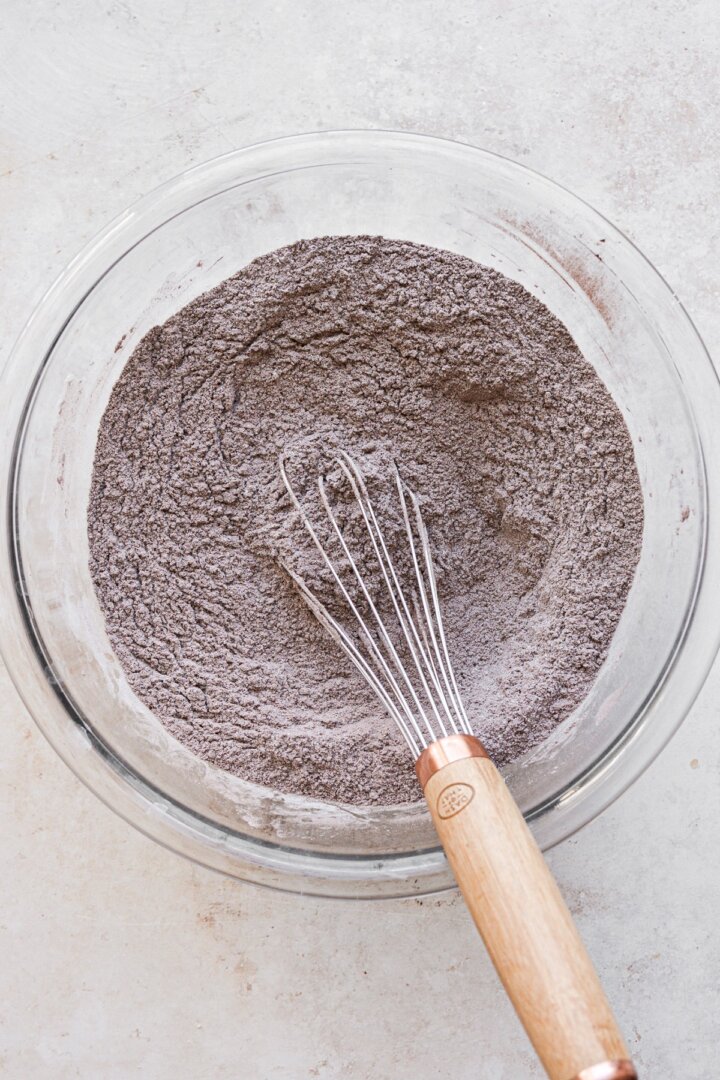
- In a bowl, sift together the flour, sugar, cocoa powder, baking powder, baking soda, salt and espresso powder, then whisk until everything is evenly distributed.
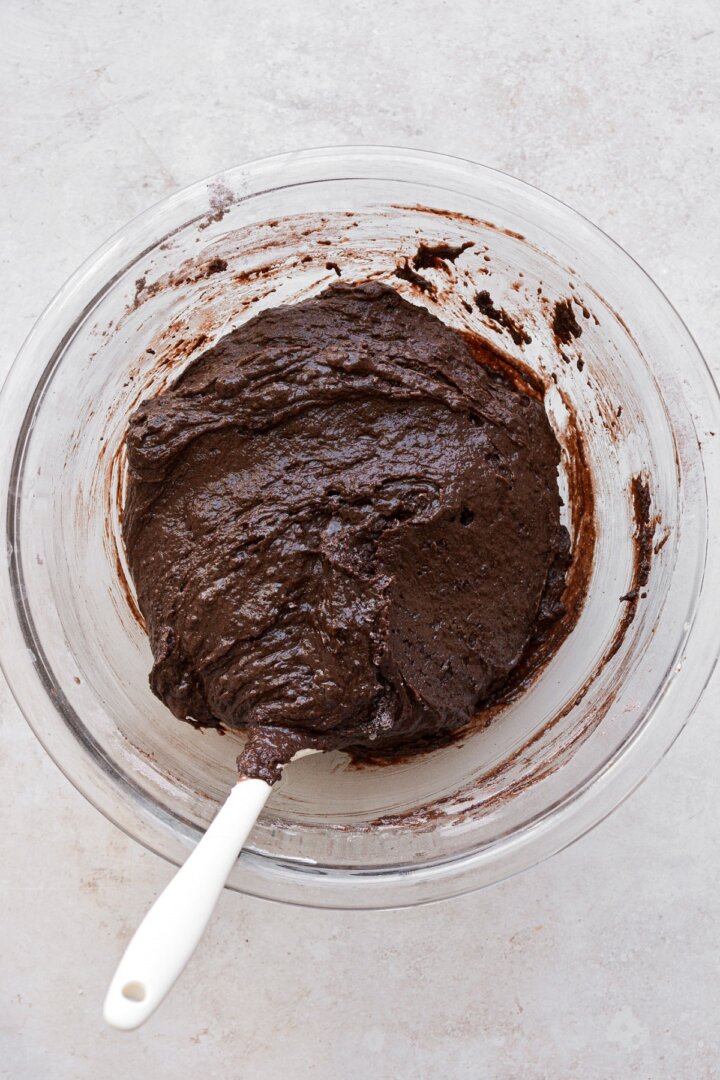
- In a separate bowl, whisk together the eggs, milk, sour cream, oil and vanilla, until well combined.
- Add the wet ingredients to the dry, and use a spatula to stir everything together until all the flour is incorporated.


- Cover the bowl of batter and refrigerate for 1 1/2 hours to rest and chill the batter. This step also prevents the cookies from spreading too much when they bake.
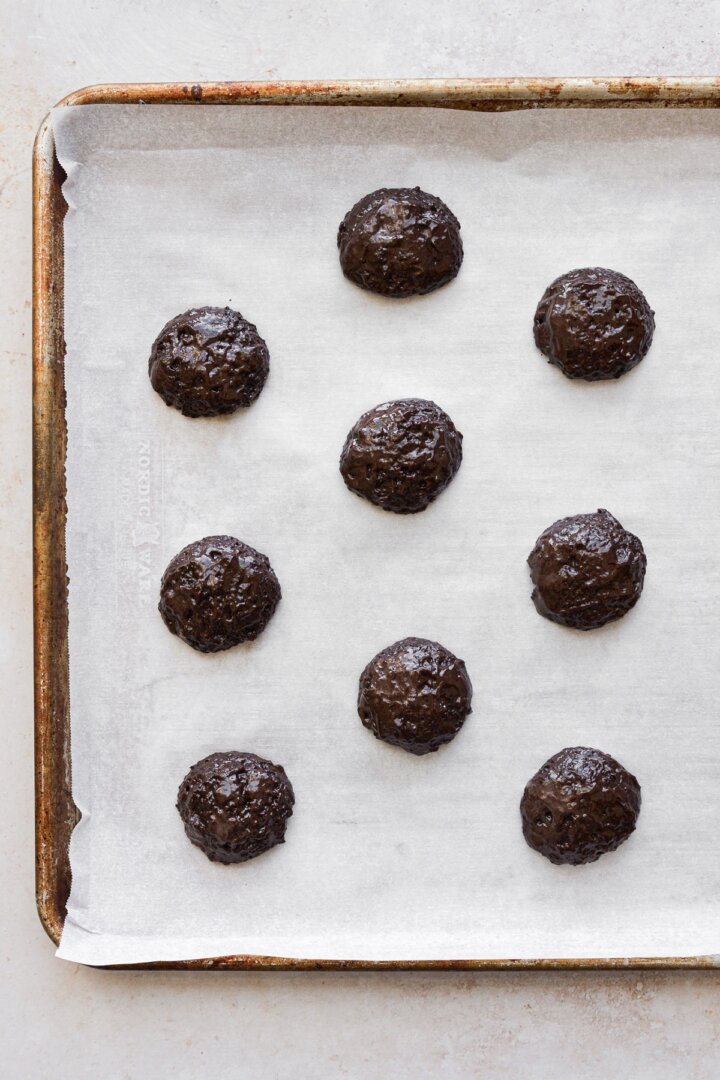
- Preheat the oven to 350 F, and position a rack in the center of the oven. Line a baking sheet with parchment paper.
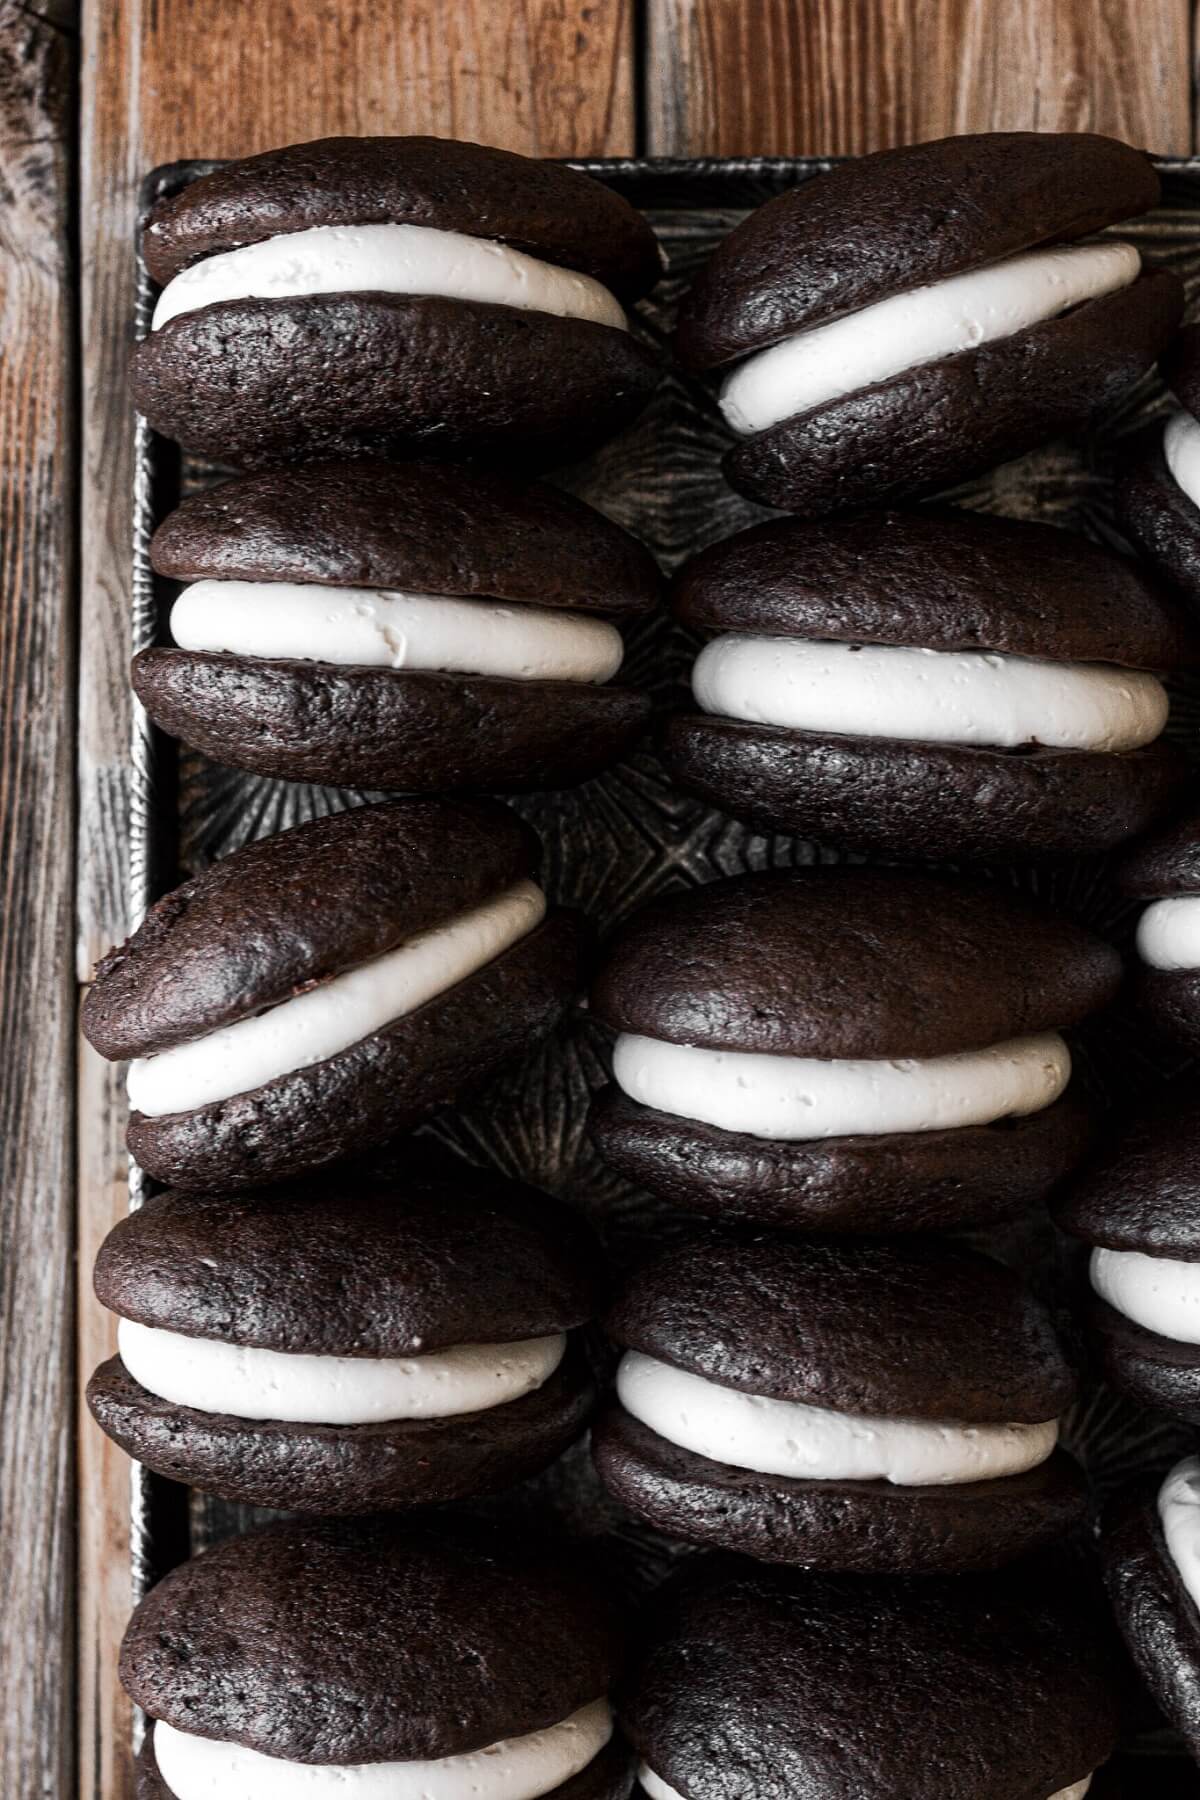
- Use a medium cookie scoop with a release lever (1 1/2 – 2 tablespoon capacity) to scoop the batter onto the baking sheet, leaving 3 inches between each cookie. You should be able to get 30 cookies, for 15 assembled whoopie pies. (The pan may only fit 15 cookies at a time; keep the rest of the batter refrigerated while you bake the first batch.)
TIP: Get a small bowl of water, dip your finger lightly in the water, and use your wet finger to smooth out the top of the batter before baking the whoopie pies. This will give them a smoother, prettier finish.
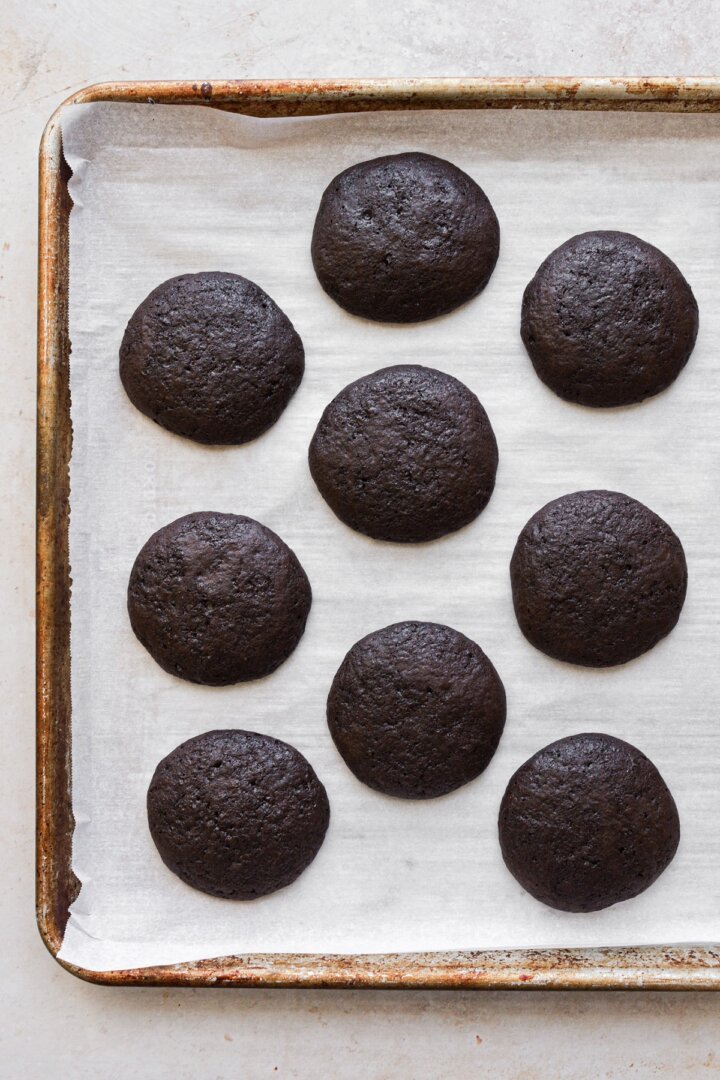

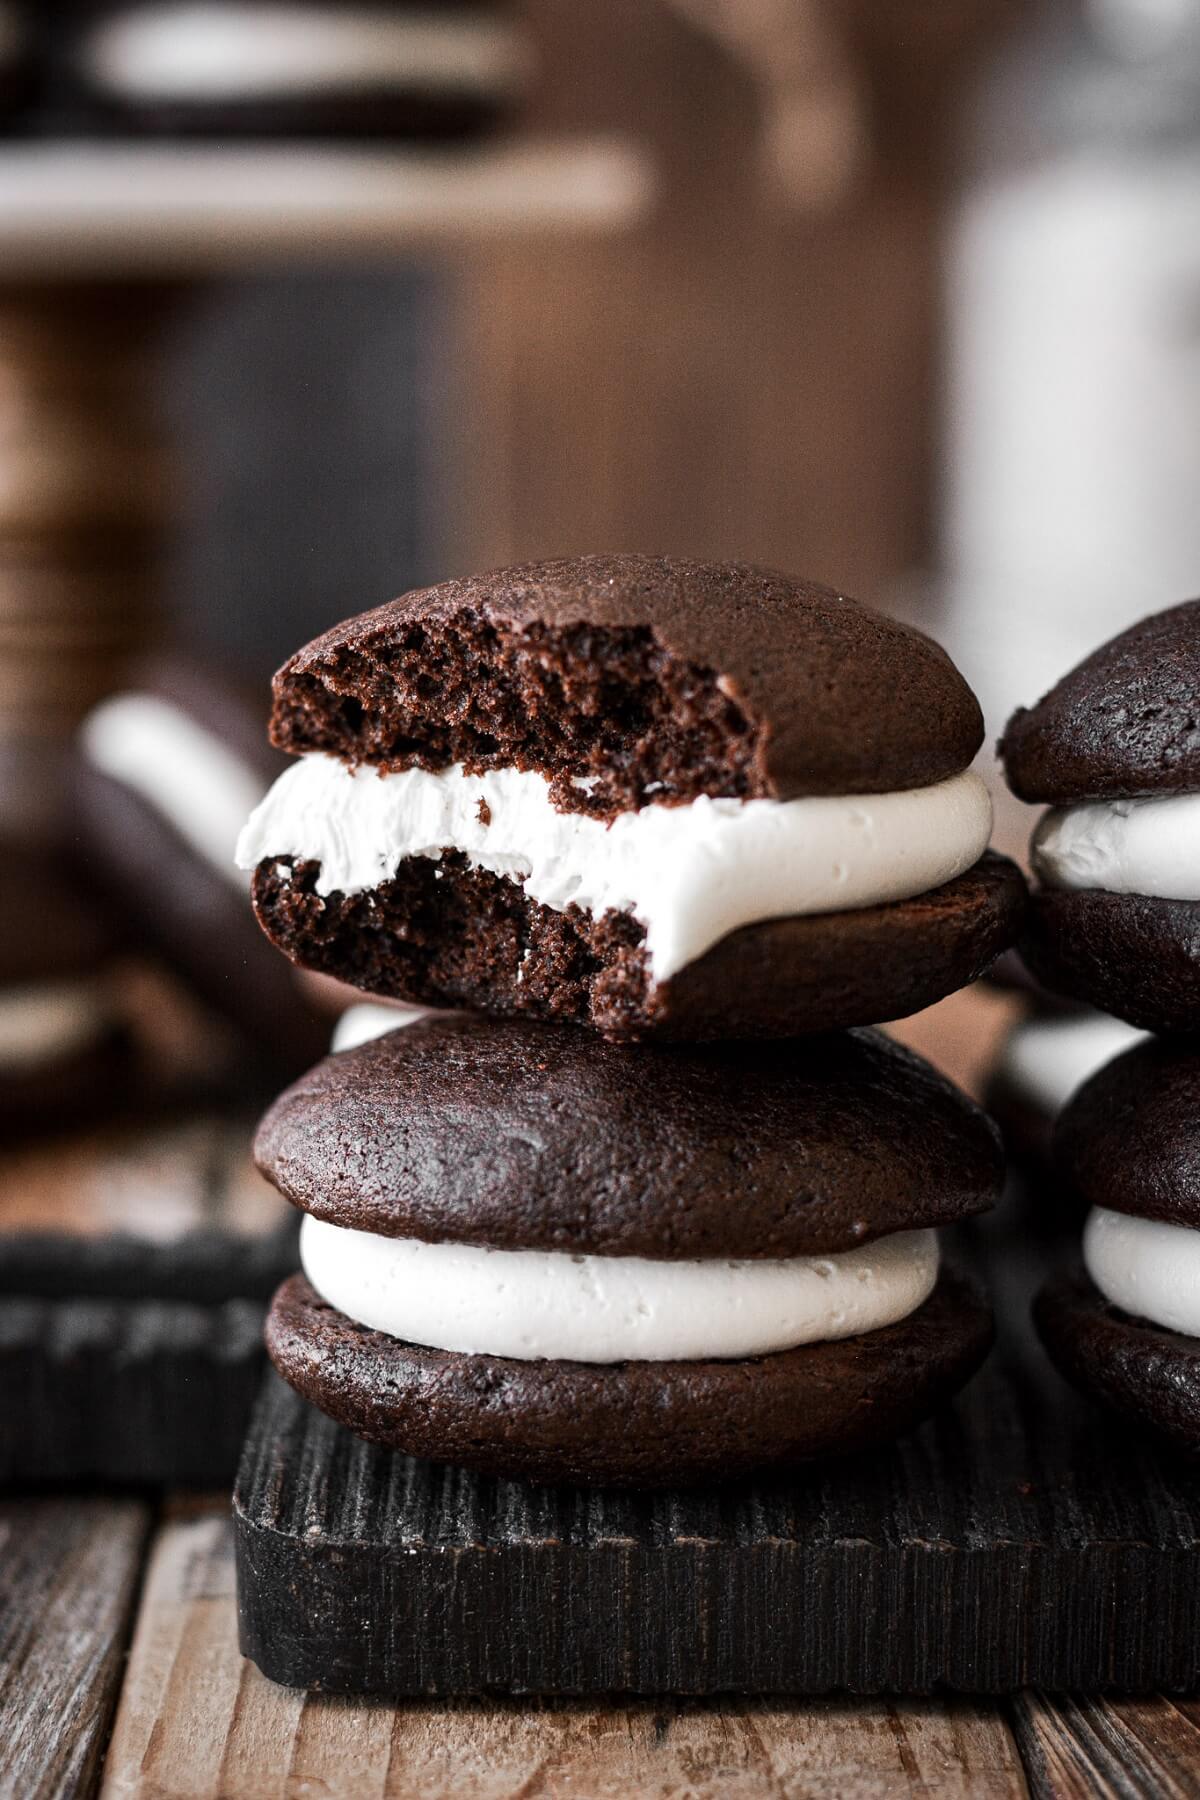
- Bake the cookies for 11 minutes, until puffed and set. Cool on the pan for 5 minutes, then transfer to a cooling rack to cool completely before filling.
Filling
- In the bowl of your stand mixer fitted with the paddle attachment, beat the butter for 1 minute until smooth.
- With the mixer on low, add the powdered sugar, meringue powder and salt, mixing until combined. Add the vanilla, and increase the speed to medium. Whip for 4-5 minutes until very light and fluffy, stopping to scrape the bowl down several times.
- Fit a disposable piping bag with tip 2A, and fill with the buttercream.
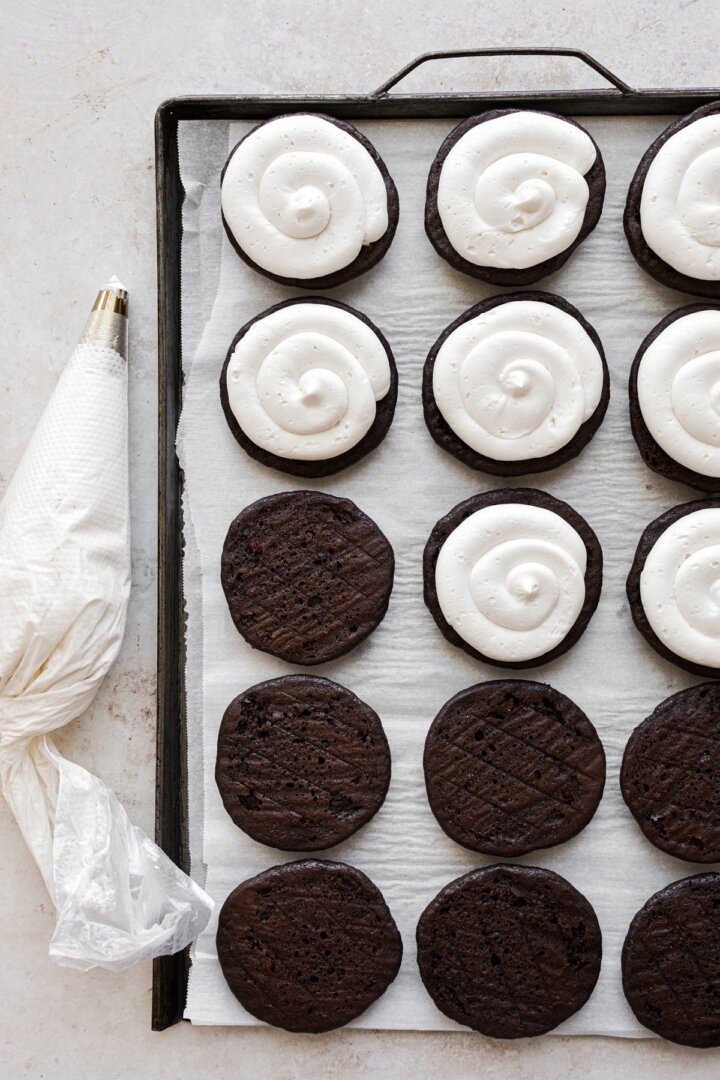
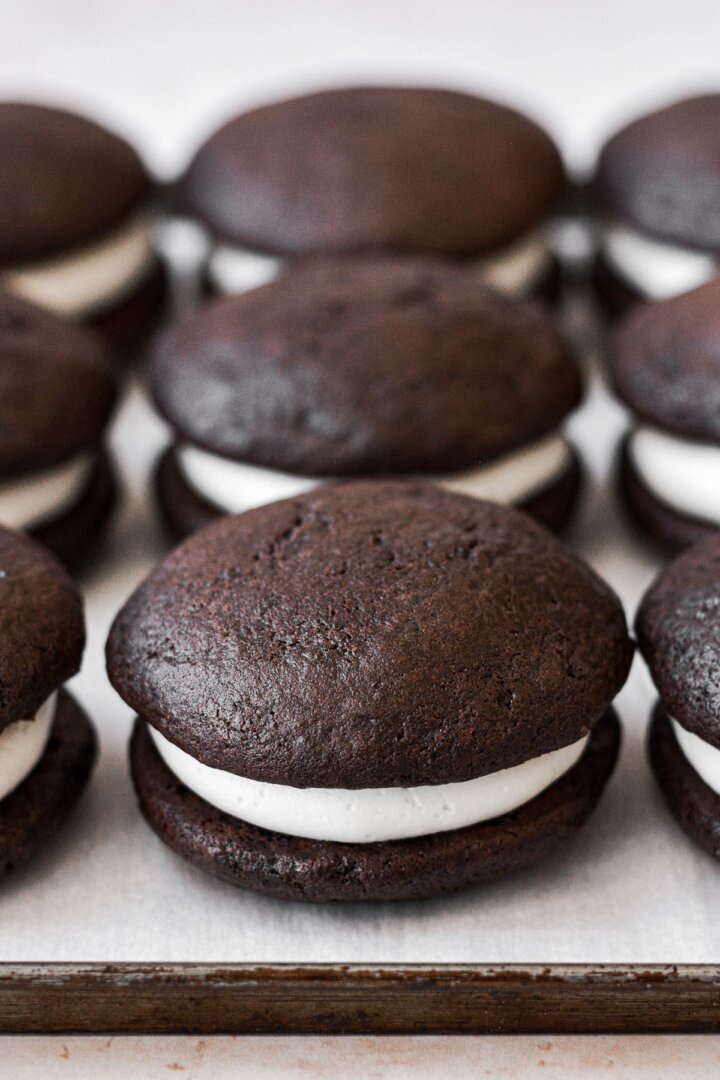
- Turn half the cookies over so the bottoms are facing up, pipe the buttercream onto the cookies, and top with another cookie.
- Store the cookies in an airtight container, separated with layers of wax paper so they don’t stick to each other, until ready to serve.
Recipe Variations
- Marshmallow Filling. A classic filling for whoopie pies is marshmallow filling. You can use the marshmallow filling recipe from these chocolate hostess cupcakes. You may need to double the filling recipe.
- Cream Cheese Buttercream. Cream cheese or mascarpone frosting is delicious with chocolate cake. You can use this cream cheese buttercream recipe.
- Chocolate Chip Buttercream. For chocolate chip buttercream, just add a handful of mini chocolate chips or some finely chopped chocolate to the buttercream. You could even add chocolate chips to the cake batter, too. The crunch of the chocolate in the filling is such a good contrast to the soft cake and frosting.
- Coconut. For chocolate coconut whoopie pies, add 1 tsp coconut extract to the buttercream filling. After assembling the sandwich cookies, press natural unsweetened coconut flakes all around the sides so it sticks to the filling.

Be sure to read all of my BAKING FAQs where I discuss ingredients, substitutions and common baking questions, so that you can be successful in your own baking!
Frequently Asked Questions
How long do chocolate whoopie pies stay soft?
Stored in an airtight container, they’ll stay soft and moist for up to 3 days. Since they are very moist, I recommend placing wax paper in the container, as well as between each layer of whoopie pies, or they’ll stick to each other.
You Might Also Like


Please check out my Amazon Shop for a curated collection of some of my favorite cake pans from trusted brands, baking tools, ingredients, pretty things and fashion finds. I recommend products that I buy and use every day!
Did you love today’s recipe? Please rate the recipe and let me know in the comments what you thought! Also, be sure to follow Curly Girl Kitchen on Instagram, and tag me when you try one of my recipes so I can see all your delicious creations!
High Altitude Chocolate Whoopie Pies
All recipes on Curly Girl Kitchen are developed for high altitude at 5,280 feet. See FAQs for adjusting to higher or lower elevations.

Equipment
- Medium Cookie Scoop with Release Lever (1 1/2 – 2 tbsp capacity)
- Baking Sheet + Parchment Paper
Ingredients
Cookies
- 1 ¾ cups all-purpose flour, fluffed, spooned and leveled
- ¾ cup granulated sugar
- ½ cup unsweetened Dutch processed cocoa powder
- ¼ tsp baking powder
- ½ tsp baking soda
- ½ tsp coarse Kosher salt (if using table salt, use half the amount)
- 1 tsp instant espresso powder (optional)
- 2 large eggs
- ½ cup whole milk
- ½ cup full-fat sour cream
- ½ cup vegetable oil
- 1 ½ tsp vanilla extract
Filling
- 1 cup unsalted butter, softened to room temperature (for a whiter color, substitute vegetable shortening for half the butter)
- 2 cups powdered sugar
- ½ tsp meringue powder
- ⅛ tsp coarse Kosher salt (if using table salt, use half the amount)
- 1 tsp vanilla extract
Instructions
Cookies
- In a bowl, sift together the flour, sugar, cocoa powder, baking powder, baking soda, salt and espresso powder, then whisk until everything is evenly distributed.
- In a separate bowl, whisk together the eggs, milk, sour cream, oil and vanilla, until well combined.
- Add the wet ingredients to the dry, and use a spatula to stir everything together until all the flour is incorporated.
- Cover the bowl of batter and refrigerate for 1 1/2 hours to rest and chill the batter.
- Preheat the oven to 350 F, and position a rack in the center of the oven. Line a baking sheet with parchment paper.Use a medium cookie scoop with a release lever (1 1/2 – 2 tablespoon capacity) to scoop the batter onto the baking sheet, leaving 3 inches between each cookie. You should be able to get 30 cookies, for 15 assembled whoopie pies. (The pan may only fit 15 cookies at a time; keep the rest of the batter refrigerated while you bake the first batch.)TIP: Get a small bowl of water, dip your finger lightly in the water, and use your wet finger to smooth out the top of the batter before baking the whoopie pies. This will give them a smoother, prettier finish.
- Bake the cookies for 11 minutes, until puffed and set. Cool on the pan for 5 minutes, then transfer to a cooling rack to cool completely before filling.
Filling
- In the bowl of your stand mixer fitted with the paddle attachment, beat the butter for 1 minute until smooth.
- With the mixer on low, add the powdered sugar, meringue powder and salt, mixing until combined. Add the vanilla, and increase the speed to medium. Whip for 4-5 minutes until very light and fluffy, stopping to scrape the bowl down several times.
- Fit a disposable piping bag with tip 2A, and fill with the buttercream.
- Turn half the cookies over so the bottoms are facing up, pipe the buttercream onto the cookies, and top with another cookie.
- Store the cookies in an airtight container, separated with layers of wax paper so they don't stick to each other, until ready to serve.
Video
 https://curlygirlkitchen.com/
These were a lot easier to make than I expected. So good! Native Colorado Girl who traveled the world. So nice that you test and share your recipes so I don’t have to make the adjustments. Thank you so much. I am down the road in Palmer Lake, about 2k higher, but made as written and worked perfectly!
Thrilled to have found your site. I’m a displaced Michigan girl living in Albuquerque. Baking here has been quite a challenge. Same altitude as Denver.
Good day,
I was wondering how I should alter the recipe for a vanilla version (without cacao powder). I also want to try the chocolate version! Thank you very much.
Isabella,
I haven’t made a vanilla version, so I couldn’t say exactly. When creating my whoopie pie recipes, I based them on my cake recipes, but added more flour to thicken the batter. So these chocolate whoopie pies are based on this chocolate cake recipe: https://curlygirlkitchen.com/best-high-altitude-chocolate-cake-recipe/
If you want to try a vanilla version, you might try adding more flour to this vanilla cake recipe: https://curlygirlkitchen.com/vanilla-cake-recipe/
I’ll add a vanilla whoopie pie recipe to my list of things to work on!
I live in Albuquerque which is the same altitude as Denver. I made these to share at a pot luck and cut them in half to serve. I didn’t have a stand mixer and I don’t think I beat the filling long enough. They were still wonderful and didn’t disappoint. I just don’t have room for a stand mixer, plus I just lost 20 pounds. I think if I had a stand mixer I’d make these more often and eat them all myself, and gain the 20 pounds back!