
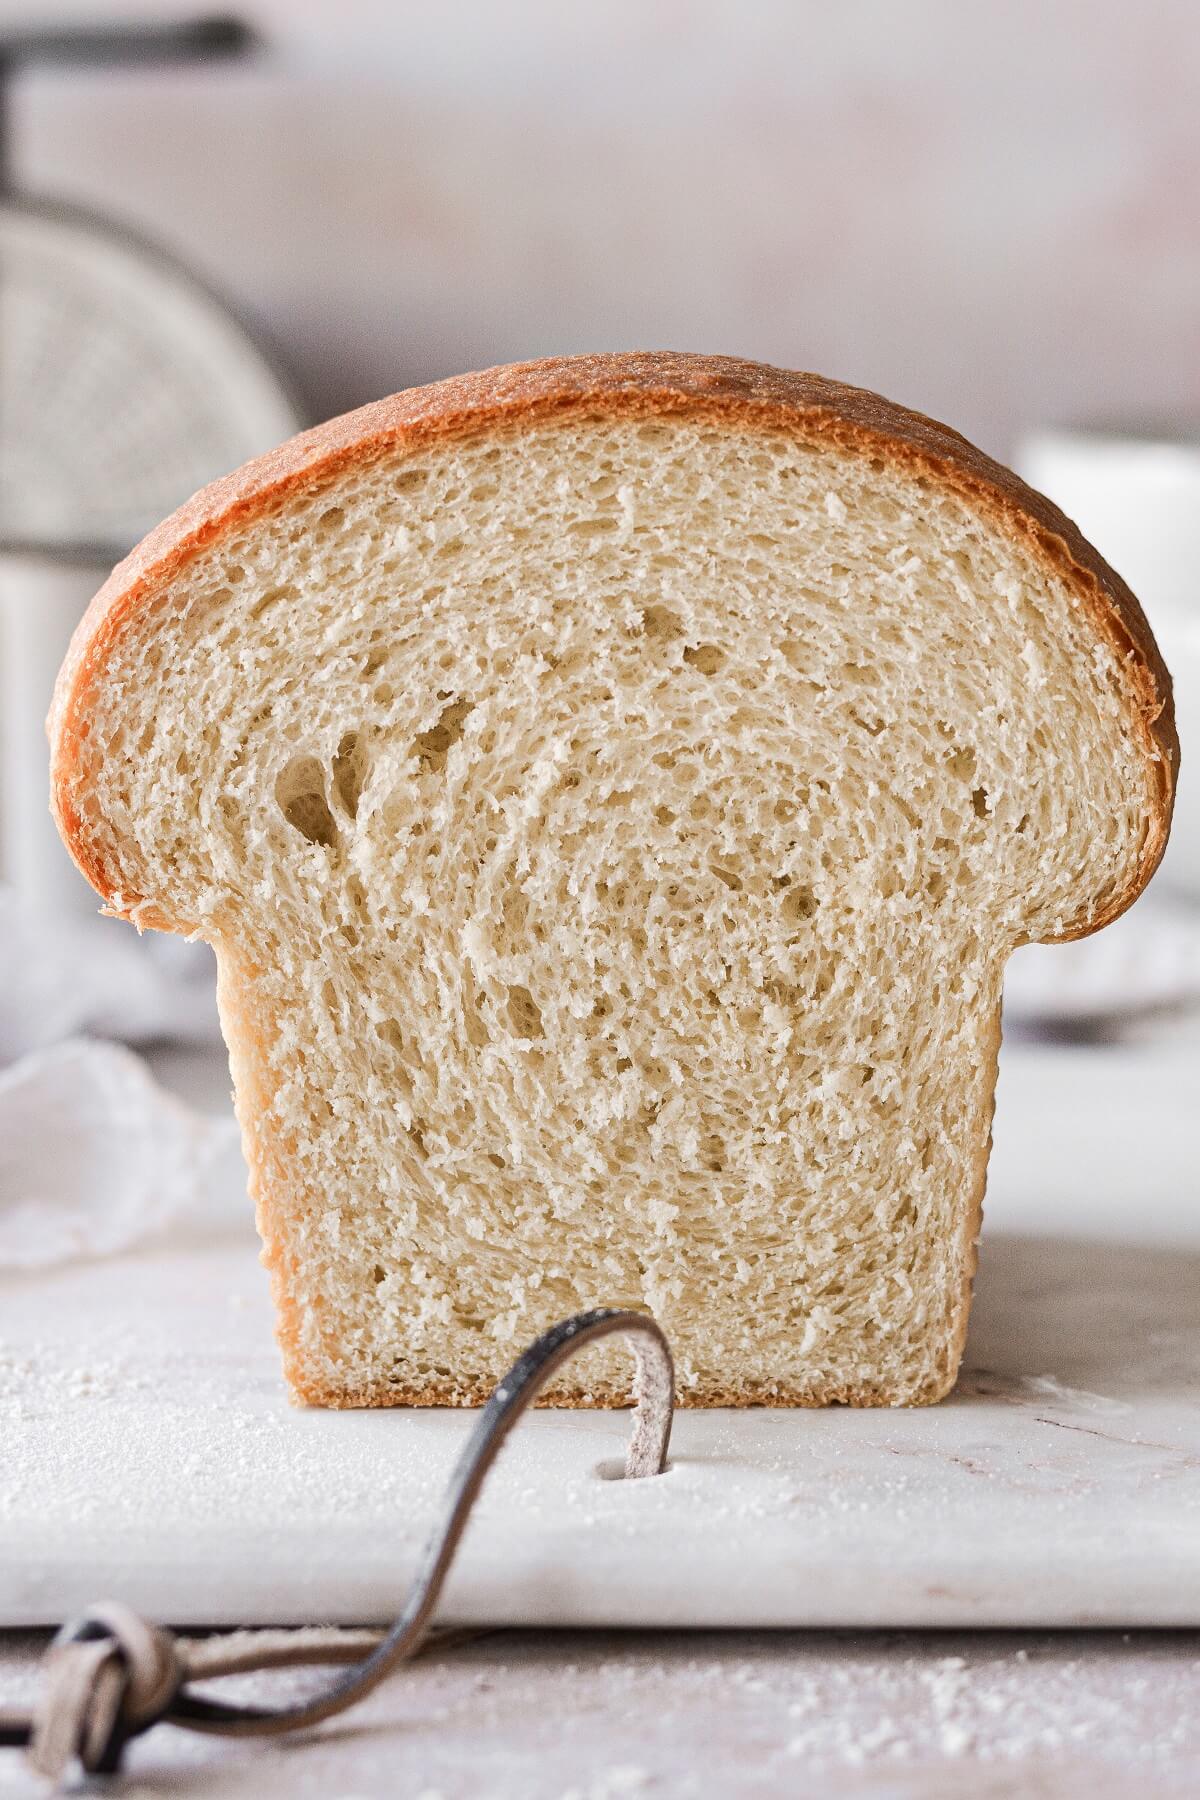
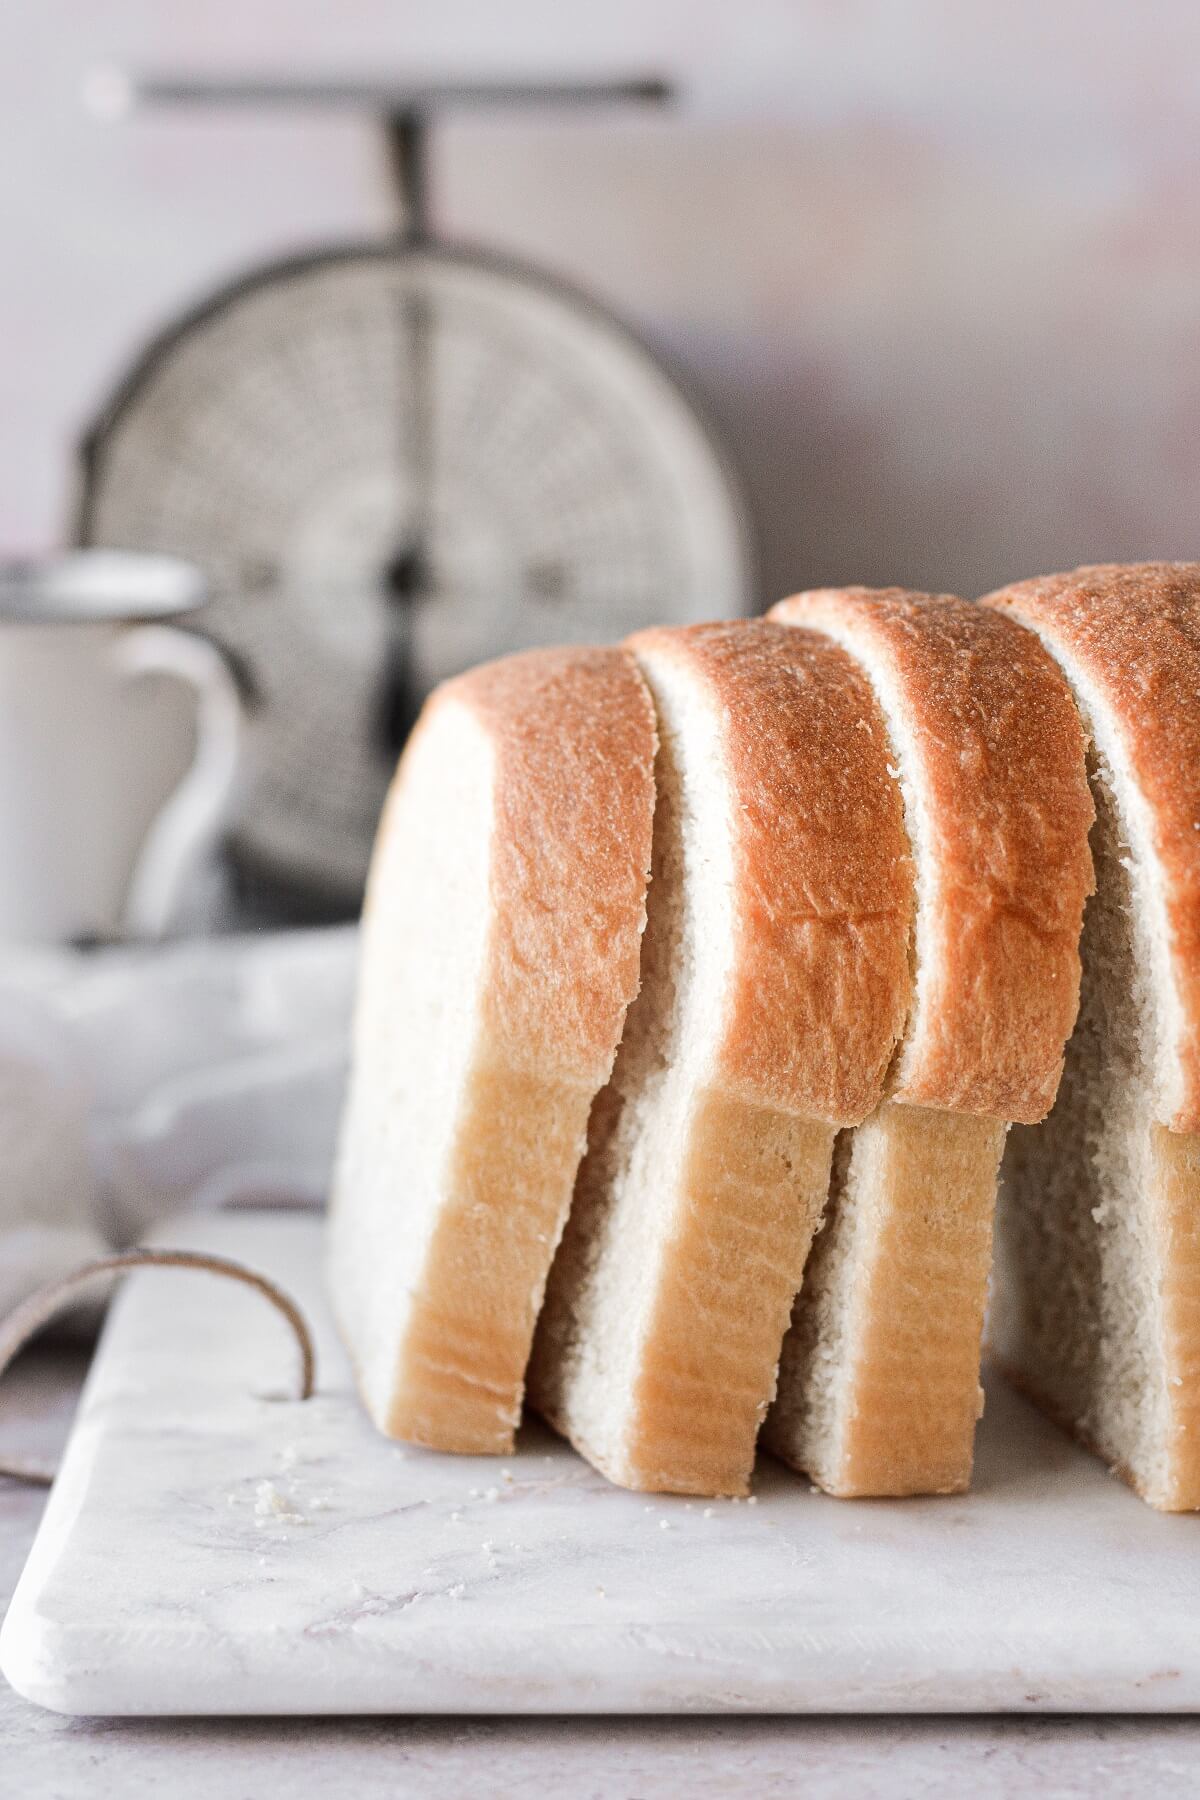
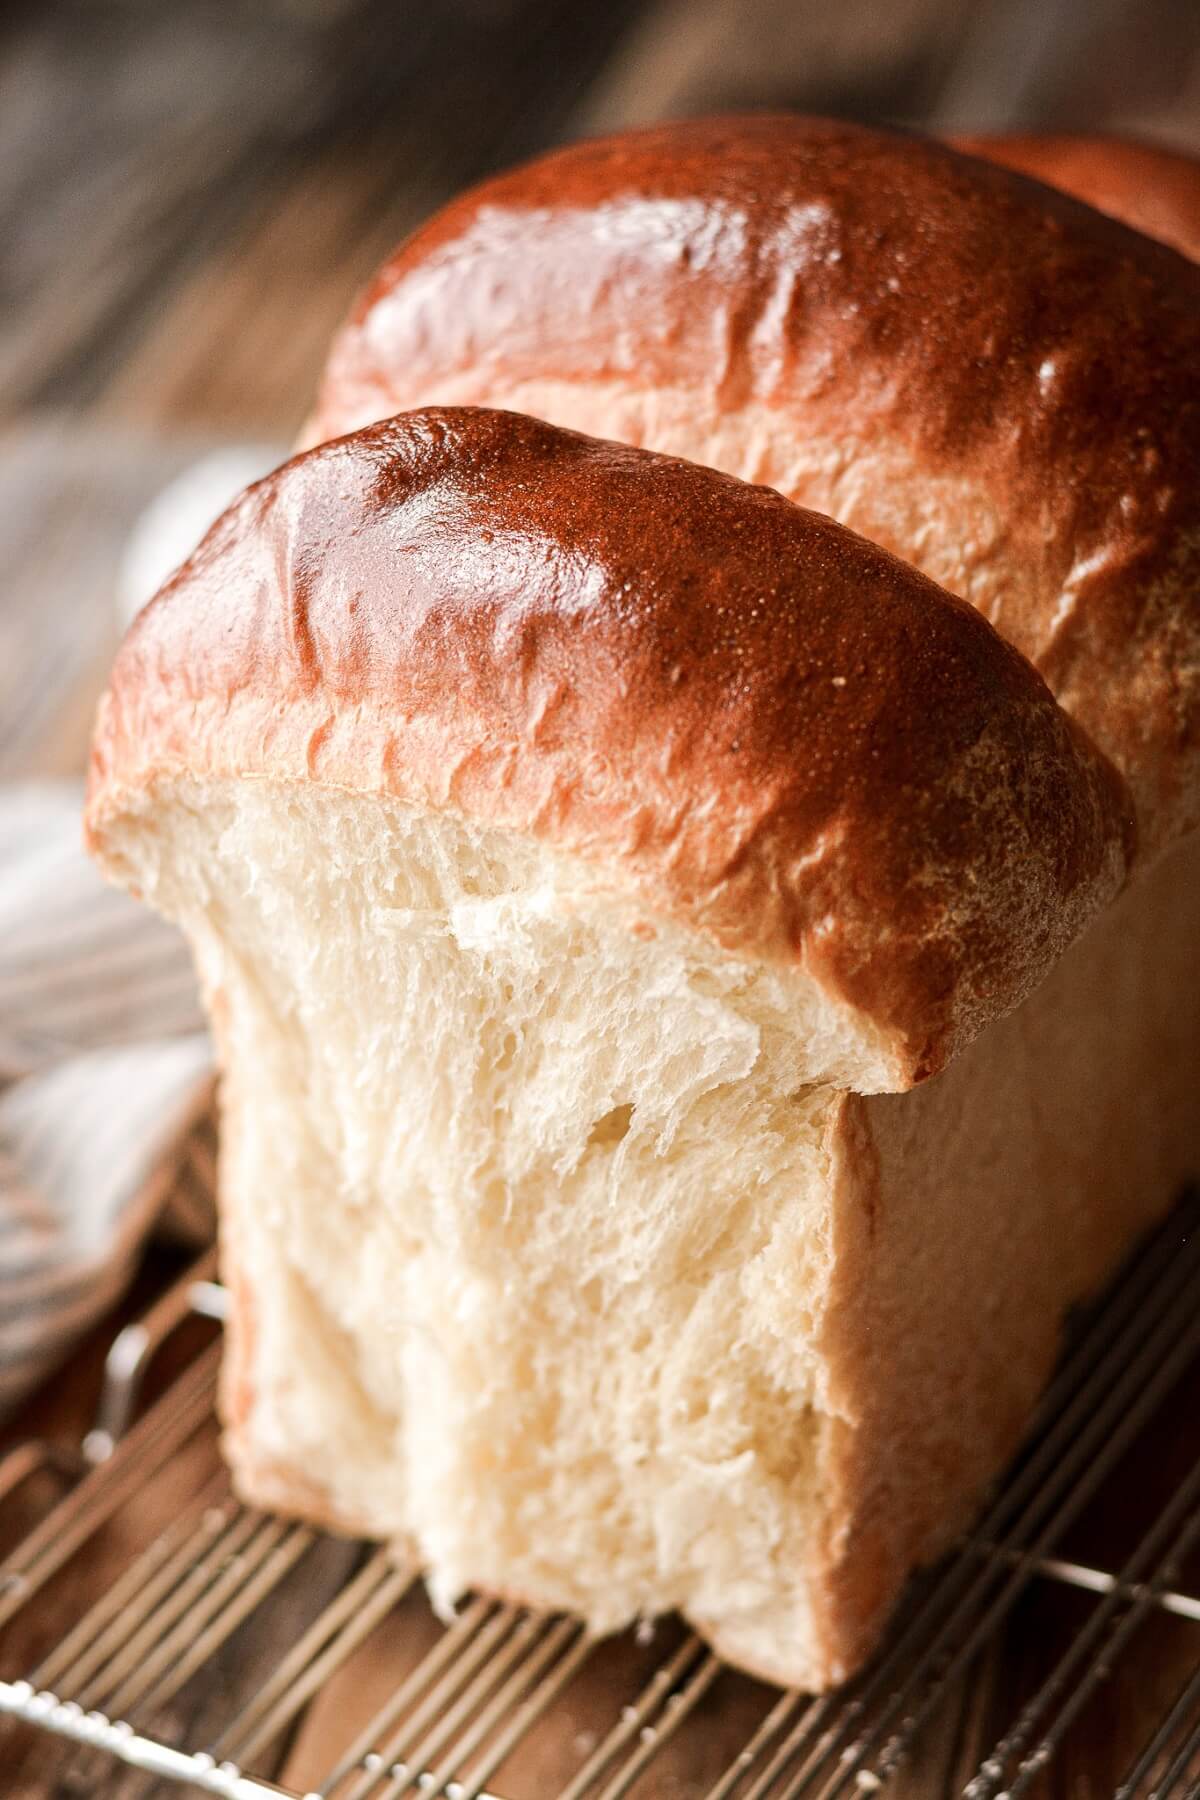
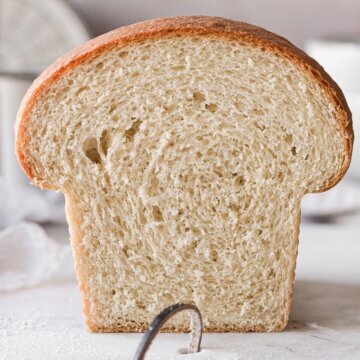
This soft and fluffy white sandwich bread is quick and easy to make, and is perfect for sandwiches, French toast, grilled cheese, or bread pudding. If you’re looking for a basic high altitude white bread recipe that’s ready to bake and eat in just a few hours, you’ll love this bread. It puffs up dramatically in the oven for a perfectly shaped loaf, and is fantastic toasted and slathered with butter and jam. And don’t miss my honey whole wheat sandwich bread recipe, too!
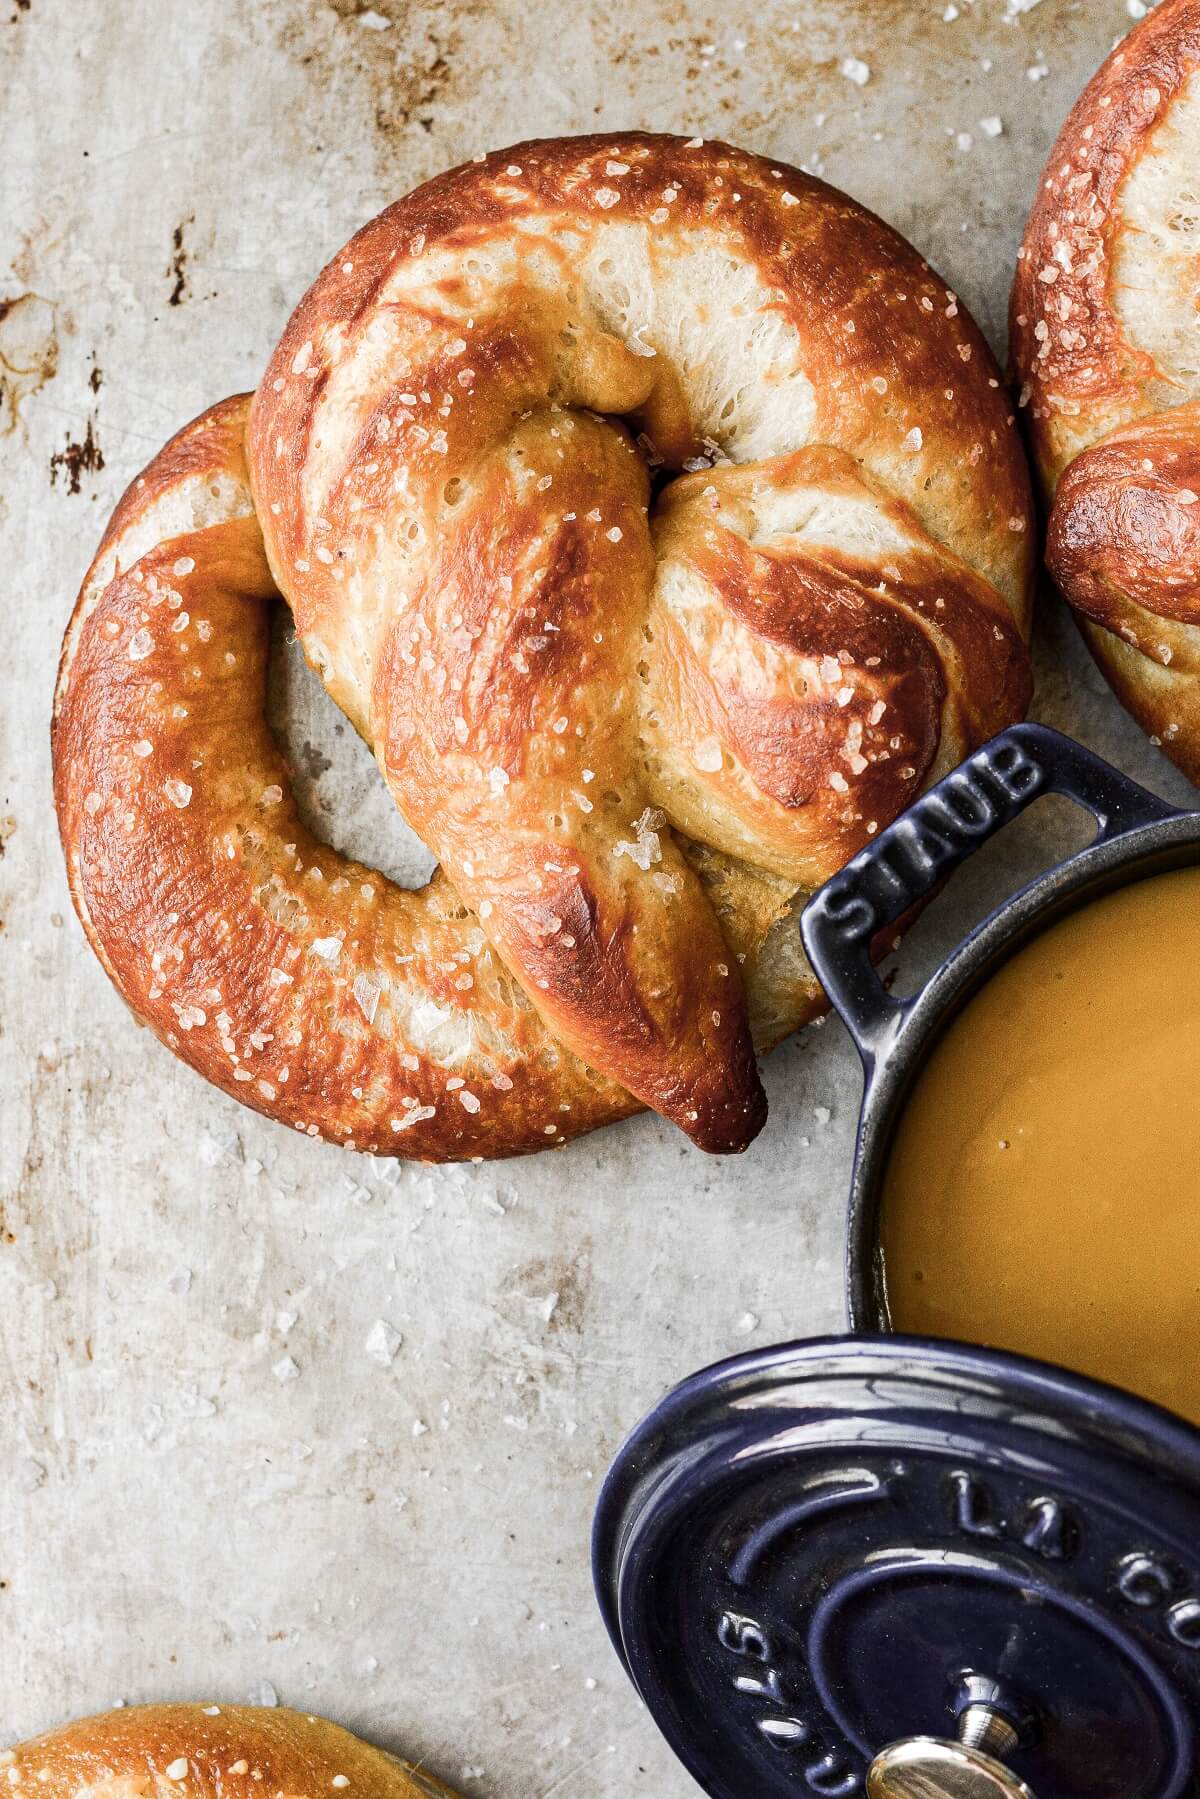
Looking for more bread recipes? You’ll love these Parker House dinner rolls with salted maple butter, apple butter cinnamon rolls, and classic sweet cornbread.
This site contains affiliate links. As an Amazon associate, I earn from qualifying purchases. This means that I may make a small commission if you purchase a product using those links. This in no way affects my opinion of those products and services. All opinions expressed on this site are my own.
Why You’ll Love This Recipe
Easy to Make. Even if you’ve never worked with yeast before, you can easily make this bread. Just be sure to read all of my tips and FAQs, and scroll through the whole post for the step-by-step process.
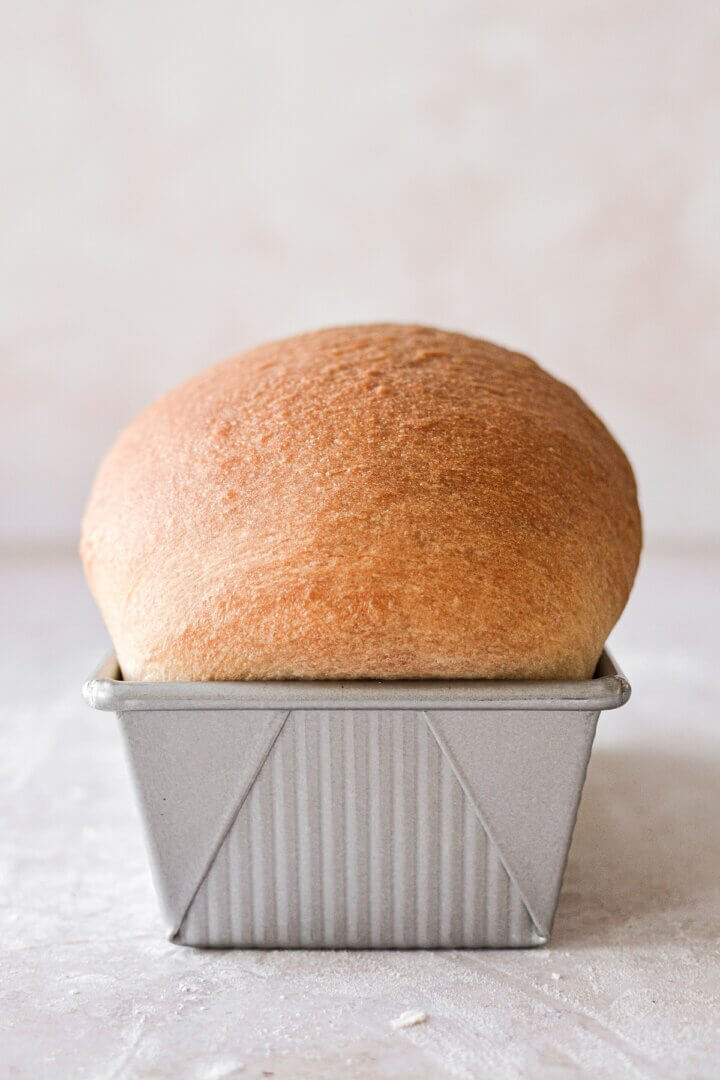
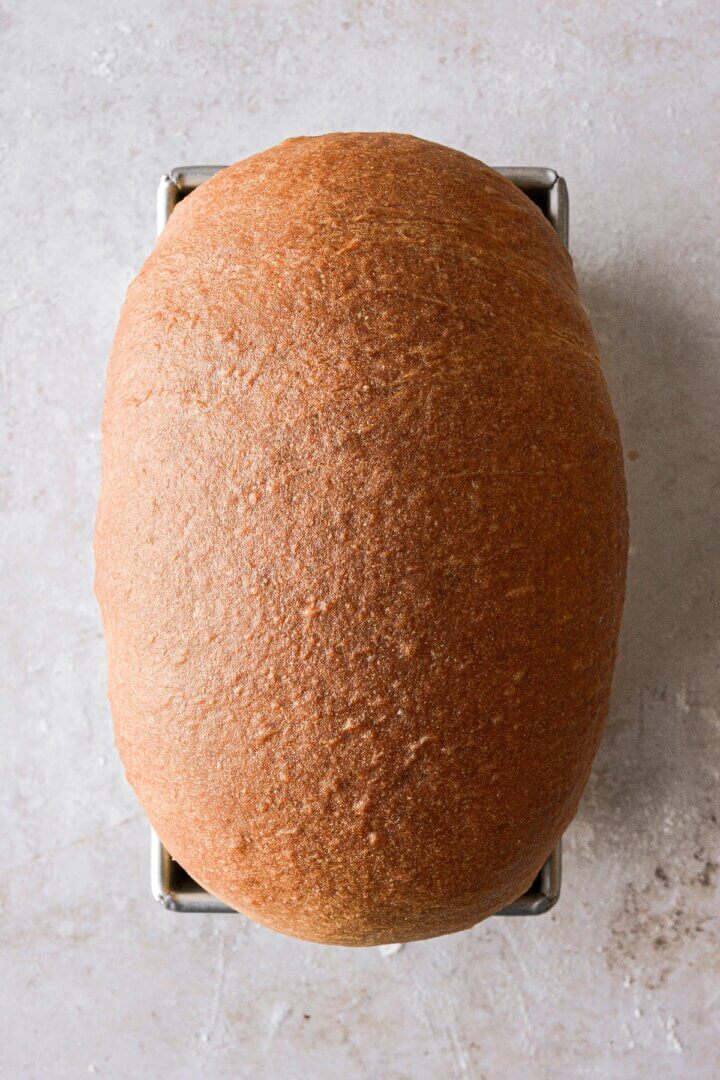
Looks Beautiful. Just look at the dramatic rise of this fluffy loaf of bread. It looks so beautiful and perfectly shaped.
Use it for Everything. Whether you want to use this white sandwich bread for sandwiches or toast, dry it out for homemade croutons or Thanksgiving stuffing, or make French toast for breakfast, this versatile recipe has you covered.
High Altitude Tested. I develop all the recipes on my site for Denver’s altitude of 5,280 feet. If you’re at a lower or higher elevation, please see my FAQs for guidance on adjusting recipes for your altitude.
See the recipe card at the end of the post for the full ingredients list and instructions.
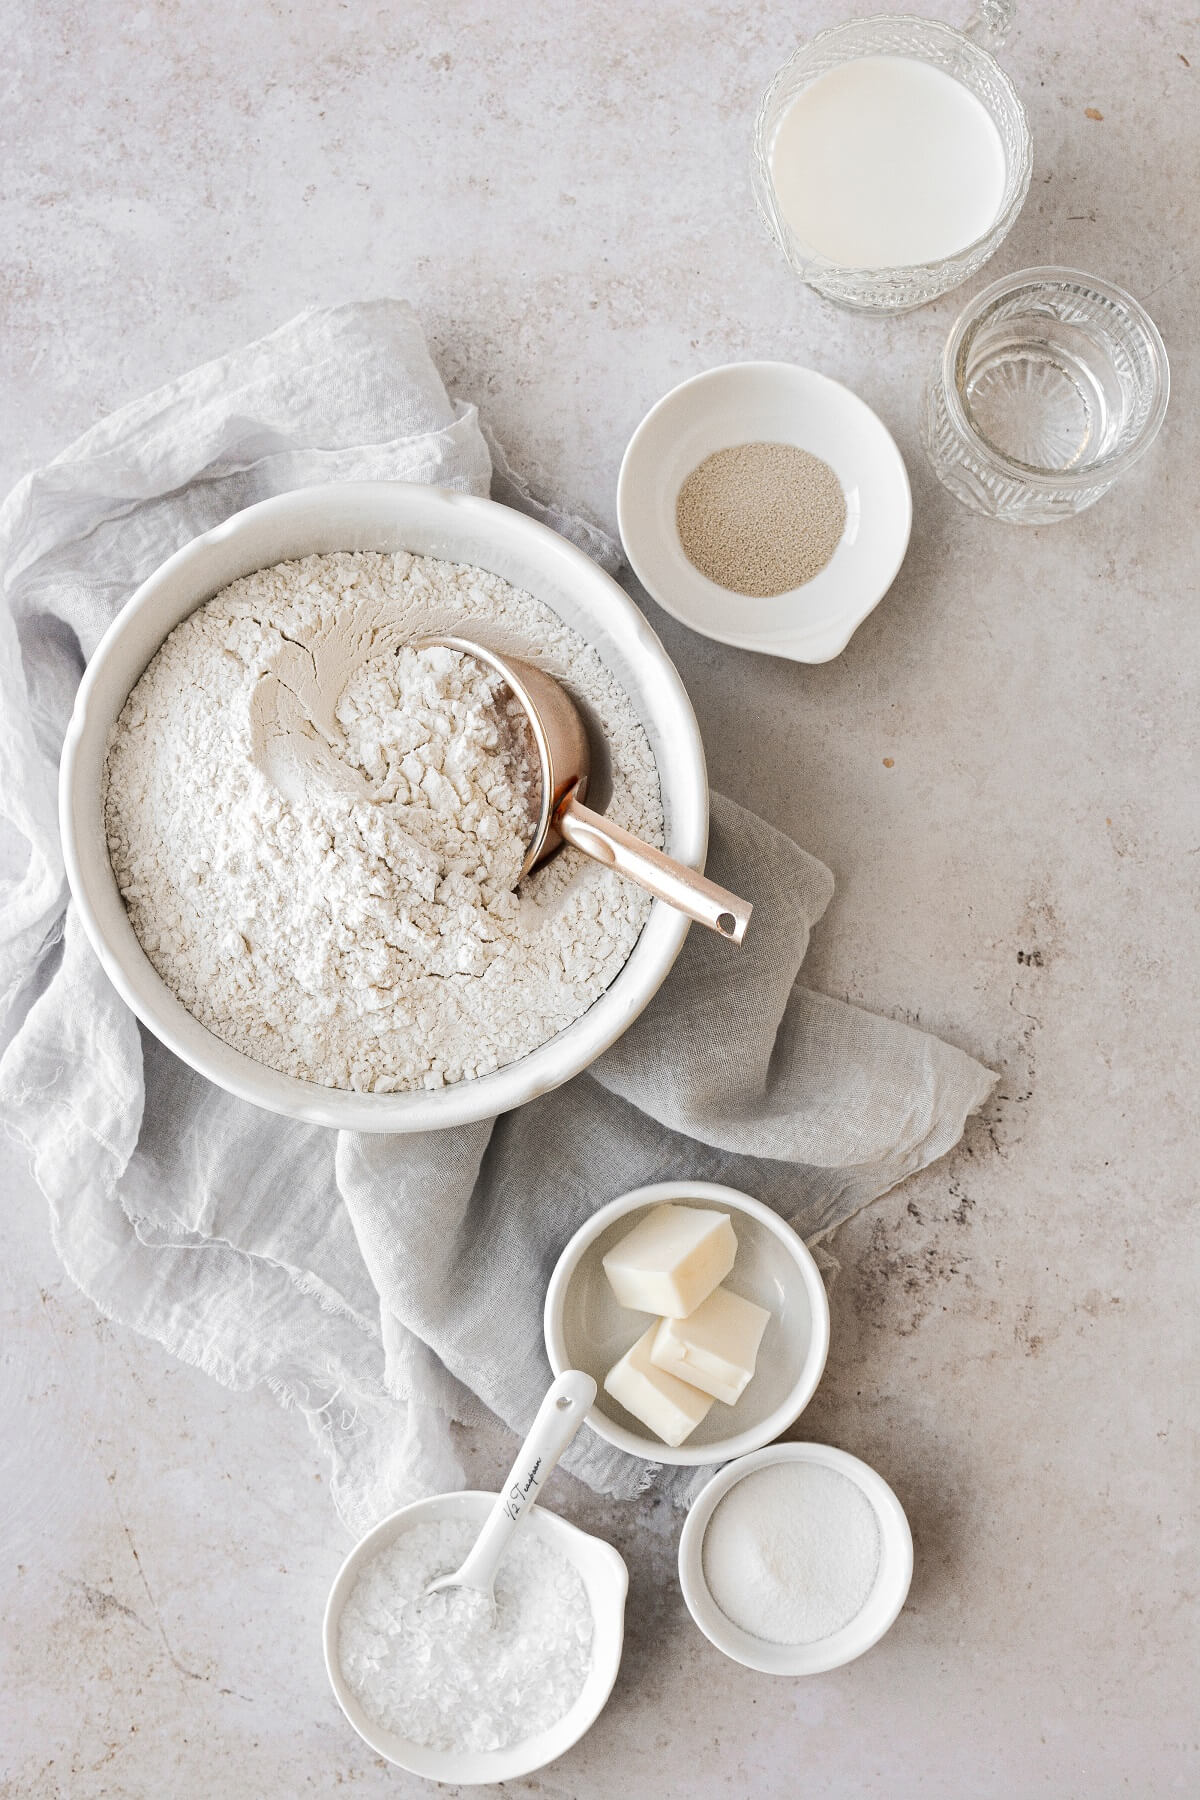
Ingredients
- Milk + Water. Adds moisture to the bread while the fat in the milk adds flavor and richness.
- Sugar. Gives the bread a touch of sweetness, but also helps to feed the yeast so the dough can rise.
- Butter. You’ll be using a small amount of butter in the bread dough, and the rest to brush over the top of the bread for flavor.
- Yeast. The yeast is the leavening agent which makes the bread rise so that it has a light, fluffy texture. I highly recommend Platinum Superior Baking Yeast. I’ve never had such a spectacular rise from my bread as I did with this yeast, compared to the grocery store brand I usually buy.
- Flour. For best results, you should use bread flour, rather than all-purpose flour. Bread flour has a higher percentage of protein, and makes a chewier bread.
- Salt. Adds flavor.
Instructions
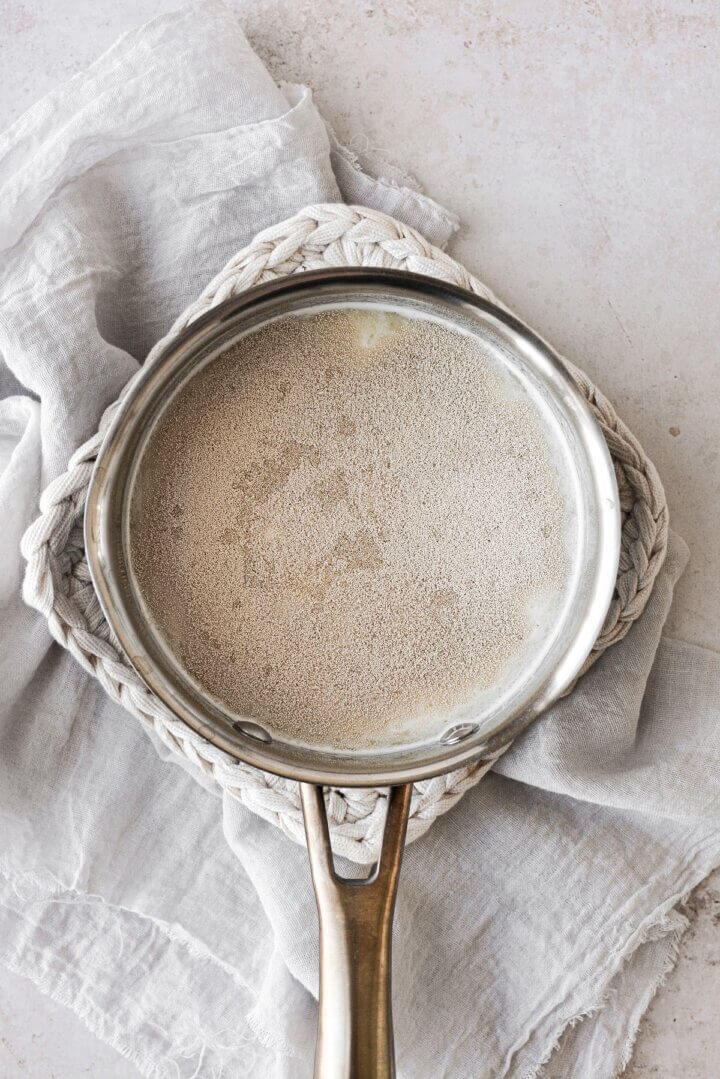
Activate the yeast.
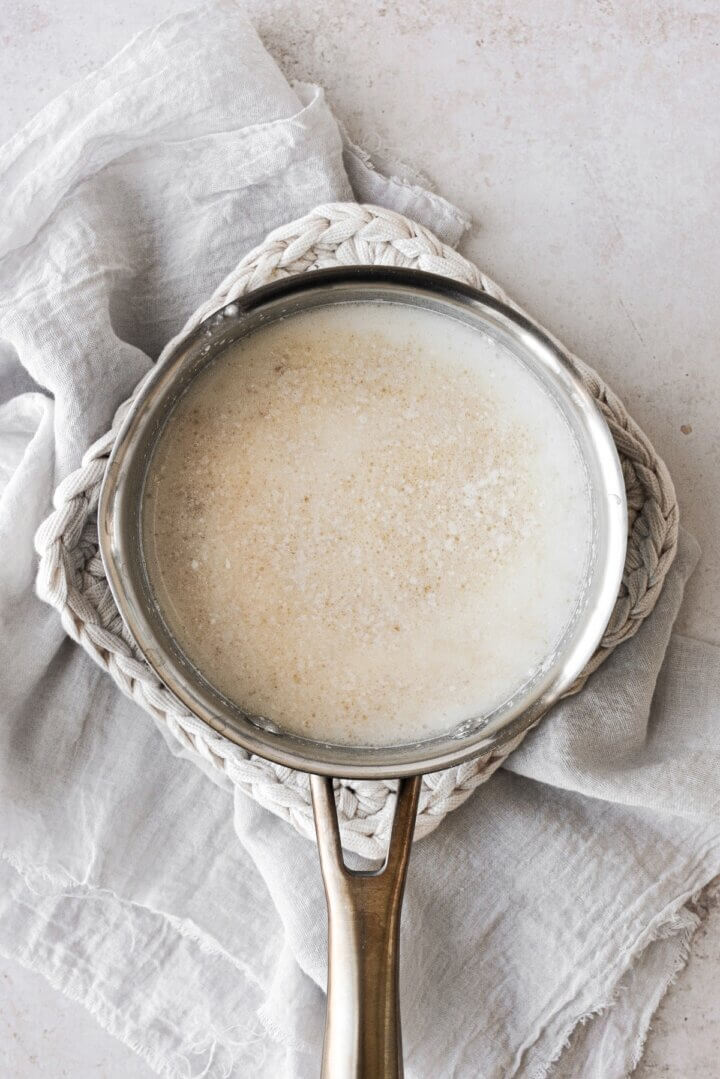
- In a saucepan, combine the milk, water, sugar and 1 tablespoon of butter. Heat the mixture over medium heat to between 110-115 degrees Fahrenheit.If the temperature is hotter or colder, the yeast won’t be properly activated.
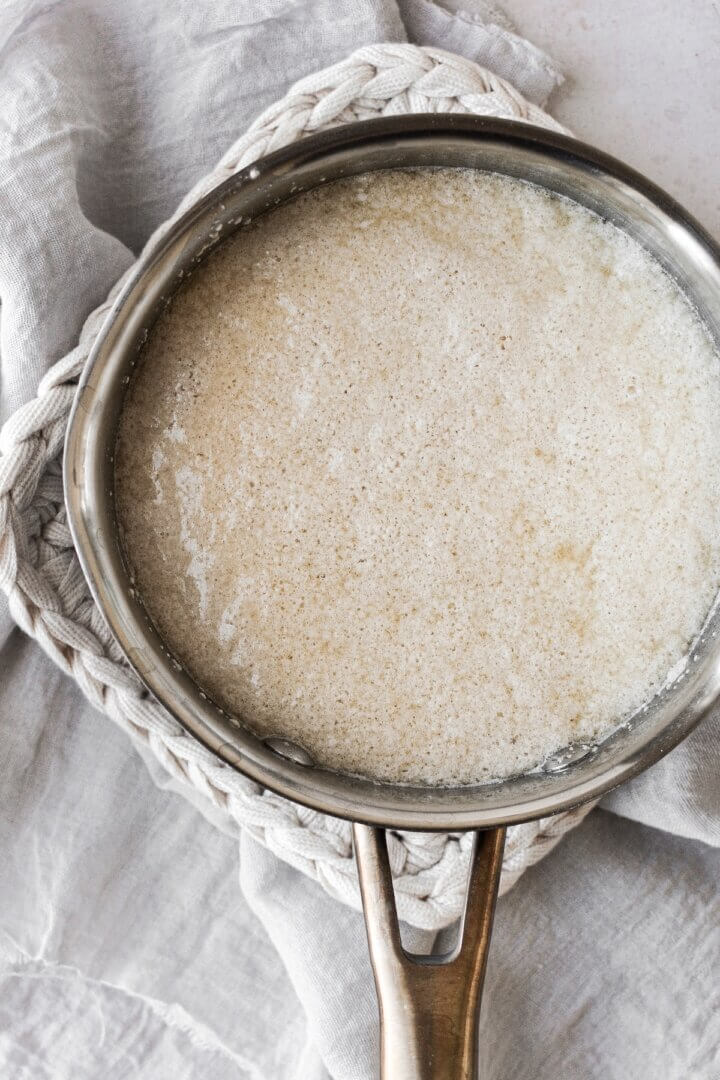
- Remove the saucepan from the heat. Sprinkle the yeast over the milk mixture and stir it in. Let it stand for about 5 minutes, until it becomes foamy and bubbly.
Mix and knead the dough.
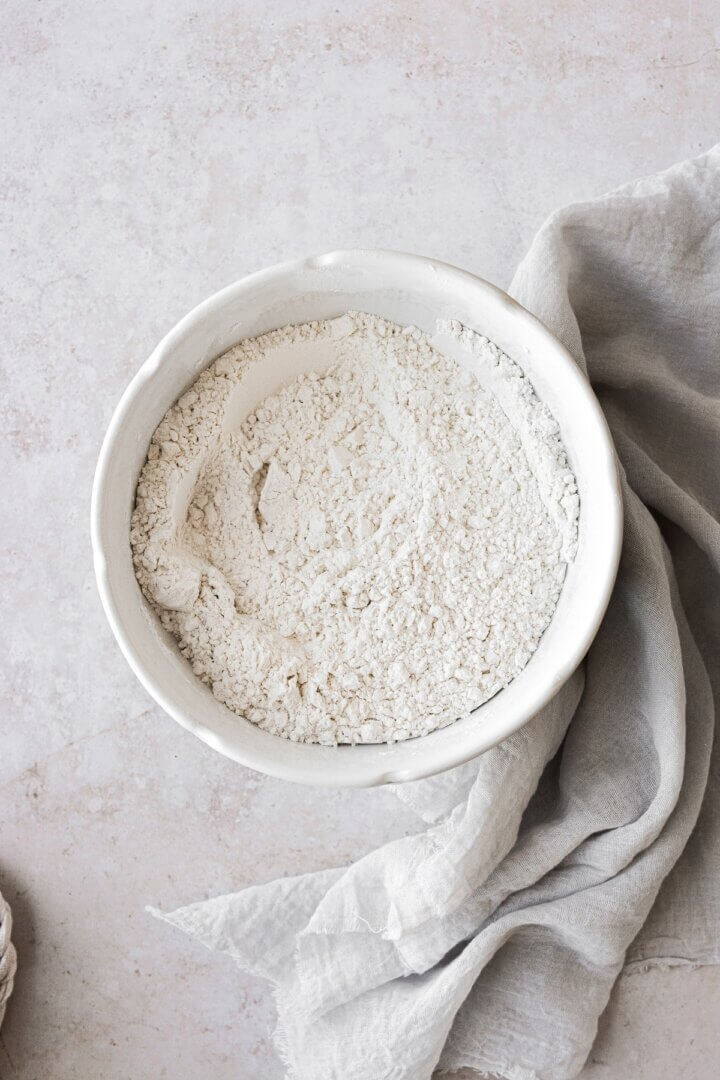
- Meanwhile, combine 3 cups of the flour with the salt in the bowl of your stand mixer. Add the milk/yeast mixture and stir together with a wooden spoon to form a soft, sticky dough.

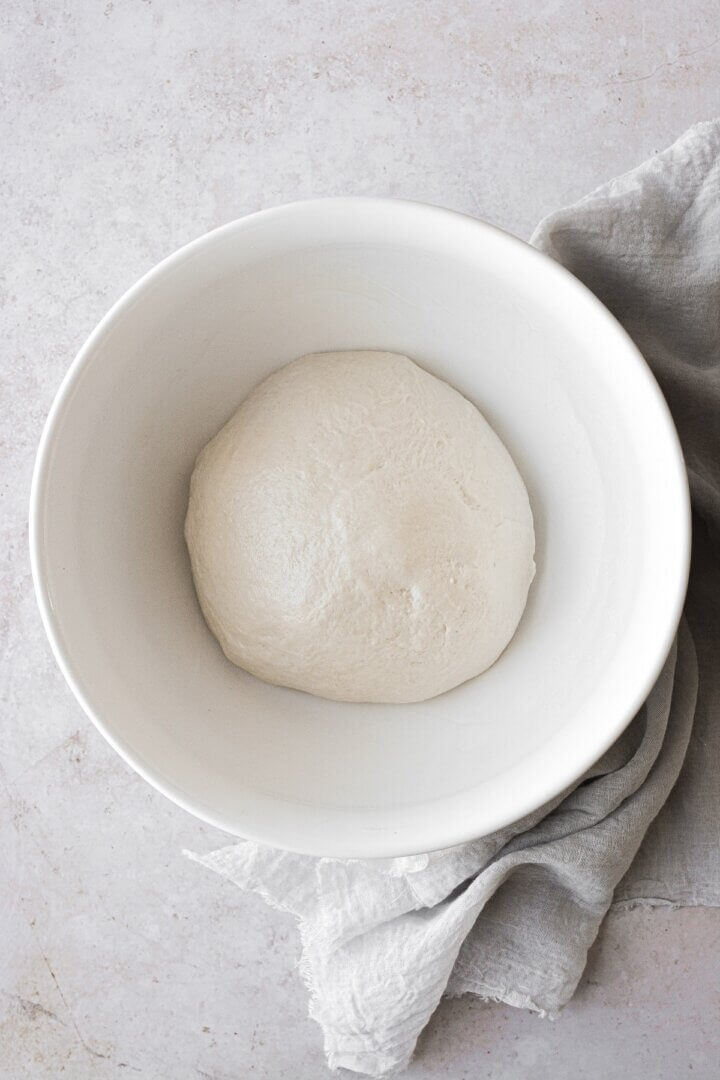
- Attach the bowl to your stand mixer fitted with the dough hook. Knead the dough for 10-15 minutes, gradually adding in the remaining 1 – 1 1/4 cups flour. As the dough kneads and absorbs the flour, it will form sort of a “torpedo” of dough around the dough hook, and the dough will pull away from the sides of the bowl. The dough should be soft, supple and spring back when gently touched.
TIP: Don’t add more flour than stated in the recipe, or your bread will end up dense.
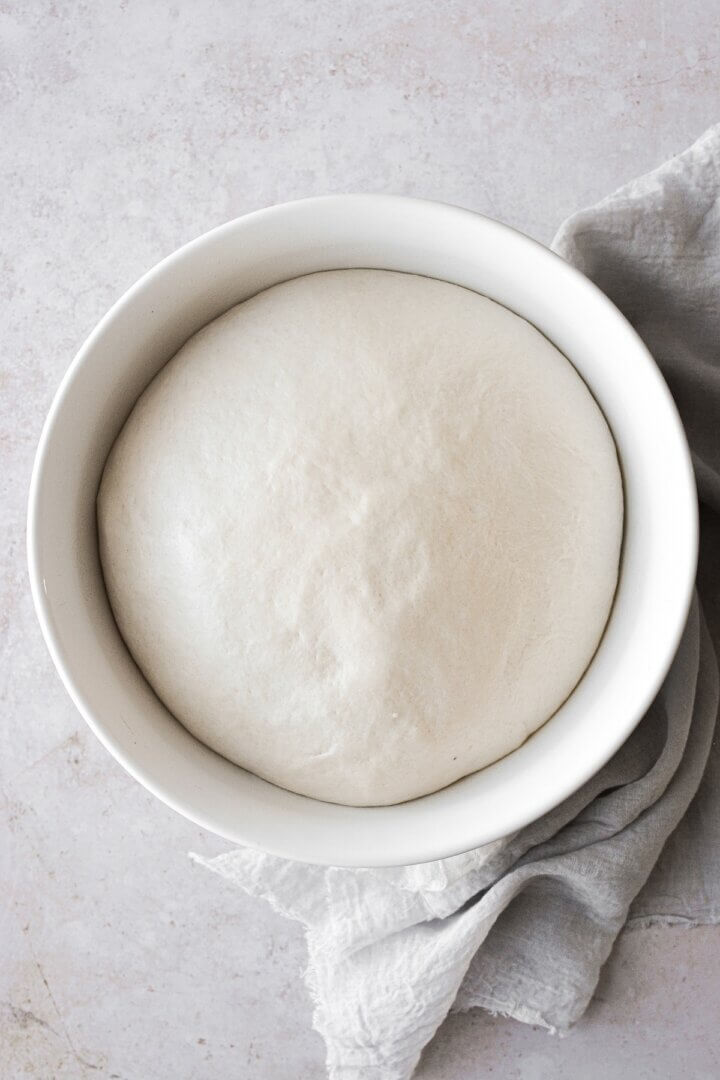
Let the dough rise.
- Lightly grease a large bowl and place the dough in the bowl. Cover the bowl tightly with plastic wrap. Set in a warm place to rise until doubled in size, being careful not to let the dough over-proof and get too big. It should take about 30-45 minutes, depending on the temperature of your kitchen.
TIP: If your oven has a “bread proof” setting, use this. Otherwise, preheat the oven to the lowest setting, then turn it off before you set the dough inside to proof.
- Meanwhile, melt the remaining 2 tablespoons of butter in a small saucepan, and keep it on the back of the stove.
- Prepare a bread loaf pan by brushing the bottom and sides lightly with some of the melted butter, then dusting with flour.
Shape and rest the dough.
- When the dough has doubled in size, lightly flour a clean work surface. Use a rolling pin to roll out the dough into a rectangle about 1/2 inch thick, with a width that’s equivalent to the length of your loaf pan.

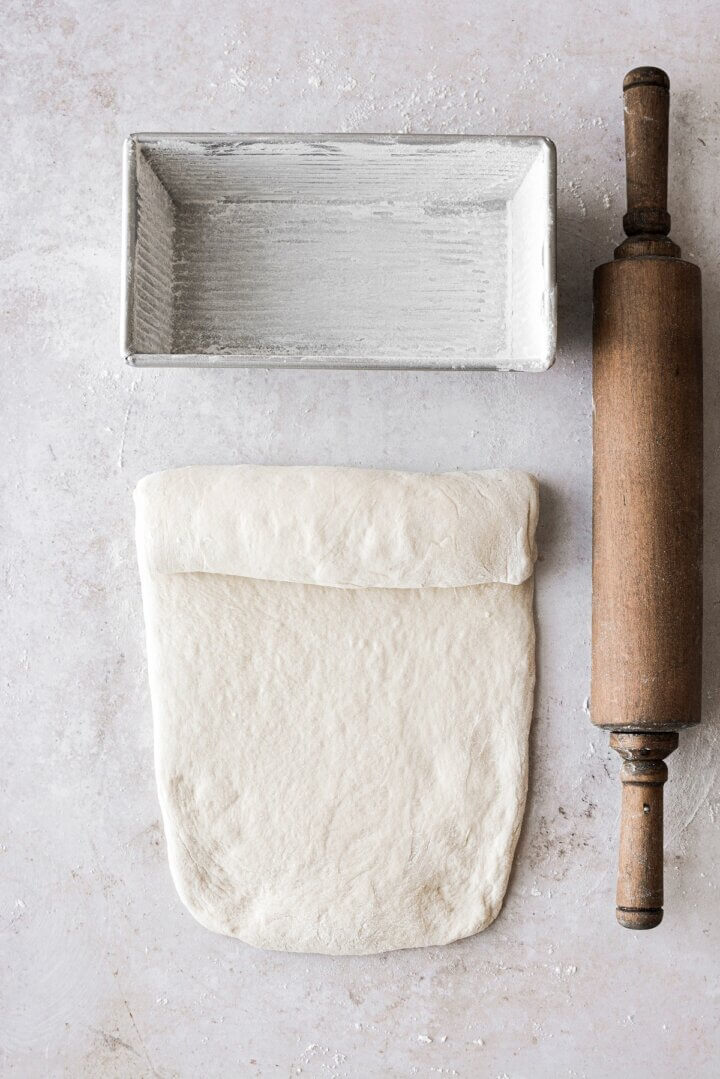
- Roll up the dough into a log, and place it in the prepared loaf pan, with the seam of the dough facing down against the bottom of the pan, and the ends tucked down.
- Brush the top of the dough with some of the melted butter, then set the pan in a warm place to rest for about 20 minutes while the oven preheats. The dough should be just starting to puff up above the top of the pan.
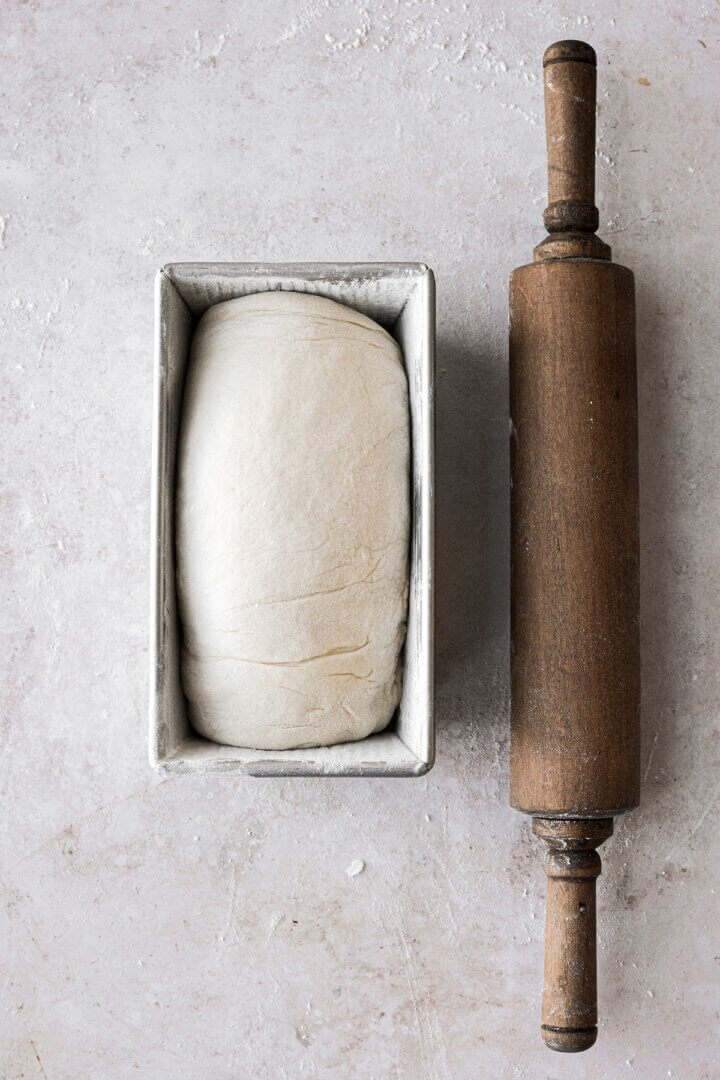
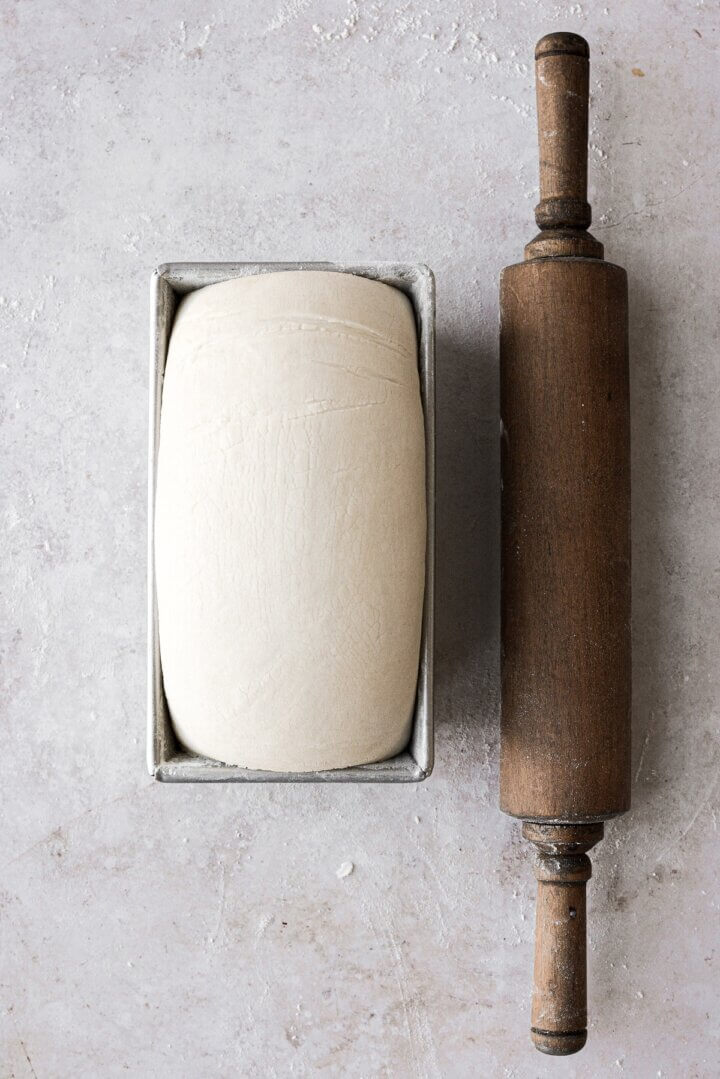
TIP: The bread will puff up and rise even more once it bakes – this is called “oven spring”. This can sometimes depend on the type or quality of yeast, though. See my yeast recommendation in the FAQs.
Bake the bread.
- While the dough is resting, preheat the oven to 350 F, and position a rack in the center of the oven. Bake the bread for about 40-45 minutes, until the top is a deep golden brown, and an instant read digital thermometer inserted into the center reaches 195 degrees Fahrenheit.

- Remove the bread from the pan (it should lift right out if you prepped the pan with butter and flour), and set on a wire cooling rack. Brush the remainder of the melted butter over the top and sides of the bread.
- Cool for about 1-2 hours before slicing with a sharp serrated knife.

Be sure to read all of my BAKING FAQs where I discuss ingredients, substitutions and common baking questions, so that you can be successful in your own baking!
Frequently Asked Questions
Should I use instant yeast or active dry yeast?
You can use either. With active dry yeast, you should follow the recipe exactly as written. With instant or rapid-rise yeast, you can skip the step of blooming the yeast in the warm milk first, and just move right on to mixing everything together. I highly recommend Platinum Superior Baking Yeast. I’ve never had such a spectacular rise from my bread as I did with this yeast, compared to the grocery store brand I usually buy.
Can I knead the dough by hand if I don’t have a stand mixer?
You can, but you’ll be kneading dough for a long time. The dough needs a good 10-15 minutes of kneading with a mixer, or 20-25 minutes of kneading by hand. The reason it needs to be kneaded for this long is to form the strands of gluten, making for a more elastic dough with better texture. If the dough isn’t kneaded for long enough, the bread will be dense and won’t have a good structure.
Can I use honey instead of granulated sugar?
Yes, that will work just fine. The sugar is important for feeding the yeast, so you shouldn’t leave it out completely.
How long will the bread stay fresh?
Homemade white sandwich bread will stay soft and fresh for about 3 days. You should store it in an airtight container or plastic bag at room temperature, or freeze the bread for up to 3-6 months. I usually freeze whatever we don’t eat within the first day or two, and then just toast the frozen bread in the toaster.
What loaf pan did you use?
I used this USA bread loaf pan. It’s fantastic!

You Might Also Like
Please check out my Amazon Shop for a curated collection of some of my favorite cake pans from trusted brands, baking tools, ingredients, pretty things and fashion finds. I recommend products that I buy and use every day!
Did you love today’s recipe? Please rate the recipe and let me know in the comments what you thought! Also, be sure to follow Curly Girl Kitchen on Instagram, and tag me when you try one of my recipes so I can see all your delicious creations!
Easy High Altitude White Sandwich Bread
All recipes on Curly Girl Kitchen are developed for high altitude at 5,280 feet. See FAQs for adjusting to higher or lower elevations.

Equipment
- Stand Mixer with Dough Hook
Ingredients
- 1 cup whole milk
- ¾ cup water
- 3 tbsp granulated sugar
- 3 tbsp unsalted butter, divided
- 1 packet (1/4 oz) active dry yeast, preferably Platinum Superior Baking Yeast
- 4 – 4 ¼ cups (about 20 oz) bread flour (spooned and leveled), plus 1/4 cup for rolling
- 1 ½ tsp coarse Kosher salt (if using table salt, use half the amount)
Instructions
Activate the yeast.
- In a saucepan, combine the milk, water, sugar and 1 tablespoon of butter. Heat the mixture over medium heat to between 110-115 degrees Fahrenheit.If the temperature is hotter or colder, the yeast won't be properly activated.
- Remove the saucepan from the heat. Sprinkle the yeast over the milk mixture and stir it in. Let it stand for about 5 minutes, until it becomes foamy and bubbly.
Mix and knead the dough.
- Meanwhile, combine 3 cups of the flour with the salt in the bowl of your stand mixer. Add the milk/yeast mixture and stir together with a wooden spoon to form a soft, sticky dough.
- Attach the bowl to your stand mixer fitted with the dough hook. Knead the dough for 10-15 minutes, gradually adding in the remaining 1 – 1 1/4 cups flour. As the dough kneads and absorbs the flour, it will form sort of a "torpedo" of dough around the dough hook, and the dough will pull away from the sides of the bowl. The dough should be soft, supple and spring back when gently touched.Don't add more flour than stated in the recipe, or your bread will end up too dense.
Let the dough rise.
- Lightly grease a large bowl and place the dough in the bowl. Cover the bowl tightly with plastic wrap. Set in a warm place to rise until doubled in size, being careful not to let the dough over-proof and get too big. It should take about 30-45 minutes.If your oven has a "bread proof" setting, use this. Otherwise, preheat the oven on to the lowest setting, then turn it off before you set the dough inside to proof.
- Meanwhile, melt the remaining 2 tablespoons of butter in a small saucepan, and keep it on the back of the stove.
- Prepare a bread loaf pan by brushing the bottom and sides lightly with some of the melted butter, then dusting with flour.
Shape and rest the dough.
- When the dough has doubled in size, lightly flour a clean work surface. Use a rolling pin to roll out the dough into a rectangle about 1/2 inch thick, with a width that's equivalent to the length of your loaf pan. Roll up the dough into a log, and place it in the prepared loaf pan, with the seam of the dough facing down against the bottom of the pan, and the ends tucked down.
- Brush the top of the dough with some of the melted butter, then set the pan in a warm place to rest for about 20 minutes while the oven preheats. The dough should be just starting to puff up above the top of the pan.
Bake the bread.
- While the dough is resting, preheat the oven to 350 F, and position a rack in the center of the oven. Bake the bread for about 40-45 minutes, until the top is a deep golden brown, and an instant read digital thermometer inserted into the center reaches 195 degrees Fahrenheit.
- Remove the bread from the pan (it should lift right out if you prepped the pan with butter and flour), and set on a wire cooling rack. Brush the remainder of the melted butter over the top and sides of the bread.
- Cool for about 1-2 hours before slicing with a sharp serrated knife.
Video
Notes
 https://curlygirlkitchen.com/
What are your thoughts on convect bake? I use that for my sourdough.
Wondering if I can use non-dairy milk?
I’ve made this bread recipe twice, both time it was fantastic. I live in Colorado Springs and have never been successful with high altitude baking (even with recipes claiming to be high altitude). I look forward to trying other recipes!
Hi Heather,
Is it possible to make this bread without a loaf pan? Just a free form loaf on a cookie sheet?
I haven’t tried that, but please let me know if you do!
This one is a keeper! Simple process overall. I like that it doesn’t take all day to make. Had a slice ready to go before dinner time. I only had AP flour and look forward to trying it another time with Bread flour for comparison. Also it was a pretty chilly day so I bet I could get a bigger fluffier rise once it warms up a bit. I will probably use this recipe on the reg. TY!
This is the best homemade white sandwich bread recipe I have made. I live at 9100 ft in the Colorado Mountains and am new to high altitude cooking. Two things helped make this recipe earn 5 stars, my Kitchenaid mixer and the recommendation for the Platinum yeast. I have never used this yeast before and it is simply a game changer when it comes to baking. Thanks, Curly Girl.
Is it possible to make this in a Pullman pan?
This will work just fine in the small pullman pan.
Would I need modify this to use in a bread machine? Or can I use the way it is I love your recipe but my mother in law just got me a bread machine and I feel out of my element
I’m honestly not sure, as I don’t own or use a bread machine.
Wonderful recipe for Santa Fe, Nm’s 7200 ft. altitude. This is the first recipe that has worked for me; However, the bread falls apart. I used it for a chicken sandwich with lettuce and tomatoes and it became a deconstructed sandwich on my plate. I used all purpose flower (that’s all I had), Fleishma yeast and I think I allowed the dough to rise too long for the first rise. Could any or all of those reasons be the problem?
It could definitely be letting it rise too long, as well as the AP flour, which has less protein in it than bread flour. AP flour will make a cakier bread, while bread flour will give the bread more strength and a chewier texture.
I have lived in Colorado for 10 years and have been searching for the perfect bread recipe. Everyone I have tried so far has never worked out for me. But this recipe is hands down the BEST! My bread came out PERFECT! It’s soft and spongy. It cuts well into slices and tastes delicious. I’m really happy with how well it turned out!
This is BY FAR the best sandwich bread recipe for high altitude!! My loaf was very tall, just like your photos and I couldn’t have been more proud 🙂 You’re ciabatta recipe is amazing as well. Baking in Longmont, CO with success because of your site, thank you!!