
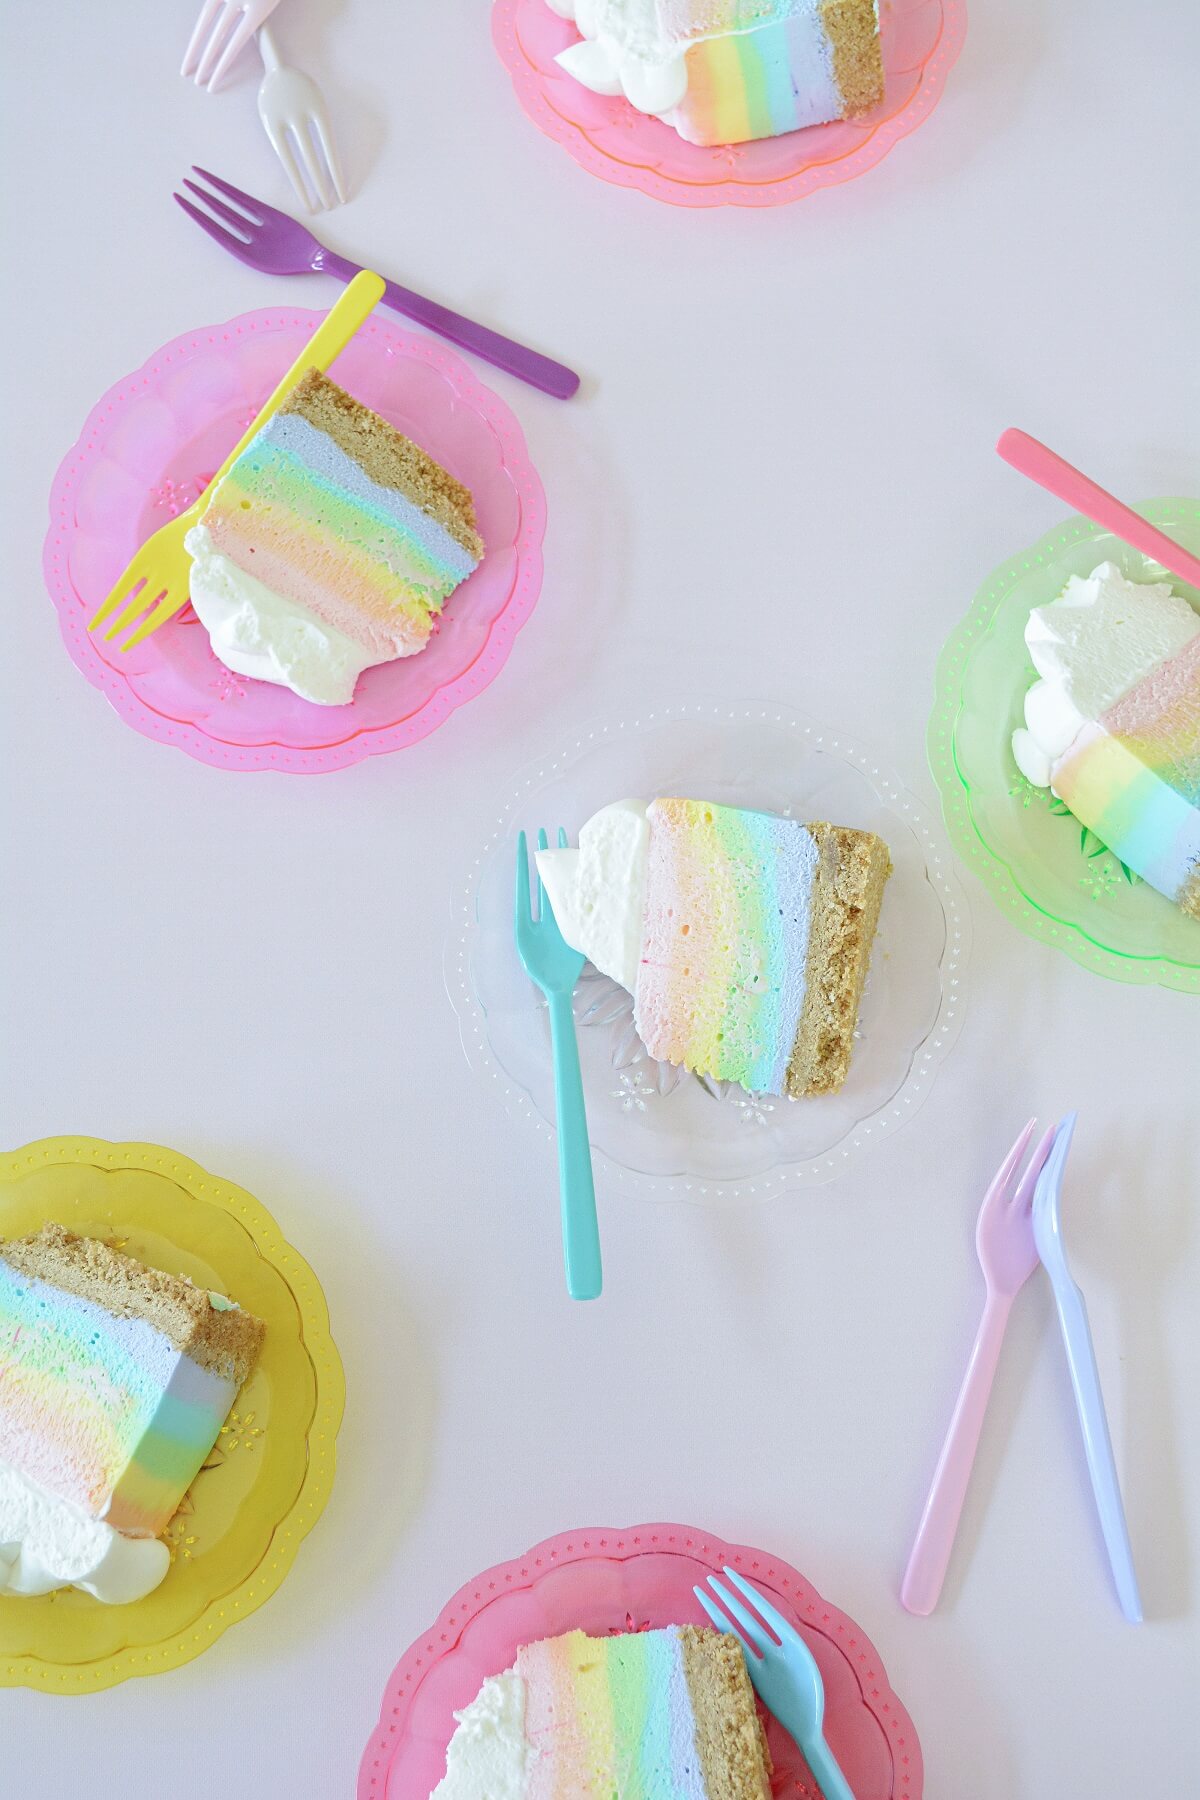
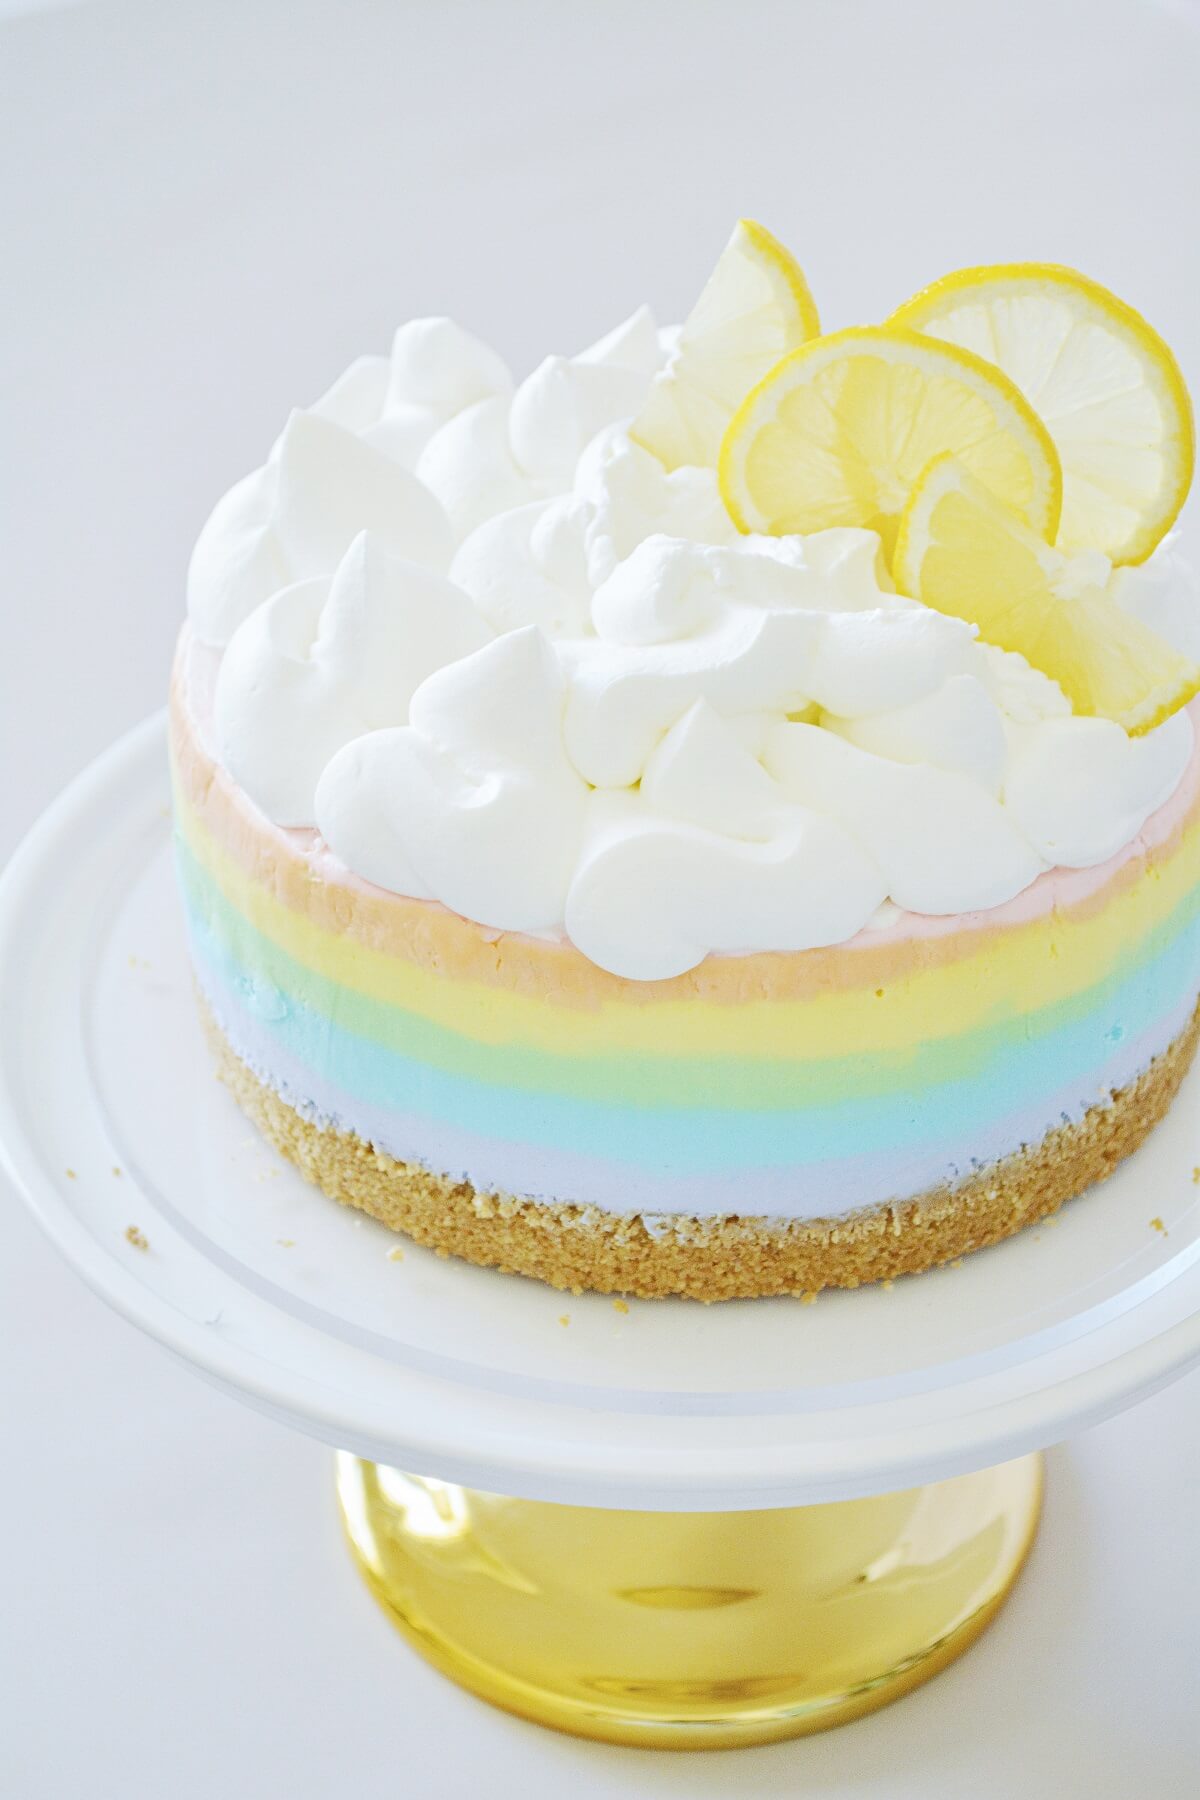
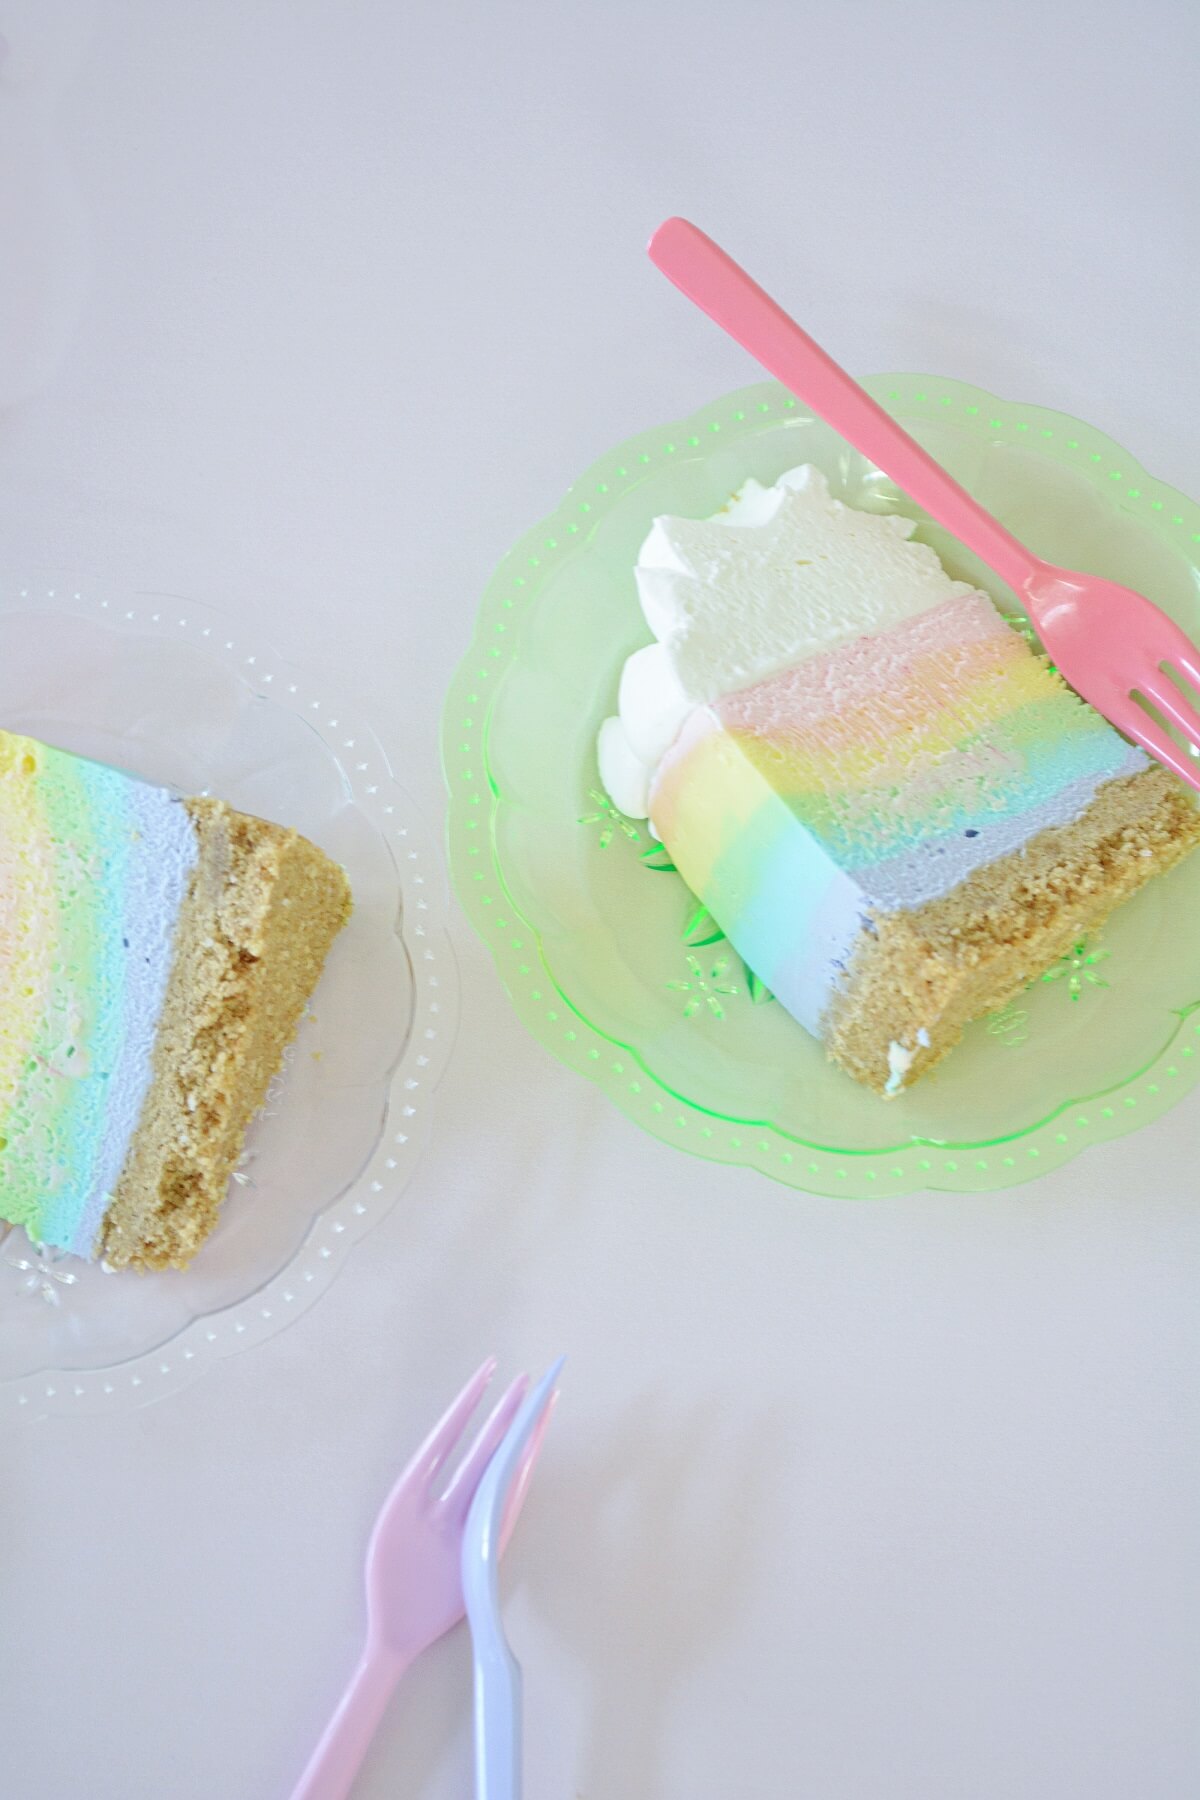
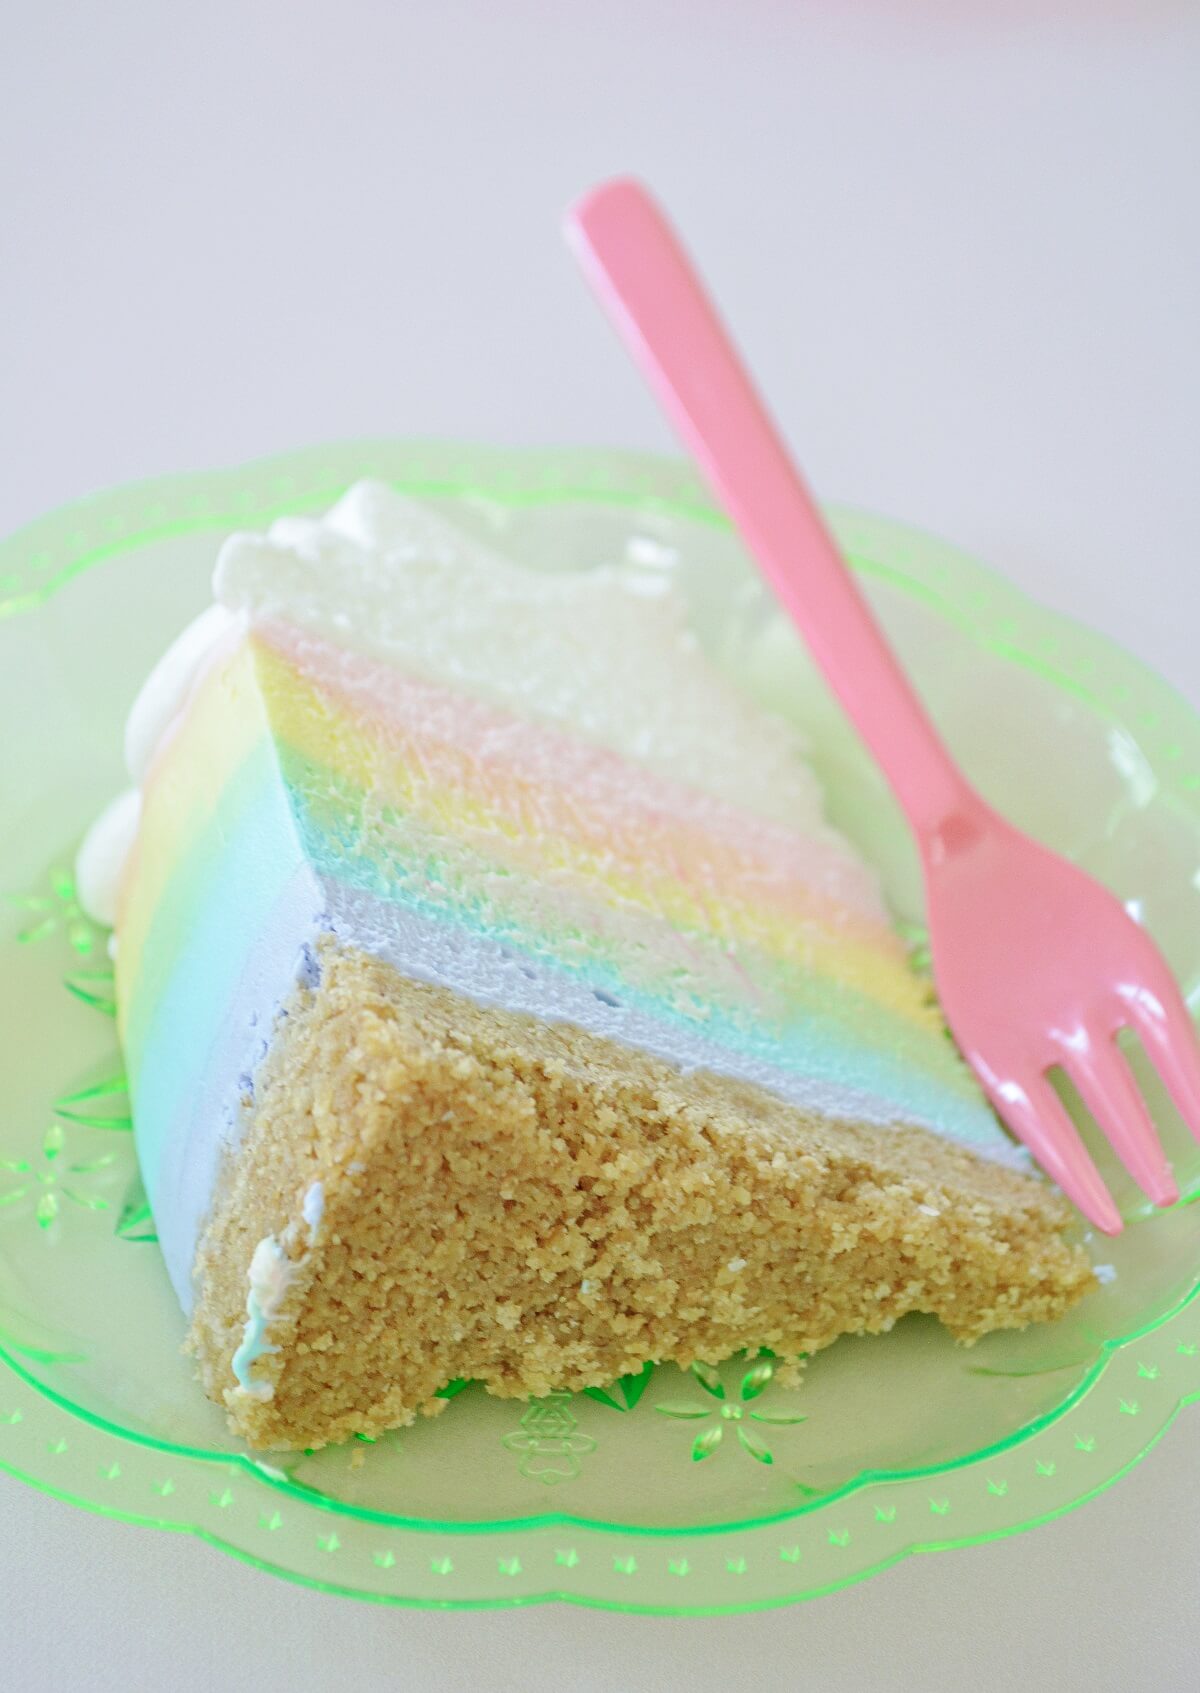
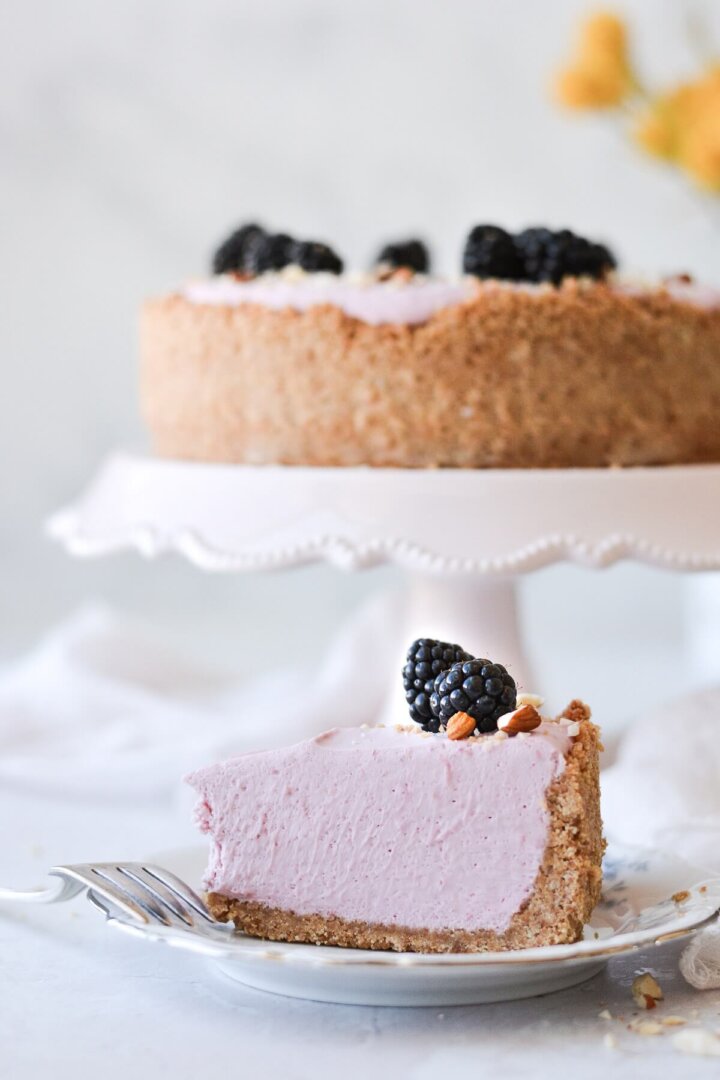
It’s the last day of March, although almost certainly not the last we’ll see of snow here in Colorado, and I’m so excited for April. With April comes warmer weather, everything turning a welcome green, flowers blooming, our baby’s first birthday, Easter, and hopefully, a few rainy days here and there. With the brown of winter fading away and the promise of days spent in the sun, it feels like the perfect time to share my Rainbow Cheesecake. This is an easy, no-bake cheesecake recipe, that’s so luscious and creamy. You can flavor it with any extract you like, such as lemon, orange, or vanilla.
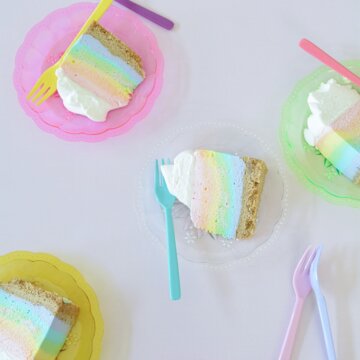
After mixing up the filling, I divided it into six equal portions and tinted each with just a drop or two of gel food coloring to create the pretty pastel rainbow hues. Topped off with clouds of whipped cream and sunny, translucent lemon slices, this rainbow cheesecake is the happiest cheesecake I’ve ever made.
This site contains affiliate links. As an Amazon associate, I earn from qualifying purchases. This means that I may make a small commission if you purchase a product using those links. This in no way affects my opinion of those products and services. All opinions expressed on this site are my own.
Instructions
Crust
- Preheat the oven to 325F. Lightly spray the bottom of an 8-inch springform pan with non-stick baking spray.
- Combine the crushed graham crackers with the sugar and salt. Drizzle with the melted butter, and toss with a fork until moistened and crumbly. Dump the crumbs into the pan, and press the crumbs firmly against the bottom and several inches up the sides of the pan.
- Bake the crust for 10 minutes, until fragrant and golden brown. Cool completely.
- Note that you can skip the step of baking the crust, but I like to bake it briefly just to toast the graham crackers for a richer, nuttier flavor.
Filling
- In a microwaveable glass measuring cup or bowl, whisk together 1/2 cup of the heavy whipping cream with the gelatin. Let stand for 5 minutes.Microwave on high for 1 minute, stirring after 30 seconds, to dissolve the gelatin.Set aside while you make the filling. If any small lumps of undissolved gelatin remain in the warmed cream/gelatin mixture, pour it through a mesh strainer.
- In a large mixing bowl, use an electric mixer to beat the cream cheese, powdered sugar and vanilla bean until smooth, about 2 minutes. Beat in the sour cream.
- Gradually add the remaining 1 cup of heavy whipping cream, and beat until soft peaks form.
- Add the strained cream/gelatin mixture to the mixing bowl and beat until smooth and thick.
- Working quickly, divide the filling into 6 bowls. Tint each portion with food coloring until it’s your desired color. Spread one color onto the crust, smoothing it out, and repeat with the remaining colors. Cover with plastic wrap, and refrigerate for 4-6 hours, or overnight.
Topping
- Run a sharp knife around the sides of the cheesecake, and carefully remove the sides of the pan.
- For the topping, beat the cream with an electric mixer until soft peaks form. Add the cream of tartar (for stability) and the powdered sugar and beat until thick, stiff peaks form. Spread or pipe on top of the cheesecake.
Be sure to read all of my BAKING FAQs where I discuss ingredients, substitutions and common baking questions, so that you can be successful in your own baking!
Frequently Asked Questions
What kind of gelatin should I use?
You should use unflavored powdered gelatin for this recipe, which is easily available in the US. I don’t have any experience with gelatin sheets, so I’m not able to advise on how to use them.
Can I make no bake cheesecake without gelatin?
You can omit the gelatin if you prefer, but you’ll need to make sure your cream is whipped thick enough, as you don’t want it to deflate and cause your cheesecake not to set. The gelatin ensures your no bake cheesecake will be perfectly set.
Do I have to use a springform pan?
A springform pan is a type of cake pan that has sides that can be removed from the base. It’s typically used for cheesecakes and other molded desserts so that the cheesecake can be easily removed from the pan and presented on a cake pedestal.
What kind of food coloring should I use?
Use gel food coloring, not liquid food coloring, for the most concentrated color.
You Might Also Like
Please check out my Amazon Shop for a curated collection of some of my favorite cake pans from trusted brands, baking tools, ingredients, pretty things and fashion finds. I recommend products that I buy and use every day!
Did you love today’s recipe? Please rate the recipe and let me know in the comments what you thought! Also, be sure to follow Curly Girl Kitchen on Instagram, and tag me when you try one of my recipes so I can see all your delicious creations!
No Bake Rainbow Cheesecake
All recipes on Curly Girl Kitchen are developed for high altitude at 5,280 feet. See FAQs for adjusting to higher or lower elevations.

Equipment
- 8-inch Springform Pan with Removable Bottom
- Electric Mixer (Stand or Handheld)
Ingredients
Crust
- 1 ½ cups finely crushed graham crackers, about 1 1/2 sleeves
- 2 tbsp dark brown sugar, optional
- 1 tsp coarse Kosher salt (if using table salt, use half the amount)
- ½ cup unsalted butter, melted
Filling
- 1 ½ cups cold heavy whipping cream, divided
- 1 envelope (1/4 oz) unflavored powdered gelatin
- 1 ½ lbs cream cheese, softened to room temperature
- ¾ cup powdered sugar
- 2 tsp vanilla extract
- ¼ cup sour cream
- gel food coloring (red or pink, orange, yellow, green, blue and purple)
Topping
- 1 cup heavy whipping cream, cold
- pinch cream of tartar
- 2 tbsp powdered sugar
- lemon slices, for garnish
Instructions
Crust
- Preheat the oven to 325F. Lightly spray the bottom of an 8-inch springform pan with non-stick baking spray.
- Combine the crushed graham crackers with the sugar and salt. Drizzle with the melted butter, and toss with a fork until moistened and crumbly. Dump the crumbs into the pan, and press the crumbs firmly against the bottom and several inches up the sides of the pan.
- Bake the crust for 10 minutes, until fragrant and golden brown. Cool completely.
- Note that you can skip the step of baking the crust, but I like to bake it briefly just to toast the graham crackers for a richer, nuttier flavor.
Filling
- In a microwaveable glass measuring cup or bowl, whisk together 1/2 cup of the heavy whipping cream with the gelatin. Let stand for 5 minutes.Microwave on high for 1 minute, stirring after 30 seconds, to dissolve the gelatin.Set aside while you make the filling. If any small lumps of undissolved gelatin remain in the warmed cream/gelatin mixture, pour it through a mesh strainer.
- In a large mixing bowl, use an electric mixer to beat the cream cheese, powdered sugar and vanilla bean until smooth, about 2 minutes. Beat in the sour cream.
- Gradually add the remaining 1 cup of heavy whipping cream, and beat until soft peaks form.
- Add the strained cream/gelatin mixture to the mixing bowl and beat until smooth and thick.
- Working quickly, divide the filling into 6 bowls. Tint each portion with food coloring until it’s your desired color. Spread one color onto the crust, smoothing it out, and repeat with the remaining colors. Cover with plastic wrap, and refrigerate for 4-6 hours, or overnight.
Topping
- Run a sharp knife around the sides of the cheesecake, and carefully remove the sides of the pan.
- For the topping, beat the cream with an electric mixer until soft peaks form. Add the cream of tartar (for stability) and the powdered sugar and beat until thick, stiff peaks form. Spread or pipe on top of the cheesecake.
Notes
 https://curlygirlkitchen.com/
It came out pretty but had no height, it was only about an inch tall. I think it would’ve come out better if I had whipped the heavy cream to firm peaks and folded it in.
It also turned into a zebra cake instead of the colors latering on top of each other