
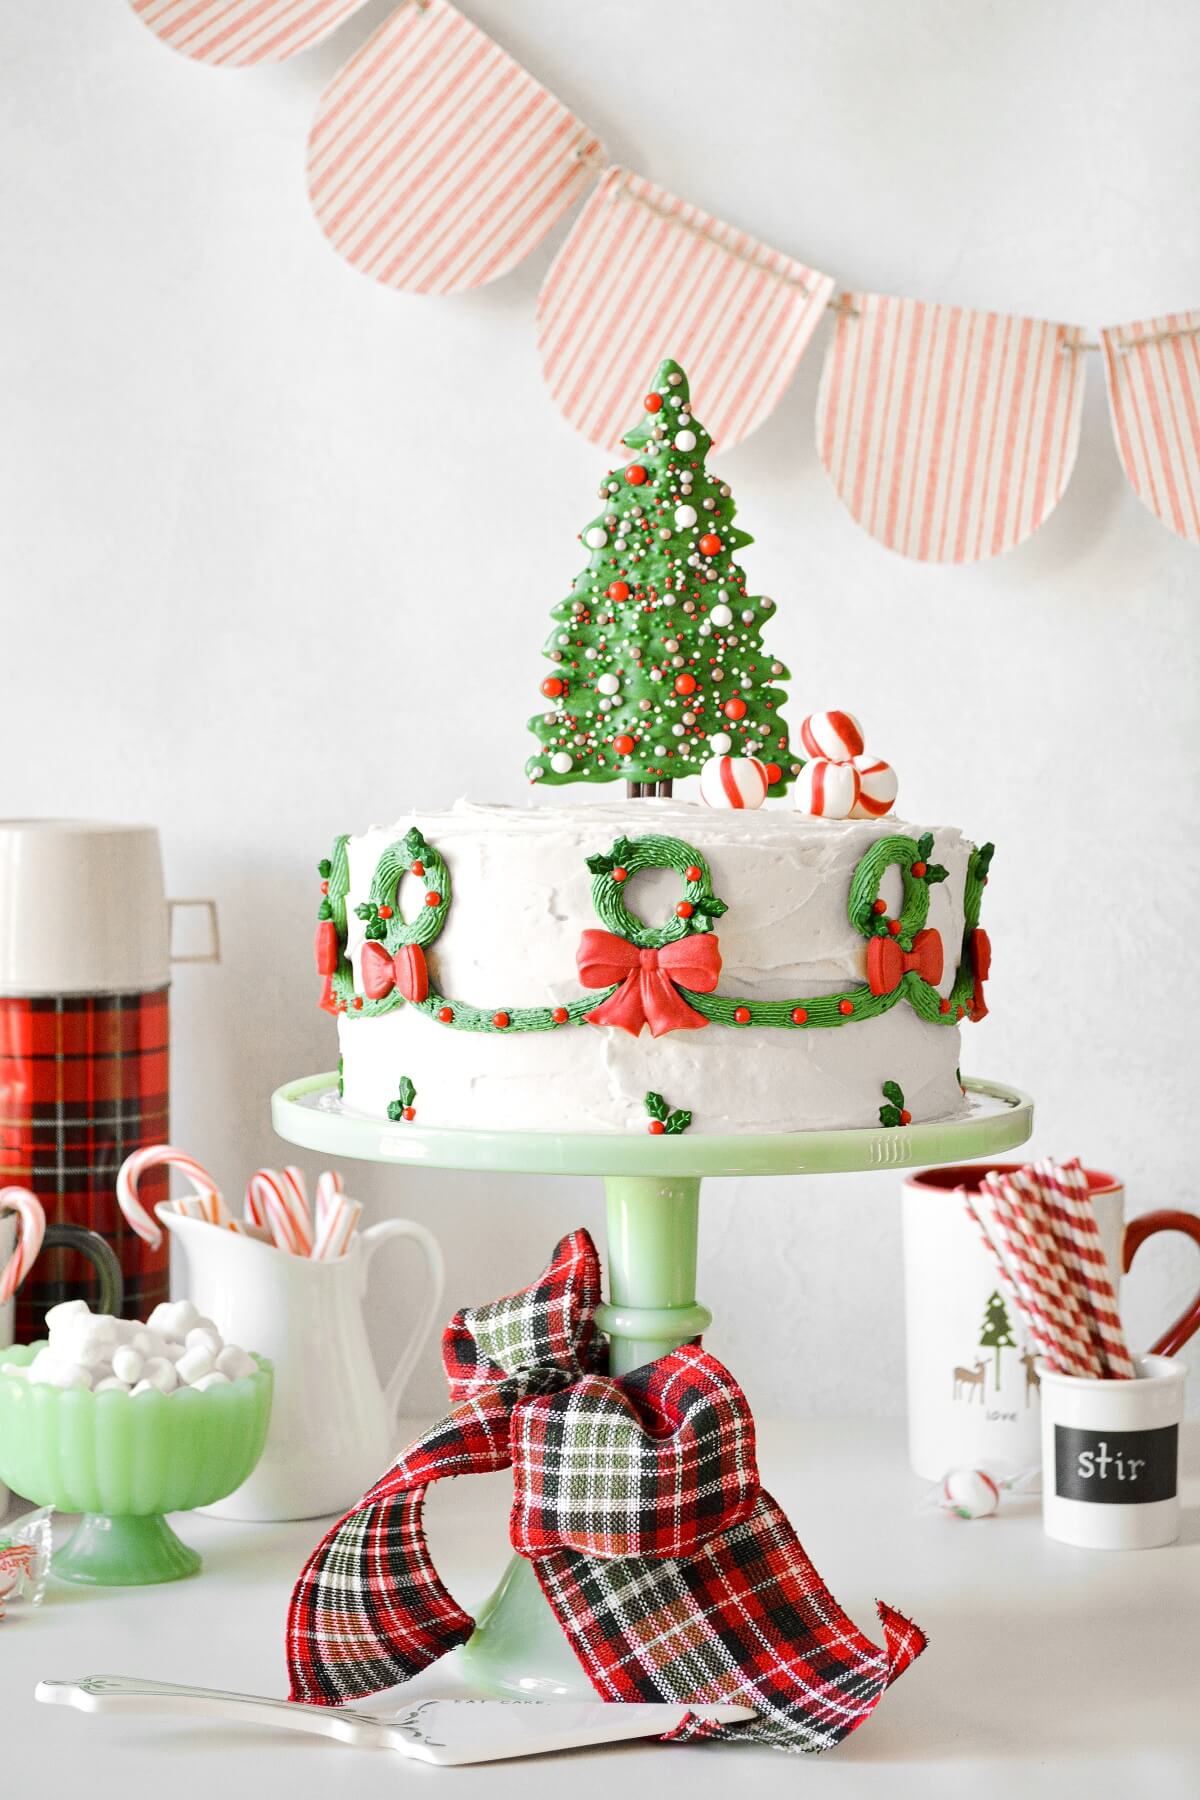
There’s no holiday that I love like Christmas, and I adore decorating festive cakes for the holidays. Today’s post doesn’t include a cake recipe, just a how-to on making this easy but gorgeous Christmas Tree Cake Topper, made from chocolate candy melts.
Looking for more Christmas inspiration? You’ll love this cute snowman cake, chocolate and peppermint North Pole cake, and Christmas tree sugar cookies.
This site contains affiliate links. As an Amazon associate, I earn from qualifying purchases. This means that I may make a small commission if you purchase a product using those links. This in no way affects my opinion of those products and services. All opinions expressed on this site are my own.
Decorating your Christmas Cake
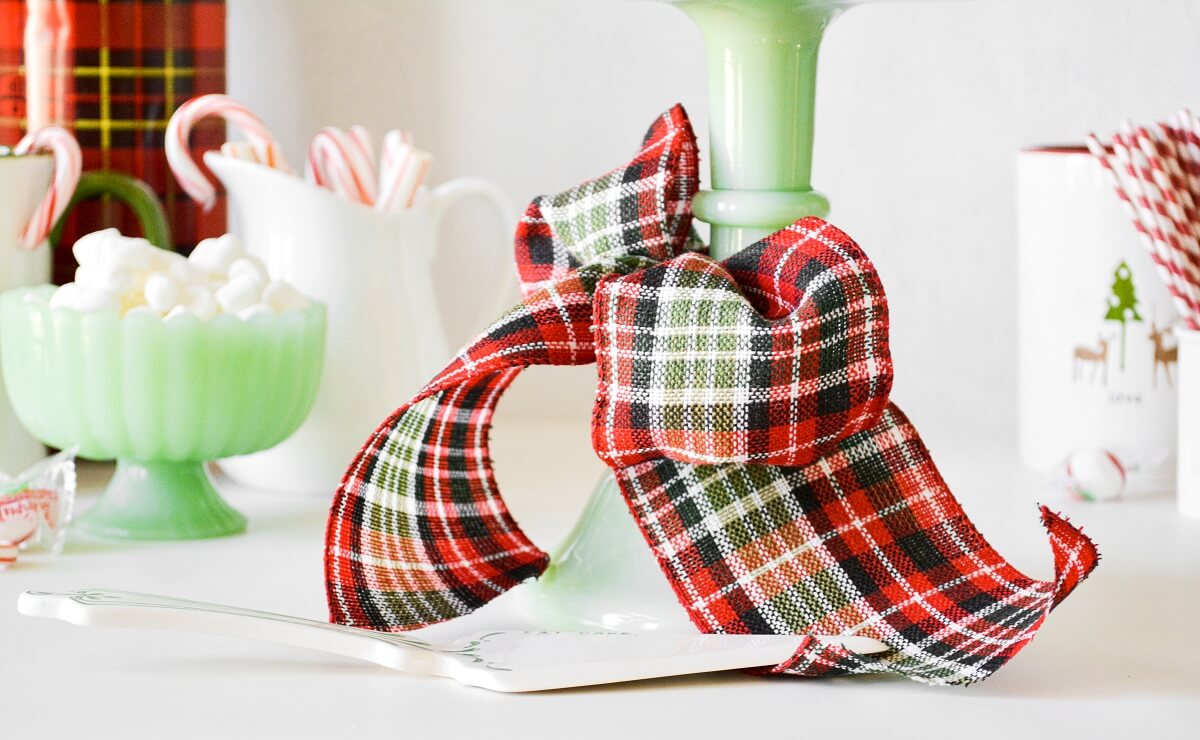
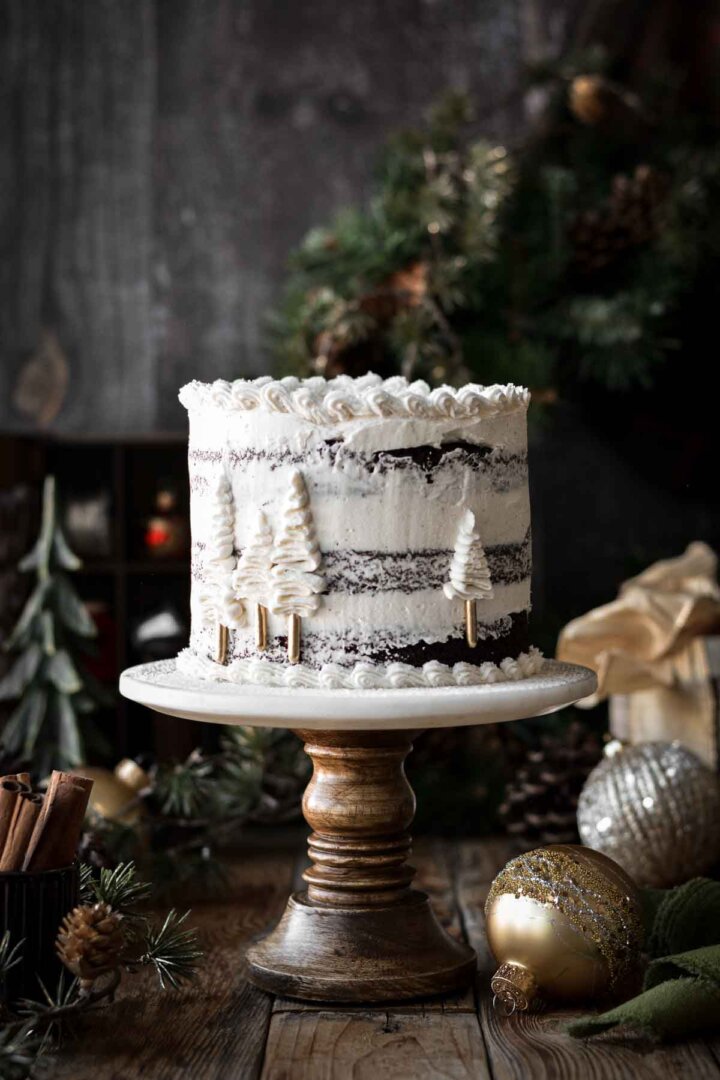
For my overall cake design, I envisioned something cozy, festive, and quintessentially Christmasy. Think of a warm crackling fire, the mantle hung with garland and stockings, and a sparkling tree nearby with glittery lights and ornaments. Laughter, music, and great food. This cake perfectly embodies the feeling of a cozy night spent snuggling by the fire with my husband and boys, eating popcorn, drinking hot chocolate, and watching Christmas movies.
There are endless ways you could decorate this cake to add your own personal style. At this time of year, Michaels has an extensive assortment of pre-made royal icing Christmas decorations for cakes, cupcakes, and gingerbread houses. Not to mention, all the cookie cutters and silicone molds for making your own chocolate candy decorations. And if you’re not able to make it to the store, there’s Amazon! I’ve linked to some of my favorite Christmas cake decorating supplies at the end of this post.
I piped the wreaths with buttercream and used a chocolate mold I already had to create the red chocolate candy bows. But you might be able to find pre-made candy bows and wreaths if you’re not inclined to make yours. I also found a jar of sprinkles with the red holly berries and green holly leaves which added such a cute touch to my wreaths.
How adorable would tiny edible presents under the tree be? Or even a sugar Santa peeking out from behind the tree? Oh! A little plate of milk and cookies?
How to Make a Christmas Tree Cake Topper
Making the Christmas tree cake topper is so simple. And although I didn’t take any step-by-step photos, I think you’ll find the explanation straightforward for following along.
What You’ll Need
- 1 cake pop stick or lollipop stick (to insert into the cake)
- green chocolate candy melts
- a variety of sprinkles in different shapes and colors
- a piping bag or spoon (for drizzling the chocolate)
- wax paper
Getting Things Ready
Lay your piece of wax paper on something flat like a baking sheet or cutting board. Set the cake pop stick on the wax paper. Have your sprinkles set out and ready to use.
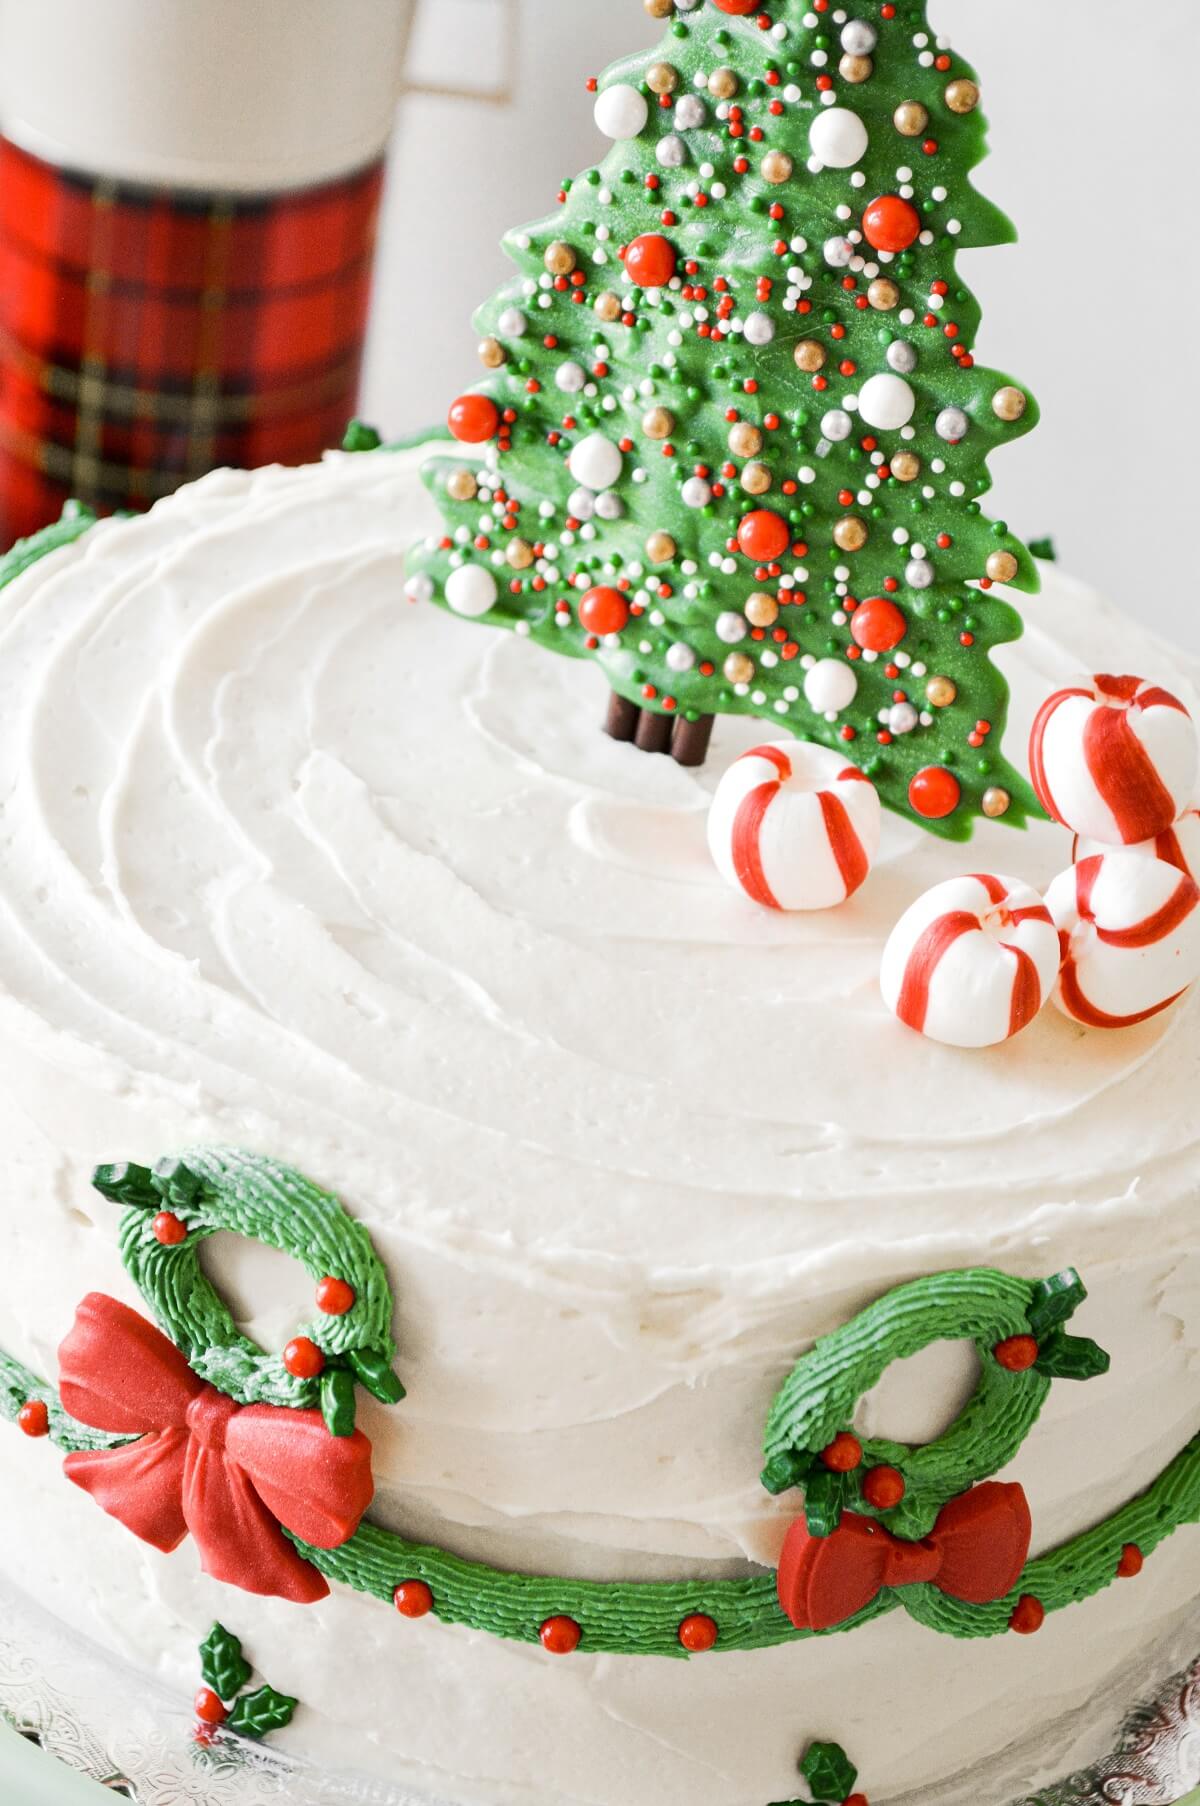
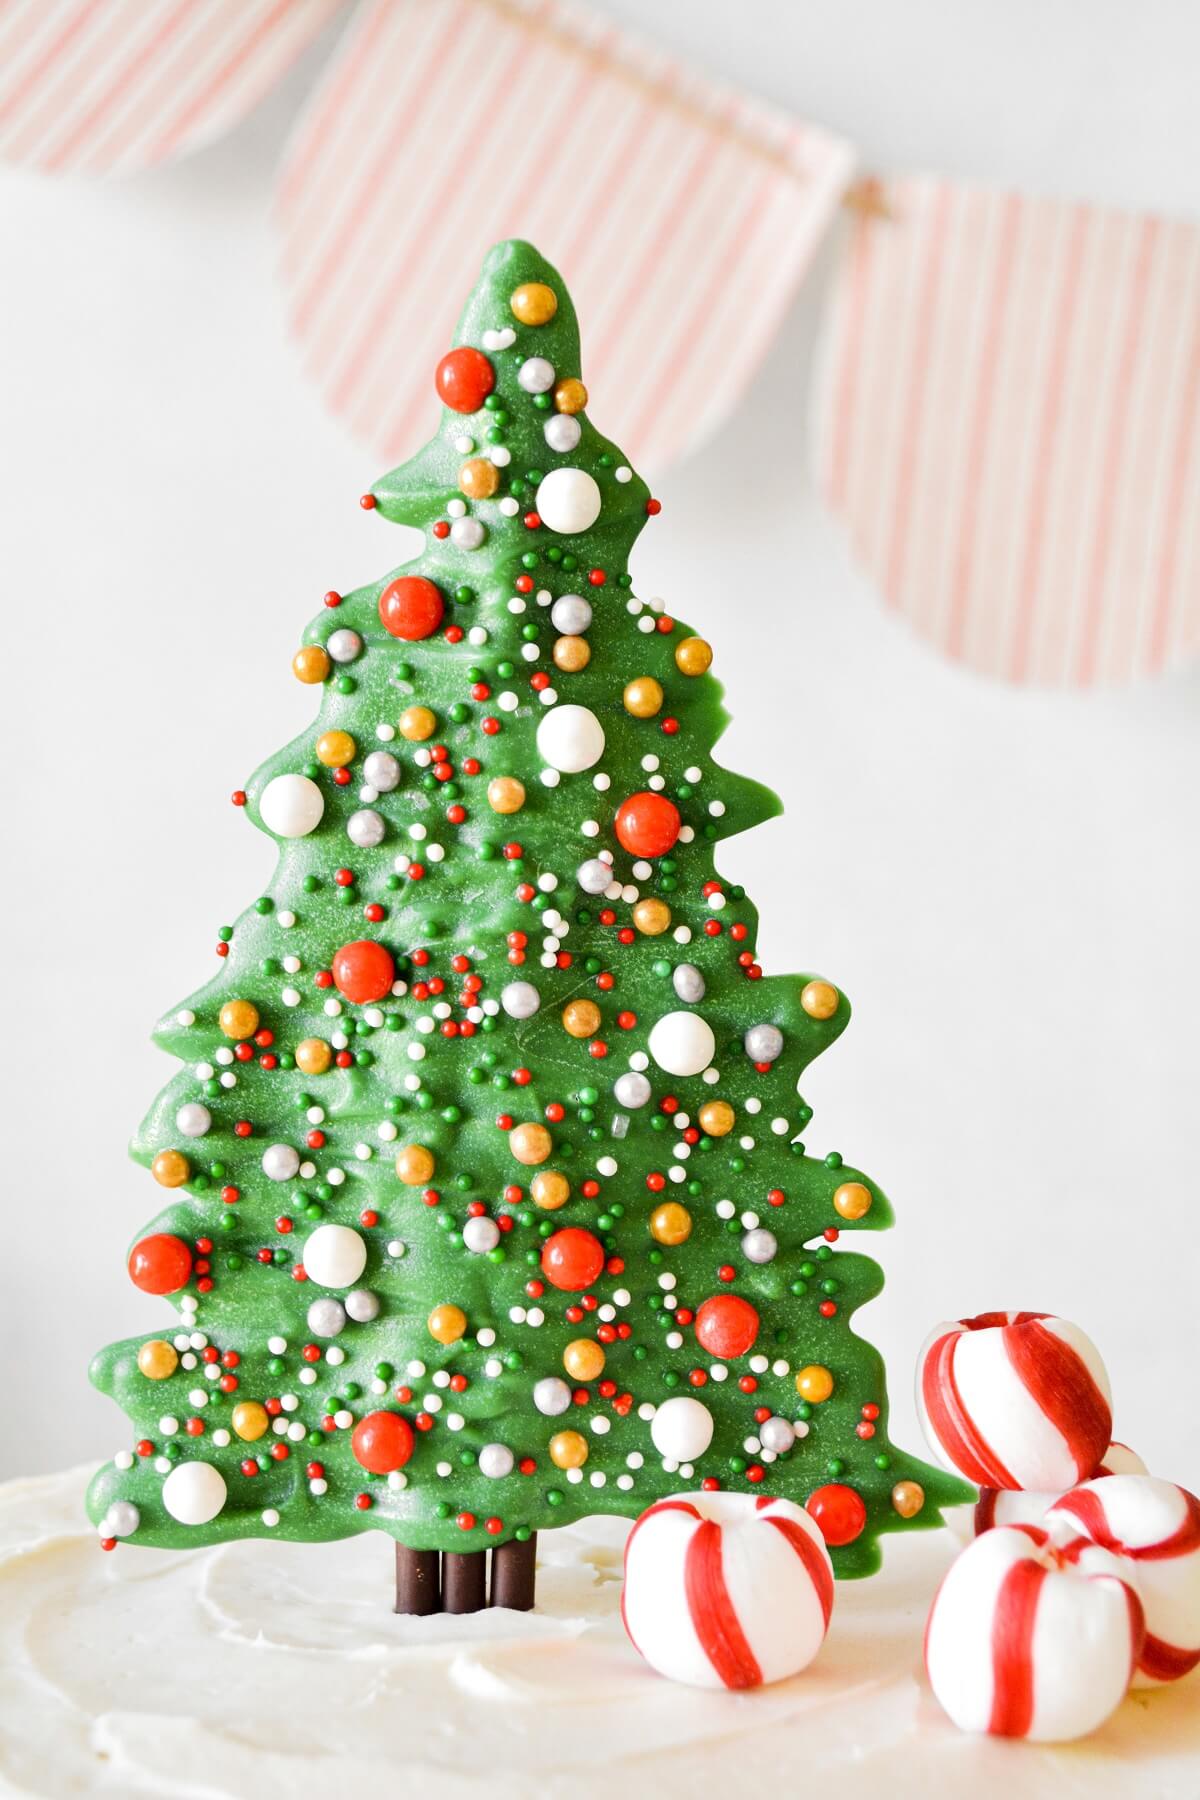
If you want, you could even trace an outline on your wax paper as a guide for the shape and size of your Christmas tree, to help you as you drizzle the chocolate. I made mine fairly large, about 7-8 inches tall and 4 inches wide.
You might have noticed that for my Christmas tree cake topper, I didn’t use a cake pop stick. That’s because I already had some Pocky sticks on hand, which I used instead. I actually used three, side-by-side, and let the chocolate-dipped ends show at the base of my tree. If I had used a cake pop stick, I would have just pushed it all the way down into the cake so it didn’t show.
Melt and Drizzle the Chocolate
You’ll need a bag of green chocolate candy melts from the baking aisle of your local craft store. They’re easy to melt and easy to use for all kinds of projects. Melt your candy according to the instructions on the package.
For drizzling the chocolate, you can fill a piping bag and snip off a small corner from the tip, or just use a spoon. Generously drizzle the chocolate back and forth over the stick in the general shape of a tree. Be sure to leave at least 2 inches of the stick at the bottom bare, as you will need to insert that end into your cake. The stick does not need to extend all the way to the top of your tree. Use a spoon or small spatula to spread and swirl the chocolate a bit, until you’re happy with the shape of the branches.
Add Sprinkles and Chill
Before the chocolate sets, add your sprinkles and any other decorations you’re using. It’s best to start with the largest sprinkles first, placing them exactly where you want them, and then scatter on the small sprinkles.
Now just place the baking sheet with your Christmas tree cake topper in the refrigerator to chill until the chocolate has re-hardened. Once firm, it can be easily peeled off the wax paper and is ready to place on your cake.
You can even make this cake topper ahead of time! Just keep it stored in a cool, dry place until you’re ready to decorate your cake.
You Might Also Like


Please check out my Amazon Shop for a curated collection of some of my favorite cake pans from trusted brands, baking tools, ingredients, pretty things and fashion finds. I recommend products that I buy and use every day!
Did you love today’s recipe? Please rate the recipe and let me know in the comments what you thought! Also, be sure to follow Curly Girl Kitchen on Instagram, and tag me when you try one of my recipes so I can see all your delicious creations!
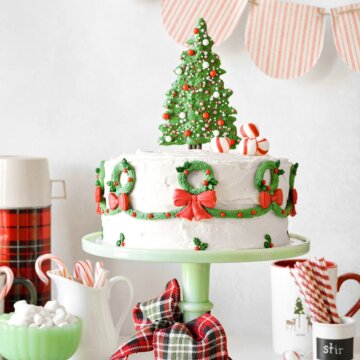
Christmas Tree Wreath Cake
All recipes on Curly Girl Kitchen are developed for high altitude at 5,280 feet. See FAQs for adjusting to higher or lower elevations.

Ingredients
- 1 layer cake (any flavor), frosted with white buttercream
- 1 cup additional buttercream, tinted green (for the wreaths and garland)
- sprinkles, various colors and sizes
- red chocolate candy coating (for bows)
- green chocolate candy coating (for the tree)
- 1 cake pop stick (for the tree trunk)
- variety of candy canes and soft peppermint candies
- bow mold
- piping tip #199, (for piping the wreaths and garland)
Instructions
- Bake and frost your cake. It can be any flavor you like! The design looks best on white buttercream, though. Before decorating, chill your cake for 30 minutes.
- To create the wreaths and garlands around the sides of the cake, fit a piping bag with a couple and tip #199, and fill with the green buttercream. Pipe the wreaths and garlands onto the chilled cake.
- To make the red bows, pour melted red chocolate candy coating into a bow mold. Chill until firm, then pop the bows out of the mold. Press onto your cake, using a little buttercream on the back, if needed.
- Be sure to add any sprinkles to your cake before the buttercream has a chance to crust over.
- To make the Christmas tree cake topper, lay your cake pop stick on a piece of wax paper. Melt the green chocolate candy coating and use either a piping bag or a spoon to generously drizzle the chocolate back and forth over the stick in the general shape of a tree, leaving at least 2 inches at the bottom for the "trunk" to insert into the cake. Use a spoon or small spatula to spread and swirl the chocolate a bit, until you’re happy with the shape of the branches. Before the chocolate sets, add sprinkles, and then refrigerate until firm. I made mine fairly large, about 7-8 inches tall and 4 inches wide.
 https://curlygirlkitchen.com/
Absolutely A+
:):)
Your hand made decos are perfect Heather..the photo..props..everything!