
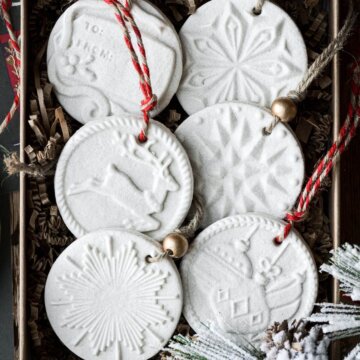
Make the most beautiful homemade salt dough ornaments for your Christmas tree with this easy recipe and assorted Christmas cookie stamps. This is a fun and creative project that the whole family can do together! Included in today’s post is a variation for cinnamon salt dough ornaments, too.
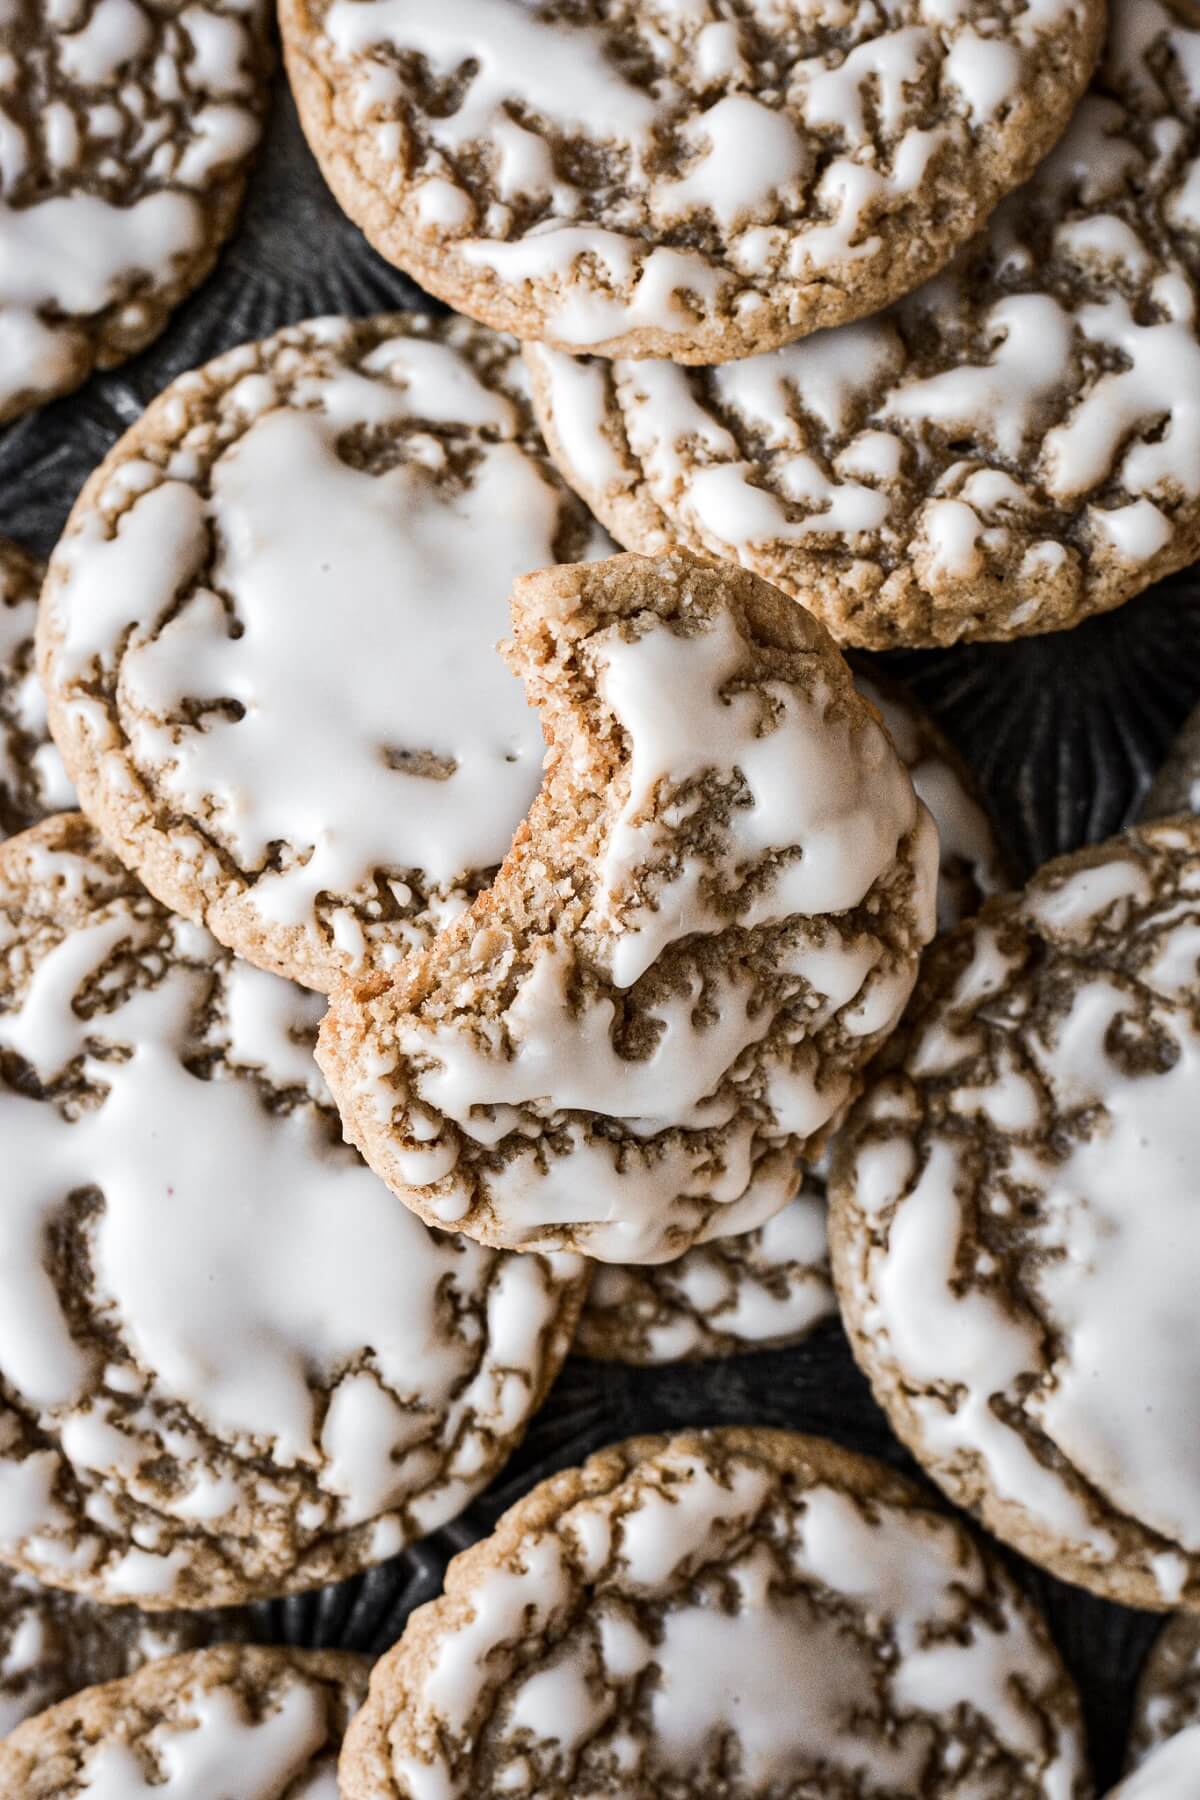
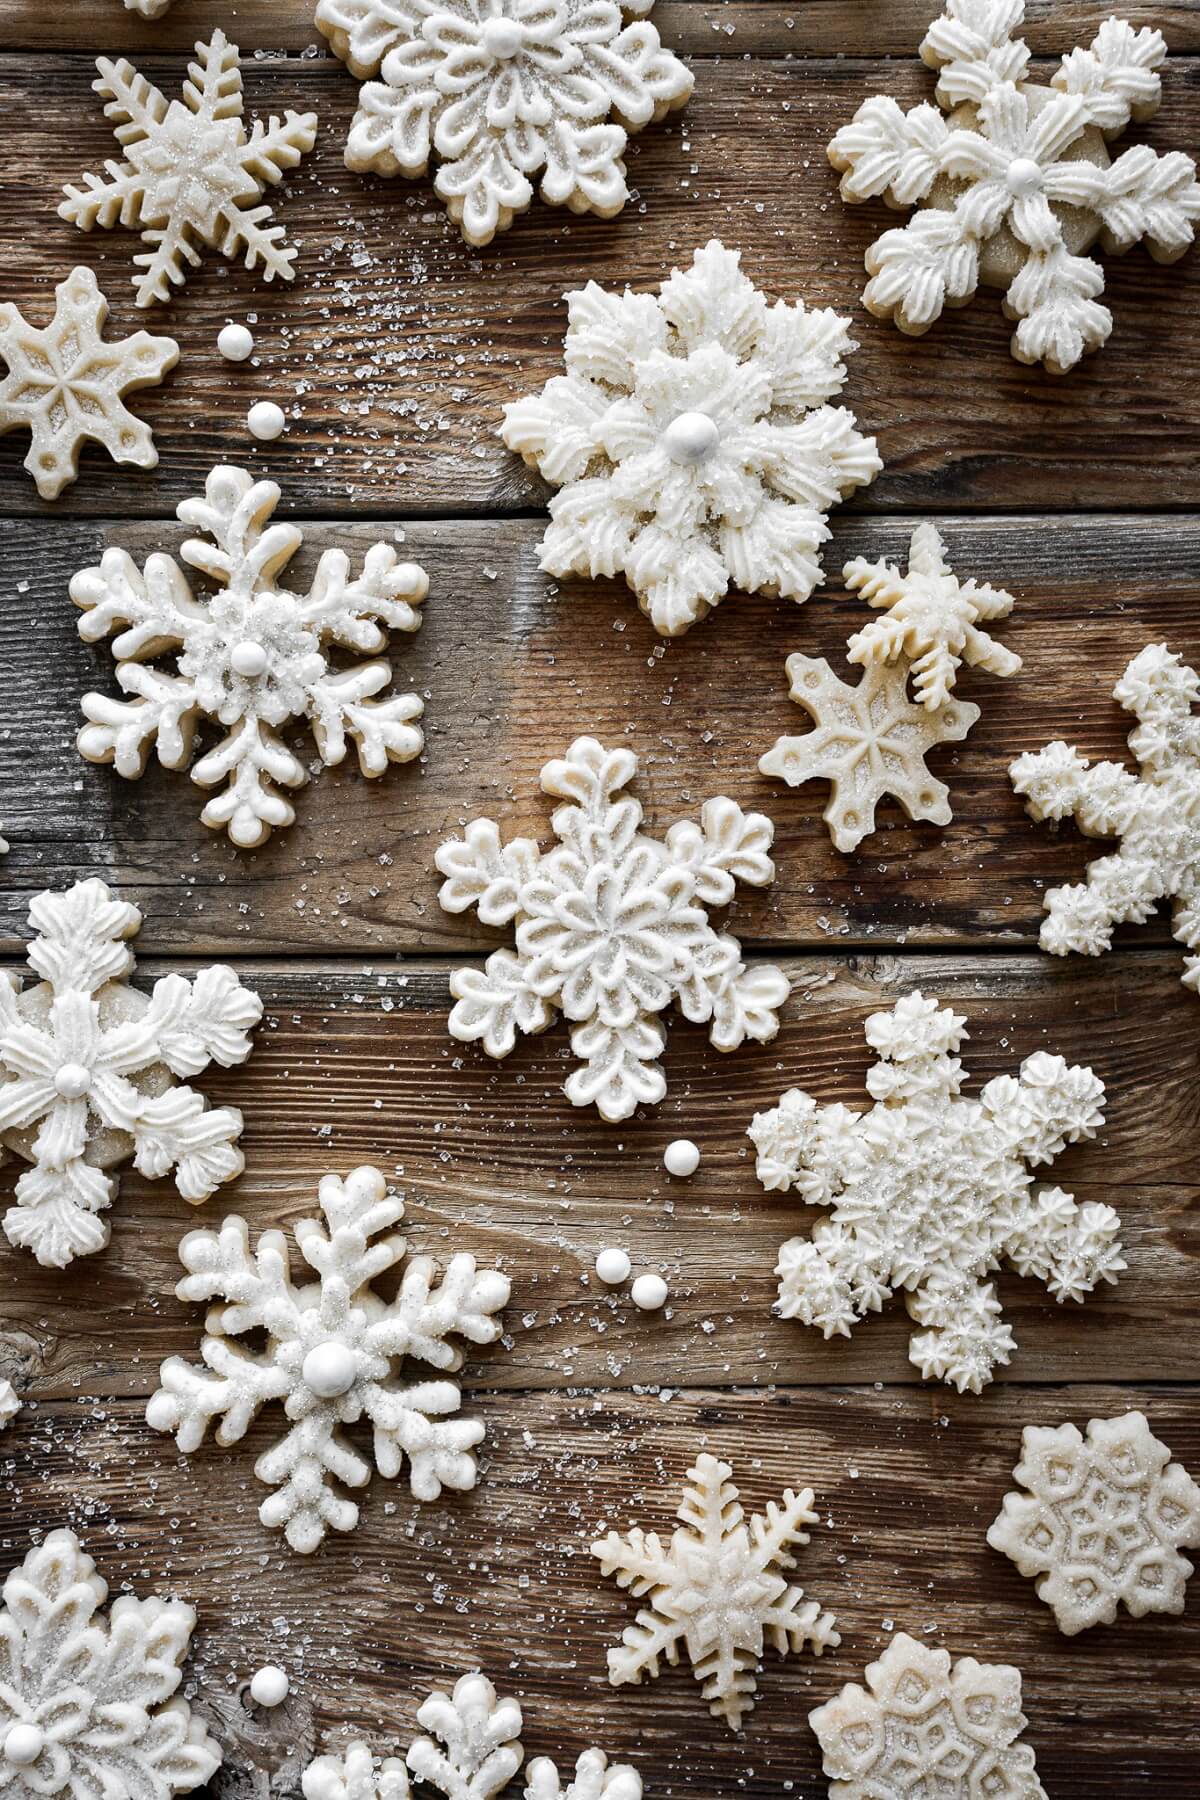
You might also love these iced snowflake cookies, raspberry thumbprint sugar cookies, and chocolate place card cookies.
This site contains affiliate links. As an Amazon associate, I earn from qualifying purchases. This means that I may make a small commission if you purchase a product using those links. This in no way affects my opinion of those products and services. All opinions expressed on this site are my own.
Why You’ll Love This Recipe
Fun for the Whole Family. Everyone can get involved in making salt dough ornaments, from making the dough, rolling and cutting “cookies” and painting the ornaments when they’re dried. My little boys absolutely loved making and painting their own set of ornaments to decorate our tree.
Versatile Possibilities. You can keep your ornaments simple and white with just a little glitter, hand paint them with craft paints, or just spray paint them. Cut them in any shape, or press the dough with cookie stamps. Use alphabet letter embossers to make an ornament with everyone’s name. Instead of hanging them on the tree, you could also use them as place cards for every place setting at Christmas dinner, or as stocking tags. And for ornaments that look like iced gingerbread cookies, see the variation in the post below for making cinnamon salt dough Christmas ornaments.
Just 3 Ingredients. You only need flour, salt and water to make the salt dough.
Lasts for Years. Enjoy these beautiful ornaments and the memories making them for years to come!
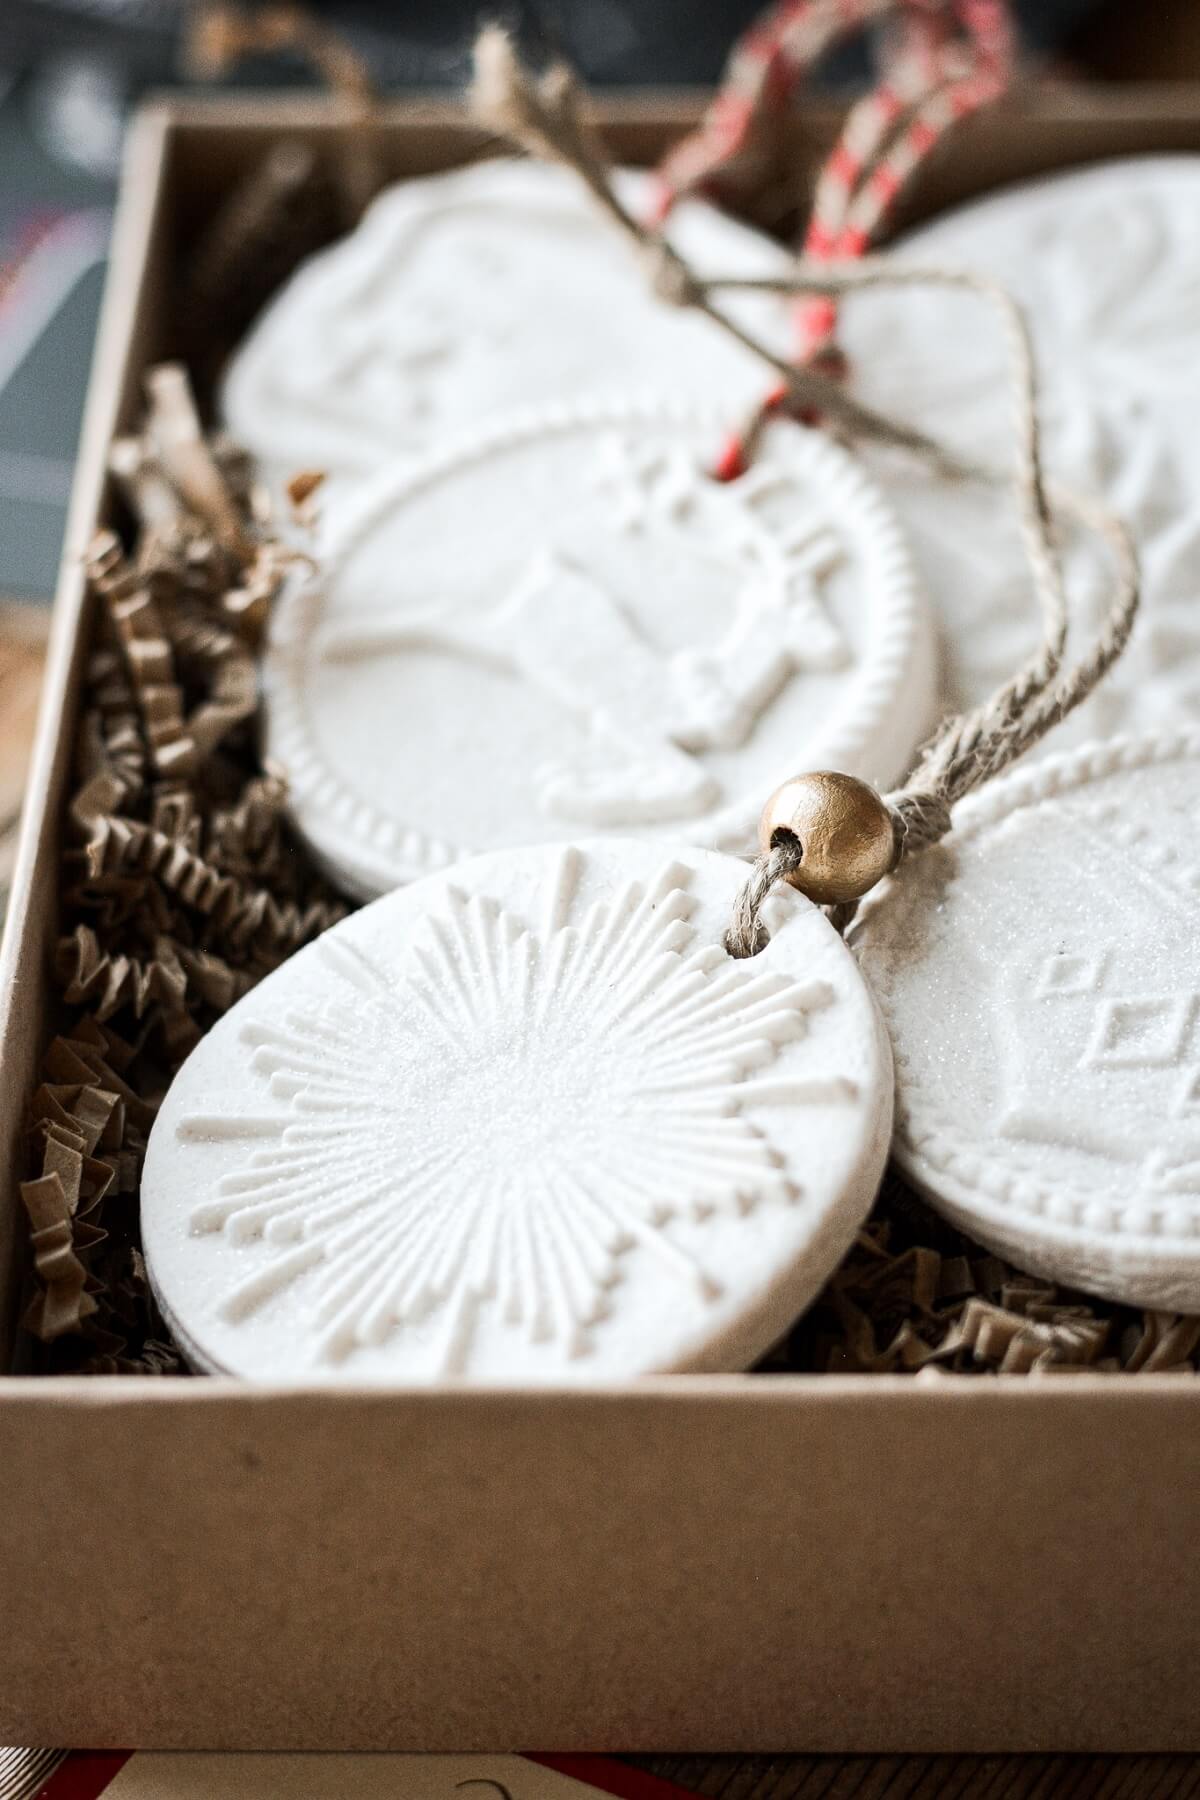
Perfect for Gifting. I just love giving homemade Christmas gifts. And these ornaments would make a beautiful gift for friends, family members, teachers and neighbors, or to include in a Christmas cookie box.
No Sugar. In the mood to cut and decorate “cookies”, but you don’t want to eat any more sugar this holiday season? This project provides all the satisfaction of creating something beautiful to enjoy and look at, without any of the calories.

See the recipe card at the end of the post for the full ingredients list and instructions.
Ingredients
- Flour. Use plain, all-purpose flour for making the dough.
- Salt. Use a finer grained table salt for your salt dough, rather than the coarse Kosher salt that I typically use in my recipes.
- Warm Water.
Tools and Equipment
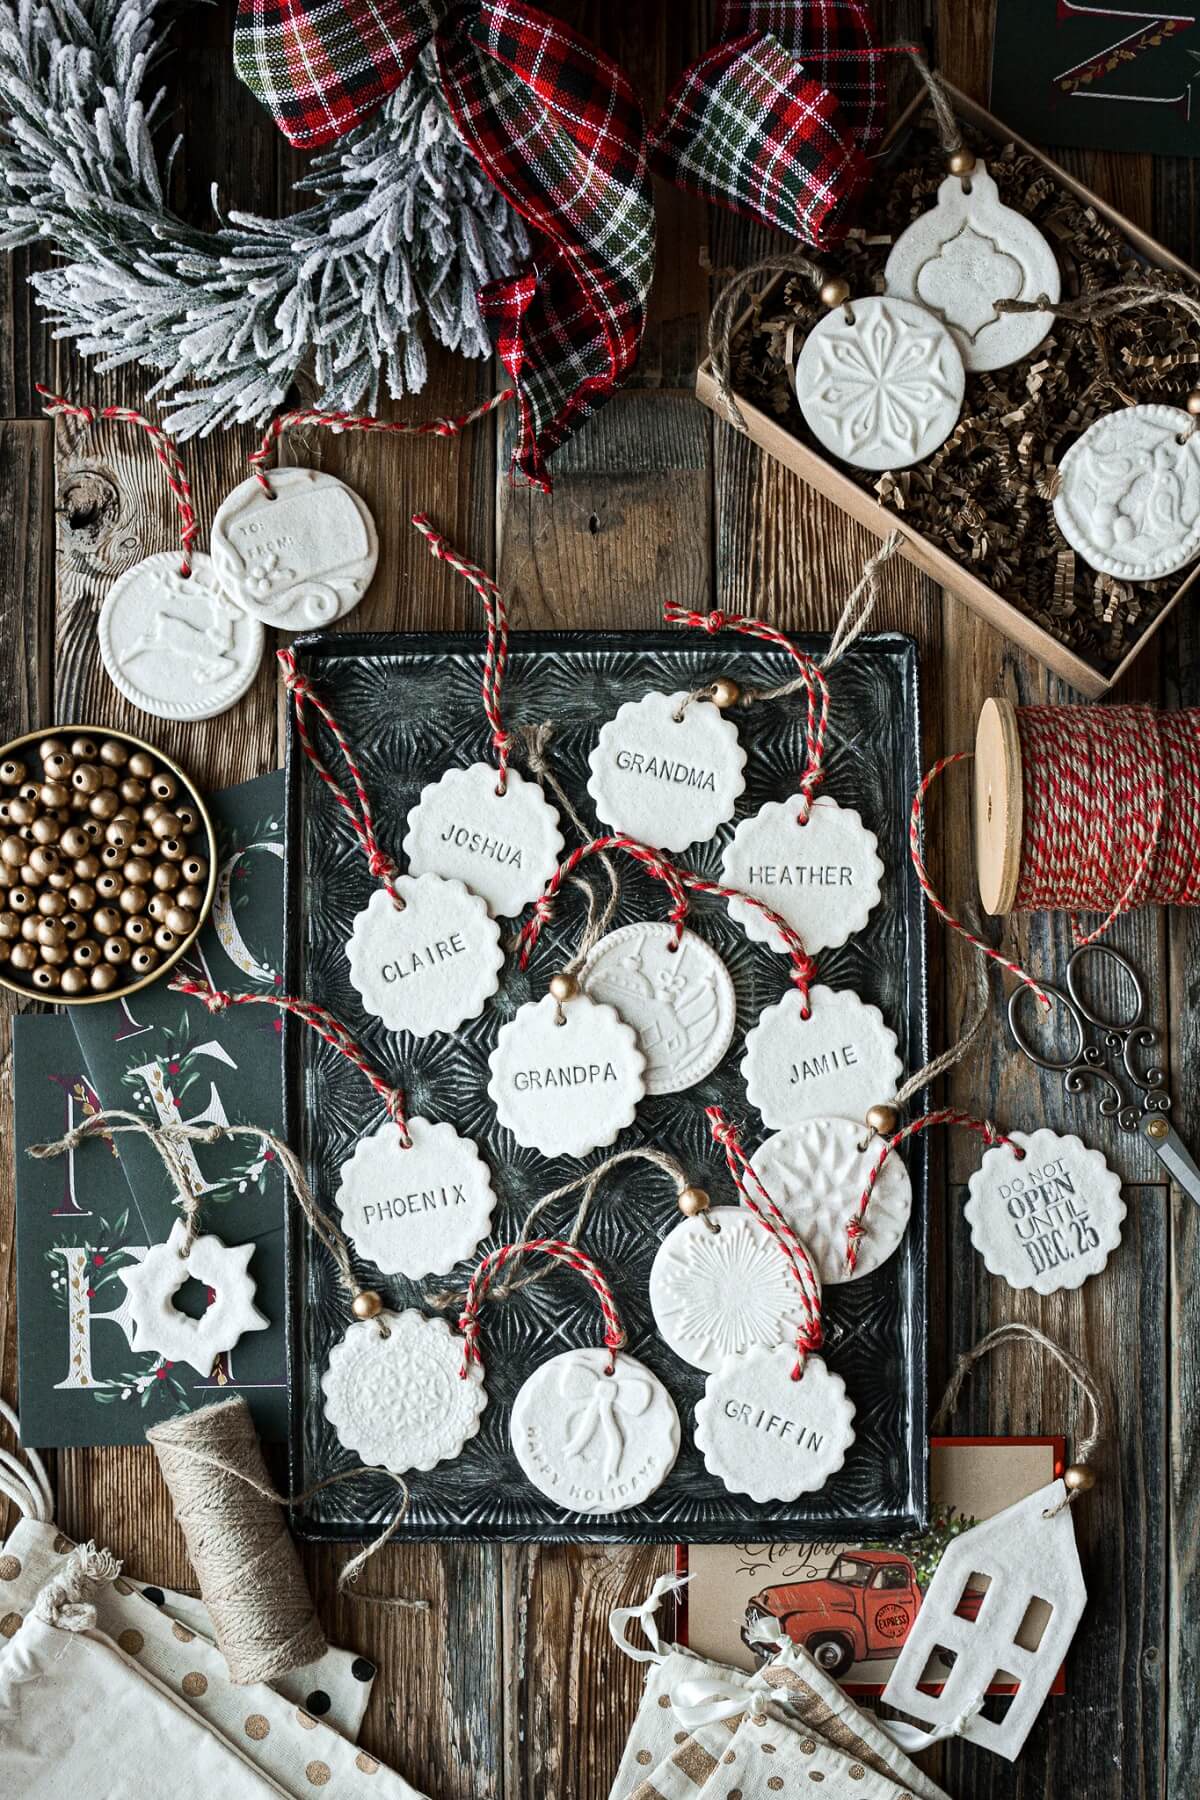
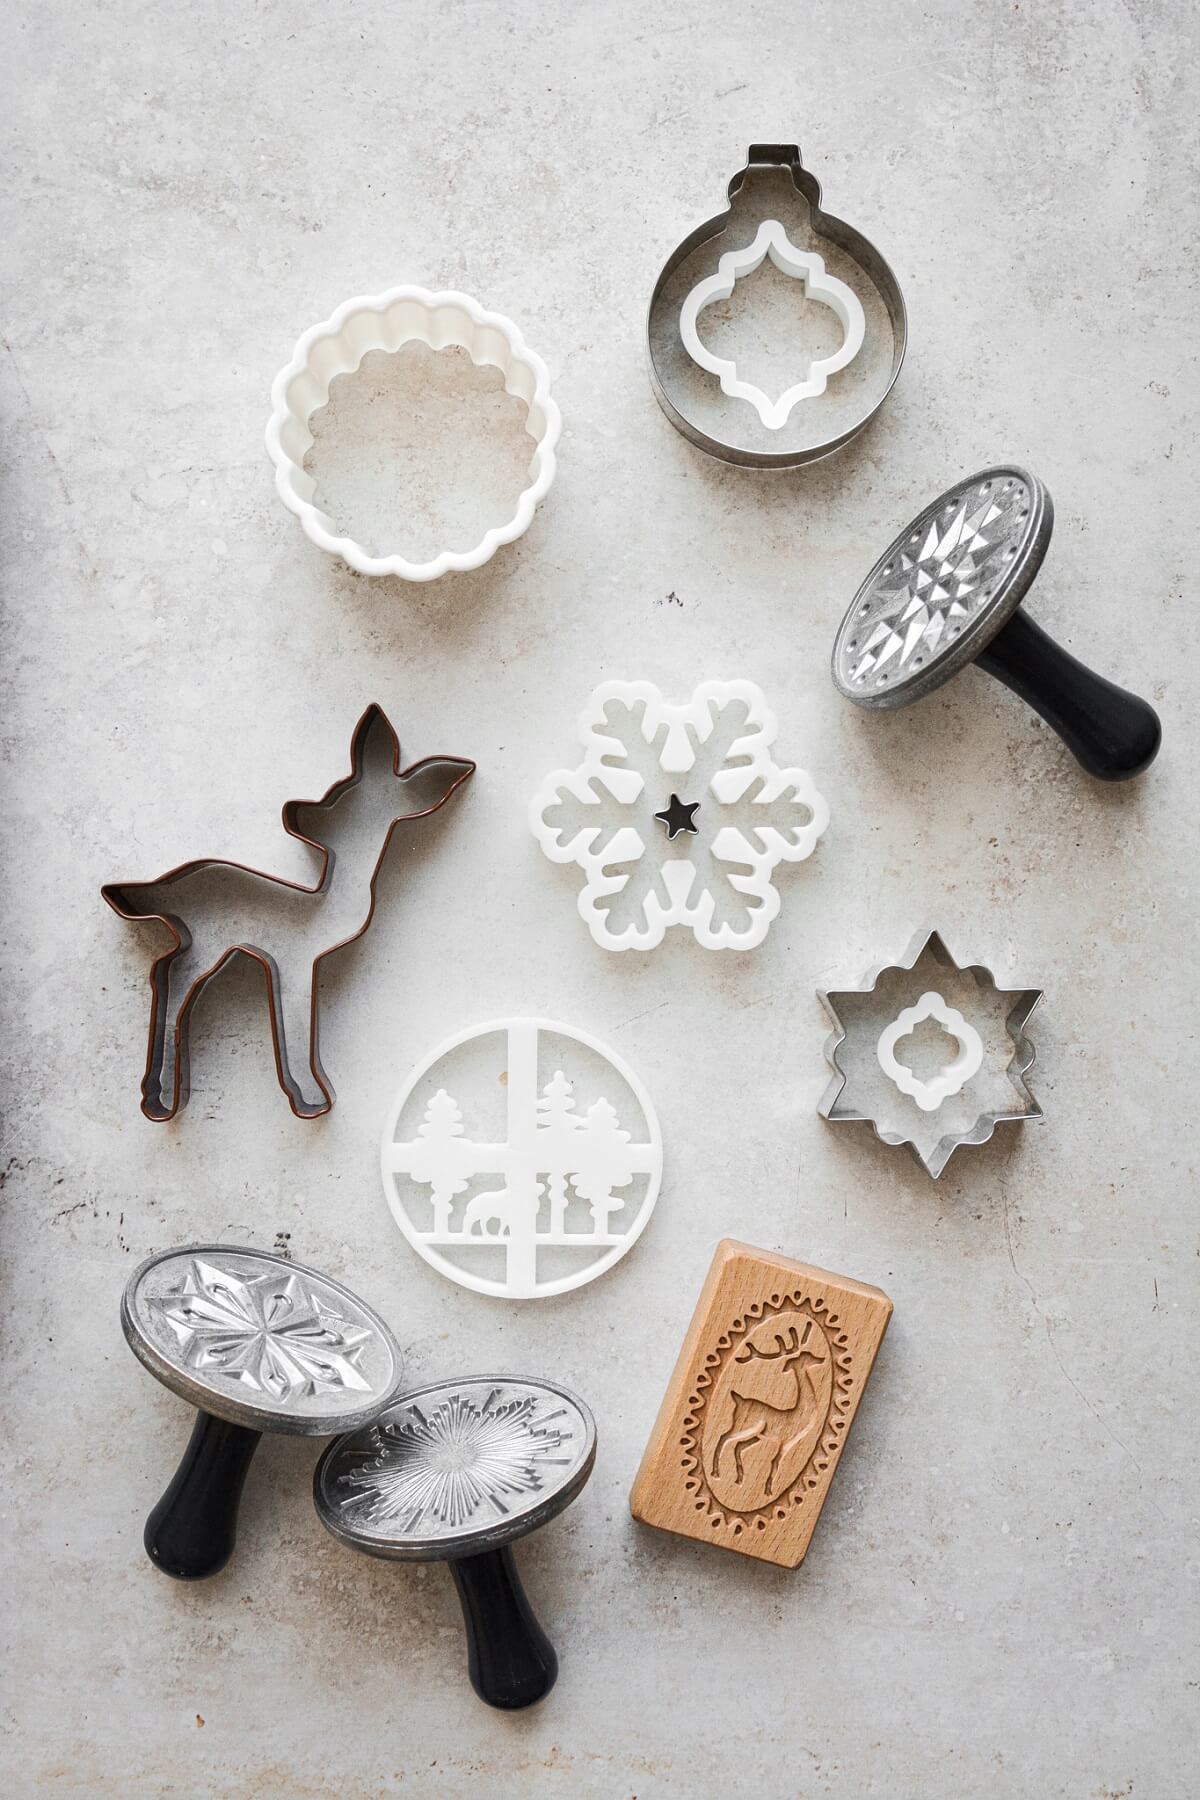
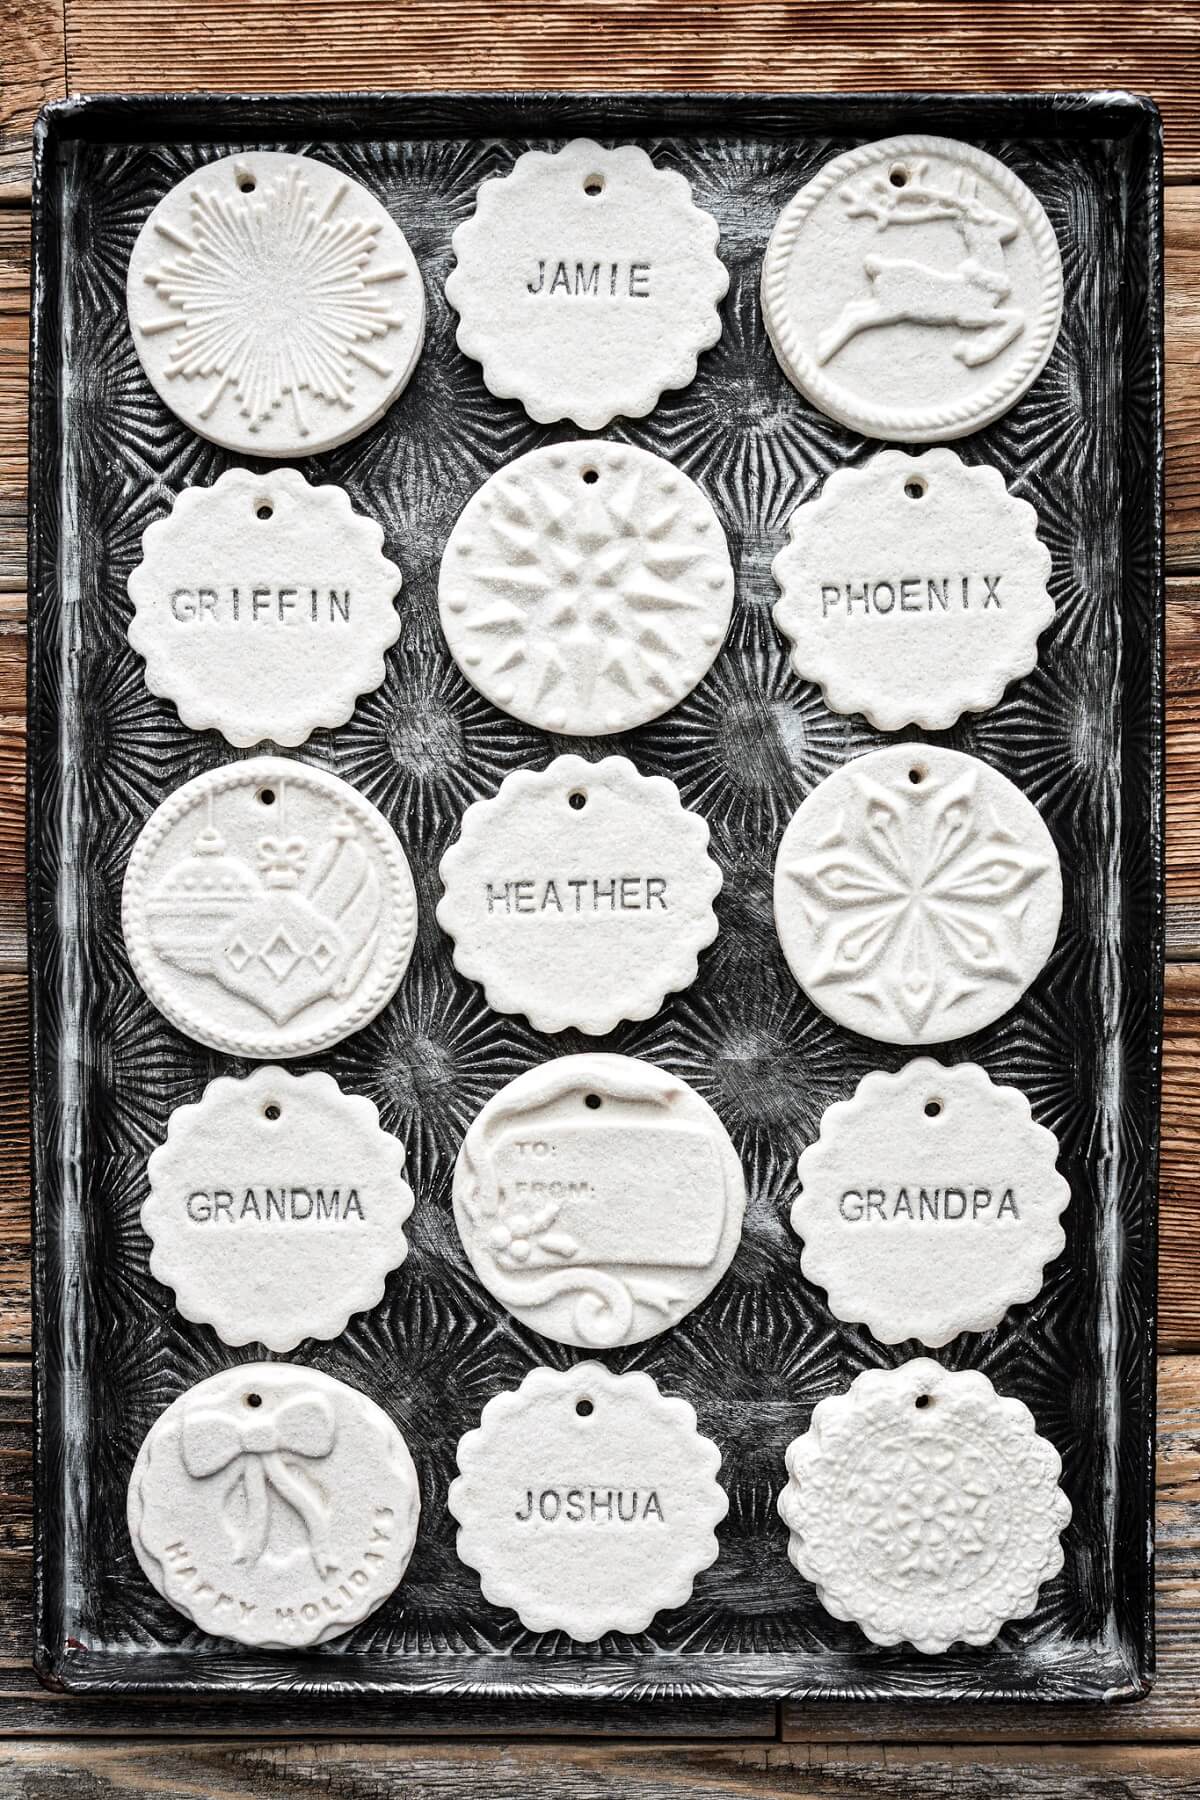
- Assorted Christmas Cookie Cutters. You can use any shape cookie cutter you like, but I did find that simpler shapes work best. The more detailed and intricate the cookie cutter, the harder it is to get the salt dough out. A round scalloped cookie cutter looks really pretty for the ornaments embossed with everyone’s names.
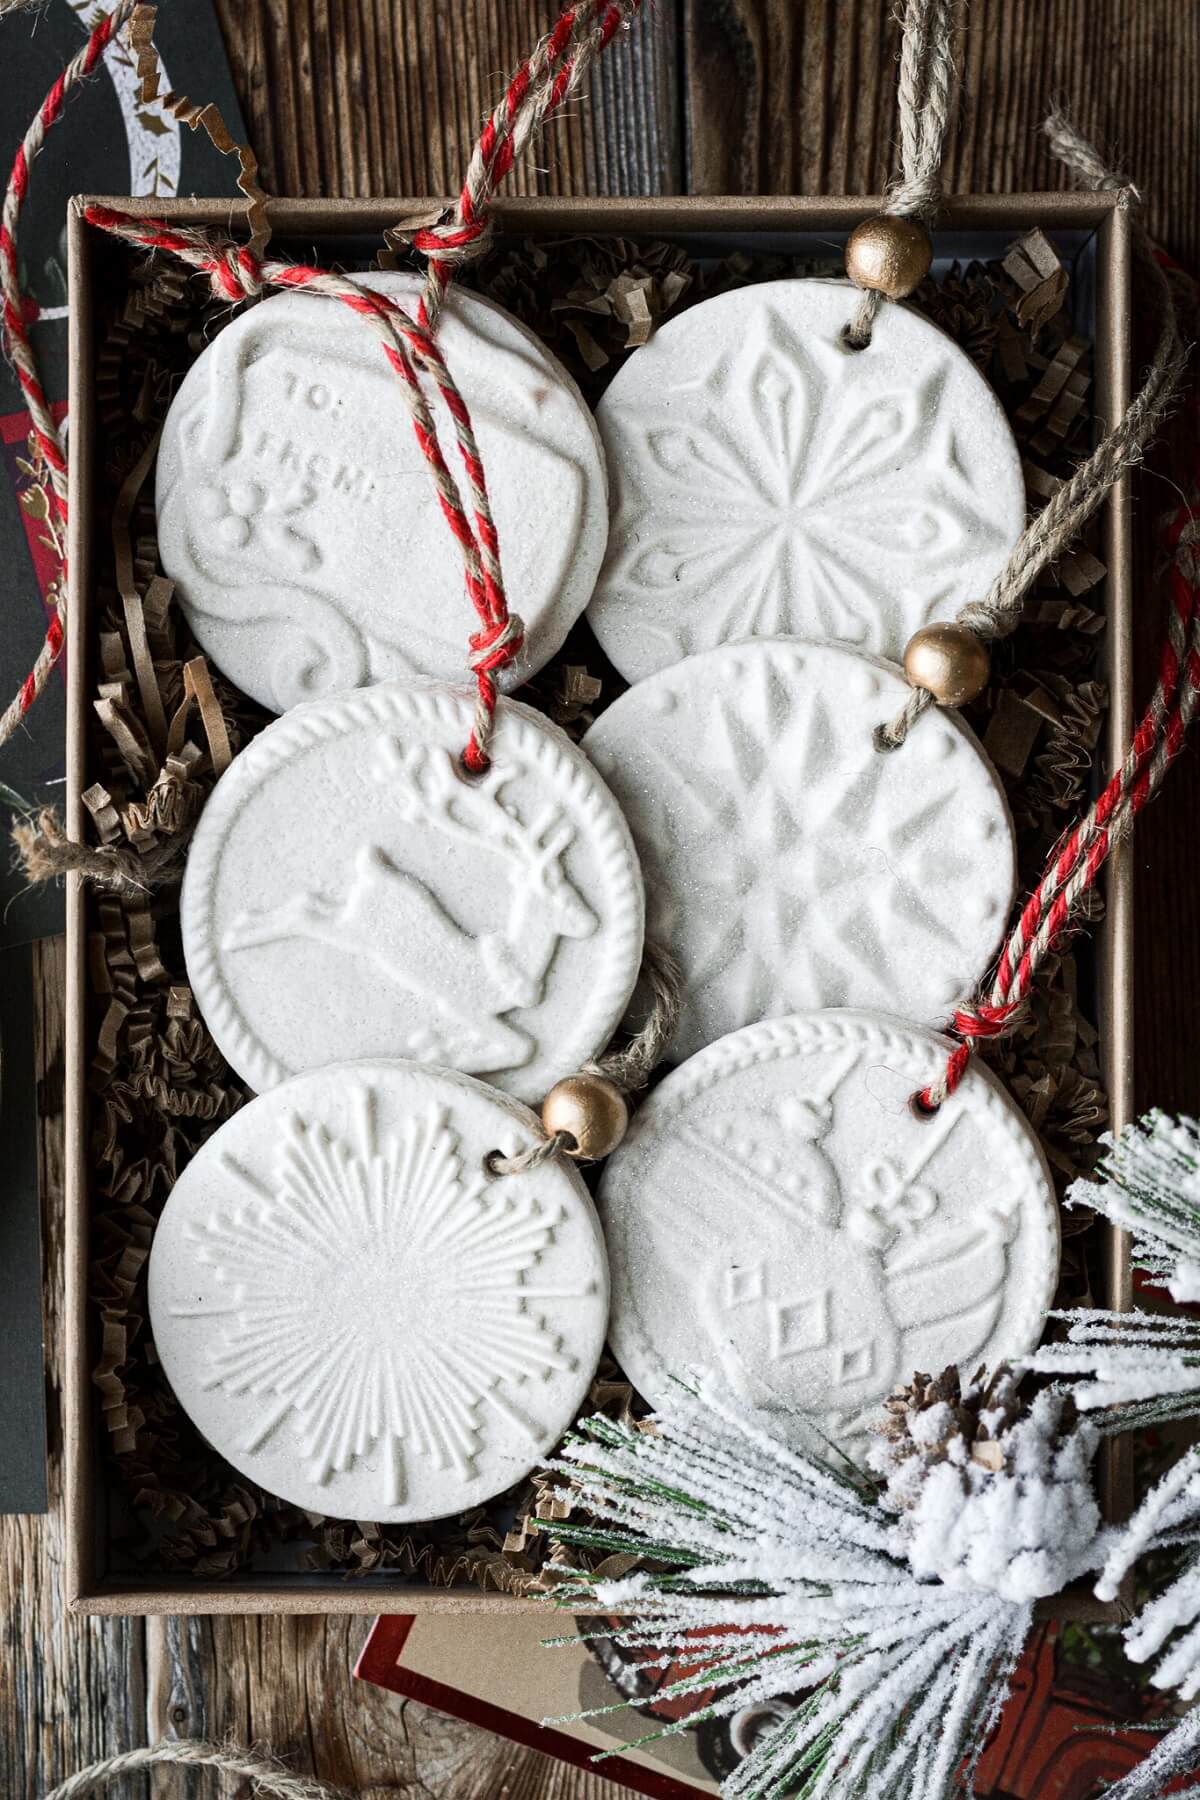
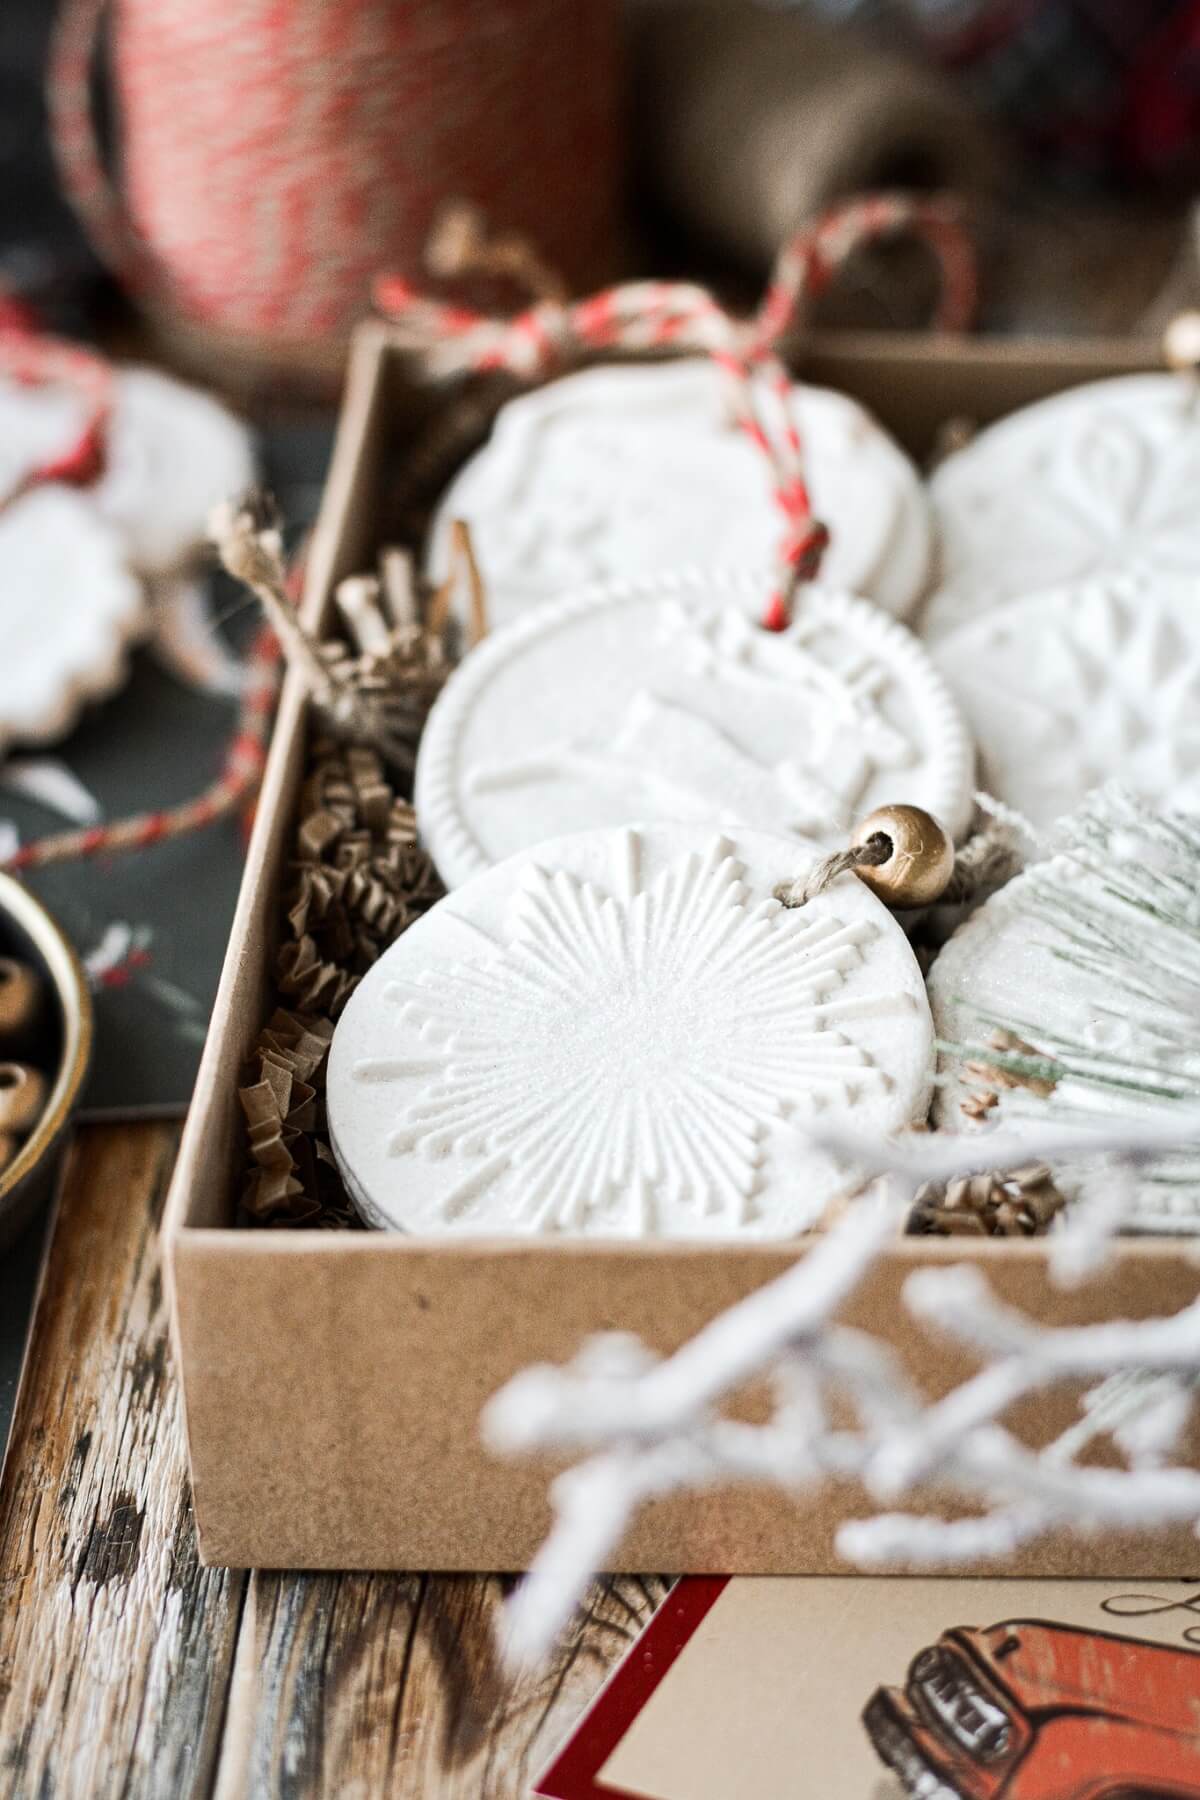
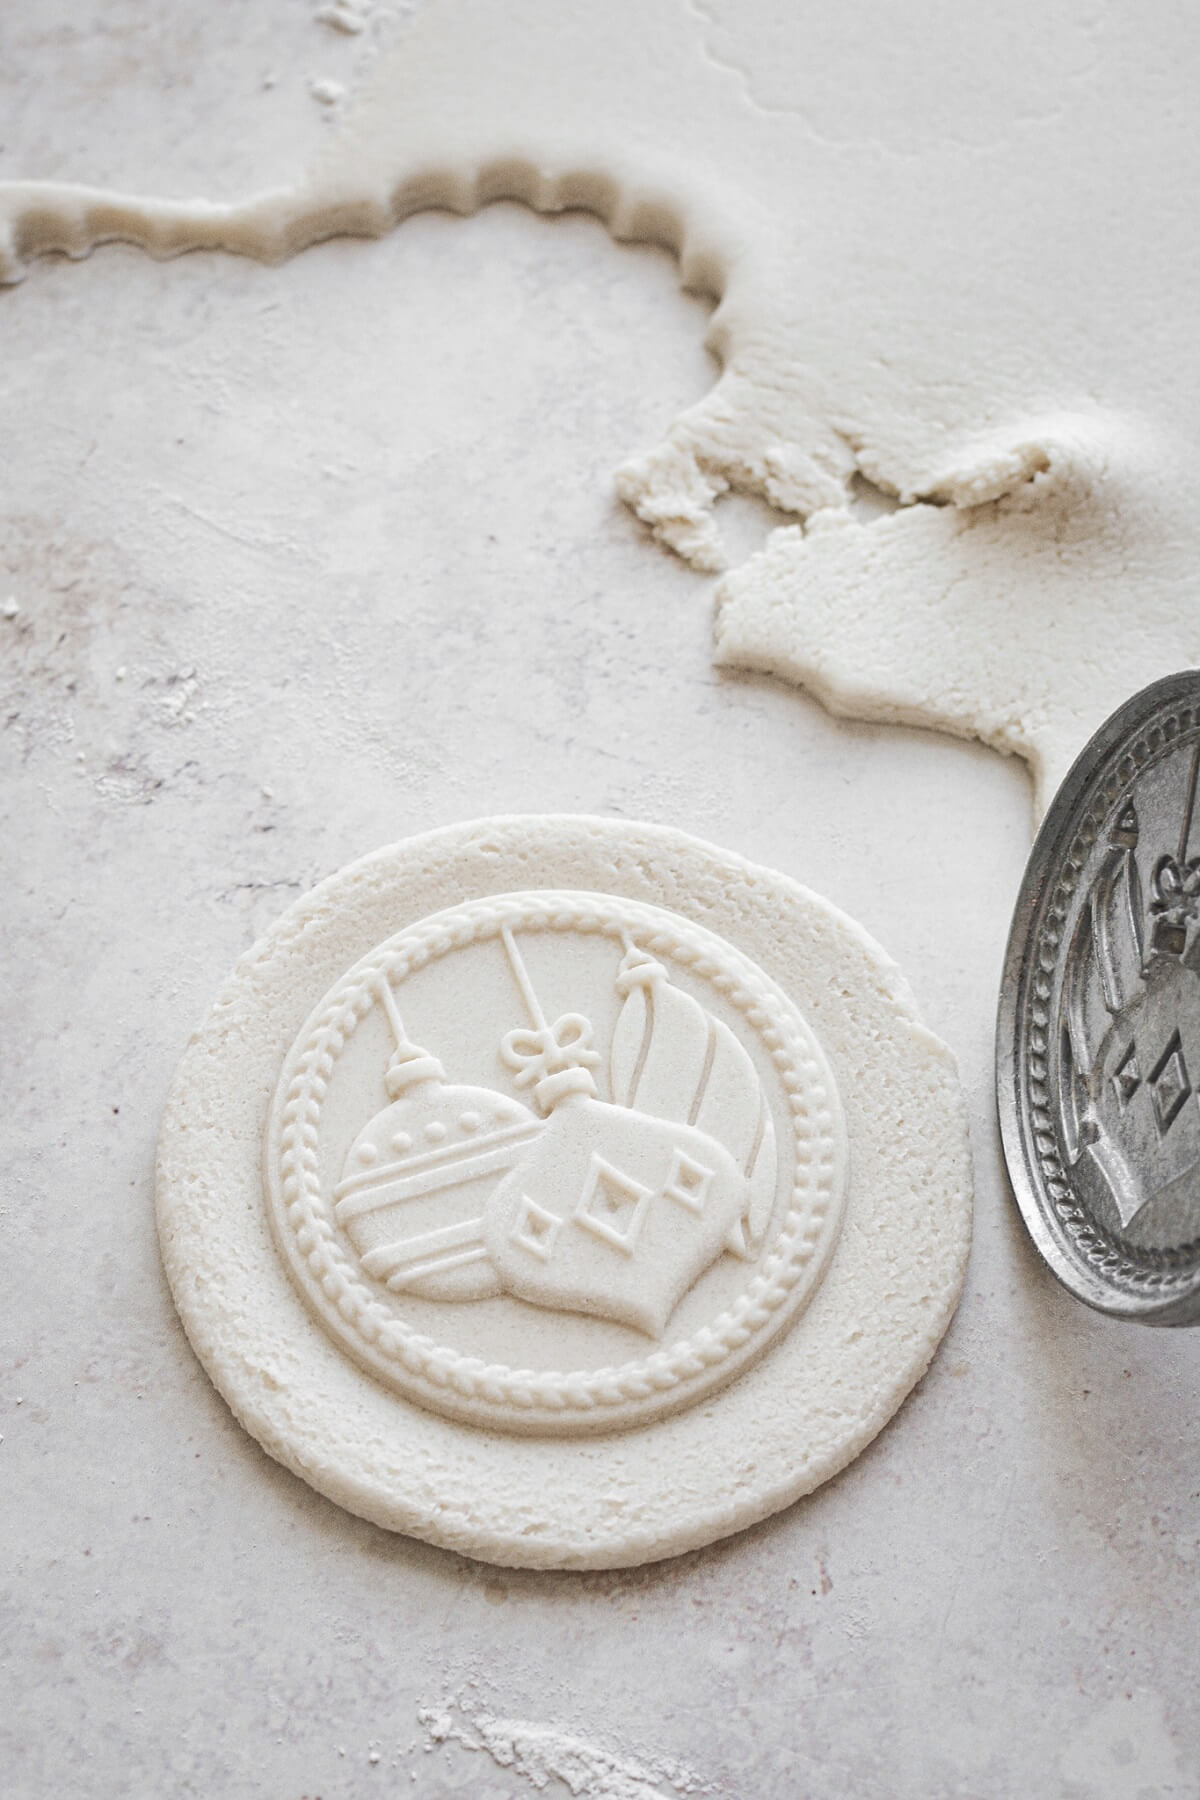
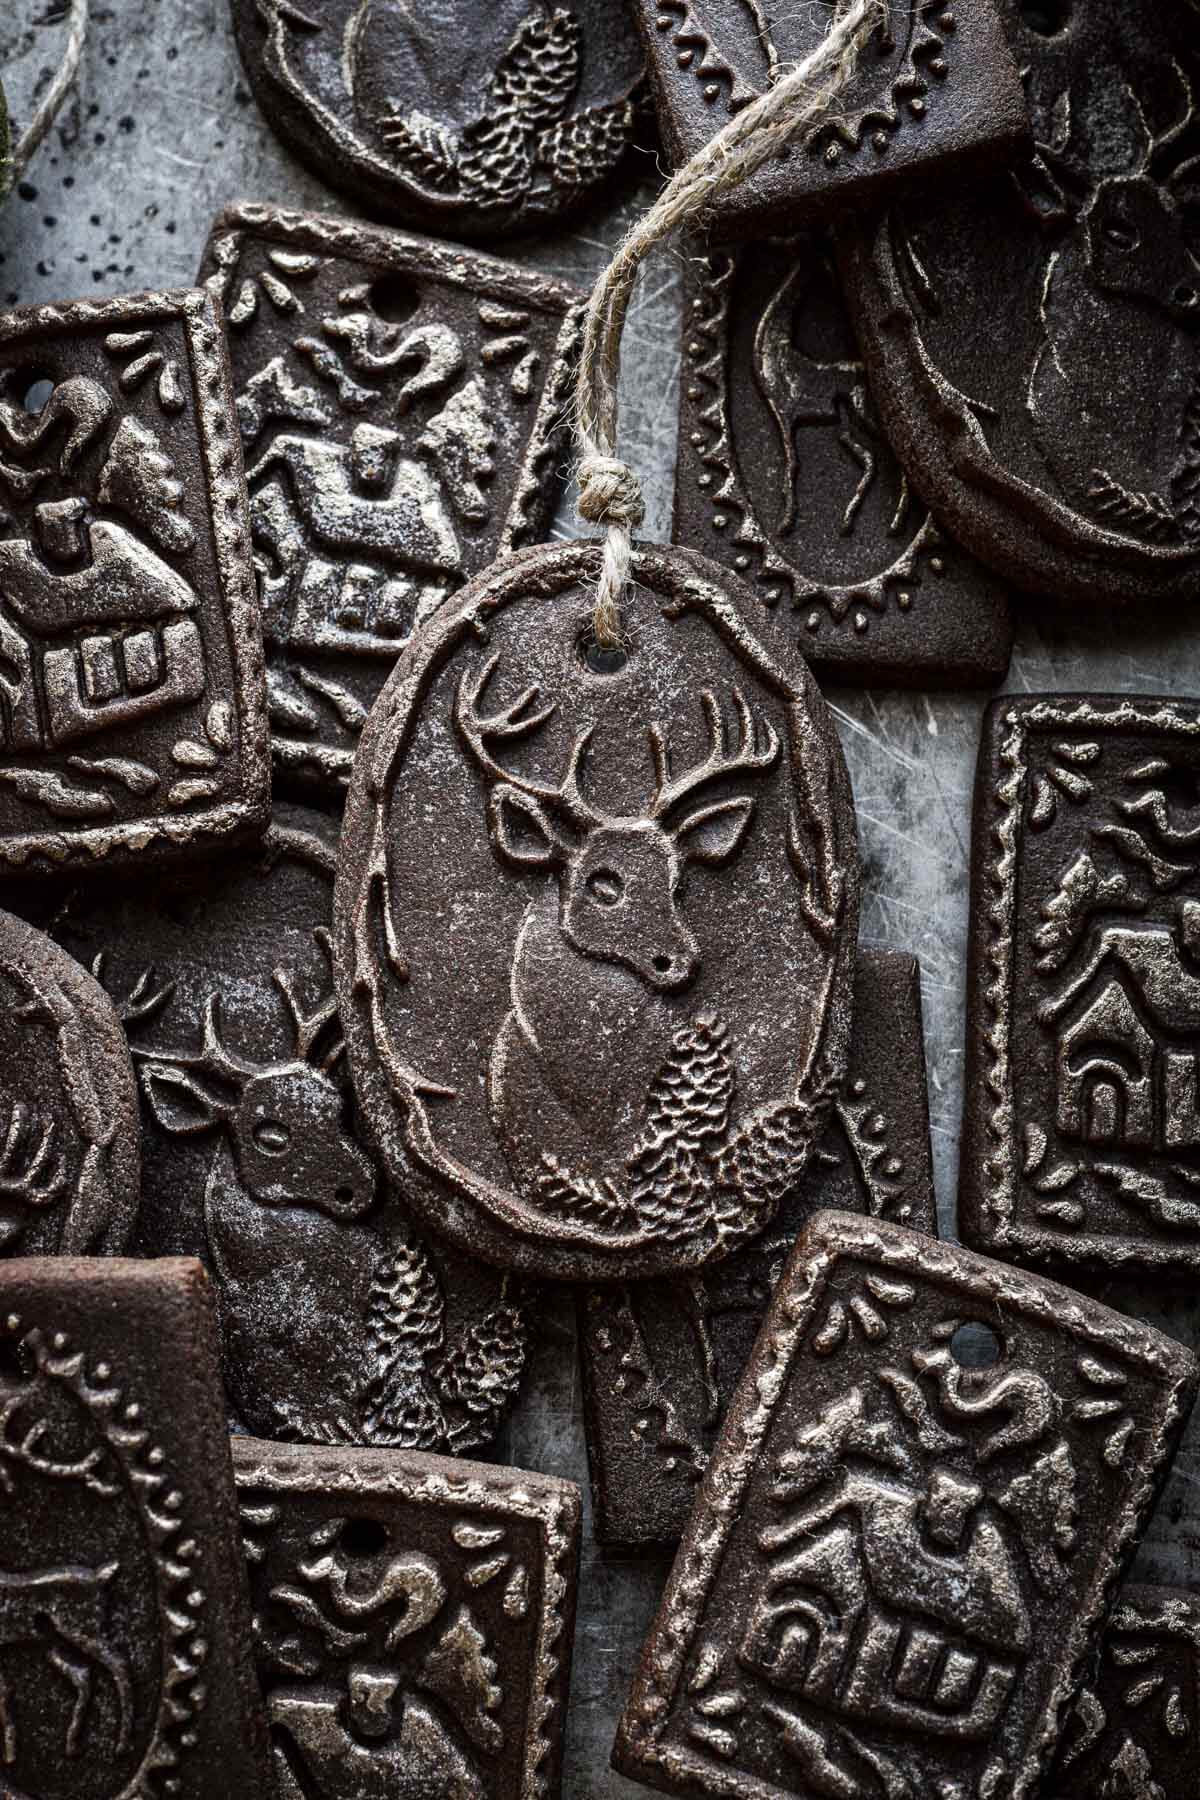
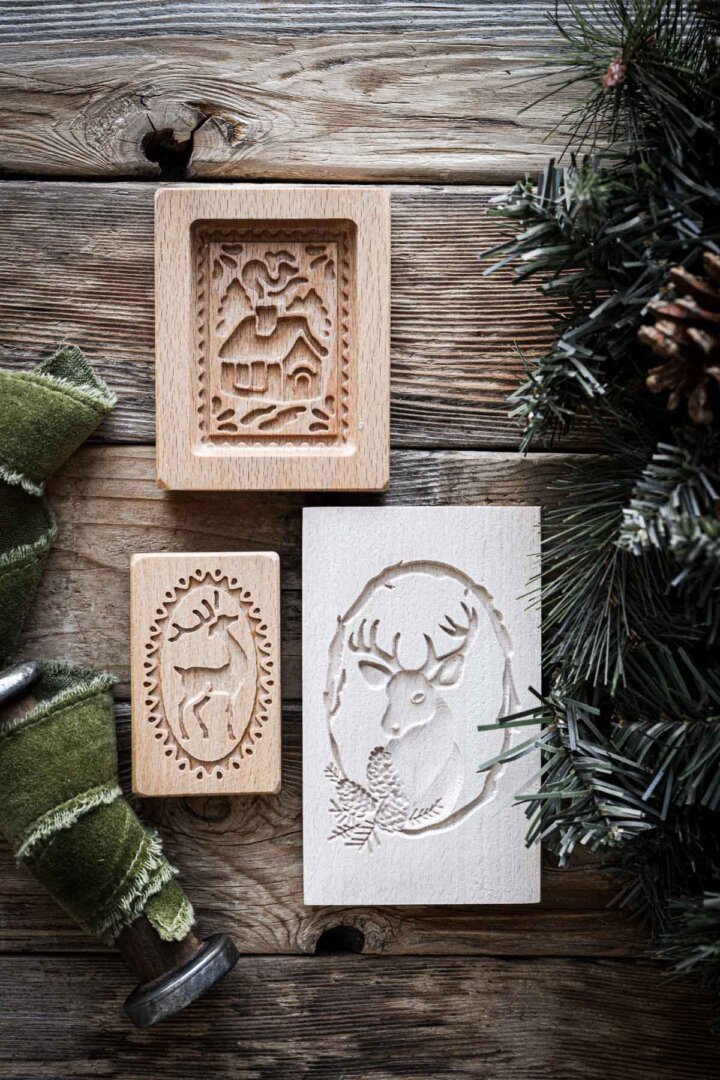
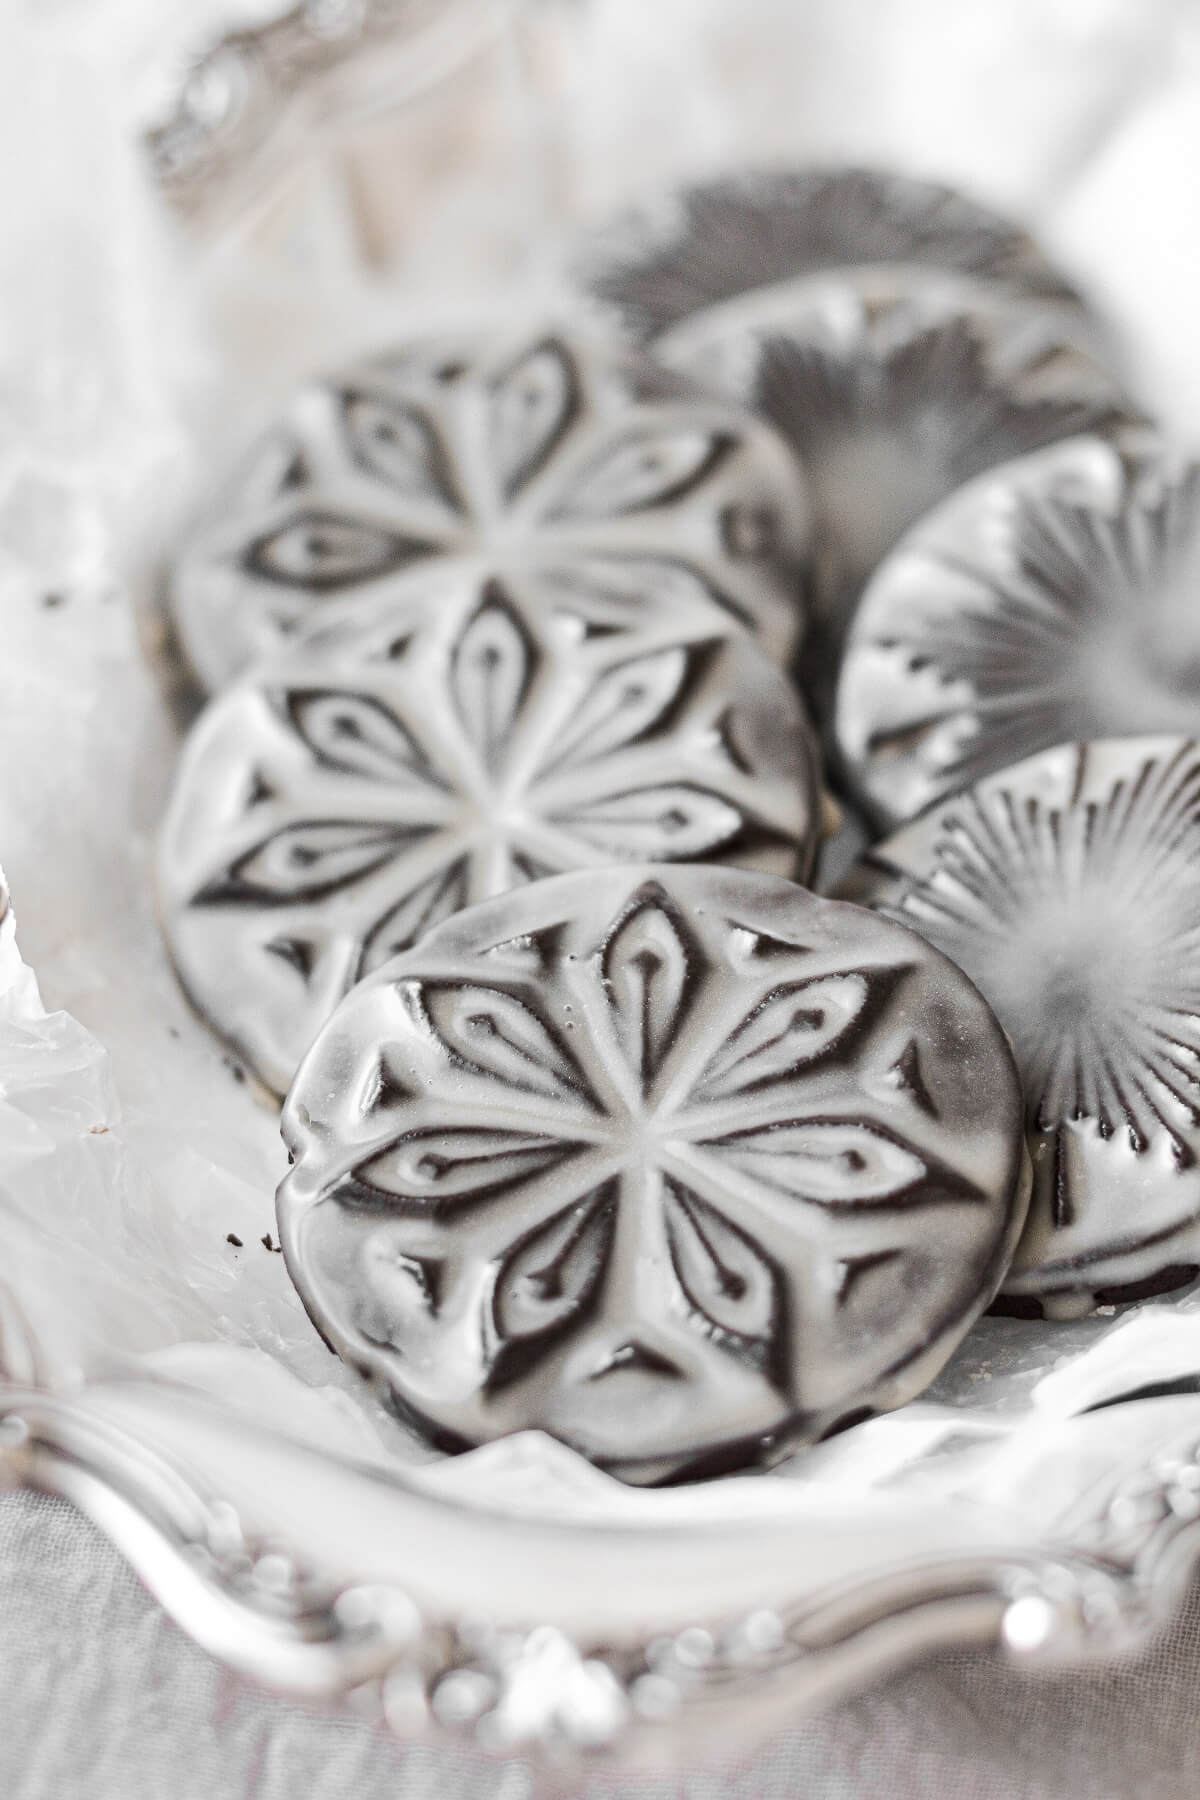
- Assorted Christmas Cookie Stamps. Cookie stamps make really beautiful salt dough ornaments. The design is perfectly preserved as the ornaments dry. I have quite a collection of cast cookie stamps, including these Nordic Ware Holiday Cookie Stamps, Nordic Ware Starry Night Cookie Stamps, Nordic Ware Yuletide Cookie Stamps, and Nordic Ware Snowflake Cookie Stamps.
- Round Cookie Cutter or Biscuit Cutter. After pressing the dough with cookie stamps, you’ll need a round cutter to trim the excess dough from around the edges.
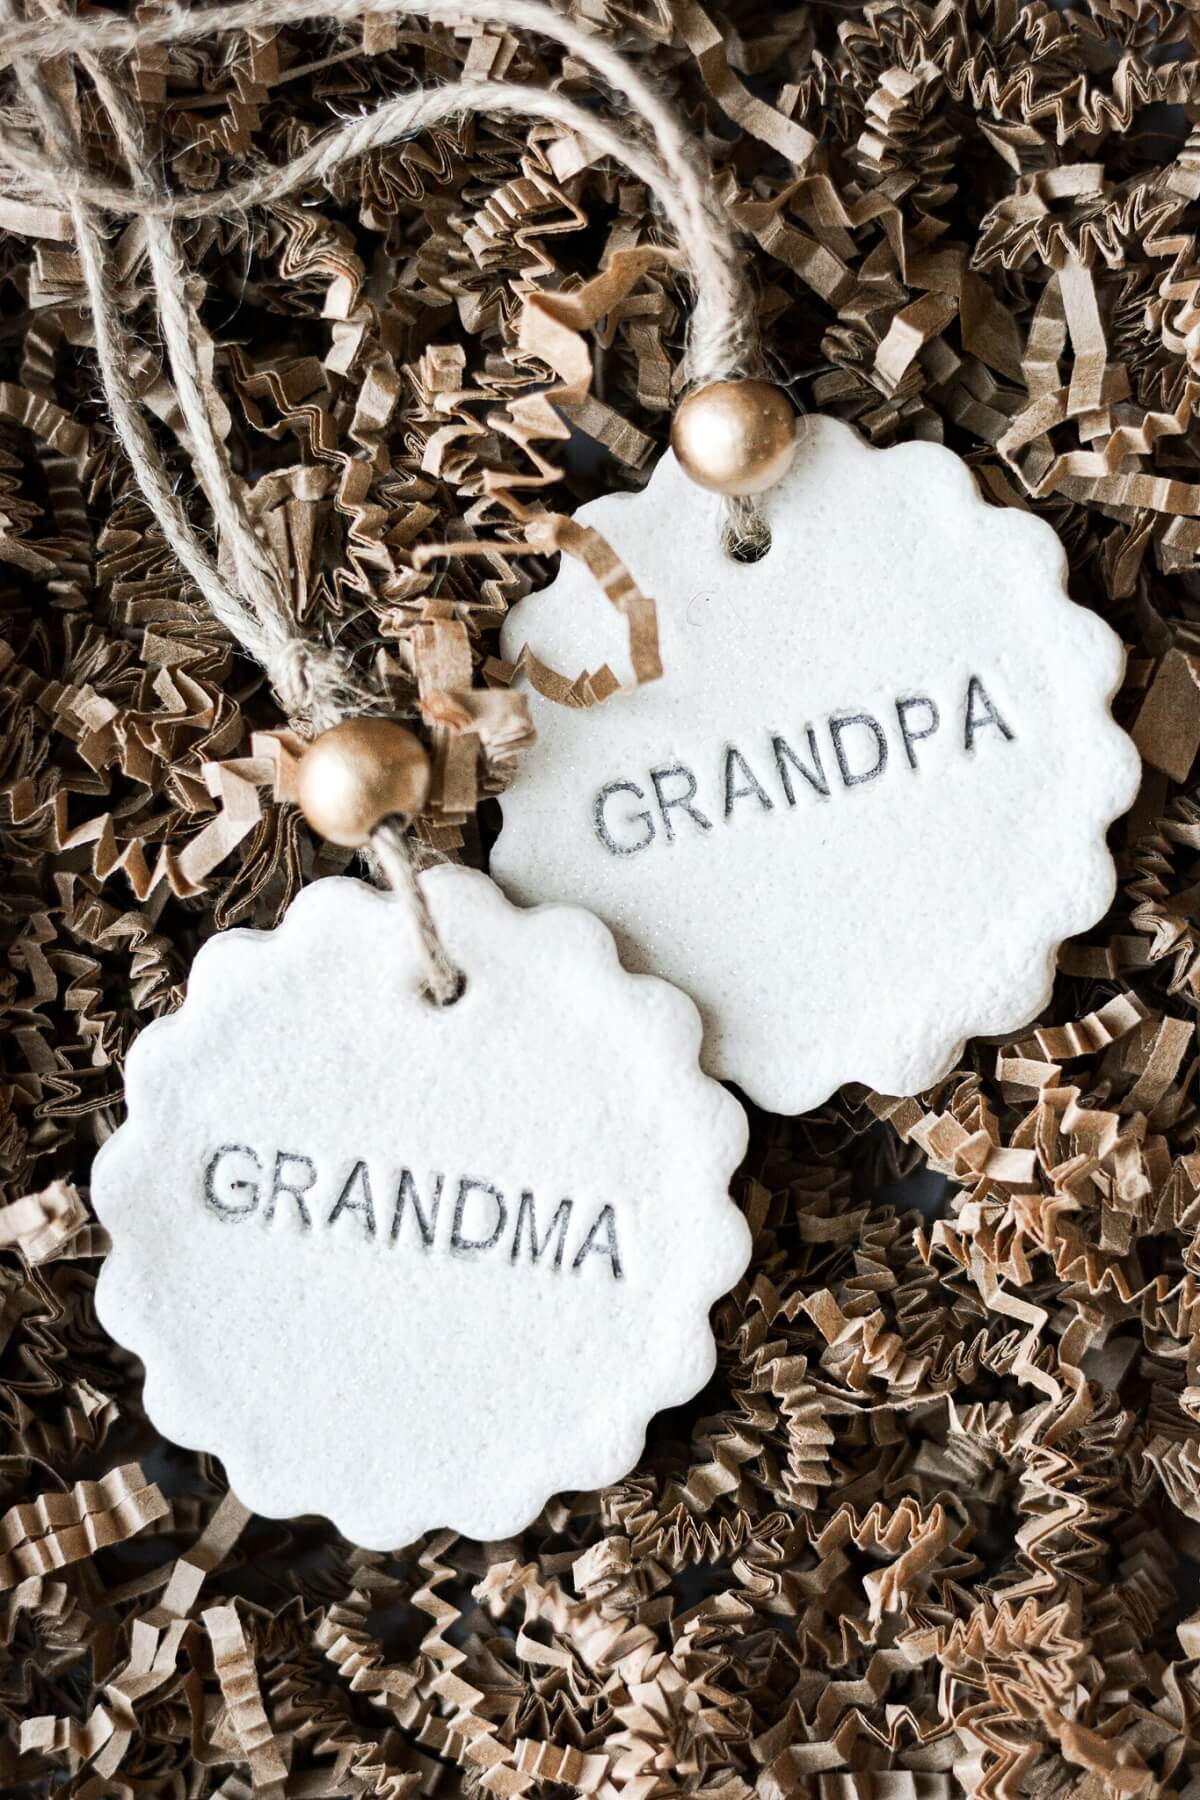
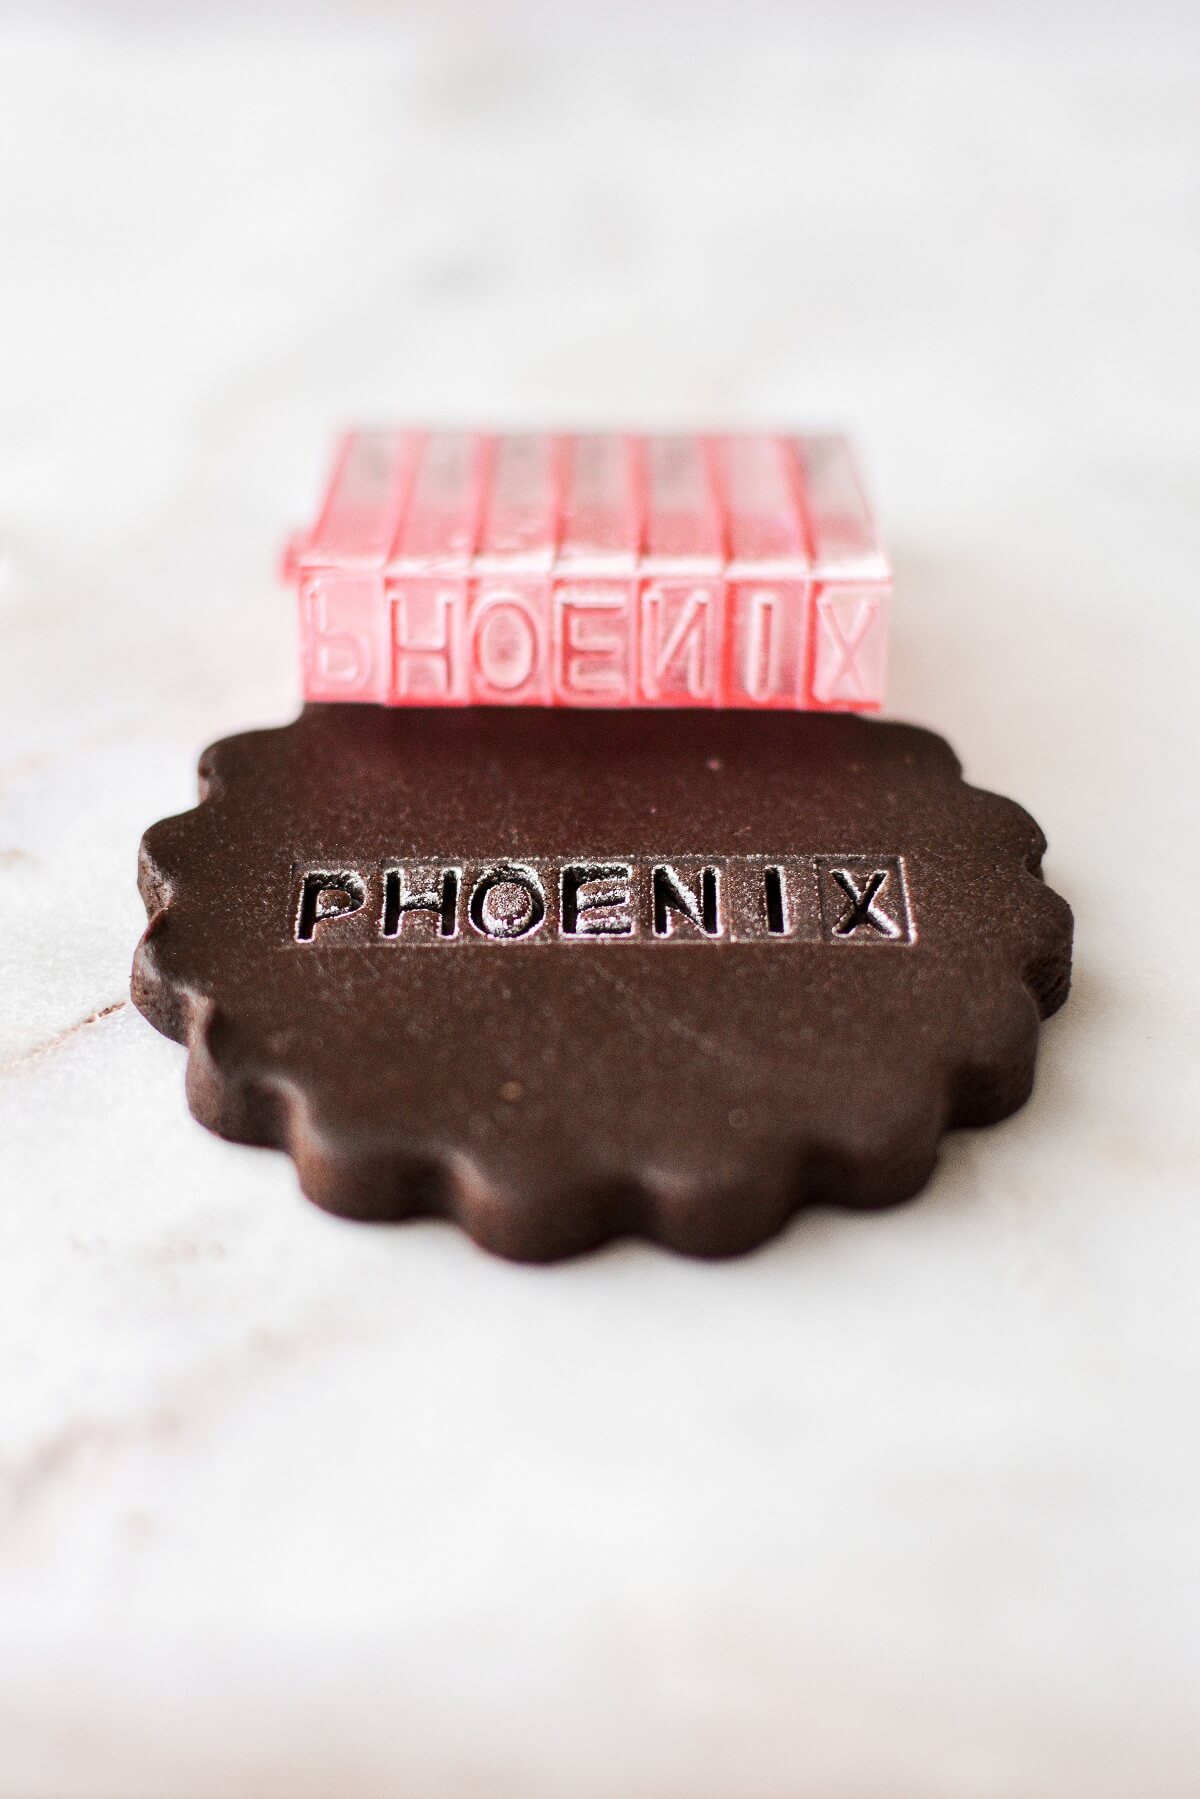
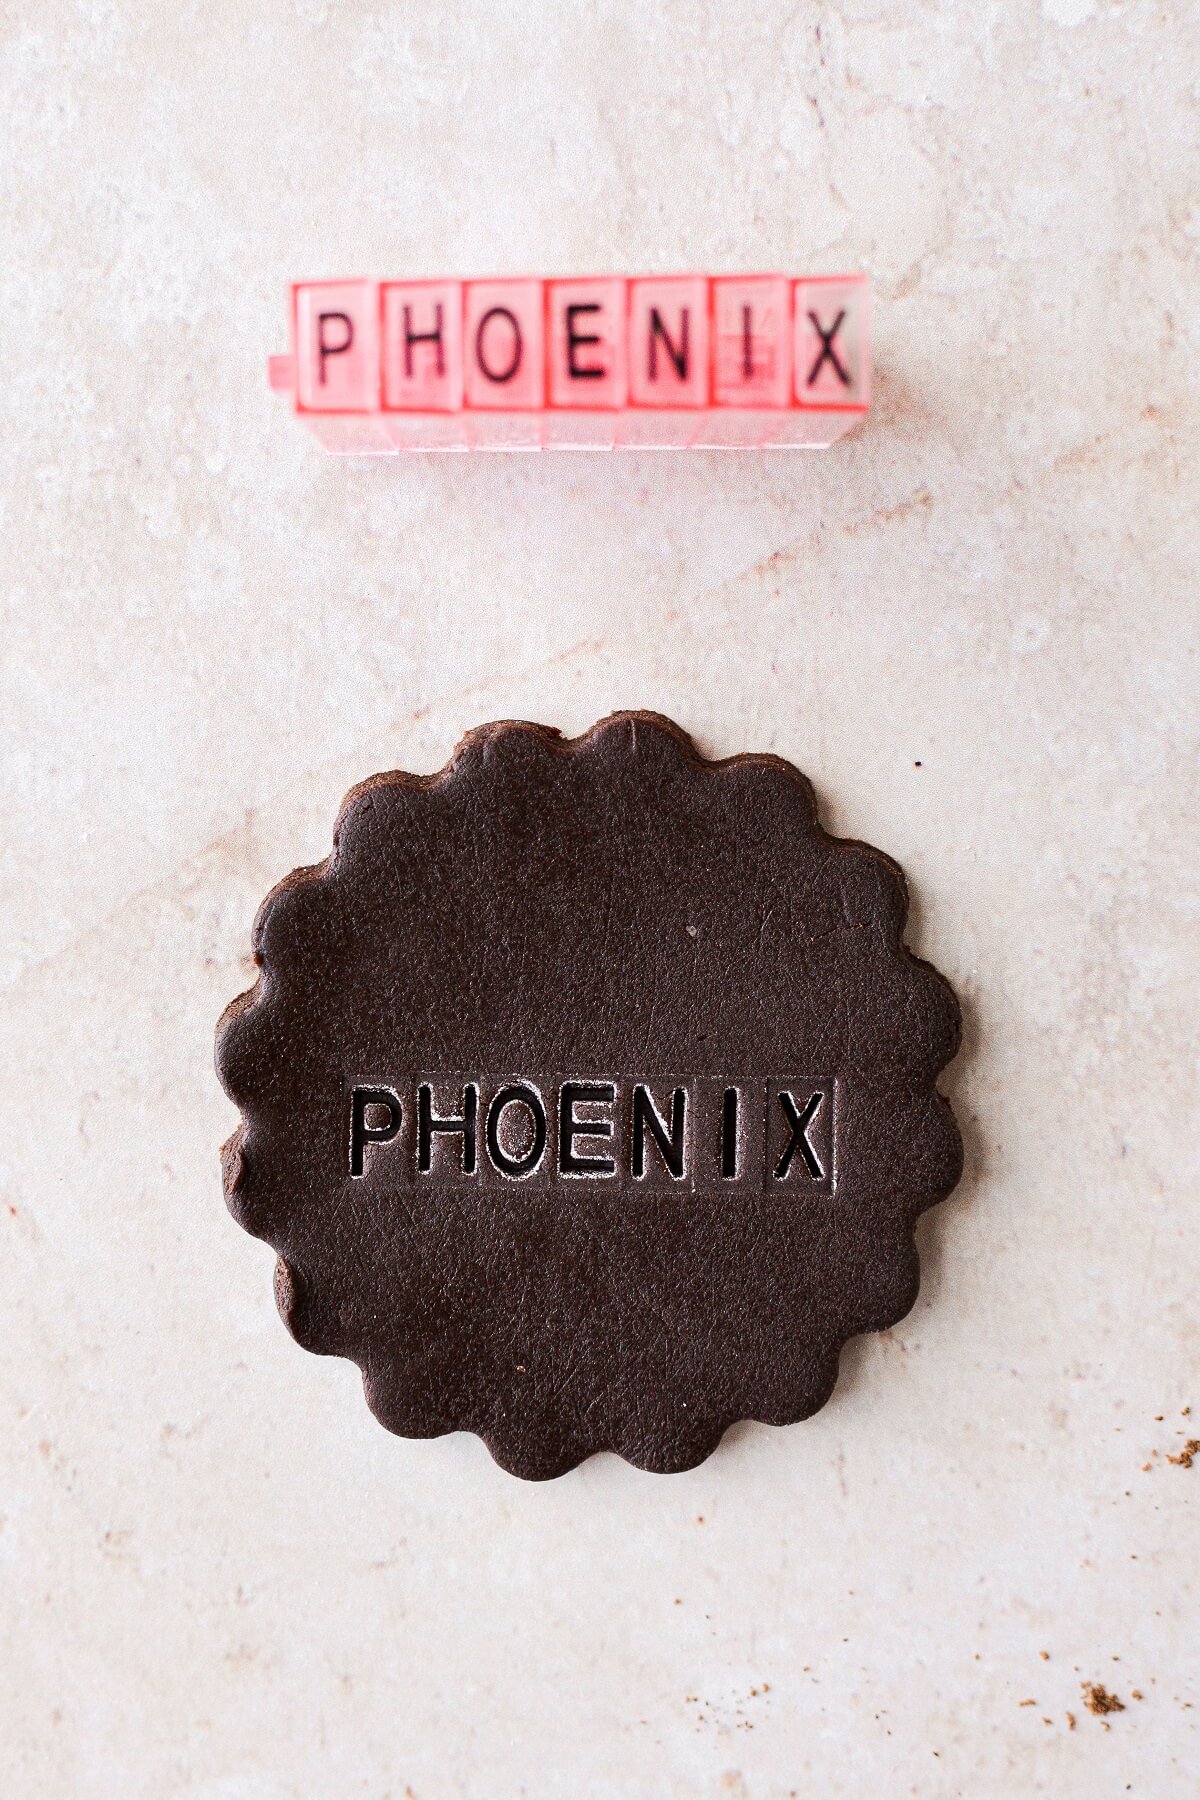
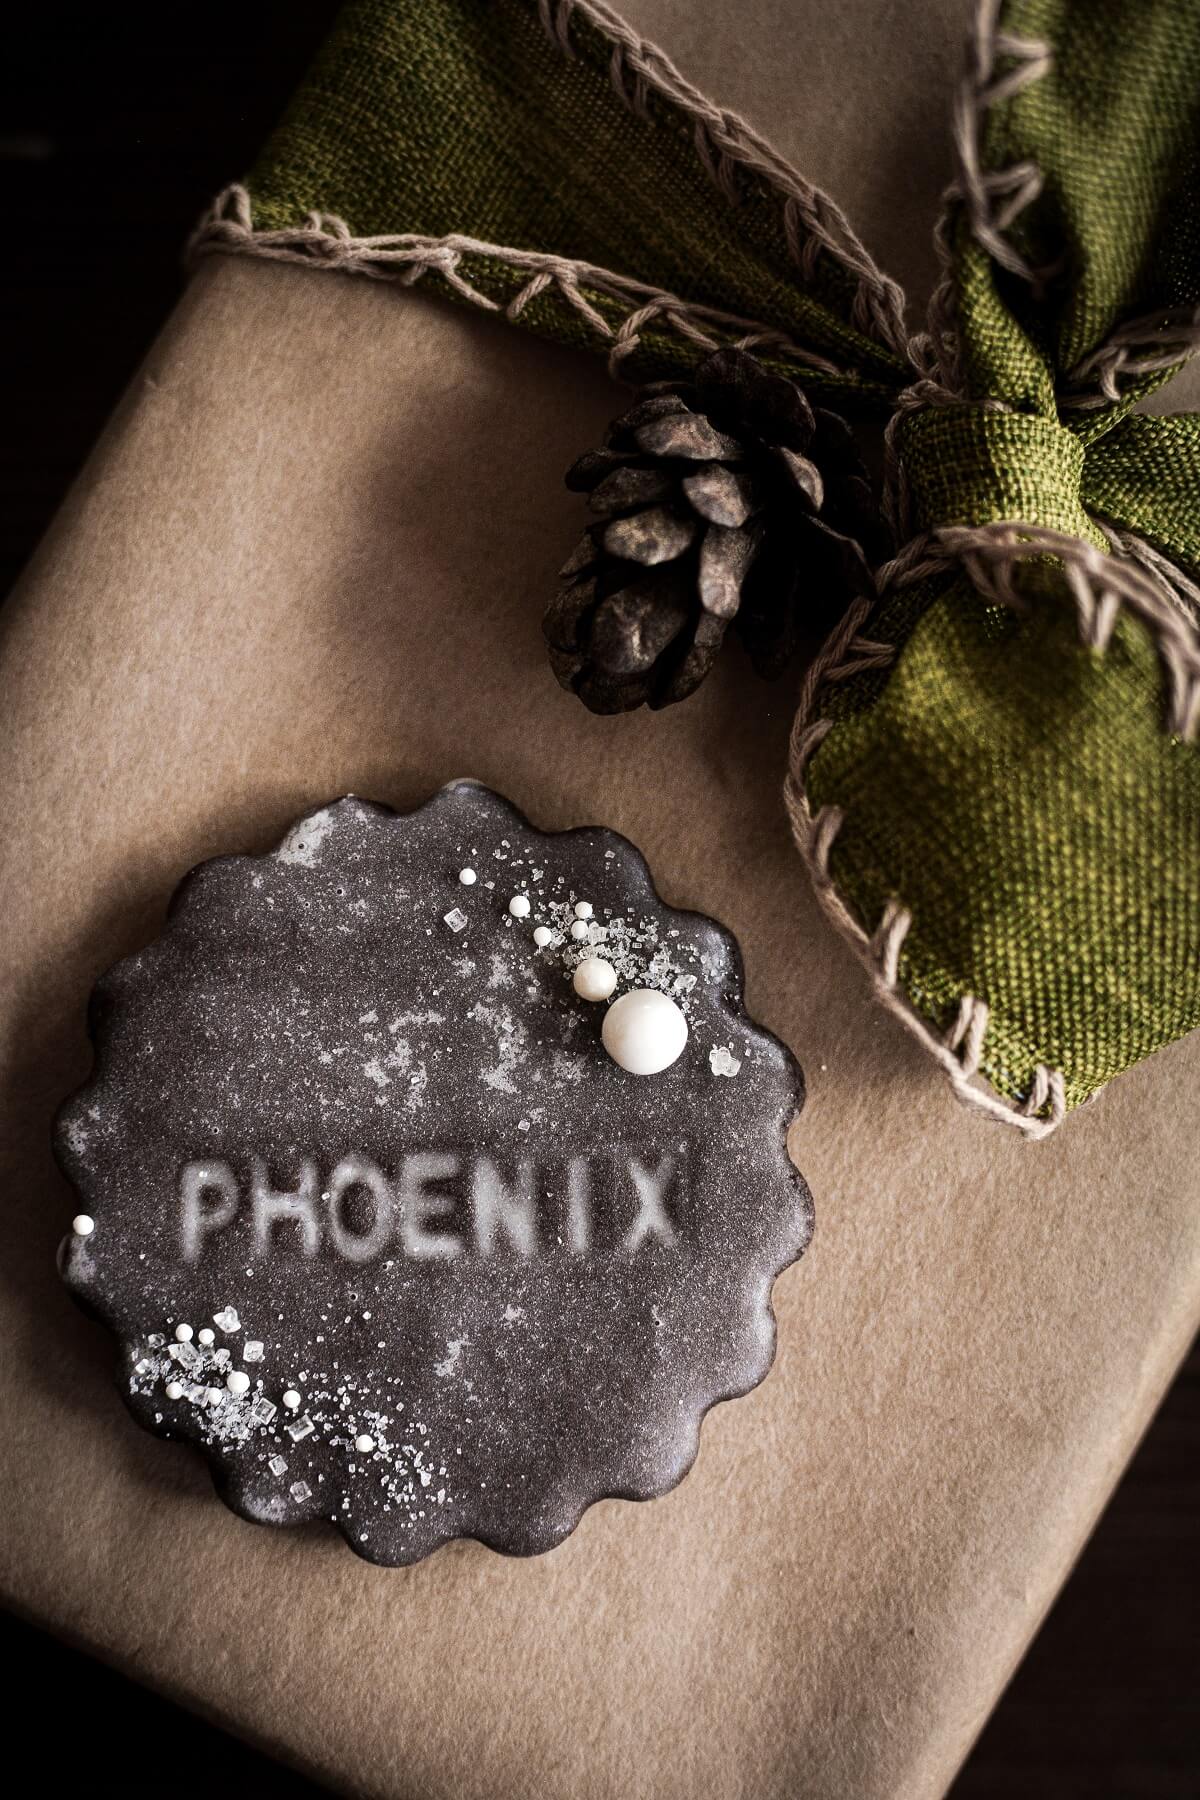
- Letter Embossers. This is optional, but if you want to stamp names or short phrases on your ornaments, you’ll need a set of mini snap together letter embossers. The letters look much better if you press them against an ink pad (such as one used for rubber stamps) first, before pressing them into the dough.
- Rolling Pin.
- Disposable Drinking Straw. You’ll use this to poke holes in the dough so that you can tie them with twine.
- Mod Podge. It’s important to seal your ornaments once they’re dried, so that they don’t absorb moisture from the air. Use Mod Podge (in matte) to seal the dough and give them a more finished look.
- Small Craft Brush. For brushing on the sealer.
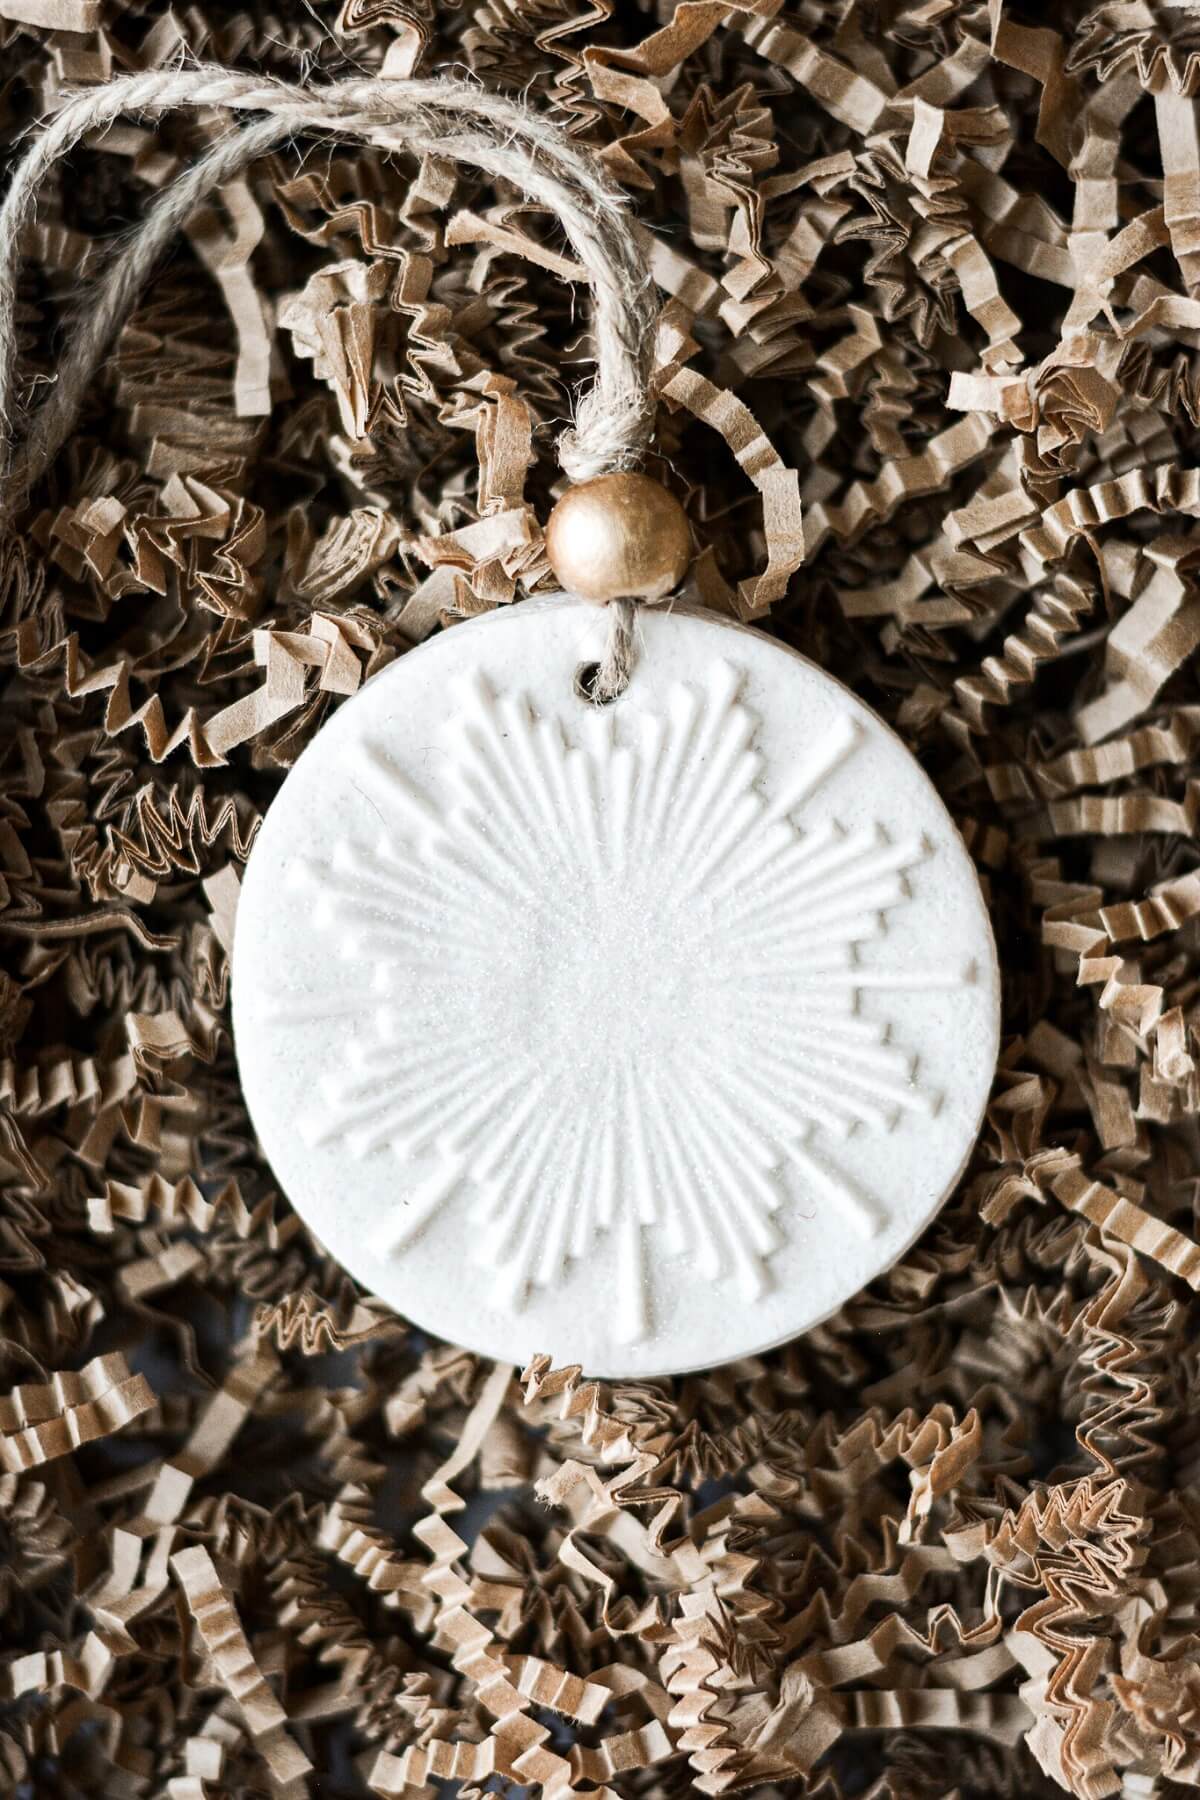
- Extra Fine White Glitter. For shimmer and sparkle.
- Paint. You can use acrylic craft paint (water based, not oil based) to paint your salt dough ornaments, or just use a can of spray paint for a uniform look.
- Baking Sheets, Cooling Racks & Silpat Baking Mat. The cut ornaments will need to dry for several days on baking sheets and cooling racks, until completely hard.
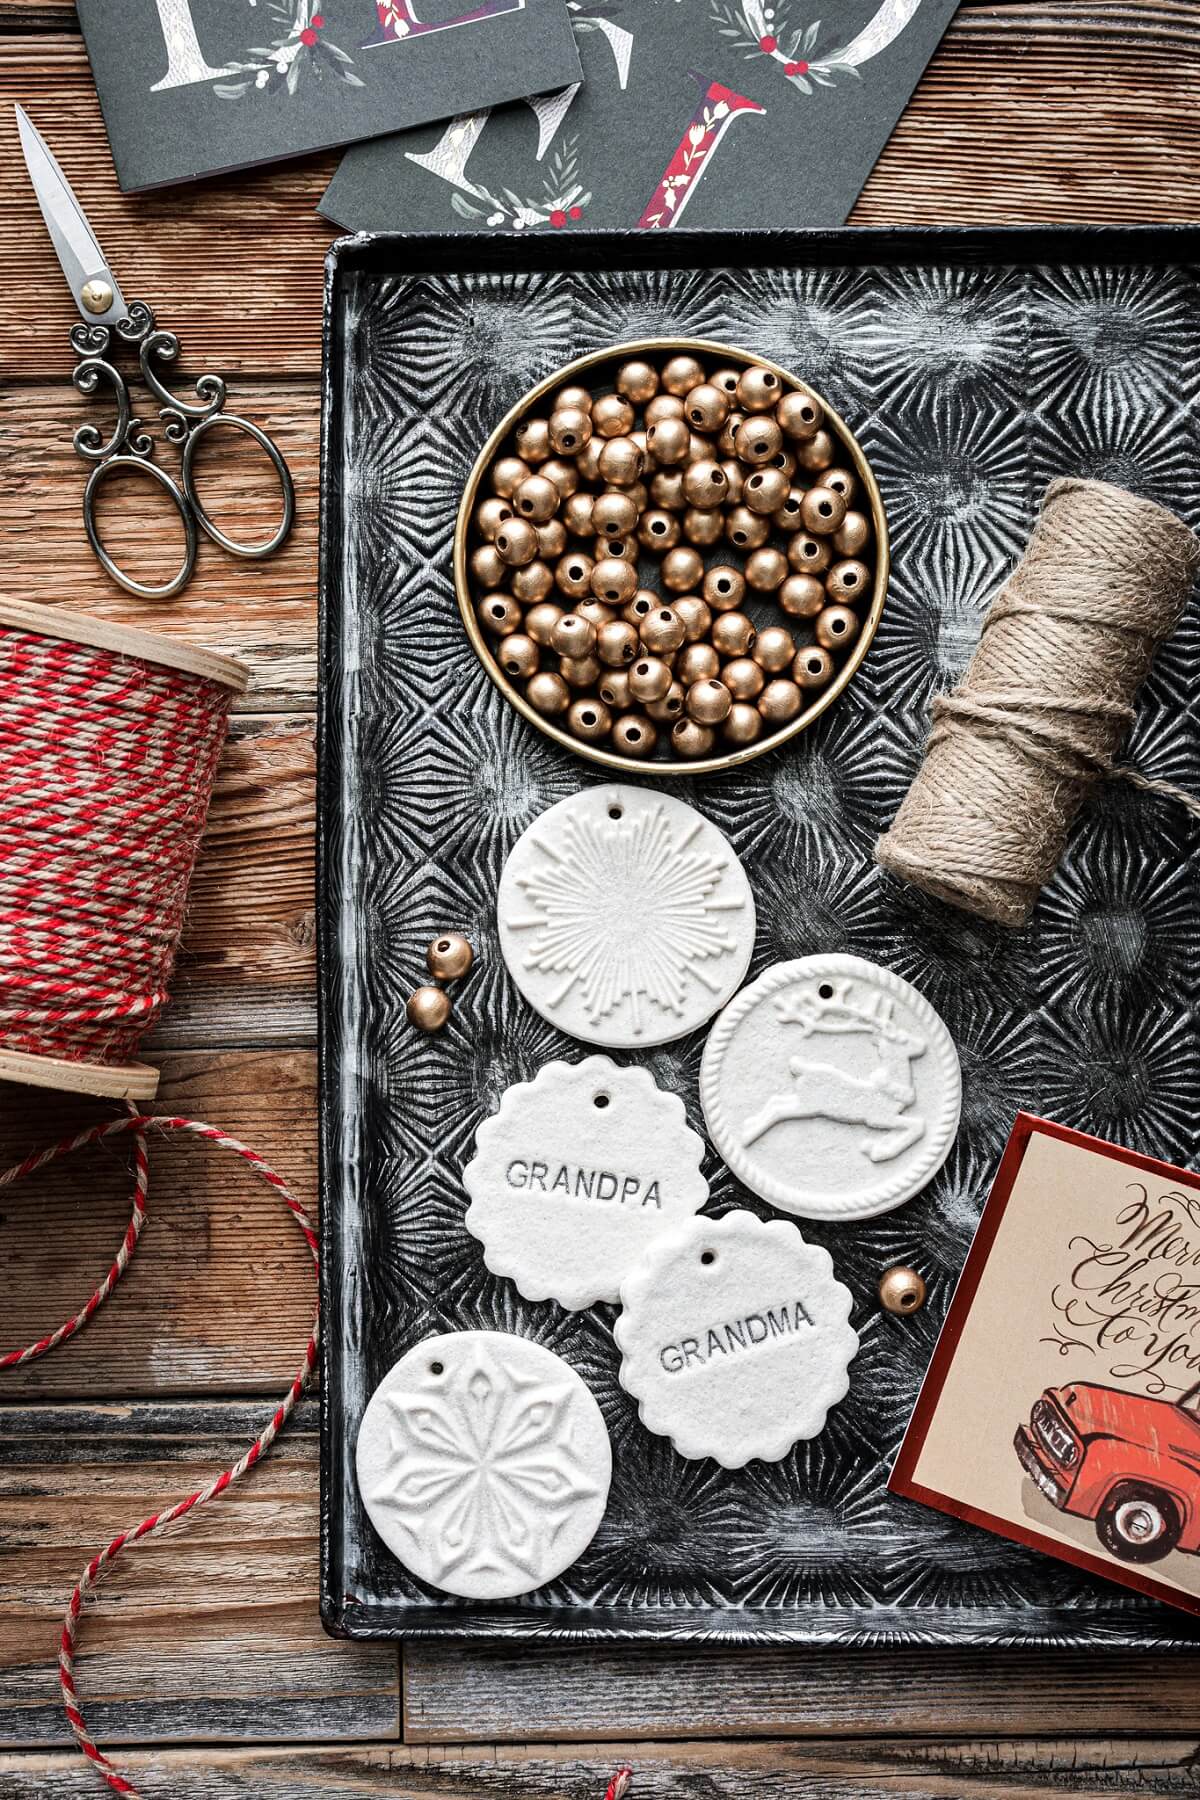
- Thick Twine. Thin baker’s twine is really too flimsy for this project. I used a thicker natural jute twine and red jute twine. You can also use ribbon, but whatever you use, make sure the holes you’re poking in the dough are large enough to get your twine or ribbon through.
- Decorative Beads. On some of my ornaments, I added these pretty gold wood beads, which add lovely detail.
Instructions
Make the Salt Dough
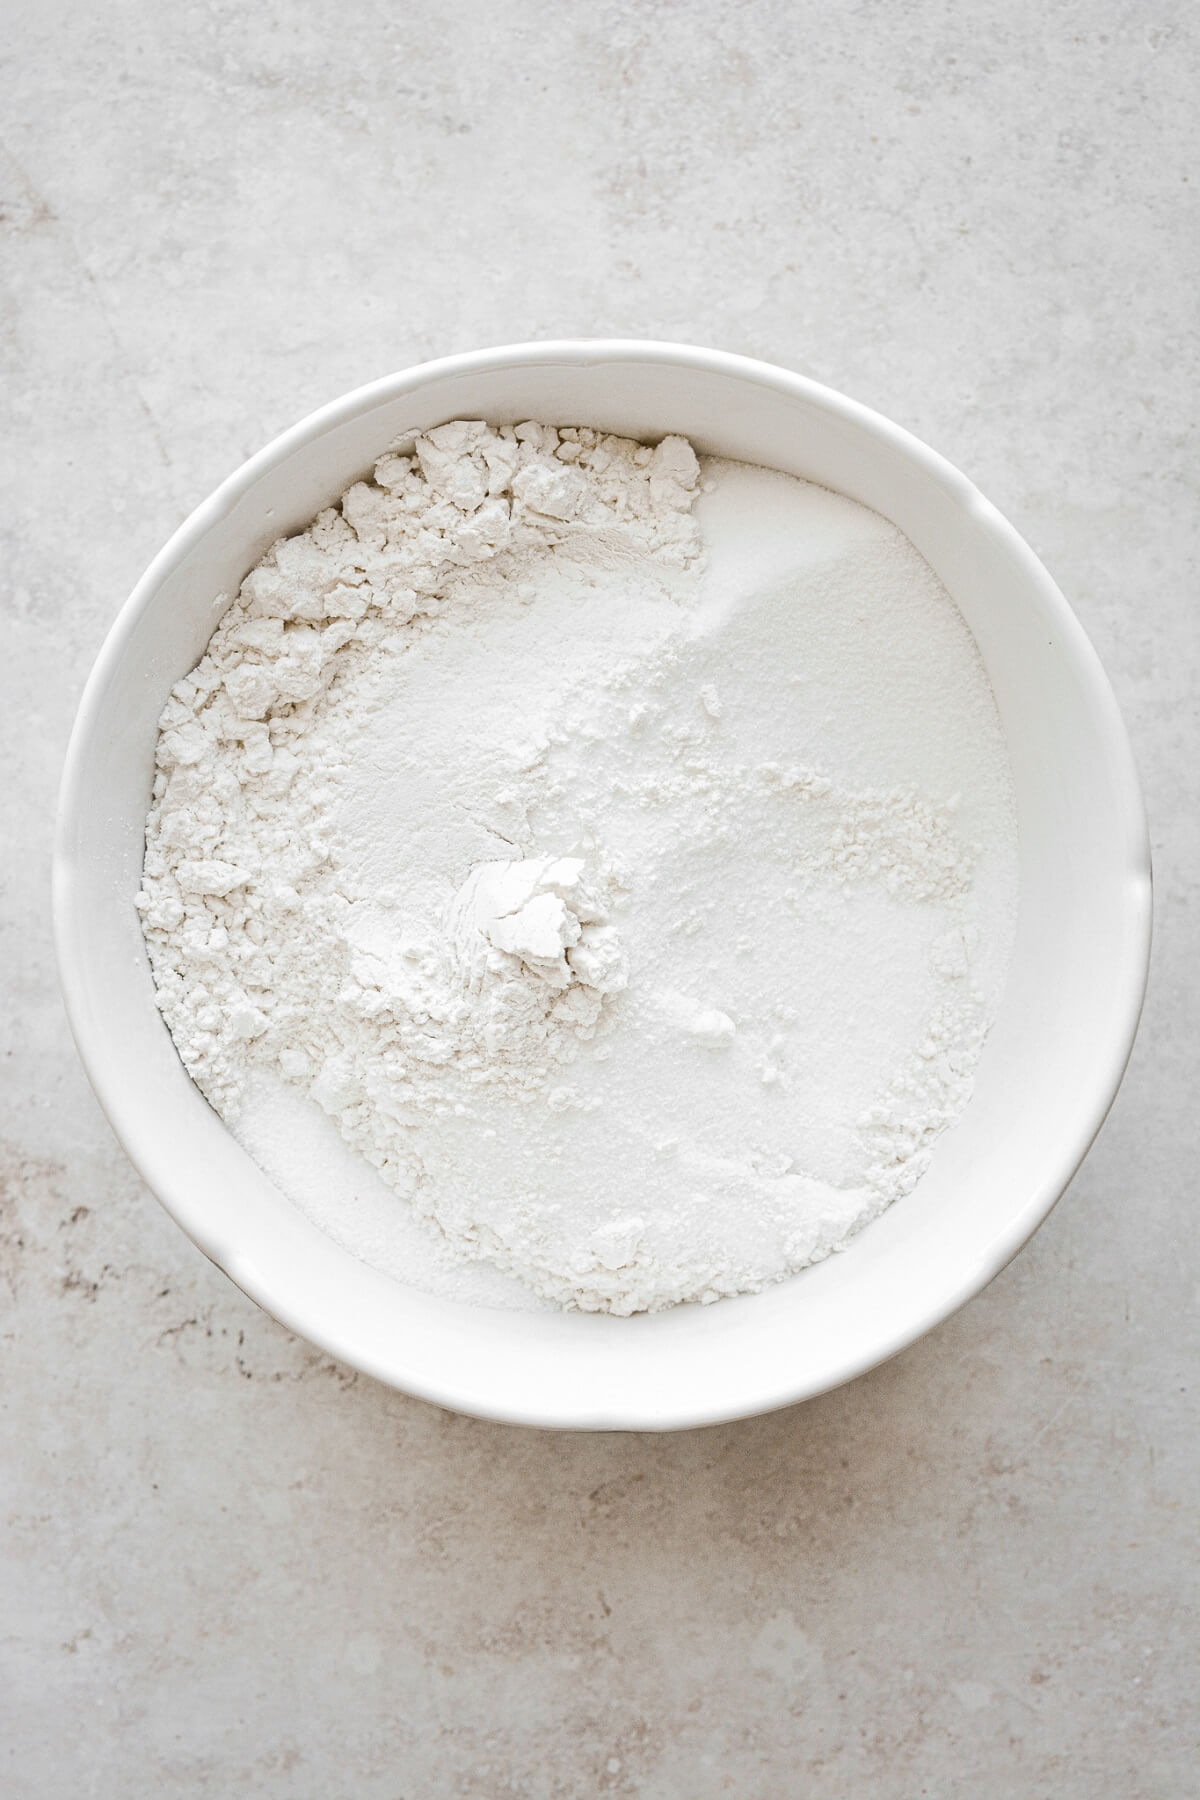
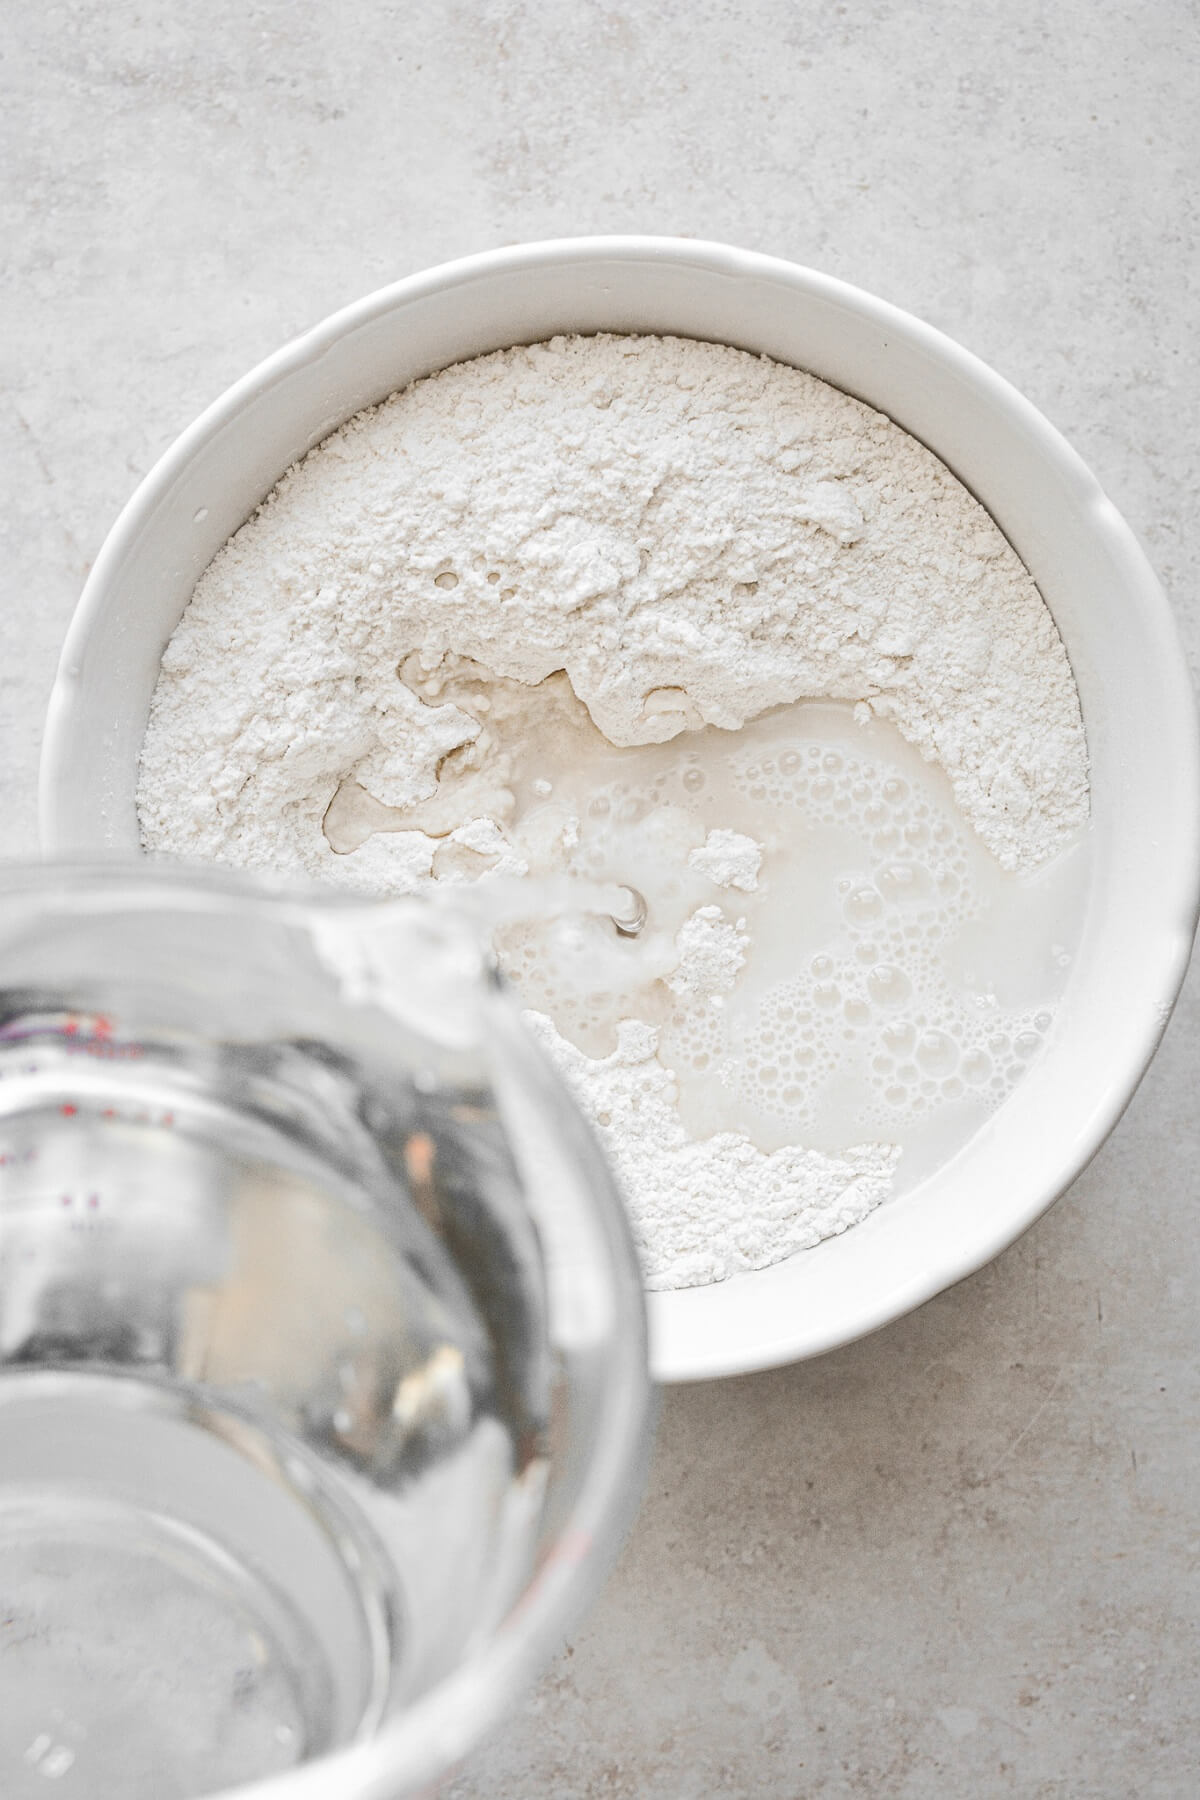
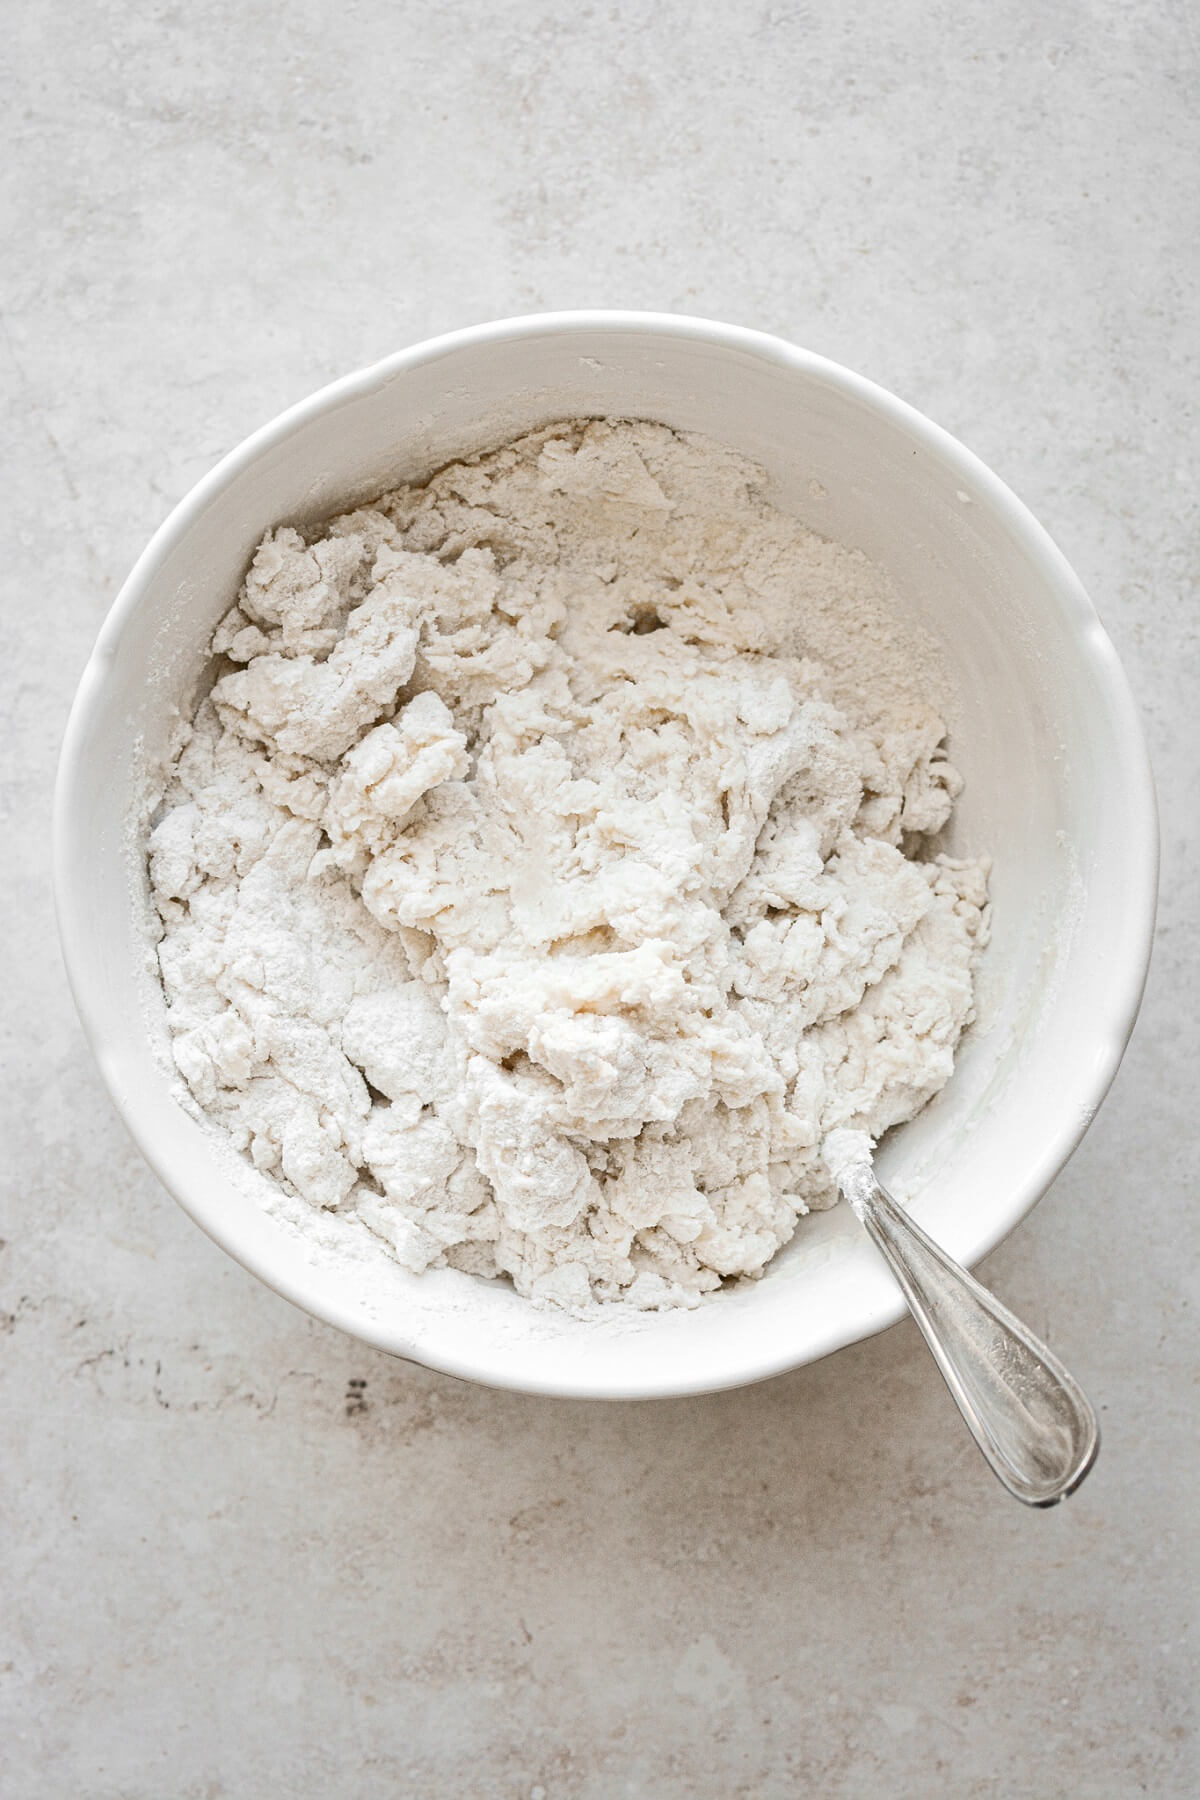
- In a bowl, combine the flour and salt. Stir in the water until the dough is moistened, but not too wet or sticky.
- Knead the dough on a clean work surface for several minutes until smooth.

TIP: Salt dough starts to dry to the touch quickly, so when you roll out your dough, you need to work as quickly as possible when cutting and stamping your ornaments.
Cut the Ornaments
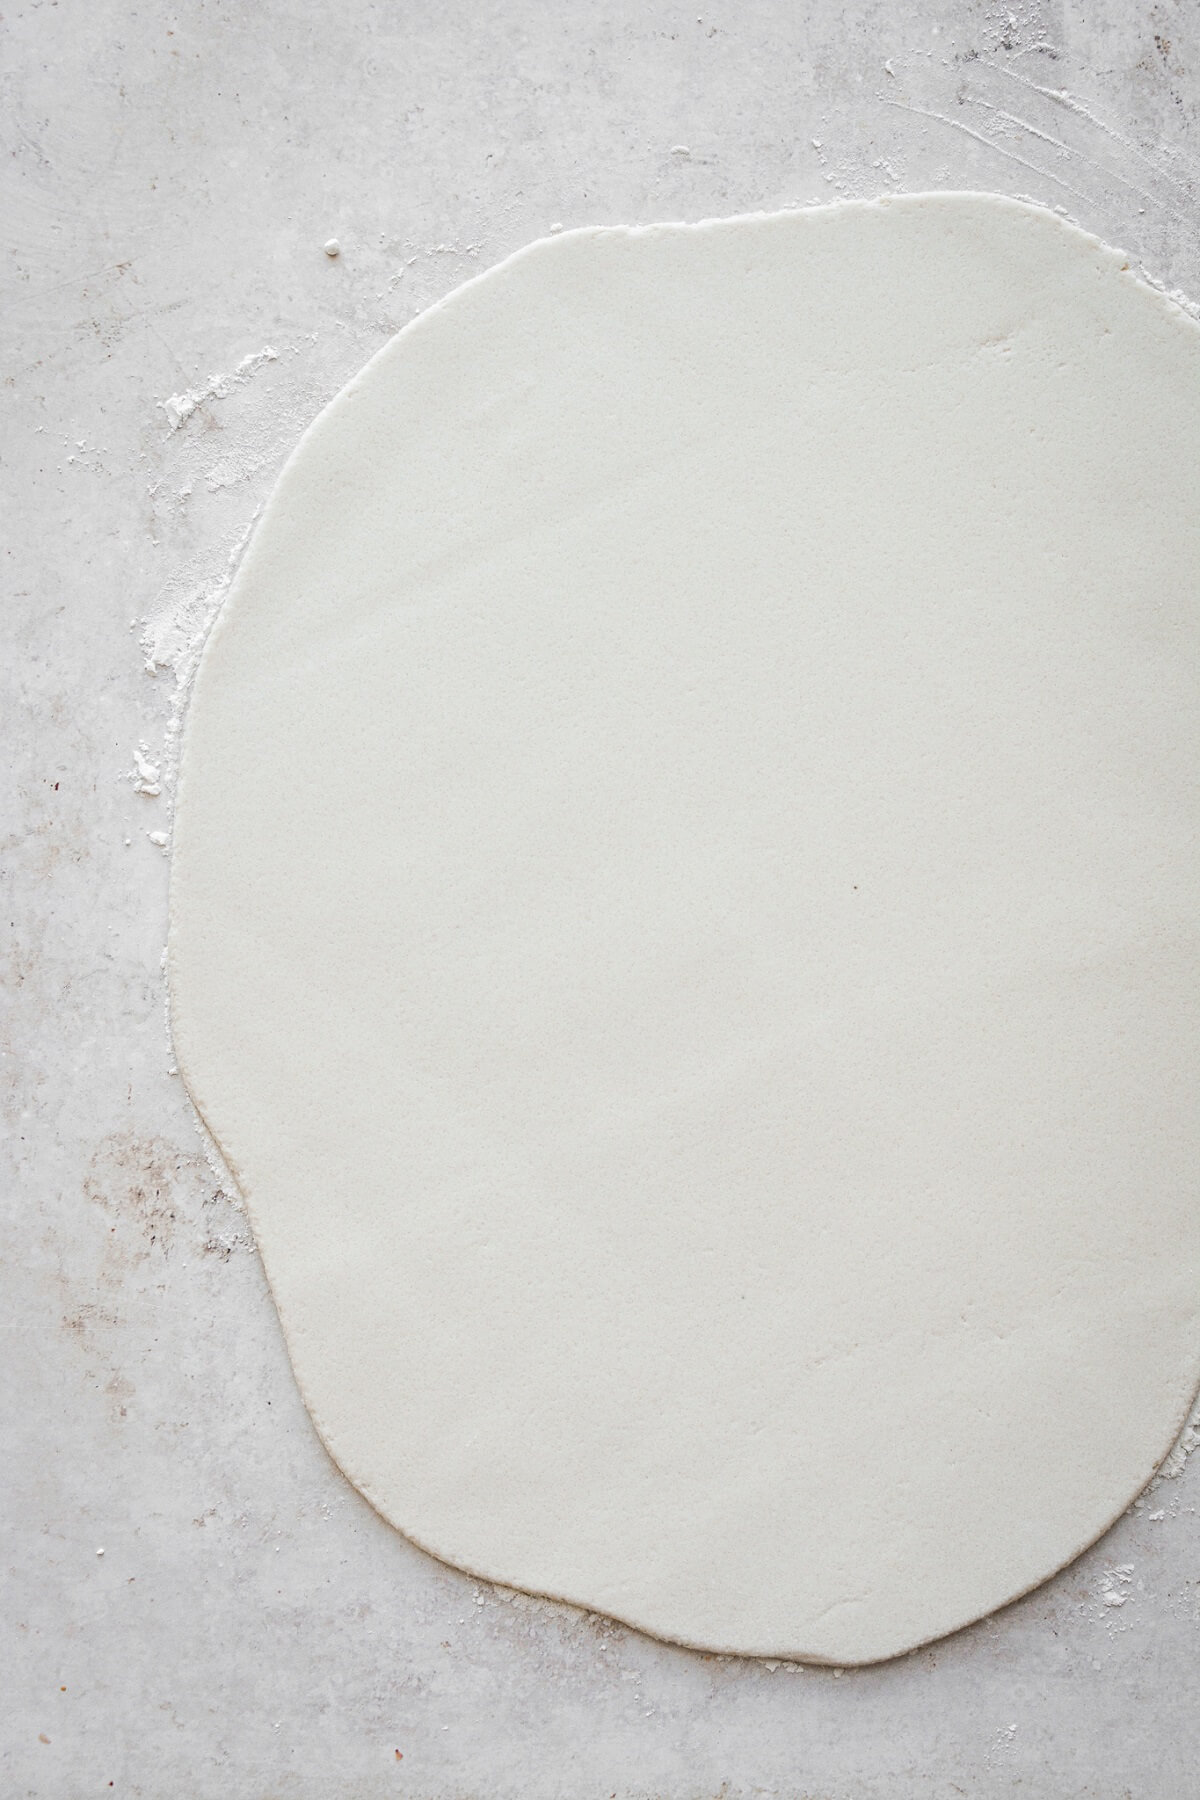
- For cutout ornaments using cookie cutters, lightly flour your counter and the top of the dough to keep it from sticking, and roll out the dough to about 1/4 inch thick. Cut as many ornaments as you can, and place the cut ornaments on a baking sheet lined with a silpat baking mat.

- Note: If you’ll be stamping names or words on the ornaments using letter embossers, do this immediately before the surface of the dough starts to dry. Stamped words look best if you first press the letter embossers on an ink pad (like one used for rubber stamps), before pressing them into the dough. (The next photo shows alphabet embossers stamping a chocolate cookie, but it works the same on the salt dough ornaments.)
- For stamped ornaments using cookie stamps, roll a ball of dough (about 2 tablespoons) smooth between your hands, and lightly dust the dough ball with flour. Flour your cookie stamps. Press the stamp straight down onto the ball of dough, until the dough spreads out just past the edges of the stamp. Lift the cookie stamp off the dough, and use a round cookie cutter or biscuit cutter to cut out the pressed ornament and remove the uneven edges.
- Place the ornaments on a baking sheet lined with a silpat baking mat. Note: Originally, I said to place the ornaments on a baking sheet lined with parchment paper. However, sometimes the paper can wrinkle from the moisture in the ornaments, creating ripples and wrinkles on the ornaments themselves (which you can see a little in my gold-painted ornaments). A silpat will not do this. You may also be able to get away without the silpat, and just place the ornaments on a baking sheet.
- Don’t forget to poke the holes for the twine! A disposable plastic drinking straw or paper straw works well for this task.
Dry the Ornaments
- Let the ornaments dry for 3-4 hours on the baking sheet until the top of the dough looks dry and porous. Turn the ornaments over, and let dry until the bottom of the dough looks dry and porous.
- Now place the ornaments on a cooling rack, and let them sit until completely hard and dry. Don’t rush to place them on the cooling rack if they’re still damp, since the cooling rack will leave indentations on the dough if it’s still soft and pliable.
- Fully drying the ornaments could take anywhere from 2-7 days depending on their size and thickness. They need to remain on the cooling rack so that the air can circulate around all sides and thoroughly dry them out.
- Another option for drying your ornaments is to dry them in the oven at very low heat. Preheat your oven to its lowest setting (usually 175-200 F), and dry the ornaments in the oven, turning them every 30-60 minutes, until dry. Be careful not to use too high of heat, or they can turn brown. While this option is faster, personally I feel like the ornaments look better in the end when dried slowly at room temperature.
Seal the Dough and Add Glitter
- Using a small craft brush, brush a thin layer of matte Mod Podge over the tops, bottoms and sides of the ornaments (let one side dry before flipping them over to do the other side).
- Once the Mod Podge is completely dry, brush the tops of the ornaments with a second thin layer of Mod Podge. Immediately sprinkle with the extra fine white glitter. Let dry completely.

- This step will really make the ornaments beautiful. The Mod Podge fills in some of the porous texture and smooths out the dough, while the glitter makes them shimmer and sparkle.
- If you’re going to be painting your ornaments, you can skip the glitter and paint them at this point. My kids loved rolling out and cutting the salt dough with Christmas cookie cutters, and then painting the dried ornaments. These look so cute hanging on our Christmas tree.

Gold Spray Paint
Here is a set of ornaments that I spray painted gold, and dusted with extra fine gold glitter.

Finish with Twine
- Cut lengths of twine, about 10-12 inches per ornament. You don’t want to use thin “baker’s twine”, but rather a heavier, thicker twine will look nicer. Insert the twine through the holes in the ornaments, and tie the twine, adding decorative beads if you like. You could also use thin ribbon instead of twine.
- Hang the ornaments on your tree.
Cinnamon Salt Dough Ornaments
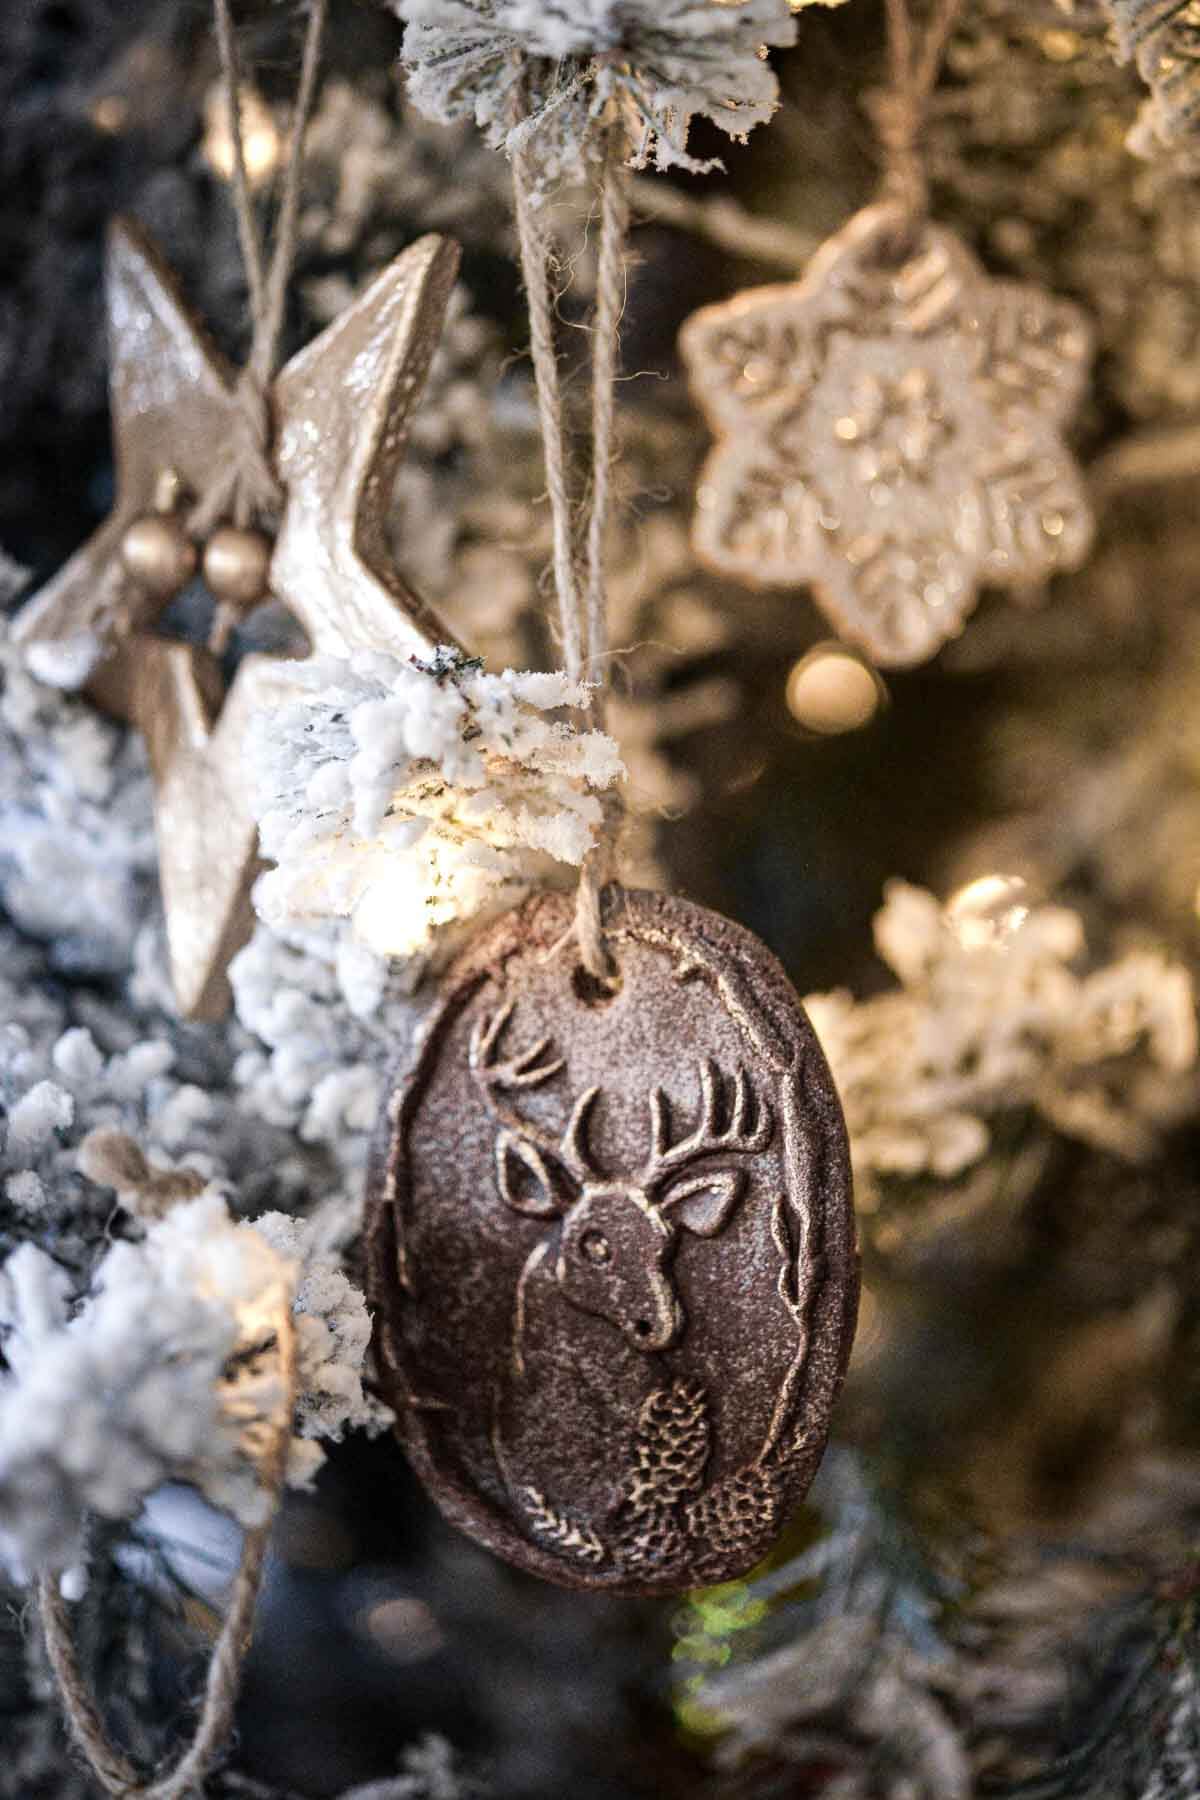
Adding cinnamon to salt dough is a simple variation to this recipe that yields gorgeous results. The cinnamon ornaments will have a rich brown color that looks like gingerbread cookies, and a subtle, spicy aroma.
Instructions
- Simply replace 1/2 cup of the flour with ground cinnamon. Any brand of cinnamon will do.
- I also like to add a teaspoon each of ground allspice, nutmeg and cloves for an extra spicy scent.
- Cut and dry the ornaments the same as instructed for the regular salt dough.
Tips and Tricks for Cinnamon Salt Dough
- After the cinnamon dough dries, you might be dismayed to see how white and chalky it becomes, losing its rich, dark color. This is totally normal. After the ornaments are fully dry, simply rub their surface with a few drops of olive oil or vegetable oil. The oil will bring back the deep brown color of the dough. I found it easiest to do this step with a small craft brush, so I could work the oil into all the nooks and crannies of the intricate designs on mine.
- To seal the ornaments, instead of brushing them with mod podge, I prefer to lightly spray them with a matte spray. I used this Rustoleum Clear Matte Finish Spray, which you can usually find at your local craft store or hardware store.
- For a finishing touch, add a little acrylic paint to highlight the details. White, gold or silver paint would all look beautiful. I used a light gold paint (which I dug out of my kids’ craft paint box), and just lightly painted the raised parts of my ornaments to add dimension and a little sparkle.

Wooden Molds for Cinnamon Salt Dough
I used wooden molds and stamps for this set of ornaments. Look for springerle molds or wooden cookie molds to find so many other beautiful designs.
- Deer Head with Antlers
- Gingerbread House (similar, I can’t find the source for the one I have)
- Reindeer

Be sure to read all of my BAKING FAQs where I discuss ingredients, substitutions and common baking questions, so that you can be successful in your own baking!
Frequently Asked Questions
Depending on how large and thick your ornaments are, they can take from 2-7 days to fully dry and harden if you’re air-drying. They will dry within a few hours if you bake them in the oven, however, I think they look better when they’re slowly air dried.
Your ornaments should last for 30 years if you seal them and store them carefully.
No, the dried ornaments are pretty hardy, and will not easily break with normal handling.
When you’re ready to pack your ornaments into storage until the next holiday, you should pack them with some dry uncooked rice, or packets of silica gel or desiccant. These will absorb any lingering moisture in the dough, and prevent them from molding when they’re in storage.
No, they are not edible.
You Might Also Like
Please check out my Amazon Shop for a curated collection of some of my favorite cake pans from trusted brands, baking tools, ingredients, pretty things and fashion finds. I recommend products that I buy and use every day!
Did you love today’s recipe? Please rate the recipe and let me know in the comments what you thought! Also, be sure to follow Curly Girl Kitchen on Instagram, and tag me when you try one of my recipes so I can see all your delicious creations!
Easy Homemade Salt Dough Christmas Ornaments with Cookie Stamps
All recipes on Curly Girl Kitchen are developed for high altitude at 5,280 feet. See FAQs for adjusting to higher or lower elevations.

Equipment
- Assorted Christmas Cookie Cutters
- Assorted Christmas Cookie Stamps
- Round Cookie Cutter or Biscuit Cutter (with a diameter equal to the diameter of your cookie stamps)
- Rolling Pin
- Disposable Drinking Straw
- Small Craft Brush
- Mod Podge (Matte)
- Extra Fine White Glitter
- Baking Sheets, Cooling Racks & Silpat Baking Mats
- Thick Twine
- Decorative Beads
Ingredients
- 2 cups all-purpose flour (plus extra for rolling the dough)
- ¾ cup table salt
- ¾ – 1 cup warm water
Instructions
Make the Salt Dough
- In a bowl, combine the flour and salt. Stir in the water until the dough is moistened, but not too wet or sticky.
- Knead the dough on a clean work surface for several minutes until smooth.
Cut the Ornaments
- For cutout ornaments using cookie cutters, lightly flour your counter and the top of the dough to keep it from sticking, and roll out the dough to about 1/4 inch thick. Cut as many ornaments as you can, and place the cut ornaments on a baking sheet lined with a silpat baking mat. Note: If you'll be stamping names or words on the ornaments using letter embossers, do this immediately before the surface of the dough starts to dry. Stamped words look best if you first press the letter embossers on an ink pad (like one used for rubber stamps), before pressing them into the dough.
- For stamped ornaments using cookie stamps, roll a ball of dough (about 2 tablespoons) smooth between your hands, and lightly dust the dough ball with flour. Flour your cookie stamps.Press the stamp straight down onto the ball of dough, until the dough spreads out just past the edges of the stamp. Lift the cookie stamp off the dough, and use a round cookie cutter or biscuit cutter to cut out the pressed ornament and remove the uneven edges. Place the ornaments on a baking sheet lined with a silpat baking mat.Note: Originally, I said to place the ornaments on a baking sheet lined with parchment paper. However, sometimes the paper can wrinkle from the moisture in the ornaments, creating ripples and wrinkles on the ornaments themselves (which you can see a little in my gold-painted ornaments). A silpat will not do this. You may also be able to get away without the silpat, and just place the ornaments on a baking sheet.
- Don't forget to poke the holes for the twine! A disposable plastic drinking straw or paper straw works well for this task.
Dry the Ornaments
- Let the ornaments dry for 3-4 hours on the baking sheet until the top of the dough looks dry and porous. Turn the ornaments over, and let dry until the bottom of the dough looks dry and porous.Now place the ornaments on a cooling rack, and let them sit until completely hard and dry. Don't rush to place them on the cooling rack if they're still damp, since the cooling rack will leave indentations on the dough if it's still soft and pliable.Fully drying the ornaments could take anywhere from 2-7 days depending on their size and thickness. They need to remain on the cooling rack so that the air can circulate around all sides and thoroughly dry them out.
- Another option for drying your ornaments is to dry them in the oven at very low heat. Preheat your oven to its lowest setting (usually 175-200 F), and dry the ornaments in the oven, turning them every 30-60 minutes, until dry. Be careful not to use too high of heat, or they can turn brown. While this option is faster, personally I feel like the ornaments look better in the end when dried slowly at room temperature.
Seal the Dough and Add Glitter
- If there are any rough, uneven edges or corners, lightly sand them with a piece of fine grit sandpaper, or even an emory board.
- Using a small craft brush, brush a thin layer of matte Mod Podge over the tops, bottoms and sides of the ornaments (let one side dry before flipping them over to do the other side).
- Once the Mod Podge is completely dry, brush the tops of the ornaments with a second thin layer of Mod Podge. Immediately sprinkle with the extra fine white glitter. Let dry completely.
- This step will really make the ornaments beautiful. The Mod Podge fills in some of the porous texture and smooths out the dough, while the glitter makes them shimmer and sparkle.
- If you're going to be painting your ornaments, you can skip the glitter and paint them at this point.
Finish with Twine
- Cut lengths of twine, about 10-12 inches per ornament. You don't want to use thin "baker's twine", but rather a heavier, thicker twine will look nicer. Insert the twine through the holes in the ornaments, and tie the twine, adding decorative beads if you like. You could also use thin ribbon instead of twine.
- Hang the ornaments on your tree.
 https://curlygirlkitchen.com/
How long do you bake the ornaments? Unless missed that in the directions some how?
Instructions for oven drying and air drying are noted in the recipe card.
Hello, how thick should the dough be before I begin cutting out the shapes? I may have missed this in your instructions, so I will apologize now if that’s the case.
Thanks!
About 1/4 inch or just a little less.
What is the best paint to use if you are going to paint them?
Spray paint is easiest. For my gold ones, I used Krylon Metallic Gold spray paint.
My kids painted theirs with brushes and some simple craft paint, though.
Thank you for this!! I made salt dough ornaments for the first time last night. I could not get the dough to release from the cookie press. I now see flour is used. I will try that next time I make them!! Your instructions are amazing!
Thank you for the recipe, I made them years ago with my kids, but the finished products looked coarser than this. Some looked darker than others in your pictures, wondering if you could add some food coloring?
Thank you again for the recipe , I love the ones you have done!
I’ve never added food coloring, but I don’t see why it wouldn’t work.
I love how you’ve used cookie stamps to make these ornaments. I’ve bought some stamps for my nephew’s son to use (he’s 4). I’ve put together a baking kit for him to make non-spreading gingerbread biscuits (cookies- but the Australian term). Of course, we don’t do a lot of baking at this time of the year, since we have Christmas in the very hot December summer, but there’s always something that tempts us.
I’m hoping to get him to reuse the stamps and cookie cutter for 2025 to make some ornaments like those you’ve shown. Your photographs are absolutely beautiful!
I wish I could make other things on your site but I’m a diabetic and can’t have sugars or carbohydrates (which turn into sugar in the body and cause a blood sugar spike). I’m going to have a look at a few of the recipes and see if I can take the ‘essence’ of the flavours but tweek it to a low-carb product.
In the meantime, let me encourage you to post a few more non-food recipes to entice those of us who can’t have flour, milk, gluton, etc!
Gorgeous!!! Is this a high altitude recipe or can it be made at any altitude?
This will work at any altitude.
Oh no, I’m so sad, I’m on day 3 of air drying the cinnamon salt dough ornaments, and they’ve started to mold. So so sad. I loved the look of them, up until the mold spots started. What did I do wrong? Help …
I have them on a cooling rack, on my dining room table. And the mold appeared today.
Oh, that is sad! I’ve made these at least 5-6 times over the years, and have never experienced them getting moldy. Do you live in a particularly humid climate? Is there anything unusual about the ingredients that you used, or were they expired or contaminated from anything? Was your dough a little too damp to begin with, or did you cut the ornaments a little too thick (both of which would make them take longer to dry). It seems strange, but mold spores are present everywhere, and the exposure to moisture can cause mold to grow. If you try again, I’d probably suggest you bake the ornaments instead of letting them air dry, to lessen the amount of time that the ingredients are wet.
I live in NY and the end of this summer has been rather hot, maybe that’s the cause? All my ingredients were fresh – well within their expiration dates. I did try them again and baked them, but as you mentioned, the color is better in the non-baked versions- other than the mold color spots, ugh.
I’m going to try again in the cold winter, to air dry them, I’m thinking it was too humid here. Otherwise, I followed the directions closely, 1/4 inch thick, just enough water.
Thank you, I was devastated because they were looking so gorgeous till the mold arrived.
Thanks for the helpful troubleshooting possibilities!!!