
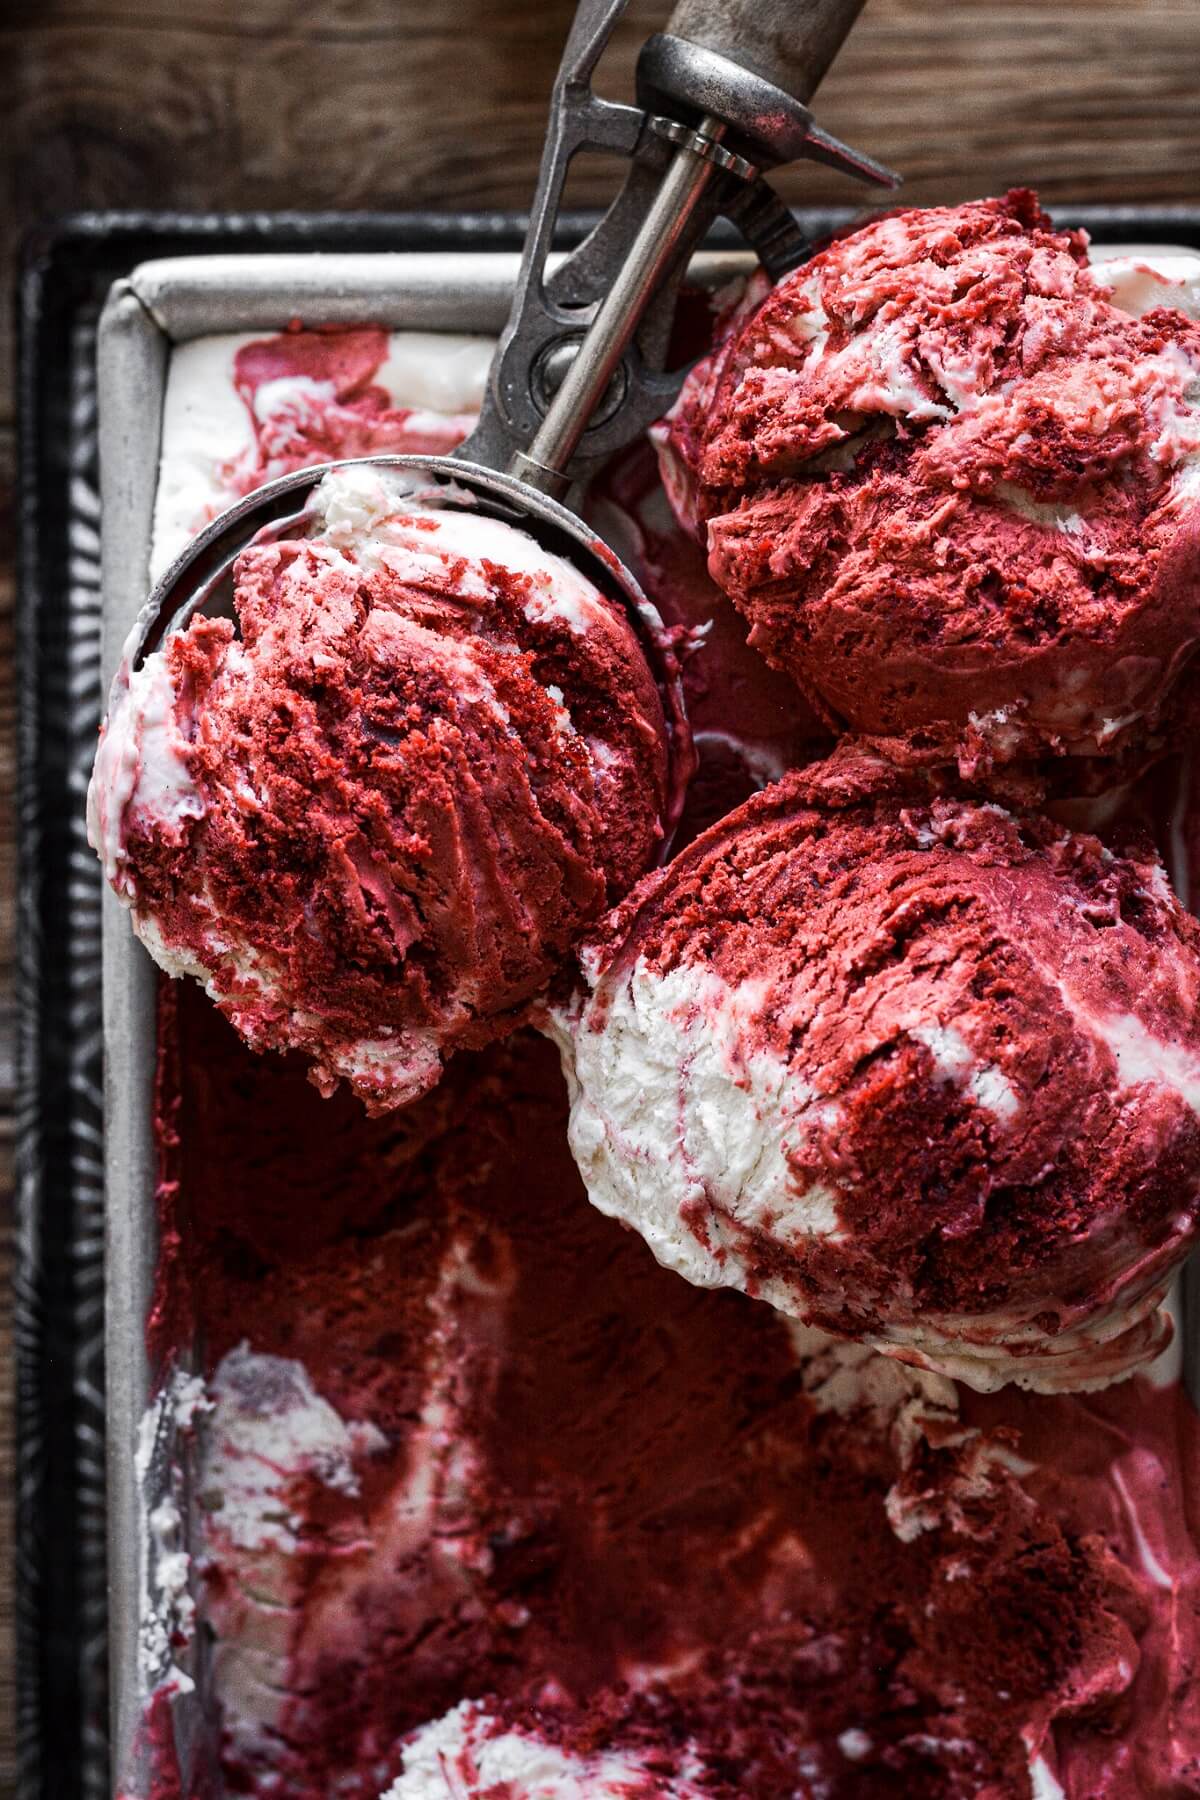
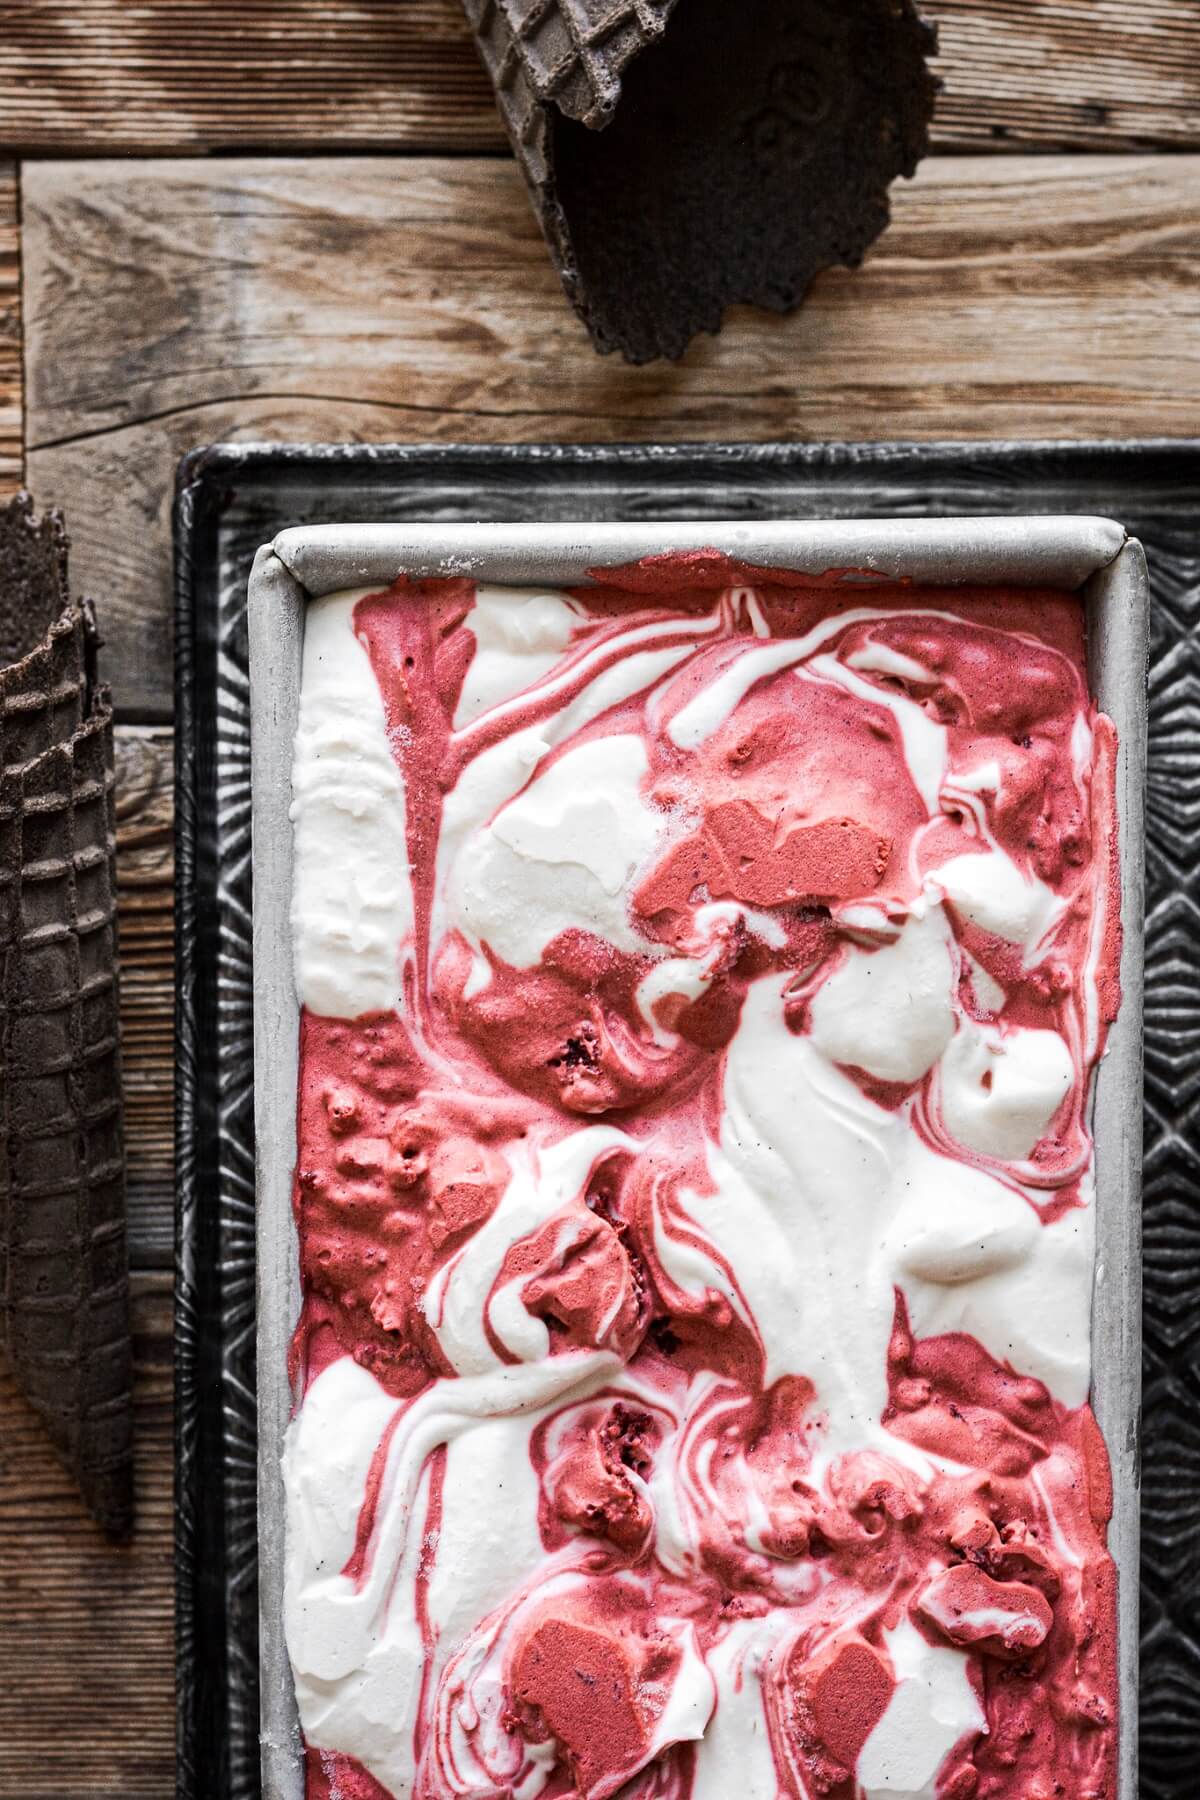
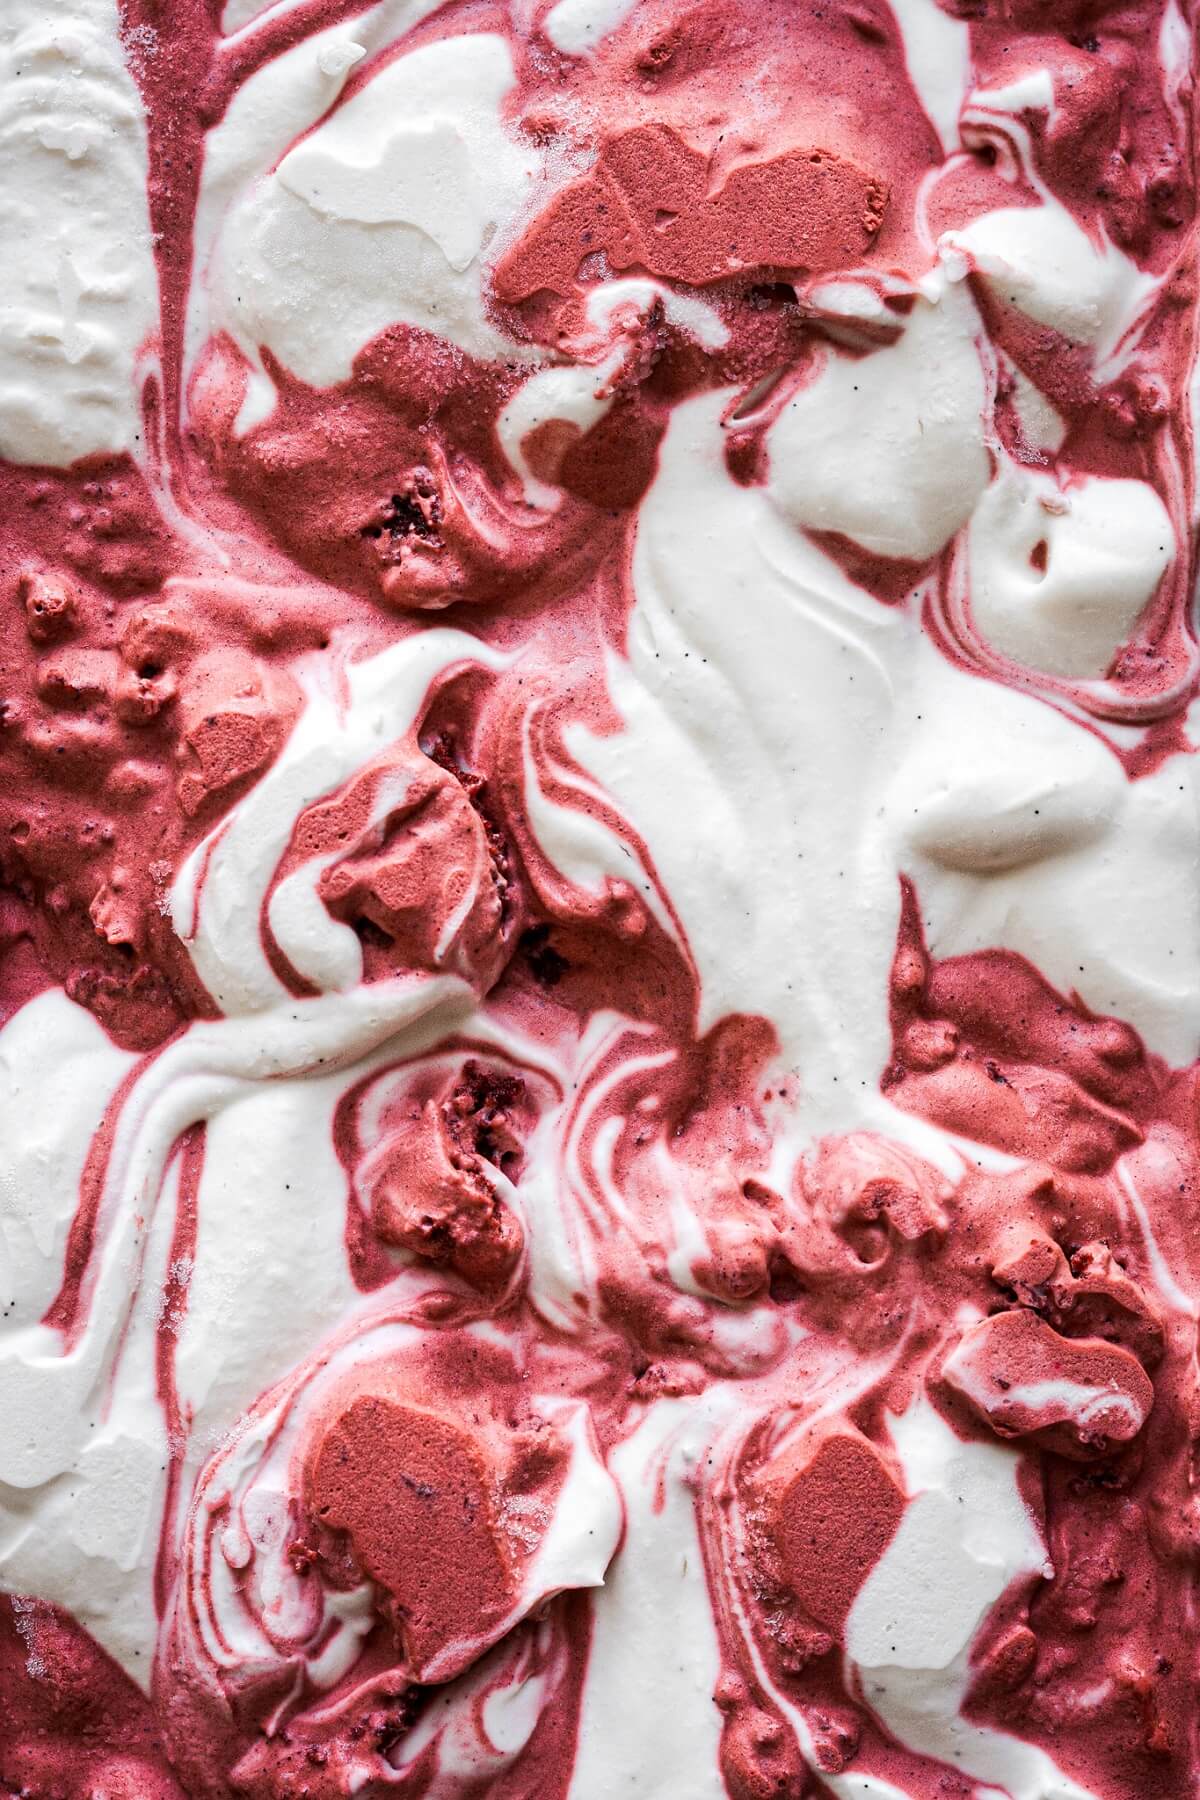
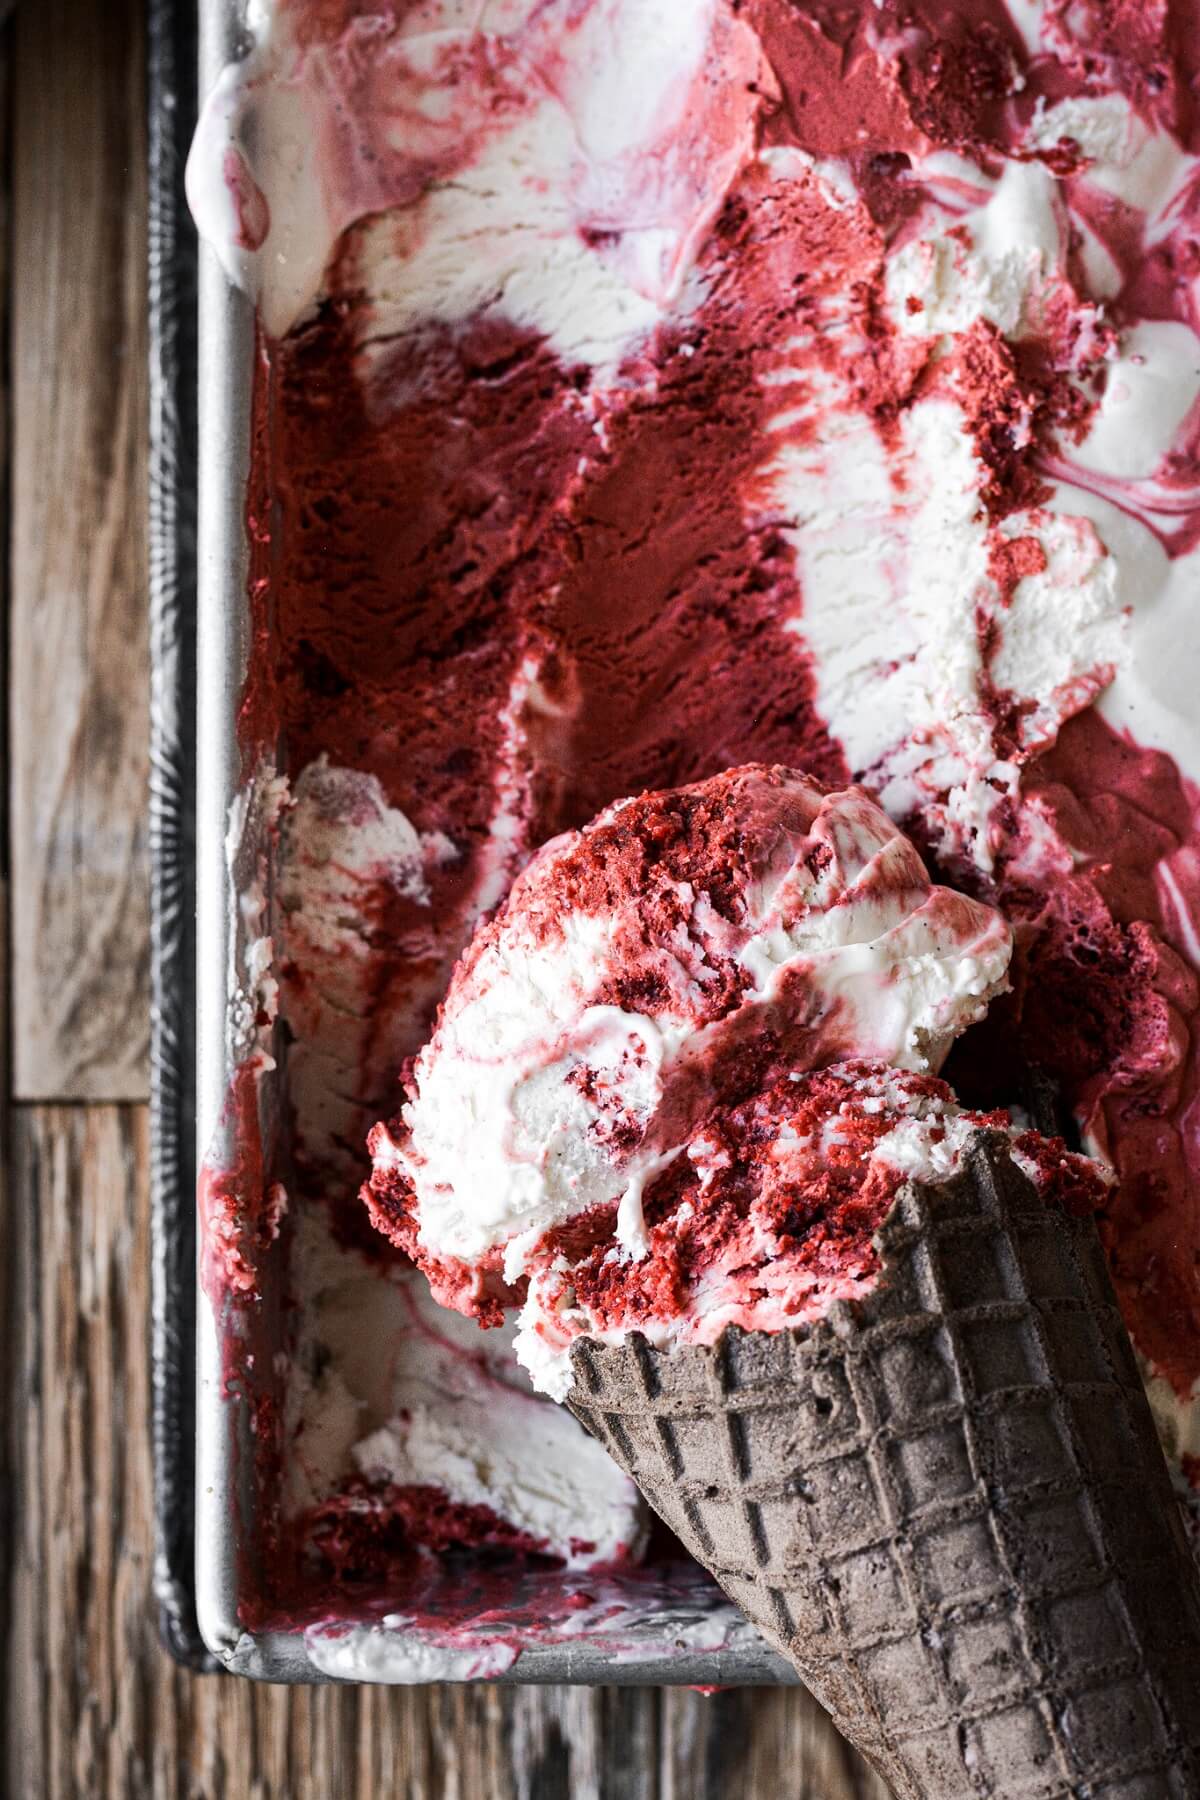
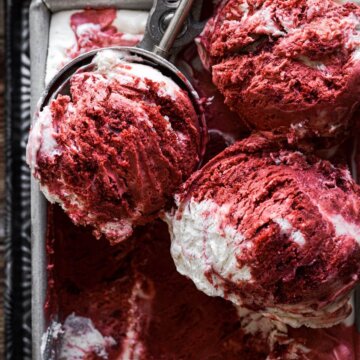
The most beautiful red and white swirled red velvet cake ice cream, in an easy to make, no churn recipe. Cream cheese vanilla bean ice cream is swirled together with red velvet ice cream and crumbled red velvet cake for a delicious cold treat that’s perfect for Christmas or Valentine’s Day.
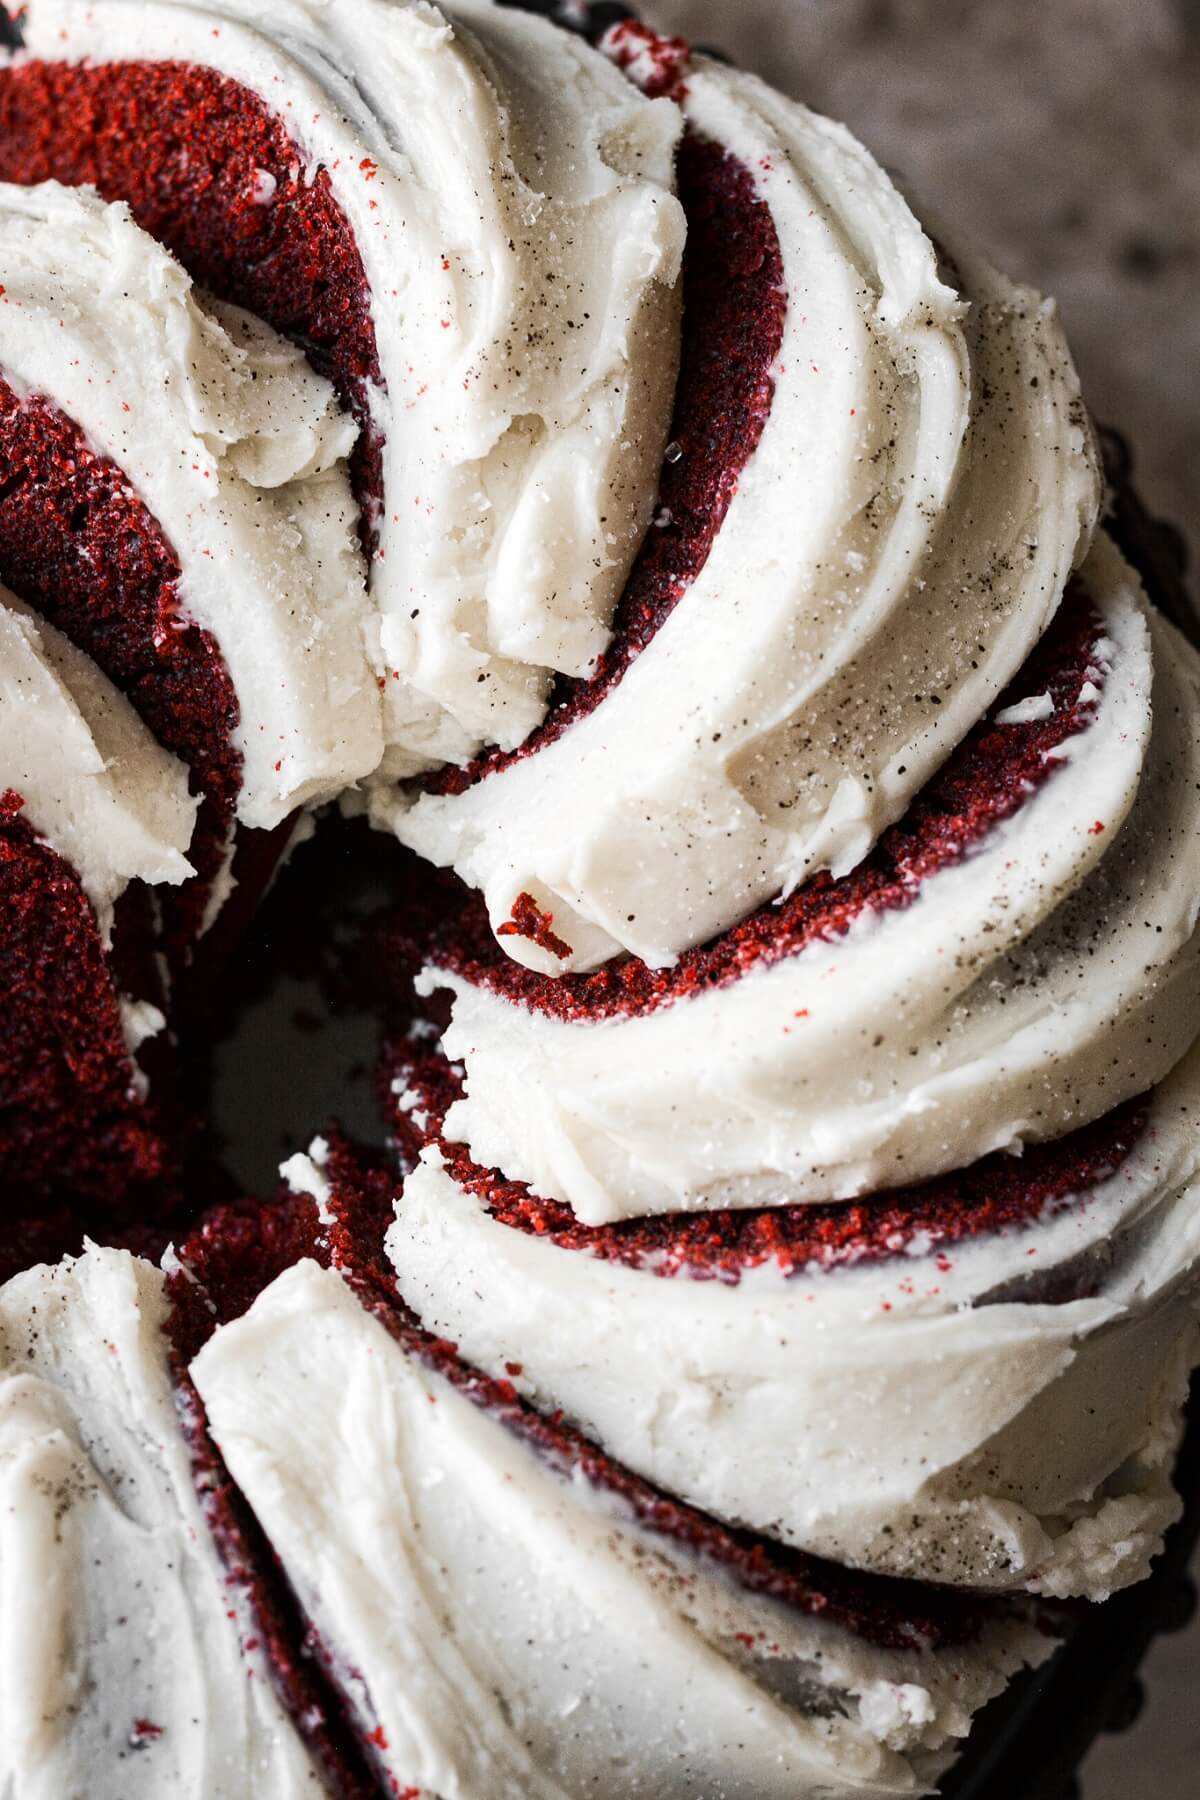
You might also love this red velvet bundt cake, red and white candy cane Christmas cake, and pink peppermint candy cane ice cream.
This site contains affiliate links. As an Amazon associate, I earn from qualifying purchases. This means that I may make a small commission if you purchase a product using those links. This in no way affects my opinion of those products and services. All opinions expressed on this site are my own.
Why You’ll Love This Recipe
Easy to Make. Just 10-15 minutes and a simple list of ingredients is all you need to make this gorgeous and delicious ice cream.
No Churn Recipe. No churn ice cream recipes are quick and easy and they don’t require an ice cream maker. All you need is an electric mixer – either stand or hand held is fine – to whip the cream until thick and fluffy.
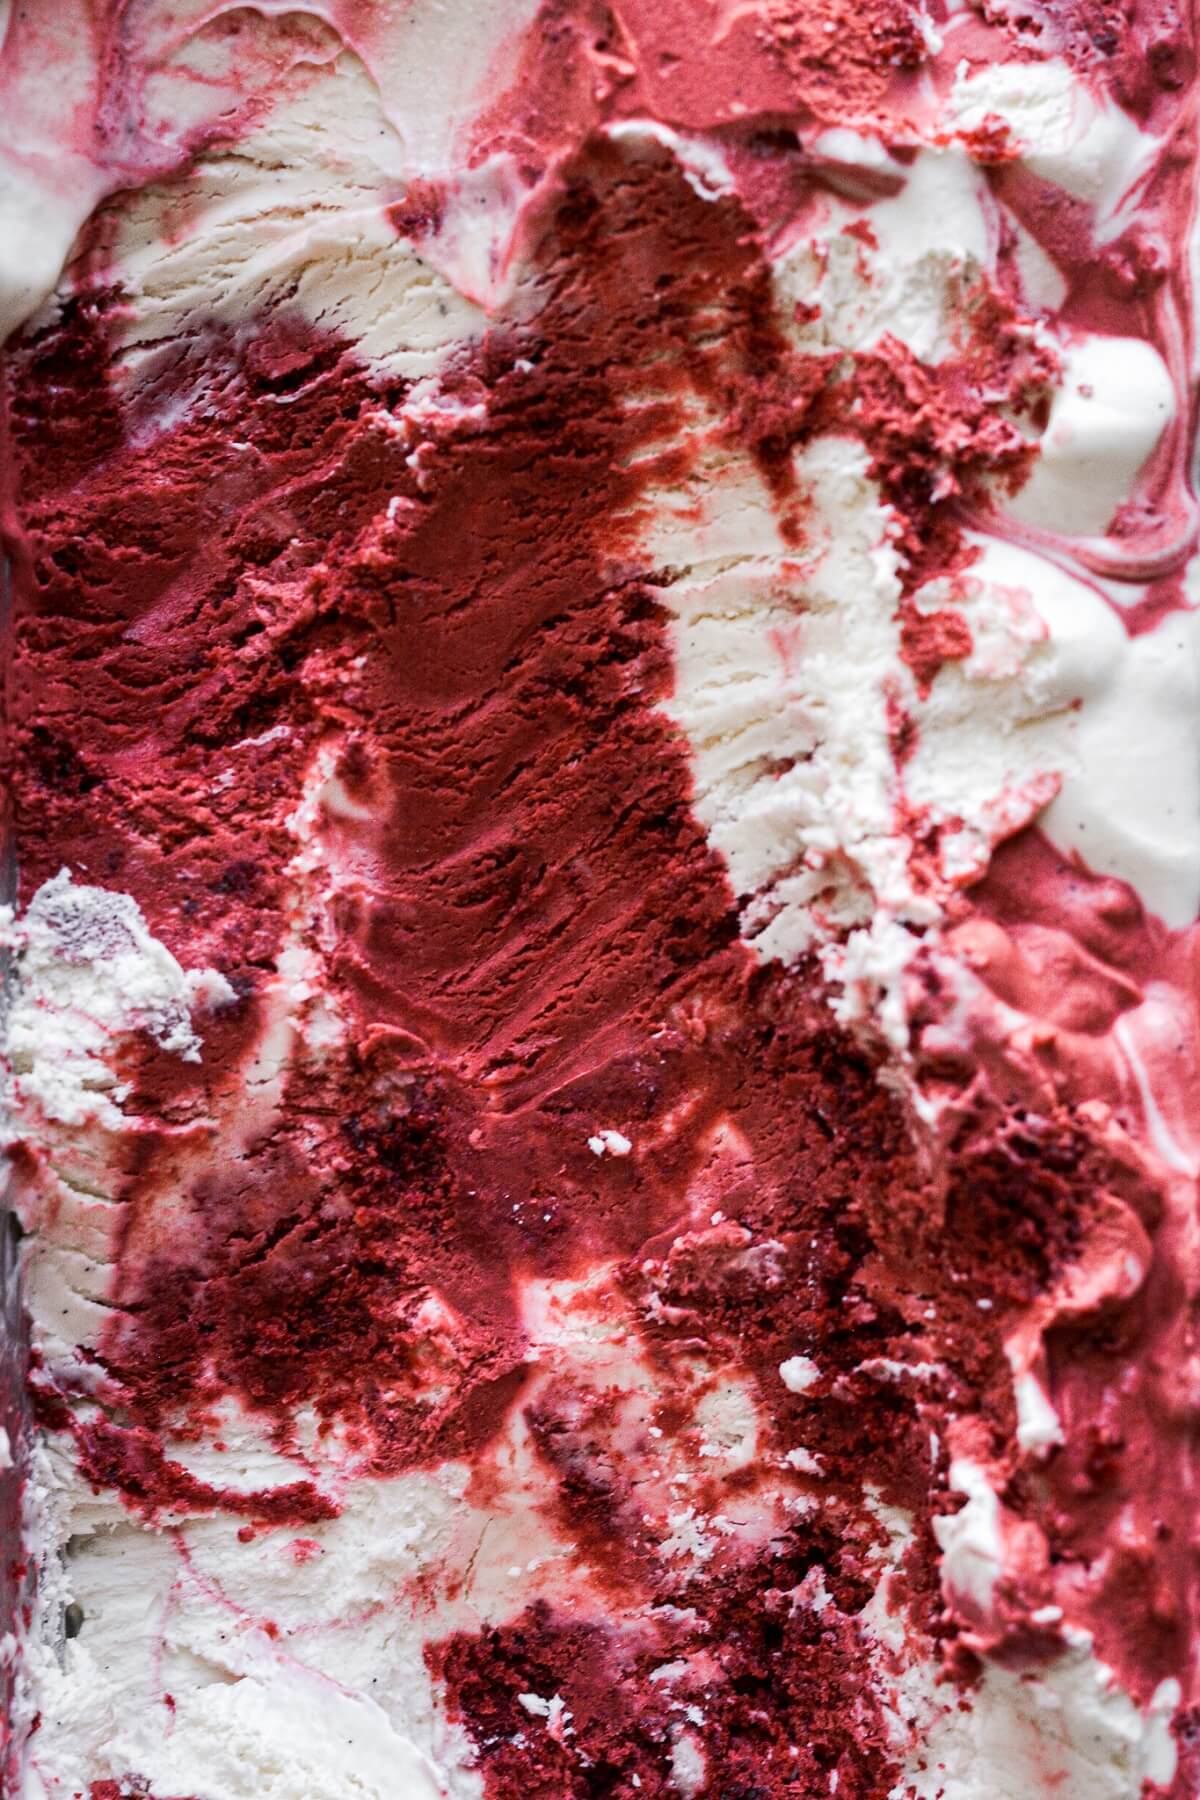
Gorgeous Red and White Swirl. In today’s recipe, you’ll be making cream cheese ice cream and red velvet ice cream, then swirling them together for a red and white marbled look.

See the recipe card at the end of the post for the full ingredients list and instructions.
Ingredients
- Cream Cheese. Since red velvet cake is almost always frosted with cream cheese frosting, then I wanted to incorporate cream cheese into the ice cream, for a rich and tangy flavor. You can also use mascarpone cheese – both work equally well.
- Sweetened Condensed Milk. Sweetens the ice cream and gives it a creamy, smooth consistency.
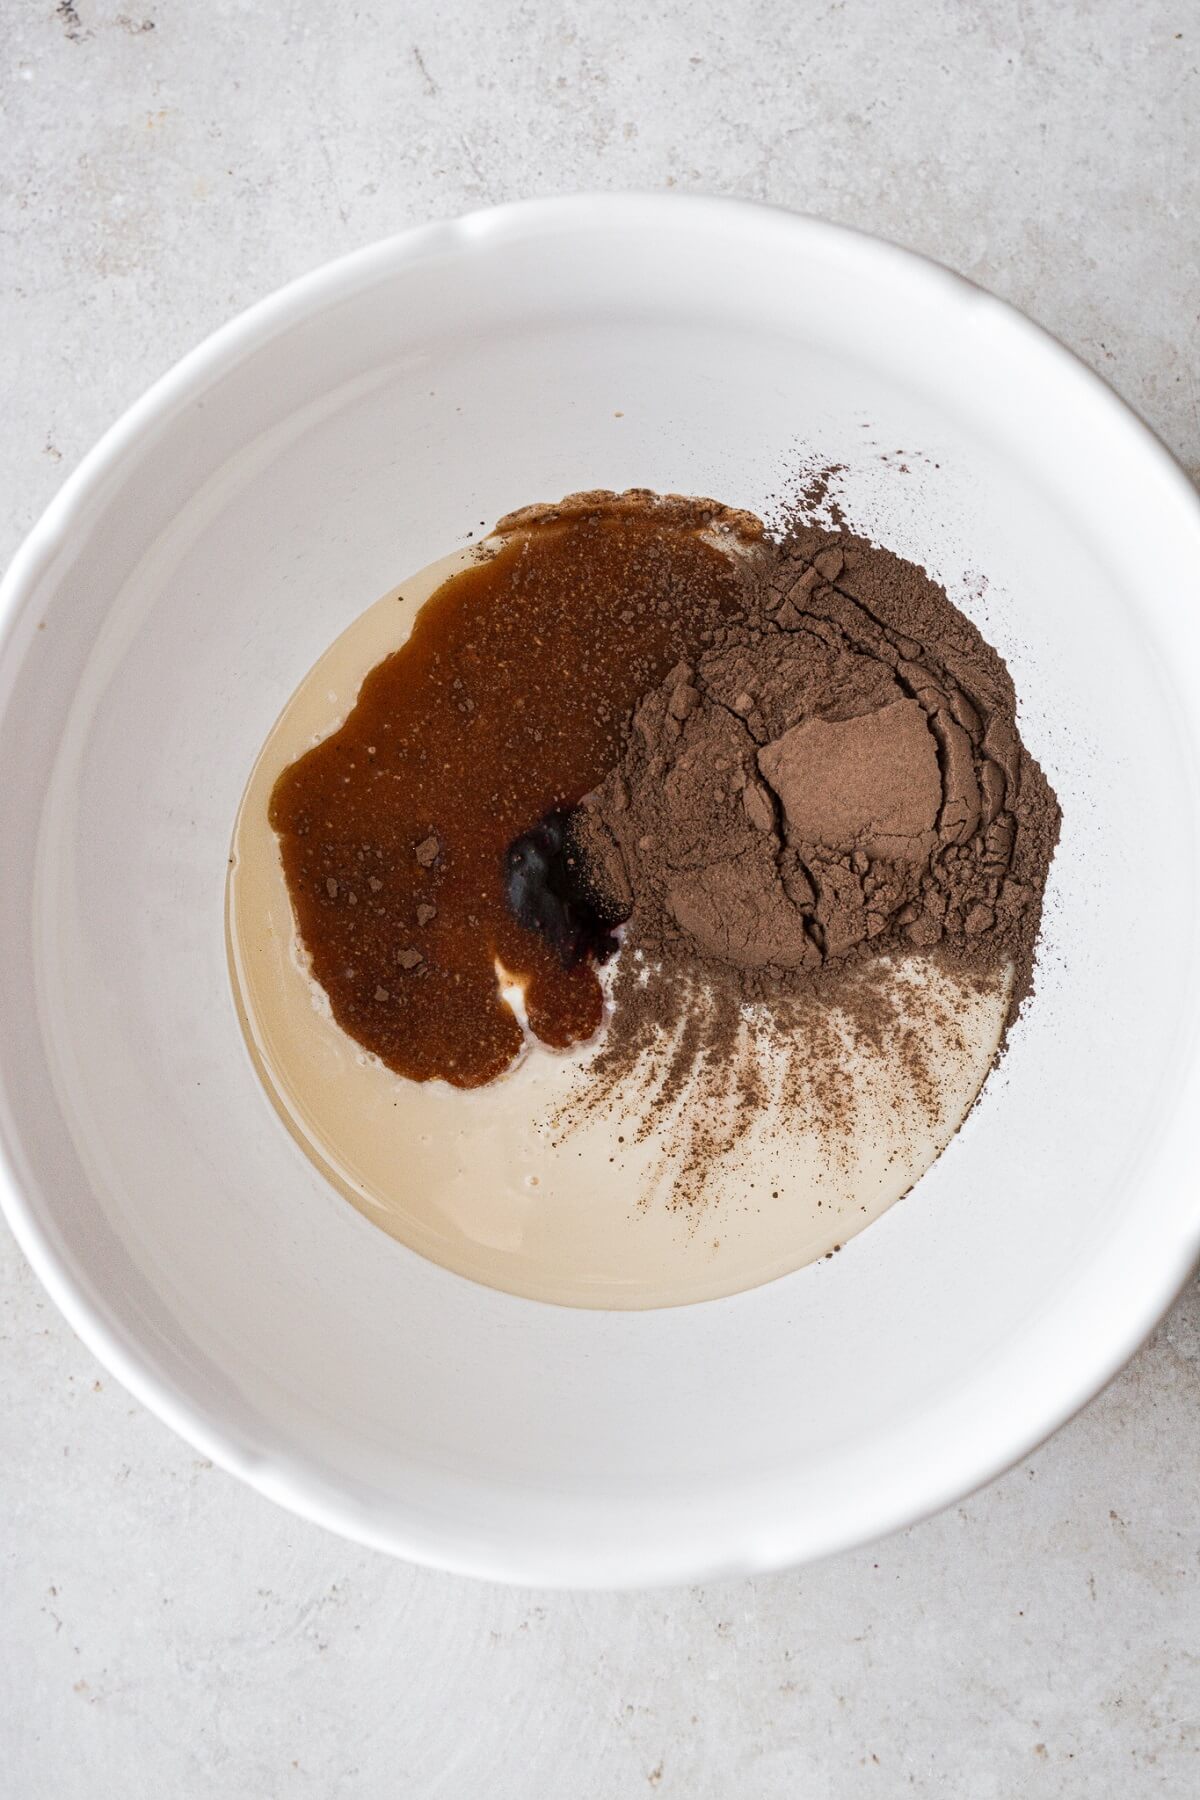
- Vanilla. You can use either vanilla bean paste or vanilla extract. Or, if you have whole vanilla beans, you can scrape the seeds out and use those, too.
- Salt. Balances the sweetness.
- Heavy Whipping Cream. Whipped to soft, fluffy peaks, the whipped cream makes the ice cream rich, smooth and creamy.
- Cocoa Powder. Red velvet cake always has a little cocoa powder, which helps contribute to the red color, as well as to give it a subtle chocolate flavor. The cocoa powder will help to deepen the color in the red ice cream.
- Food Coloring. You’ll need “super red” gel food coloring for the red ice cream.
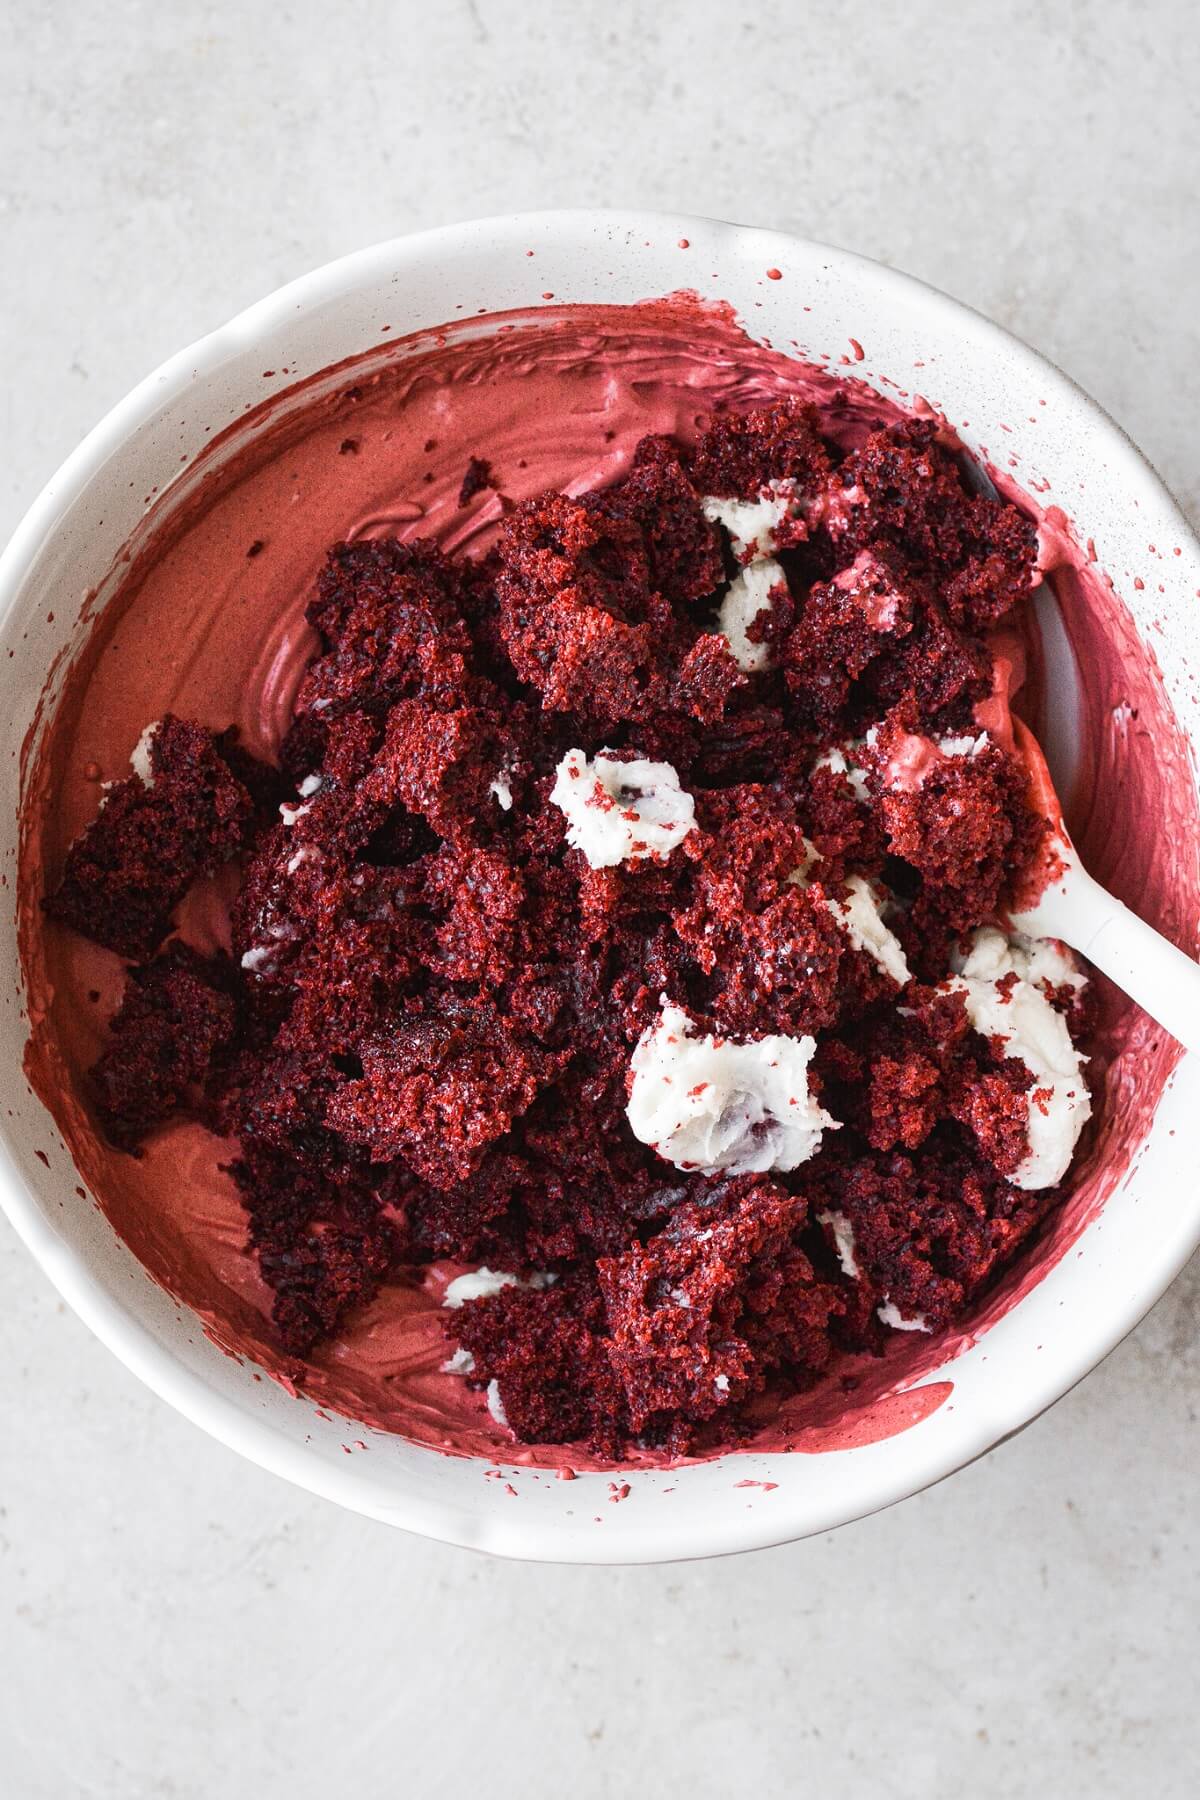
- Red Velvet Cake. Crumbled red velvet cake in the red ice cream adds more flavor and a bit of texture that you’ll just love. I saved two pieces of the red velvet bundt cake I made recently to use in mine. But you can also just buy two individual slices of red velvet cake or two cupcakes in the bakery section of most major grocery stores.
Instructions
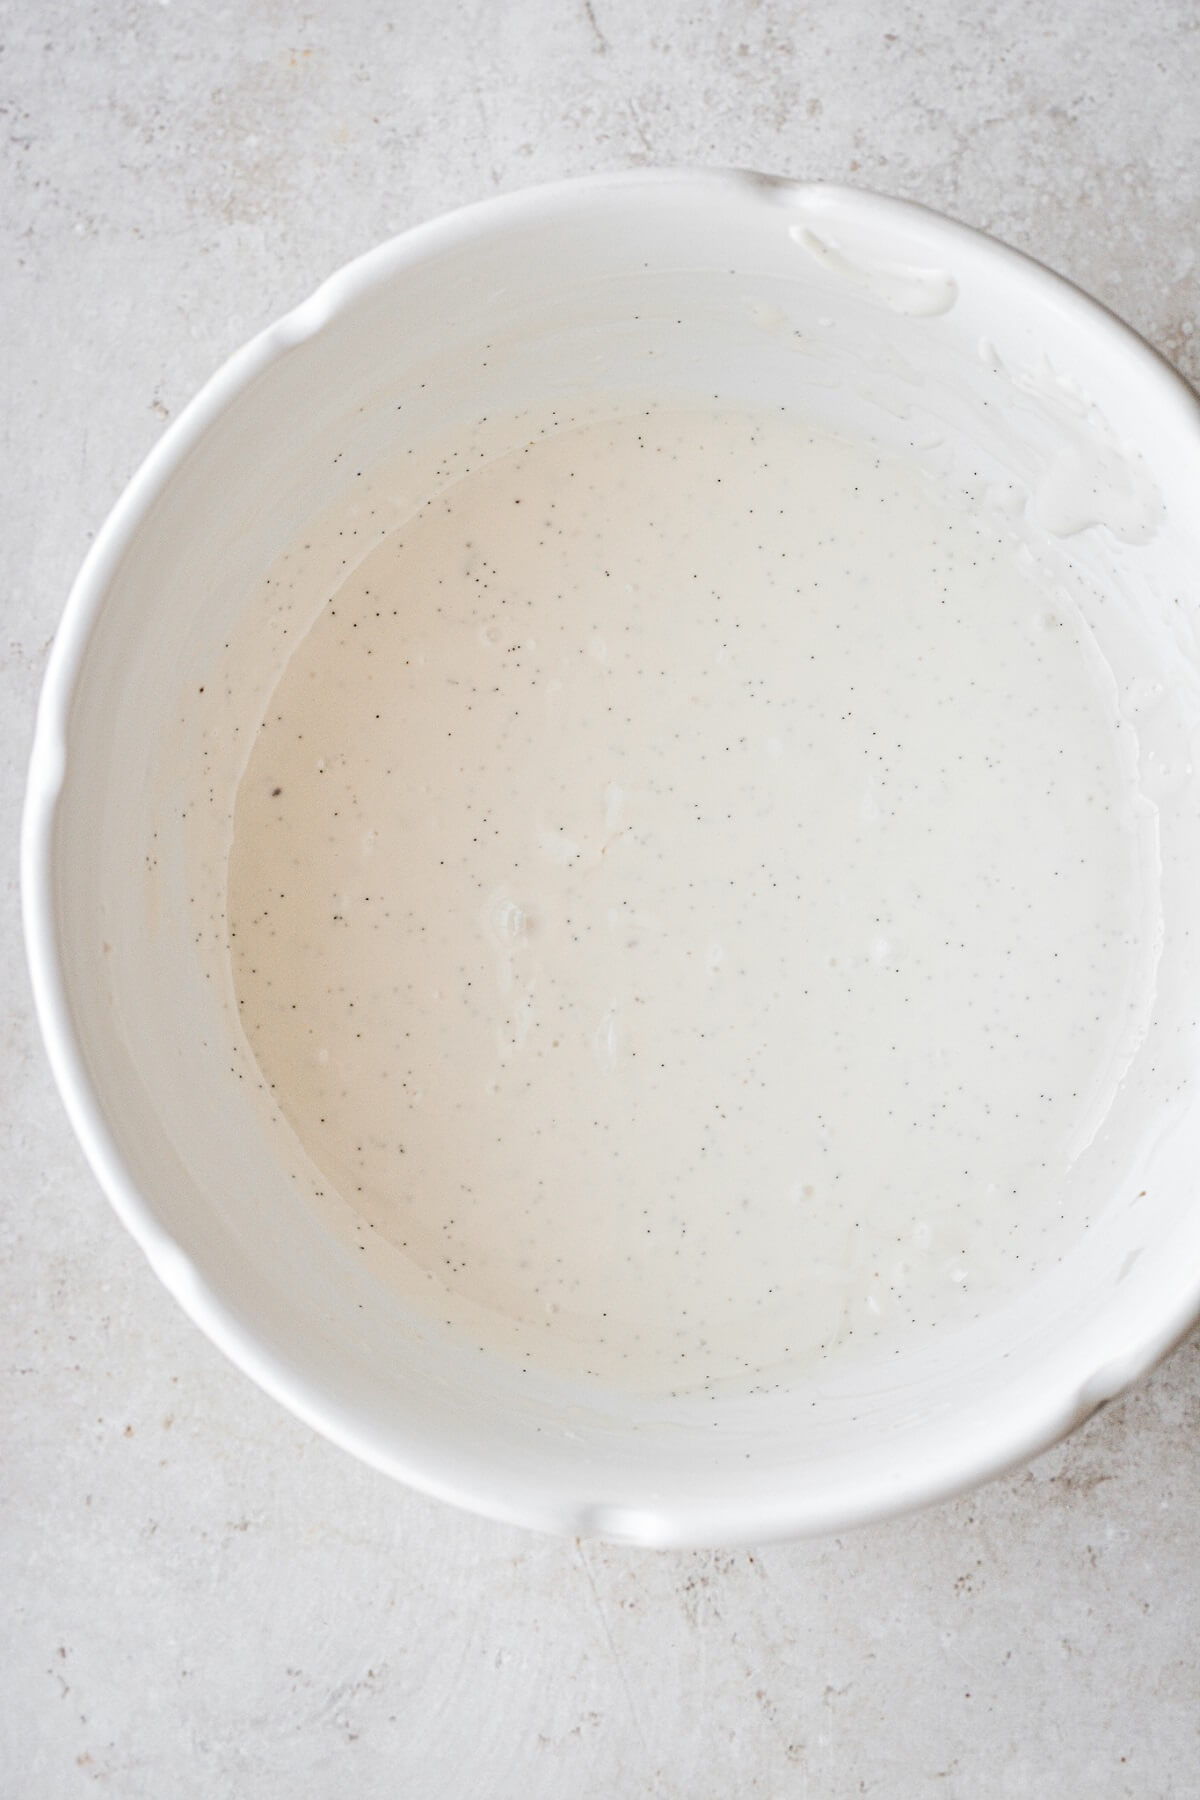
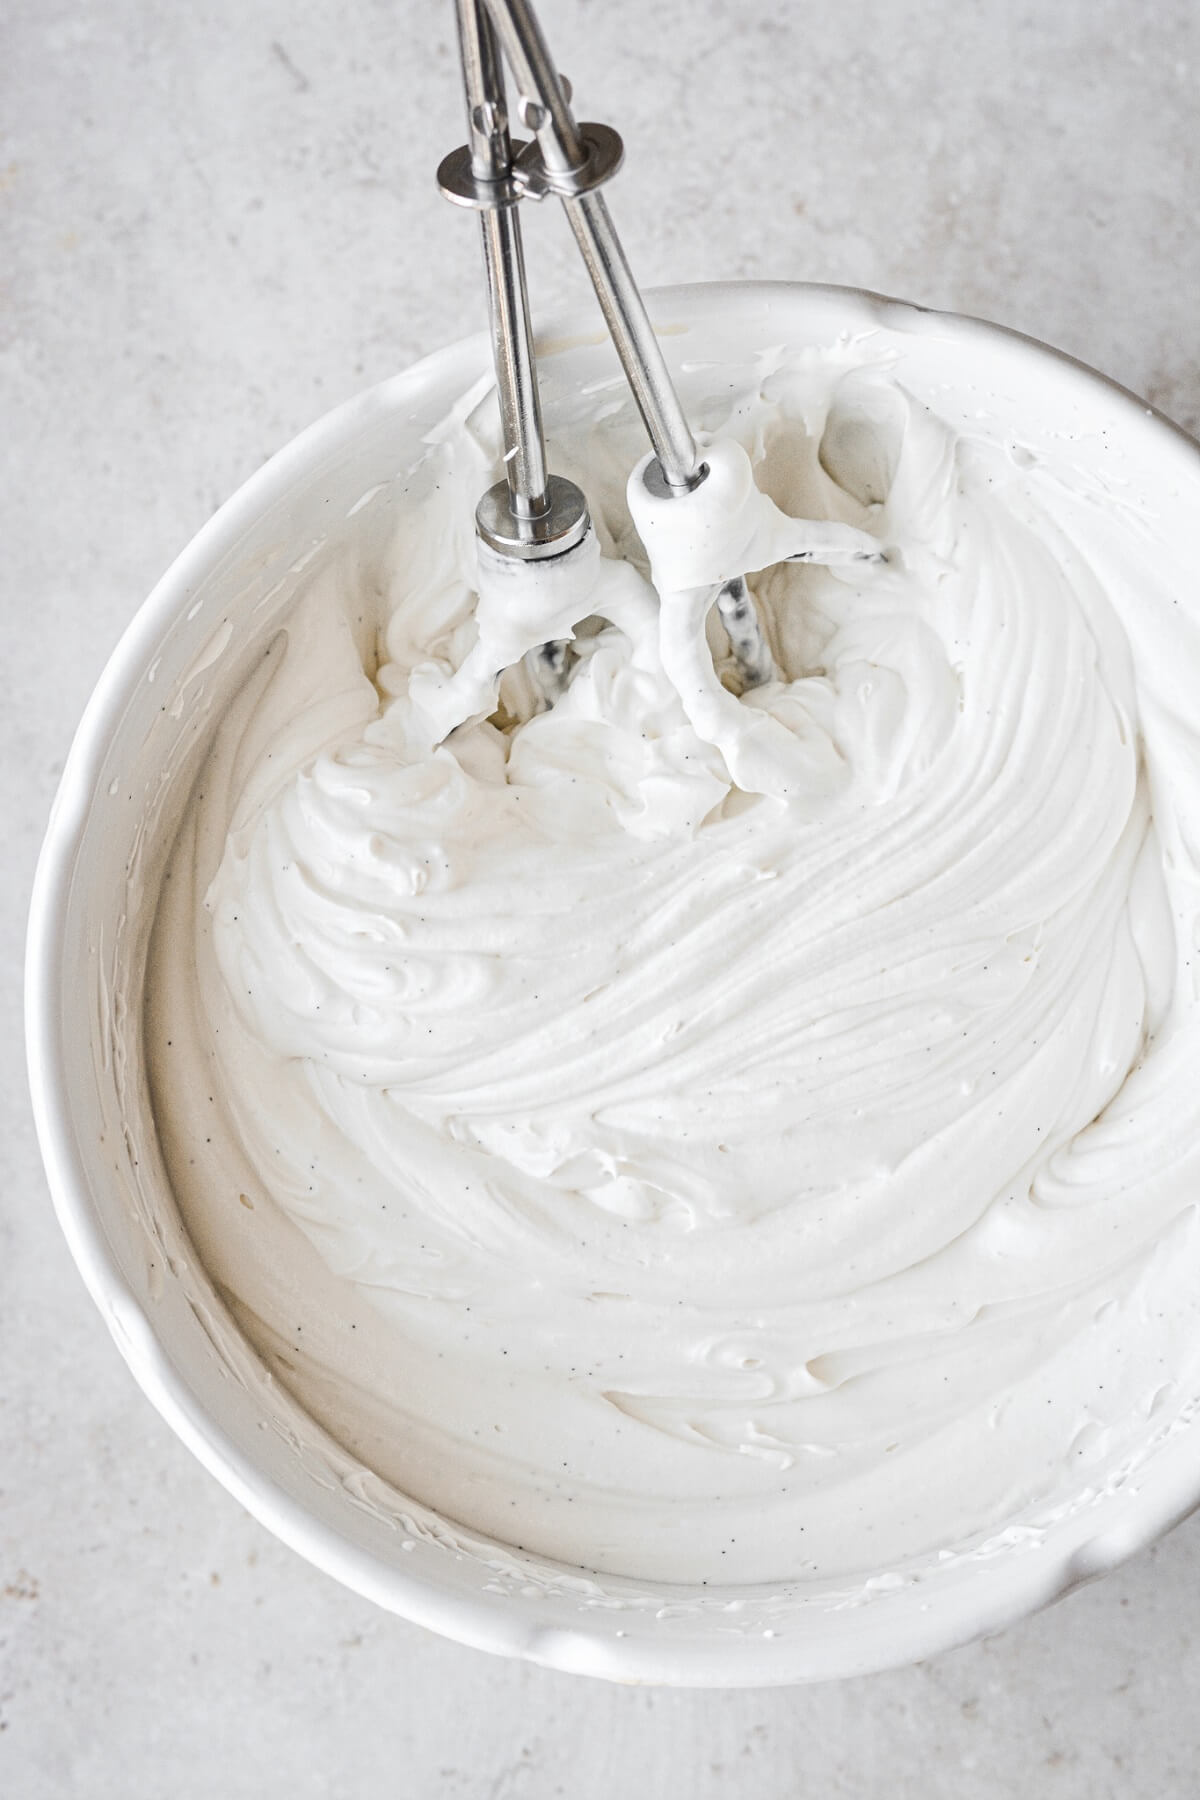
Cream Cheese Ice Cream
- In a bowl, use your electric mixer to beat the cream cheese, sweetened condensed milk, vanilla and salt until smooth.
- Add the heavy whipping cream, and whip on medium high speed for several minutes, until thick, soft fluffy peaks form.
- Set the bowl in the refrigerator while you make the red ice cream.

Red Velvet Ice Cream
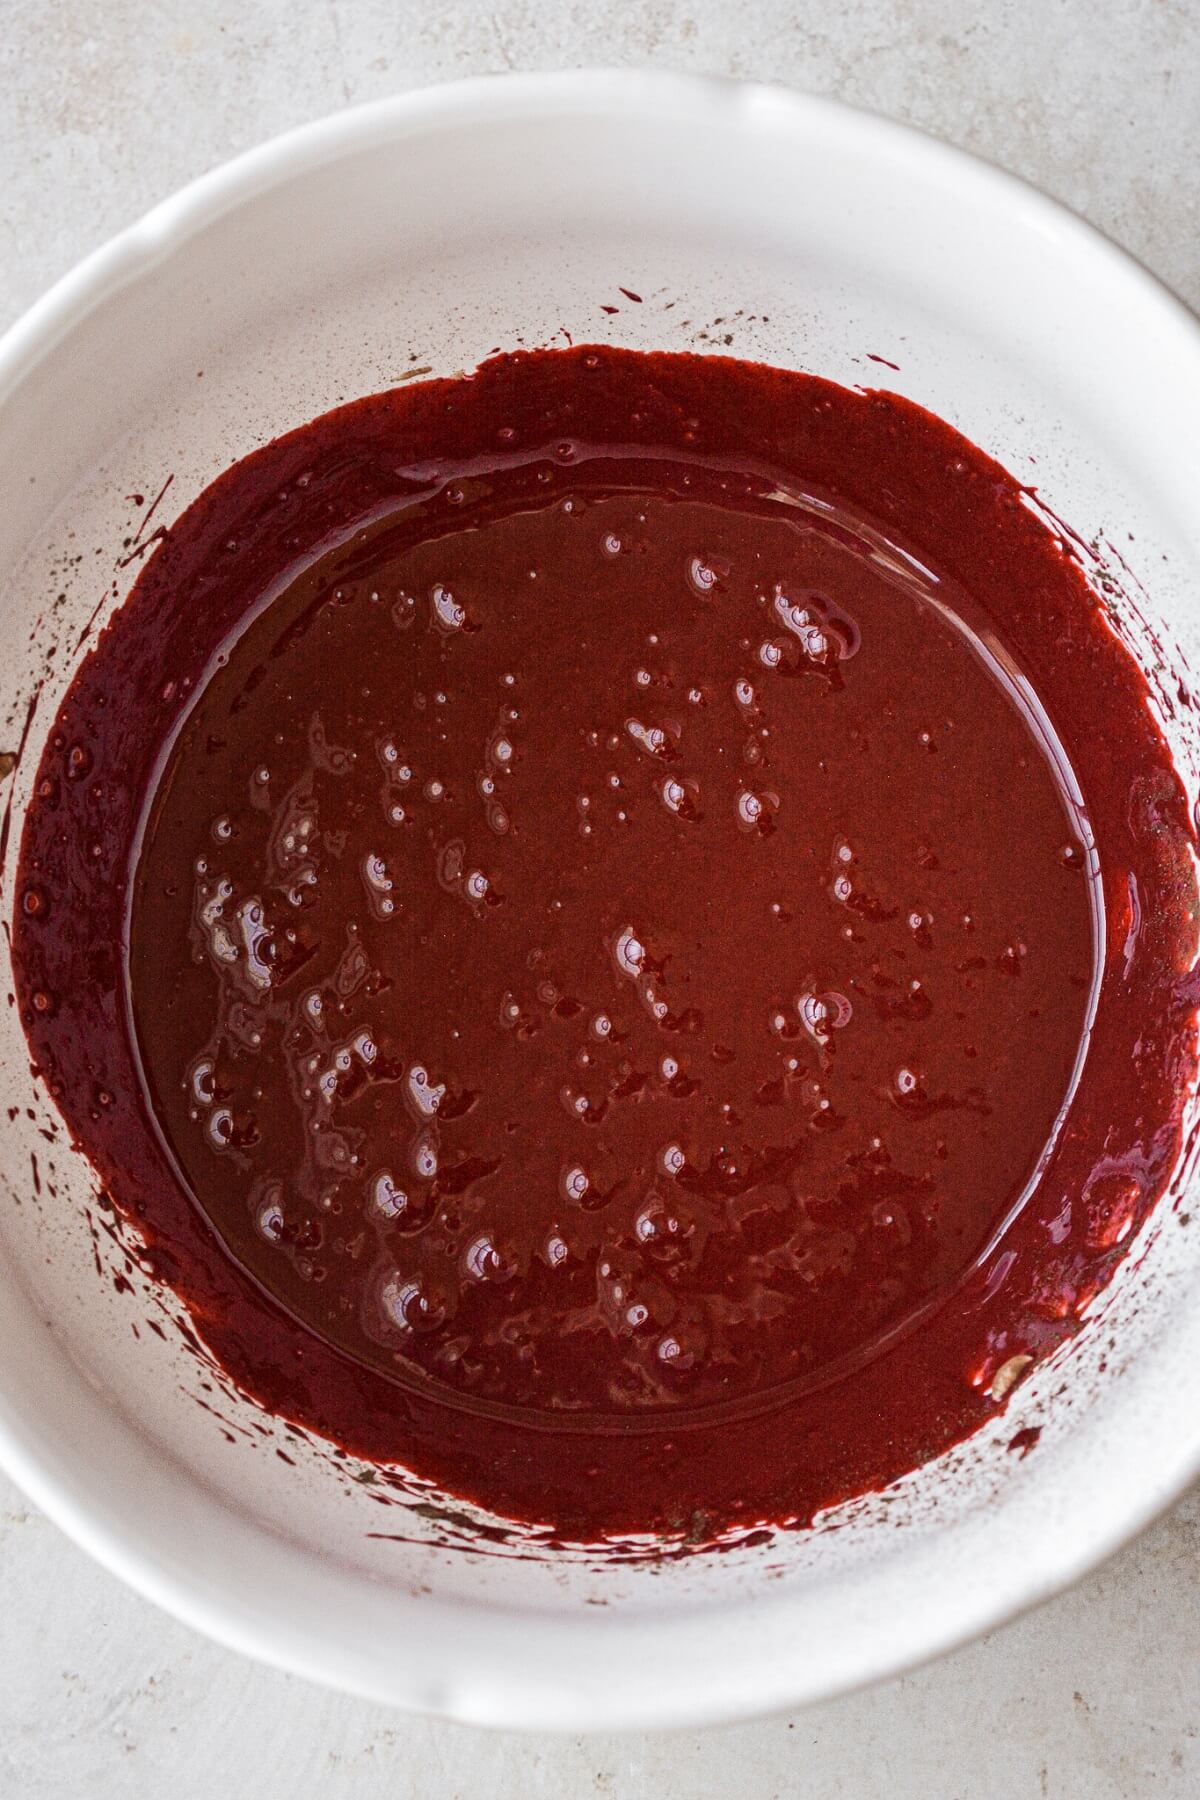
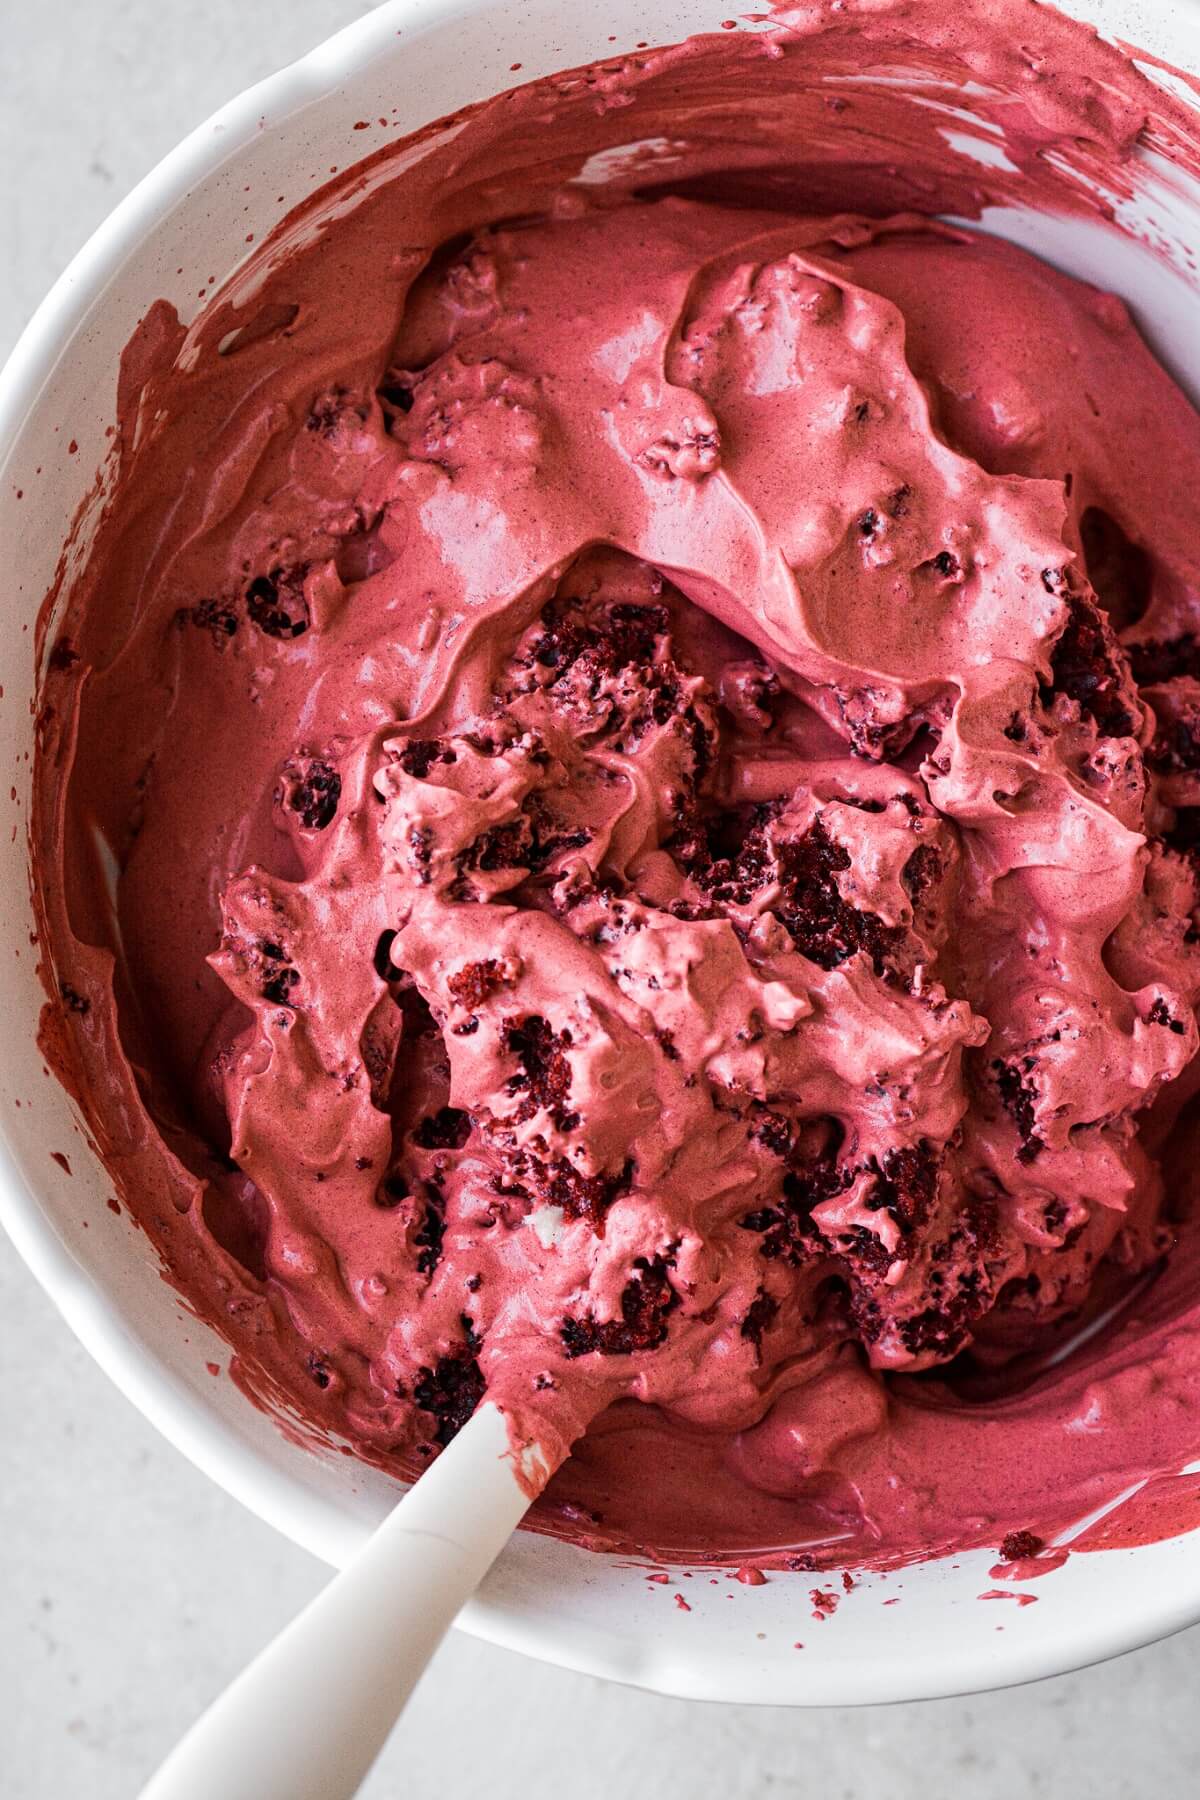
- In a bowl, use your electric mixer to beat the sweetened condensed milk, cocoa powder, red food coloring, vanilla and salt until smooth.
- Add the heavy whipping cream, and whip on medium high speed for several minutes, until thick, soft fluffy peaks form.
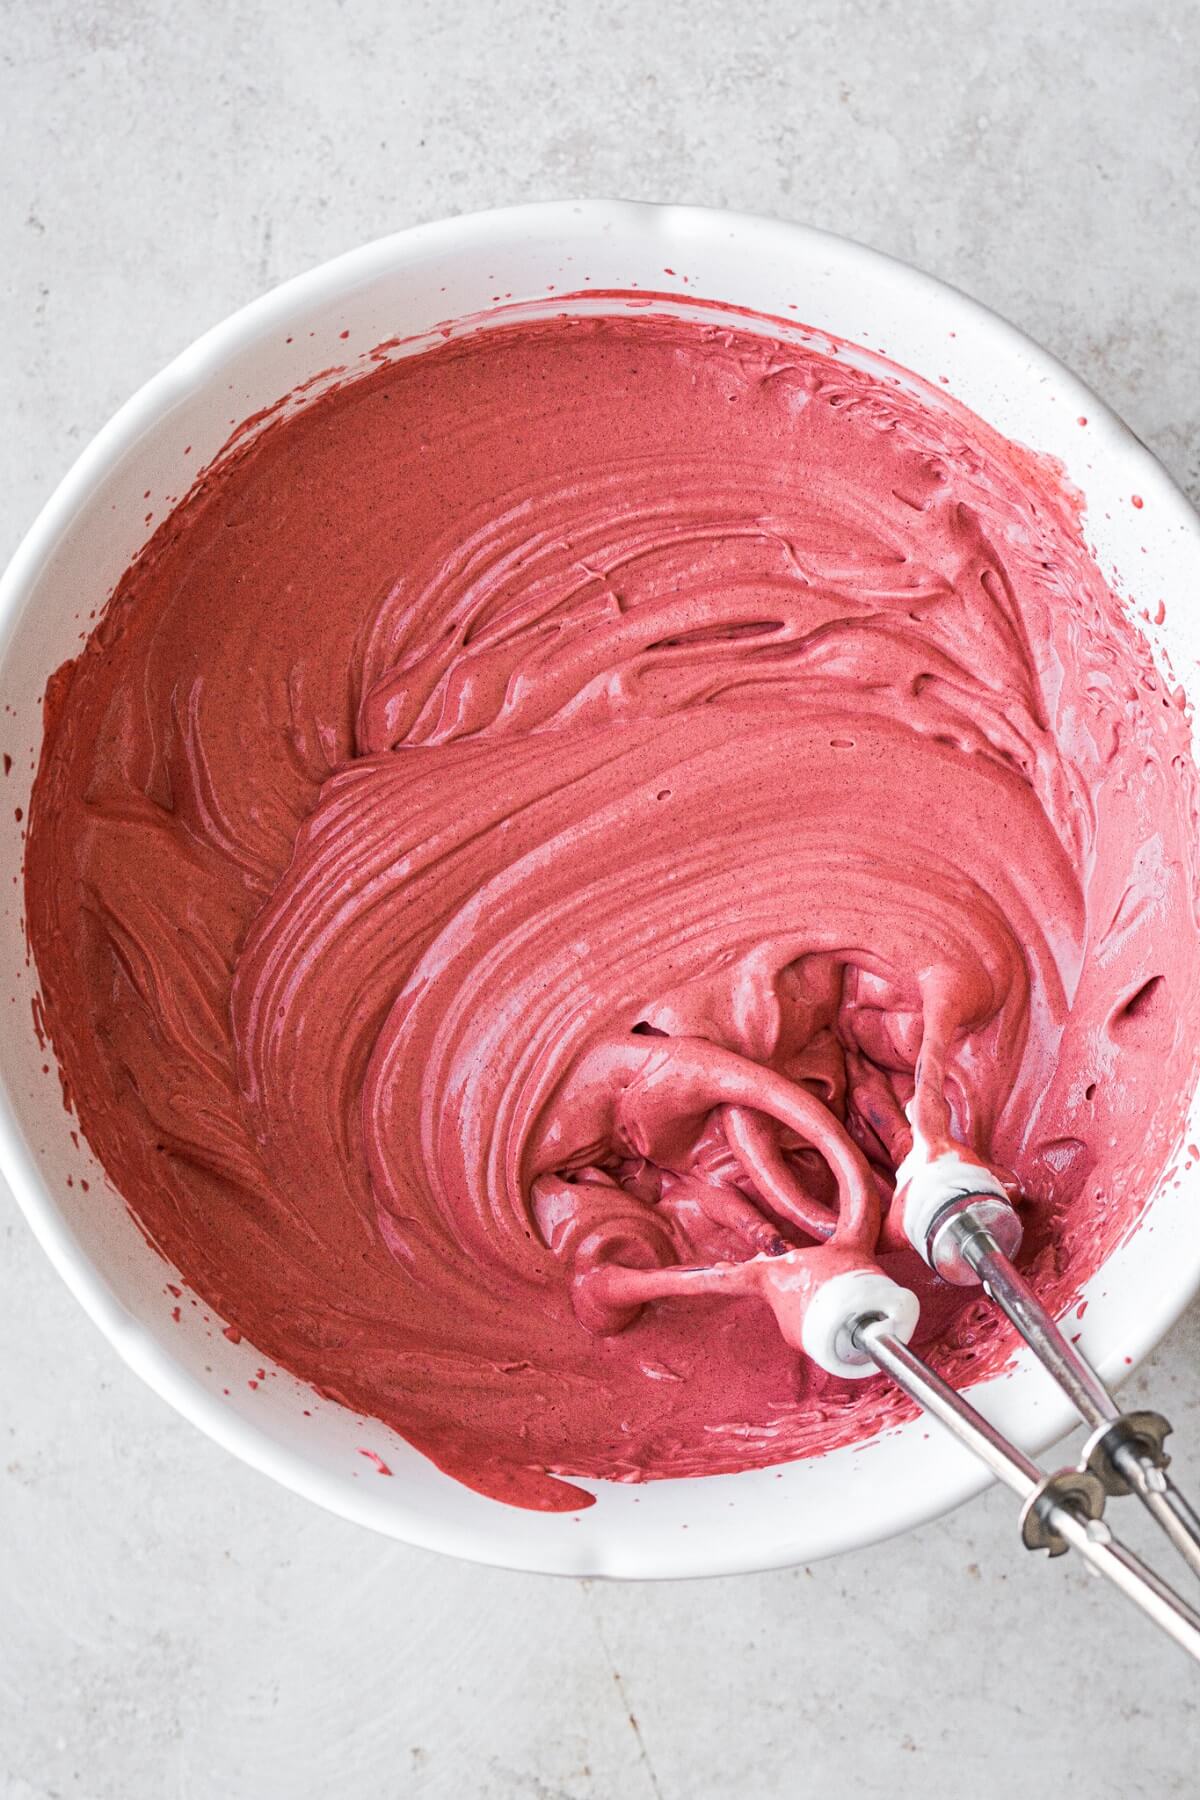
- Crumble the red velvet cupcakes and fold the cake into the ice cream.
Assembly
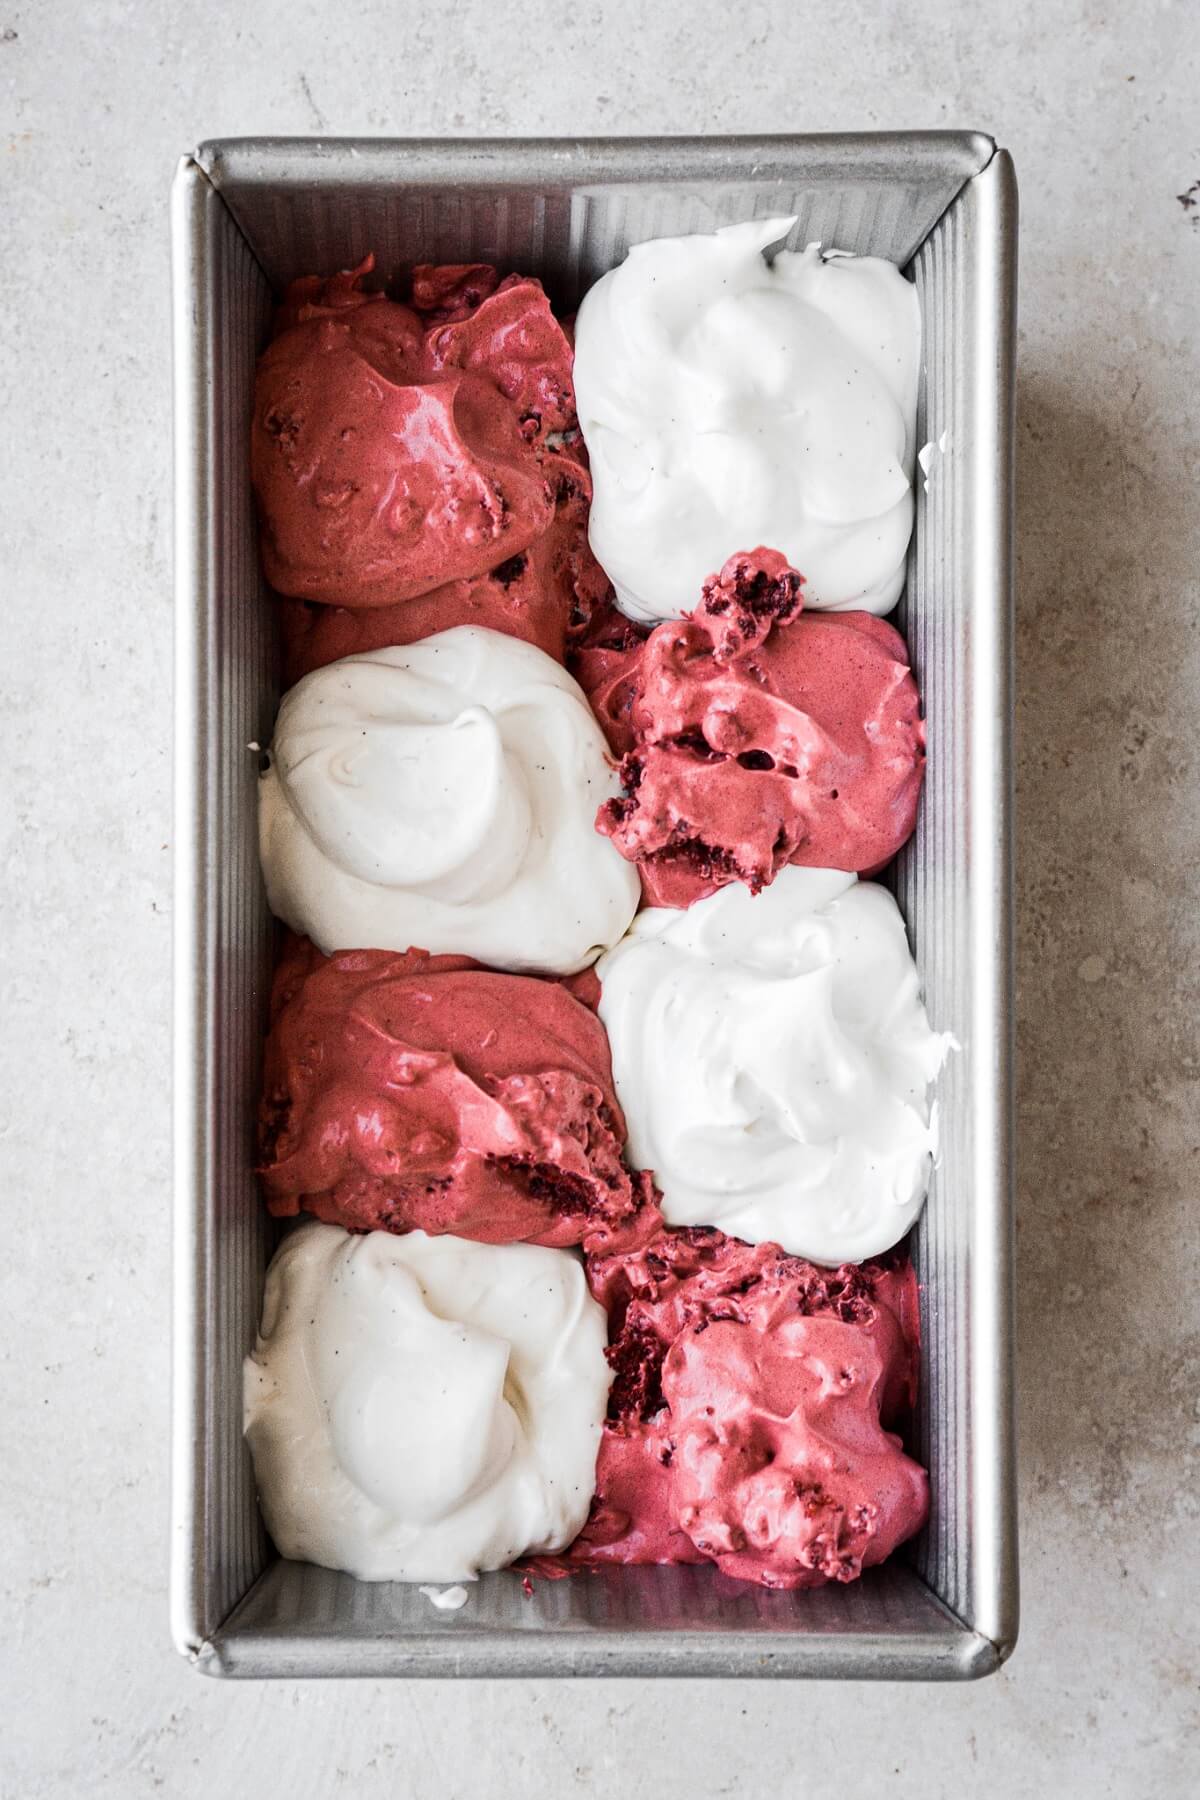
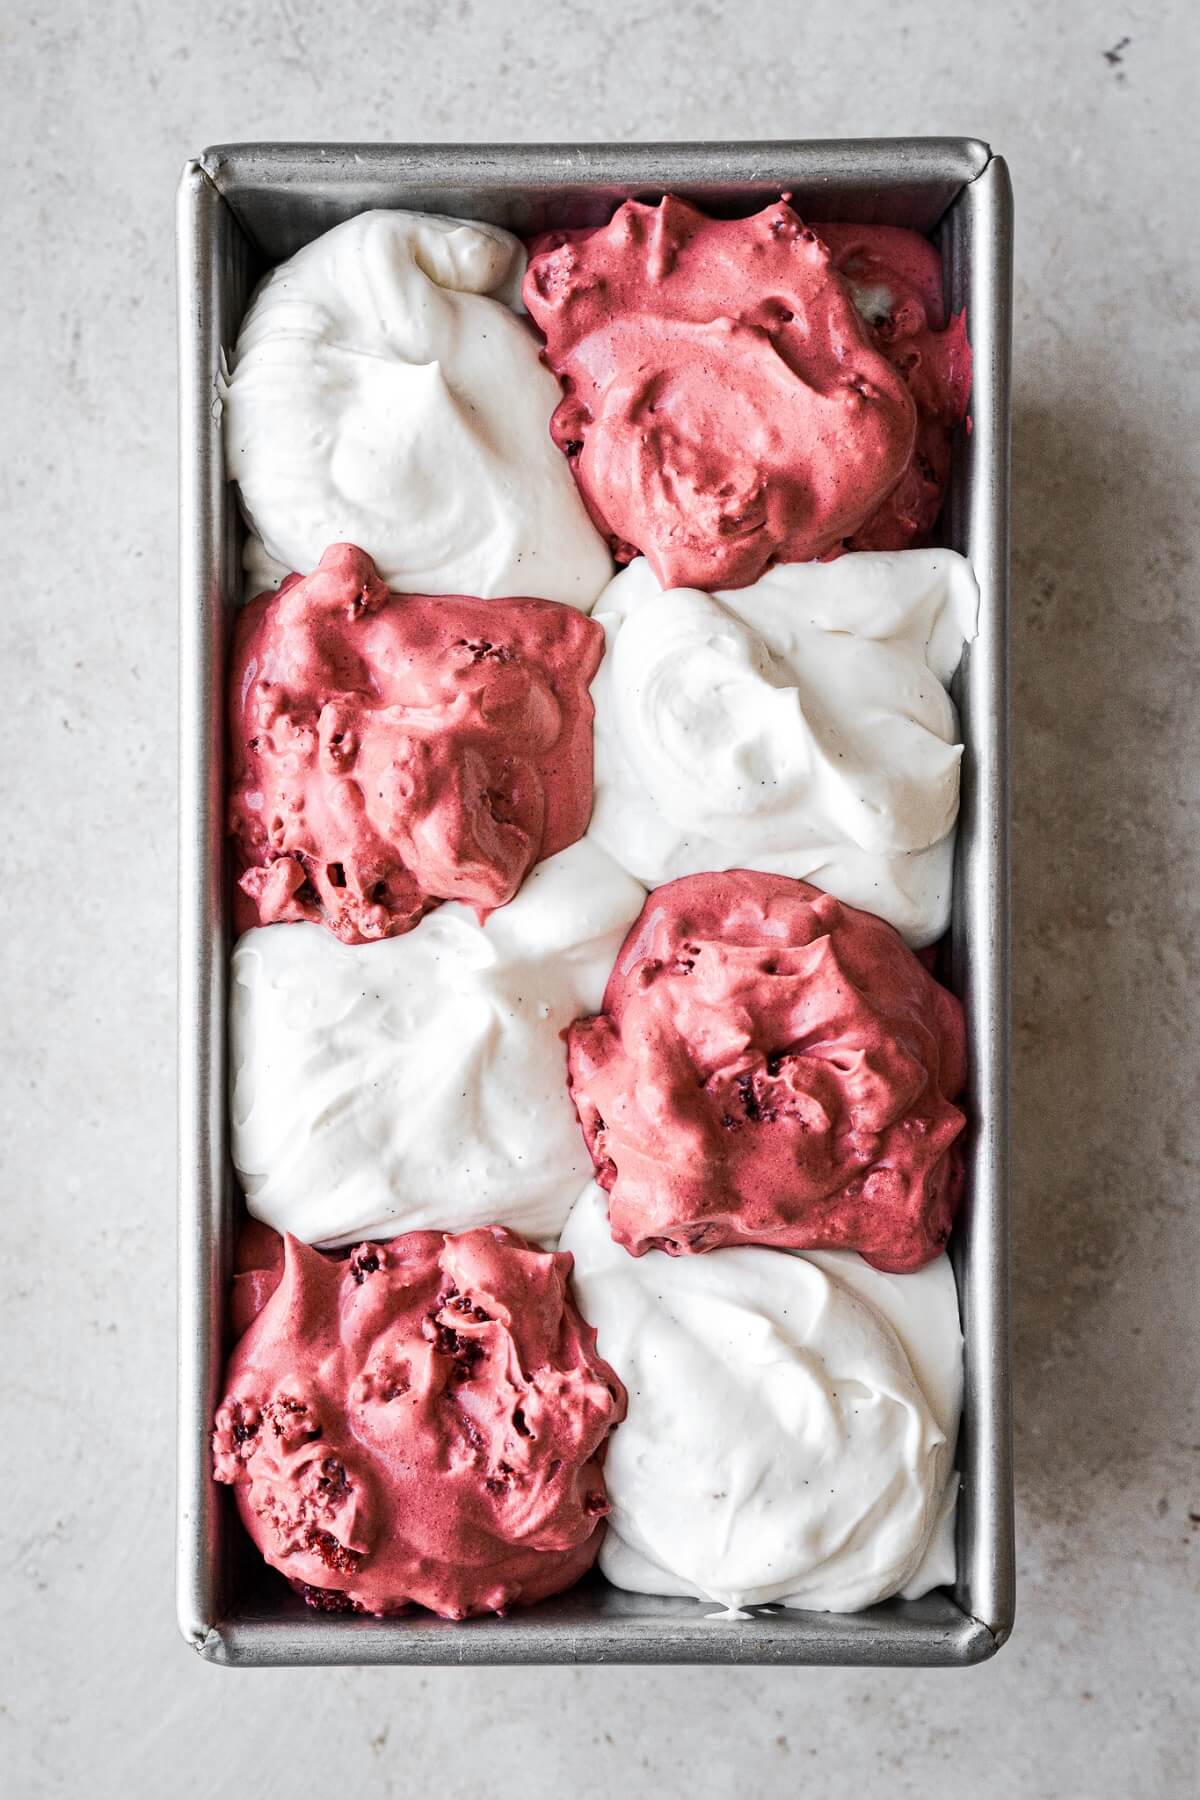
- In a freezer safe container, alternate dollops of the red and white ice cream until you’ve filled the pan. Use a knife to briefly swirl the colors together for a swirly, marbled look.
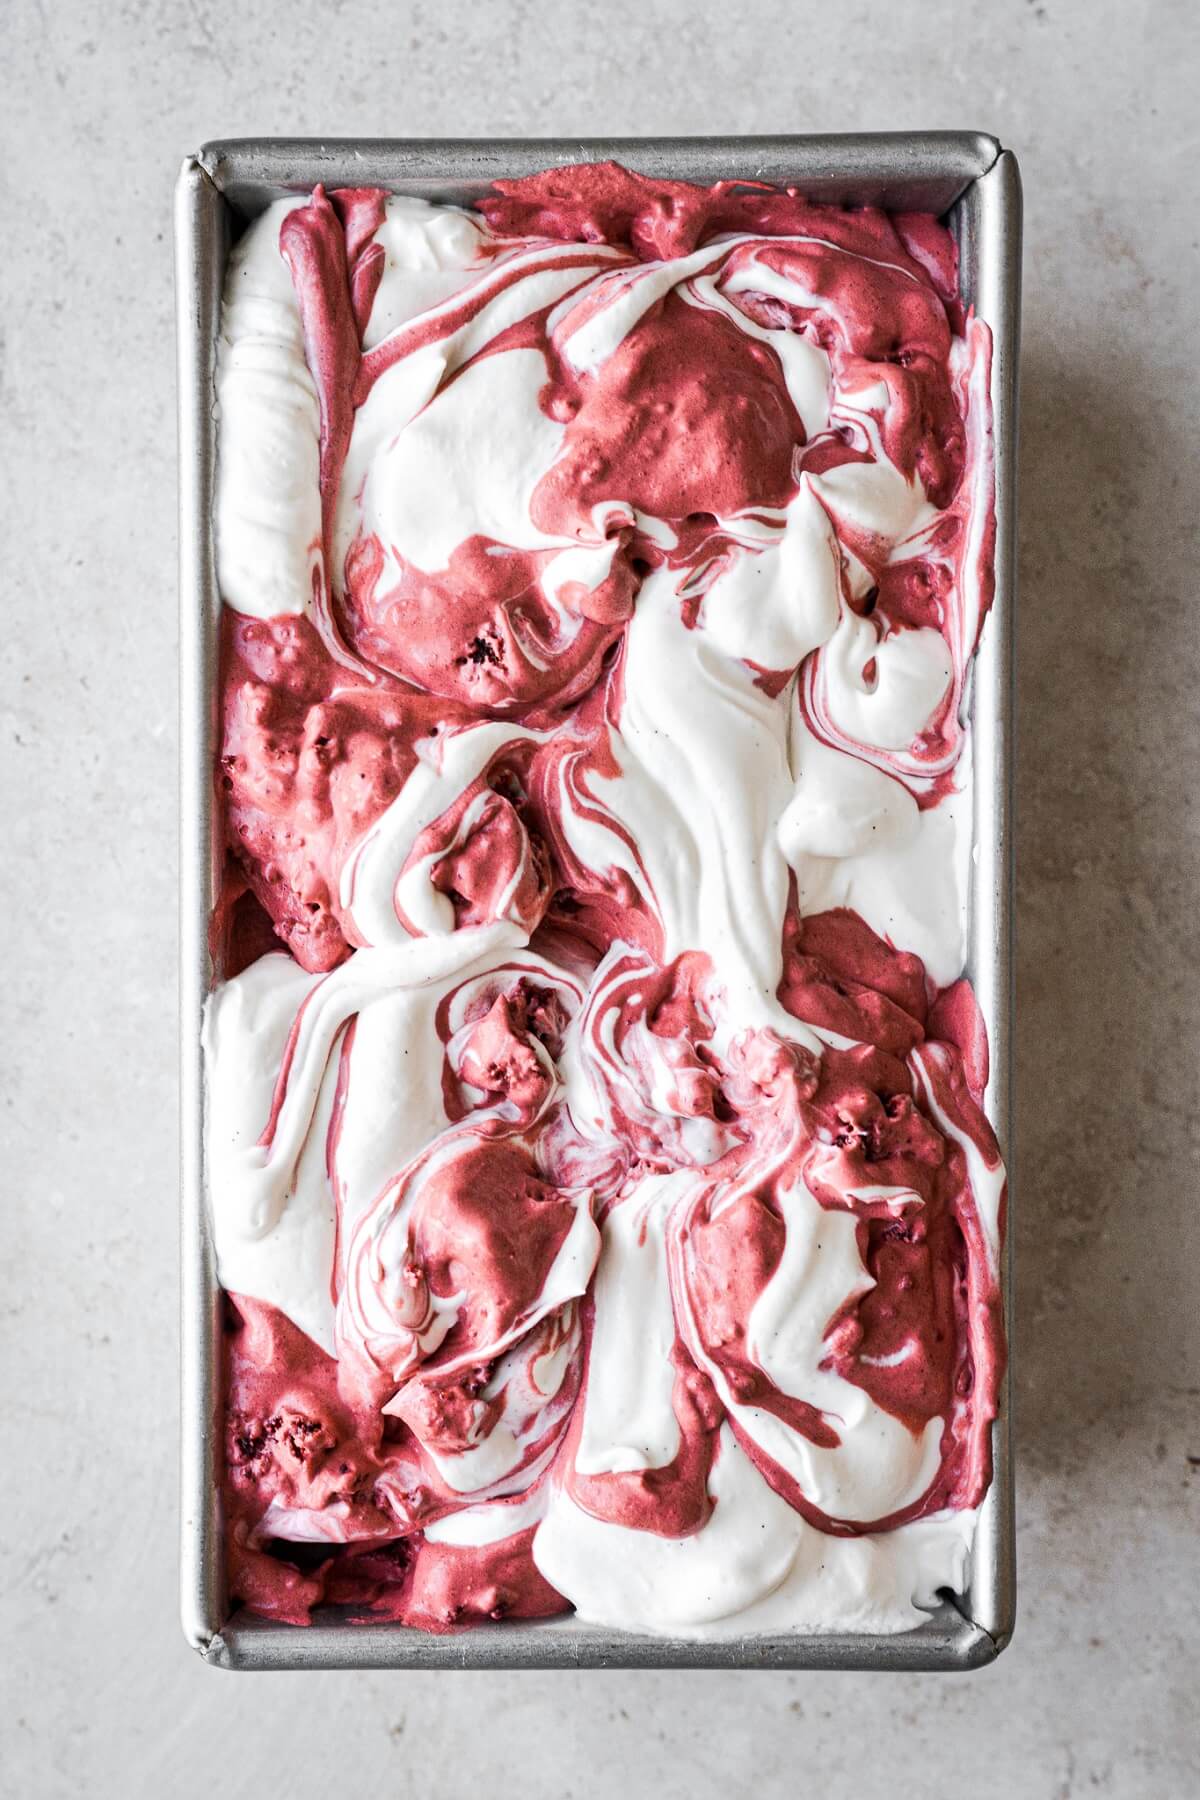
- Cover the pan and freeze until firm enough to scoop, at least 8-10 hours, or overnight.
Frequently Asked Questions
What kind of food coloring do you use?
I used Americolor Super Red Gel Food Coloring.
What cocoa powder did you use?
In the red ice cream, I used Rodelle Dutch Processed Cocoa Powder.
You Might Also Love
Please check out my Amazon Shop for a curated collection of some of my favorite cake pans from trusted brands, baking tools, ingredients, pretty things and fashion finds. I recommend products that I buy and use every day!
Did you love today’s recipe? Please rate the recipe and let me know in the comments what you thought! Also, be sure to follow Curly Girl Kitchen on Instagram, and tag me when you try one of my recipes so I can see all your delicious creations!
Red Velvet Cake Ice Cream (No Churn)
All recipes on Curly Girl Kitchen are developed for high altitude at 5,280 feet. See FAQs for adjusting to higher or lower elevations.

Equipment
- Electric Mixer (Stand or Hand-Held)
Ingredients
Cream Cheese Ice Cream
- 4 oz cream cheese or mascarpone cheese, softened for 1 hour
- ½ can (7 oz) sweetened condensed milk
- 1 tsp vanilla bean paste or vanilla extract
- ⅛ tsp coarse Kosher salt (if using table salt, use half the amount)
- 1 cup cold heavy whipping cream
Red Velvet Ice Cream
- ½ can (7 oz) sweetened condensed milk
- 2 tbsp unsweetened Dutch-processed cocoa powder
- 1 tsp "super red" gel food coloring
- 1 tsp vanilla bean paste or vanilla extract
- ⅛ tsp coarse Kosher salt (if using table salt, use half the amount)
- 1 cup cold heavy whipping cream
- 2 red velvet cupcakes, with cream cheese frosting
Instructions
Cream Cheese Ice Cream
- In a bowl, use your electric mixer to beat the cream cheese, sweetened condensed milk, vanilla and salt until smooth.
- Add the heavy whipping cream, and whip on medium high speed for several minutes, until thick, soft fluffy peaks form.
- Set the bowl in the refrigerator while you make the red velvet ice cream.
Red Velvet Ice Cream
- In a bowl, use your electric mixer to beat the sweetened condensed milk, cocoa powder, red food coloring, vanilla and salt until smooth.
- Add the heavy whipping cream, and whip on medium high speed for several minutes, until thick, soft fluffy peaks form.
- Crumble the red velvet cupcakes and fold the cake into the ice cream.
Assembly
- In a freezer safe container, alternate dollops of the red and white ice cream until you've filled the pan. Use a knife to briefly swirl the colors together for a swirly, marbled look.
- Cover the pan and freeze until firm enough to scoop, at least 8-10 hours, or overnight.
 https://curlygirlkitchen.com/
In your recipe box, it says: “See FAQs for adjusting to higher or lower elevations,” but there are no instructions. Can you make this recipe in lower elevations as is or does it need adjustments?
This FAQ post contains guidelines on how to adjust recipes for various altitudes. Ice cream does not need to be adjusted.
https://curlygirlkitchen.com/baking-faqs/
I LOVE this recipe! However I do not have a loaf/cake pan or anything like that. I have a Ninja Creami Icecream Maker that I’ve been wanting to use to make some sort of Red Velvet Icecream. Do you have any recommendations for how to adjust this recipe to suit a Ninja Creami? Such as, making the icecream “batter” as is and dolloping it in the pint then churn when ready to get a great swirl?
I don’t have that appliance, so I’m not actually very familiar with how it works. That said, though, this is a “no churn” recipe, so you only need to make the ice cream with a hand mixer, then swirl the two ice creams together in any freezer-safe container.